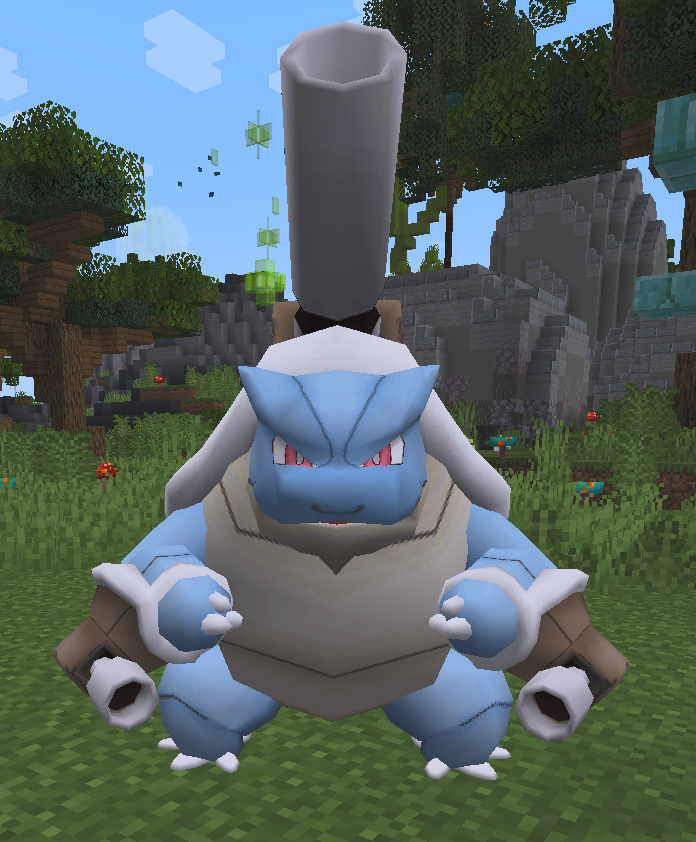
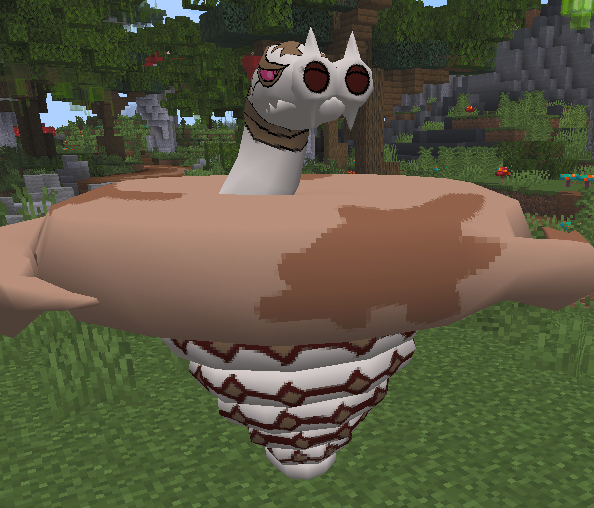
# Welcome to the MMO Realms Server Wiki!

Welcome to the official MMO Realms Wiki website! You can use this website to help you access everything you need to know about the server as well as Cobblemon and Pixelmon in general!

### Jump right in

<table data-view="cards"><thead><tr><th></th><th></th><th data-hidden></th><th data-hidden data-card-target data-type="content-ref"></th><th data-hidden data-card-cover data-type="image">Cover image</th></tr></thead><tbody><tr><td><strong>Cobblemon Wiki</strong></td><td>Click here to find out everything that you need to know about Cobblemon on MMO Realms!</td><td></td><td><a href="/pages/W0pV53OauKAGQPPfBRPK">/pages/W0pV53OauKAGQPPfBRPK</a></td><td><a href="/files/8hW5AuMuiU4prhe7nHLh">/files/8hW5AuMuiU4prhe7nHLh</a></td></tr><tr><td><strong>Pixelmon Wiki</strong></td><td>Click here to find out everything that you need to know about Pixelmon on MMO Realms!</td><td></td><td><a href="/pages/i7bNPDIR0FL5YKfrODKV">/pages/i7bNPDIR0FL5YKfrODKV</a></td><td data-object-fit="fill"><a href="/files/mJgcmrFVYFxCfVrtOrLk">/files/mJgcmrFVYFxCfVrtOrLk</a></td></tr><tr><td><strong>MMO Realms Discord</strong></td><td>Click here to join our Official Discord Server for giveaways, server updates, direct support plus more!</td><td></td><td><a href="https://discord.com/invite/mmorealms">https://discord.com/invite/mmorealms</a></td><td><a href="/files/PV7SnEuVJgBtGjk9VRoX">/files/PV7SnEuVJgBtGjk9VRoX</a></td></tr><tr><td><strong>MMO Realms Store</strong></td><td>Click here to access the Official MMO Realms Gems Store!</td><td></td><td><a href="https://store.mmorealms.gg/">https://store.mmorealms.gg/</a></td><td><a href="/files/OTA1Ep2wIIZ9RXqWfnG5">/files/OTA1Ep2wIIZ9RXqWfnG5</a></td></tr><tr><td><strong>Voting</strong></td><td>Here you can find all of the links you can vote on for rewards in-game!</td><td></td><td><a href="/pages/rAY7oQb7CMP1tnVY3QKP">/pages/rAY7oQb7CMP1tnVY3QKP</a></td><td><a href="/files/ZJevCK56FN2ar2Wvf8Jp">/files/ZJevCK56FN2ar2Wvf8Jp</a></td></tr><tr><td><strong>MMO Realms Forums</strong></td><td>Click here to gain access to our Official Forums used for Appeals and Applications</td><td></td><td><a href="https://forum.mmorealms.gg/">https://forum.mmorealms.gg/</a></td><td><a href="/files/HEf7fhjfFe7EPkVQwVZ5">/files/HEf7fhjfFe7EPkVQwVZ5</a></td></tr><tr><td><strong>Meet the Staff Team!</strong></td><td>Here you'll find all of the players currently part of the MMO Realms Staff Team.</td><td></td><td><a href="/pages/yiYZEQ4ar7mw15o4sHWw">/pages/yiYZEQ4ar7mw15o4sHWw</a></td><td><a href="/files/SrvDi3Hv12OSPqWr16z9">/files/SrvDi3Hv12OSPqWr16z9</a></td></tr><tr><td><strong>Installation Guide</strong></td><td>Click here to find out how to install Cobblemon or Pixelmon on your PC!</td><td></td><td><a href="/pages/vIYlrhvrdcsH2Li0QdX2">/pages/vIYlrhvrdcsH2Li0QdX2</a></td><td><a href="/files/AO6oUxwBD6JKNgMYFSzm">/files/AO6oUxwBD6JKNgMYFSzm</a></td></tr></tbody></table>

Do you have any issues or questions about the Wiki? If so please make a ticket within our [Discord Server](https://discord.gg/muGmwBkAFB) and a member of staff will help you with your query as soon as one is free to do so!


# Best Cobblemon Servers to Join in 2026 – MMO Realms

Join MMO Realms Cobblemon - the top Cobblemon server in 2026 with legendary Pokémon, custom modpack, and thousands of daily active players. Cobblemon Server IP 👉 play.mmorealms.gg

Looking for a Cobblemon server that’s actually worth your time?\
Welcome to **MMO Realms,** one of the most active, polished, and feature-packed Cobblemon servers out there. Built on the **latest version of Cobblemon** and running Minecraft **1.21.1**, it’s got everything you need for the full Pokémon-in-Minecraft experience.

Whether you’re here to build the ultimate team, climb the leaderboards, or just explore with friends, this is where it starts.

***

### 🖥️ Server Details

* **Cobblemon IP:** `play.mmorealms.gg`
* **Version:** Minecraft 1.21.1
* **Modpack:** [Cobblemon SMP: Ultimate Trainer Adventure](https://www.curseforge.com/minecraft/modpacks/cobblemon-smp-adventure)
* **Discord:** [discord.gg/mmorealms](https://discord.gg/mmorealms)

***

### 🔥 Why MMO Realms?

MMO Realms isn’t just another Cobblemon server, it’s designed for players who want more than catching Pokémon. We’ve built out a full MMO-style experience around it, with constant content drops, competitive features, and a dedicated player base.

#### What you’ll find here:

* Legendary Pokémon you can **actually summon** through in-game mechanics
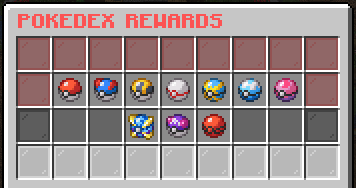
* **Pokédex rewards**, shiny bonuses, breeding systems, and evolution paths
* Player-run **gyms**, PvP battles, and competitive raids
* Weekly events, giveaways, and updates that keep things fresh
* A massive Discord full of helpful trainers and active staff

Whether you're playing solo or with your crew, there's always something to do.

***

### 🚀 How to Join

**Step 1: Get the Modpack**\
Install it from CurseForge:\
👉 [Cobblemon SMP: Ultimate Trainer Adventure](https://www.curseforge.com/minecraft/modpacks/cobblemon-smp-adventure)

Works with: CurseForge Launcher, Modrinth App, Prism Launcher, MultiMC

**Step 2: Launch Minecraft 1.21.1**\
Fire up the modpack and let it load.

**Step 3: Hop in-game**\
Join the server using: `play.mmorealms.gg`


# How to Install Cobblemon and Pixelmon

Looking to play Cobblemon or Pixelmon on MMO Realms?

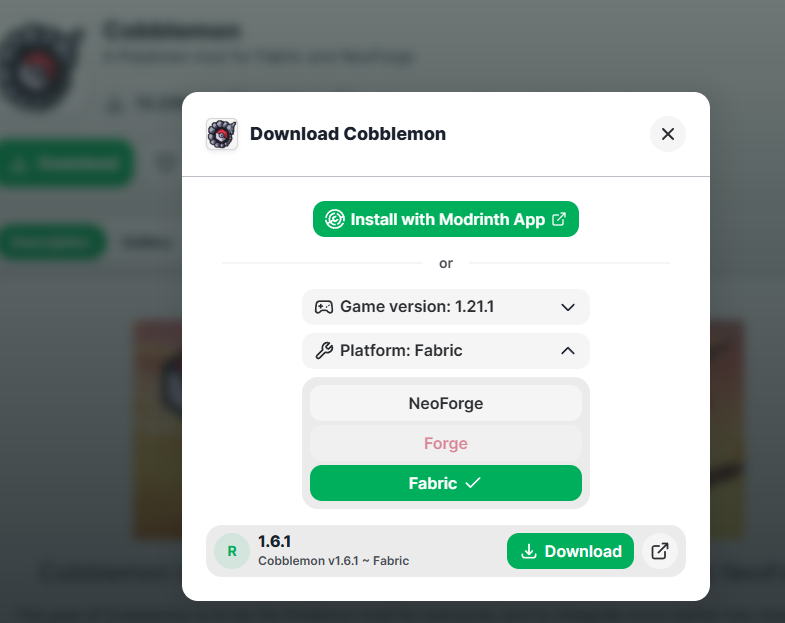
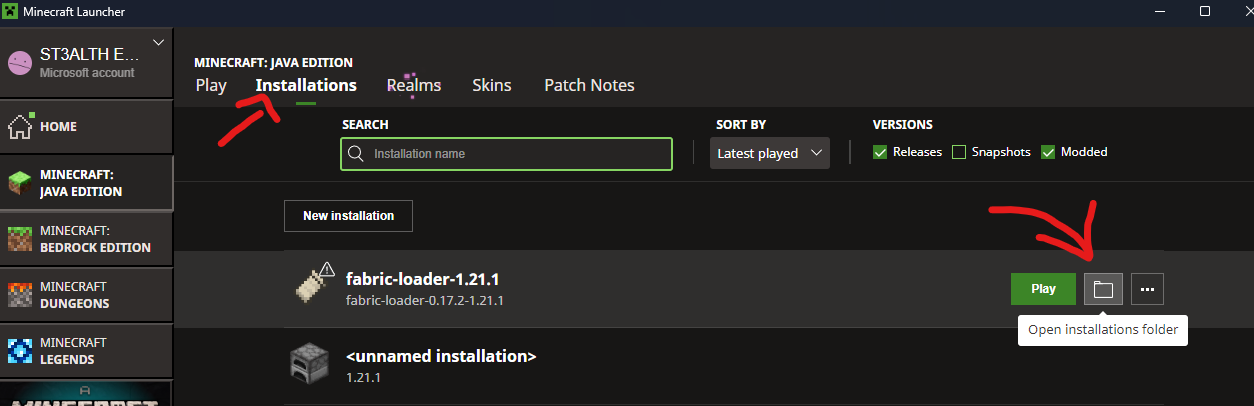
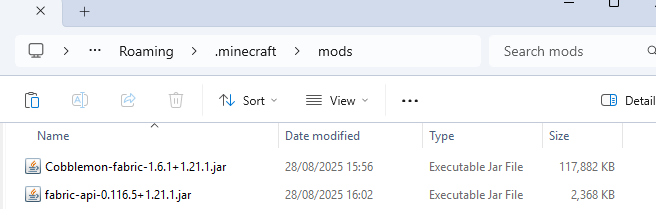
Here you'll be able to find Guides for installing Cobblemon or Pixelmon for MMO Realms. There will be guides for you to use which will install via Modrinth, Cobblemon or via Vanilla depending on your preference.&#x20;

<table data-card-size="large" data-view="cards"><thead><tr><th></th><th data-hidden data-card-cover data-type="image">Cover image</th><th data-hidden data-card-target data-type="content-ref"></th></tr></thead><tbody><tr><td><strong>COBBLEMON GUIDES</strong></td><td><a href="/files/8hW5AuMuiU4prhe7nHLh">/files/8hW5AuMuiU4prhe7nHLh</a></td><td><a href="/pages/Phj2wwUKZb3UxM1iCTk4">/pages/Phj2wwUKZb3UxM1iCTk4</a></td></tr><tr><td><strong>PIXELMON GUIDES</strong></td><td><a href="/files/mJgcmrFVYFxCfVrtOrLk">/files/mJgcmrFVYFxCfVrtOrLk</a></td><td><a href="/pages/lHHO7C65cSBhRzs9bStw">/pages/lHHO7C65cSBhRzs9bStw</a></td></tr></tbody></table>

#### Need any support?&#x20;

Our support team are always here to help you with any issues or querys you may have. To get support please join our Discord server via the link provided below:

{% embed url="<https://discord.com/invite/mmorealms>" %}


# Cobblemon Wiki

Within this Wiki, you'll find out everything you need to know about Cobblemon including it's mechanics found within MMO Realms Cobblemon.

**Server IP**: `play.mmorealms.gg`

Make sure to be using our **Modrinth Launcher** which you can access via the link below to have the best experience on the server including **Bonus Rewards like Daily Gems** you can spend on `/store`!

{% embed url="<https://modrinth.com/server/cobblemon-mmo-realms>" %}

## Pokemon and Legendary Spawns

All of the Pokemon listed will show each of the biome(s) you can obtain the Pokemon. If you wish to know the specific biomes please use the following link which goes over it all.&#x20;

* [Biomes Information](/cobblemon-wiki/general-pokemon-spawns/biomes-information)

<table data-view="cards"><thead><tr><th></th><th data-hidden data-card-cover data-type="files"></th><th data-hidden data-card-target data-type="content-ref"></th></tr></thead><tbody><tr><td>🌳 <strong>General Pokemon Spawns</strong></td><td><a href="/files/z8PLIOjBr4wLtRuhMUI7">/files/z8PLIOjBr4wLtRuhMUI7</a></td><td><a href="/pages/ooXag4X9v0BgELF5b3ml">/pages/ooXag4X9v0BgELF5b3ml</a></td></tr><tr><td>🐉 <strong>Legendary and Mythicals Spawns</strong></td><td><a href="/files/s3Sdc5NveXh0ybSRhI9D">/files/s3Sdc5NveXh0ybSRhI9D</a></td><td><a href="/pages/Pdj36wXa5OJ31QESKvar">/pages/Pdj36wXa5OJ31QESKvar</a></td></tr><tr><td>🌌 <strong>Ultra Beasts and Paradox Spawns</strong></td><td><a href="/files/ltj2JBWDAit3p2xJpLfU">/files/ltj2JBWDAit3p2xJpLfU</a></td><td><a href="/pages/JmSW8PfiF1kk72CYPRX5">/pages/JmSW8PfiF1kk72CYPRX5</a></td></tr></tbody></table>

***

## General Information for MMO Realms Cobblemon

**CONTENTS**

<table data-card-size="large" data-view="cards"><thead><tr><th></th><th></th><th data-hidden data-card-target data-type="content-ref"></th></tr></thead><tbody><tr><td><strong>⚠️ Server Rules</strong></td><td></td><td><a href="/pages/Uo58daCh3fMCzheFK8X6">/pages/Uo58daCh3fMCzheFK8X6</a></td></tr><tr><td>🏏 <strong>Server Features and Mechanics</strong></td><td></td><td><a href="/pages/xgEmCuu7fR5bYgRh4AE1">/pages/xgEmCuu7fR5bYgRh4AE1</a></td></tr><tr><td>⌨️ <strong>Commands and Uses</strong></td><td></td><td><a href="/pages/oyyiqdNrz87za40eF6K9">/pages/oyyiqdNrz87za40eF6K9</a></td></tr><tr><td>💸 <strong>Donor Ranks Info</strong></td><td></td><td><a href="/pages/Oofw1otJ0zqO6gHR1iEh">/pages/Oofw1otJ0zqO6gHR1iEh</a></td></tr><tr><td>🤝 <strong>Beginners Guide to the Server</strong></td><td></td><td><a href="/pages/rABgAZiaczZvTjGVPexi">/pages/rABgAZiaczZvTjGVPexi</a></td></tr><tr><td><span data-gb-custom-inline data-tag="emoji" data-code="1f332">🌲</span><strong>A Complete Overview of the Wilds</strong></td><td></td><td><a href="/pages/I5XYGph76kHsmD4fWhcB">/pages/I5XYGph76kHsmD4fWhcB</a></td></tr><tr><td>🆘 <strong>General Guides</strong></td><td></td><td><a href="/pages/o6ueIHbEwTa3bpTWKrIK">/pages/o6ueIHbEwTa3bpTWKrIK</a></td></tr><tr><td>📚 <strong>Technical Guides</strong></td><td></td><td><a href="/pages/323Glbta6iSr4dQIeR5S">/pages/323Glbta6iSr4dQIeR5S</a></td></tr><tr><td>🪴 <strong>Realm Guide</strong></td><td></td><td><a href="/pages/9bw29qS5cBSGkQyvP3BJ">/pages/9bw29qS5cBSGkQyvP3BJ</a></td></tr><tr><td>❓<strong>FAQ (Frequently Asked Questions)</strong></td><td></td><td><a href="/pages/WxqIEvSDZjf1vSYB6Jdj">/pages/WxqIEvSDZjf1vSYB6Jdj</a></td></tr><tr><td>📊 <strong>Datapacks</strong></td><td></td><td><a href="/pages/jDym4jk7v5AvwxjSbiTE">/pages/jDym4jk7v5AvwxjSbiTE</a></td></tr><tr><td>📝 <strong>Wiki Changelogs</strong></td><td></td><td><a href="/pages/NtmaTfd1YiRvubQbE1LP">/pages/NtmaTfd1YiRvubQbE1LP</a></td></tr><tr><td>⚙️ <strong>How to Install Cobblemon (Modrinth &#x26; CurseForge)</strong></td><td></td><td><a href="/pages/vIYlrhvrdcsH2Li0QdX2">/pages/vIYlrhvrdcsH2Li0QdX2</a></td></tr></tbody></table>

***


# General Pokemon Spawns

Here you will find how to find all of the General Pokemon found within Cobblemon on our server based on the Generation they were first introduced.

All of the Pokemon listed will show each of the biome(s) you can obtain the Pokemon. If you wish to know the specific biomes please use the following link which goes over it all.&#x20;

* [Biomes Information](/cobblemon-wiki/general-pokemon-spawns/biomes-information)

For a more in-depth list for all Pokemon and specifics for their spawn conditions make sure to check the Cobblemon Spawning document found here: [**COBBLEMON SPAWNING**](https://docs.google.com/spreadsheets/d/16JrrEp919HVn8YE0AtmeAu6_tPkMkKqEmRzMlKW442A/edit?gid=0#gid=0)

***

<table data-view="cards"><thead><tr><th></th><th data-hidden data-card-cover data-type="files"></th><th data-hidden data-card-target data-type="content-ref"></th></tr></thead><tbody><tr><td><strong>Generation 1 Spawns</strong></td><td><a href="/files/U1ucDHcd2qFjGcfEPI2L">/files/U1ucDHcd2qFjGcfEPI2L</a></td><td><a href="/pages/yFikoVDJuC1baeZIhoTi">/pages/yFikoVDJuC1baeZIhoTi</a></td></tr><tr><td><strong>Generation 2 Spawns</strong></td><td><a href="/files/yyCHAd3e7W0j167lm4kb">/files/yyCHAd3e7W0j167lm4kb</a></td><td><a href="/pages/aLybfgyipv0fkPYsM9sE">/pages/aLybfgyipv0fkPYsM9sE</a></td></tr><tr><td><strong>Generation 3 Spawns</strong></td><td><a href="/files/QMrAPPDvIxxlgdcGSrd1">/files/QMrAPPDvIxxlgdcGSrd1</a></td><td><a href="/pages/XUDMtVW1FqXE2XC89iSD">/pages/XUDMtVW1FqXE2XC89iSD</a></td></tr><tr><td><strong>Generation 4 Spawns</strong></td><td><a href="/files/USbv5y5SkKv2med3Wt3g">/files/USbv5y5SkKv2med3Wt3g</a></td><td><a href="/pages/Syn42Vj1ufcyazyX2F5F">/pages/Syn42Vj1ufcyazyX2F5F</a></td></tr><tr><td><strong>Generation 5 Spawns</strong></td><td><a href="/files/8E2rmz3oPbrl15MwGgYo">/files/8E2rmz3oPbrl15MwGgYo</a></td><td><a href="/pages/tzpckrTX5ABG61w7sggj">/pages/tzpckrTX5ABG61w7sggj</a></td></tr><tr><td><strong>Generation 6 Spawns</strong></td><td><a href="/files/iZ1JWbGlAEJGCzn9PiLV">/files/iZ1JWbGlAEJGCzn9PiLV</a></td><td><a href="/pages/UW6dmVZ1he7KD1oMesBf">/pages/UW6dmVZ1he7KD1oMesBf</a></td></tr><tr><td><strong>Generation 7 Spawns</strong></td><td><a href="/files/ThVd38Vnw8H1exVRx1ya">/files/ThVd38Vnw8H1exVRx1ya</a></td><td><a href="/pages/lPic3m2H4P9jCNEBwqw6">/pages/lPic3m2H4P9jCNEBwqw6</a></td></tr><tr><td><strong>Generation 8 Spawns</strong></td><td><a href="/files/r5TUc8ITzweESG2k8hXX">/files/r5TUc8ITzweESG2k8hXX</a></td><td><a href="/pages/flVhrOPsZq2FOamCvpzp">/pages/flVhrOPsZq2FOamCvpzp</a></td></tr><tr><td><strong>Generation 9 Spawns</strong></td><td><a href="/files/k6zrwBc8Z7yMADrxhrkn">/files/k6zrwBc8Z7yMADrxhrkn</a></td><td><a href="/pages/me8Rzh1XrfJtMGXvLTme">/pages/me8Rzh1XrfJtMGXvLTme</a></td></tr></tbody></table>

***


# Biomes Information

Here you'll find all information needed when it comes to biomes listed for Pokemon spawns.

**Contents**

1. [Biome Categories](#biome-categories)
2. [Specific Biomes](#specific-biomes)

***

### Biome Categories

Here is a list of all the general Biome Categories listed for Pokemon on the wiki.

<table><thead><tr><th width="178.25">Biome Category</th><th>Biome(s)</th></tr></thead><tbody><tr><td>Arid</td><td>All Sandy biomes, All Savanna biomes</td></tr><tr><td>Badlands</td><td>All Badlands biomes</td></tr><tr><td>Bamboo</td><td>Bamboo Jungle</td></tr><tr><td>Beach</td><td>All Beach Biomes</td></tr><tr><td>Cave</td><td>Dripstone Caves, Lush Caves</td></tr><tr><td>Coast</td><td>Stony Shore, All Beach biomes</td></tr><tr><td>Cold</td><td>All Cold Ocean biomes, All Freezing biomes, All Peak biomes, All Taiga biomes, All Tundra biomes</td></tr><tr><td>Deep Dark</td><td>Deep Dark</td></tr><tr><td>Deep Ocean</td><td>All Deep Ocean biomes</td></tr><tr><td>Desert</td><td>Desert</td></tr><tr><td>Dripstone</td><td>Dripstone Caves</td></tr><tr><td>Floral</td><td>Cherry Grove, Flower Forest, Meadow, Sunflower Plains</td></tr><tr><td>Forest</td><td>All Forest biomes, Cherry Grove</td></tr><tr><td>Freezing</td><td>Frozen River, Jagged Peaks, Snowy Beach, Snowy Plains, Snowy Slopes,  All Frozen Ocean biomes, All Glacial biomes, All Snowy Forest biomes</td></tr><tr><td>Freshwater</td><td>All River biomes, All Swamp biomes</td></tr><tr><td>Frozen Ocean</td><td>Deep Frozen Ocean, Frozen Ocean</td></tr><tr><td>Glacial</td><td>Frozen Peaks, Ice Spikes</td></tr><tr><td>Grassland</td><td>All Plains biomes, All Savanna biomes</td></tr><tr><td>Highlands</td><td>Meadow</td></tr><tr><td>Hills</td><td>All Hills biomes, All Highlands biomes</td></tr><tr><td>Island</td><td>Mushroom Fields, All Tropical Island biomes</td></tr><tr><td>Jungle</td><td>All Jungle biomes</td></tr><tr><td>Lukewarm Ocean</td><td>Deep Lukewarm Ocean, Lukewarm Ocean</td></tr><tr><td>Lush</td><td>Lush Caves</td></tr><tr><td>Magical</td><td>Dark Forest</td></tr><tr><td>Mountain</td><td>All Mountain biomes, All Hill biomes</td></tr><tr><td>Mushroom</td><td>Dark Forest, Mushroom Fields</td></tr><tr><td>Ocean</td><td>All Ocean biomes, All Coast biomes</td></tr><tr><td>Peak</td><td>Frozen Peaks, Jagged Peaks, Snowy Slopes, Stony Peaks</td></tr><tr><td>Plains</td><td>Plains, Sunflower Plains, All Highlands biomes</td></tr><tr><td>Plateau</td><td>Savanna Plateau</td></tr><tr><td>River</td><td>All River biomes</td></tr><tr><td>Sandy</td><td>All Badlands biomes, All Desert biomes</td></tr><tr><td>Savanna</td><td>All Savanna biomes</td></tr><tr><td>Snowy Forest</td><td>Grove, Snowy Taiga</td></tr><tr><td>Spooky</td><td>Dark Forest</td></tr><tr><td>Swamp</td><td>Mangrove Swamp, Swamp</td></tr><tr><td>Taiga</td><td>All Taiga biomes, Grove</td></tr><tr><td>Temperate</td><td>Plains, Forest, Dark Forest, Cherry Grove, Swamp, Taiga, Mountains</td></tr><tr><td>Temperat Ocean</td><td>Ocean [<em>Excl Cold, Frozen, Lukewarm or Warm Oceans</em>]</td></tr><tr><td>Tundra</td><td>Ice Spikes, Snowy Plains</td></tr><tr><td>Warm Ocean</td><td>Warm Ocean</td></tr><tr><td>Overworld</td><td>All Overworld Biomes</td></tr><tr><td>End</td><td>All End biomes</td></tr><tr><td>Nether</td><td>All Nether biomes</td></tr><tr><td>Nether Basalt</td><td>Basalt Deltas</td></tr><tr><td>Nether Crimson</td><td>Crimson Forest</td></tr><tr><td>Nether Desert</td><td>Soul Sand Valley</td></tr><tr><td>Nether Fungus</td><td>Crimson Forest, Warped Forest</td></tr><tr><td>Nether Mountain</td><td>Basalt Deltas</td></tr><tr><td>Nether Soul Fire</td><td>Soul Sand Valley</td></tr><tr><td>Nether Soul Sand</td><td>Soul Sand Valley</td></tr><tr><td>Nether Warped</td><td>Warped Forest</td></tr><tr><td>Nether Wasteland</td><td>Nether Wastes</td></tr><tr><td>Autumn</td><td>All Arid biomes, All Cold Ocean biomes, All Mountain biomes, All Mushroom biomes, All Taiga biomes</td></tr><tr><td>Spring</td><td>All Floral biomes, All Lukewarm Ocean biomes, All Magical biomes, All Plains biomes</td></tr><tr><td>Summer</td><td>All Forest biomes, All Jungle biomes, All Lush biomes, All Warm Ocean biomes, All Swamp biomes</td></tr><tr><td>Winter</td><td>All Freezing biomes</td></tr><tr><td>Dense</td><td>Dark Forest, Mangrove Swamp</td></tr><tr><td>Sparse</td><td>All Arid biomes, All Grassland biomes, All Tundra biomes</td></tr></tbody></table>

### Specific Biomes

Here you can find a list of all the individual specific biomes for each of the general biomes listed above.

<details>

<summary>All <strong>Arid</strong> Biomes</summary>

* Desert
* Savanna
* Savanna Plateau
* Windswept Savanna
* Badlands
* Wooded Badlands
* Eroded Badlands

</details>

<details>

<summary>All <strong>Badlands</strong> Biomes</summary>

* Badlands
* Wooded Badlands
* Eroded Badlands

</details>

<details>

<summary>All <strong>Bamboo</strong> Biomes</summary>

* Bamboo Jungle
* Jungle \[*Near Bamboo*]

</details>

<details>

<summary>All <strong>Beach</strong> Biomes</summary>

* Beach
* Snowy Beach
* Stone Shore

</details>

<details>

<summary>All <strong>Cave</strong> Biomes</summary>

* Deep Dark
* Dripstone Caves
* Lush Caves

</details>

<details>

<summary>All <strong>Coast</strong> Biomes</summary>

* Beach
* Cold Beach
* Snowy Beach

</details>

<details>

<summary>All <strong>Cold Ocean</strong> Biomes</summary>

* Cold Ocean
* Deep Cold Ocean

</details>

<details>

<summary>All <strong>Deep Ocean</strong> Biomes</summary>

* Deep Ocean
* Deep Warm Ocean
* Deep Lukewarm Ocean
* Deep Cold Ocean
* Deep Frozen Ocean

</details>

<details>

<summary>All <strong>Desert</strong> Biomes</summary>

* Desert
* Desert Hills
* Desert Lakes
* Eroded Badlands
* Badlands
* Wooded Badlands

</details>

<details>

<summary>All <strong>End</strong> Biomes</summary>

* The End
* Small End Islands
* End Midlands
* End Highlands
* End Barrens

</details>

<details>

<summary>All <strong>Forest</strong> Biomes</summary>

* Forest
* Flower Forest
* Birch Forest
* Tall Birch Forest
* Dark Forest

</details>

<details>

<summary>All <strong>Freezing</strong> Biomes</summary>

* Snowy Tundra
* Snowy Taiga
* Snowy Taiga Hills
* Snowy Taiga Mountains
* Ice Spikes
* Frozen River
* Frozen Ocean
* Deep Frozen Ocean
* Snowy Slopes
* Jagged Peaks
* Frozen Peaks

</details>

<details>

<summary>All <strong>Frozen Ocean</strong> Biomes</summary>

* Frozen Ocean
* Deep Frozen Ocean

</details>

<details>

<summary>All <strong>Glacial</strong> Biomes</summary>

* Snowy Slopes
* Jagged Peaks
* Frozen Peaks
* Stony Peaks

</details>

<details>

<summary>All <strong>Grassland</strong> Biomes</summary>

* Plains
* Sunflower Plains
* Savanna
* Savanna Plateau

</details>

<details>

<summary>All <strong>Highlands</strong> Biomes</summary>

* Jagged Peaks
* Frozen Peaks
* Stony Peaks
* Meadow
* Cherry Grove
* Grove
* Snowy Slopes
* Windswept Hills
* Windswept Gravelly Hills
* Windswept Forest

</details>

<details>

<summary>All <strong>Hills</strong> Biomes</summary>

* Hills
* Wooded Hills
* Taiga Hills
* Snowy Taiga Hills
* Mountain Meadows
* Snowy Slopes
* Jagged Peaks
* Frozen Peaks
* Stony Peaks

</details>

<details>

<summary>All <strong>Jungle</strong> Biomes</summary>

* Jungle
* Jungle Hills
* Bamboo Jungle
* Bamboo Jungle Hills

</details>

<details>

<summary>All <strong>Lukewarm Ocean</strong> Biomes</summary>

* Lukewarm Ocean
* Deep Lukewarm Ocean

</details>

<details>

<summary>All <strong>Lush</strong> Biomes</summary>

* Forest
* Flower Forest
* Birch Forest
* Tall Birch Forest
* Dark Forest
* Jungle
* Jungle Hills
* Bamboo Jungle
* Bamboo Jungle Hills
* Swamp
* Mangrove Swamp

</details>

<details>

<summary>All <strong>Magical</strong> Biomes</summary>

* Mushroom Fields
* Mushroom Field Shore
* Flower Forest

</details>

<details>

<summary>All <strong>Mountain</strong> Biomes</summary>

* Mountains
* Wooded Mountains
* Gravelly Mountains
* Mountain Meadows
* Snowy Slopes
* Jagged Peaks
* Frozen Peaks
* Stony Peaks

</details>

<details>

<summary>All <strong>Mushroom</strong> Biomes</summary>

* Mushroom Fields
* Mushroom Field Shore

</details>

<details>

<summary>All <strong>Nether</strong> Biomes</summary>

* Nether Wastes
* Soul Sand Valley
* Crimson Forest
* Warped Forest
* Basalt Deltas

</details>

<details>

<summary>All <strong>Ocean</strong> Biomes</summary>

* Ocean
* Deep Ocean
* Warm Ocean
* Lukewarm Ocean
* Cold Ocean
* Frozen Ocean
* Deep Warm Ocean
* Deep Lukewarm Ocean
* Deep Cold Ocean
* Deep Frozen Ocean

</details>

<details>

<summary>All <strong>Peak</strong> Biomes</summary>

* Jagged Peaks
* Frozen Peaks
* Stony Peaks
* Snowy Slopes

</details>

<details>

<summary>All <strong>Plains</strong> Biomes</summary>

* Plains
* Sunflower Plains

</details>

<details>

<summary>All <strong>River</strong> Biomes</summary>

* River
* Frozen River

</details>

<details>

<summary>All <strong>Sandy</strong> Biomes</summary>

* Desert
* Desert Hills
* Desert Lakes
* Badlands
* Eroded Badlands
* Wooded Badlands
* Beach
* Cold Beach
* Snowy Beach

</details>

<details>

<summary>All <strong>Savanna</strong> Biomes</summary>

* Savanna
* Savanna Plateau
* Shattered Savanna
* Shattered Savanna Plateau

</details>

<details>

<summary>All <strong>Snowy Forest</strong> Biomes</summary>

* Snowy Taiga
* Snowy Taiga Hills
* Snowy Taiga Mountains

</details>

<details>

<summary>All <strong>Swamp</strong> Biomes</summary>

* Swamp
* Mangrove Swamp

</details>

<details>

<summary>All <strong>Taiga</strong> Biomes</summary>

* Taiga
* Taiga Hills
* Taiga Mountains
* Snowy Taiga
* Snowy Taiga Hills
* Snowy Taiga Mountains
* Giant Tree Taiga
* Giant Tree Taiga Hills
* Giant Spruce Taiga
* Giant Spruce Taiga Hills

</details>

<details>

<summary>All <strong>Tropical Island</strong> Biomes</summary>

* Jungle
* Jungle Hills
* Bamboo Jungle
* Bamboo Jungle Hills
* Beach
* Warm Ocean

</details>

<details>

<summary>All <strong>Tundra</strong> Biomes</summary>

* Snowy Tundra
* Snowy Slopes
* Ice Spikes

</details>

<details>

<summary>All <strong>Warm Oceans</strong> Biomes</summary>

* Warm Ocean
* Deep Warm Ocean

</details>


# Generation 1 Spawns

This page will go over all the non-legendary pokemon that are found within the first Generation of Pokemon games.

<table><thead><tr><th width="114">Pokemon</th><th width="100">Rarity</th><th width="92">Lvl Average</th><th width="112">Biome(s)</th><th width="71">Time</th><th width="79">Weather</th><th width="114">Spawn Info</th><th width="106">Context</th></tr></thead><tbody><tr><td><strong>Bulbasaur</strong></td><td>Ultra Rare</td><td>Lvl 5-32</td><td>Jungle</td><td>Any</td><td>Any</td><td></td><td>Grounded</td></tr><tr><td><strong>Ivysaur</strong></td><td>Ultra Rare</td><td>Lvl 16-40</td><td>Jungle</td><td>Any</td><td>Any</td><td></td><td>Grounded</td></tr><tr><td><strong>Venusaur</strong></td><td>Ultra Rare</td><td>Lvl 32-52</td><td>Jungle</td><td>Any</td><td>Any</td><td></td><td>Grounded</td></tr><tr><td><strong>Charmander</strong></td><td>Ultra Rare</td><td>Lvl 5-31</td><td>Hills, Nether Basalt</td><td>Any</td><td>Any</td><td></td><td>Grounded</td></tr><tr><td><strong>Charmeleon</strong></td><td>Ultra Rare</td><td>Lvl 16-40</td><td>Hills, Nether Basalt</td><td>Any</td><td>Any</td><td></td><td>Grounded</td></tr><tr><td><strong>Charizard</strong></td><td>Ultra Rare</td><td>Lvl 36-53</td><td>Hills, Nether Basalt</td><td>Any</td><td>Any</td><td></td><td>Grounded</td></tr><tr><td><strong>Squirtle</strong></td><td>Ultra Rare</td><td>Lvl 5-31</td><td>Freshwater, Hills, Jungle, Temperate</td><td>Any</td><td>Any</td><td></td><td>Grounded, Submerged or Fishing.</td></tr><tr><td><strong>Wartortle</strong></td><td>Ultra Rare</td><td>Lvl 16-40</td><td>Freshwater, Hills, Jungle, Temperate</td><td>Any</td><td>Any</td><td></td><td>Grounded, Submerged or Fishing.</td></tr><tr><td><strong>Blastoise</strong></td><td>Ultra Rare</td><td>Lvl 36-53</td><td>Freshwater, Hills, Jungle, Temperate</td><td>Any</td><td>Any</td><td></td><td>Grounded, Submerged or Fishing.</td></tr><tr><td><strong>Caterpie</strong></td><td>Common</td><td>Lvl 1-20</td><td>Forest, Plains</td><td>Any</td><td>Any</td><td></td><td>Grounded</td></tr><tr><td><strong>Metapod</strong></td><td>Common</td><td>Lvl 7-21</td><td>Forest, Plains</td><td>Any</td><td>Any</td><td></td><td>Grounded</td></tr><tr><td><strong>Butterfree</strong></td><td>Common</td><td>Lvl 10-40</td><td>Jungle</td><td>Any</td><td>Clear</td><td></td><td>Grounded</td></tr><tr><td><strong>Weedle</strong></td><td>Common</td><td>Lvl 1-20</td><td>Forest, Jungle</td><td>Any</td><td>Any</td><td></td><td>Grounded</td></tr><tr><td><strong>Kakuna</strong></td><td>Common</td><td>Lvl 7-21</td><td>Forest, Jungle</td><td>Any</td><td>Any</td><td></td><td>Grounded</td></tr><tr><td><strong>Beedrill</strong></td><td>Common</td><td>Lvl 10-40</td><td>Forest, Jungle</td><td>Any</td><td>Clear</td><td></td><td>Grounded</td></tr><tr><td><strong>Pidgey</strong></td><td>Common</td><td>Lvl 1-25</td><td>Temperate</td><td>Any</td><td>Any</td><td></td><td>Grounded</td></tr><tr><td><strong>Pidgeotto</strong></td><td>Common</td><td>Lvl 18-35</td><td>Temperate</td><td>Any</td><td>Any</td><td></td><td>Grounded</td></tr><tr><td><strong>Pidgeot</strong></td><td>Common</td><td>Lvl 36-48</td><td>Temperate</td><td>Any</td><td>Any</td><td></td><td>Grounded</td></tr><tr><td><strong>Rattata</strong></td><td>Common to Uncommon</td><td>Lvl 1-25</td><td><strong>Normal</strong>: Grassland <strong>Alolan</strong>: Spooky</td><td>Any</td><td>Any</td><td></td><td>Grounded</td></tr><tr><td><strong>Raticate</strong></td><td>Common to Uncommon</td><td>Lvl 20-41</td><td><strong>Normal</strong>: Grassland <strong>Alolan</strong>: Spooky</td><td>Any</td><td>Any</td><td></td><td>Grounded</td></tr><tr><td><strong>Spearow</strong></td><td>Common</td><td>Lvl 1-26</td><td>Badlands, Savanna</td><td>Day</td><td>Any</td><td></td><td>Grounded</td></tr><tr><td><strong>Fearow</strong></td><td>Common</td><td>Lvl 20-44</td><td>Badlands, Savanna</td><td>Day</td><td>Any</td><td></td><td>Grounded</td></tr><tr><td><strong>Ekans</strong></td><td>Common</td><td>Lvl 4-29</td><td>Arid, Nether Desert</td><td>Any</td><td>Any</td><td></td><td>Grounded</td></tr><tr><td><strong>Arbok</strong></td><td>Common</td><td>Lvl 22-45</td><td>Arid, Nether Desert</td><td>Any</td><td>Any</td><td></td><td>Grounded</td></tr><tr><td><strong>Pikachu</strong></td><td>Uncommon</td><td>Lvl 16-32</td><td>Forest, Beach</td><td>Any</td><td>Any</td><td></td><td>Grounded</td></tr><tr><td><strong>Raichu</strong></td><td>Uncommon</td><td>Lvl 27-49</td><td><strong>Normal</strong>: Forest. <strong>Alolan</strong>: Beach</td><td>Any</td><td>Any</td><td></td><td>Grounded</td></tr><tr><td><strong>Sandshrew</strong></td><td>Common to Uncommon</td><td>Lvl 5-30</td><td><strong>Normal:</strong><br>Badlands, Desert<br><strong>Alolan:</strong><br>Freezing</td><td>Any</td><td>Any</td><td></td><td>Grounded</td></tr><tr><td><strong>Sandslash</strong></td><td>Common to Rare</td><td>Lvl 22-70</td><td><strong>Normal:</strong><br>Badlands, Desert<br><strong>Alolan:</strong><br>Freezing</td><td>Any</td><td>Any</td><td></td><td>Grounded</td></tr><tr><td><strong>Nidoran♀</strong></td><td>Uncommon</td><td>Lvl 3-28</td><td>Savanna</td><td>Any</td><td>Any</td><td></td><td>Grounded</td></tr><tr><td><strong>Nidorina</strong></td><td>Uncommon</td><td>Lvl 16-37</td><td>Savanna</td><td>Any</td><td>Any</td><td></td><td>Grounded</td></tr><tr><td><strong>Nidoqueen</strong></td><td>Uncommon</td><td>Lvl 37-51</td><td>Savanna</td><td>Any</td><td>Any</td><td></td><td>Grounded</td></tr><tr><td><strong>Nidoran♂</strong></td><td>Uncommon</td><td>Lvl 3-28</td><td>Savanna</td><td>Any</td><td>Any</td><td></td><td>Grounded</td></tr><tr><td><strong>Nidorino</strong></td><td>Uncommon</td><td>Lvl 16-37</td><td>Savanna</td><td>Any</td><td>Any</td><td></td><td>Grounded</td></tr><tr><td><strong>Nidoking</strong></td><td>Uncommon</td><td>Lvl 37-51</td><td>Savanna</td><td>Any</td><td>Any</td><td></td><td>Grounded</td></tr><tr><td><strong>Clefairy</strong></td><td>Uncommon</td><td>Lvl 17-32</td><td>Dripstone, Aether, Dripstone, Hills, Magical</td><td>Night</td><td>Any</td><td>For <strong>Hills</strong> will only spawn during Full Moon.</td><td>Grounded</td></tr><tr><td><strong>Clefable</strong></td><td>Uncommon</td><td>Lvl 27-48</td><td>Dripstone, Aether, Dripstone, Hills, Magica</td><td>Night</td><td>Any</td><td>For <strong>Hills</strong> will only spawn during Full Moon.</td><td>Grounded</td></tr><tr><td><strong>Vulpix</strong></td><td>Common to Uncommon</td><td>Lvl 5-30</td><td><strong>Normal</strong>: Forest, Taiga. <strong>Alolan</strong>: Snowy Forest, Snowy Taiga</td><td>Any</td><td>Any</td><td></td><td>Grounded</td></tr><tr><td><strong>Ninetales</strong></td><td>Common to Uncommon</td><td>Lvl 25-51</td><td>N<strong>ormal</strong>: Forest, Taiga. <strong>Alolan</strong>: Snowy Forest, Snowy Taiga</td><td>Any</td><td>Any</td><td></td><td>Grounded</td></tr><tr><td><strong>Jigglypuff</strong></td><td>Common </td><td>Lvl 16-27</td><td>Floral, Plains, Skyroot Grove, Skyroot Meadow</td><td>Any</td><td>Any</td><td></td><td>Grounded</td></tr><tr><td><strong>Wigglytuff</strong></td><td>Common </td><td>Lvl 22-44</td><td>Floral, Plains, Skyroot Grove, Skyroot Meadow</td><td>Any</td><td>Any</td><td></td><td>Grounded</td></tr><tr><td><strong>Zubat</strong></td><td>Common to Uncommon</td><td>Lvl 1-25</td><td>Forest, Swamp, Overworld, Spooky, Deep Dark</td><td>Any</td><td>Any</td><td></td><td>Grounded</td></tr><tr><td><strong>Golbat</strong></td><td>Common to Uncommon</td><td>Lvl 22-46</td><td>Forest, Swamp, Overworld, Spooky, Deep Dark</td><td>Any</td><td>Any</td><td></td><td>Grounded</td></tr><tr><td><strong>Oddish</strong></td><td>Common</td><td>Lvl 7-32</td><td>Jungle, Temperature, Savanna</td><td>Any</td><td>Any</td><td></td><td>Grounded</td></tr><tr><td><strong>Gloom</strong></td><td>Common</td><td>Lvl 21-40</td><td>Jungle, Temperature, Savanna</td><td>Any</td><td>Any</td><td></td><td>Grounded</td></tr><tr><td><strong>Vileplume</strong></td><td>Common</td><td>Lvl 35-49</td><td>Jungle, Temperature, Savanna</td><td>Night</td><td>Any</td><td></td><td>Grounded</td></tr><tr><td><strong>Paras</strong></td><td>Common to Uncommon</td><td>Lvl 4-29</td><td>Lush, Mushroom, Nether Fungus</td><td>Any</td><td>Any</td><td>Can also be obtauned from <strong>Lush</strong> Shripwrecks</td><td>Grounded</td></tr><tr><td><strong>Parasect</strong></td><td>Common to Uncommon</td><td>Lvl 24-41</td><td>Lush, Mushroom, Nether Fungus</td><td>Any</td><td>Any</td><td>Can also be obtained from <strong>Lush</strong> Shripwrecks</td><td>Grounded</td></tr><tr><td><strong>Venonat</strong></td><td>Common</td><td>Lvl 6-31</td><td>Spooky, Swamp</td><td>Night</td><td>Any</td><td></td><td>Grounded</td></tr><tr><td><strong>Venomoth</strong></td><td>Common</td><td>Lvl 31-45</td><td>Spooky, Swamp</td><td>Night</td><td>Clear</td><td></td><td>Grounded</td></tr><tr><td><strong>Diglett</strong></td><td>Common</td><td>Lvl 2-27</td><td><strong>Normal</strong>:<br>Caves (<em>Above y=0</em>)<br><strong>Alolan</strong>:<br>Caves (<em>Below y=0</em>)</td><td>Any</td><td>Any</td><td>Will not spawn in <strong>Deep Dark</strong>.</td><td>Grounded</td></tr><tr><td><strong>Dugtrio</strong></td><td>Common</td><td>Lvl 26-43</td><td><strong>Normal</strong>:<br>Caves (<em>Above y=0</em>)<br><strong>Alolan</strong>:<br>Caves (<em>Below y=0</em>)</td><td>Any</td><td>Any</td><td>Will not spawn in <strong>Deep Dark</strong>.</td><td>Grounded</td></tr><tr><td><strong>Meowth</strong></td><td>Common</td><td>Lvl 4-29</td><td><strong>Normal</strong>: Arid. <strong>Alolan</strong>:  Arid, Freezing. <strong>Galarian</strong>: Freezing, Taiga</td><td>Any</td><td>Clear</td><td>All forms can spawn within <strong>Villages</strong> in Overworld.</td><td>Grounded</td></tr><tr><td><strong>Persian</strong></td><td>Common</td><td>Lvl 28-44</td><td><strong>Normal</strong>: Overworld, Arid. <strong>Alolan</strong>: Overworld, Arid, Freezing</td><td>Any</td><td>Clear</td><td>All forms can spawn within <strong>Villages</strong> in Overworld.</td><td>Grounded</td></tr><tr><td><strong>Psyduck</strong></td><td>Common</td><td>Lvl 7-32</td><td>Swamp, Forest, Freshwater, Grassland, Magical </td><td>Any</td><td>Any</td><td>Will spawn near water. </td><td>Fishing, Grounded or Submerged</td></tr><tr><td><strong>Golduck</strong></td><td>Common</td><td>Lvl 33-50</td><td>Swamp, Forest, Freshwater, Grassland, Magical </td><td>Any</td><td>Any</td><td>Will spawn near water.</td><td>Fishing, Grounded or Submerged</td></tr><tr><td><strong>Mankey</strong></td><td>Common</td><td>Lvl 6-31</td><td>Hills, Jungle</td><td>Any</td><td>Any</td><td></td><td>Grounded</td></tr><tr><td><strong>Primeape</strong></td><td>Common</td><td>Lvl 28-46</td><td>Hills, Jungle</td><td>Any</td><td>Any</td><td></td><td>Grounded</td></tr><tr><td><strong>Growlithe</strong></td><td>Common</td><td>Lvl 10-37</td><td><strong>Normal</strong>:<br>Overworld<br><strong>Hisuian</strong>:<br>Peak, Nether Basalt.</td><td>Any</td><td>Any</td><td>Nomral will only spawn in <strong>Villages</strong> in the Overworld.</td><td>Grounded</td></tr><tr><td><strong>Arcanine</strong></td><td>Common</td><td>Lvl 30-57</td><td><strong>Normal</strong>:<br>Overworld<br><strong>Hisuian</strong>:<br>Peak, Nether Basalt</td><td>Any</td><td>Any</td><td>Normal will only spawn in <strong>Villages</strong> in the Overworld.</td><td>Grounded</td></tr><tr><td><strong>Poliwag</strong></td><td>Common</td><td>Lvl 5-30</td><td>Swamp, Freshwater, Hills, Jungle, Magical, Mushroom, Temperate, Lush</td><td>Any</td><td>Any (Rain)</td><td>Only spawns near <strong>Lily Pads</strong> within <strong>Swamps</strong>. Obtainable from Shipwrecks</td><td>Fishing, Grounded or Submerged</td></tr><tr><td><strong>Poliwhirl</strong></td><td>Common</td><td>Lvl 25-39</td><td>Swamp, Freshwater, Hills, Jungle, Magical, Mushroom, Temperate, Lush</td><td>Any</td><td>Any (Rain)</td><td>Only spawns near <strong>Lily Pads</strong> within <strong>Swamps</strong>. Obtainable from Shipwrecks</td><td>Fishing, Grounded or Submerged</td></tr><tr><td><strong>Poliwrath</strong></td><td>Common</td><td>Lvl 34-51</td><td>Swamp, Freshwater, Hills, Jungle, Magical, Mushroom, Temperate, Lush</td><td>Any</td><td>Any (Rain)</td><td> Only spawns near <strong>Lily Pads</strong> within <strong>Swamps</strong>. Obtainable from Shipwrecks</td><td>Fishing, Grounded or Submerged</td></tr><tr><td><strong>Abra</strong></td><td>Common to Rare</td><td>Lvl 6-31</td><td>Hills, Temperate, Magical, Overworld</td><td>Any</td><td>Any</td><td></td><td>Grounded</td></tr><tr><td><strong>Kadabra</strong></td><td>Common to Rare</td><td>Lvl 16-40</td><td>Hills, Temperate, Magical, Overworld</td><td>Any</td><td>Any</td><td></td><td>Grounded</td></tr><tr><td><strong>Alakazam</strong></td><td>Common to Rare</td><td>Lvl 35-50</td><td>Hills, Temperate, Magical, Overworld</td><td>Any</td><td>Any</td><td></td><td>Grounded</td></tr><tr><td><strong>Machop</strong></td><td>Common</td><td>Lvl 6-31</td><td>Hills</td><td>Any</td><td>Any</td><td></td><td>Grounded</td></tr><tr><td><strong>Machoke</strong></td><td>Common</td><td>Lvl 28-41</td><td>Hills</td><td>Any</td><td>Any</td><td></td><td>Grounded</td></tr><tr><td><strong>Machamp</strong></td><td>Common</td><td>Lvl 36-51</td><td>Hills</td><td>Any</td><td>Any</td><td></td><td>Grounded</td></tr><tr><td><strong>Bellsprout</strong></td><td>Common</td><td>Lvl 5-30</td><td>Jungle</td><td>Any</td><td>Any</td><td></td><td>Grounded</td></tr><tr><td><strong>Weepinbell</strong></td><td>Common</td><td>Lvl 21-39</td><td>Jungle</td><td>Any</td><td>Any</td><td></td><td>Grounded</td></tr><tr><td><strong>Victreebel</strong></td><td>Common</td><td>Lvl 34-49</td><td>Jungle</td><td>Any</td><td>Any</td><td></td><td>Grounded</td></tr><tr><td><strong>Tentacool</strong></td><td>Common to Uncommon</td><td>Lvl 9-34</td><td>Ocean, Deep Ocean, Overworld</td><td>Any</td><td>Any</td><td>Can only be obtained via Fishing in <strong>Overworld</strong>. Rest biomes can spawn submerged.</td><td>Fishing, Submerged or Surface</td></tr><tr><td><strong>Tentacruel</strong></td><td>Common to Uncommon</td><td>Lvl 30-52</td><td>Ocean, Deep Ocean, Overworld</td><td>Any</td><td>Any</td><td>Can only be obtained via Fishing in <strong>Overworld</strong>. Rest biomes can spawn submerged.</td><td>Fishing, Submerged or Surface</td></tr><tr><td><strong>Geodude</strong></td><td>Common</td><td>Lvl 5-30</td><td><strong>Normal</strong>: Mountain, Caves. <strong>Alolan</strong>: Overworld</td><td>Any</td><td>Any</td><td><strong>Alolan Geodude</strong> only spawns near <strong>Iron Ores</strong> within Overworld. </td><td>Grounded</td></tr><tr><td><strong>Graveler</strong></td><td>Common</td><td>Lvl 25-39</td><td><strong>Normal</strong>: Mountain, Caves. <strong>Alolan</strong>: Overworld</td><td>Any</td><td>Any</td><td><strong>Alolan Gravaler</strong> only spawns near <strong>Iron Ores</strong> within Overworld. </td><td>Grounded</td></tr><tr><td><strong>Golem</strong></td><td>Common</td><td>Lvl 34-50</td><td><strong>Normal</strong>: Mountain, Caves. <strong>Alolan</strong>: Overworld</td><td>Any</td><td>Any</td><td><strong>Alolan Golem</strong> only spawns near <strong>Iron Ores</strong> within Overworld. </td><td>Grounded</td></tr><tr><td><strong>Ponyta</strong></td><td>Common to Uncommon</td><td>Lvl 16-41</td><td><strong>Normal</strong>: Grassland. <strong>Galarian</strong>: Floral, Magical</td><td>Any</td><td>Clear</td><td></td><td>Grounded</td></tr><tr><td><strong>Rapidash</strong></td><td>Common to Uncommon</td><td>Lvl 40-50</td><td><strong>Normal</strong>: Grassland. <strong>Galarian</strong>: Floral, Magical</td><td>Any</td><td>Clear</td><td></td><td>Grounded</td></tr><tr><td><strong>Slowpoke</strong></td><td>Common</td><td>Lvl 7-32</td><td><strong>Normal</strong>: Beach, River, Freshwater. <strong>Galarian</strong>: Mushroom Fields</td><td>Any</td><td>Any</td><td><p>Can be fished in all listed biomes besides <strong>Beach</strong>. </p><p>Can be obtained via Natural spawns excluding <strong>Freshwater</strong>.</p></td><td>Fishing or Grounded</td></tr><tr><td><strong>Slowbro</strong></td><td>Common</td><td>Lvl 37-49</td><td>N<strong>ormal</strong>: Beach, River, Freshwater. <strong>Galarian</strong>: Mushroom Fields</td><td>Any</td><td>Any</td><td><p>Can be fished in all listed biomes besides <strong>Beach</strong>. </p><p>Can be obtained via Natural spawns excluding <strong>Freshwater</strong>.</p></td><td>Fishing or Grounded</td></tr><tr><td><strong>Magnemite</strong></td><td>Common to Uncommon</td><td>Lvl 8-33</td><td>Overworld</td><td>Any</td><td>Any</td><td>Can spawn near <strong>Redstone</strong> [<em>excl Deep Dark</em>]. Can also spawn near <strong>Lightning Rod</strong> in any Biome.</td><td>Grounded</td></tr><tr><td><strong>Magneton</strong></td><td>Common to Uncommon</td><td>Lvl 30-47</td><td>Overworld</td><td>Any</td><td>Any</td><td>Can spawn near <strong>Redstone</strong> [<em>excl Deep Dark</em>]. Can also spawn near <strong>Lightning Rod</strong> in any Biome.</td><td>Grounded</td></tr><tr><td><strong>Farfetch'd</strong></td><td>Common, Rare</td><td>Lvl 13-38</td><td><strong>Normal</strong>: Overworld. <strong>Galarian</strong> Forest</td><td>Any</td><td>Any</td><td><strong>Normal</strong> will <strong>only spawn</strong> near <strong>Medicinal Leek.</strong> <strong>Galarian</strong> won't spawn near <strong>Water.</strong></td><td>Grounded</td></tr><tr><td><strong>Doduo</strong></td><td>Common</td><td>Lvl 6-31</td><td>Savanna</td><td>Any</td><td>Any</td><td></td><td>Grounded</td></tr><tr><td><strong>Dodrio</strong></td><td>Common</td><td>Lvl 31-47</td><td>Savanna</td><td>Any</td><td>Any</td><td></td><td>Grounded</td></tr><tr><td><strong>Seel</strong></td><td>Common</td><td>Lvl 8-33</td><td>Frozen Ocean, Cold Ocean</td><td>Any</td><td>Any</td><td>Can be <strong>fished</strong> in both biomes, but <strong>only naturally</strong> within <strong>Forzen Oceans.</strong></td><td>Fishing, Grounded or Submerged</td></tr><tr><td><strong>Dewgong</strong></td><td>Common</td><td>Lvl 34-48</td><td>Frozen Ocean, Cold Ocean</td><td>Any</td><td>Any</td><td>Can be <strong>fished</strong> in both biomes, but <strong>only naturally</strong> within <strong>Forzen Oceans.</strong></td><td>Fishing, Grounded or Submerged</td></tr><tr><td><strong>Grimer</strong></td><td>Common to Uncommon</td><td>Lvl 8-33</td><td><strong>Normal</strong>: Overworld, Swamp. <strong>Alolan</strong>: Overworld</td><td>Any</td><td>Any</td><td>Increased spawns at night. Normal can be fished in all <strong>overworld</strong> biomes <strong>besides Swamps</strong>. Both can spawn near villages.</td><td>Fishing, Grounded or Submerged</td></tr><tr><td><strong>Muk</strong></td><td>Common to Uncommon</td><td>Lvl 38-50</td><td><strong>Normal</strong>: Overworld, Swamp. <strong>Alolan</strong>: Overworld</td><td>Any</td><td>Any</td><td>Increased spawns at night. Normal can be fished in all <strong>overworld</strong> biomes <strong>besides Swamps</strong>. Both can spawn near villages.</td><td>Fishing, Grounded or Submerged</td></tr><tr><td><strong>Shellder</strong></td><td>Common</td><td>Lvl 6-31</td><td>Ocean, Cold Ocean, Frozen Ocean, Coast, Overworld</td><td>Any</td><td>Any</td><td>Only obtainable on <strong>Seafloor</strong> or via <strong>Fishing</strong> in all biomes besides Deep Dark. Also obtainable at seawrecks.</td><td>Fishing or Seafloor</td></tr><tr><td><strong>Cloyster</strong></td><td>Common</td><td>Lvl 26-53</td><td>Ocean, Cold Ocean, Frozen Ocean, Coast, Overworld</td><td>Any</td><td>Any</td><td>Only obtainable on <strong>Seafloor</strong> or via <strong>Fishing</strong> in all biomes besides Deep Dark. Also obtainable at seawrecks.</td><td>Fishing or Seafloor</td></tr><tr><td><strong>Gastly</strong></td><td>Common to Uncommon</td><td>Lvl 6-31</td><td>Overworld, Spooky, Nether</td><td>Any</td><td>Any</td><td>Will <strong>only spawn</strong> in caves or within no sunlight.</td><td>Grounded</td></tr><tr><td><strong>Haunter</strong></td><td>Common to Uncommon</td><td>Lvl 25-41</td><td>Overworld, Spooky, Nether</td><td>Any</td><td>Any</td><td>Will <strong>only spawn</strong> in caves or within no sunlight.</td><td>Grounded</td></tr><tr><td><strong>Gengar</strong></td><td>Common to Uncommon</td><td>Lvl 36-50</td><td>Overworld, Spooky, Nether</td><td>Any</td><td>Any</td><td>Will <strong>only spawn</strong> in caves or within no sunlight.</td><td>Grounded</td></tr><tr><td><strong>Onix</strong></td><td>Uncommon</td><td>Lvl 14-39</td><td>Overworld, Nether Basalt</td><td>Any</td><td>Any</td><td></td><td>Grounded</td></tr><tr><td><strong>Drowzee</strong></td><td>Common</td><td>Lvl 8-33</td><td>Overworld</td><td>Night</td><td>Any</td><td><strong>Will not spawn</strong> in <strong>Freezing</strong> Biomes.</td><td>Grounded</td></tr><tr><td><strong>Hypno</strong></td><td>Common</td><td>Lvl 26-48</td><td>Overworld</td><td>Night</td><td>Any</td><td><strong>Will not spawn</strong> in <strong>Freezing</strong> Biomes.</td><td>Grounded</td></tr><tr><td><strong>Krabby</strong></td><td>Common</td><td>Lvl 8-33</td><td>Coast, Ocean, Overworld</td><td>Any</td><td>Any</td><td>Can be <strong>fishied</strong> in all biomes or found near <strong>shipwrecks</strong>. Also spawns in seafloor naturally.</td><td>Fishing, Grounded or Seafloor</td></tr><tr><td><strong>Kingler</strong></td><td>Common</td><td>Lvl 28-48</td><td>Coast, Ocean, Overworld</td><td>Any</td><td>Any</td><td>Can be <strong>fishied</strong> in all biomes or found near <strong>shipwrecks</strong>. Also spawns in seafloor naturally.</td><td>Fishing, Grounded or Seafloor</td></tr><tr><td><strong>Voltorb</strong></td><td>Common to Uncommon</td><td>Lvl 8-33</td><td><strong>Normal</strong>:<br>Overworld<br><strong>Hisuian</strong>:<br>Overworld</td><td>Any</td><td>Any</td><td><p>Can spawn during <strong>Storms</strong>. Will also spawn in <strong>villages</strong> or near <strong>Lightning Rods</strong>. </p><p><strong>Hisuian</strong> will spawn near <strong>Apricorns</strong>.</p></td><td>Grounded</td></tr><tr><td><strong>Electrode</strong></td><td>Common to Uncommon</td><td>Lvl 30-49</td><td><strong>Normal</strong>:<br>Overworld<br><strong>Hisuian</strong>:<br>Overworld</td><td>Any</td><td>Any</td><td><p>Can spawn during <strong>Storms</strong>. Will also spawn in <strong>villages</strong> or near <strong>Lightning Rods</strong>. </p><p><strong>Hisuian</strong> will spawn near <strong>Apricorns</strong>.</p></td><td>Grounded</td></tr><tr><td><strong>Exeggcute</strong></td><td>Common to Uncommon</td><td>Lvl 8-33</td><td>Jungle, Savanna, Beach</td><td>Any</td><td>Any</td><td></td><td>Grounded</td></tr><tr><td><strong>Exeggutor</strong></td><td>Common to Uncommon</td><td>Lvl 28-53</td><td><strong>Normal</strong>: Jungle, Savanna. <strong>Alolan</strong>: Beach</td><td>Any</td><td>Any</td><td></td><td>Grounded</td></tr><tr><td><strong>Cubone</strong></td><td>Common</td><td>Lvl 7-32</td><td>Badlands, Desert, Nether Desert</td><td>Any</td><td>Any</td><td></td><td>Grounded</td></tr><tr><td><strong>Marowak</strong></td><td>Common</td><td>Lvl 28-43</td><td><strong>Normal</strong>: Badlands, Desert. <strong>Alolan</strong>:  Nether Desert</td><td>Any</td><td>Any</td><td></td><td>Grounded</td></tr><tr><td><strong>Hitmonlee</strong></td><td>Uncommon</td><td>Lvl 20-46</td><td>Hills</td><td>Any</td><td>Any</td><td></td><td>Grounded</td></tr><tr><td><strong>Hitmonchan</strong></td><td>Uncommon</td><td>Lvl 20-46</td><td>Hills</td><td>Any</td><td>Any</td><td></td><td>Grounded</td></tr><tr><td><strong>Lickitung</strong></td><td>Uncommon</td><td>Lvl 14-39</td><td>Grassland</td><td>Any</td><td>Any</td><td></td><td>Grounded</td></tr><tr><td><strong>Koffing</strong></td><td>Common</td><td>Lvl 9-34</td><td>Overworld</td><td>Any</td><td>Any</td><td>Can also spawn near <strong>Villages</strong>. Increased spawn rate at night.</td><td>Grounded</td></tr><tr><td><strong>Weezing</strong></td><td>Common</td><td>Lvl 35-49</td><td><strong>Normal</strong>:<br>Overworld <strong>Galarian</strong>: Spooky, Magical.   </td><td>Any</td><td>Any</td><td>Normal form can also spawn near <strong>Villages</strong>. Increased spawn rate at night.</td><td>Grounded</td></tr><tr><td><strong>Rhyhorn</strong></td><td>Common</td><td>Lvl 10-35</td><td>Mountain, Savanna</td><td>Any</td><td>Any</td><td></td><td>Grounded</td></tr><tr><td><strong>Rhydon</strong></td><td>Common</td><td>Lvl 42-49</td><td>Mountain, Savanna</td><td>Any</td><td>Any</td><td></td><td>Grounded</td></tr><tr><td><strong>Chansey</strong></td><td>Rare</td><td>Lvl 17-45</td><td>Overworld</td><td>Any</td><td>Any</td><td>Can also spawn near <strong>Villages</strong>.</td><td>Grounded</td></tr><tr><td><strong>Tangela</strong></td><td>Common</td><td>Lvl 19-44</td><td>Jungle</td><td>Any</td><td>Any</td><td></td><td>Grounded</td></tr><tr><td><strong>Kangaskhan</strong></td><td>Rare</td><td>Lvl 24-49</td><td>Savanna</td><td>Any</td><td>Any</td><td></td><td>Grounded</td></tr><tr><td><strong>Horsea</strong></td><td>Common</td><td>Lvl 5-30</td><td>Lukewarm Ocean, Warm Ocean, Ocean, Overworld</td><td>Any</td><td>Any</td><td>Can be obtained via <strong>fishing</strong> or near <strong>shipwrecks</strong> alongside <strong>natural</strong> spawns.</td><td>Fishing or Submerged</td></tr><tr><td><strong>Seadra</strong></td><td>Common</td><td>Lvl 32-44</td><td>Lukewarm Ocean, Warm Ocean, Ocean, Overworld</td><td>Any</td><td>Any</td><td>Can be obtained via <strong>fishing</strong> or near <strong>shipwrecks</strong> alongside <strong>natural</strong> spawns.</td><td>Fishing or Submerged</td></tr><tr><td><strong>Goldeen</strong></td><td>Common</td><td>Lvl 7-32</td><td>River, Floral, Freezing, Freshwater, Jungle, Magical, Mountain, Taiga, Temperate</td><td>Any</td><td>Any</td><td>Only spawns in <strong>Rivers naturally</strong>. All <strong>other biome</strong>s only obtainable via <strong>Fishing</strong>.</td><td>Fishing or Submerged</td></tr><tr><td><strong>Seaking</strong></td><td>Common</td><td>Lvl 33-45</td><td>River, Floral, Freezing, Freshwater, Jungle, Magical, Mountain, Taiga, Temperate</td><td>Any</td><td>Any</td><td>Only spawns in <strong>Rivers naturally</strong>. All <strong>other biome</strong>s only obtainable via <strong>Fishing</strong>.</td><td>Fishing or Submerged</td></tr><tr><td><strong>Staryu</strong></td><td>Common to Uncommon</td><td>Lvl 9-34</td><td>Coast, Ocean, Tropical Island, Overworld</td><td>Any</td><td>Any</td><td><strong>Overworld</strong> spawns are <strong>only near Shipwrecks</strong>. The other <strong>three biomes</strong> can be obtained by <strong>fishing or natural</strong>.</td><td>Fishing, Grounded or Submerged</td></tr><tr><td><strong>Starmine</strong></td><td>Common to Uncommon</td><td>Lvl 29-52</td><td>Coast, Ocean, Tropical Island, Overworld</td><td>Any</td><td>Any</td><td><strong>Overworld</strong> spawns are <strong>only near Shipwrecks</strong>. The other <strong>three biomes</strong> can be obtained by <strong>fishing or natural</strong>.</td><td>Fishing, Grounded or Submerged</td></tr><tr><td><strong>Mr. Mime</strong></td><td>Common to Uncommon</td><td>Lvl 26-46</td><td><strong>Normal</strong>:<br>Overworld<br><strong>Galarian</strong>:<br>Freezing</td><td>Any</td><td>Any</td><td>Can also spawn near <strong>Villages</strong> [<em>excl Freezing for Normal</em>].</td><td>Grounded</td></tr><tr><td><strong>Scyther</strong></td><td>Uncommon To Rare</td><td>Lvl 25-50</td><td>Forest, Hills, Jungle</td><td>Day</td><td>Any</td><td></td><td>Grounded</td></tr><tr><td><strong>Jynx</strong></td><td>Uncommon</td><td>Lvl 30-46</td><td>Freezing</td><td>Any</td><td>Any</td><td>Can also spawn near <strong>Villages.</strong></td><td>Grounded</td></tr><tr><td><strong>Electabuzz</strong></td><td>Uncommon</td><td>Lvl 30-50</td><td>Hills, Plains</td><td>Any</td><td>Any</td><td></td><td>Grounded</td></tr><tr><td><strong>Magmar</strong></td><td>Common</td><td>Lvl 30-50</td><td>Hills, Nether Basalt, Nether Wasteland</td><td>Any</td><td>Clear</td><td>Only spawns in <strong>Hills</strong> near <strong>Lava</strong> or a <strong>Magma Block</strong>.</td><td>Grounded</td></tr><tr><td><strong>Pinsir</strong></td><td>Rare</td><td>Lvl 25-50</td><td>Jungle</td><td>Any</td><td>Any</td><td></td><td>Grounded</td></tr><tr><td><strong>Tauros</strong></td><td>Common</td><td>Lvl 24-49</td><td><strong>Normal</strong>: Grassland. <strong>Paldean Forms</strong>: Highlands</td><td>Any</td><td>Any</td><td></td><td>Grounded</td></tr><tr><td><strong>Magikarp</strong></td><td>Common to Uncommon</td><td>Lvl 1-20</td><td>Freshwater, Ocean, Overworld</td><td>Any</td><td>Any</td><td>Only obtainable via <strong>Fishing in Overworld</strong>. <strong>Freshwater and Ocean</strong> can also spawn them <strong>naturally</strong>.</td><td>Fishing, Submerged or Surface</td></tr><tr><td><strong>Gyarados</strong></td><td>Common to Uncommon</td><td>Lvl 20-54</td><td>Freshwater, Ocean, Overworld</td><td>Any</td><td>Any</td><td>Only obtainable via <strong>Fishing in Overworld</strong>. <strong>Freshwater and Ocean</strong> can also spawn them <strong>naturally</strong>.</td><td>Fishing, Submerged or Surface</td></tr><tr><td><strong>Lapras</strong></td><td>Common to Ultra-rare</td><td>Lvl 29-54</td><td>Ocean, Frozen Ocean</td><td>Any</td><td>Any</td><td>Can be obtained via <strong>Fishing or Natural</strong>.</td><td>Fishing or Surface</td></tr><tr><td><strong>Ditto</strong></td><td>Ultra-rare</td><td>Lvl 4-29</td><td>Overworld</td><td>Any</td><td>Any</td><td>Can spawn in <strong>Mansions</strong> or near <strong>Slime Blocks</strong>. </td><td>Grounded</td></tr><tr><td><strong>Eevee</strong></td><td>Uncommon to Ultra-rare</td><td>Lvl 5-33</td><td>Overworld</td><td>Any</td><td>Any</td><td>Can spawn near <strong>Villages</strong> or in <strong>Mansions</strong>.</td><td>Grounded</td></tr><tr><td><strong>Vaporeon</strong></td><td>Uncommon, Ultra-rare</td><td>Lvl 28-53</td><td>Freshwater, Jungle, Magical, Temperate,  Overworld</td><td>Any</td><td>Any</td><td>Can spawn near <strong>villages</strong> in overworld or <strong>fishing or natura</strong>l in the <strong>listed biomes</strong>.</td><td>Fishing, Grounded or Submerged</td></tr><tr><td><strong>Jolteon</strong></td><td>Uncommon, Ultra-rare</td><td>Lvl 28-53</td><td>Grassland, Overworld</td><td>Any</td><td>Any</td><td>Can spawn near <strong>Villages</strong> or in <strong>Mansions</strong>.</td><td>Grounded</td></tr><tr><td><strong>Flareon</strong></td><td>Uncommon, Ultra-rare</td><td>Lvl 28-53</td><td>Badlands, Desert, Overworld</td><td>Any</td><td>Any</td><td>Can spawn near <strong>Villages</strong> or in <strong>Mansions</strong>.</td><td>Grounded</td></tr><tr><td><strong>Porygon</strong></td><td>Uncommon</td><td>Lvl 15-40</td><td>Overworld</td><td>Any</td><td>Any</td><td><strong>Will only spawn</strong> near a <strong>Cobblemon PC</strong>.</td><td>Grounded</td></tr><tr><td><strong>Omanyte</strong></td><td>Ultra-rare</td><td>Lvl 11-36</td><td>Lush</td><td>Any</td><td>Any</td><td></td><td>Grounded or Submerged</td></tr><tr><td><strong>Omastar</strong></td><td>Ultra-rare</td><td>Lvl 40-50</td><td>Lush</td><td>Any</td><td>Any</td><td></td><td>Grounded or Submerged</td></tr><tr><td><strong>Kabuto</strong></td><td>Ultra-rare</td><td>Lvl 11-36</td><td>Lush</td><td>Any</td><td>Any</td><td></td><td>Grounded or Submerged</td></tr><tr><td><strong>Kabutops</strong></td><td>Ultra-rare</td><td>Lvl 40-50</td><td>Lush</td><td>Any</td><td>Any</td><td></td><td>Grounded or Submerged</td></tr><tr><td><strong>Aerodactyl</strong></td><td>Ultra-rare</td><td>Lvl 27-52</td><td>Lush</td><td>Any</td><td>Any</td><td></td><td>Grounded</td></tr><tr><td><strong>Snorlax</strong></td><td>Rare</td><td>Lvl 34-54</td><td>Snowy Forest, Forest, Hills</td><td>Any</td><td>Any</td><td></td><td>Grounded</td></tr><tr><td><strong>Dratini</strong></td><td>Uncommon to Ultra-rare</td><td>Lvl 5-30</td><td>Overworld, Ocean, Magical</td><td>Any</td><td>Any</td><td>Can be obtained <strong>natural or via fishing</strong> in <strong>Overworld</strong>.</td><td>Fishing, Submerged or Surface</td></tr><tr><td><strong>Dragonair</strong></td><td>Uncommon to Ultra-rare</td><td>Lvl 30-42</td><td>Overworld, Ocean, Magical</td><td>Any</td><td>Any</td><td>Can be obtained <strong>natural or via fishing</strong> in <strong>Overworld</strong>.</td><td>Fishing, Submerged or Surface</td></tr><tr><td><strong>Dragonite</strong></td><td>Uncommon to Ultra-rare</td><td>Lvl 55-60</td><td>Overworld, Ocean, Magical</td><td>Any</td><td>Any</td><td>Can be obtained <strong>natural or via fishing</strong> in <strong>Overworld</strong>.</td><td>Fishing, Grounded or Submerged</td></tr></tbody></table>


# Generation 2 Spawns

This page will go over all the non-legendary pokemon that are found within the second Generation of Pokemon games.

<table><thead><tr><th width="90.25">Pokemon</th><th width="102.5">Rarity </th><th width="89.25">Lvl Average</th><th width="124.5">Biome(s)</th><th width="96">Time</th><th width="80.25">Weather</th><th width="110">Spawn Info</th><th width="110">Context</th></tr></thead><tbody><tr><td><strong>Chikorita</strong></td><td>Ultra-rare</td><td>Lvl 5-32</td><td>Floral</td><td>Any</td><td>Any</td><td></td><td>Grounded</td></tr><tr><td><strong>Bayleef</strong></td><td>Ultra-rare</td><td>Lvl 16-41</td><td>Floral</td><td>Any</td><td>Any</td><td></td><td>Grounded</td></tr><tr><td><strong>Meganium</strong></td><td>Ultra-rare</td><td>Lvl 32-53</td><td>Floral</td><td>Any</td><td>Any</td><td></td><td>Grounded</td></tr><tr><td><strong>Cyndaquil</strong></td><td>Ultra-rare</td><td>Lvl 5-31</td><td>Temperat, Taiga, Nether Crimson</td><td>Any</td><td>Any</td><td></td><td>Grounded</td></tr><tr><td><strong>Quilava</strong></td><td>Ultra-rare</td><td>Lvl 17-41</td><td>Temperat, Taiga, Nether Crimson</td><td>Any</td><td>Any</td><td></td><td>Grounded</td></tr><tr><td><strong>Typhlosion</strong></td><td>Ultra-rare</td><td>Lvl 36-53</td><td><strong>Normal:</strong> Temperate <strong>Hisuian:</strong> Taiga, Nether Crimson</td><td>Any</td><td>Any </td><td></td><td>Grounded</td></tr><tr><td><strong>Totodile</strong></td><td>Ultra-rare</td><td>Lvl 5-31</td><td>Swamp, Arid, Jungle</td><td>Any</td><td>Any</td><td></td><td>Fishing, Grounded or Submerged</td></tr><tr><td><strong>Croconaw</strong></td><td>Ultra-rare</td><td>Lvl 18-41</td><td>Swamp, Arid, Jungle</td><td>Any</td><td>Any</td><td></td><td>Fishing, Grounded or Submerged</td></tr><tr><td><strong>Feraligatr</strong></td><td>Ultra-rare</td><td>Lvl 30-53</td><td>Swamp, Arid, Jungle</td><td>Any</td><td>Any</td><td></td><td>Fishing, Grounded or Submerged</td></tr><tr><td><strong>Sentret</strong></td><td>Common</td><td>Lvl 1-22</td><td>Taiga, Temperat,Tundra</td><td>Any</td><td>Any</td><td></td><td>Grounded</td></tr><tr><td><strong>Furret</strong></td><td>Common</td><td>Lvl 15-42</td><td>Taiga, Temperat, Tundra</td><td>Any</td><td>Any</td><td></td><td>Grounded</td></tr><tr><td><strong>Hoothoot</strong></td><td>Common</td><td>Lvl 1-26</td><td>Forest, Sky, Spooky</td><td>Night</td><td>Any</td><td></td><td>Grounded</td></tr><tr><td><strong>Noctowl</strong></td><td>Common</td><td>Lvl 20-45</td><td>Forest, Sky, Spooky</td><td>Night</td><td>Any</td><td></td><td>Grounded</td></tr><tr><td><strong>Ledyba</strong></td><td>Common</td><td>Lvl 2-27</td><td>Temperate</td><td>Any</td><td>Clear</td><td>Does not spawn in <strong>Freezing</strong> Biomes.</td><td>Grounded</td></tr><tr><td><strong>Ledian</strong></td><td>Common</td><td>Lvl 18-39</td><td>Temperate</td><td>Any</td><td>Clear</td><td>Does not spawn in <strong>Freezing</strong> Biomes.</td><td>Grounded</td></tr><tr><td><strong>Spinarak</strong></td><td>Common</td><td>Lvl 1-25</td><td>Overworld, Forest, Jungle, Spooky</td><td>Any</td><td>Clear</td><td>Spawns in <strong>Caves</strong> or near <strong>Cobwebs in Overworld</strong>. For the listed biomes it does not spawn in <strong>Freezing</strong>.</td><td>Grounded</td></tr><tr><td><strong>Ariados</strong></td><td>Common</td><td>Lvl 22-40</td><td>Overworld, Forest, Jungle, Spooky</td><td>Any</td><td>Clear</td><td>Spawns in <strong>Caves</strong> or near <strong>Cobwebs in Overworld</strong>. For the listed biomes it does not spawn in <strong>Freezing</strong>.</td><td>Grounded</td></tr><tr><td><strong>Crobat</strong></td><td>Common to Uncommon</td><td>Lvl 41-54</td><td>Forest, Swamp, Overworld, Spooky, Deep Dark</td><td>Any</td><td>Clear</td><td></td><td>Grounded</td></tr><tr><td><strong>Chinchou</strong></td><td>Common</td><td>Lvl 8-33</td><td>Overworld, Ocean, Deep Ocean</td><td>Any</td><td>Any</td><td>Can spawn near <strong>shipwrecks</strong> within overworld.</td><td>Fishing or Submerged</td></tr><tr><td><strong>Lanturn</strong></td><td>Common</td><td>Lvl 27-46</td><td>Overworld, Ocean, Deep Ocean</td><td>Any</td><td>Any</td><td>Can spawn near <strong>shipwrecks</strong> within overworld.</td><td>Fishing or Submerged</td></tr><tr><td><strong>Pichu</strong></td><td>Uncommon</td><td>Lvl 1-21</td><td>Forest</td><td>Any</td><td>Any</td><td></td><td>Grounded</td></tr><tr><td><strong>Cleffa</strong></td><td>Uncommon</td><td>Lvl 1-22</td><td>Dripstone, Hills</td><td>Night</td><td>Any</td><td></td><td>Grounded</td></tr><tr><td><strong>Igglybuff</strong></td><td>Common</td><td>Lvl 1-21</td><td>Floral, Plains</td><td>Any</td><td>Any</td><td></td><td>Grounded</td></tr><tr><td><strong>Togepi</strong></td><td>Common</td><td>Lvl 10-22</td><td>Magical, Floral</td><td>Morning</td><td>Any</td><td></td><td>Grounded</td></tr><tr><td><strong>Togetic</strong></td><td>Common</td><td>Lvl 15-22</td><td>Magical, Floral</td><td>Morning</td><td>Any</td><td></td><td>Grounded</td></tr><tr><td><strong>Natu</strong></td><td>Common</td><td>vl 7-32</td><td>Badlands, Plateau, Overworld</td><td>Day</td><td>Any</td><td></td><td>Grounded</td></tr><tr><td><strong>Xatu</strong></td><td>Common</td><td>Lvl 25-47</td><td>Badlands, Plateau, Overworld</td><td>Day</td><td>Any</td><td></td><td>Grounded</td></tr><tr><td><strong>Mareep</strong></td><td>Common</td><td>Lvl 3-28</td><td>Highlands, Plains</td><td>Any</td><td>Any</td><td></td><td>Groundedv</td></tr><tr><td><strong>Flaaffy</strong></td><td>Common</td><td>Lvl 15-37</td><td>Highlands, Plains</td><td>Any</td><td>Any</td><td></td><td>Grounded</td></tr><tr><td><strong>Ampharos</strong></td><td>Common</td><td>Lvl 30-51</td><td>Highlands, Plains</td><td>Any</td><td>Any</td><td></td><td>Grounded</td></tr><tr><td><strong>Bellossom</strong></td><td>Common</td><td>Lvl 35-49</td><td>Floral, Jungle, Savanna</td><td>Day</td><td>Any</td><td></td><td>Grounded</td></tr><tr><td><strong>Marril</strong></td><td>Common</td><td>Lvl 20-35</td><td>River</td><td>Underwater</td><td>Clear</td><td></td><td>Fishing, Grounded or Surface</td></tr><tr><td><strong>Azumarill</strong></td><td>Common to Uncommon</td><td>Lvl 19-35</td><td>River, Lukewarm Ocean, Warm Ocean</td><td>Underwater</td><td>Clear</td><td></td><td>Fishing, Grounded or Surface</td></tr><tr><td><strong>Sudowoodo</strong></td><td>Uncommon</td><td>Lvl 16-41</td><td>Forest</td><td>Any</td><td>Clear</td><td></td><td>Grounded</td></tr><tr><td><strong>Politoed</strong></td><td>Common</td><td>Lvl 34-50</td><td>Swamp, Lush, Freshwater, Hills, Jungle, Magical, Mushroo, Temperate</td><td>Any</td><td>Any</td><td>Does not spawn in <strong>Freezing or Lush</strong> Biomes. Spawns near <strong>Lily Pads</strong> in <strong>Swamps</strong>. Can spawn in <strong>Shripwreck Coves</strong> in <strong>Overworld.</strong></td><td>Fishing, Grounded or Submerged</td></tr><tr><td><strong>Hoppip</strong></td><td>Common</td><td>Lvl 4-25</td><td>Plains</td><td>Day</td><td>Clear</td><td></td><td>Grounded</td></tr><tr><td><strong>Skiploom</strong></td><td>Common</td><td>Lvl 18-34</td><td>Plains</td><td>Day</td><td>Clear</td><td></td><td>Grounded</td></tr><tr><td><strong>Jumpluff</strong></td><td>Uncommon</td><td>Lvl 27-46</td><td>Plains</td><td>Day</td><td>Clear</td><td></td><td>Grounded</td></tr><tr><td><strong>Aipom</strong></td><td>Common</td><td>Lvl 11-36</td><td>Jungle</td><td>Any</td><td>Any</td><td>Can spawn in <strong>Shripwreck Coves</strong> in <strong>Overworld</strong>.</td><td>Grounded</td></tr><tr><td><strong>Sunkern</strong></td><td>Common</td><td>Lvl 1-18</td><td>Sunflower Plains, Overworld</td><td>Any</td><td>Any</td><td>Only spawns near <strong>Sunflowers</strong>.</td><td>Grounded</td></tr><tr><td><strong>Sunflora</strong></td><td>Common</td><td>Lvl 13-43</td><td>Sunflower Plains, Overworld</td><td>Any</td><td>Any</td><td>Only spawns near <strong>Sunflowers</strong>.</td><td>Grounded</td></tr><tr><td><strong>Yanma</strong></td><td>Uncommon</td><td>Lvl 14-39</td><td>Freshwater, Lush.</td><td>Any</td><td>Clear</td><td>Can spawn in <strong>Shripwreck Coves</strong> in <strong>Overworld</strong>. Does not spawn in <strong>Freezing</strong> or <strong>Lush</strong> biomes.</td><td>Surface</td></tr><tr><td><strong>Wooper</strong></td><td>Common to Uncommon</td><td>Lvl 1-21</td><td><strong>Normal</strong>: Swamp, Mushroom. <strong>Paldean</strong>: Muddy, Savanna, Arid</td><td>Any</td><td>Any</td><td>Both forms can be obtained via Fishing. Normal can spawn in <strong>Shripwreck Coves</strong> in <strong>Overworld</strong>.</td><td>Fishing, Grounded or Submerged</td></tr><tr><td><strong>Quagsire</strong></td><td>Common to Uncommon</td><td>Lvl 20-43</td><td>Lush, Overworld, Swamp, Mushroom</td><td>Any</td><td>Any</td><td>Can spawn in <strong>Shripwreck Coves</strong> in <strong>Overworld</strong>.</td><td>Fishing, Grounded or Submerged</td></tr><tr><td><strong>Espeon</strong></td><td>Uncommon, Ultra-rare</td><td>Lvl 28-53</td><td>Overworld, Hills.</td><td>Any</td><td>Any</td><td>Will spawn in <strong>Villages</strong> in <strong>Overworld</strong> at <strong>Uncommon</strong>. <strong>Ultra-rar</strong>e for Hills.</td><td>Grounded</td></tr><tr><td><strong>Umbreon</strong></td><td>Uncommon, Ultra-rare</td><td>Lvl 28-53</td><td>Overworld, Spooky</td><td>Any</td><td>Any</td><td>Will spawn in <strong>Villages</strong> in <strong>Overworld</strong> at <strong>Uncommon</strong>. <strong>Ultra-rare</strong> for <strong>Spooky</strong>.</td><td>Grounded</td></tr><tr><td><strong>Murkrow</strong></td><td>Common</td><td>Lvl 16-41</td><td>Spooky, Swamp, Taiga</td><td>Night</td><td>Any</td><td></td><td>Grounded</td></tr><tr><td><strong>Slowking</strong></td><td>Common</td><td>Lvl 37-49</td><td><strong>Normal</strong>: Beach <strong>Galarian</strong>: Mushroom Fields, Tropical Island.</td><td>Any</td><td>Any</td><td>Both can be obtained via <strong>Fishing</strong>.</td><td>Fishing or Grounded</td></tr><tr><td><strong>Misdreavus</strong></td><td>Common</td><td>Lvl 19-44</td><td>Spooky, Swamp, Nether Warped.</td><td>Any</td><td>Any</td><td>Can spawn in <strong>Caves</strong> or within <strong>Shipwreck Coves</strong> in <strong>Overworld</strong>.</td><td>Grounded</td></tr><tr><td><strong>Unown</strong></td><td>Common to Uncommon</td><td>Lvl 15-55</td><td>End, Strongholds</td><td>Any</td><td>Any</td><td></td><td>Grounded</td></tr><tr><td><strong>Wobbuffet</strong></td><td>Rare</td><td>Lvl 15-41</td><td>Overworld</td><td>Any</td><td>Any</td><td></td><td>Grounded</td></tr><tr><td><strong>Girafarig</strong></td><td>Common</td><td>Lvl 21-46</td><td>Savanna</td><td>Any</td><td>Any</td><td></td><td>Grounded</td></tr><tr><td><strong>Pineco</strong></td><td>Common</td><td>Lvl 4-29</td><td>Taiga</td><td>Any</td><td>Any</td><td></td><td>Grounded</td></tr><tr><td><strong>Forretress</strong></td><td>Common to Uncommon</td><td>Lvl 31-47</td><td>Taiga, End</td><td>Any</td><td>Any</td><td></td><td>Grounded</td></tr><tr><td><strong>Dunsparce</strong></td><td>Rare</td><td>Lvl 20-45</td><td>Mountain, Caves, Deep Dark, Mountain</td><td>Any</td><td>Underground</td><td></td><td>Grounded</td></tr><tr><td><strong>Gligar</strong></td><td>Common to Uncommon</td><td>Lvl 18-43</td><td>Badlands, Nether Mountain</td><td>Night</td><td>Any</td><td></td><td>Grounded</td></tr><tr><td><strong>Steelix</strong></td><td>Uncommon</td><td>Lvl 34-51</td><td>Overworld, Nether Basalt</td><td>Any</td><td>Any</td><td></td><td>Grounded</td></tr><tr><td><strong>Snubbull</strong></td><td>Common</td><td>Lvl 5-30</td><td>Overworld</td><td>Any</td><td>Any</td><td>Can spawn within <strong>Villages</strong> [<em>excl Freezing</em>] in Overworld.</td><td>Grounded</td></tr><tr><td><strong>Granbull</strong></td><td>Common</td><td>Lvl 23-45</td><td>Overworld</td><td>Any</td><td>Any</td><td>Can spawn within <strong>Villages</strong> [<em>excl Freezing</em>] in Overworld.</td><td>Grounded</td></tr><tr><td><strong>Qwilfish</strong></td><td>Common to Uncommon</td><td>Lvl 19-44</td><td><strong>Normal</strong>: Ocean, Lukewarm Ocean, Warm Ocean <strong>Hisuian</strong>: Cold, Cold Ocean, Frozen Ocean</td><td>Any</td><td>Any</td><td>Can spawn within <strong>Shipwreck Coves</strong> in <strong>Overworld</strong>.</td><td>Fishing or Submerged</td></tr><tr><td><strong>Scizor</strong></td><td>Uncommon</td><td>Lvl 45-50</td><td>Jungle</td><td>Day</td><td>Any</td><td></td><td>Grounded</td></tr><tr><td><strong>Shuckle</strong></td><td>Common to Uncommon</td><td>Lvl 16-51</td><td>Lush, Overworld</td><td>Any</td><td>Any</td><td>Can spawn within <strong>Shipwreck Coves</strong> in <strong>Overworld</strong>.</td><td>Fishing or Grounded</td></tr><tr><td><strong>Heracross</strong></td><td>Uncommon to Rare</td><td>Lvl 25-50</td><td>Forest, Jungle</td><td>Any</td><td>Any</td><td></td><td>Grounded</td></tr><tr><td><strong>Sneasel</strong></td><td>Uncommon</td><td>Lvl 18-43</td><td><strong>Normal</strong>: Taiga <strong>Hisuian</strong>: Mountains</td><td>Any</td><td>Any</td><td></td><td>Grounded</td></tr><tr><td><strong>Teddiursa</strong></td><td>Common</td><td>Lvl 8-33</td><td>Forest, Mountain, Taiga</td><td>Any</td><td>Any</td><td></td><td>Grounded</td></tr><tr><td><strong>Ursaring</strong></td><td>Common</td><td>Lvl 30-50</td><td>Forest, Mountain, Taiga</td><td>Any</td><td>Any</td><td></td><td>Grounded</td></tr><tr><td><strong>Slugma</strong></td><td>Common</td><td>Lvl 1-25</td><td>Nether, Overworld</td><td>Any</td><td>Any</td><td>High chance for it to spawn in or near <strong>Lava</strong>.</td><td>Grounded or Surface</td></tr><tr><td><strong>Magcargo</strong></td><td>Common</td><td>Lvl 38-43</td><td>Nether Basalt, Nether Wasteland, Nether, Overworld</td><td>Any</td><td>Any</td><td>High chance for it to spawn in or near <strong>Lava</strong>.</td><td>Grounded or Surface</td></tr><tr><td><strong>Swinub</strong></td><td>Common</td><td>Lvl 1-25</td><td>Tundra</td><td>Any</td><td>Any</td><td></td><td>Grounded</td></tr><tr><td><strong>Piloswine</strong></td><td>Common</td><td>Lvl 33-45</td><td>Tundra</td><td>Any</td><td>Any</td><td></td><td>Grounded</td></tr><tr><td><strong>Corsola</strong></td><td>Common to Uncommon</td><td>Lvl 16-41</td><td><strong>Normal</strong>:<br>Warm Ocean<br><strong>Galarian</strong>:<br>Beach, Warm Ocean</td><td>Any</td><td>Any</td><td>Can be obtained via <strong>Fishing</strong> or <strong>Seafloor</strong>.</td><td>Fishing, Grounded or Seafloor</td></tr><tr><td><strong>Remoraid</strong></td><td>Common</td><td>Lvl 5-30</td><td>Ocean, Overworld</td><td>Any</td><td>Any</td><td>Can spawn within <strong>Shipwreck Coves</strong> in <strong>Overworld</strong>.</td><td>Fishing or Submerged</td></tr><tr><td><strong>Octillery</strong></td><td>Common</td><td>Lvl 25-48</td><td>Ocean, Overworld</td><td>Any</td><td>Any</td><td>Can spawn within <strong>Shipwreck Coves</strong> in <strong>Overworld</strong>.</td><td>Fishing or Submerged</td></tr><tr><td><strong>Delibird</strong></td><td>Common to Uncommon</td><td>Lvl 8-33</td><td>Peak, Aether</td><td>Any</td><td>Any</td><td></td><td>Grounded</td></tr><tr><td><strong>Mantine</strong></td><td>Common to Uncommon</td><td>Lvl 30-49</td><td>Lukewarm Ocean, Warm Ocean, Ocean</td><td>Any</td><td>Any</td><td></td><td>Fishing or Submerged</td></tr><tr><td><strong>Skarmory</strong></td><td>Rare</td><td>Lvl 22-47</td><td>Badlands, Desert</td><td>Day</td><td>Any</td><td></td><td>Grounded</td></tr><tr><td><strong>Houndour</strong></td><td>Uncommon to Rare</td><td>Lvl 7-34</td><td>Nether, Desert Villages</td><td>Night</td><td>Any</td><td></td><td>Grounded</td></tr><tr><td><strong>Houndoom</strong></td><td>Rare</td><td>Lvl 32-42</td><td>Nether, Desert Villages</td><td>Night</td><td>Any</td><td></td><td>Grounded</td></tr><tr><td><strong>Kingdra</strong></td><td>Common</td><td>Lvl 39-54</td><td>Ocean, Lukewarm Ocean, Warm Ocean, Overworld</td><td>Any</td><td>Any</td><td>Can spawn within <strong>Shipwreck Coves</strong> in <strong>Overworld</strong>.</td><td>Fishing or Submerged</td></tr><tr><td><strong>Phanpy</strong></td><td>Common</td><td>Lvl 8-33</td><td>Badlands. Savanna</td><td>Any</td><td>Any</td><td></td><td>Grounded</td></tr><tr><td><strong>Donphan</strong></td><td>Common</td><td>Lvl 25-50</td><td>Badlands. Savanna</td><td>Any</td><td>Any</td><td></td><td>Grounded</td></tr><tr><td><strong>Porygon2</strong></td><td>Uncommon</td><td>Lvl 35-52</td><td>Overworld</td><td>Any</td><td>Any</td><td><strong>Only spawns</strong> near <strong>Cobblemon PC's</strong>.</td><td>Grounded</td></tr><tr><td><strong>Stantler</strong></td><td>Common</td><td>Lvl 22-47</td><td>Snowy Forest, Snowy Taiga, Tundra</td><td>Any</td><td>Any</td><td></td><td>Grounded</td></tr><tr><td><strong>Smeargle</strong></td><td>Common, Rare</td><td>Lvl 1-25</td><td>Overworld</td><td>Any</td><td>Any</td><td>Can spawn in <strong>Villages</strong> or higher chance within <strong>Mansions</strong>.</td><td>Grounded</td></tr><tr><td><strong>Tyrogue</strong></td><td>Uncommon</td><td>Lvl 1-21</td><td>Hills</td><td>Any</td><td>Any</td><td></td><td>Grounded</td></tr><tr><td><strong>Hitmontop</strong></td><td>Uncommon</td><td>Lvl 20-46</td><td>Hills</td><td>Any</td><td>Any</td><td></td><td>Grounded</td></tr><tr><td><strong>Smoochum</strong></td><td>Uncommon</td><td>Lvl 6-31</td><td>Freezing</td><td>Any</td><td>Any</td><td>Can spawn in <strong>Villages.</strong></td><td>Grounded</td></tr><tr><td><strong>Elekid</strong></td><td>Uncommon</td><td>Lvl 11-36</td><td>Hills, Plains</td><td>Any</td><td>Any</td><td></td><td>Grounded</td></tr><tr><td><strong>Magby</strong></td><td>Common</td><td>Lvl 11-36</td><td>Nether Basalt, Nether Wasteland, Hills</td><td>Any</td><td>Clear</td><td>Only spawns near <strong>Lava</strong> or <strong>Magma blocks</strong> within <strong>Hills</strong>.</td><td>Grounded</td></tr><tr><td><strong>Miltank</strong></td><td>Common</td><td>Lvl 24-49</td><td>Grasslands, Mushroom Fields</td><td>Any</td><td>Any</td><td></td><td>Grounded</td></tr><tr><td><strong>Blissey</strong></td><td>Rare</td><td>Lvl 40-54</td><td>Overworld</td><td>Any</td><td>Any</td><td>Can spawn in <strong>Villages.</strong></td><td>Grounded</td></tr><tr><td><strong>Larvitar</strong></td><td>Rare to Ultra-rare</td><td>Lvl 5-30</td><td>Mountains</td><td>Any</td><td>Any</td><td></td><td>Grounded</td></tr><tr><td><strong>Pupitar</strong></td><td>Rare to Ultra-rare</td><td>Lvl 30-54</td><td>Mountains</td><td>Any</td><td>Any</td><td></td><td>Grounded</td></tr><tr><td><strong>Tyranitar</strong></td><td>Rare to Ultra-rare</td><td>Lvl 55-60</td><td>Mountains</td><td>Any</td><td>Any</td><td></td><td>Grounded</td></tr></tbody></table>


# Generation 3 Spawns

This page will go over all the non-legendary pokemon that are found within the third Generation of Pokemon games.

<table><thead><tr><th width="110">Pokemon</th><th width="94">Rarity </th><th width="97.33331298828125">Lvl Average</th><th width="114">Biome(s)</th><th width="65">Time</th><th width="90.333251953125">Weather</th><th width="108">Spawn Info</th><th width="106">Context</th></tr></thead><tbody><tr><td><strong>Treecko</strong></td><td>Ultra-rare</td><td>Lvl 5-31</td><td>Jungle</td><td>Any</td><td>Any</td><td></td><td>Grounded</td></tr><tr><td><strong>Grovyle</strong></td><td>Ultra-rare</td><td>Lvl 16-41</td><td>Jungle</td><td>Any</td><td>Any</td><td></td><td>Grounded</td></tr><tr><td><strong>Sceptile</strong></td><td>Ultra-rare</td><td>Lvl 36-53</td><td>Jungle</td><td>Any</td><td>Any</td><td></td><td>Grounded</td></tr><tr><td><strong>Torchic</strong></td><td>Ultra-rare</td><td>Lvl 5-31</td><td>Plains</td><td>Any</td><td>Any</td><td></td><td>v</td></tr><tr><td><strong>Combusken</strong></td><td>Ultra-rare</td><td>Lvl 16-41</td><td>Plains</td><td>Any</td><td>Any</td><td></td><td>Grounded</td></tr><tr><td><strong>Blaziken</strong></td><td>Ultra-rare</td><td>Lvl 36-53</td><td>Plains</td><td>Any</td><td>Any</td><td></td><td>Grounded</td></tr><tr><td><strong>Mudkip</strong></td><td>Ultra-rare</td><td>Lvl 5-31</td><td>Swamp, Lush, Badlands, Forest, Jungle, Mushroom, Savanna, Overworld</td><td>Any</td><td>Any</td><td> Higher chance to be found in <strong>Swamps</strong> during rain. Can be found in <strong>Shipwreck Coves</strong>.</td><td>Fishing, Grounded or Submerged</td></tr><tr><td><strong>Marshtomp</strong></td><td>Ultra-rare</td><td>Lvl 16-41</td><td>Swamp, Lush, Badlands, Forest, Jungle, Mushroom, Savanna, Overworld</td><td>Any</td><td>Any</td><td> Higher chance to be found in <strong>Swamps</strong> during rain. Can be found in <strong>Shipwreck Coves</strong>.</td><td>Fishing, Grounded or Submerged</td></tr><tr><td><strong>Swampert</strong></td><td>Ultra-rare</td><td>Lvl 36-53</td><td>Swamp, Lush, Badlands, Forest, Jungle, Mushroom, Savanna, Overworld</td><td>Any</td><td>Any</td><td> Higher chance to be found in <strong>Swamps</strong> during rain. Can be found in <strong>Shipwreck Coves</strong>.</td><td>Fishing, Grounded or Submerged</td></tr><tr><td><strong>Poochyena</strong></td><td>Common</td><td>Lvl 1-22</td><td>Badlands, Savanna, Overworld</td><td>Any</td><td>Any</td><td>Can spawn in Pillager Outposts.</td><td>Grounded</td></tr><tr><td><strong>Mightyena</strong></td><td>Common</td><td>Lvl 18-42</td><td>Badlands, Savanna, Overworld</td><td>Any</td><td>Any</td><td>Can spawn in Pillager Outposts.</td><td>Grounded</td></tr><tr><td><strong>Zigzagoon</strong></td><td>Common</td><td>Lvl 1-24</td><td><strong>Normal</strong>: Temperate <strong>Galarian</strong>: Taiga</td><td>Any</td><td>Any</td><td></td><td>Grounded</td></tr><tr><td><strong>Linoone</strong></td><td>Common</td><td>Lvl 20-42</td><td><strong>Normal</strong>: Temperate <strong>Galarian</strong>: Taiga</td><td>Any</td><td>Any</td><td></td><td>Grounded</td></tr><tr><td><strong>Wurmple</strong></td><td>Common</td><td>Lvl 1-20</td><td>Forest, Jungle [<em>Excl Freezing</em>]</td><td>Any</td><td>Clear</td><td></td><td></td></tr><tr><td><strong>Silicoon</strong></td><td>Common</td><td>Lvl 7-21</td><td>Forest, Jungle [<em>Excl Freezing</em>]</td><td>Any</td><td>Clear</td><td></td><td></td></tr><tr><td><strong>Beautifly</strong></td><td>Common</td><td>Lvl 10-35</td><td>Forest, Jungle [<em>Excl Freezing</em>]</td><td>Any</td><td>Clear</td><td></td><td></td></tr><tr><td><strong>Cascoon</strong></td><td>Common</td><td>Lvl 7-21</td><td>Forest, Jungle [<em>Excl Freezing</em>]</td><td>Any</td><td>Clear</td><td></td><td></td></tr><tr><td><strong>Dustox</strong></td><td>Common</td><td>Lvl 10-35</td><td>Forest, Jungle [<em>Excl Freezing</em>]</td><td>Any</td><td>Clear</td><td></td><td></td></tr><tr><td><strong>Lotad</strong></td><td>Common</td><td>Lvl 1-22</td><td>Forest, Jungle, Swamp</td><td>Any</td><td>Rain</td><td></td><td>Fishing, Grounded or Surface</td></tr><tr><td><strong>Lombre</strong></td><td>Common</td><td>Lvl 14-34</td><td>Forest, Jungle, Swamp</td><td>Any</td><td>Rain</td><td></td><td>Fishing, Grounded or Surface</td></tr><tr><td><strong>Ludicolo</strong></td><td>Common</td><td>Lvl 29-48</td><td>Forest, Jungle, Swamp</td><td>Any</td><td>Rain</td><td></td><td>Fishing, Grounded or Surface</td></tr><tr><td><strong>Seedot</strong></td><td>Common</td><td>Lvl 1-22</td><td>Forest</td><td>Any</td><td>Any</td><td></td><td>Grounded</td></tr><tr><td><strong>Nuzleaf</strong></td><td>Common</td><td>Lvl 14-34</td><td>Forest</td><td>Any</td><td>Any</td><td></td><td>Grounded</td></tr><tr><td><strong>Shiftry</strong></td><td>Common</td><td>Lvl 29-48</td><td>Forest</td><td>Any</td><td>Any</td><td></td><td>Grounded</td></tr><tr><td><strong>Taillow</strong></td><td>Common</td><td>Lvl 2-27</td><td>Temperate</td><td>Any</td><td>Any</td><td></td><td>Grounded</td></tr><tr><td><strong>Swellow</strong></td><td>Common</td><td>Lvl 22-46</td><td>Temperate</td><td>Any</td><td>Any</td><td></td><td>Grounded</td></tr><tr><td><strong>Wingull</strong></td><td>Common</td><td>Lvl 2-27</td><td>Coast, Ocean</td><td>Day</td><td>Any</td><td></td><td>Grounded</td></tr><tr><td><strong>Pelipper</strong></td><td>Common</td><td>Lvl 25-44</td><td>Coast, Ocean</td><td>Day</td><td>Any</td><td></td><td>Grounded</td></tr><tr><td><strong>Ralts</strong></td><td>Common, Rare</td><td>Lvl 1-20</td><td>Overworld, Floral, Magical, Snowy Forest</td><td>Any</td><td>Any</td><td>Can spawn in <strong>Villages</strong>.</td><td>Grounded</td></tr><tr><td><strong>Kirlia</strong></td><td>Common, Rare</td><td>Lvl 20-29</td><td>Overworld, Floral, Magical, Snowy Forest</td><td>Any</td><td>Any</td><td>Can spawn in <strong>Villages</strong>.</td><td>Grounded</td></tr><tr><td><strong>Gardevoir</strong></td><td>Common, Rare</td><td>Lvl 30-52</td><td>Overworld, Floral, Magical, Snowy Forest</td><td>Any</td><td>Any</td><td>Can spawn in <strong>Villages</strong>.</td><td>Grounded</td></tr><tr><td><strong>Surskit</strong></td><td>Uncommon</td><td>Lvl 2-27</td><td>Freshwater</td><td>Any</td><td>Clear</td><td></td><td>Surface</td></tr><tr><td><strong>Masquerain</strong></td><td>Uncommon</td><td>Lvl 22-45</td><td>Freshwater</td><td>Any</td><td>Clear</td><td></td><td>Surface</td></tr><tr><td><strong>Shroomish</strong></td><td>Common</td><td>Lvl 5-30</td><td>Forest</td><td>Any</td><td>Any</td><td></td><td>Grounded</td></tr><tr><td><strong>Breloom</strong></td><td>Common</td><td>Lvl 23-46</td><td>Forest</td><td>Any</td><td>Any</td><td></td><td>Grounded</td></tr><tr><td><strong>Slakoth</strong></td><td>Common</td><td>Lvl 3-28</td><td>Jungle</td><td>Any</td><td>Any</td><td></td><td>Grounded</td></tr><tr><td><strong>Vigoroth</strong></td><td>Common</td><td>Lvl 18-44</td><td>Jungle</td><td>Any</td><td>Any</td><td></td><td>Grounded</td></tr><tr><td><strong>Slaking</strong></td><td>Common</td><td>Lvl 36-67</td><td>Jungle</td><td>Any</td><td>Any</td><td></td><td>Grounded</td></tr><tr><td><strong>Nincada</strong></td><td>Common</td><td>Lvl 2-27</td><td>Forest, Jungle</td><td>Any</td><td>Any</td><td><strong>Only spawns</strong> between Levels Y=32 to Y=62</td><td>Grounded</td></tr><tr><td><strong>Ninjask</strong></td><td>Common</td><td>Lvl 20-46</td><td>Forest, Jungle</td><td>Any</td><td>Clear</td><td></td><td>Grounded</td></tr><tr><td><strong>Shedinja</strong></td><td>Common</td><td>Lvl 20-24</td><td>Forest, Jungle</td><td>Any</td><td>Clear</td><td></td><td>Grounded</td></tr><tr><td><strong>Whismur</strong></td><td>Common to Uncommon</td><td>Lvl 1-24</td><td>Deep Dark, Overworld</td><td>Any</td><td>Any</td><td>For <strong>Overworld</strong> it only spawns when below Y=0.</td><td>Grounded</td></tr><tr><td><strong>Loudred</strong></td><td>Common to Uncommon</td><td>Lvl 20-39</td><td>Deep Dark, Overworld</td><td>Any</td><td>Any</td><td>For <strong>Overworld</strong> it only spawns when below Y=0.</td><td>Grounded</td></tr><tr><td><strong>Exploud</strong></td><td>Common to Uncommon</td><td>Lvl 40-49</td><td>Deep Dark, Overworld</td><td>Any</td><td>Any</td><td>For <strong>Overworld</strong> it only spawns when below Y=0.</td><td>Grounded</td></tr><tr><td><strong>Makuhita</strong></td><td>Common</td><td>Lvl 1-24</td><td>Mountain</td><td>Any</td><td>Any</td><td></td><td>Grounded</td></tr><tr><td><strong>Hariyama</strong></td><td>Common</td><td>Lvl 24-47</td><td>Mountain</td><td>Any</td><td>Any</td><td></td><td>Grounded</td></tr><tr><td><strong>Azurill</strong></td><td>Uncommon</td><td>Lvl 2-15</td><td>River</td><td>Any</td><td>Underwater</td><td></td><td>Fishing, Grounded or Surface</td></tr><tr><td><strong>Nosepass</strong></td><td>Uncommon</td><td>Lvl 13-38</td><td>Overworld</td><td>Any</td><td>Any</td><td></td><td>Grounded</td></tr><tr><td><strong>Skitty</strong></td><td>Common</td><td>Lvl 1-35</td><td>Arid, Freezing, Floral</td><td>Night</td><td>Any</td><td>Can spawn near <strong>Gemstones</strong>.</td><td>Grounded</td></tr><tr><td><strong>Delcatty</strong></td><td>Uncommon</td><td>Lvl 15-55</td><td>Arid, Freezing, Floral</td><td>Night</td><td>Any</td><td></td><td>Grounded</td></tr><tr><td><strong>Sableye</strong></td><td>Common, Rare</td><td>Lvl 13-38</td><td>Overworld, Deep Dark</td><td>Any</td><td>Any</td><td></td><td>Grounded</td></tr><tr><td><strong>Mawile</strong></td><td>Uncommon to Rare</td><td>Lvl 13-38</td><td>Deep Dark, Overworld</td><td>Any</td><td>Any</td><td></td><td>Grounded</td></tr><tr><td><strong>Aron</strong></td><td>Common to Uncommon</td><td>Lvl 8-33</td><td>Mountain, Overworld</td><td>Any</td><td>Any</td><td>Only spawns near <strong>Iron Ore</strong>.</td><td>Grounded</td></tr><tr><td><strong>Lairon</strong></td><td>Common to Uncommon</td><td>Lvl 32-43</td><td>Mountain, Overworld</td><td>Any</td><td>Any</td><td>Only spawns near <strong>Iron Ore</strong>.</td><td>Grounded</td></tr><tr><td><strong>Aggron</strong></td><td>Common to Uncommon</td><td>Lvl 42-53</td><td>Mountain, Overworld</td><td>Any</td><td>Any</td><td>Only spawns near <strong>Iron Ore</strong>.</td><td>Grounded</td></tr><tr><td><strong>Meditite</strong></td><td>Common</td><td>Lvl 8-22</td><td>End</td><td>Any</td><td>Any</td><td></td><td>Grounded</td></tr><tr><td><strong>Medicham</strong></td><td>Uncommon</td><td>Lvl 39-45</td><td>End</td><td>Any</td><td>Any</td><td></td><td>Grounded</td></tr><tr><td><strong>Electrike</strong></td><td>Common</td><td>Lvl 5-30</td><td>Grasslands, Hills</td><td>Any</td><td>Any</td><td></td><td>Grounded</td></tr><tr><td><strong>Manectric</strong></td><td>Common</td><td>Lvl 26-48</td><td>Grasslands, Hills</td><td>Any</td><td>Any</td><td></td><td>Grounded</td></tr><tr><td><strong>Plusle</strong></td><td>Uncommon</td><td>Lvl 16-41</td><td>Plains</td><td>Any</td><td>Any</td><td></td><td>Grounded</td></tr><tr><td><strong>Minun</strong></td><td>Uncommon</td><td>Lvl 16-41</td><td>Plains</td><td>Any</td><td>Any</td><td></td><td>Grounded</td></tr><tr><td><strong>Volbeat</strong></td><td>Common to Uncommon</td><td>Lvl 18-43</td><td>Freshwater, Floral Meadow</td><td>Any</td><td>Clear</td><td></td><td>Grounded or Surface</td></tr><tr><td><strong>Illumise</strong></td><td>Common to Uncommon</td><td>Lvl 18-43</td><td>Freshwater, Floral Meadow</td><td>Any</td><td>Clear</td><td>Higher chance to spawn when near <strong>Lightning Rod</strong> and/or during a <strong>Storm</strong>.</td><td>Grounded or Surface</td></tr><tr><td><strong>Roselia</strong></td><td>Common</td><td>Lvl 23-40</td><td>Floral, Floral Meadow</td><td>Any</td><td>Any</td><td>Higher chance to spawn when near <strong>Lightning Rod</strong>.</td><td>Grounded</td></tr><tr><td><strong>Gulpin</strong></td><td>Common to Uncommon</td><td>Lvl 15-27</td><td>Swamp, River</td><td>Any</td><td>Any</td><td></td><td></td></tr><tr><td><strong>Swalot</strong></td><td>Uncommon to Rare</td><td>Lvl 25-62</td><td>Swamp, River</td><td>Any</td><td>Any</td><td></td><td></td></tr><tr><td><strong>Carvanha</strong></td><td>Common</td><td>Lvl 6-31</td><td>Ocean, Swamp, Jungle, Overworld</td><td></td><td></td><td>Obtainable within <strong>Shipwreck Coves</strong>.</td><td>Fishing or Submerged</td></tr><tr><td><strong>Sharpedo</strong></td><td>Common</td><td>Lvl 30-46</td><td>Overworld, Ocean</td><td>Any</td><td>Any</td><td>Obtainable within <strong>Shipwreck Coves</strong>.</td><td>Fishing or Submerged</td></tr><tr><td><strong>Wailmer</strong></td><td>Common to Uncommon</td><td>Lvl 15-40</td><td>Ocean, Deep Ocean</td><td>Any</td><td>Any</td><td></td><td>Fishing or Submerged</td></tr><tr><td><strong>Wailord</strong></td><td>Common to Uncommon</td><td>Lvl 40-50</td><td>Ocean, Deep Ocean</td><td>Any</td><td>Any</td><td></td><td>Fishing or Submerged</td></tr><tr><td><strong>Numel</strong></td><td>Common</td><td>Lvl 6-31</td><td>Badlands, Nether Wasteland </td><td>Any</td><td>Any</td><td></td><td>Grounded</td></tr><tr><td><strong>Camerupt</strong></td><td>Common</td><td>Lvl 33-46</td><td>Badlands, Nether Wasteland</td><td>Any</td><td>Any</td><td></td><td>Grounded</td></tr><tr><td><strong>Torkoal</strong></td><td>Common to Uncommon</td><td>Lvl 22-47</td><td>Mountain, Thermal, Overworld, Nether Basalt</td><td>Any</td><td>Any</td><td>In overworld only spawns near <strong>Coal Ores</strong>.</td><td>Grounded</td></tr><tr><td><strong>Spoink</strong></td><td>Common</td><td>Lvl 5-25</td><td>Mountain</td><td>Night</td><td>Any</td><td></td><td>Grounded</td></tr><tr><td><strong>Grumpig</strong></td><td>Uncommon</td><td>Lvl 32-65</td><td>Mountain</td><td>Night</td><td>Any</td><td></td><td>Grounded</td></tr><tr><td><strong>Spinda</strong></td><td>Uncommon</td><td>Lvl 11-36</td><td>Hills</td><td>Any</td><td>Any</td><td></td><td>Grounded</td></tr><tr><td><strong>Trapinch</strong></td><td>Uncommon to Rare</td><td>Lvl 4-29</td><td>Desert</td><td>Any</td><td>Any</td><td></td><td>Grounded</td></tr><tr><td><strong>Vibrava</strong></td><td>Rare</td><td>Lvl 35-40</td><td>Desert</td><td>Any</td><td>Rain</td><td></td><td>Grounded</td></tr><tr><td><strong>Flygon</strong></td><td>Rare</td><td>Lvl 45-52</td><td>Desert</td><td>Any</td><td>Rain</td><td></td><td>Grounded</td></tr><tr><td><strong>Cacnea</strong></td><td>Common</td><td>Lvl 9-34</td><td>Badlands, Desert</td><td>Any</td><td>Any</td><td></td><td>Grounded</td></tr><tr><td><strong>Cacturne</strong></td><td>Common</td><td>Lvl 32-48</td><td>Badlands, Desert</td><td>Any</td><td>Any</td><td></td><td>Grounded</td></tr><tr><td><strong>Swablu</strong></td><td>Uncommon</td><td>Lvl 15-34</td><td>Mountain</td><td>Any</td><td>Clear</td><td>Does not spawn in Peak, Sky, Freezing or Volcanic Biomes.</td><td>Grounded</td></tr><tr><td><strong>Altaria</strong></td><td>Uncommon</td><td>Lvl 35-48</td><td>Mountain</td><td>Any</td><td>Clear</td><td></td><td>Grounded</td></tr><tr><td><strong>Seviper</strong></td><td>Uncommon</td><td>Lvl 25-62</td><td>Plains</td><td>Any</td><td>Any</td><td></td><td>Grounded</td></tr><tr><td><strong>Zangoose</strong></td><td>Uncommon</td><td>Lvl-25-62</td><td>Plains</td><td>Any</td><td>Any</td><td></td><td>Grounded</td></tr><tr><td><strong>Lunatone</strong></td><td>Common to Uncommon</td><td>Lvl 21-46</td><td>Dripstone, Mountain, Overworld</td><td>Night</td><td>Any</td><td></td><td>Grounded</td></tr><tr><td><strong>Solrock</strong></td><td>Common to Uncommon</td><td>Lvl 21-46</td><td>Dripstone, Mountain,</td><td>Day</td><td>Any</td><td></td><td>Grounded</td></tr><tr><td><strong>Barboach</strong></td><td>Common to Uncommon</td><td>Lvl 4-29</td><td>Arid, Freshwater, Hills, Jungle, Mushroom, Temperate, Swamp, Overworld</td><td>Any</td><td>Any</td><td></td><td>Fishing or Submerged</td></tr><tr><td><strong>Whiscash</strong></td><td>Common to Rare</td><td>Lvl 30-47</td><td>Arid, Freshwater, Hills, Jungle, Mushroom, Temperate, Swamp, Overworld</td><td>Any</td><td>Any</td><td>Higher chance to be obtained when fishing with a Master Ball bobber.</td><td>Fishing or Submerged</td></tr><tr><td><strong>Corphish</strong></td><td>Common</td><td>Lvl 6-31</td><td>Arid, Freshwater, Hills, Jungle, Temperate</td><td>Any</td><td>Any</td><td></td><td>Fishing, Grounded or Seafloor</td></tr><tr><td><strong>Crawdaunt</strong></td><td>Common</td><td>Lvl 30-47</td><td>Arid, Freshwater, Hills, Jungle, Temperate</td><td>Any</td><td>Any</td><td></td><td>Fishing, Grounded or Seafloor</td></tr><tr><td><strong>Baltoy</strong></td><td>Common to Uncommon</td><td>Lvl 5-30</td><td>Badlands, Desert, Overworld</td><td>Any</td><td>Any</td><td>Obtainable within <strong>Desert Temple</strong>. For general spawn it'll only spawn when <strong>minY=0</strong>.</td><td>Grounded</td></tr><tr><td><strong>Claydol</strong></td><td>Common to Uncommon</td><td>Lvl 36-50</td><td>Badlands, Desert, Overworld</td><td>Any</td><td>Any</td><td>Obtainable within <strong>Desert Temple</strong>. For general spawn it'll only spawn when <strong>minY=0</strong>.</td><td>Grounded</td></tr><tr><td><strong>Lileep</strong></td><td>Ultra-rare</td><td>Lvl 11-36</td><td>Lush</td><td>Any</td><td>Any</td><td></td><td>Seafloor</td></tr><tr><td><strong>Cradily</strong></td><td>Ultra-rare</td><td>Lvl 40-50</td><td>Lush</td><td>Any</td><td>Any</td><td></td><td>Seafloor</td></tr><tr><td><strong>Anorith</strong></td><td>Ultra-rare</td><td>Lvl 11-36</td><td>Lush</td><td>Any</td><td>Any</td><td></td><td>Grounded or Submerged</td></tr><tr><td><strong>Armaldo</strong></td><td>Ultra-rare</td><td>Lvl 40-50</td><td>Lush</td><td>Any</td><td>Any</td><td></td><td>Grounded or Submerged</td></tr><tr><td><strong>Feebas</strong></td><td>Common</td><td>Lvl 1-20</td><td>Overworld</td><td>Any</td><td>Any</td><td>Spawns near a <strong>Slime Chunk</strong>. Higher chance to obtain with <strong>Lure Level 1</strong>.</td><td>Fishing</td></tr><tr><td><strong>Milotic</strong></td><td>Common</td><td>Lvl 15-54</td><td>Overworld</td><td>Any</td><td>Any</td><td>Spawns near a <strong>Slime Chunk</strong>. Higher chance to obtain with <strong>Lure Level 1</strong>.</td><td>Fishing</td></tr><tr><td><strong>Castform</strong></td><td>Uncommon</td><td>Lvl 15-65</td><td><p><strong>Normal</strong>: Overworld.</p><p><strong>Sunny</strong>: Arid. </p><p><strong>Snowy</strong>: Freezing.</p><p><strong>Rainy</strong>: Beach, Plains.</p></td><td><p><strong>Normal</strong>, <strong>Snowy</strong> and <strong>Rainy</strong>: Any </p><p><strong>Sunny</strong>: Day</p></td><td><strong>Normal</strong>, <strong>Sunny</strong>, <strong>Snowy</strong>: Any <strong>Rainy</strong>: Raining</td><td></td><td></td></tr><tr><td><strong>Kecleon</strong></td><td>Uncommon</td><td>Lvl 19-44</td><td>Jungle</td><td>Any</td><td>Any</td><td></td><td>Grounded</td></tr><tr><td><strong>Shuppet</strong></td><td>Common to Rare</td><td>Lvl 15-36</td><td>Deep Dark, Plains</td><td>Night</td><td>Any</td><td>Can also spawn within <strong>Villages</strong>.</td><td>Grounded</td></tr><tr><td><strong>Banette</strong></td><td>Rare to Ultra-Rare</td><td>Lvl 37-45</td><td>Deep Dark, Plains</td><td>Night</td><td>Any</td><td>Can also spawn within <strong>Villages</strong>.</td><td>Grounded</td></tr><tr><td><strong>Duskull</strong></td><td>Common</td><td>Lvl 5-30</td><td>Spooky, Nether Soul Sand</td><td>Any</td><td>Any</td><td></td><td>Grounded</td></tr><tr><td><strong>Dusclops</strong></td><td>Common</td><td>Lvl 37-46</td><td>Spooky, Nether Soul Sand</td><td>Any</td><td>Any</td><td></td><td>Grounded</td></tr><tr><td><strong>Tropius</strong></td><td>Uncommon</td><td>Lvl 21-46</td><td>Jungle</td><td>Any</td><td>Any</td><td></td><td>Grounded</td></tr><tr><td><strong>Chimecho</strong></td><td>Uncommon</td><td>Lvl 24-46</td><td>Forest, Mountain, Spooky, Taiga, Magical, Overworld</td><td>Any</td><td>Any</td><td>Can spawn in overworld next to a <strong>Bell</strong>.</td><td>Grounded</td></tr><tr><td><strong>Absol</strong></td><td>Rare</td><td>Lvl 22-47</td><td>Mountain, Snowy Forest, Taiga</td><td>Any</td><td>Any</td><td></td><td>Grounded</td></tr><tr><td><strong>Wynaut</strong></td><td>Rare</td><td>Lvl 1-26</td><td>Overworld</td><td>Any</td><td>Any</td><td></td><td>Grounded</td></tr><tr><td><strong>Snorunt</strong></td><td>Common to Rare</td><td>Lvl 15-43</td><td>Cold, Freezing</td><td>Any</td><td>Any</td><td>Can spawn within <strong>Igloo.</strong></td><td>Grounded</td></tr><tr><td><strong>Glalie</strong></td><td>Rare</td><td>Lvl 40-65</td><td>Freezing</td><td>Any</td><td>Any</td><td></td><td>Grounded</td></tr><tr><td><strong>Spheal</strong></td><td>Common</td><td>Lvl 4-29</td><td>Cold Ocean, Frozen Ocean</td><td>Any</td><td>Any</td><td></td><td>Fishing, Grounded or Submerged</td></tr><tr><td><strong>Sealeo</strong></td><td>Common</td><td>Lvl 32-41</td><td>Cold Ocean, Frozen Ocean</td><td>Any</td><td>Any</td><td></td><td>Fishing, Grounded or Submerged</td></tr><tr><td><strong>Walrein</strong></td><td>Common</td><td>Lvl 44-53</td><td>Cold Ocean, Frozen Ocean</td><td>Any</td><td>Any</td><td></td><td>Fishing, Grounded or Submerged</td></tr><tr><td><strong>Clamperl</strong></td><td>Uncommon to Rare</td><td>Lvl 10-35</td><td>Deep Ocean, Warm Ocean, Ocean, Overworld</td><td>Any</td><td>Any</td><td>Can be obtained within <strong>Shipwreck Coves</strong>. </td><td>Fishing or Seafloor</td></tr><tr><td><strong>Huntail</strong></td><td>Uncommon to Rare</td><td>Lvl 30-49</td><td>Deep Ocean, Warm Ocean, Ocean, Overworld</td><td>Any</td><td>Any</td><td>Can be obtained within <strong>Shipwreck Coves</strong>. </td><td>Fishing or Submerged</td></tr><tr><td><strong>Gorebyss</strong></td><td>Uncommon to Rare</td><td>Lvl 30-49</td><td>Deep Ocean, Warm Ocean, Ocean, Overworld</td><td>Any</td><td>Any</td><td>Can be obtained within <strong>Shipwreck Coves</strong>. </td><td>Fishing or Submerged</td></tr><tr><td><strong>Relicanth</strong></td><td>Common to Rare</td><td>Lvl 24-49</td><td>Deep Ocean, Ocean, Overworld</td><td>Any</td><td>Any</td><td>Can be obtained within <strong>Shipwreck Coves</strong>.  Higher chance to obtain with <strong>Lure Level 1</strong>.</td><td>Fishing or Submerged</td></tr><tr><td><strong>Luvdisc</strong></td><td>Common</td><td>Lvl 8-33</td><td>Warm Ocean</td><td>Day</td><td>Any</td><td></td><td>Fishing or Submerged</td></tr><tr><td><strong>Bagon</strong></td><td>Rare to Ultra-rare</td><td>Lvl 5-30</td><td>Peak, Dripstone</td><td>Any</td><td>Any</td><td></td><td>Grounded</td></tr><tr><td><strong>Shelgon</strong></td><td>Rare to Ultra-rare</td><td>Lvl 30-42</td><td>Dripstone</td><td>Any</td><td>Any</td><td></td><td>Grounded</td></tr><tr><td><strong>Salamence</strong></td><td>Rare to Ultra-rare</td><td>Lvl 50-60</td><td>Peak, Dripstone</td><td>Any</td><td>Any</td><td></td><td>Grounded</td></tr><tr><td><strong>Beldum</strong></td><td>Rare to Ultra-rare</td><td>Lvl 5-30</td><td>Dripstone, Peak, End </td><td>Any</td><td>Any</td><td></td><td>Grounded</td></tr><tr><td><strong>Metang</strong></td><td>Rare to Ultra-rare</td><td>Lvl 20-44</td><td>Dripstone, Peak, End </td><td>Any</td><td>Any</td><td></td><td>Grounded</td></tr><tr><td><strong>Metagross</strong></td><td>Rare to Ultra-rare</td><td>Lvl 45-60</td><td>Dripstone, Peak, End </td><td>Any</td><td>Any</td><td></td><td>Grounded</td></tr></tbody></table>


# Generation 4 Spawns

This page will go over all the non-legendary pokemon that are found within the fourth Generation of Pokemon games.

<table><thead><tr><th width="112">Pokemon</th><th width="102">Rarity </th><th width="92">Lvl Average</th><th width="117.5999755859375">Biome(s)</th><th width="73">Time</th><th width="97">Weather</th><th width="100">Spawn Info</th><th width="108">Context</th></tr></thead><tbody><tr><td><strong>Turtwig</strong></td><td>Ultra-rare</td><td>Lvl 5-32</td><td>Forest</td><td>Any</td><td>Any</td><td></td><td>Grounded</td></tr><tr><td><strong>Grotle</strong></td><td>Ultra-rare</td><td>Lvl 18-41</td><td>Forest</td><td>Any</td><td>Any</td><td></td><td>Grounded</td></tr><tr><td><strong>Torterra</strong></td><td>Ultra-rare</td><td>Lvl 32-53</td><td>Forest</td><td>Any</td><td>Any</td><td></td><td>Grounded</td></tr><tr><td><strong>Chimchar</strong></td><td>Ultra-rare</td><td>Lvl 5-31</td><td>Mountain</td><td>Any</td><td>Clear</td><td></td><td>Grounded</td></tr><tr><td><strong>Monferno</strong></td><td>Ultra-rare</td><td>Lvl 14-41</td><td>Mountain</td><td>Any</td><td>Clear</td><td></td><td>Grounded</td></tr><tr><td><strong>Infernape</strong></td><td>Ultra-rare</td><td>Lvl 36-53</td><td>Mountain</td><td>Any</td><td>Clear</td><td></td><td>Grounded</td></tr><tr><td><strong>Piplup</strong></td><td>Ultra-rare</td><td>Lvl 5-31</td><td>Cold Ocean, Frozen Ocean, Frozen River, Glacial, Tundra</td><td>Any</td><td>Any</td><td></td><td>Fishing, Grounded or Submerged</td></tr><tr><td><strong>Prinplup</strong></td><td>Ultra-rare</td><td>Lvl 16-41</td><td>Cold Ocean, Frozen Ocean, Frozen River, Glacial, Tundra</td><td>Any</td><td>Any</td><td></td><td>Fishing, Grounded or Submerged</td></tr><tr><td><strong>Empoleon</strong></td><td>Ultra-rare</td><td>Lvl 36-53</td><td>Cold Ocean, Frozen Ocean, Frozen River, Glacial, Tundra</td><td>Any</td><td>Any</td><td></td><td>Fishing, Grounded or Submerged</td></tr><tr><td><strong>Starly</strong></td><td>Common</td><td>Lvl 1-25</td><td>Hills, Snowy Forest, Taiga</td><td>Any</td><td>Any</td><td></td><td>Grounded</td></tr><tr><td><strong>Staravia</strong></td><td>Common</td><td>Lvl 14-34</td><td>Hills, Snowy Forest, Taiga</td><td>Any</td><td>Any</td><td></td><td>Grounded</td></tr><tr><td><strong>Staraptor</strong></td><td>Common</td><td>Lvl 34-49</td><td>Hills, Snowy Forest, Taiga</td><td>Any</td><td>Any</td><td></td><td>Grounded</td></tr><tr><td><strong>Bidoof</strong></td><td>Common to Uncommon</td><td>Lvl 1-25</td><td>Forest, Freshwater, Snowy Forest, Taiga</td><td>Any</td><td>Any</td><td>Higher chance to spawn near <strong>Water</strong>.</td><td>Fishing, Grounded or Surface</td></tr><tr><td><strong>Bibarel</strong></td><td>Common to Uncommon</td><td>Lvl 15-41</td><td>Forest, Freshwater, Snowy Forest, Taiga</td><td>Any</td><td>Any</td><td>Higher chance to spawn near <strong>Water</strong>. </td><td>Fishing, Grounded or Surface</td></tr><tr><td><strong>Kricketot</strong></td><td>Common</td><td>Lvl 1-19</td><td>Forest, Swamp</td><td>Night</td><td>Any</td><td></td><td>Grounded</td></tr><tr><td><strong>Kricketune</strong></td><td>Common</td><td>Lvl 10-38</td><td>Forest, Swamp</td><td>Night</td><td>Any</td><td></td><td>Grounded</td></tr><tr><td><strong>Shinx</strong></td><td>Uncommon</td><td>Lvl 1-26</td><td>Desert, Savanna</td><td>Any</td><td>Any</td><td></td><td>Grounded</td></tr><tr><td><strong>Luxio</strong></td><td>Uncommon</td><td>Lvl 15-36</td><td>Desert, Savanna</td><td>Any</td><td>Any</td><td></td><td>Grounded</td></tr><tr><td><strong>Luxray</strong></td><td>Uncommon</td><td>Lvl 30-52</td><td>Desert, Savanna</td><td>Any</td><td>Any</td><td></td><td>Grounded</td></tr><tr><td><strong>Budew</strong></td><td>Common</td><td>Lvl 3-28</td><td>Floral</td><td>Any</td><td>Any</td><td></td><td>Grounded</td></tr><tr><td><strong>Roserade</strong></td><td>Common</td><td>Lvl 35-52</td><td>Floral</td><td>Any</td><td>Any</td><td></td><td>Grounded</td></tr><tr><td><strong>Cranidos</strong></td><td>Ultra-rare</td><td>Lvl 10-35</td><td>Lush</td><td>Any</td><td>Any</td><td></td><td>Grounded</td></tr><tr><td><strong>Rampardos</strong></td><td>Ultra-rare</td><td>Lvl 30-50</td><td>Lush</td><td>Any</td><td>Any</td><td></td><td>Grounded</td></tr><tr><td><strong>Shieldon</strong></td><td>Ultra-rare</td><td>Lvl 10-35</td><td>Lush</td><td>Any</td><td>Any</td><td></td><td>Grounded</td></tr><tr><td><strong>Bastiodon</strong></td><td>Ultra-rare</td><td>Lvl 30-50</td><td>Lush</td><td>Any</td><td>Any</td><td></td><td>Grounded</td></tr><tr><td><strong>Burmy</strong></td><td>Common to Uncommon</td><td>Lvl 10-25</td><td><strong>Plant:</strong> Forests, Plains. Tropical Island, Jungle. <strong>Sandy</strong>: Arid <strong>Trash</strong>: Overworld</td><td>Any</td><td>Any</td><td></td><td>Grounded</td></tr><tr><td><strong>Wormadam</strong></td><td>Common to Uncommon</td><td>Lvl 20-65</td><td><strong>Plant:</strong> Forests, Plains. Tropical Island, Jungle. <strong>Sandy</strong>: Arid <strong>Trash</strong>: Overworld</td><td>Any</td><td>Any</td><td>Trash spawns within Villages.</td><td>Grounded</td></tr><tr><td><strong>Mothim</strong></td><td>Common</td><td>Lvl 25-65</td><td>Temperate. Jungle, Tropical Island.</td><td>Any</td><td>Any</td><td>Does not spawn in Floral, Freezing or Spooky biomes.</td><td>Grounded</td></tr><tr><td><strong>Combee</strong></td><td>Common</td><td>Lvl 1-24</td><td>Temperate</td><td>Any</td><td>Clear</td><td><strong>Only spawns next to 5x Beehives</strong>. Higher chance to spawn near <strong>Saccharine Trees</strong>.</td><td>Grounded</td></tr><tr><td><strong>Vespiquen</strong></td><td>Common</td><td>Lvl 21-47</td><td>Temperate</td><td>Any</td><td>Clear</td><td><strong>Only spawns next to 5x Beehives</strong>. Higher chance to spawn near <strong>Saccharine Trees</strong>.</td><td>Grounded</td></tr><tr><td><strong>Pachirisu</strong></td><td>Uncommon</td><td>Lvl 16-41</td><td>Forest</td><td>Any</td><td>Any</td><td></td><td>Grounded</td></tr><tr><td><strong>Buizel</strong></td><td>Common to Uncommon</td><td>Lvl 8-33</td><td>Forest, Freshwater, Grassland, Hills, Jungle, Taiga</td><td>Any</td><td>Any</td><td></td><td>Fishing, Grounded, Submerged or Surface</td></tr><tr><td><strong>Floatzel</strong></td><td>Common to Uncommon</td><td>Lvl 26-50</td><td>Forest, Freshwater, Grassland, Hills, Jungle, Taiga</td><td>Any</td><td>Any</td><td></td><td>Fishing, Grounded, Submerged or Surface</td></tr><tr><td><strong>Shellos</strong></td><td>Common to Uncommon</td><td>Lvl 8-33</td><td><strong>East Sea</strong>: Beach, Cold Ocean, Frozen Ocean. <strong>West Sea</strong>: Beach, Lukewarm Ocean, Warm Ocean </td><td>Any</td><td><strong>Beach</strong>: Rain <strong>Ocean</strong>: Any</td><td></td><td>Fishing, Grounded or Seafloor</td></tr><tr><td><strong>Gastrodon</strong></td><td>Common to Uncommon</td><td>Lvl 30-48</td><td><strong>East Sea</strong>: Beach, Cold Ocean, Frozen Ocean. <strong>West Sea</strong>: Beach, Lukewarm Ocean, Warm Ocean</td><td>Any</td><td><strong>Beach</strong>: Rain <strong>Ocean</strong>: Any</td><td></td><td>Fishing, Grounded or Seafloor</td></tr><tr><td><strong>Ambipom</strong></td><td>Common</td><td>Lvl 32-48</td><td>Jungle, Overworld</td><td>Any</td><td>Any</td><td></td><td>Grounded</td></tr><tr><td><strong>Drifloon</strong></td><td>Common to Uncommon</td><td>Lvl 10-35</td><td>Overworld</td><td>Any</td><td>Clear</td><td></td><td>Grounded</td></tr><tr><td><strong>Drifblim</strong></td><td>Common to Uncommon</td><td>Lvl 28-50</td><td>Overworld</td><td>Any</td><td>Clear</td><td></td><td>Grounded</td></tr><tr><td><strong>Buneary</strong></td><td>Common</td><td>Lvl 10-35</td><td>Forest, Hills, Snowy Forest, Snowy Taiga, Taiga</td><td>Any</td><td>Any</td><td></td><td>Grounded</td></tr><tr><td><strong>Lopunny</strong></td><td>Common</td><td>Lvl 30-48</td><td>Forest, Hills, Snowy Forest, Snowy Taiga, Taiga</td><td>Any</td><td>Any</td><td></td><td>Grounded</td></tr><tr><td><strong>Mismagius</strong></td><td>Common</td><td>Lvl 39-50</td><td>Spooky, Swamp. Nether Warped, Overworld</td><td>Any</td><td>Any</td><td></td><td>Grounded</td></tr><tr><td><strong>Honchkrow</strong></td><td>Common</td><td>Lvl 36-51</td><td>Spooky, Swamp, Taiga</td><td>Night</td><td>Any</td><td></td><td>Grounded</td></tr><tr><td><strong>Glameow</strong></td><td>Common</td><td>Lvl 1-35</td><td>Villages</td><td>Night</td><td>Any</td><td>Can also spawn within <strong>Villages</strong>.</td><td>Grounded</td></tr><tr><td><strong>Purugly</strong></td><td>Uncommon</td><td>Lvl 30-75</td><td>Villages</td><td>Night</td><td>Any</td><td>Can also spawn within <strong>Villages</strong>.</td><td>Grounded</td></tr><tr><td><strong>Chingling</strong></td><td>Uncommon</td><td>Lvl 4-29</td><td>Forest, Mountain, Spooky, Taiga, Magical, Overworld</td><td>Night</td><td>Any</td><td>Higher chance to spawn near <strong>Bell</strong>.</td><td>Grounded</td></tr><tr><td><strong>Stunky</strong></td><td>Common</td><td>Lvl 1-35</td><td>Swamp</td><td>Night</td><td>Any</td><td></td><td>Grounded</td></tr><tr><td><strong>Stuntank</strong></td><td>Uncommon</td><td>Lvl 20-55</td><td>Swamp</td><td>Night</td><td>Any</td><td></td><td>Grounded</td></tr><tr><td><strong>Bronzor</strong></td><td>Common to Uncommon</td><td>Lvl 5-30</td><td>Jungle, Peak, Overworld</td><td>Any</td><td>Any</td><td>Within Overworld, it spawns in Ruins, Jungle Prymaids and Trail Chambers.</td><td>Grounded</td></tr><tr><td><strong>Bronzong</strong></td><td>Common to Uncommon</td><td>Lvl 33-50</td><td>Jungle, Peak, Overworld</td><td>Any</td><td>Any</td><td>Within Overworld, it spawns in Ruins, Jungle Prymaids and Trail Chambers.</td><td>Grounded</td></tr><tr><td><strong>Bonsly</strong></td><td>Uncommon</td><td>Lvl 4-29</td><td>Forest</td><td>Any</td><td>Clear</td><td></td><td>Grounded</td></tr><tr><td><strong>Mime Jr.</strong></td><td>Common to Uncommon</td><td>Lvl 6-31n</td><td>Overworld</td><td>Any</td><td>Any</td><td></td><td>Grounded</td></tr><tr><td><strong>Happiny</strong></td><td>Rare</td><td>Lvl 1-22</td><td>Overworld</td><td>Any</td><td>Any</td><td></td><td>Grounded</td></tr><tr><td><strong>Chatot</strong></td><td>Common to Uncommon</td><td>Lvl 16-41</td><td>Jungle, Overworld</td><td>Any</td><td>Any</td><td></td><td>Grounded</td></tr><tr><td><strong>Spiritomb</strong></td><td>Uncommon to Rare</td><td>Lvl 24-49</td><td>Deep Dark, Overworld, Desert, Jungle</td><td>Any</td><td>Any</td><td></td><td>Grounded</td></tr><tr><td><strong>Gible</strong></td><td>Rare to Ultra-rare</td><td>Lvl 5-30</td><td>Badlands, Mountain, Overworld</td><td>Any</td><td>Any</td><td></td><td>Grounded</td></tr><tr><td><strong>Gabite</strong></td><td>Rare to Ultra-rare</td><td>Lvl 24-47</td><td>Badlands, Mountain, Overworld</td><td>Any</td><td>Any</td><td></td><td>Grounded</td></tr><tr><td><strong>Garchomp</strong></td><td>Rare to Ultra-rare</td><td>Lvl 48-60</td><td>Badlands, Mountain, Overworld</td><td>Any</td><td>Any</td><td></td><td>Grounded</td></tr><tr><td><strong>Munchlax</strong></td><td>Rare</td><td>Lvl 24-39</td><td>Snowy Forest, Forest, Hills</td><td>Any</td><td>Any</td><td></td><td>Grounded</td></tr><tr><td><strong>Riolu</strong></td><td>Rare</td><td>Lvl 4-29</td><td>Mountain</td><td>Any</td><td>Any</td><td></td><td>Grounded</td></tr><tr><td><strong>Lucario</strong></td><td>Rare</td><td>Lvl 24-53</td><td>Mountain</td><td>Any</td><td>Any</td><td></td><td>Grounded</td></tr><tr><td><strong>Hippopotas</strong></td><td>Common</td><td>Lvl 8-33</td><td>Desert</td><td>Any</td><td>Any</td><td></td><td>Grounded</td></tr><tr><td><strong>Hippowdon</strong></td><td>Common</td><td>Lvl 34-53</td><td>Desert</td><td>Any</td><td>Any</td><td></td><td>Grounded</td></tr><tr><td><strong>Skorupi</strong></td><td>Common to Uncommon</td><td>Lvl 20-27</td><td>Swamp, Desert</td><td>Any</td><td>Any</td><td></td><td>Grounded</td></tr><tr><td><strong>Drapion</strong></td><td>Rare</td><td>Lvl 45-65</td><td>Swamp, Desert, Deep Dark, Caves</td><td>Any</td><td>Any</td><td></td><td>Grounded</td></tr><tr><td><strong>Croagunk</strong></td><td>Common to Uncommon</td><td>Lvl 10-36</td><td>Swamp</td><td>Any</td><td>Rain</td><td></td><td>Grounded</td></tr><tr><td><strong>Toxicroak</strong></td><td>Uncommon to Rare</td><td>Lvl 10-36</td><td>Swamp</td><td>Any</td><td>Rain</td><td></td><td>Grounded</td></tr><tr><td><strong>Carnivine</strong></td><td>Uncommon</td><td>Lvl 20-45</td><td>Lush, Overworld</td><td>Any</td><td>Any</td><td></td><td>Grounded</td></tr><tr><td><strong>Finneon</strong></td><td>Common</td><td>Lvl 8-33</td><td>Ocean, Deep Ocean, Overworld</td><td>Any</td><td>Any</td><td></td><td>Fishing or Submerged</td></tr><tr><td><strong>Lumineon</strong></td><td>Common</td><td>Lvl 31-46</td><td>Ocean, Deep Ocean, Overworld</td><td>Any</td><td>Any</td><td></td><td>Fishing or Submerged</td></tr><tr><td><strong>Mantyke</strong></td><td>Common to Uncommon</td><td>Lvl 10-35</td><td>Ocean, Lukewarm Ocean, Warm Ocean</td><td>Any</td><td>Any</td><td></td><td>Fishing or Submerged</td></tr><tr><td><strong>Snover</strong></td><td>Common</td><td>Lvl 7-32</td><td>Snowy Taiga, Snowy Forest</td><td>Any</td><td>Any</td><td></td><td>Grounded</td></tr><tr><td><strong>Abomasnow</strong></td><td>Uncommon</td><td>Lvl 42-65</td><td>Snowy Taiga, Snowy Forest</td><td>Any</td><td>Any</td><td></td><td>Grounded</td></tr><tr><td><strong>Weavile</strong></td><td>Uncommon</td><td>Lvl 38-51</td><td>Taiga</td><td>Any</td><td>Any</td><td></td><td>Grounded</td></tr><tr><td><strong>Magnezone</strong></td><td>Common to Uncommon</td><td>Lvl 42-54</td><td>Overworld</td><td>Any</td><td>Any</td><td></td><td>Grounded</td></tr><tr><td><strong>Lickilicky</strong></td><td>Uncommon</td><td>Lvl 34-52</td><td>Grassland</td><td>Any</td><td>Any</td><td></td><td>Grounded</td></tr><tr><td><strong>Rhyperior</strong></td><td>Common</td><td>Lvl 44-54</td><td>Mountain, Savanna</td><td>Any</td><td>Any</td><td></td><td>Grounded</td></tr><tr><td><strong>Tangrowth</strong></td><td>Common</td><td>Lvl 24-54</td><td>Jungle</td><td>Any</td><td>Any</td><td></td><td>Grounded</td></tr><tr><td><strong>Electivire</strong></td><td>Uncommon</td><td>Lvl 45-54</td><td>Hills, Plains</td><td>Any</td><td>Any</td><td></td><td>Grounded</td></tr><tr><td><strong>Magmortar</strong></td><td>Common</td><td>Lvl 45-54</td><td>Hills, Nether Basalt, Nether Wasteland</td><td>Any</td><td>Clear</td><td></td><td>Grounded</td></tr><tr><td><strong>Togekiss</strong></td><td>Common</td><td>Lvl 22-34</td><td>Magical, Floral</td><td>Any</td><td>Any</td><td></td><td>Grounded</td></tr><tr><td><strong>Yanmega</strong></td><td>Uncommon</td><td>Lvl 33-52</td><td>Freshwater, Lush, Nether Basalt, Overworld</td><td>Any</td><td>Any</td><td></td><td>Grounded</td></tr><tr><td><strong>Leafeon</strong></td><td>Uncommon to Ultra-rare</td><td>Lvl 28-53</td><td>Forest, Jungle, Overworld</td><td>Any</td><td>Any</td><td></td><td>Grounded</td></tr><tr><td><strong>Glaceon</strong></td><td>to Ultra-rare</td><td>Lvl 28-53</td><td>Freezing, Overworld</td><td>Any</td><td>Any</td><td></td><td>Grounded</td></tr><tr><td><strong>Gliscor</strong></td><td>Common to Uncommo</td><td>Lvl 38-51</td><td>Badlands, Nether Mountain</td><td>Night</td><td>Any</td><td></td><td>Grounded</td></tr><tr><td><strong>Mamoswine</strong></td><td>Common</td><td>Lvl 40-53</td><td>Tundra</td><td>Any</td><td>Any</td><td></td><td>Grounded</td></tr><tr><td><strong>Porygon-Z</strong></td><td>Uncommon</td><td>Lvl 47-54</td><td>Overworld</td><td>Any</td><td>Any</td><td></td><td>Grounded</td></tr><tr><td><strong>Gallade</strong></td><td>Common, Rare</td><td>Lvl 30-52</td><td>Floral, Magical, Snowy Forest, Overworld</td><td>Any</td><td>Any</td><td></td><td>Grounded</td></tr><tr><td><strong>Probopass</strong></td><td>Uncommon</td><td>Lvl 33-53</td><td>Overworld</td><td>Any</td><td>Any</td><td></td><td>Grounded</td></tr><tr><td><strong>Dusknoir</strong></td><td>Common</td><td>Lvl 41-53</td><td>Spooky, Nether Soul Sand</td><td>Night</td><td>Any</td><td></td><td>Grounded</td></tr><tr><td><strong>Froslass</strong></td><td>Uncommon</td><td>Lvl 32-65</td><td>Freezing</td><td>Night</td><td>Any</td><td></td><td>Grounded</td></tr><tr><td><strong>Rotom</strong></td><td>Rare to Ultra-Rare</td><td>Lvl 20-75</td><td>Beach [<em>+ Near Machinery in Overworld</em>]</td><td>Thunder</td><td>N/A</td><td></td><td>Grounded</td></tr></tbody></table>


# Generation 5 Spawns

This page will go over all the non-legendary pokemon that are found within the fifth Generation of Pokemon games.

<table><thead><tr><th width="119.20001220703125">Pokemon</th><th width="98">Rarity </th><th width="80.4000244140625">Lvl Average</th><th width="118.39990234375">Biome(s)</th><th width="63">Time</th><th width="93">Weather</th><th width="106">Spawn Info</th><th width="112">Context</th></tr></thead><tbody><tr><td><strong>Snivy</strong></td><td>Ultra-rare</td><td>Lvl 5-31</td><td>Jungle</td><td>Any</td><td>Any</td><td></td><td>Grounded</td></tr><tr><td><strong>Servine</strong></td><td>Ultra-rare</td><td>Lvl 17-41</td><td>Jungle</td><td>Any</td><td>Any</td><td></td><td>Grounded</td></tr><tr><td><strong>Serperior</strong></td><td>Ultra-rare</td><td>Lvl 36-53</td><td>Jungle</td><td>Any</td><td>Any</td><td></td><td>Grounded</td></tr><tr><td><strong>Tepig</strong></td><td>Ultra-rare</td><td>Lvl 5-31</td><td>Plains, Nether Crimson</td><td>Any</td><td>Any</td><td></td><td>Grounded</td></tr><tr><td><strong>Pignite</strong></td><td>Ultra-rare</td><td>Lvl 17-41</td><td>Plains, Nether Crimson</td><td>Any</td><td>Any</td><td></td><td>Grounded</td></tr><tr><td><strong>Emboar</strong></td><td>Ultra-rare</td><td>Lvl 36-53</td><td>Plains, Nether Crimson</td><td>Any</td><td>Any</td><td></td><td>Grounded</td></tr><tr><td><strong>Oshawott</strong></td><td>Ultra-rare</td><td>Lvl 5-31</td><td>Beach, Ocean, Coast, Snowy Beach, Cold Ocean</td><td>Any</td><td>Any</td><td></td><td>Fishing, Grounded or Surface</td></tr><tr><td><strong>Dewott</strong></td><td>Ultra-rare</td><td>Lvl 17-41</td><td>Beach, Ocean, Coast, Snowy Beach, Cold Ocean</td><td>Any</td><td>Any</td><td></td><td>Fishing, Grounded or Surface</td></tr><tr><td><strong>Samurott</strong></td><td>Ultra-rare</td><td>Lvl 36-53</td><td><strong>Normal</strong>: Beach, Ocean. <strong>Hisuian</strong>: Coast, Snowy Beach, Cold Ocean</td><td>Any</td><td>Any</td><td></td><td>Fishing, Grounded or Surface</td></tr><tr><td><strong>Patrat</strong></td><td>Common</td><td>Lvl 1-26</td><td>Grassland</td><td>Any</td><td>Any</td><td></td><td>Grounded</td></tr><tr><td><strong>Watchog</strong></td><td>Common</td><td>Lvl 20-42</td><td>Grassland</td><td>Any</td><td>Any</td><td></td><td>Grounded</td></tr><tr><td><strong>Lillipup</strong></td><td>Common</td><td>Lvl 3-28</td><td>Overworld</td><td>Any</td><td>Any</td><td></td><td>Grounded</td></tr><tr><td><strong>Herdier</strong></td><td>Common</td><td>Lvl 16-37</td><td>Overworld</td><td>Any</td><td>Any</td><td></td><td>Grounded</td></tr><tr><td><strong>Stoutland</strong></td><td>Common</td><td>Lvl 32-50</td><td>Overworld</td><td>Any</td><td>Any</td><td></td><td>Grounded</td></tr><tr><td><strong>Purrloin</strong></td><td>Common</td><td>Lvl 3-28</td><td>Jungle, Swamp, Temperate, Savanna, Overworld</td><td>Any</td><td>Clear</td><td></td><td>Grounded</td></tr><tr><td><strong>Liepard</strong></td><td>Common</td><td>Lvl 20-45</td><td>Jungle, Swamp, Temperate, Savanna, Overworld</td><td>Any</td><td>Clear</td><td></td><td>Grounded</td></tr><tr><td><strong>Pansage</strong></td><td>Uncommon to Rare</td><td>Lvl 10-25</td><td>Forest, Villages</td><td>Any</td><td>Clear</td><td></td><td>Grounded</td></tr><tr><td><strong>Simisage</strong></td><td>Rare</td><td>Lvl 30-60</td><td>Forest</td><td>Any</td><td>Clear</td><td></td><td>Grounded</td></tr><tr><td><strong>Pansear</strong></td><td>Uncommon to Rare</td><td>Lvl 10-25</td><td>Forest, Villages</td><td>Any</td><td>Clear</td><td></td><td>Grounded</td></tr><tr><td><strong>Simisear</strong></td><td>Rare</td><td>Lvl 30-60</td><td>Forest</td><td>Any</td><td>Clear</td><td></td><td>Grounded</td></tr><tr><td><strong>Panpour</strong></td><td>Uncommon to Rare</td><td>Lvl 10-25</td><td>Forest, Villages</td><td>Any</td><td>Clear</td><td></td><td>Grounded</td></tr><tr><td><strong>Simipour</strong></td><td>Rare</td><td>Lvl 30-60</td><td>Forest</td><td>Any</td><td>Clear</td><td></td><td>Grounded</td></tr><tr><td><strong>Munna</strong></td><td>Common to Uncommon</td><td>Lvl 10-25</td><td>Overworld, End</td><td>Any</td><td>Any</td><td>Only Spawns near Beds</td><td>Grounded</td></tr><tr><td><strong>Musharna</strong></td><td>Uncommon to Rare</td><td>Lvl 20-45</td><td>Overworld, End</td><td>Any</td><td>Any</td><td>Only Spawns near Beds</td><td>Grounded</td></tr><tr><td><strong>Pidove</strong></td><td>Common</td><td>Lvl 1-26</td><td>Mountain, Overworld</td><td>Day</td><td>Any</td><td></td><td>Grounded</td></tr><tr><td><strong>Tranquill</strong></td><td>Common</td><td>Lvl 21-36</td><td>Mountain, Overworld</td><td>Day</td><td>Any</td><td></td><td>Grounded</td></tr><tr><td><strong>Unfezant</strong></td><td>Common</td><td>Lvl 32-49</td><td>Mountain, Overworld</td><td>Day</td><td>Any</td><td></td><td>Grounded</td></tr><tr><td><strong>Blitzle</strong></td><td>Common</td><td>Lvl 5-30</td><td>Savanna</td><td>Any</td><td>Any</td><td></td><td>Grounded</td></tr><tr><td><strong>Zebstrika</strong></td><td>Common</td><td>Lvl 27-50</td><td>Savanna</td><td>Any</td><td>Any</td><td></td><td>Grounded</td></tr><tr><td><strong>Roggenrola</strong></td><td>Common to Uncommon</td><td>Lvl 3-28</td><td>Overworld, Deep Dark</td><td>Any</td><td>Any</td><td></td><td>Grounded</td></tr><tr><td><strong>Boldore</strong></td><td>Common to Uncommon</td><td>Lvl 25-39</td><td>Overworld, Deep Dark</td><td>Any</td><td>Any</td><td></td><td>Grounded</td></tr><tr><td><strong>Gigalith</strong></td><td>Common to Uncommon</td><td>Lvl 34-52</td><td>Overworld, Deep Dark</td><td>Any</td><td>Any</td><td></td><td>Grounded</td></tr><tr><td><strong>Woobat</strong></td><td>Common</td><td>Lvl 7-32</td><td>Jungle, Savanna</td><td>Night</td><td>Clear</td><td></td><td>Grounded</td></tr><tr><td><strong>Swoobat</strong></td><td>Common</td><td>Lvl 27-43</td><td>Jungle, Savanna</td><td>Night</td><td>Clear</td><td></td><td>Grounded</td></tr><tr><td><strong>Drilbur</strong></td><td>Common</td><td>Lvl 8-31</td><td>Overworld</td><td>Any</td><td>Any</td><td>Underground Max Y: 30 </td><td>Grounded</td></tr><tr><td><strong>Excadrill</strong></td><td>Common</td><td>Lvl 25-51</td><td>Overworld</td><td>Any</td><td>Any</td><td>Underground Max Y: 30 </td><td>Grounded</td></tr><tr><td><strong>Audino</strong></td><td>Uncommon</td><td>Lvl 15-75</td><td>Plains, Highlands, Forest</td><td>Night</td><td>Any</td><td></td><td>Grounded</td></tr><tr><td><strong>Timburr</strong></td><td>Common</td><td>Lvl 6-31</td><td>Overworld</td><td>Any</td><td>Any</td><td></td><td>Grounded</td></tr><tr><td><strong>Gurdurr</strong></td><td>Common</td><td>Lvl 25-41</td><td>Overworld</td><td>Any</td><td>Any</td><td></td><td>Grounded</td></tr><tr><td><strong>Conkeldurr</strong></td><td>Common</td><td>Lvl 36-51</td><td>Overworld</td><td>Any</td><td>Any</td><td></td><td>Grounded</td></tr><tr><td><strong>Tympole</strong></td><td>Common</td><td>Lvl 10-35</td><td>Lukewarm Ocean, River, Swamp, Lush Caves, Lush, Dripstone Caves</td><td>Any</td><td>Any</td><td></td><td>Submerged</td></tr><tr><td><strong>Palpitoad</strong></td><td>Uncommon</td><td>Lvl 10-35</td><td>Lukewarm Ocean, River, Swamp, Lush Caves, Lush, Dripstone Caves</td><td>Any</td><td>Any</td><td></td><td>Submerged</td></tr><tr><td><strong>Seismitoad</strong></td><td>Common</td><td>Lvl 36-55</td><td>Swamp</td><td>Any</td><td>Any</td><td></td><td></td></tr><tr><td><strong>Throh</strong></td><td>Uncommon</td><td>Lvl 12-62</td><td>Mountain</td><td>Any</td><td>Clear</td><td></td><td>Grounded</td></tr><tr><td><strong>Sawk</strong></td><td>Uncommon</td><td>Lvl 12-62</td><td>Mountain</td><td>Any</td><td>Clear</td><td></td><td>Grounded</td></tr><tr><td><strong>Sewaddle</strong></td><td>Uncommon</td><td>Lvl 5-30</td><td>Forest</td><td>Day</td><td>Any</td><td>Does not spawn in Spooky</td><td>Grounded</td></tr><tr><td><strong>Swadloon</strong></td><td>Uncommon</td><td>Lvl 25-40</td><td>Forest</td><td>Day</td><td>Any</td><td>Does not spawn in Spooky</td><td>Grounded</td></tr><tr><td><strong>Leavanny</strong></td><td>Uncommon</td><td>Lvl 40-60</td><td>Forest</td><td>Day</td><td>Any</td><td>Does not spawn in Spooky</td><td>Grounded</td></tr><tr><td><strong>Venipede</strong></td><td>Common</td><td>Lvl 1-26</td><td>Forest, Jungle, Lush, Nether Fungus, Overworld</td><td>Night</td><td>Any</td><td></td><td>Grounded</td></tr><tr><td><strong>Whirlipede</strong></td><td>Common</td><td>Lvl 22-36</td><td>Forest, Jungle, Lush, Nether Fungus, Overworld</td><td>Night</td><td>Any</td><td></td><td>Grounded</td></tr><tr><td><strong>Scolipede</strong></td><td>Common</td><td>Lvl 30-49</td><td>Forest, Jungle, Lush, Nether Fungus, Overworld</td><td>Night</td><td>Any</td><td></td><td>Grounded</td></tr><tr><td><strong>Cottonee</strong></td><td>Common</td><td>Lvl 3-28</td><td>Plains</td><td>Any</td><td>Clear</td><td></td><td>Grounded</td></tr><tr><td><strong>Whimsicott</strong></td><td>Common</td><td>Lvl 23-48</td><td>Plains</td><td>Any</td><td>Clear</td><td></td><td>Grounded</td></tr><tr><td><strong>Petilil</strong></td><td>Common</td><td>Lvl 3-28</td><td>Floral, Forest, Hills</td><td>Any</td><td>Any</td><td></td><td>Grounded</td></tr><tr><td><strong>Lilligant</strong></td><td>Common</td><td>Lvl 23-48</td><td><strong>Normal</strong>: Floral, Forest <strong>Hisuian</strong>: Hills</td><td>Any</td><td>Any</td><td></td><td>Grounded</td></tr><tr><td><strong>Basculin</strong></td><td>Common</td><td>Lvl 21-46</td><td>Arid, Forest, Freshwater, Grassland, Jungle, Mountain, Snowy Forest, Taiga, Tundra</td><td>Any</td><td>Any</td><td></td><td>Fishing or Submerged</td></tr><tr><td><strong>Sandile</strong></td><td>Common</td><td>Lvl 4-29</td><td>Desert</td><td>Any</td><td>Any</td><td></td><td>Grounded</td></tr><tr><td><strong>Krokorok</strong></td><td>Common</td><td>Lvl 29-35</td><td>Desert</td><td>Any</td><td>Any</td><td></td><td>Grounded</td></tr><tr><td><strong>Krookodile</strong></td><td>Common</td><td>Lvl 40-52</td><td>Desert</td><td>Any</td><td>Any</td><td></td><td>Grounded</td></tr><tr><td><strong>Darumaka</strong></td><td>Common</td><td>Lvl 7-32</td><td><strong>Normal</strong>:<br>Desert, Jungle, Nether<br><strong>Galarian</strong>:<br><strong>DOES NOT SPAWN</strong></td><td>Any</td><td>Any</td><td></td><td>Grounded</td></tr><tr><td><strong>Darmanitan</strong></td><td>Common</td><td>Lvl 35-54</td><td><strong>Normal</strong>:<br>Desert, Jungle, Nether<br><strong>Galarian</strong>:<br><strong>DOES NOT SPAWN</strong></td><td>Any</td><td>Any</td><td></td><td>Grounded</td></tr><tr><td><strong>Maractus</strong></td><td>Common</td><td>Lvl 21-46</td><td>Badlands, Desert</td><td>Any</td><td>Any</td><td></td><td>Grounded</td></tr><tr><td><strong>Dwebble</strong></td><td>Common</td><td>Lvl 8-33</td><td>Badlands</td><td>Any</td><td>Any</td><td></td><td>Grounded</td></tr><tr><td><strong>Crustle</strong></td><td>Common</td><td>Lvl 34-49</td><td>Badlands</td><td>Any</td><td>Any</td><td></td><td>Grounded</td></tr><tr><td><strong>Scraggy</strong></td><td>Common</td><td>Lvl 10-35</td><td>Badlands, Arid</td><td>Any</td><td>Any</td><td></td><td>Grounded</td></tr><tr><td><strong>Scrafty</strong></td><td>Common</td><td>Lvl 39-49</td><td>Badlands, Arid</td><td>Any</td><td>Any</td><td></td><td>Grounded</td></tr><tr><td><strong>Sigilyph</strong></td><td>Common to Uncommon</td><td>Lvl 24-49</td><td>Badlands, Desert, Overworld, End</td><td>Any</td><td>Any</td><td></td><td>Grounded</td></tr><tr><td><strong>Yamask</strong></td><td>Common to Rare</td><td>Lvl 5-30</td><td><strong>Normal:</strong> Desert, Overworld. <strong>Galarian:</strong> Ruins, Underground (<em>Near Bricks</em>)</td><td>Any</td><td>Any</td><td></td><td>Grounded</td></tr><tr><td><strong>Cofagrigus</strong></td><td>Common to Rare</td><td>Lvl 34-48</td><td><strong>Normal:</strong> Desert, Overworld. <strong>Galarian:</strong> Ruins, Underground (<em>Near Bricks</em>)</td><td>Any</td><td>Any</td><td></td><td>Grounded</td></tr><tr><td><strong>Tirtouga</strong></td><td>Ultra-rare</td><td>Lvl 15-40</td><td>Lush</td><td>Any</td><td>Any</td><td></td><td>Grounded or Submerged</td></tr><tr><td><strong>Carracosta</strong></td><td>Ultra-rare</td><td>Lvl 37-57</td><td>Lush</td><td>Any</td><td>Any</td><td></td><td>Grounded or Submerged</td></tr><tr><td><strong>Archen</strong></td><td>Ultra-rare</td><td>Lvl 15-40</td><td>Lush</td><td>Any</td><td>Any</td><td></td><td>Grounded</td></tr><tr><td><strong>Archeops</strong></td><td>Ultra-rare</td><td>Lvl 37-57</td><td>Lush</td><td>Any</td><td>Any</td><td></td><td>Grounded</td></tr><tr><td><strong>Trubbish</strong></td><td>Common to Uncommon</td><td>Lvl 10-40</td><td>Swamp, Overworld (<em>Near Composter</em>)</td><td>Clear</td><td>Any</td><td></td><td>Grounded</td></tr><tr><td><strong>Garbodor</strong></td><td>Rare</td><td>Lvl 32-65</td><td>Swamp, Overworld (<em>Near Composter</em>)</td><td>Clear</td><td>Any</td><td></td><td>Grounded</td></tr><tr><td><strong>Zorua</strong></td><td>Uncommon</td><td>Lvl 8-33</td><td><strong>Normal</strong>: Forest <strong>Hisuian</strong>: Snowy Forest, Snowy Taiga, Nether</td><td>Night</td><td>Any</td><td></td><td>Grounded</td></tr><tr><td><strong>Zoroark</strong></td><td>Uncommon</td><td>Lvl 30-51</td><td>N<strong>ormal</strong>: Forest <strong>Hisuian</strong>: Snowy Forest, Snowy Taiga, Nether</td><td>Night</td><td>Any</td><td></td><td>Grounded</td></tr><tr><td><strong>Minccino</strong></td><td>Rare</td><td>Lvl 15-20</td><td>Forest</td><td>Any</td><td>Clear</td><td></td><td>Grounded</td></tr><tr><td><strong>Cinccino</strong></td><td>N/A</td><td>N/A</td><td><strong>DOES NOT SPAWN</strong></td><td>N/A</td><td>N/A</td><td></td><td>Grounded</td></tr><tr><td><strong>Gothita</strong></td><td>Uncommon</td><td>Lvl 10-35</td><td>Spooky, End</td><td>Night</td><td>Any</td><td></td><td>Grounded</td></tr><tr><td><strong>Gothorita</strong></td><td>Rare</td><td>Lvl 32-44</td><td>Spooky, End</td><td>Night</td><td>Any</td><td></td><td>Grounded</td></tr><tr><td><strong>Gothitelle</strong></td><td>Rare</td><td>Lvl 41-70</td><td>Spooky, End</td><td>Night</td><td>Any</td><td></td><td>Grounded</td></tr><tr><td><strong>Solosis</strong></td><td>Common to Uncommon</td><td>Lvl 15-35</td><td>Magical, End</td><td>Day</td><td>Any</td><td></td><td>Grounded</td></tr><tr><td><strong>Duosion</strong></td><td>Uncommon to Rare</td><td>Lvl 31-52</td><td>Magical, End</td><td>Day</td><td>Any</td><td></td><td>Grounded</td></tr><tr><td><strong>Reuniclus</strong></td><td>Rare to Ultra-Rare</td><td>Lvl 41-60</td><td>Magical, End</td><td>Day</td><td>Any</td><td></td><td>Grounded</td></tr><tr><td><strong>Ducklett</strong></td><td>Common to Uncommon</td><td>Lvl 6-31</td><td>Freshwater</td><td>Day</td><td>Any</td><td></td><td>Grounded or Surface</td></tr><tr><td><strong>Swanna</strong></td><td>Common to Uncommon</td><td>Lvl 35-47</td><td>Freshwater</td><td>Day</td><td>Any</td><td></td><td>Grounded or Surface</td></tr><tr><td><strong>Vanillite</strong></td><td>Common</td><td>Lvl 10-32</td><td>Snowy</td><td>Clear</td><td>Any</td><td></td><td>Grounded</td></tr><tr><td><strong>Vanillish</strong></td><td>Uncommon</td><td>Lvl 36-51</td><td>Snowy</td><td>Clear</td><td>Any</td><td></td><td>Grounded</td></tr><tr><td><strong>Vanilluxe</strong></td><td>Rare</td><td>Lvl 50-65</td><td>Snowy</td><td>Clear</td><td>Any</td><td></td><td>Grounded</td></tr><tr><td><strong>Deerling</strong></td><td>Common to Uncommon</td><td>Lvl 9-34</td><td>Floral, Forest, Hills, Plains, Snowy Forest, Taiga</td><td>Any</td><td>Any</td><td></td><td>Grounded</td></tr><tr><td><strong>Sawsbuck</strong></td><td>Common to Uncommon</td><td>Lvl 34-48</td><td>Floral, Forest, Hills, Plains, Snowy Forest, Taiga</td><td>Any</td><td>Any</td><td></td><td>Grounded</td></tr><tr><td><strong>Emolga</strong></td><td>Uncommon</td><td>Lvl 18-43</td><td>Taiga</td><td>Any</td><td>Any</td><td></td><td>Grounded</td></tr><tr><td><strong>Karrablast</strong></td><td>Common</td><td>Lvl 7-32</td><td>Swamp</td><td>Any</td><td>Any</td><td></td><td>Grounded</td></tr><tr><td><strong>Escavalier</strong></td><td>Common</td><td>Lvl 27-50</td><td>Swamp</td><td>Any</td><td>Any</td><td></td><td>Grounded</td></tr><tr><td><strong>Foongus</strong></td><td>Common</td><td>Lvl 4-29</td><td>Mushroom</td><td>Any</td><td>Any</td><td></td><td>Grounded</td></tr><tr><td><strong>Amoonguss</strong></td><td>Common</td><td>Lvl 39-46</td><td>Mushroom</td><td>Any</td><td>Any</td><td></td><td>Grounded</td></tr><tr><td><strong>Frillish</strong></td><td>Common to Uncommon</td><td>Lvl 9-34</td><td>Ocean, Overworld</td><td>Any</td><td>Any</td><td></td><td>Fishing, Submerged or Surface</td></tr><tr><td><strong>Jellicent</strong></td><td>Common to Uncommon</td><td>Lvl 40-48</td><td>Ocean, Overworld</td><td>Any</td><td>Any</td><td></td><td>Fishing, Submerged or Surface</td></tr><tr><td><strong>Alomomola</strong></td><td>Common to Uncommon</td><td>Lvl 22-47</td><td>Ocean, Deep Ocean</td><td>Any</td><td>Any</td><td></td><td>Fishing or Submerged</td></tr><tr><td><strong>Joltik</strong></td><td>Common</td><td>Lvl 7-32</td><td>Badlands, Jungle, Savanna, Overworld</td><td>Night</td><td>Any</td><td></td><td>Grounded</td></tr><tr><td><strong>Galvantula</strong></td><td>Common</td><td>Lvl 36-47</td><td>Badlands, Jungle, Savanna, Overworld</td><td>Night</td><td>Any</td><td></td><td>Grounded</td></tr><tr><td><strong>Ferroseed</strong></td><td>Common</td><td>Lvl 6-31</td><td>Lush, Overworld</td><td>Any</td><td>Any</td><td></td><td>Grounded</td></tr><tr><td><strong>Ferrothorn</strong></td><td>Common</td><td>Lvl 40-49</td><td>Lush, Overworld</td><td>Any</td><td>Any</td><td></td><td>Grounded</td></tr><tr><td><strong>Klink</strong></td><td>Common</td><td>Lvl 5-30</td><td>Overworld</td><td>Any</td><td>Any</td><td></td><td>Grounded</td></tr><tr><td><strong>Klang</strong></td><td>Common</td><td>Lvl 38-44</td><td>Overworld</td><td>Any</td><td>Any</td><td></td><td>Grounded</td></tr><tr><td><strong>Klinklang</strong></td><td>Common</td><td>Lvl 49-52</td><td>Overworld</td><td>Any</td><td>Any</td><td></td><td>Grounded</td></tr><tr><td><strong>Tynamo</strong></td><td>Common to Rare</td><td>Lvl 8-36</td><td>Caves, Lush</td><td>Any</td><td>Underwater</td><td>Can be caught via Fishing in Caves [<em>NOT LUSH</em>]</td><td>Fishing or Submerged</td></tr><tr><td><strong>Eelektrik</strong></td><td>Uncommon to Rare</td><td>Lvl 39-50</td><td>Caves, Lush</td><td>Any</td><td>Underwater</td><td>Can be caught via Fishing in Caves [<em>NOT LUSH</em>]</td><td>Fishing or Submerged</td></tr><tr><td><strong>Eelektross</strong></td><td>Uncommon to Rare</td><td>Lvl 39-60</td><td>Caves, Lush</td><td>Any</td><td>Underwater</td><td>Can be caught via Fishing in Caves [<em>NOT LUSH</em>]</td><td>Fishing or Submerged</td></tr><tr><td><strong>Elgyem</strong></td><td>Common to Uncommon</td><td>Lvl 9-34</td><td>End, Overworld</td><td>Night</td><td>Any</td><td></td><td>Grounded</td></tr><tr><td><strong>Beheeyem</strong></td><td>Common to Uncommon</td><td>Lvl 42-49</td><td>End, Overworld</td><td>Night</td><td>Any</td><td></td><td>Grounded</td></tr><tr><td><strong>Litwick</strong></td><td>Common</td><td>Lvl 3-28</td><td>Nether Soul Fire, Overworld</td><td>Night</td><td>Any</td><td></td><td>Grounded</td></tr><tr><td><strong>Lampent</strong></td><td>Common</td><td>Lvl 41-46</td><td>Nether Soul Fire, Overworld</td><td>Night</td><td>Any</td><td></td><td>Grounded</td></tr><tr><td><strong>Chandelure</strong></td><td>Common</td><td>Lvl 41-52</td><td>Nether Soul Fire, Overworld</td><td>Night</td><td>Any</td><td></td><td>Grounded</td></tr><tr><td><strong>Axew</strong></td><td>Uncommon to Rare</td><td>Lvl 5-30</td><td>Mountain, Highlands</td><td>Any</td><td>Any</td><td></td><td>Grounded</td></tr><tr><td><strong>Fraxure</strong></td><td>Rare</td><td>Lvl 38-47</td><td>Mountain, Highlands</td><td>Any</td><td>Any</td><td></td><td>Grounded</td></tr><tr><td><strong>Haxorus</strong></td><td>Ultra-Rare</td><td>Lvl 48-70</td><td>Mountain, Highlands</td><td>Any</td><td>Any</td><td></td><td>Grounded</td></tr><tr><td><strong>Cubchoo</strong></td><td>Common</td><td>Lvl 6-31</td><td>Frozen Ocean</td><td>Any</td><td>Any</td><td></td><td>Grounded</td></tr><tr><td><strong>Beartic</strong></td><td>Common</td><td>Lvl 37-51</td><td>Frozen Ocean</td><td>Any</td><td>Any</td><td></td><td>Grounded</td></tr><tr><td><strong>Cryogonal</strong></td><td>Uncommon</td><td>Lvl 27-52</td><td>Freezing</td><td>Any</td><td>Any</td><td></td><td>Grounded</td></tr><tr><td><strong>Shelmet</strong></td><td>Common</td><td>Lvl 6-31</td><td>Swamp</td><td>Any</td><td>Any</td><td></td><td>Grounded</td></tr><tr><td><strong>Accelgor</strong></td><td>Common</td><td>Lvl 26-50</td><td>Swamp</td><td>Any</td><td>Any</td><td></td><td>Grounded</td></tr><tr><td><strong>Stunfisk</strong></td><td>Common</td><td>Lvl 22-47</td><td><strong>Normal:</strong><br>Swamp, Arid, Jungle<br><strong>Galarian:</strong><br>Swamp</td><td>Any</td><td>Any</td><td></td><td>Grounded, Fishing or Seafloor</td></tr><tr><td><strong>Meinfoo</strong></td><td>Uncommon</td><td>Lvl 10-35</td><td>Mountains</td><td>Any</td><td>Any</td><td>Will not spawn in Hill biome.</td><td>Grounded</td></tr><tr><td><strong>Mienshao</strong></td><td>Uncommon</td><td>Lvl 50-51</td><td>Mountains</td><td>Any</td><td>Any</td><td>Will not spawn in Hill biome.</td><td>Grounded</td></tr><tr><td><strong>Druddigon</strong></td><td>Rare</td><td>Lvl 45-65</td><td>Mountains, Caves</td><td>Any</td><td>Any</td><td>Does not spawn via Deep Dark</td><td>Grounded</td></tr><tr><td><strong>Golett</strong></td><td>Common to Rare</td><td>Lvl 5-30</td><td>Desert, Jungle, Deep Dark, Overworld</td><td>Any</td><td>Any</td><td></td><td>Grounded</td></tr><tr><td><strong>Golurk</strong></td><td>Common to Rare</td><td>Lvl 43-48</td><td>Desert, Jungle, Deep Dark, Overworld</td><td>Any</td><td>Any</td><td></td><td>Grounded</td></tr><tr><td><strong>Pawniard</strong></td><td>Uncommon</td><td>Lvl 10-38</td><td>Bamboo</td><td>Night</td><td>Any</td><td></td><td>Grounded</td></tr><tr><td><strong>Bisharp</strong></td><td>Rare</td><td>Lvl 38-65</td><td>Bamboo</td><td>Night</td><td>Any</td><td></td><td>Grounded</td></tr><tr><td><strong>Bouffalant</strong></td><td>Common</td><td>Lvl 24-49</td><td>Plains</td><td>Any</td><td>Any</td><td></td><td>Grounded</td></tr><tr><td><strong>Rufflet</strong></td><td>Common</td><td>Lvl 10-35</td><td>Badlands, Hills</td><td>Day</td><td>Any</td><td></td><td>Grounded</td></tr><tr><td><strong>Braviary</strong></td><td>Common</td><td>Lvl 54-59</td><td><strong>Normal</strong>: Badlands, Hills<br><strong>Hisuian</strong>:<br>Mountain</td><td>Day</td><td>Any</td><td></td><td>Grounded</td></tr><tr><td><strong>Vullaby</strong></td><td>Uncommon</td><td>Lvl 16-44</td><td>Badlands</td><td>Any</td><td>Any</td><td></td><td>Grounded</td></tr><tr><td><strong>Mandibuzz</strong></td><td>Uncommon</td><td>Lvl 54-63</td><td>Badlands</td><td>Any</td><td>Any</td><td></td><td>Grounded</td></tr><tr><td><strong>Heatmor</strong></td><td>Common to Uncommon</td><td>Lvl 23-48</td><td>Badlands, Hills, Nether Mountain</td><td>Any</td><td>Any</td><td></td><td>Grounded</td></tr><tr><td><strong>Durant</strong></td><td>Common</td><td>Lvl 23-48</td><td>Badlands, Hills, Nether Mountain</td><td>Any</td><td>Any</td><td></td><td>Grounded</td></tr><tr><td><strong>Deino</strong></td><td>Rare to Ultra-rare</td><td>Lvl 5-30</td><td>Deep Dark, Overworld</td><td>Any</td><td>Any</td><td></td><td>Grounded</td></tr><tr><td><strong>Zweilous</strong></td><td>Rare to Ultra-rare</td><td>Lvl 50-55</td><td>Deep Dark, Overworld</td><td>Any</td><td>Any</td><td></td><td>Grounded</td></tr><tr><td><strong>Hydreigon</strong></td><td>Rare to Ultra-rare</td><td>Lvl 64-69</td><td>Deep Dark, Overworld</td><td>Any</td><td>Any</td><td></td><td>Grounded</td></tr><tr><td><strong>Larvesta</strong></td><td>Uncommon</td><td>Lvl 11-36</td><td>Desert, Jungle, Nether Crimson</td><td>Any</td><td>Any</td><td></td><td>Grounded</td></tr><tr><td><strong>Volcarona</strong></td><td>Uncommon</td><td>Lvl 59-64</td><td>Desert, Jungle, Nether Crimson</td><td>Any</td><td>Any</td><td></td><td>Grounded</td></tr></tbody></table>


# Generation 6 Spawns

This page will go over all the non-legendary pokemon that are found within the sixth Generation of Pokemon games.

<table><thead><tr><th width="98">Pokemon</th><th width="96">Rarity </th><th width="108">Lvl Average</th><th width="106">Biome(s)</th><th width="65">Time</th><th width="89">Weather</th><th width="106">Spawn Info</th><th width="110">Context</th></tr></thead><tbody><tr><td><strong>Chespin</strong></td><td>Ultra-rare</td><td>Lvl 5-31</td><td>Forest</td><td>Any</td><td>Any</td><td></td><td>Grounded</td></tr><tr><td><strong>Quilladin</strong></td><td>Ultra-rare</td><td>Lvl 16-41</td><td>Forest</td><td>Any</td><td>Any</td><td></td><td>Grounded</td></tr><tr><td><strong>Chesnaught</strong></td><td>Ultra-rare</td><td>Lvl 36-53</td><td>Forest</td><td>Any</td><td>Any</td><td></td><td>Grounded</td></tr><tr><td><strong>Fennekin</strong></td><td>Ultra-rare</td><td>Lvl 5-31</td><td>Desert</td><td>Any</td><td>Any</td><td></td><td>Grounded</td></tr><tr><td><strong>Braixen</strong></td><td>Ultra-rare</td><td>Lvl 16-41</td><td>Desert</td><td>Any</td><td>Any</td><td></td><td>Grounded</td></tr><tr><td><strong>Delphox</strong></td><td>Ultra-rare</td><td>Lvl 36-53</td><td>Desert</td><td>Any</td><td>Any</td><td></td><td>Grounded</td></tr><tr><td><strong>Froakie</strong></td><td>Ultra-rare</td><td>Lvl 5-31</td><td>Freshwater, Jungle</td><td>Any</td><td>Any</td><td></td><td>Fishing, Grounded or Submerged</td></tr><tr><td><strong>Frogadier</strong></td><td>Ultra-rare</td><td>Lvl 16-41</td><td>Freshwater, Jungle</td><td>Any</td><td>Any</td><td></td><td>Fishing, Grounded or Submerged</td></tr><tr><td><strong>Greninja</strong></td><td>Ultra-rare</td><td>Lvl 36-53</td><td>Freshwater, Jungle</td><td>Any</td><td>Any</td><td></td><td>Fishing, Grounded or Submerged</td></tr><tr><td><strong>Bunnelby</strong></td><td>Common</td><td>Lvl 1-24</td><td>Hills, Temperate</td><td>Any</td><td>Any</td><td></td><td>Grounded</td></tr><tr><td><strong>Diggersby</strong></td><td>Common</td><td>Lvl 20-42</td><td>Hills, Temperate</td><td>Any</td><td>Any</td><td></td><td>Grounded</td></tr><tr><td><strong>Fletchling</strong></td><td>Common</td><td>Lvl 3-28</td><td>Forest, Taiga, Nether Fungus</td><td>Any</td><td>Any</td><td></td><td>Grounded</td></tr><tr><td><strong>Fletchinder</strong></td><td>Common</td><td>Lvl 17-38</td><td>Forest, Taiga, Nether Fungus</td><td>Any</td><td>Any</td><td></td><td>Grounded</td></tr><tr><td><strong>Talonflame</strong></td><td>Common</td><td>Lvl 35-50</td><td>Forest, Taiga, Nether Fungus</td><td>Any</td><td>Any</td><td></td><td>Grounded</td></tr><tr><td><strong>Scatterbug</strong></td><td>Common</td><td>Lvl 1-20</td><td>Floral, Plains, Savanna</td><td>Any</td><td>Any</td><td></td><td>Grounded</td></tr><tr><td><strong>Spewpa</strong></td><td>Common</td><td>Lvl 9-21</td><td>Floral, Plains, Savanna</td><td>Any</td><td>Any</td><td></td><td>Grounded</td></tr><tr><td><strong>Vivillon</strong></td><td>Common</td><td>Lvl 12-41</td><td>Badlands, Coast, Warm Ocean, Desert, Floral, Floral Meadow, Forest, Freshwater, Frozen Ocean, Glacial, Snowy Forest, Tundra, Jungle, Mountain, Mushroom, Ocean, Overworld, Plains, Savanna, Sunflower Plains, Magical, Spooky, Taiga</td><td>Day</td><td>Clear</td><td></td><td>Grounded</td></tr><tr><td><strong>Litleo</strong></td><td>Common</td><td>Lvl 1-35</td><td>Badlands, Savanna, Jungle</td><td>Any</td><td>Any</td><td></td><td>Grounded</td></tr><tr><td><strong>Pyroar</strong></td><td>Uncommon</td><td>Lvl 20-55</td><td>Badlands, Savanna, Jungle</td><td>Any</td><td>Any</td><td></td><td>Grounded</td></tr><tr><td><strong>Flabebe</strong></td><td>Common</td><td>Lvl 5-30</td><td>Overworld</td><td>Any</td><td>Any</td><td></td><td>Grounded</td></tr><tr><td><strong>Floette</strong></td><td>Common</td><td>Lvl 19-37</td><td>Overworld</td><td>Any</td><td>Any</td><td></td><td>Grounded</td></tr><tr><td><strong>Florges</strong></td><td>Common</td><td>Lvl 32-55</td><td>Overworld</td><td>Any</td><td>Any</td><td></td><td>Grounded</td></tr><tr><td><strong>Skiddo</strong></td><td>Common</td><td>Lvl 5-20</td><td>Hills</td><td>Any</td><td>Any</td><td></td><td>Grounded</td></tr><tr><td><strong>Gogoat</strong></td><td>Uncommon</td><td>Lvl 30-45</td><td>Hills</td><td>Any</td><td>Any</td><td></td><td>Grounded</td></tr><tr><td><strong>Pancham</strong></td><td>Uncommon</td><td>Lvl 20-35</td><td>Bamboo</td><td>Any</td><td>Any</td><td></td><td>Grounded</td></tr><tr><td><strong>Pangoro</strong></td><td>Rare</td><td>Lvl 40-65</td><td>Bamboo</td><td>Any</td><td>Any</td><td></td><td>Grounded</td></tr><tr><td><strong>Furfrou</strong></td><td>Rare</td><td>Lvl 30-65</td><td>Plains</td><td>Any</td><td>Any</td><td></td><td>Grounded</td></tr><tr><td><strong>Espurr</strong></td><td>Uncommon</td><td>Lvl 5-35</td><td>End</td><td>Any</td><td>Any</td><td></td><td>Grounded</td></tr><tr><td><strong>Meowstic</strong></td><td>Uncommon</td><td>Lvl 20-65</td><td>End</td><td>Any</td><td>Any</td><td></td><td>Grounded</td></tr><tr><td><strong>Honedge</strong></td><td>Uncommon</td><td>Lvl 8-33</td><td>Nether, Overworld</td><td>Any</td><td>Any</td><td></td><td>Grounded</td></tr><tr><td><strong>Doublade</strong></td><td>Uncommon</td><td>Lvl 35-45</td><td>Nether, Overworld</td><td>Any</td><td>Any</td><td></td><td>Grounded</td></tr><tr><td><strong>Aegislash</strong></td><td>Uncommon</td><td>Lvl 40-50</td><td>Nether, Overworld</td><td>Any</td><td>Any</td><td></td><td>Grounded</td></tr><tr><td><strong>Spritzee</strong></td><td>Uncommon</td><td>Lvl 15-28</td><td>Magical, Floral</td><td>Day</td><td>Any</td><td></td><td>Grounded</td></tr><tr><td><strong>Aromatisse</strong></td><td>Rare</td><td>Lvl 35-65</td><td>Magical, Floral</td><td>Day</td><td>Any</td><td></td><td>Grounded</td></tr><tr><td><strong>Swirlix</strong></td><td>Common to Uncommon</td><td>Lvl 9-34</td><td>Overworld</td><td>Any</td><td>Any</td><td></td><td></td></tr><tr><td><strong>Slurpuff</strong></td><td>Common to Uncommon</td><td>Lvl 29-48</td><td>Overworld</td><td>Any</td><td>Any</td><td></td><td></td></tr><tr><td><strong>Inkay</strong></td><td>Common to Uncommon</td><td>Lvl 4-29</td><td>Coast, Beach</td><td>Any</td><td>Any</td><td></td><td>Fishing, Grounded or Submerged</td></tr><tr><td><strong>Malamar</strong></td><td>Common to Uncommon</td><td>Lvl 30-48</td><td>Coast, Beach</td><td>Any</td><td>Any</td><td></td><td>Fishing, Grounded or Submerged</td></tr><tr><td><strong>Binacle</strong></td><td>Common to Uncommon</td><td>Lvl 6-31</td><td>Coast, Ocean</td><td>Any</td><td>Any</td><td></td><td>Fishing, Grounded or Seafloor</td></tr><tr><td><strong>Barbaracle</strong></td><td>Common to Uncommon</td><td>Lvl 39-50</td><td>Coast, Ocean</td><td>Any</td><td>Any</td><td></td><td>Fishing, Grounded or Seafloor</td></tr><tr><td><strong>Skrelp</strong></td><td>Common</td><td>Lvl 7-32</td><td>Coast, Ocean, Overworld</td><td>Any</td><td>Any</td><td></td><td>Fishing or Submerged</td></tr><tr><td><strong>Dragalge</strong></td><td>Common</td><td>Lvl 48-49</td><td>Coast, Ocean, Overworld</td><td>Any</td><td>Any</td><td></td><td>Fishing or Submerged</td></tr><tr><td><strong>Clauncher</strong></td><td>Common</td><td>Lvl 8-33</td><td>Coast, Ocean</td><td>Any</td><td>Any</td><td></td><td>Fishing or Seafloor</td></tr><tr><td><strong>Clawitzer</strong></td><td>Common</td><td>Lvl 37-50</td><td>Coast, Ocean</td><td>Any</td><td>Any</td><td></td><td>Fishing or Submerged</td></tr><tr><td><strong>Helioptile</strong></td><td>Rare</td><td>Lvl 12-25</td><td>Mountain</td><td>Any</td><td>Any</td><td></td><td>Grounded</td></tr><tr><td><strong>Heliolisk</strong></td><td>Ultra-Rare</td><td>Lvl 30-70</td><td>Mountain</td><td>Any</td><td>Any</td><td></td><td>Grounded</td></tr><tr><td><strong>Tyrunt</strong></td><td>Ultra-rare</td><td>Lvl 11-36</td><td>Lush</td><td>Any</td><td>Any</td><td></td><td>Grounded</td></tr><tr><td><strong>Tyrantrum</strong></td><td>Ultra-rare</td><td>Lvl 39-52</td><td>Lush</td><td>Any</td><td>Any</td><td></td><td>Grounded</td></tr><tr><td><strong>Amaura</strong></td><td>Ultra-rare</td><td>Lvl 11-36</td><td>Lush</td><td>Any</td><td>Any</td><td></td><td>Grounded</td></tr><tr><td><strong>Aurorus</strong></td><td>Ultra-rare</td><td>Lvl 39-52</td><td>Lush</td><td>Any</td><td>Any</td><td></td><td>Grounded</td></tr><tr><td><strong>Sylveon</strong></td><td>Uncommon</td><td>Lvl 28-53</td><td>Overworld</td><td>Any</td><td>Any</td><td></td><td>Grounded</td></tr><tr><td><strong>Hawlucha</strong></td><td>Rare</td><td>Lvl 20-60</td><td>Mountain</td><td>Any</td><td>Any</td><td></td><td>Grounded</td></tr><tr><td><strong>Dedenne</strong></td><td>Uncommon</td><td>Lvl 15-65</td><td>Forest [<em>Excl Spooky</em>]</td><td>Any</td><td>Thunder</td><td></td><td>Grounded</td></tr><tr><td><strong>Carbink</strong></td><td>Common to Uncommon</td><td>Lvl 25-50</td><td>Overworld</td><td>Any</td><td>Any</td><td></td><td>Grounded</td></tr><tr><td><strong>Goomy</strong></td><td>Common to Ultra-Rare</td><td>Lvl 5-30</td><td><strong>Normal</strong>: Swamp, Overworld     <strong>Hisuian</strong>: Dripstone, Lush, Overworld</td><td>Any</td><td>Any</td><td></td><td>Fishing or Grounded</td></tr><tr><td><strong>Sliggoo</strong></td><td>Common to Ultra-Rare</td><td>Lvl 40-45</td><td><strong>Normal</strong>: Swamp, Overworld     <strong>Hisuian</strong>: Dripstone, Lush, Overworld</td><td>Any</td><td>Any</td><td></td><td>Fishing or Grounded</td></tr><tr><td><strong>Goodra</strong></td><td>Common to Ultra-Rare</td><td>Lvl 50-60</td><td><strong>Normal</strong>: Swamp, Overworld     <strong>Hisuian</strong>: Dripstone, Lush, Overworld</td><td>Any</td><td>Any</td><td></td><td>Fishing or Grounded</td></tr><tr><td><strong>Klefki</strong></td><td>Common to Uncommon</td><td>Lvl 22-47</td><td>Overworld</td><td>Any</td><td>Any</td><td></td><td>Grounded</td></tr><tr><td><strong>Phantump</strong></td><td>Common</td><td>Lvl 6-31</td><td>Forest, Taiga, Spooky</td><td>Night</td><td>Any</td><td></td><td>Grounded</td></tr><tr><td><strong>Trevenant</strong></td><td>Common</td><td>Lvl 26-47</td><td>Forest, Taiga, Spooky</td><td>Night</td><td>Any</td><td></td><td>Grounded</td></tr><tr><td><strong>Pumpkaboo</strong></td><td>Common to Uncommon</td><td>Lvl 9-34</td><td>Overworld</td><td>Night</td><td>Any</td><td></td><td>Grounded</td></tr><tr><td><strong>Gourgeist</strong></td><td>Common to Uncommon</td><td>Lvl 29-49</td><td>Overworld</td><td>Night</td><td>Any</td><td></td><td>Grounded</td></tr><tr><td><strong>Bergmite</strong></td><td>Common</td><td>Lvl 5-30</td><td>Frozen Ocean</td><td>Any</td><td>Any</td><td></td><td>Fishing, Grounded or Surface</td></tr><tr><td><strong>Avalugg</strong></td><td>Common</td><td>Lvl 37-51</td><td><strong>Normal</strong>: Frozen Ocean<br><strong>Hisuian</strong>:<br><strong>DOES NOT SPAWN</strong></td><td>Any</td><td>Any</td><td></td><td>Fishing, Grounded or Surface</td></tr><tr><td><strong>Noibat</strong></td><td>Uncommon</td><td>Lvl 20-43</td><td>Spooky, Caves, Dripstone, Deep Dark</td><td>Night</td><td>Any</td><td></td><td>Grounded</td></tr><tr><td><strong>Noivern</strong></td><td>Rare</td><td>Lvl 50-80</td><td>Spooky, Caves, Dripstone, Deep Dark</td><td>Night</td><td>Any</td><td></td><td>Grounded</td></tr></tbody></table>


# Generation 7 Spawns

This page will go over all the non-legendary pokemon that are found within the seventh Generation of Pokemon games.

<table><thead><tr><th width="118">Pokemon</th><th width="102">Rarity </th><th width="86">Lvl Average</th><th width="104">Biome(s)</th><th width="74">Time</th><th width="91">Weather</th><th width="106">Spawn Info</th><th width="106">Context</th></tr></thead><tbody><tr><td><strong>Rowlet</strong></td><td>Ultra-rare</td><td>Lvl 5-32</td><td>Forest, Snowy Forest, Snowy Taiga</td><td>Any</td><td>Any</td><td></td><td>Grounded</td></tr><tr><td><strong>Dartrix</strong></td><td>Ultra-rare</td><td>Lvl 17-42</td><td>Forest, Snowy Forest, Snowy Taiga</td><td>Any</td><td>Any</td><td></td><td>Grounded</td></tr><tr><td><strong>Decidueye</strong></td><td>Ultra-rare</td><td>Lvl 34-53</td><td><strong>Normal</strong>: Forest <strong>Hisuian</strong>: Snowy Forest, Snowy Taiga</td><td>Any</td><td>Any</td><td></td><td>Grounded</td></tr><tr><td><strong>Litten</strong></td><td>Ultra-rare</td><td>Lvl 5-32</td><td>Jungle</td><td>Any</td><td>Clear</td><td></td><td>Grounded</td></tr><tr><td><strong>Torracat</strong></td><td>Ultra-rare</td><td>Lvl 17-42</td><td>Jungle</td><td>Any</td><td>Clear</td><td></td><td>Grounded</td></tr><tr><td><strong>Incineroar</strong></td><td>Ultra-rare</td><td>Lvl 34-53</td><td>Jungle</td><td>Any</td><td>Clear</td><td></td><td>Grounded</td></tr><tr><td><strong>Popplio</strong></td><td>Ultra-rare</td><td>Lvl 5-32</td><td>Coast, Ocean</td><td>Any</td><td>Any</td><td></td><td>Fishing, Grounded or Submerged</td></tr><tr><td><strong>Brionne</strong></td><td>Ultra-rare</td><td>Lvl 17-42</td><td>Coast, Ocean</td><td>Any</td><td>Any</td><td></td><td>Fishing, Grounded or Submerged</td></tr><tr><td><strong>Primarina</strong></td><td>Ultra-rare</td><td>Lvl 34-53</td><td>Coast, Ocean</td><td>Any</td><td>Any</td><td></td><td>Fishing, Grounded or Submerged</td></tr><tr><td><strong>Pikipek</strong></td><td>Common</td><td>Lvl 2-27</td><td>Jungle</td><td>Day</td><td>Any</td><td></td><td>Grounded</td></tr><tr><td><strong>Trumbeak</strong></td><td>Common</td><td>Lvl 14-36</td><td>Jungle</td><td>Day</td><td>Any</td><td></td><td>Grounded</td></tr><tr><td><strong>Toucannon</strong></td><td>Common</td><td>Lvl 28-49</td><td>Jungle</td><td>Day</td><td>Any</td><td></td><td>Grounded</td></tr><tr><td><strong>Yungoos</strong></td><td>Common</td><td>Lvl 1-25</td><td>Plains</td><td>Any</td><td>Any</td><td></td><td>Grounded</td></tr><tr><td><strong>Gumshoos</strong></td><td>Common</td><td>Lvl 20-42</td><td>Plains</td><td>Any</td><td>Any</td><td></td><td>Grounded</td></tr><tr><td><strong>Grubbin</strong></td><td>Common</td><td>Lvl 5-25</td><td>Badlands, Jungle</td><td>Any</td><td>Any</td><td></td><td>Grounded</td></tr><tr><td><strong>Charjabug</strong></td><td>Uncommon</td><td>Lvl 20-45</td><td>Badlands, Jungle</td><td>Any</td><td>Any</td><td></td><td>Grounded</td></tr><tr><td><strong>Vikavolt</strong></td><td>Rare</td><td>Lvl 40-67</td><td>Badlands</td><td>Any</td><td>Any</td><td></td><td>Grounded</td></tr><tr><td><strong>Crabrawler</strong></td><td>Common</td><td>Lvl 9-34</td><td>Coast</td><td>Any</td><td>Any</td><td></td><td>Grounded</td></tr><tr><td><strong>Crabominable</strong></td><td>Uncommon</td><td>Lvl 29-48</td><td>Peak</td><td>Any</td><td>Any</td><td></td><td>Grounded</td></tr><tr><td><strong>Oricorio</strong></td><td>Uncommon</td><td>Lvl 18-33</td><td><p><strong>Baile</strong>: Plains, Hills. <strong>Pom-Pom</strong>: Mountain, Jungle </p><p><strong>Pa'u</strong>: Floral. </p><p><strong>Sensu</strong>: Forest.</p></td><td>Any</td><td>Clear</td><td></td><td></td></tr><tr><td><strong>Cutiefly</strong></td><td>Common</td><td>Lvl 5-30</td><td>Floral, Overworld</td><td>Day</td><td>Clear</td><td></td><td>Grounded</td></tr><tr><td><strong>Ribombee</strong></td><td>Common</td><td>Lvl 25-46</td><td>Floral, Overworld</td><td>Day</td><td>Clear</td><td></td><td>Grounded</td></tr><tr><td><strong>Rockruff</strong></td><td>Uncommon</td><td>Lvl 8-25</td><td>Mountain</td><td>Any</td><td>Any</td><td></td><td>Grounded</td></tr><tr><td><strong>Lycanroc</strong></td><td>Uncommon</td><td>N/A</td><td>Mountain</td><td>Any</td><td>Any</td><td>Each form will spawn at respective time frames</td><td>Grounded</td></tr><tr><td><strong>Wishiwashi</strong></td><td>Common</td><td>Lvl 1-18</td><td>Coast, Ocean</td><td>Any</td><td>Any</td><td></td><td>Fishing or Submerged</td></tr><tr><td><strong>Mareanie</strong></td><td>Common to Uncommon</td><td>Lvl 6-31</td><td>Coast, Warm Ocean</td><td>Any</td><td>Any</td><td></td><td>Fishing, Grounded or Seafloor</td></tr><tr><td><strong>Toxapex</strong></td><td>Common to Uncommon</td><td>Lvl 38-50</td><td>Coast, Warm Ocean</td><td>Any</td><td>Any</td><td></td><td>Fishing, Grounded or Seafloor</td></tr><tr><td><strong>Mudbray</strong></td><td>Common</td><td>Lvl 14-39</td><td>Badlands, Grassland</td><td>Any</td><td>Any</td><td></td><td>Grounded</td></tr><tr><td><strong>Mudsdale</strong></td><td>Common</td><td>Lvl 30-50</td><td>Badlands, Grassland</td><td>Any</td><td>Any</td><td></td><td>Grounded</td></tr><tr><td><strong>Dewpider</strong></td><td>Common to Uncommon</td><td>Lvl 2-27</td><td>Forest, Freshwater, Grassland, Jungle</td><td>Any</td><td>Any</td><td></td><td>Fishing, Grounded or Seafloor</td></tr><tr><td><strong>Araquanid</strong></td><td>Common to Uncommon</td><td>Lvl 22-45</td><td>Forest, Freshwater, Grassland, Jungle</td><td>Any</td><td>Any</td><td></td><td>Fishing, Grounded or Seafloor</td></tr><tr><td><strong>Fomantis</strong></td><td>Common</td><td>Lvl 1-25</td><td>Floral, Jungle</td><td>Any</td><td>Any</td><td></td><td>Grounded</td></tr><tr><td><strong>Lurantis</strong></td><td>Common</td><td>Lvl 34-48</td><td>Floral, Jungle</td><td>Any</td><td>Any</td><td></td><td>Grounded</td></tr><tr><td><strong>Morelull</strong></td><td>Common</td><td>Lvl 4-29</td><td>Jungle, Magical, Mushroom, Lush, Nether Fungus, Overworld</td><td>Any</td><td>Any</td><td></td><td>Grounded</td></tr><tr><td><strong>Shiinotic</strong></td><td>Common</td><td>Lvl 24-41</td><td>Jungle, Magical, Mushroom, Lush, Nether Fungus, Overworld</td><td>Any</td><td>Any</td><td></td><td>Grounded</td></tr><tr><td><strong>Salandit</strong></td><td>Common</td><td>Lvl 7-32</td><td>Badlands, Mountain, Nether Basalt, Nether Desert</td><td>Any</td><td>Any</td><td></td><td>Grounded</td></tr><tr><td><strong>Salazzle</strong></td><td>Common</td><td>Lvl 33-48</td><td>Badlands, Mountain, Nether Basalt, Nether Desert</td><td>Any</td><td>Any</td><td></td><td>Grounded</td></tr><tr><td><strong>Stufful</strong></td><td>Common</td><td>Lvl 9-34</td><td>Bamboo</td><td>Any</td><td>Any</td><td></td><td>Grounded</td></tr><tr><td><strong>Bewear</strong></td><td>Common</td><td>Lvl 27-50</td><td>Bamboo</td><td>Any</td><td>Any</td><td></td><td>Grounded</td></tr><tr><td><strong>Bounsweet</strong></td><td>Common</td><td>Lvl 1-21</td><td>Jungle</td><td>Any</td><td>Any</td><td></td><td>Grounded</td></tr><tr><td><strong>Steenee</strong></td><td>Common</td><td>Lvl 18-29</td><td>Jungle</td><td>Any</td><td>Any</td><td></td><td>Grounded</td></tr><tr><td><strong>Tsareena</strong></td><td>Common</td><td>Lvl 28-51</td><td>Jungle</td><td>Any</td><td>Any</td><td></td><td>Grounded</td></tr><tr><td><strong>Oranguru</strong></td><td>Rare</td><td>Lvl 45-70</td><td>Jungle</td><td>Any</td><td>Any</td><td></td><td>Grounded</td></tr><tr><td><strong>Passimian</strong></td><td>Rare</td><td>Lvl 45-70</td><td>Jungle</td><td>Any</td><td>Any</td><td></td><td>Grounded</td></tr><tr><td><strong>Comfey</strong></td><td>Uncommon to Rare</td><td>Lvl 24-49</td><td>Floral, Overworld</td><td>Any</td><td>Clear</td><td></td><td>Grounded</td></tr><tr><td><strong>Wimpod</strong></td><td>Common to Uncommon</td><td>Lvl 1-23</td><td>Coast, Overworld</td><td>Any</td><td>Any</td><td></td><td>Fishing, Grounded or Seafloor</td></tr><tr><td><strong>Golisopod</strong></td><td>Common to Uncommon</td><td>Lvl 30-53</td><td>Coast, Overworld</td><td>Any</td><td>Any</td><td></td><td>Fishing, Grounded or Seafloor</td></tr><tr><td><strong>Sandygast</strong></td><td>Common</td><td>Lvl 7-32</td><td>Beach</td><td>Any</td><td>Any</td><td></td><td>Grounded</td></tr><tr><td><strong>Palossand</strong></td><td>Common</td><td>Lvl 42-48</td><td>Beach</td><td>Any</td><td>Any</td><td></td><td>Grounded</td></tr><tr><td><strong>Pyukumuku</strong></td><td>Common to Uncommon</td><td>Lvl 16-41</td><td>Beach, Ocean, Warm Ocean</td><td>Any</td><td>Any</td><td></td><td>Fishing, Grounded or Seafloor</td></tr><tr><td><strong>Minior</strong></td><td>Uncommon to Rare</td><td>Lvl 25-28</td><td><p><strong>Red</strong>: Hills. </p><p><strong>Orange</strong>: Savanna. </p><p><strong>Yellow</strong>: Plains. </p><p><strong>Green</strong>: Jungle. </p><p><strong>Blue</strong>: Ocean, River. </p><p><strong>Indigo</strong>: Cold. </p><p><strong>Violet</strong>: End.</p></td><td><p><strong>All Colours</strong>: Night. </p><p><strong>Meteor</strong>: Day/</p></td><td>Clear</td><td>All core colours are Uncommon Spawns and spawns at Night. Meteor form is Rare and only spawns during Day.</td><td>Grounded</td></tr><tr><td><strong>Komala</strong></td><td>Common</td><td>Lvl 23-48</td><td>Savanna</td><td>Any</td><td>Any</td><td></td><td>Grounded</td></tr><tr><td><strong>Turtonator</strong></td><td>Uncommon</td><td>Lvl 24-49</td><td>Thermal, Nether Basalt</td><td>Any</td><td>Clear</td><td></td><td>Grounded</td></tr><tr><td><strong>Togedemaru</strong></td><td>Uncommon</td><td>Lvl 15-32</td><td>Badlands</td><td>Any</td><td>Any</td><td></td><td>Grounded</td></tr><tr><td><strong>Mimikyu</strong></td><td>Rare</td><td>Lvl 23-48</td><td>Spooky, Overworld</td><td>Any</td><td>Any</td><td></td><td>Grounded</td></tr><tr><td><strong>Bruxish</strong></td><td>Common to Uncommon</td><td>Lvl 23-48</td><td>Warm Ocean</td><td>Any</td><td>Any</td><td></td><td>Fishing or Submerged</td></tr><tr><td><strong>Drampa</strong></td><td>Uncommon</td><td>Lvl 24-49</td><td>Sky, Peak</td><td>Any</td><td>Any</td><td></td><td>Grounded</td></tr><tr><td><strong>Dhelmise</strong></td><td>Common, Rare</td><td>Lvl 27-52</td><td>Ocean</td><td>Any</td><td>Any</td><td></td><td>Fishing or Submerged</td></tr><tr><td><strong>Jangmo-o</strong></td><td>Rare to Ultra-rare</td><td>Lvl 5-30</td><td>Jungle</td><td>Any</td><td>Any</td><td></td><td>Grounded</td></tr><tr><td><strong>Hakamo-o</strong></td><td>Rare to Ultra-rare</td><td>Lvl 35-42</td><td>Jungle</td><td>Any</td><td>Any</td><td></td><td>Grounded</td></tr><tr><td><strong>Kommo-o</strong></td><td>Rare to Ultra-rare</td><td>Lvl 45-60</td><td>Jungle</td><td>Any</td><td>Any</td><td></td><td>Grounded</td></tr></tbody></table>


# Generation 8 Spawns

This page will go over all the non-legendary pokemon that are found within the eighth Generation of Pokemon games.

<table><thead><tr><th width="124">Pokemon</th><th width="98">Rarity </th><th width="82">Lvl Average</th><th width="114">Biome(s)</th><th width="67">Time</th><th width="77">Weather</th><th width="110">Spawn Info</th><th width="108">Context</th></tr></thead><tbody><tr><td><strong>Grookey</strong></td><td>Ultra-rare</td><td>Lvl 5-31</td><td>Jungle</td><td>Any</td><td>Any</td><td></td><td>Grounded</td></tr><tr><td><strong>Thwackey</strong></td><td>Ultra-rare</td><td>Lvl 16-42</td><td>Jungle</td><td>Any</td><td>Any</td><td></td><td>Grounded</td></tr><tr><td><strong>Rillaboom</strong></td><td>Ultra-rare</td><td>Lvl 35-53</td><td>Jungle</td><td>Any</td><td>Any</td><td></td><td>Grounded</td></tr><tr><td><strong>Scorbunny</strong></td><td>Ultra-rare</td><td>Lvl 5-31</td><td>Grassland, Tundra</td><td>Any</td><td>Any</td><td></td><td>Grounded</td></tr><tr><td><strong>Raboot</strong></td><td>Ultra-rare</td><td>Lvl 16-42</td><td>Grassland, Tundra</td><td>Any</td><td>Any</td><td></td><td>Grounded</td></tr><tr><td><strong>Cinderace</strong></td><td>Ultra-rare</td><td>Lvl 35-53</td><td>Grassland, Tundra</td><td>Any</td><td>Any</td><td></td><td>Grounded</td></tr><tr><td><strong>Sobble</strong></td><td>Ultra-rare</td><td>Lvl 5-31</td><td>Forest, Jungle, Swamp</td><td>Any</td><td>Any</td><td></td><td>Fishing, Grounded or Submerged</td></tr><tr><td><strong>Drizzile</strong></td><td>Ultra-rare</td><td>Lvl 16-42</td><td>Forest, Jungle, Swamp</td><td>Any</td><td>Any</td><td></td><td>Fishing, Grounded or Submerged</td></tr><tr><td><strong>Inteleon</strong></td><td>Ultra-rare</td><td>Lvl 35-53</td><td>Forest, Jungle, Swamp</td><td>Any</td><td>Any</td><td></td><td>Fishing, Grounded or Submerged</td></tr><tr><td><strong>Skwovet</strong></td><td>Common</td><td>Lvl 15-32</td><td>Forest</td><td>Any</td><td>Any</td><td></td><td>Grounded</td></tr><tr><td><strong>Greedent</strong></td><td>Uncommon</td><td>Lvl 24-60</td><td>Forest</td><td>Any</td><td>Any</td><td></td><td>Grounded</td></tr><tr><td><strong>Rookidee</strong></td><td>Common</td><td>Lvl 1-25</td><td>Hills, Spooky, Taiga</td><td>Day</td><td>Any</td><td></td><td>Grounded</td></tr><tr><td><strong>Corvisquire</strong></td><td>Common</td><td>Lvl 18-37</td><td>Hills, Spooky, Taiga</td><td>Day</td><td>Any</td><td></td><td>Grounded</td></tr><tr><td><strong>Corviknight</strong></td><td>Common</td><td>Lvl 38-50</td><td>Hills, Spooky, Taiga</td><td>Day</td><td>Any</td><td></td><td>Grounded</td></tr><tr><td><strong>Blipbug</strong></td><td>Common</td><td>Lvl 2-19</td><td>Plains, Forest</td><td>Day</td><td>Clear</td><td></td><td>Grounded</td></tr><tr><td><strong>Dottler</strong></td><td>Uncommon</td><td>Lvl 9-20</td><td>Plains, Forest</td><td>Day</td><td>Clear</td><td></td><td>Grounded</td></tr><tr><td><strong>Orbeetle</strong></td><td>Rare</td><td>Lvl 27-39</td><td>Temperature</td><td>Any</td><td>Clear</td><td></td><td>Grounded</td></tr><tr><td><strong>Nickit</strong></td><td>Common to Uncommon</td><td>Lvl 1-25</td><td>Forest, Taiga, Plains</td><td>Night</td><td>Any</td><td></td><td>Grounded</td></tr><tr><td><strong>Thievul</strong></td><td>Common to Uncommon</td><td>Lvl 18-46</td><td>Forest, Taiga, Plains</td><td>Night</td><td>Any</td><td></td><td>Grounded</td></tr><tr><td><strong>Gossifleur</strong></td><td>Common</td><td>Lvl 1-25</td><td>Floral</td><td>Any</td><td>Clear</td><td></td><td>Grounded</td></tr><tr><td><strong>Eldegoss</strong></td><td>Common</td><td>Lvl 20-46</td><td>Floral</td><td>Any</td><td>Clear</td><td></td><td>Grounded</td></tr><tr><td><strong>Wooloo</strong></td><td>Common</td><td>Lvl 2-27</td><td>Mountain, Plains</td><td>Any</td><td>Any</td><td></td><td>Grounded</td></tr><tr><td><strong>Dubwool</strong></td><td>Common</td><td>Lvl 24-49</td><td>Mountain, Plains</td><td>Any</td><td>Any</td><td></td><td>Grounded</td></tr><tr><td><strong>Chewtle</strong></td><td>Common</td><td>Lvl 3-28</td><td>Arid, Freshwater, Hills, Jungle, Temperate</td><td>Any</td><td>Any</td><td></td><td>Fishing, Grounded or Seafloor</td></tr><tr><td><strong>Drednaw</strong></td><td>Common</td><td>Lvl 22-49</td><td>Arid, Freshwater, Hills, Jungle, Temperate</td><td>Any</td><td>Any</td><td></td><td>Fishing, Grounded or Seafloor</td></tr><tr><td><strong>Yamper</strong></td><td>Common</td><td>Lvl 2-27</td><td>Overworld</td><td>Any</td><td>Any</td><td></td><td>Grounded</td></tr><tr><td><strong>Boltund</strong></td><td>Common</td><td>Lvl 25-49</td><td>Overworld</td><td>Any</td><td>Any</td><td></td><td>Grounded</td></tr><tr><td><strong>Rolycoly</strong></td><td>Common</td><td>Lvl 10-20</td><td>Mountain, Caves</td><td>Any</td><td>Any</td><td></td><td>Grounded</td></tr><tr><td><strong>Carkol</strong></td><td>Uncommon</td><td>Lvl 18-40</td><td>Mountain, Caves</td><td>Any</td><td>Any</td><td></td><td>Grounded</td></tr><tr><td><strong>Coalossal</strong></td><td>Rare</td><td>Lvl 34-65</td><td>Mountain, Caves</td><td>Any</td><td>Any</td><td></td><td>Grounded</td></tr><tr><td><strong>Applin</strong></td><td>Uncommon to Rare</td><td>Lvl 15-20</td><td>Forest, Floral</td><td>N/A</td><td>Clear</td><td></td><td>Grounded</td></tr><tr><td><strong>Flaaple</strong></td><td>N/A</td><td>N/A</td><td><strong>Does not Spawn</strong></td><td>N/A</td><td>N/A</td><td></td><td></td></tr><tr><td><strong>Appletun</strong></td><td>N/A</td><td>N/A</td><td><strong>Does not Spawn</strong></td><td>N/A</td><td>N/A</td><td></td><td></td></tr><tr><td><strong>Silicobra</strong></td><td>Uncommon</td><td>Lvl 10-25</td><td>Arid</td><td>Day</td><td>Any</td><td></td><td>Grounded</td></tr><tr><td><strong>Sandaconda</strong></td><td>Rare</td><td>Lvl 30-65</td><td>Arid</td><td>Day</td><td>Any</td><td></td><td>Grounded</td></tr><tr><td><strong>Cramorant</strong></td><td>Common to Uncommon</td><td>Lvl 23-48</td><td>Coast, Island, Ocean</td><td>Any</td><td>Any</td><td></td><td>Fishing, Grounded or Surface</td></tr><tr><td><strong>Arrokuda</strong></td><td>Common</td><td>Lvl 3-28</td><td>Coast, Ocean, Swamp</td><td>Any</td><td>Any</td><td></td><td>Fishing or Submerged</td></tr><tr><td><strong>Barraskewda</strong></td><td>Common</td><td>Lvl 26-49</td><td>Coast, Ocean, Swamp</td><td>Any</td><td>Any</td><td></td><td>Fishing or Submerged</td></tr><tr><td><strong>Toxel</strong></td><td>Uncommon</td><td>Lvl 15-40</td><td>Overworld</td><td>Any</td><td>Any</td><td>Only spawns next to Pasture</td><td>Grounded</td></tr><tr><td><strong>Toxtricity</strong></td><td>Common to Uncommon</td><td>Lvl 30-50</td><td>Overworld</td><td>Any</td><td>Any</td><td></td><td>Grounded</td></tr><tr><td><strong>Sizzlipede</strong></td><td>Common</td><td>Lvl 6-31</td><td>Badlands, Nether Basalt, Nether Wasteland</td><td>Any</td><td>Any</td><td></td><td>Grounded</td></tr><tr><td><strong>Centiskorch</strong></td><td>Common</td><td>Lvl 28-53</td><td>Badlands, Nether Basalt, Nether Wasteland</td><td>Any</td><td>Any</td><td></td><td></td></tr><tr><td><strong>Clobbopus</strong></td><td>Uncommon</td><td>Lvl 10-25</td><td>Beach, Ocean</td><td>Any</td><td>Any</td><td></td><td>Fishing, Grounded or Seafloor</td></tr><tr><td><strong>Grapploct</strong></td><td>Rare</td><td>Lvl 35-60</td><td>Beach, Ocean</td><td>Any</td><td>Any</td><td></td><td>Fishing, Grounded or Seafloor</td></tr><tr><td><strong>Sinistea</strong></td><td>Uncommon</td><td>Lvl 10-25</td><td>Spooky</td><td>Any</td><td>Any</td><td></td><td>Grounded</td></tr><tr><td><strong>Polteageist</strong></td><td>Uncommon</td><td>Lvl 26-32</td><td>Spooky</td><td>Any</td><td>Any</td><td></td><td>Grounded</td></tr><tr><td><strong>Hatenna</strong></td><td>Common to Uncommon</td><td>Lvl 2-27</td><td>Magical, Overworld</td><td>Any</td><td>Any</td><td></td><td>Grounded</td></tr><tr><td><strong>Hattrem</strong></td><td>Common to Uncommon</td><td>Lvl 32-37</td><td>Magical, Overworld</td><td>Any</td><td>Any</td><td></td><td>Grounded</td></tr><tr><td><strong>Hatterene</strong></td><td>Common to Uncommon</td><td>Lvl 42-51</td><td>Magical, Overworld</td><td>Any</td><td>Any</td><td></td><td>Grounded</td></tr><tr><td><strong>Impidimp</strong></td><td>Common</td><td>Lvl 2-27</td><td>Magical, Nether Warped</td><td>Any</td><td>Any</td><td></td><td>Grounded</td></tr><tr><td><strong>Morgrem</strong></td><td>Common</td><td>Lvl 32-37</td><td>Magical, Nether Warped</td><td>Any</td><td>Any</td><td></td><td>Grounded</td></tr><tr><td><strong>Grimmsnarl</strong></td><td>Common</td><td>Lvl 42-51</td><td>Magical, Nether Warped</td><td>Any</td><td>Any</td><td></td><td>Grounded</td></tr><tr><td><strong>Obstagoon</strong></td><td>Common</td><td>Lvl 35-52</td><td>Taiga</td><td>Any</td><td>Any</td><td></td><td>Grounded</td></tr><tr><td><strong>Perrserker</strong></td><td>Common</td><td>Lvl 28-44</td><td>Freezing, Taiga</td><td>Any</td><td>Any</td><td></td><td>Grounded</td></tr><tr><td><strong>Cursola</strong></td><td>Uncommon to Rare</td><td>Lvl 38-60</td><td>Ocean, Warm Ocean</td><td>Any</td><td>Any</td><td></td><td>Fishing, Grounded or Seafloor</td></tr><tr><td><strong>Sirfetch'd</strong></td><td>Rare</td><td>Lvl 33-51</td><td>Forest</td><td>Any</td><td>Any</td><td></td><td>Grounded</td></tr><tr><td><strong>Mr. Rime</strong></td><td>Rare</td><td>Lvl 42-50</td><td>Freezing, Cold Villages</td><td>Any</td><td>Any</td><td>Only spawns </td><td>Grounded</td></tr><tr><td><strong>Runerigus</strong></td><td>Rare</td><td>Lvl 34-65</td><td>Trail Ruins, Strongholds</td><td>Any</td><td>Any</td><td></td><td>Grounded</td></tr><tr><td><strong>Milcery</strong></td><td>Common to Uncommon</td><td>Lvl 2-27</td><td>Overworld</td><td>Any</td><td>Any</td><td></td><td>Grounded</td></tr><tr><td><strong>Alcremie</strong></td><td>Common to Uncommon</td><td>Lvl 22-50</td><td>Overworld</td><td>Any</td><td>Any</td><td></td><td>Grounded</td></tr><tr><td><strong>Falinks</strong></td><td>Uncommon</td><td>Lvl 22-47</td><td>Badlands, Nether</td><td>Any</td><td>Any</td><td></td><td>Grounded</td></tr><tr><td><strong>Pincurchin</strong></td><td>Common to Uncommon</td><td>Lvl 19-44</td><td>Coast, Ocean</td><td>Any</td><td>Any</td><td></td><td>Fishing or Seafloor</td></tr><tr><td><strong>Snom</strong></td><td>Common</td><td>Lvl 15-36</td><td>Tundra</td><td>Night</td><td>Any</td><td></td><td>Grounded</td></tr><tr><td><strong>Frosmoth</strong></td><td>Uncommon</td><td>Lvl 15-36</td><td>Tundra</td><td>Night</td><td>N/A</td><td></td><td>Grounded</td></tr><tr><td><strong>Stonjourner</strong></td><td>Common to Rare</td><td>Lvl 22-47</td><td>Plains, Overworld</td><td>Dusk</td><td>Any</td><td></td><td>Grounded</td></tr><tr><td><strong>Eiscue</strong></td><td>Common</td><td>Lvl 22-47</td><td>Frozen Ocean, Glacial, Tundra</td><td>Any</td><td>Any</td><td></td><td>Fishing, Grounded or Surface</td></tr><tr><td><strong>Indeedee</strong></td><td>Uncommon</td><td>Lvl 40-70</td><td>End</td><td>Any</td><td>Any</td><td></td><td>Grounded</td></tr><tr><td><strong>Morpeko</strong></td><td>Uncommon</td><td>Lvl 15-32</td><td>Spooky, Magical</td><td>Any</td><td>Any</td><td></td><td>Grounded</td></tr><tr><td><strong>Cufant</strong></td><td>Uncommon</td><td>Lvl 8-33</td><td>Badlands, Hills, Savanna</td><td>Any</td><td>Any</td><td></td><td>Grounded</td></tr><tr><td><strong>Copperajah</strong></td><td>Uncommon</td><td>Lvl 34-50</td><td>Badlands, Hills, Savanna</td><td>Any</td><td>Any</td><td></td><td>Grounded</td></tr><tr><td><strong>Dracozolt</strong></td><td>N/A</td><td>N/A</td><td><strong>DOES NOT SPAWN</strong> </td><td>N/A</td><td>N/A</td><td></td><td></td></tr><tr><td><strong>Arctozolt</strong></td><td>N/A</td><td>N/A</td><td><strong>DOES NOT SPAWN</strong> </td><td>N/A</td><td>N/A</td><td></td><td></td></tr><tr><td><strong>Dracovish</strong></td><td>N/A</td><td>N/A</td><td><strong>DOES NOT SPAWN</strong>  </td><td>N/A</td><td>N/A</td><td></td><td></td></tr><tr><td><strong>Arctovish</strong></td><td>N/A</td><td>N/A</td><td><strong>DOES NOT SPAWN</strong>  </td><td>N/A</td><td>N/A</td><td></td><td></td></tr><tr><td><strong>Duraludon</strong></td><td>Rare</td><td>Lvl 38-48</td><td>Snowy Taiga</td><td>Any</td><td>Any</td><td></td><td>Grounded</td></tr><tr><td><strong>Dreepy</strong></td><td>Ultra-rare</td><td>Lvl 2-27</td><td>Coast, Ocean</td><td>Any</td><td>Any</td><td></td><td>Fishing, Grounded or Surface</td></tr><tr><td><strong>Drakloak</strong></td><td>Ultra-rare</td><td>Lvl 50-55</td><td>Coast, Ocean</td><td>Any</td><td>Any</td><td></td><td>Fishing, Grounded or Surface</td></tr><tr><td><strong>Dragapult</strong></td><td>Ultra-rare</td><td>Lvl 60-65</td><td>Coast, Ocean</td><td>Any</td><td>Any</td><td></td><td>Fishing, Grounded or Surface</td></tr><tr><td><strong>Wyrdeer</strong></td><td>Common</td><td>Lvl 42-53</td><td>Snowy Forest, Snowy Taiga, Tundra</td><td>Any</td><td>Any</td><td></td><td>Grounded</td></tr><tr><td><strong>Kleavor</strong></td><td>Rare</td><td>Lvl 45-50</td><td>Forest, Hills</td><td>Any</td><td>Any</td><td></td><td>Grounded</td></tr><tr><td><strong>Ursaluna</strong></td><td>Common</td><td>Lvl 45-55</td><td>Forest, Mountain, Taiga</td><td>Any</td><td>Any</td><td></td><td>Grounded</td></tr><tr><td><strong>Basculegion</strong></td><td>Common</td><td>Lvl 41-53</td><td>Arid, Forest, Freshwater, Grassland, Jungle, Mountain, Snowy Forest, Taiga, Tundra</td><td>Any</td><td>Any</td><td></td><td>Fishing or Submerged</td></tr><tr><td><strong>Sneasler</strong></td><td>Uncommon</td><td>Lvl 38-51</td><td>Mountain</td><td>Any</td><td>Any</td><td></td><td>Grounded</td></tr><tr><td><strong>Overqwil</strong></td><td>Common to Uncommon</td><td>Lvl 39-51</td><td>Cold Ocean, Frozen Ocean, Cold</td><td>Any</td><td>Any</td><td></td><td>Fishing or Submerged</td></tr></tbody></table>


# Generation 9 Spawns

This page will go over all the non-legendary pokemon that are found within the nineth Generation of Pokemon games.

<table><thead><tr><th width="116">Pokemon</th><th width="100">Rarity </th><th width="90">Lvl Average</th><th width="112">Biome(s)</th><th width="73">Time</th><th width="77">Weather</th><th width="110">Spawn Info</th><th width="108">Context</th></tr></thead><tbody><tr><td><strong>Sprigatito</strong></td><td>Ultra-rare</td><td>Lvl 5-31</td><td>Floral, Magical</td><td>Any</td><td>Any</td><td></td><td>Grounded</td></tr><tr><td><strong>Floragato</strong></td><td>Ultra-rare</td><td>Lvl 16-41</td><td>Floral, Magical</td><td>Any</td><td>Any</td><td></td><td>Grounded</td></tr><tr><td><strong>Meowscarada</strong></td><td>Ultra-rare</td><td>Lvl 36-53</td><td>Floral, Magical</td><td>Any</td><td>Any</td><td></td><td>Grounded</td></tr><tr><td><strong>Fuecoco</strong></td><td>Ultra-rare</td><td>Lvl 5-31</td><td>Badlands, Nether Wasteland</td><td>Any</td><td>Any</td><td></td><td>Grounded</td></tr><tr><td><strong>Crocalor</strong></td><td>Ultra-rare</td><td>Lvl 16-41</td><td>Badlands, Nether Wasteland</td><td>Any</td><td>Any</td><td></td><td>Grounded</td></tr><tr><td><strong>Skeledirge</strong></td><td>Ultra-rare</td><td>Lvl 36-53</td><td>Badlands, Nether Wasteland</td><td>Any</td><td>Any</td><td></td><td>Grounded</td></tr><tr><td><strong>Quaxly</strong></td><td>Ultra-rare</td><td>Lvl 5-31</td><td>Forest, Freshwater, Grassland, Jungle</td><td>Any</td><td>Any</td><td></td><td>Fishing, Grounded or Submerged</td></tr><tr><td><strong>Quaxwell</strong></td><td>Ultra-rare</td><td>Lvl 16-41</td><td>Forest, Freshwater, Grassland, Jungle</td><td>Any</td><td>Any</td><td></td><td>Fishing, Grounded or Submerged</td></tr><tr><td><strong>Quaquaval</strong></td><td>Ultra-rare</td><td>Lvl 36-53</td><td>Forest, Freshwater, Grassland, Jungle</td><td>Any</td><td>Any</td><td></td><td>Fishing, Grounded or Submerged</td></tr><tr><td><strong>Lechonk</strong></td><td>Common</td><td>Lvl 1-25</td><td>Mushroom, Temperate, Swamp, Nether Crimson, Nether Fungus</td><td>Any</td><td>Any</td><td></td><td>Grounded</td></tr><tr><td><strong>Oinkologne</strong></td><td>Common</td><td>Lvl 18-49</td><td>Mushroom, Temperate, Swamp, Nether Crimson, Nether Fungus</td><td>Any</td><td>Any</td><td></td><td>Grounded</td></tr><tr><td><strong>Tarountula</strong></td><td>Common</td><td>Lvl 1-21</td><td>Forest, Spooky, Swamp</td><td>N/A</td><td>N/A</td><td>Does not spawn in Freezing biomes.</td><td>Grounded</td></tr><tr><td><strong>Spidops</strong></td><td>Common</td><td>Lvl 15-40</td><td>Forest, Spooky, Swamp</td><td>N/A</td><td>N/A</td><td>Does not spawn in Freezing biomes.</td><td>Grounded</td></tr><tr><td><strong>Nymble</strong></td><td>Common</td><td>Lvl 7-22</td><td>Forest, Plains</td><td>Any</td><td>Clear</td><td>Does not spawn in Freezing, Taiga or Tundra.</td><td>Grounded</td></tr><tr><td><strong>Lotix</strong></td><td>Uncommon</td><td>Lvl 35-45</td><td>Forest, Plains</td><td>Any</td><td>Clear</td><td>Does not spawn in Freezing, Taiga or Tundra.</td><td>Grounded</td></tr><tr><td><strong>Pawmi</strong></td><td>Uncommon</td><td>Lvl 7-17</td><td>Plains</td><td>Any</td><td>Clear</td><td></td><td>Grounded</td></tr><tr><td><strong>Pawmo</strong></td><td>Rare</td><td>Lvl 18-34</td><td>Plains</td><td>Any</td><td>Clear</td><td></td><td>Grounded</td></tr><tr><td><strong>Pawmot</strong></td><td>Rare</td><td>Lvl 30-45</td><td>Plains</td><td>Any</td><td>Clear</td><td></td><td>Grounded</td></tr><tr><td><strong>Tandemaus</strong></td><td>Common</td><td>Lvl 6-31</td><td>Temperate, Overworld</td><td>Any</td><td>Any</td><td></td><td>Grounded</td></tr><tr><td><strong>Maushold</strong></td><td>Common</td><td>Lvl 25-47</td><td>Temperate, Overworld</td><td>Any</td><td>Any</td><td></td><td>Grounded</td></tr><tr><td><strong>Fidough</strong></td><td>Common</td><td>Lvl 6-31</td><td>Overworld</td><td>Any</td><td>Any</td><td></td><td>Grounded</td></tr><tr><td><strong>Dachsbun</strong></td><td>Common</td><td>Lvl 26-48</td><td>Overworld</td><td>Any</td><td>Any</td><td></td><td>Grounded</td></tr><tr><td><strong>Smoliv</strong></td><td>Rare</td><td>Lvl 15-32</td><td>Plains, Forest</td><td>Day</td><td>Any</td><td></td><td>Grounded</td></tr><tr><td><strong>Dolliv</strong></td><td>Rare</td><td>Lvl 32-45</td><td>Plains, Forest</td><td>Day</td><td>Any</td><td></td><td>Grounded</td></tr><tr><td><strong>Arboliva</strong></td><td>Rare</td><td>Lvl 45-62</td><td>Plains, Forest</td><td>Day</td><td>Any</td><td></td><td>Grounded</td></tr><tr><td><strong>Squawkabilly</strong></td><td>Common</td><td>Lvl 17-42</td><td>Jungle, Savanna, Overworld</td><td>Any</td><td>Clear</td><td></td><td>Grounded</td></tr><tr><td><strong>Nacli</strong></td><td>Common</td><td>Lvl 3-28</td><td>Badlands, Caves</td><td>Any</td><td>Any</td><td></td><td>Grounded</td></tr><tr><td><strong>Naclstack</strong></td><td>Common</td><td>Lvl 24-36</td><td>Badlands, Caves</td><td>Any</td><td>Any</td><td></td><td>Grounded</td></tr><tr><td><strong>Garganacl</strong></td><td>Common</td><td>Lvl 38-50</td><td>Badlands, Caves</td><td>Any</td><td>Any</td><td></td><td>Grounded</td></tr><tr><td><strong>Charcadet</strong></td><td>Uncommon</td><td>Lvl 1-26</td><td>Nether, Overworld</td><td>Any</td><td>Any</td><td></td><td>Grounded</td></tr><tr><td><strong>Armarouge</strong></td><td>Uncommon</td><td>Lvl 21-53</td><td>Nether, Overworld</td><td>Any</td><td>Any</td><td></td><td>Grounded</td></tr><tr><td><strong>Ceruledge</strong></td><td>Uncommon</td><td>Lvl 21-53</td><td>Nether, Overworld</td><td>Any</td><td>Any</td><td></td><td>Grounded</td></tr><tr><td><strong>Tadbulb</strong></td><td>Common</td><td>Lvl 15-32</td><td>Swamp</td><td>Any</td><td>Clear</td><td>Can be caught fishing.</td><td>Grounded</td></tr><tr><td><strong>Bellibolt</strong></td><td>Uncommon</td><td>Lvl 30-55</td><td>Swamp</td><td>Any</td><td>Clear</td><td></td><td>Grounded</td></tr><tr><td><strong>Wattrel</strong></td><td>Common to Uncommon</td><td>Lvl 3-28</td><td>Coast, Island, Ocean</td><td>Any</td><td>Any</td><td></td><td>Fishing, Grounded or Surface</td></tr><tr><td><strong>Kilowattrel</strong></td><td>Common to Uncommon</td><td>Lvl 25-49</td><td>Coast, Island, Ocean</td><td>Any</td><td>Any</td><td></td><td>Fishing, Grounded or Surface</td></tr><tr><td><strong>Maschiff</strong></td><td>Common</td><td>Lvl 9-34</td><td>Overworld</td><td>Any</td><td>Any</td><td></td><td>Grounded</td></tr><tr><td><strong>Mabosstiff</strong></td><td>Common</td><td>Lvl 30-51</td><td>Overworld</td><td>Any</td><td>Any</td><td></td><td>Grounded</td></tr><tr><td><strong>Shroodle</strong></td><td>Common</td><td>Lvl 4-29</td><td>Jungle</td><td>Night</td><td>Any</td><td></td><td>Grounded</td></tr><tr><td><strong>Grafaiai</strong></td><td>Common</td><td>Lvl 28-49</td><td>Jungle</td><td>Night</td><td>Any</td><td></td><td>Grounded</td></tr><tr><td><strong>Bramblin</strong></td><td>Uncommon</td><td>Lvl 25-45</td><td>Arid</td><td>Any</td><td>Any</td><td></td><td>Grounded</td></tr><tr><td><strong>Brambleghast</strong></td><td>Rare</td><td>Lvl 45-65</td><td>Arid</td><td>Any</td><td>Any</td><td></td><td>Grounded</td></tr><tr><td><strong>Toadscool</strong></td><td>Uncommon</td><td>Lvl 11-30</td><td>Swamp</td><td>Any</td><td>Any</td><td></td><td>Grounded</td></tr><tr><td><strong>Toedscruel</strong></td><td>Uncommon</td><td>Lvl 30-42</td><td>Swamp</td><td>Any</td><td>Any</td><td></td><td>Grounded</td></tr><tr><td><strong>Klawf</strong></td><td>Uncommon</td><td>Lvl 20-45</td><td>Badlands</td><td>Any</td><td>Any</td><td></td><td>Grounded</td></tr><tr><td><strong>Capsakid</strong></td><td>Common</td><td>Lvl 4-25</td><td>Savanna</td><td>Any</td><td>Clear</td><td></td><td>Grounded</td></tr><tr><td><strong>Scovillain</strong></td><td>Uncommon</td><td>Lvl 26-60</td><td>Savanna</td><td>Any</td><td>Clear</td><td></td><td>Grounded</td></tr><tr><td><strong>Rellor</strong></td><td>Common</td><td>Lvl 2-27</td><td>Arid</td><td>Any</td><td>Any</td><td></td><td>Grounded</td></tr><tr><td><strong>Rabsca</strong></td><td>Common</td><td>Lvl 22-47</td><td>Arid</td><td>Any</td><td>Any</td><td></td><td>Grounded</td></tr><tr><td><strong>Flittle</strong></td><td>Uncommon</td><td>Lvl 1-26</td><td>Arid</td><td>Any</td><td>Any</td><td></td><td>Grounded</td></tr><tr><td><strong>Espathra</strong></td><td>Uncommon</td><td>Lvl 35-48</td><td>Arid</td><td>Any</td><td>Any</td><td></td><td>Grounded</td></tr><tr><td><strong>Tinkatink</strong></td><td>Common to Uncommon</td><td>Lvl 5-30</td><td>Overworld, Aether</td><td>Any</td><td>Any</td><td></td><td>Grounded</td></tr><tr><td><strong>Tinkatuff</strong></td><td>Common to Uncommon</td><td>Lvl 24-38</td><td>Overworld, Aether</td><td>Any</td><td>Any</td><td></td><td>Grounded</td></tr><tr><td><strong>Tinkaton</strong></td><td>Common to Uncommon</td><td>Lvl 38-51</td><td>Overworld, Aether</td><td>Any</td><td>Any</td><td></td><td>Grounded</td></tr><tr><td><strong>Wiglett</strong></td><td>Common</td><td>Lvl 1-25</td><td>Beach, Lukewarm Ocean, Warm Ocean</td><td>Any</td><td>Any</td><td></td><td>Grounded or Seafloor</td></tr><tr><td><strong>Wugtrio</strong></td><td>Common</td><td>Lvl 26-43</td><td>Beach, Lukewarm Ocean, Warm Ocean</td><td>Any</td><td>Any</td><td></td><td>Grounded or Seafloor</td></tr><tr><td><strong>Bombirdier</strong></td><td>Rare</td><td>Lvl 35-63</td><td>Beach, River [<em>Excl Freezing</em>]</td><td>Any</td><td>Any</td><td></td><td>Grounded</td></tr><tr><td><strong>Finizen</strong></td><td>Common to Uncommon</td><td>Lvl 7-32</td><td>Ocean</td><td>Any</td><td>Any</td><td></td><td>Fishing or Submerged</td></tr><tr><td><strong>Palafin</strong></td><td>Common to Uncommon</td><td>Lvl 38-46</td><td>Ocean</td><td>Any</td><td>Any</td><td></td><td>Fishing or Submerged</td></tr><tr><td><strong>Varoom</strong></td><td>Uncommon</td><td>Lvl 5-30</td><td>Badlands, Overworld</td><td>Any</td><td>Any</td><td></td><td>Grounded</td></tr><tr><td><strong>Revavroom</strong></td><td>Uncommon</td><td>Lvl 40-50</td><td>Badlands, Overworld</td><td>Any</td><td>Any</td><td></td><td>Grounded</td></tr><tr><td><strong>Cyclizar</strong></td><td>Rare</td><td>Lvl 30-55</td><td>Desert</td><td>Any</td><td>Any</td><td></td><td>Grounded</td></tr><tr><td><strong>Orthworm</strong></td><td>Rare</td><td>Lvl 24-45</td><td>Sandy</td><td>Any</td><td>Clear</td><td></td><td>Grounded</td></tr><tr><td><strong>Glimmet</strong></td><td>Common</td><td>Lvl 10-35</td><td>Overworld</td><td>Any</td><td>Any</td><td></td><td>Grounded</td></tr><tr><td><strong>Glimmora</strong></td><td>Common</td><td>Lvl 35-53</td><td>Overworld</td><td>Any</td><td>Any</td><td></td><td>Grounded</td></tr><tr><td><strong>Greavard</strong></td><td>Rare</td><td>Lvl 3-33</td><td>Spooky</td><td>Night</td><td>Clear</td><td></td><td>Grounded</td></tr><tr><td><strong>Houndstone</strong></td><td>Rare</td><td>Lvl 35-53</td><td>Spooky</td><td>Night</td><td>Clear</td><td></td><td>Grounded</td></tr><tr><td><strong>Flamigo</strong></td><td>Common to Uncommon</td><td>Lvl 25-50</td><td>Jungle, Savanna, Swamp</td><td>Any</td><td>Any</td><td></td><td>Grounded or Surface</td></tr><tr><td><strong>Cetoddle</strong></td><td>Uncommon</td><td>Lvl 8-33</td><td>Frozen Ocean, Glacial, Tundra</td><td>Any</td><td>Any</td><td></td><td>Grounded</td></tr><tr><td><strong>Cetitan</strong></td><td>Uncommon</td><td>Lvl 28-52</td><td>Frozen Ocean</td><td>Any</td><td>Any</td><td></td><td>Grounded</td></tr><tr><td><strong>Veluza</strong></td><td>Common to Uncommon</td><td>Lvl 23-48</td><td>Ocean, Overworld</td><td>Any</td><td>Any</td><td></td><td>Fishing or Submerged</td></tr><tr><td><strong>Dondozo</strong></td><td>Rare</td><td>Lvl 28-53</td><td>Forest, Jungle, Swamp</td><td>Any</td><td>Any</td><td></td><td>Fishing or Submerged</td></tr><tr><td><strong>Tatsugiri</strong></td><td>Rare</td><td>Lvl 23-48</td><td>Forest, Jungle, Swamp</td><td>Any</td><td>Any</td><td></td><td>Fishing, Grounded or Submerged</td></tr><tr><td><strong>Annihilape</strong></td><td>Common</td><td>Lvl 35-54</td><td>Hills, Jungle</td><td>Any</td><td>Any</td><td></td><td>Grounded</td></tr><tr><td><strong>Clodsire</strong></td><td>Common to Uncommon</td><td>Lvl 20-43</td><td>Savanna, Arid</td><td>Any</td><td>Any</td><td></td><td>Fishing, Grounded or Submerged</td></tr><tr><td><strong>Farigiraf</strong></td><td>Common</td><td>Lvl 32-45</td><td>Savanna</td><td>Any</td><td>Any</td><td></td><td>Grounded</td></tr><tr><td><strong>Dudunsparce</strong></td><td>Rare</td><td>Lvl 32-65</td><td>Mountain</td><td>Any</td><td>Any</td><td></td><td>Grounded</td></tr><tr><td><strong>Kingambit</strong></td><td>Ultra-Rare</td><td>Lvl 52-85</td><td>Bamboo Jungle</td><td>Any</td><td>Any</td><td></td><td>Grounded</td></tr><tr><td><strong>Frigibax</strong></td><td>Rare</td><td>Lvl 28-37</td><td>Glacial</td><td>Any</td><td>Clear</td><td></td><td>Grounded</td></tr><tr><td><strong>Arctibax</strong></td><td>Rare</td><td>Lvl 38-57</td><td>Glacial</td><td>Any</td><td>Clear</td><td></td><td>Grounded</td></tr><tr><td><strong>Baxcalibur</strong></td><td>Ultra-Rare</td><td>Lvl 58-76</td><td>Glacial</td><td>Any</td><td>Clear</td><td></td><td>Grounded</td></tr><tr><td><strong>Gimmighoul</strong></td><td>Common to Rare</td><td>Lvl 5-30</td><td>Overworld</td><td>Any</td><td>Any</td><td></td><td>Grounded</td></tr><tr><td><strong>Gholdengo</strong></td><td>N/A</td><td>N/A</td><td><strong>DOES NOT SPAWN</strong></td><td>N/A</td><td>N/A</td><td></td><td></td></tr><tr><td><strong>Dipplin</strong></td><td>N/A</td><td>N/A</td><td><strong>DOES NOT SPAWN</strong></td><td>N/A</td><td>N/A</td><td></td><td></td></tr><tr><td><strong>Poltchageist</strong></td><td>Rare</td><td>Lvl 15-48</td><td>Spooky</td><td>Any</td><td>Any</td><td></td><td>Grounded</td></tr><tr><td><strong>Sinishtcha</strong></td><td>Uncommon</td><td>Lvl 26-51</td><td>Arid, Bamboo, Cherry Blossom, Forest, Island, Jungle, Ocean, Swamp, Thermal, Volcanic</td><td>Any</td><td>Any</td><td></td><td>Grounded</td></tr><tr><td><strong>Archaludon</strong></td><td>N/A</td><td>N/A</td><td><strong>DOES NOT SPAWN</strong></td><td>N/A</td><td>N/A</td><td></td><td></td></tr><tr><td><strong>Hydrapple</strong></td><td>N/A</td><td>N/A</td><td><strong>DOES NOT SPAWN</strong></td><td>N/A</td><td>N/A</td><td></td><td></td></tr></tbody></table>


# Legendary and Mythicals Spawns Info

Here you will find how to find all of the Legendaries and Mythicals on our server letting you know how exactly to obtain them and if they're available yet.

**Contents**

1. [How do Legend and Mythical spawns work?](#how-do-legend-and-mythical-spawns-work)
   1. [Biomes Information](#biomes-information)
2. [Mythical Spawns](#mythical-spawns)
3. [Legendary Spawns](#legendary-spawns)

***

### How do Legend and Mythical spawns work?

Legendary and Mythical Pokemon do not spawn like standard Pokémon, as they are the rarest Pokemon obtainable available on the server. Every so often, a random Legendary or Mythical Pokemon will spawn, and its appearance will be announced in Public Chat, including the Pokemon and the biome it has spawned in. The announcement will not reveal which player it has spawned near or its exact location, but if you are not in the correct biome or nearby, it will not appear for you.

<figure><img src="/files/TXd8F19xEAqZwoidu15s" alt=""><figcaption><p>Chat Notification of a Legendary that's Spawned</p></figcaption></figure>

Legendaries always spawn next to a player rather than randomly in the wild. Once a Legendary has been caught, defeated, or despawned then this will also be announced within the public chat. Legendaries and Mythicals also **do not spawn within personal realms**, so if you wish to obtain one then you need to be within the wilds.

{% hint style="success" %}
Legends that spawn naturally have a small chance to be shiny, currently set to 3%.
{% endhint %}

There is no fixed timer for Legendary or Mythical spawns. However, higher player counts increase the overall spawn frequency. Be sure to keep an eye on Discord for special events, such as weekends with double Legendary spawns, which offer the best opportunity to encounter a Legendary or Mythical Pokemon. Legendaries **will spawn between 10 to 40 blocks from your current position** of it's landed on you.

{% hint style="warning" %}
**If you are marked as AFK, no legends will spawn on you** even while you are within Wilds. Using AFK Machines, Boats, Water, Minecarts etc won't disable this AFK Tracker. If you find methods that do bypass this report it to staff as abusing it yourself will result in a form of **ban and restrictions added to playtime rewards** given.
{% endhint %}

Although the spawn tick is random, a Legendary or Mythical Pokemon’s ability to spawn depends on your current biome and the time of day when the tick occurs. Certain Pokemon require specific conditions, such as clear weather, being underground, or being underwater. When a Vote Party occurs as well, it'll automatically spawn a Legendary on a random player. Be sure to review the information below carefully so you know exactly where and when to position yourself for the best chance of encountering one.

#### Biomes Information

All of the Legends and Mythicals listed will show each of the biome(s) you can obtain the Pokemon. If you wish to know the specific biomes please use the following link which goes over it all.&#x20;

* [Biomes Information](/cobblemon-wiki/general-pokemon-spawns/biomes-information)

### Mythical Spawns

<table><thead><tr><th width="126">Mythicals</th><th width="111">Is it Avilable?</th><th width="150.75">Biome(s)</th><th width="116.5">Time</th><th width="128">Weather</th></tr></thead><tbody><tr><td><strong>Mew</strong></td><td>Yes</td><td>Bamboo, Tropical Island</td><td>Any</td><td>Clear</td></tr><tr><td><strong>Celebi</strong></td><td>Yes</td><td>Magical</td><td>Dawn</td><td>Clear</td></tr><tr><td><strong>Jirachi</strong></td><td>Yes</td><td>Forest</td><td>Midnight</td><td>Clear</td></tr><tr><td><strong>Deoxys</strong></td><td>Yes</td><td>End</td><td>Day</td><td>Any</td></tr><tr><td><strong>Phione</strong></td><td>Yes</td><td><strong>Does not Spawn</strong></td><td>N/A</td><td>N/A</td></tr><tr><td><strong>Manaphy</strong></td><td>Yes</td><td>Ocean</td><td>Day</td><td>Underwater</td></tr><tr><td><strong>Darkrai</strong></td><td>Yes</td><td>Spooky</td><td>Midnight</td><td>Clear</td></tr><tr><td><strong>Shaymin</strong></td><td>Yes</td><td>Floral</td><td>Morning</td><td>Clear</td></tr><tr><td><strong>Arceus</strong></td><td>Yes</td><td>Peak</td><td>Noon</td><td>Any</td></tr><tr><td><strong>Victini</strong></td><td>Yes</td><td>Savanna</td><td>Afternoon</td><td>Clear</td></tr><tr><td><strong>Genesect</strong></td><td>Yes</td><td>Mountains</td><td>Night</td><td>Any</td></tr><tr><td><strong>Meloetta</strong></td><td>Yes</td><td>Floral</td><td>Afternoon</td><td>Clear</td></tr><tr><td><strong>Keldeo</strong></td><td>Yes</td><td>Freshwater</td><td>Morning</td><td>Any</td></tr><tr><td><strong>Diancie</strong></td><td>Yes</td><td>Arid</td><td>Day</td><td>Underground</td></tr><tr><td><strong>Hoopa</strong></td><td>Yes</td><td>Arid</td><td>Night</td><td>Any</td></tr><tr><td><strong>Volcanion</strong></td><td>Yes</td><td>Nether Toxic, Nether Crimson, Nether Warped</td><td>Any</td><td>Underground</td></tr><tr><td><strong>Magearna</strong></td><td>Yes</td><td>Island</td><td>Any</td><td>Any</td></tr><tr><td><strong>Marshadow</strong></td><td>Yes</td><td>Island</td><td>Night</td><td>Any</td></tr><tr><td><strong>Zeraora</strong></td><td>Yes</td><td>Savanna</td><td>Morning</td><td>Any</td></tr><tr><td><strong>Meltan</strong></td><td>Yes</td><td>Overworld</td><td>Dawn, Dusk</td><td>Underground</td></tr><tr><td><strong>Melmetal</strong></td><td>Yes</td><td>N/A</td><td>N/A</td><td>N/A</td></tr><tr><td><strong>Zarude</strong></td><td>Yes</td><td>Jungle</td><td>Dawn, Dusk</td><td>Any</td></tr><tr><td><strong>Pecharunt</strong></td><td>Yes</td><td>Mushroom</td><td>Dawn, Dusk</td><td>Underground</td></tr></tbody></table>

### Legendary Spawns

<table><thead><tr><th width="139.25">Legendaries</th><th width="112">Is it Avilable?</th><th width="194.75">Biome(s)</th><th width="121.5">Time</th><th width="125">Weather</th></tr></thead><tbody><tr><td><strong>Articuno</strong></td><td>Yes</td><td><strong>Normal</strong>: Glacial, Snowy Taiga, Snowy Forest<br><strong>Galarian</strong>: Glacial, Snowy Taiga, Snowy Forest</td><td><strong>Normal</strong>: Day<br><strong>Galarian</strong>: Night</td><td>Any</td></tr><tr><td><strong>Zapdos</strong></td><td>Yes</td><td><strong>Normal</strong>: Savanna, Badlands, Plateaus<br><strong>Galarian</strong>: Savanna, Badlands, Plateaus</td><td><strong>Normal</strong>: Day<br><strong>Galarian</strong>: Night</td><td>Any</td></tr><tr><td><strong>Moltres</strong></td><td>Yes</td><td><strong>Normal</strong>: Desert<br><strong>Galarian</strong>: Desert</td><td><strong>Normal</strong>: Day<br><strong>Galarian</strong>: Night</td><td>Any</td></tr><tr><td><strong>Mewtwo</strong></td><td>Yes</td><td>Deep Dark</td><td>Any</td><td>Underground</td></tr><tr><td><strong>Raikou</strong></td><td>Yes</td><td>Savanna</td><td>Afternoon</td><td>Any</td></tr><tr><td><strong>Entei</strong></td><td>Yes</td><td>Mountains</td><td>Morning</td><td>Any</td></tr><tr><td><strong>Suicune</strong></td><td>Yes</td><td>Beach</td><td>Noon</td><td>Any</td></tr><tr><td><strong>Lugia</strong></td><td>Yes</td><td>Temperature Ocean</td><td>Noon</td><td>Underwater</td></tr><tr><td><strong>Ho-oh</strong></td><td>Yes</td><td>Highlands</td><td>Noon</td><td>Any</td></tr><tr><td><strong>Regirock</strong></td><td>Yes</td><td>Badlands</td><td>Morning</td><td>Underground</td></tr><tr><td><strong>Regice</strong></td><td>Yes</td><td>Freezing</td><td>Night</td><td>Underground</td></tr><tr><td><strong>Registeel</strong></td><td>Yes</td><td>Mountains</td><td>Afternoon</td><td>Underground</td></tr><tr><td><strong>Latias</strong></td><td>Yes</td><td>Beach</td><td>Afternoon</td><td>Clear</td></tr><tr><td><strong>Latios</strong></td><td>Yes</td><td>Beach</td><td>Morning</td><td>Clear</td></tr><tr><td><strong>Kyogre</strong></td><td>Yes</td><td>Deep Ocean</td><td>Night</td><td>Underwater</td></tr><tr><td><strong>Groudon</strong></td><td>Yes</td><td>Sandy</td><td>Day</td><td>Clear</td></tr><tr><td><strong>Rayquaza</strong></td><td>Yes</td><td>Sky, Mountains</td><td>Dawn, Dusk</td><td>Any</td></tr><tr><td><strong>Uxie</strong></td><td>Yes</td><td>Coast</td><td>Dawn</td><td>Any</td></tr><tr><td><strong>Mesprit</strong></td><td>Yes</td><td>Coast</td><td>Noon</td><td>Any</td></tr><tr><td><strong>Azelf</strong></td><td>Yes</td><td>Coast</td><td>Dusk</td><td>Any</td></tr><tr><td><strong>Dialga</strong></td><td>Yes</td><td>Peak</td><td>Morning</td><td>Any</td></tr><tr><td><strong>Palkia</strong></td><td>Yes</td><td>Peak</td><td>Afternoon</td><td>Any</td></tr><tr><td><strong>Giratina</strong></td><td>Yes</td><td>Peak</td><td>Night</td><td>Any</td></tr><tr><td><strong>Heatran</strong></td><td>Yes</td><td>Wasteland, Mountains</td><td>Any</td><td>Underground</td></tr><tr><td><strong>Regigigas</strong></td><td>Yes</td><td>Caves</td><td>Dawn, Dusk</td><td>Underground</td></tr><tr><td><strong>Cresselia</strong></td><td>Yes</td><td>Magical</td><td>Midnight</td><td>Clear</td></tr><tr><td><strong>Tornadus</strong></td><td>Yes</td><td>Grassland</td><td>Afternoon</td><td>Rain</td></tr><tr><td><strong>Thundurus</strong></td><td>Yes</td><td>Grassland</td><td>Morning</td><td>Storm</td></tr><tr><td><strong>Landorus</strong></td><td>Yes</td><td>Plateau</td><td>Afternoon</td><td>Rain</td></tr><tr><td><strong>Reshiram</strong></td><td>Yes</td><td>Taiga</td><td>Morning</td><td>Clear</td></tr><tr><td><strong>Zekrom</strong></td><td>Yes</td><td>Taiga</td><td>Afternoon</td><td>Any</td></tr><tr><td><strong>Kyurem</strong></td><td>Yes</td><td>Tundra</td><td>Dawn, Dusk</td><td>Underground</td></tr><tr><td><strong>Cobalion</strong></td><td>Yes</td><td>Forest</td><td>Night</td><td>Underground</td></tr><tr><td><strong>Terrakion</strong></td><td>Yes</td><td>Dripstone</td><td>Afternoon</td><td>Underground</td></tr><tr><td><strong>Virizion</strong></td><td>Yes</td><td>Lush</td><td>Morning</td><td>Underground</td></tr><tr><td><strong>Xerneas</strong></td><td>Yes</td><td>Magical</td><td>Day</td><td>Any</td></tr><tr><td><strong>Yveltal</strong></td><td>Yes</td><td>Spooky</td><td>Night</td><td>Any</td></tr><tr><td><strong>Zygarde</strong></td><td>Yes</td><td>Arid</td><td>Dawn, Dusk</td><td>Underground</td></tr><tr><td><strong>Hoopa</strong></td><td>Yes</td><td>Arid</td><td>Night</td><td>Any</td></tr><tr><td><strong>Tapu Koko</strong> </td><td>Yes</td><td>Jungle</td><td>Afternoon</td><td>Any</td></tr><tr><td><strong>Tapu Lele</strong></td><td>Yes</td><td>Jungle</td><td>Morning</td><td>Any</td></tr><tr><td><strong>Tapu Bulu</strong></td><td>Yes</td><td>Jungle</td><td>Night</td><td>Any</td></tr><tr><td><strong>Tapu Fini</strong></td><td>Yes</td><td>Jungle</td><td>Day</td><td>Any</td></tr><tr><td><strong>Cosmog</strong></td><td>Yes</td><td>Floral</td><td>Dawn, Dusk</td><td>Clear</td></tr><tr><td><strong>Cosmoem</strong></td><td>Yes</td><td><strong>Does not Spawn</strong></td><td>N/A</td><td>N/A</td></tr><tr><td><strong>Solgaleo</strong></td><td>Yes</td><td><strong>Does not Spawn</strong></td><td>N/A</td><td>N/A</td></tr><tr><td><strong>Lunala</strong></td><td>Yes</td><td><strong>Does not Spawn</strong></td><td>N/A</td><td>N/A</td></tr><tr><td><strong>Necrozma</strong></td><td>Yes</td><td>Spooky</td><td>Night</td><td>Any</td></tr><tr><td><strong>Type-Null</strong></td><td>Yes</td><td>Swamp</td><td>Afternoon</td><td>Any</td></tr><tr><td><strong>Silvally</strong></td><td>Yes</td><td><strong>Does not Spawn</strong></td><td>N/A</td><td>N/A</td></tr><tr><td><strong>Zacian</strong></td><td>Yes</td><td>Forest</td><td>Morning</td><td>Clear</td></tr><tr><td><strong>Zamazenta</strong></td><td>Yes</td><td>Forest</td><td>Afternoon</td><td>Clear</td></tr><tr><td><strong>Eternatus</strong></td><td>Yes</td><td>End, Space</td><td>Night</td><td>Any</td></tr><tr><td><strong>Kubfu</strong></td><td>Yes</td><td>Plateau</td><td>Dawn, Dusk</td><td>Any</td></tr><tr><td><strong>Urshifu</strong></td><td>Yes</td><td><strong>Does not Spawn</strong></td><td>N/A</td><td>N/A</td></tr><tr><td><strong>Regieleki</strong></td><td>Yes</td><td>Savanna</td><td>Morning</td><td>Underground</td></tr><tr><td><strong>Regidrago</strong></td><td>Yes</td><td>Deep Dark</td><td>Afternoon</td><td>Underground</td></tr><tr><td><strong>Galar-Articuno</strong></td><td>Yes</td><td>Glacial, Snowy Taiga, Snowy Forest</td><td>Night</td><td>Any</td></tr><tr><td><strong>Galar-Zapdos</strong></td><td>Yes</td><td>Plateau, Savanna, Badlands</td><td>Night</td><td>Any</td></tr><tr><td><strong>Galar-Moltres</strong></td><td>Yes</td><td>Desert</td><td>Night</td><td>Any</td></tr><tr><td><strong>Glastrier</strong></td><td>Yes</td><td>Glacial</td><td>Day</td><td>Any</td></tr><tr><td><strong>Spectrier</strong></td><td>Yes</td><td>Swamps</td><td>Night</td><td>Any</td></tr><tr><td><strong>Calyrex</strong></td><td>Yes</td><td>Snowy Forest, Snowy Taiga</td><td>Day</td><td>Clear</td></tr><tr><td><strong>Enamorous</strong></td><td>Yes</td><td>Plateau</td><td>Morning</td><td>Rain</td></tr><tr><td><strong>Koraidon</strong></td><td>Yes</td><td>Hills</td><td>Afternoon</td><td>Any</td></tr><tr><td><strong>Miraidon</strong></td><td>Yes</td><td>Hills</td><td>Morning</td><td>Any</td></tr><tr><td><strong>Chien-Pao</strong></td><td>Yes</td><td>Snowy Forest, Snowy Taiga</td><td>Night</td><td>Clear</td></tr><tr><td><strong>Ting-Lu</strong></td><td>Yes</td><td>Plateau</td><td>Night</td><td>Clear</td></tr><tr><td><strong>Wo-Chien</strong></td><td>Yes</td><td>Forest</td><td>Night</td><td>Clear</td></tr><tr><td><strong>Chi-Yu</strong></td><td>Yes</td><td>Badlands</td><td>Night</td><td>Clear</td></tr><tr><td><strong>Okidogi</strong></td><td>Yes</td><td>Temperate</td><td>Morning</td><td>Any</td></tr><tr><td><strong>Munkidori</strong></td><td>Yes</td><td>Temperate</td><td>Night</td><td>Any</td></tr><tr><td><strong>Fezandipiti</strong></td><td>Yes</td><td>Temperate</td><td>Afternoon</td><td>Any</td></tr><tr><td><strong>Ogerpon</strong></td><td>Yes</td><td>Forest, Lush</td><td>Night</td><td>Any</td></tr><tr><td><strong>Terapagos</strong></td><td>Yes</td><td>Beach</td><td>Dawn, Dusk</td><td>Any</td></tr></tbody></table>


# Ultra Beasts and Paradox Spawns Info

Here you will find how to find all of the Ultra Beasts and Mythicals on our server letting you know how exactly to obtain them and if they're available yet.

**Contents**

1. [How do Ultra Beasts and Paradox spawns work?](#how-do-ultra-beasts-and-paradox-spawns-work)
   1. [Biomes Information](#biomes-information)
2. [Ultra Beast Spawns](#ultra-beast-spawns)
3. [Paradox Pokemon Spawns](#paradox-pokemon-spawns)

***

### How do Ultra Beasts and Paradox spawns work?

Ultra Beasts and Paradox Pokemon function differently from Legendaries and also differ from each other.

**Ultra Beasts** do not spawn on the server under any circumstances. For now, the only ways to obtain them are through Crates, Pokedex Rewards, purchasing or trading with other players, or via rank related benefits.

**Paradox Pokemon**, on the other hand, spawn similarly to standard Pokemon. They appear naturally when you are in the correct biome and meet the required spawn conditions, without relying on the random tick system used for Legendaries and Mythicals. Paradox Pokémon can also spawn within personal realms, however they are significantly rarer there than in the overworld. You may also obtain a Paradox Pokemon from Random Pokemon or Shiny rewards from crates, ranks, hunts and so on.

#### Biomes Information

All of the Pokemon listed will show each of the biome(s) you can obtain the Pokemon. If you wish to know the specific biomes please use the following link which goes over it all.&#x20;

* [Biomes Information](/cobblemon-wiki/general-pokemon-spawns/biomes-information)

#### Ultra Beast Spawns

<table><thead><tr><th width="144">Ultra Beast</th><th width="110">Is it Avilable?</th><th width="173.5">Biome(s)</th><th width="106">Time</th><th width="152">Weather/Spawn Info</th></tr></thead><tbody><tr><td><strong>Nihilego</strong></td><td>Yes</td><td><strong>DOES NOT SPAWN</strong></td><td>N/A</td><td>N/A</td></tr><tr><td><strong>Buzzwole</strong></td><td>Yes</td><td><strong>DOES NOT SPAWN</strong></td><td>N/A</td><td>N/A</td></tr><tr><td><strong>Celesteela</strong></td><td>Yes</td><td><strong>DOES NOT SPAWN</strong></td><td>N/A</td><td>N/A</td></tr><tr><td><strong>Pheromosa</strong></td><td>Yes</td><td><strong>DOES NOT SPAWN</strong></td><td>N/A</td><td>N/A</td></tr><tr><td><strong>Xurkitree</strong></td><td>Yes</td><td><strong>DOES NOT SPAWN</strong></td><td>N/A</td><td>N/A</td></tr><tr><td><strong>Kartana</strong></td><td>Yes</td><td><strong>DOES NOT SPAWN</strong></td><td>N/A</td><td>N/A</td></tr><tr><td><strong>Guzzlord</strong></td><td>Yes</td><td><strong>DOES NOT SPAWN</strong></td><td>N/A</td><td>N/A</td></tr><tr><td><strong>Poipole</strong></td><td>Yes</td><td><strong>DOES NOT SPAWN</strong></td><td>N/A</td><td>N/A</td></tr><tr><td><strong>Naganadel</strong></td><td>Yes</td><td><strong>DOES NOT SPAWN</strong></td><td>N/A</td><td>N/A</td></tr><tr><td><strong>Blacephalon</strong></td><td>Yes</td><td><strong>DOES NOT SPAWN</strong></td><td>N/A</td><td>N/A</td></tr><tr><td><strong>Stakataka</strong></td><td>Yes</td><td><strong>DOES NOT SPAWN</strong></td><td>N/A</td><td>N/A</td></tr></tbody></table>

#### Paradox Pokemon Spawns

All Paradox that spawn will be between the levels 40 to 75.

<table><thead><tr><th width="149.25">Paradox Pokemon</th><th width="117.75">Is it Available?</th><th width="158">Biome(s)</th><th width="123">Time</th><th width="165.5">Weather/Spawn Info</th></tr></thead><tbody><tr><td><strong>Great Tusk</strong></td><td>Yes</td><td>Arid</td><td>Day</td><td>N/A</td></tr><tr><td><strong>Scream Tail</strong></td><td>Yes</td><td>Floral</td><td>Day</td><td>N/A</td></tr><tr><td><strong>Brute Bonnet</strong></td><td>Yes</td><td>Jungle</td><td>Day</td><td>N/A</td></tr><tr><td><strong>Flutter Mane</strong></td><td>Yes</td><td>Spooky, Swamp</td><td>Day</td><td>N/A</td></tr><tr><td><strong>Slither Wing</strong></td><td>Yes</td><td>Desert</td><td>Day</td><td>N/A</td></tr><tr><td><strong>Sandy Shocks</strong></td><td>Yes</td><td>Mountains</td><td>Day</td><td>N/A</td></tr><tr><td><strong>Roaring Moon</strong></td><td>Yes</td><td>Mountains, Dripstone</td><td>Day</td><td>N/A</td></tr><tr><td><strong>Walking Wake</strong></td><td>Yes</td><td>Mountains</td><td>Day</td><td>Rain</td></tr><tr><td><strong>Raging Bolt</strong></td><td>Yes</td><td>Coast</td><td>Day</td><td>Rain or Thunder</td></tr><tr><td><strong>Gouging Fire</strong></td><td>Yes</td><td>Plains</td><td>Day</td><td>Rain</td></tr><tr><td><strong>Iron Treads</strong></td><td>Yes</td><td>Mountains</td><td>Night</td><td>N/A</td></tr><tr><td><strong>Iron Bundle</strong></td><td>Yes</td><td>Freezing</td><td>Night</td><td>N/A</td></tr><tr><td><strong>Iron Hands</strong></td><td>Yes</td><td>Mountains, End</td><td>Night</td><td>N/A</td></tr><tr><td><strong>Iron Jugulis</strong></td><td>Yes</td><td>Deep Dark</td><td>Night</td><td>N/A</td></tr><tr><td><strong>Iron Moth</strong></td><td>Yes</td><td>Swamp</td><td>Night</td><td>N/A</td></tr><tr><td><strong>Iron Thorns</strong></td><td>Yes</td><td>Mountains</td><td>Night</td><td>Spawns near Lightning Rod</td></tr><tr><td><strong>Iron Valiant</strong></td><td>Yes</td><td>Plains, Dripstone</td><td>Night</td><td>Spawns near Lightning Rod</td></tr><tr><td><strong>Iron Leaves</strong></td><td>Yes</td><td>Forest</td><td>Night</td><td>N/A</td></tr><tr><td><strong>Iron Crown</strong></td><td>Yes</td><td>Forest</td><td>Night</td><td>N/A</td></tr><tr><td><strong>Iron Boulder</strong></td><td>Yes</td><td>Mountains</td><td>Night</td><td>N/A</td></tr></tbody></table>


# Server Rules

Here you'll find all the rules that apply when playing Cobblemon on our server.

Breaking any of these rules listed below on the server will result in some form of punishment given from warnings to permanent bans.

<table><thead><tr><th width="91.666748046875">Number</th><th width="656.9998779296875">Rule</th></tr></thead><tbody><tr><td><strong>Rule 1.</strong></td><td>Keep chat PG-13 - no inappropriate roleplaying, no swearing, use common sense and don't disrupt other players.</td></tr><tr><td><strong>Rule 2.</strong></td><td>Do not advertise, spam, use racial slurs, discuss politics/religion.</td></tr><tr><td><strong>Rule 3.</strong></td><td>Do not grief/steal/raid build within realms without permission from the owner. Builds within wilds are not protected and will be deleted when wilds reset.</td></tr><tr><td><strong>Rule 4.</strong></td><td>Do not use any harmful / objectionable language towards any players or staff.</td></tr><tr><td><strong>Rule 5.</strong></td><td>Do not use any mods/ resource packs or clients which grant an unfair advantage.</td></tr><tr><td><strong>Rule 6.</strong></td><td>The use of Macro's (regardless if with a client/mod or not) are not allowed on the server, especially within AFK farms.</td></tr><tr><td><strong>Rule 7.</strong></td><td>While AFKing is allowed, do not circumvent AFK detection by using objects or methods that make you appear active while away from your keyboard.</td></tr><tr><td><strong>Rule 8.</strong></td><td>Do not cheat or exploit server bugs, instead report them on discord.</td></tr><tr><td><strong>Rule 9.</strong></td><td>Do not scam players on the server under any capacity.</td></tr><tr><td><strong>Rule 10.</strong></td><td>No inappropriate names/skins/text/builds/signs for users/pokemon/items &#x26; no nickname impersonations.</td></tr><tr><td><strong>Rule 11.</strong></td><td>Any form of wagers, casino's or luck based games with prizes are not allowed under any capacity.</td></tr><tr><td><strong>Rule 12.</strong></td><td>No entry fee's for unofficial Gyms or Tournaments especially when giving out prizes.</td></tr><tr><td><strong>Rule 13.</strong></td><td>Do not beg players or staff for Items/Pokemon/Tokens/Etc.</td></tr><tr><td><strong>Rule 14.</strong></td><td>Selling/Buying Items/Pokemon/Tokens/Etc with money or gift cards outside the MMO Realms Store is strictly forbidden.</td></tr><tr><td><strong>Rule 15.</strong></td><td>Do not sell teleport requests or sell shiny/ub/legendaries catches.</td></tr><tr><td><strong>Rule 16.</strong></td><td>Using 'alts' or alternative accounts for personal advantage is forbidden.</td></tr><tr><td><strong>Rule 17.</strong></td><td>Do not discuss punishments within chat. If you wish to report a player then please make a ticket within the Discord server.</td></tr><tr><td><strong>Rule 18.</strong></td><td>Do not avoid the chat filter in place by swearing or using any words that's currently blocked.</td></tr><tr><td><strong>Rule 19.</strong></td><td>Do not use abbreviations which includes words or swears blocked by the censor. If you can't say it unabbreviated then don't say it at all.</td></tr><tr><td><strong>Rule 20.</strong></td><td>Do not argue with staff in public or private chats, listen to what they say and follow it. If you wish to report a staff member then contact a Head Admin or Manager.</td></tr><tr><td><strong>Rule 21.</strong></td><td>Do not grief/kill legends that spawn on another player. If you can't catch it then leave it alone for the player.</td></tr><tr><td><strong>Rule 22.</strong></td><td>Do not impersonate staff under any capacity, regardless of intentions behind it.</td></tr></tbody></table>

You'll be able to access the rules at any point while playing on the server when running the command `/rules` as you can go through each of the pages to see each one listed above.

### Want to Appeal a Punishment?

If you wish to appeal a permanent mute or ban you can do so by creating a ticket within our Discord  in which you'll need to show understanding to what you did wrong, why it's not allowed and that you won't do it again on the server.&#x20;

{% embed url="<https://forum.mmorealms.gg/>" %}

If you think you punishment given, regardless of the length, is unfair then please make a ticket to state your case to the staff member in which proof will be provided for your punishment. If there is sufficient proof to state your punishment as false we can then go ahead and reverse your punishment.

<mark style="color:red;">**\*NOTE\* - If you have a temp ban or mute you will not be able to appeal it and as such you will just have to wait it out.**</mark>

Not in our Discord Server? You can join it by clicking this link -> [**DISCORD**](https://discord.gg/muGmwBkAFB)


# Server Features and Mechanics

Here you'll find all features and mechanics that are accessible exclusively within Cobblemon MMO Realms.

**Contents**

1. [What are Features and Mechanics?](#what-are-features-and-mechanics)
2. [List of all current Features and Mechanics](#list-of-all-current-features-and-mechanics)
   1. [Realms](#realms)
   2. [NPC Gyms](#npc-gyms)
   3. [Megas](#megas)
   4. [Breeding](#breeding)
   5. [Catch Combo](#catch-combo)
   6. [Chat Games](#chat-games)
   7. [Pokedex Rewards](#pokedex-rewards)
   8. [Hunts](#hunts)
   9. [Auction House](#auction-house)
   10. [Plushies](#plushies)
   11. [Pokemart \[Shop\]](#pokemart-shop)
   12. [Wondertrade](#wondertrade)
   13. [Daily (Login) Rewards](#daily-login-rewards)
   14. [Playtime Rewards](#playtime-rewards)
   15. [RTP (Random Teleport)](#rtp-random-teleport)
3. [Features and Mechanics planned for the future](#features-and-mechanics-planned-for-the-future)

***

### What are Features and Mechanics?

While the base Cobblemon mod already includes plenty of exciting features for players to enjoy (*including mechanics such as Pokémon Riding*), MMO Realms expands the experience even further with a wide variety of custom features you won’t find in the base mod or on many other Cobblemon servers.

This guide will showcase the many custom systems and features we have implemented ourselves, along with a preview of the exciting content and additions planned for the future.

### List of all current Features and Mechanics

#### Realms

We couldn’t begin this list without mentioning Realms, the flagship feature that sets MMO Realms apart from many other servers on the market. Instead of every player sharing a single world for building and gathering resources, which can often lead to griefing, resource shortages, or trolling, MMO Realms gives every player access to their very own private world. Here, you have complete freedom to build, explore, and create while choosing exactly who can access your Realm, making it a truly personal experience.

You can begin your Realm adventure as soon as you join the server by using the `/realms` command.

<figure><img src="/files/XLk73UJOu5aJzc7UPnhi" alt="" width="375"><figcaption><p>Private Realm via <code>/realms</code></p></figcaption></figure>

You'll be able to find out more information about Realms via this guide:

{% embed url="<https://wiki.mmorealms.gg/cobblemon-wiki/realm-guide>" %}

#### NPC Gyms

A core feature of the server is its NPC Gyms, where players can take on challenges inspired by the main series Pokemon games in order to earn badges and valuable rewards. With over 25 unique gyms already available and hundreds more planned for the future, there is no shortage of battles and progression for trainers to experience. Whether you’re testing your strategy, building the perfect team, or collecting every badge, NPC Gyms provide an exciting long-term challenge for every battler on the server.

You can start battling Gyms via the command `/gyms`

<figure><img src="/files/uyJoyH0zTVv26yQY1aEO" alt=""><figcaption><p>GUI for Kanto Region</p></figcaption></figure>

You'll be able to find out more information about NPC Gyms via this guide:

{% embed url="<https://wiki.mmorealms.gg/cobblemon-wiki/general-guides/complete-overview-to-npc-gyms>" %}

#### Megas

One feature that may surprise you is that Mega Pokemon are not included in the base Cobblemon mod. While many other servers require players to install additional mods just to access Mega Evolutions, MMO Realms has everything fully integrated with no extra downloads required. Every Mega Evolution, from Pokemon X and Y all the way to Pokémon Legends: Z-A, is available and ready to use directly on the server. These powerful transformations represent some of the strongest Pokemon available and can completely change the outcome of your battles.

<figure><img src="/files/6LkDNxDejtkovKM2bTyA" alt=""><figcaption></figcaption></figure>

You'll be able to find out more information about Megas via this guide:

{% embed url="<https://wiki.mmorealms.gg/cobblemon-wiki/general-guides/complete-guide-to-mega-pokemon>" %}

#### Breeding

Breeding is another feature that goes beyond the base Cobblemon experience and we’ve made sure it’s fully integrated on the server. Players can breed Pokemon with advanced mechanics including inherited IVs, abilities, increased Shiny odds, and even fully automated Redstone breeding farms. Whether you’re aiming to create competitive teams or hatch the perfect Shiny, there’s no better place to breed for perfect IV Pokemon than MMO Realms.

<figure><img src="/files/5So2jcYcu1kJw06dKMS8" alt=""><figcaption><p>Ex of Egg in Pasture Block</p></figcaption></figure>

You'll be able to find out more information about Breeding via this guide:

{% embed url="<https://wiki.mmorealms.gg/cobblemon-wiki/general-guides/complete-overview-of-breeding>" %}

#### Catch Combo

Catch Combo is a custom mechanic inspired by the feature first introduced in the Pokemon Lets Go games. By continuously catching the same Pokemon species, you can build up your Catch Combo, increasing both the spawn rates of that Pokemon and its chances of appearing as a Shiny. The higher your combo grows, the greater your odds become, making it a rewarding system for trainers hunting rare and valuable Pokemon.

<figure><img src="/files/B7jLyf0mLl1XhmBHXb5D" alt=""><figcaption></figcaption></figure>

You'll be able to find out more information about Catch Combos via this guide:

{% embed url="<https://wiki.mmorealms.gg/cobblemon-wiki/general-guides/a-complete-guide-to-catch-combo>" %}

#### Chat Games

Chat Games is an interactive feature that allows every player to participate directly through the main public chat. Every few minutes, a question will appear for all players to answer, and the first player to respond correctly will earn the point along with a reward prize.

<figure><img src="/files/EcH8Bg0tZvhTeDXcQpLp" alt=""><figcaption><p>Chat Games within Public Chat</p></figcaption></figure>

For players who enjoy competition, Chat Games also features a monthly leaderboard where the top 3 players can earn exclusive bonus rewards. Whether you’re testing your Pokemon knowledge or competing to prove who knows the most, Chat Games offers a fun and rewarding challenge for everyone. You can view your Chat Games statistics and leaderboard rankings at any time using`/cg lb`.

<figure><img src="/files/yJBa65ueWoYls3vsTK9f" alt=""><figcaption><p>Chat Games Leaderboard</p></figcaption></figure>

#### Pokedex Rewards

Pokedex Rewards is the perfect feature for players who love catching them all while earning valuable rewards along the way. As you progress through your Pokedex completion, you’ll unlock milestone rewards for every 10% completed, giving you even more incentive to continue your journey. However, Pokedex entries cannot be obtained through trading, you’ll need to truly earn them by catching Pokémon in the wild, breeding, and evolving them to fully complete your collection.

You can start collecting Pokedex Rewards via the command `/pokedex` or `/pokedexrewards`

<figure><img src="/files/2tD9OP59IFgjVTYGvFY0" alt=""><figcaption><p>Pokedex Rewards GUI via <code>/pokedex</code></p></figcaption></figure>

#### Hunts

Hunts are one of the best ways for players to earn exciting rewards while doing what Pokémon is best known for, catching Pokémon. With three different hunt types available, players can take on challenges ranging from finding a specific Pokémon, catching one with certain IVs and Natures, or even tracking down a rare Shiny Pokémon. Completing Hunts can reward you with valuable prizes such as PokeCoins, Gems, rare shinies, and much more.

<figure><img src="/files/3esuyRJ3TE8wEgB0B41U" alt=""><figcaption><p>Hunts GUI via <code>/hunts</code></p></figcaption></figure>

You'll be able to find out more information about Hunts via this guide:

{% embed url="<https://wiki.mmorealms.gg/cobblemon-wiki/general-guides/complete-overview-to-hunts>" %}

#### Auction House

The Auction House is the perfect place to buy and sell Pokemon, items, and valuable resources with other players across the server. Easily list your items for any price you choose, and once purchased, the buyer receives the item while you earn the money instantly.&#x20;

Whether you’re looking to make profits, trade rare finds, or search for something specific, the Auction House provides a simple and convenient marketplace for every player.

<figure><img src="/files/cLCnfHwlpLcQH3jWfmBT" alt=""><figcaption><p>Auction House via <code>/ah</code></p></figcaption></figure>

You can start selling items or pokemon via the `/ah sell` command. Items and Pokemon commands work slightly different as follows:

* **POKEMON** - `/ah sell pokemon <slot> <amount>`
* **ITEM** - `/ah sell pokemon <amount>`   \[*While holding the item*]

#### Plushies

Plushies are the perfect way to bring your Realm to life with the Pokemon of your choice. Obtainable through Crates, Mechanics, Trading, or Ranks, these collectible decorations can be placed anywhere within your personal Realm, allowing your favorite Pokemon to stand proudly as lifelike statues and displays. Whether it’s a majestic Gyarados resting within a lake or a powerful Rayquaza soaring across the skies, Plushies give you the freedom to unleash your creativity and design a Realm that feels truly alive.

<figure><img src="/files/EMzLwMEp4W9sPVnU8bJe" alt="" width="288"><figcaption><p>Plushies Placed within Realm</p></figcaption></figure>

#### Pokemart \[Shop]

This is another feature which will allow you to easily buy and sell stuff on the server regardless of your location. From Pokeballs, to Wood, to Decorations to even Music Discs; there's bound to be something to catch your eye. You can start accessing the shop via the command `/shop` .

<figure><img src="/files/HZnVVTcp5D2l4mHb6MfM" alt=""><figcaption><p>PokeMart via /<code>shop</code></p></figcaption></figure>

#### Wondertrade

Wondertrade, originally introduced in Pokemon X and Y (2013), lets you trade a Pokemon and receive a random Pokemon from another player. On the server it works similarly, but you can view the Wondertrade Pool at any time and may receive a system generated Pokemon which grants a Pokedex entry if you don't already have it.

Use `/wt` to start a Wondertrading and `/wt pool` to view the current pool.

<figure><img src="/files/xcBK8OQtsWtDq4bZlQuK" alt=""><figcaption><p>Wondertrade Pool via <code>/wt pool</code></p></figcaption></figure>

**NOTE:** Wondertraded Pokemon cannot be recovered. Pokemon received from other players do not grant Pokédex entries. The Wondertrade Pool resets weekly, removing existing entries and creating opportunities for new shiny and legendary Pokémon to enter the pool.

#### Daily (Login) Rewards

Daily Login Rewards reward players for logging in each day, increasing their streak and unlocking better rewards for up to 365 days. Missing a login day will reset your streak back to Day 1. Your daily timer begins when you log in and after 24 hours have passed, you have until the 48 hour mark to log in again and maintain your streak. If you fail to do so, your streak will be lost and cannot be restored.

**Access Daily Login Rewards** with `/daily`, or through the Calendar Rewards pop up shown when you join the server.

<figure><img src="/files/gC4Snao0jmzj7uKfenrm" alt=""><figcaption><p>Login Rewards via <code>/daily</code></p></figcaption></figure>

Players also receive one **Daily Spin** per day, offering a chance to win rewards ranging from Poke Balls and Rare Candies to Keys and Gems. You can access this within the same GUI as `/daily`.

<figure><img src="/files/npvcpolwSUYDO7Dadz6A" alt=""><figcaption><p>Daily Spin Rewards via <code>/daily</code></p></figcaption></figure>

#### Playtime Rewards

Playtime Rewards allow players to earn rewards simply by spending time on the server. As your playtime increases, you'll unlock milestone rewards, with higher playtime milestones offering better rewards.

Start accessing Playtime Rewards by using `/playtime`.

<figure><img src="/files/76NAxCtkdfjf23oPWlFu" alt=""><figcaption></figcaption></figure>

**NOTE:** Playtime is only counted while actively playing. Time spent AFK or remaining in water, boats, or minecarts for more than 5 minutes will not contribute to your playtime total.

#### RTP (Random Teleport)

All players will be able to easily teleport to different dimensions without needing to worry about finding or creating portals. You are currently able to randomly teleported to a random spot within the Wilds (*Overworld*), Nether and End.

Start accessing different dimensions via using `/rtp` to bring up a GUI to select the Dimension of your choice!

<figure><img src="/files/RTUtKLcaAOCLyAiRGpdx" alt=""><figcaption></figcaption></figure>

### Features and Mechanics planned for the future

Here is a list of future Features and Mechanics we have planned on the server with future updates:

* Safetrade
* Jobs
* Player Run Gyms
* Battle Tower
* Warzone
* Mail System
* Party Chat
* Ultra Space
* Raids
* Drop Crates
* In-game Wiki

Among many other features and mechanics planned to be introduced in future updates made on the server. Be sure to keep an eye out on all news from our Discord server here:

{% embed url="<https://discord.gg/wtFANZWC4a>" %}


# Commands and Uses

Here you can find a list of the main commands you can use on the server that are not connected with those found with donor ranks.

**Contents**

1. [General Commands](#general-commands)
2. [Donor Commands](#donor-commands)

***

#### **GENERAL COMMANDS**

Here you'll find all the commands you have access to on the server regardless if you have a rank or not.

<table><thead><tr><th width="209">Command</th><th>Use of Command</th></tr></thead><tbody><tr><td><code>/ah</code> or <code>/gts</code></td><td>This command will bring up the Auction House for you to use.</td></tr><tr><td><code>/ah sell pokemon SLOT PRICE</code> or <code>/gts sell pokemon SLOT PRICE</code> </td><td>You can use this command to sell Pokemon you have on the Auction House. Make sure you're picking the right slot of the pokemon you wish to sell and the amount you want for it within Pokecoins.</td></tr><tr><td><code>/ah sell item PRICE</code></td><td>You can use this command to sell item(s) you have on the Auction House. Make sure you're holding the items you wish to sell and the amount you want for it within Pokecoins.</td></tr><tr><td><code>/apply</code></td><td>Using this command in-game will bring up a link to the forums in where you can apply for staff.</td></tr><tr><td><code>/back</code></td><td>This command will take you back to the last spot you were in prior teleporting or warping to another area.</td></tr><tr><td><code>/bal</code></td><td>Using this command will show your current Pokecoins and Gems on the server.</td></tr><tr><td><code>/berries</code></td><td>This'll bring up a command to the wiki guide on all information relating to Berries.</td></tr><tr><td><code>/breedinghelp</code></td><td>This'll bring up a command to the wiki guide on all information relating to Breeding.</td></tr><tr><td><code>/builder</code></td><td>This will bring you up a command for how to apply for Builder and a link to our Discord server.</td></tr><tr><td><code>/buy</code> &#x26; <code>/store</code></td><td>This will bring up a link that'll direct you to the official MMO Realms store.</td></tr><tr><td><code>/catchcombo_info</code></td><td>This'll bring up a command that will link to the Catch Combo Guide found on this wiki.</td></tr><tr><td><code>/clauses</code></td><td>Gives a direct link to the clauses section within the NPC Gyms guide.</td></tr><tr><td><code>/colour</code> &#x26; <code>/color</code></td><td>This will bring up a link that'll direct you to the guide within the Wiki for help creating your Nickname and Colour help.</td></tr><tr><td><code>/combo</code> or <code>/catchcombo</code></td><td>You can use these commands to keep track on your active Catch Combo on the server.</td></tr><tr><td><code>/commands</code></td><td>This will bring up a link to this current guide for you to check all commands and their uses.</td></tr><tr><td><code>/crate</code> &#x26; <code>/crates</code></td><td>Using either of these commands will bring up a menu where you can access the crates on the server.</td></tr><tr><td><code>/daily</code></td><td>Opens up a GUI for selecting either Calander Rewards or Daily Spin Rewards.</td></tr><tr><td><code>/daily spin</code></td><td>Use this command to open the Daily Spin Rewards directly.</td></tr><tr><td><code>/daily streak</code></td><td>Use this command to see information relating to your current daily streak on the server.</td></tr><tr><td><code>/dexrewards</code> or <code>/pokedex</code></td><td>You can use this command to access the dex rewards, claim prizes for tiers or just check progress.</td></tr><tr><td><code>/discord</code></td><td>This command will bring up a link for you to join our Official Discord Server.</td></tr><tr><td><code>/discord link</code> and <code>/link</code>  </td><td>You'll be using this command to get access to the linking code needed to link your account to discord.</td></tr><tr><td><code>/discord_link_info</code></td><td>This command will show you how to link your minecraft account to discord in order to claim the discord kit.</td></tr><tr><td><code>/donate</code></td><td>This will bring up a link that'll direct you to the official MMO Realms store.</td></tr><tr><td><code>/end_battle</code></td><td>This command will allow you to end battles automatically. This is there in case you get stuck in a broken battle like within <code>/gyms</code>.</td></tr><tr><td><code>/fishing</code></td><td>This'll bring up a command that will link to the Fishing Guide found on this wiki.</td></tr><tr><td><code>/faq</code></td><td>Using this command will bring up a link to the FAQ page found within the Wiki.</td></tr><tr><td><code>/forms</code></td><td>This will bring up a link to the guide for all pokemon with forms on the server like Legendaries as well as regionals.</td></tr><tr><td><code>/fossils</code></td><td>This'll bring up a command to the wiki guide on all information relating to Fossils.</td></tr><tr><td><code>/gems</code></td><td>This'll bring up a command that will link to the Gems Guide found on this wiki.</td></tr><tr><td><code>/gts</code></td><td>This command will bring up the GTS for you to use.</td></tr><tr><td><code>/guide</code> &#x26; <code>/guides</code></td><td>Using either command will bring up a link to the Guides page found within the Wiki.</td></tr><tr><td><code>/gym</code> and <code>/gyms</code></td><td>This command allows you to access all Gyms currently available on the server.</td></tr><tr><td><code>/gyms_info</code></td><td>This'll bring up a command that will link to the Gyms Guide found on this wiki.</td></tr><tr><td><code>/help</code> &#x26; <code>/wiki</code></td><td>Using this command will give you a link which will direct you to this wiki.</td></tr><tr><td><code>/home</code> &#x26; <code>/homes</code></td><td>This command will show you all the homes you have on the server so you can teleport to if you set it up with <code>/sethome</code>.</td></tr><tr><td><code>/hunt</code> &#x26; <code>/hunts</code></td><td>This will bring up a GUI in which players will have a choice of 3 different hunts to complete on the server for some rewards.</td></tr><tr><td><code>/ignore</code></td><td>Blocks chats from being received by a specified user.</td></tr><tr><td><code>/ignorelist</code></td><td>Displays all users you currently have ignored.</td></tr><tr><td><code>/ip</code></td><td>This command will show you the IP for the server.</td></tr><tr><td><code>/kit</code> &#x26; <code>/kits</code></td><td><p>Using either command will bring up a submenu where you can see all the kits and which ones are accessible or not for you. </p><p>[<em>There are also kits exclusive to each Donor Rank.</em>]</p></td></tr><tr><td><code>/keys</code></td><td>This will direct you into the store where you can purchase Gems.</td></tr><tr><td><code>/legendaries</code> and <code>/mythicalspawns</code></td><td>This will bring up a link that will direct you to the Legends and Mythicals spawn page on the Wiki.</td></tr><tr><td><code>/megas</code></td><td>This'll bring up a command that will link to the Mega Pokemon Guide found on this wiki.</td></tr><tr><td><code>/modpack</code></td><td>This command will give you a direct link to our official Modrinth Pack.</td></tr><tr><td><code>/modpack_info</code></td><td>Using this command will show you information relating to the modpack.</td></tr><tr><td><code>/mutechat</code></td><td>You can use this command to mute the global chat or re-activate it if you already have it muted.</td></tr><tr><td><code>/msg IGN</code></td><td>You can use this command to message people privately on the server.</td></tr><tr><td><code>/neuter</code></td><td>You can use this command to neuter any pokemon you have on you so that it will no longer be breedable.</td></tr><tr><td><code>/p2w</code></td><td>This command will bring up a mini text message explaining why we have a store on the server.</td></tr><tr><td><code>/playtime</code> or <code>/playtimerewards</code></td><td>Use this to open the Playtime Rewards GUI feature.</td></tr><tr><td><code>/playtime info</code> or <code>/playtimerewards info</code></td><td>Use this command to check your current playtime stats on the server.</td></tr><tr><td><code>/pokecoins</code></td><td>This'll bring up a command that will link to the Pokecoins Guide found on this wiki.</td></tr><tr><td><code>/pokesnacks</code></td><td>Gives a direct link to the Pokesnacks guide found on this wiki.</td></tr><tr><td><code>/realm</code></td><td>This command will bring up the submenu for Realms in which you can teleport back to your own Realm as well as checking members.</td></tr><tr><td><code>/realm add IGN</code>&#x26; <code>/realm invite IGN</code></td><td>You can use this command to add players into your Realm.</td></tr><tr><td><code>/realm ban IGN</code>&#x26; <code>/realm unban IGN</code></td><td>Use the commands to ban and unban certain players from entering from entering your realm.</td></tr><tr><td><code>/realm delete</code></td><td>Use this command to delete the current realm you have on the server. <strong>You have to be standing in the realm you wish to delete.</strong> </td></tr><tr><td><code>/realm help</code></td><td>This menu will bring up text where you can find info relating to realm commands.</td></tr><tr><td><code>/realm leave</code></td><td>Use this command to leave the realm that you're currently in.</td></tr><tr><td><code>/realm members</code></td><td>This command will show all current members within a realm.</td></tr><tr><td><code>/realm remove IGN</code></td><td>Use this command to remove a player from the realm.</td></tr><tr><td><code>/realm teleport</code></td><td>Use this command to jump straight back into your personal realm.</td></tr><tr><td><code>/realm trust IGN RANK</code></td><td>You can use this command to give certain players more permission than others</td></tr><tr><td><code>/realm visit IGN</code></td><td>Use this command to visit another players realm.</td></tr><tr><td><code>/realm set_spawn</code></td><td>You'll use this command to set your spawn with your own personal realm.</td></tr><tr><td><code>/realm legendarycapture ownerOnly</code></td><td>Using this command will mean any legendary that spawns on you will only be catch-able by you.</td></tr><tr><td><code>/realm legendarycapture shared</code></td><td>Using this command will mean any legendary that spawns on you will also be catchable for players you have shared access to within your realm.</td></tr><tr><td><code>/realm visitor_message</code></td><td>You can use this command to set a message which players will see upon joining your realm.</td></tr><tr><td><code>/rank</code> &#x26; <code>/ranks</code></td><td>Use this command to bring up a link to the ranks page on our Official Store.</td></tr><tr><td><code>/rewards</code></td><td>This a command players can use to obtain rewards from supporting the server. <strong>[NOT IMPLEMENTED]</strong></td></tr><tr><td><code>/rideable</code></td><td>This will give a link to the guide for riding pokemon where you can find all current rideable pokemon on the server.</td></tr><tr><td><code>/rtp</code></td><td>Using this command will bring up a GUI for RTP (Random Teleport) where you can choose the respective dimension to teleport to.</td></tr><tr><td><code>/rtp overworlds</code> or <code>/rtp wilds</code></td><td>Using either command will take you in a random spot within the Wilds. [<em>Cooldown = 10 Seconds</em>]</td></tr><tr><td><code>/rtp nether</code></td><td>Using this command will take you in a random spot within the Nether. [<em>Cooldown = 2 Minutes</em>]</td></tr><tr><td><code>/rtp end</code></td><td>Using this command will take you in a random spot within the End. [<em>Cooldown = 2 Minutes</em>]</td></tr><tr><td><code>/rules</code></td><td>This will show you all the rules you have to follow on the server.</td></tr><tr><td><code>/scoreboard_toggle</code></td><td>Use this to hide (<em>or unhide</em>) the Scoreboard on the right side of your screen.</td></tr><tr><td><code>/shinies</code></td><td>This'll bring up a command that will link to the Shinies Guide found on this wiki.</td></tr><tr><td><code>/sethome NAME</code></td><td><p>Use this command to set homes on the server with the names you wish for them. </p><p>[<em>You can gain more Sethomes with donor ranks</em>]</p></td></tr><tr><td><code>/shop</code> or <code>/store</code></td><td>Use this command to bring up a submenu for the Pokemart on the server.</td></tr><tr><td><code>/tags</code></td><td>This command will bring up a GUI for players to select and look over tags available on the server.</td></tr><tr><td><code>/ticket</code> , <code>/tickets</code> or <code>/support</code></td><td>This will direct you into our Official Discord Server where you can create a ticket.</td></tr><tr><td><code>/tms</code></td><td>This will open a menu where you can click a Pokemon in your party and purchase a move from their moveset.</td></tr><tr><td><code>/tpa</code></td><td>Use this command to send a TP request to a player so you can teleport to their position.</td></tr><tr><td><code>/tpahere</code></td><td>Use this command to send a TP request to a player so you can teleport them to your position.</td></tr><tr><td><code>/trade &#x3C;user></code></td><td>Players can use this command to send Safetrade requests to others. They will receive the request within the Public Chat to accept.</td></tr><tr><td><code>/unignore</code></td><td>Removes a specified user from your ignore list, allowing for them to send you chats again.</td></tr><tr><td><code>/voicechat</code></td><td>This command is used to access the voice chat submenu on the server.</td></tr><tr><td><code>/vote</code></td><td>This command will bring up a link to where you can find all the places you can vote to earn vote keys on the server.</td></tr><tr><td><code>/warp &#x3C;WARP></code> </td><td>Use this command to teleport to any warps that are currently set up on the server.</td></tr><tr><td><code>/warps</code></td><td>This will state all warps available on the server.</td></tr><tr><td><code>/website</code></td><td>This will direct you to our official Wesbite Forums,</td></tr><tr><td><code>/wiki</code></td><td>This will direct you to the Wiki page.</td></tr><tr><td><code>/wildtrainer</code> or <code>/wildtrainers</code></td><td>Displays the location of the nearest wild trainer NPC. This command only functions on the Wilds server type.</td></tr><tr><td><code>/wondertrade</code> or <code>/wt</code></td><td>Use this command to open the GUI for wondertrading a Pokemon from your party.</td></tr><tr><td><code>/wondertrade pool</code> or <code>/wt pool</code></td><td>Use this command to see the current Wondertrade pool on the server.</td></tr><tr><td><code>/wt info</code> or <code>/wondertrade info</code></td><td>Use either of these commands to get a bit of info relating to Wondertrade.</td></tr><tr><td><code>/wt history</code> or <code>/wondertrade history</code></td><td>Use either of these commands to see your previous pulls from Wondertrade.</td></tr></tbody></table>

#### DONOR COMMANDS

This will go over all the commands found within ranks and give a brief bit of info relating to the command for you to fully understand. You can find out about more of the ranks and which command relates to which rank here:

{% embed url="<https://wiki.mmorealms.gg/cobblemon-wiki/donor-ranks-info>" %}

<table><thead><tr><th>Command</th><th>Use of Command</th><th align="center" valign="middle">Donor Rank Availability</th></tr></thead><tbody><tr><td><code>/anvil</code></td><td>Using this command will open up a anvil menu wherever you are.</td><td align="center" valign="middle"><strong>ARBITER</strong></td></tr><tr><td><code>/breed</code></td><td>This command lets you breed two pokemon together in a 10 minute cooldown.</td><td align="center" valign="middle"><strong>GRANDMASTER</strong></td></tr><tr><td><code>/craft</code></td><td>Using this command will open up a crafting table menu wherever you are.</td><td align="center" valign="middle"><strong>MASTER</strong></td></tr><tr><td><code>/eat</code></td><td>Using this command will refill your hunger bar to max in a 3 minute cooldown.</td><td align="center" valign="middle"><strong>CHAMPION</strong></td></tr><tr><td><code>/enchant</code></td><td>Using this command will open up a enchantment table menu wherever you are.</td><td align="center" valign="middle"><strong>ARBITER</strong></td></tr><tr><td><code>/enderchest</code></td><td>Using this command will open up your personal ender chest menu wherever you are.</td><td align="center" valign="middle"><strong>DIVINE</strong></td></tr><tr><td><code>/fly</code></td><td>This command will allow you to activate and de-active the ability to fly on the server.</td><td align="center" valign="middle"><strong>DIVINE</strong></td></tr><tr><td><code>/hatch</code></td><td>This command lets you hat Pokemon Eggs with a 10 minute cooldown per egg hatched.</td><td align="center" valign="middle"><strong>CELESTIAL</strong></td></tr><tr><td><code>/hat</code></td><td>This command will allow you equip items as your hat on the server.</td><td align="center" valign="middle"><strong>EXPERT</strong></td></tr><tr><td><code>/nightvision</code></td><td>This command will allow you to activate and de-active nightvision on yourself on the server.</td><td align="center" valign="middle"><strong>MYTHICAL</strong></td></tr><tr><td><code>/nick</code></td><td>Using this command, you'll be able to give yourself a nickname including adding colour to your name. For more info refer to our <a href="https://wiki.mmorealms.gg/cobblemon-wiki/general-guides/nickname-and-colour-help">Nickname &#x26; Colour Guide</a></td><td align="center" valign="middle"><strong>EXPERT</strong></td></tr><tr><td><code>/pc</code></td><td>Using this command will open up the Pokemon PC menu wherever you are.</td><td align="center" valign="middle"><strong>HEROIC</strong></td></tr><tr><td><code>/pokeheal</code></td><td>This command will heal your pokemon that are currently within your party.</td><td align="center" valign="middle"><strong>MASTER</strong></td></tr><tr><td><code>/pokecolor</code></td><td><p>Using this command will allow you change your pokemon name colours within your party. </p><p>[<strong>TO BE IMPLEMENTED</strong>]</p></td><td align="center" valign="middle"><strong>MYTHICAL</strong></td></tr><tr><td><code>/pokesee</code></td><td>Using this command will allow you to see other players Pokemon within their party.</td><td align="center" valign="middle"><strong>ARBITER</strong></td></tr><tr><td><code>/repair</code></td><td>This command will allow you to repair tools and armour on the server.</td><td align="center" valign="middle"><strong>CHAMPION</strong></td></tr><tr><td><code>/sethome</code></td><td>This command is used to be able to set multiple homes on the server. The higher the rank you are, the more you have access to. You will need to name each of your homes in order to go to your corresponding home.</td><td align="center" valign="middle"><strong>ALL RANKS</strong></td></tr><tr><td><code>/smelt</code></td><td>This command will allow you to smelt ores on the server.</td><td align="center" valign="middle"><strong>CELESTIAL</strong></td></tr><tr><td><code>/stonecutter</code></td><td>Using this command will open up a stonecutter menu wherever you are.</td><td align="center" valign="middle"><strong>GRANDMASTER</strong></td></tr><tr><td><code>/trash</code></td><td>Using this command will allow you to trash items you have within your hotbar.</td><td align="center" valign="middle"><strong>HEROIC</strong></td></tr></tbody></table>


# Donor Ranks Info

You'll find all the information connected to each of the ranks and what you'll obtain from all of them and how commands work.

**Contents**

1. [What are Donor Ranks?](#what-are-donor-ranks)
2. [How can I buy ranks?](#how-can-i-buy-ranks)
3. [All Ranks and their Benefits](#all-ranks-and-their-benefits)
   1. [Rank Upgrade](#rank-upgrade)
4. [Rank Commands](#rank-commands)

***

### What are Donor Ranks?

**Donor Ranks** are a way to support the server while unlocking a range of exclusive benefits in return. Unlike Keys, which are only single use and will grant a specific reward, Ranks provide ongoing perks such as unique commands, one time rewards (*including Legendaries*), and access to exclusive kits designed to enhance your overall experience.

No Pokemon are permanently locked behind ranks or any form of IRL payment. Rank rewards are designed to help streamline progression, speed up certain tasks, and provide bonus items that support you on your Pokemon journey without creating unfair advantages (*i.e. extra attack within battles*).

Your Rank will also be displayed in-game through distinctive chat and tab tags, and all donor ranks unlock perks such as custom nicknames that regular trainers won’t have access to. Every donation made through the store directly supports the server, allowing us to stay online while continuing to deliver new content and QOL improvements for *all* players, whether they donate or not.

### How can I buy ranks?

In order to buy ranks on the server, you will have to purchase gems from our official store which can be accessed below:

{% embed url="<https://store.pixelmonrealms.com/category/gems>" %}

From there all you need to do is head to /store in-game, click on **Ranks** and select the rank you wish to purchase.

<figure><img src="/files/47DikrHBQGf696chrNjF" alt="" width="302"><figcaption><p>In-game store via <code>/store</code></p></figcaption></figure>

For more ways to obtain Gems outside of buying them from our store, you can use the following guide:

{% embed url="<https://wiki.mmorealms.gg/cobblemon-wiki/general-guides/intro-to-earning-gems>" %}

### All Ranks and their Benefits

**Here is a list of all the Ranks, their price and what you obtain from purchasing them outright:**

> Please note that **you will only get the differences between ranks if you're upgrading your rank from a previous one**. To see specifics about what you get from each rank-upgrade [refer to the guide here](#rank-upgrade).

<details>

<summary><strong>Expert</strong>   [1350 Gems]</summary>

#### **On purchase, you will receive:** 🎁 **One Time Items (`/kit onetime` or `/`**`kit expertonetime`**)**

* 8 x Rare Candies
* 1 x Random Shiny Pokémon
* $5,000 Pokecoins
* 1x Random Evolution Item
* 1x Random Pokemon Plushy

#### ✨ **Command Perks**

* 2 x /sethome
* /hat
* /nick

#### 📦 **Kits**

* **/kit expert** (4x Poké Balls, 4x Great Balls, 2x Rare Candies — **Daily**)

</details>

<details>

<summary><strong>Master</strong>   [3390 Gems]</summary>

#### **On purchase, you will receive:** 🎁 **One Time Items (`/kit onetime` or `/`**`kit masteronetime`**)**

* 16 x Rare Candies
* 1 x Master Ball
* 2 x Random Shiny Pokémon
* $12,500 Pokecoins
* 1x Random Evolution Item & Stone
* 2x Random Pokemon Plushy

<mark style="color:red;">**NOTE \~ You only get the differences between ranks if choosing this as a rank up for one time rewards.**</mark>

#### ✨ **Command Perks**

* 4 x /sethome
* /hat
* /nick
* /craft
* /pokeheal (5 min cooldown)

#### 📦 **Kits**

* **/kit expert** (4x Poké Balls, 4x Great Balls, 2x Rare Candies — **Daily**)
* **/kit master** (5x Poké Balls, 5x Great Balls, 3x Rare Candies — **Daily**)

</details>

<details>

<summary><strong>Heroic</strong>   [6900 Gems]</summary>

#### **On purchase, you will receive:** 🎁 **One Time Items (`/kit onetime` or `/`**`kit heroiconetime`**)**

* 24 x Rare Candies
* 2 x Master Balls
* 3 x Random Shiny Pokémon
* $22,500 Pokecoins
* 1x Random Evolution Item & Stone
* 1x Random Held Item
* 2x Random Pokemon Plushy
* 1x Random Shiny Pokemon Plushy

<mark style="color:red;">**NOTE \~ You only get the differences between ranks if choosing this as a rank up for one time rewards.**</mark>

#### ✨ **Command Perks**

* 6 x /sethome
* /hat
* /nick
* /craft
* /pokeheal (5 min cooldown)
* /pc
* /trash

#### 📦 **Kits**

* **/kit expert** (4x Poké Balls, 4x Great Balls, 2x Rare Candies — **Daily**)
* **/kit master** (5x Poké Balls, 5x Great Balls, 3x Rare Candies — **Daily**)
* **/kit heroic** (8x Poké Balls, 8x Great Balls, 4x Rare Candies — **Daily**)

</details>

<details>

<summary><strong>Mythical</strong>   [10400 Gems]</summary>

#### **On purchase, you will receive:** 🎁 **One Time Items (`/kit onetime` or `/`**`kit mythicalonetime`**)**

* 36 x Rare Candies
* 4 x Master Balls
* 4 x Random Shiny Pokémon
* $35,000 Pokecoins
* 1x Random Evolution Item & Stone
* 1x Random Held Item
* 1x EXP Share & Lucky Egg
* 2x Random Pokemon Plushy
* 2x Random Shiny Pokémon Plushy

<mark style="color:red;">**NOTE \~ You only get the differences between ranks if choosing this as a rank up for one time rewards.**</mark>

#### ✨ **Command Perks**

* 8 x /sethome
* /hat
* /nick
* /craft
* /pokeheal (5 min cooldown)
* /pc
* /trash
* /pokecolor
* /nightvision

#### 📦 **Kits**

* **/kit expert** (4x Poké Balls, 4x Great Balls, 2x Rare Candies — **Daily**)
* **/kit master** (5x Poké Balls, 5x Great Balls, 3x Rare Candies — **Daily**)
* **/kit heroic** (8x Poké Balls, 8x Great Balls, 4x Rare Candies — **Daily**)
* **/kit mythical** (8x Great Balls, 12x Ultra Balls, 8x Quick Balls, 6x Rare Candies — **Daily**)

</details>

<details>

<summary><strong>Divine</strong>   [13900 Gems]</summary>

#### **On purchase, you will receive:** 🎁 **One Time Items (`/kit onetime` or `/`**`kit divineonetime`**)**

* 48 x Rare Candies
* 6 x Master Balls
* 5 x Random Shiny Pokémon
* $50,000 PokeCoins
* 1x Random Evolution Item & Stone
* 2x Random Held Item
* 1x Random Mint
* 1x EXP Share & Lucky Egg
* 2x Random Pokémon Plushy
* 3x Random Shiny Pokémon Plushy

<mark style="color:red;">**NOTE \~ You only get the differences between ranks if choosing this as a rank up for one time rewards.**</mark>

#### ✨ **Command Perks**

* 10 x /sethome
* /hat
* /nick
* /craft
* /pokeheal (5 min cooldown)
* /pc
* /trash
* /pokecolor
* /nightvision
* /enderchest
* /fly

#### 📦 **Kits**

* **/kit expert** (4x Poké Balls, 4x Great Balls, 2x Rare Candies — **Daily**)
* **/kit master** (5x Poké Balls, 5x Great Balls, 3x Rare Candies — **Daily**)
* **/kit heroic** (8x Poké Balls, 8x Great Balls, 4x Rare Candies — **Daily**)
* **/kit mythical** (8x Great Balls, 12x Ultra Balls, 8x Quick Balls, 6x Rare Candies — **Daily**)
* **/kit divine** (16x Great Balls, 16x Ultra Balls, 12x Quick Balls, 6x Rare Candies — **Daily**)

</details>

<details>

<summary><strong>Arbiter</strong>   [17400 Gems]</summary>

#### **On purchase, you will receive:** 🎁 **One Time Items (`/kit onetime` or `/`**`kit arbiteronetime`**)**

* 64x Rare Candies
* 8x Master Balls
* 6x Random Shiny Pokémon
* 1x Random Ultra Beast
* $70,000 PokeCoins
* 1x Random Evolution Item & Stone
* 2x Random Held Items & Random Mints
* 1x EXP Share & Lucky Egg
* 2x Random Pokémon Plushy
* 4x Random Shiny Pokémon Plushy

<mark style="color:red;">**NOTE \~ You only get the differences between ranks if choosing this as a rank up for one time rewards.**</mark>

#### ✨ **Command Perks**

* 12 x /sethome
* /hat
* /nick
* /craft
* /pokeheal (5 min cooldown)
* /pc
* /trash
* /pokecolor
* /nightvision
* /enderchest
* /fly
* /enchant
* /pokesee
* /anvil

#### 📦 **Kits**

* **/kit expert** (4x Poké Balls, 4x Great Balls, 2x Rare Candies — **Daily**)
* **/kit master** (5x Poké Balls, 5x Great Balls, 3x Rare Candies — **Daily**)
* **/kit heroic** (8x Poké Balls, 8x Great Balls, 4x Rare Candies — **Daily**)
* **/kit mythical** (8x Great Balls, 12x Ultra Balls, 8x Quick Balls, 6x Rare Candies — **Daily**)
* **/kit divine** (16x Great Balls, 16x Ultra Balls, 12x Quick Balls, 6x Rare Candies — **Daily**)
* **/kit arbiter** (16x Great Balls, 20x Ultra Balls, 16x Level Balls, 10x Rare Candies — **Daily**)
* **/kit arbitermonthly** (1x Basic Key — **Monthly**)

</details>

<details>

<summary><strong>Champion</strong>   [20900 Gems]</summary>

#### **On purchase, you will receive:** 🎁 **One Time Items (`/kit onetime` or `/`**`kit championonetime`**)**

* 80x Rare Candies
* 11x Master Balls
* 6x Random Shiny Pokémon
* 1x Random Ultra Beast & Shiny Ultra Beast
* $95,000 PokeCoins
* 1x Random Evolution Item & Stone
* 2x Random Held Items & Random Mints
* 1x EXP Share & Lucky Egg
* 2x Random Pokémon Plushy
* 4x Random Shiny Pokémon Plushy
* 1x Random Ultra Beast Plushy

<mark style="color:red;">**NOTE \~ You only get the differences between ranks if choosing this as a rank up for one time rewards.**</mark>

#### ✨ **Command Perks**

* 14 x /sethome
* /hat
* /nick
* /craft
* /pokeheal (5 min cooldown)
* /pc
* /trash
* /pokecolor
* /nightvision
* /enderchest
* /fly
* /enchant
* /pokesee
* /anvil
* /repair
* /eat (3 min cooldown)

#### 📦 **Kits**

* **/kit expert** (4x Poké Balls, 4x Great Balls, 2x Rare Candies — **Daily**)
* **/kit master** (5x Poké Balls, 5x Great Balls, 3x Rare Candies — **Daily**)
* **/kit heroic** (8x Poké Balls, 8x Great Balls, 4x Rare Candies — **Daily**)
* **/kit mythical** (8x Great Balls, 12x Ultra Balls, 8x Quick Balls, 6x Rare Candies — **Daily**)
* **/kit divine** (16x Great Balls, 16x Ultra Balls, 12x Quick Balls, 6x Rare Candies — **Daily**)
* **/kit arbiter** (16x Great Balls, 20x Ultra Balls, 16x Level Balls, 10x Rare Candies — **Daily**)
* **/kit champion** (16x Great Balls, 16x Ultra Balls, 16x Level Balls, 10x Rare Candies — **Daily**)
* **/kit arbitermonthly** (1x Basic Key — **Monthly**)
* **/kit championmonthly** (1x Basic Key — **Monthly**)

</details>

<details>

<summary><strong>Grandmaster</strong>   [27900 Gems]</summary>

#### **On purchase, you will receive:** 🎁 **One Time Items (`/kit onetime` or `/`**`kit grandmasteronetime`**)**

* 104 x Rare Candies
* 14 x Master Balls
* 6x Random Shiny Pokémon
* 1x Random Ultra Beast, Shiny Ultra Beast & Legendary
* $130,000 PokeCoins
* 1x Random Evolution Item & Stone
* 2x Random Held Items & Random Mints
* 1x EXP Share & Lucky Egg
* 2x Random Pokémon Plushy
* 4x Random Shiny Pokémon Plushy
* 1x Random Legendary & Ultra Beast Plushies

<mark style="color:red;">**NOTE \~ You only get the differences between ranks if choosing this as a rank up for one time rewards.**</mark>

#### ✨ **Command Perks**

* 16 x /sethome
* /hat
* /nick
* /craft
* /pokeheal (5 min cooldown)
* /pc
* /trash
* /pokecolor
* /nightvision
* /enderchest
* /fly
* /enchant
* /pokesee
* /anvil
* /repair
* /eat (3 min cooldown)
* /breed (10 min cooldown)
* /stonecutter

#### 📦 **Kits**

* **/kit expert** (4x Poké Balls, 4x Great Balls, 2x Rare Candies — **Daily**)
* **/kit master** (5x Poké Balls, 5x Great Balls, 3x Rare Candies — **Daily**)
* **/kit heroic** (8x Poké Balls, 8x Great Balls, 4x Rare Candies — **Daily**)
* **/kit mythical** (8x Great Balls, 12x Ultra Balls, 8x Quick Balls, 6x Rare Candies — **Daily**)
* **/kit divine** (16x Great Balls, 16x Ultra Balls, 12x Quick Balls, 6x Rare Candies — **Daily**)
* **/kit arbiter** (16x Great Balls, 20x Ultra Balls, 16x Level Balls, 10x Rare Candies — **Daily**)
* **/kit champion** (16x Great Balls, 16x Ultra Balls, 16x Level Balls, 10x Rare Candies — **Daily**)
* **/kit grandmaster** (24x Great Balls, 24x Ultra Balls, 24x Level Balls, 12x Rare Candies — **Daily**)
* **/kit arbitermonthly** (1x Basic Key — **Monthly**)
* **/kit championmonthly** (1x Basic Key — **Monthly**)
* **/kit grandmastermonthly** (1x Premium Key — **Monthly**)

</details>

<details>

<summary><strong>Celestial</strong>   [34900 Gems]</summary>

#### **On purchase, you will receive:** 🎁 **One Time Items (`/kit onetime` or `/`**`kit celestialonetime`**)**

* 128x Rare Candies
* 16x Master Balls
* 6x Random Shiny Pokémon
* 1x Random Ultra Beast, Shiny Ultra Beast, Legendary & Shiny Legendary
* $180,000 PokeCoins
* 1x Random Evolution Item & Stone
* 2x Random Held Items & Random Mints
* 1x EXP Share & Lucky Egg
* 2x Random Pokémon Plushy
* 4x Random Shiny Pokémon Plushy
* 1x Random Ultra Beast, Legendary & Ultra Beast Plushies

<mark style="color:red;">**NOTE \~ You only get the differences between ranks if choosing this as a rank up for one time rewards.**</mark>

#### ✨ **Command Perks**

* 20 x /sethome
* /hat
* /nick
* /craft
* /pokeheal (5 min cooldown)
* /pc
* /trash
* /pokecolor
* /nightvision
* /enderchest
* /fly
* /enchant
* /pokesee
* /anvil
* /repair
* /eat (3 min cooldown)
* /breed (10 min cooldown)
* /stonecutter
* /hatch (10 min cooldown)
* /smelt

#### 📦 **Kits**

* **/kit expert** (4x Poké Balls, 4x Great Balls, 2x Rare Candies — **Daily**)
* **/kit master** (5x Poké Balls, 5x Great Balls, 3x Rare Candies — **Daily**)
* **/kit heroic** (8x Poké Balls, 8x Great Balls, 4x Rare Candies — **Daily**)
* **/kit mythical** (8x Great Balls, 12x Ultra Balls, 8x Quick Balls, 6x Rare Candies — **Daily**)
* **/kit divine** (16x Great Balls, 16x Ultra Balls, 12x Quick Balls, 6x Rare Candies — **Daily**)
* **/kit arbiter** (16x Great Balls, 20x Ultra Balls, 16x Level Balls, 10x Rare Candies — **Daily**)
* **/kit champion** (16x Great Balls, 16x Ultra Balls, 16x Level Balls, 10x Rare Candies — **Daily**)
* **/kit grandmaster** (24x Great Balls, 24x Ultra Balls, 24x Level Balls, 12x Rare Candies — **Daily**)
* **/kit celestial** (32x Quick Balls, 32x Dusk Balls, 14x Rare Candies — **Daily**)
* **/kit arbitermonthly** (1x Basic Key — **Monthly**)
* **/kit championmonthly** (1x Basic Key — **Monthly**)
* **/kit grandmastermonthly** (1x Premium Key — **Monthly**)
* **/kit celestialmonthly** (1x Premium Key — **Monthly**)<br>

</details>

#### Rank Upgrade

This section is for players who want to know what you get with the differences between the ranks instead of the former section which just shows the bonuses combined.

<details>

<summary><strong>Expert to Master</strong>   [2040 Gems]</summary>

#### **On purchase, you will receive:** 🎁 **One Time Items (`/kit onetime` or `/`**`kit masteronetime`**)**

* 8 x Rare Candies
* 1 x Master Ball
* 1 x Random Shiny Pokémon
* $7,500 Pokecoins
* 1x Random Evolution Stone
* 1x Random Pokemon Plushy

#### ✨ **Command Perks**

* 4 x /sethome
* /craft
* /pokeheal (5 min cooldown)

#### 📦 **Kits**

* **/kit master** (5x Poké Balls, 5x Great Balls, 3x Rare Candies — **Daily**)

</details>

<details>

<summary><strong>Master to Heroic</strong>   [3510 Gems]</summary>

#### **On purchase, you will receive:** 🎁 **One Time Items (`/kit onetime` or `/`**`kit heroiconetime`**)**

* 8 x Rare Candies
* 1 x Master Balls
* 1 x Random Shiny Pokémon
* $10,000 Pokecoins
* 1x Random Held Item
* 1x Random Shiny Pokemon Plushy

#### ✨ **Command Perks**

* 6 x /sethome
* /pc
* /trash

#### 📦 **Kits**

* **/kit heroic** (8x Poké Balls, 8x Great Balls, 4x Rare Candies — **Daily**)

</details>

<details>

<summary><strong>Heroic to Mythical</strong>   [3500 Gems]</summary>

#### **On purchase, you will receive:** 🎁 **One Time Items (`/kit onetime` or `/`**`kit mythicalonetime`**)**

* 12 x Rare Candies
* 2 x Master Balls
* 1 x Random Shiny Pokémon
* $12,500 Pokecoins
* 1x EXP Share & Lucky Egg
* 1x Random Shiny Pokémon Plushy

#### ✨ **Command Perks**

* 8 x /sethome
* /pokecolor
* /nightvision

#### 📦 **Kits**

* **/kit mythical** (8x Great Balls, 12x Ultra Balls, 8x Quick Balls, 6x Rare Candies — **Daily**)

</details>

<details>

<summary><strong>Mythical to</strong> <strong>Divine</strong>   [3500 Gems]</summary>

#### **On purchase, you will receive:** 🎁 **One Time Items (`/kit onetime` or `/`**`kit divineonetime`**)**

* 12 x Rare Candies
* 2 x Master Balls
* 1 x Random Shiny Pokémon
* $15,000 PokeCoins
* 1x Random Held Item
* 1x Random Mint
* 1x Random Shiny Pokémon Plushy

#### ✨ **Command Perks**

* 10 x /sethome
* /enderchest
* /fly

#### 📦 **Kits**

* **/kit divine** (16x Great Balls, 16x Ultra Balls, 12x Quick Balls, 6x Rare Candies — **Daily**)

</details>

<details>

<summary><strong>Divine to Arbiter</strong>   [3500 Gems]</summary>

#### **On purchase, you will receive:** 🎁 **One Time Items (`/kit onetime` or `/`**`kit arbiteronetime`**)**

* 16x Rare Candies
* 2x Master Balls
* 1x Random Shiny Pokémon
* 1x Random Ultra Beast
* $20,000 PokeCoins
* 2x Random Mints
* 1x Random Shiny Pokémon Plushy

#### ✨ **Command Perks**

* 12 x /sethome
* /enchant
* /pokesee
* /anvil

#### 📦 **Kits**

* **/kit arbiter** (16x Great Balls, 20x Ultra Balls, 16x Level Balls, 10x Rare Candies — **Daily**)
* **/kit arbitermonthly** (1x Basic Key — **Monthly**)

</details>

<details>

<summary><strong>Arbiter to Champion</strong>   [3500 Gems]</summary>

#### **On purchase, you will receive:** 🎁 **One Time Items (`/kit onetime` or `/`**`kit championonetime`**)**

* 16x Rare Candies
* 3x Master Balls
* 1x Random Shiny Ultra Beast
* $25,000 PokeCoins
* 1x Random Ultra Beast Plushy

#### ✨ **Command Perks**

* 14 x /sethome
* /repair
* /eat (3 min cooldown)

#### 📦 **Kits**

* **/kit champion** (16x Great Balls, 16x Ultra Balls, 16x Level Balls, 10x Rare Candies — **Daily**)
* **/kit championmonthly** (1x Basic Key — **Monthly**)

</details>

<details>

<summary><strong>Champion to Grandmaster</strong>   [7000 Gems]</summary>

#### **On purchase, you will receive:** 🎁 **One Time Items (`/kit onetime` or `/`**`kit grandmasteronetime`**)**

* 24 x Rare Candies
* 3 x Master Balls
* $35,000 PokeCoins
* 1x Random Legendary
* 1x Random Legendary Plushiy

#### ✨ **Command Perks**

* 16 x /sethome
* /breed (10 min cooldown)
* /stonecutter

#### 📦 **Kits**

* **/kit grandmaster** (24x Great Balls, 24x Ultra Balls, 24x Level Balls, 12x Rare Candies — **Daily**)
* **/kit grandmastermonthly** (1x Premium Key — **Monthly**)

</details>

<details>

<summary><strong>Grandmaster to Celestial</strong>   [7000 Gems]</summary>

#### **On purchase, you will receive:** 🎁 **One Time Items (`/kit onetime` or `/`**`kit celestialonetime`**)**

* 24x Rare Candies
* 2x Master Balls
* 1x Random Shiny Legendary
* $50,000 PokeCoins
* 1x Random Mythical Plushy

#### ✨ **Command Perks**

* 20 x /sethome
* /hatch (10 min cooldown)
* /smelt

#### 📦 **Kits**

* **/kit celestial** (32x Quick Balls, 32x Dusk Balls, 14x Rare Candies — **Daily**)
* **/kit celestialmonthly** (1x Premium Key — **Monthly**)<br>

</details>

### Rank Commands

Now we will go over all the commands found within ranks and give a brief bit of info relating to the command for you to fully understand.

* `/sethome` \[*This command is used to be able to set multiple homes on the server. The higher the rank you are, the more you have access to. You will need to name each of your homes in order to go to your corresponding home.*]
* `/hat` \[*This command will allow you equip items as your hat on the server.*]
* `/nick` \[*Using this command, you'll be able to give yourself a nickname including adding colour to your name. For more info refer to our* [*Nickname & Colour Guide*](/cobblemon-wiki/general-guides/nickname-and-colour-help)]
* `/craft` \[*Using this command will open up a crafting table menu wherever you are.*]
* `/pokeheal` \[*This command will heal your pokemon that are currently within your party.*]
* `/pc` \[*Using this command will open up the Pokemon PC menu wherever you are.*]
* `/trash` \[*Using this command will allow you to trash items you have within your hotbar.*]
* `/pokecolor` \[*Using this command will allow you change your pokemon name colours within your party.*]
* `/nightvision` \[*This command will allow you to activate and de-active nightvision on yourself on the server.*]
* `/enderchest` \[*Using this command will open up your personal ender chest menu wherever you are.*]
* `/fly` \[*This command will allow you to activate and de-active the ability to fly on the server.*]
* `/enchant` \[*Using this command will open up a enchantment table menu wherever you are.*]
* `/pokesee` \[*Using this command will allow you to see other players Pokemon within their party.*]
* `/anvil` \[*Using this command will open up a anvil menu wherever you are.*]
* `/repair` \[*This command will allow you to repair tools and armour on the server.*]
* `/eat` \[*This command will refill your hunger bar back to max in a 3 minute cooldown.*]
* `/breed` \[*This command lets you breed two pokemon together in a 10 minute cooldown.*]
* `/stonecutter` \[*Using this command will open up a stonecutter menu wherever you are.*]
* `/hatch` \[*This command lets you hat Pokemon Eggs with a 10 minute cooldown per egg hatched.*]
* `/smelt` \[*This command will allow you to smelt ores on the server.*]


# Beginners Guide to the Server

Welcome to MMO Realms Cobblemon! We're happy to have you here with us on our server and we want your experience to be as smooth as can be. If you're a brand new player you'll find this guide useful!

**Contents**

1. [Important Notes about the Server](#important-notes-about-the-server)
2. [Getting Started](#getting-started)
3. [Claim your Starter](#claim-your-starter)
4. [Making your own Realm](#making-your-own-realm)
5. [The Basics of Cobblemon](#the-basics-of-cobblemon)
   1. [Healer and PC](#healer-and-pc)
   2. [Pokeballs](#pokeballs)

***

### Important Notes about the Server

* You'll want to join our server on a compatible fabric or forge launcher. We have [guides](/how-to-install-cobblemon-and-pixelmon) for both [**Modrinth**](/cobblemon-wiki/how-to-install-cobblemon-modrinth-and-curseforge/modrinth) and [**Curseforge**](/cobblemon-wiki/how-to-install-cobblemon-modrinth-and-curseforge/curseforge) for now players to be able to join the server easily. We suggest you **use Modrinth for bonuses** you won't get from playing any other version.
* If you're not using one of our launchers, make sure you're using the most up to date versions of both Cobblemon and Minecraft
  * Cobblemon version: **1.7.3**
  * Minecraft version: **1.21.1**
  * The **Server IP** is **`play.mmorealms.gg`**
* You'll want to **look over all of the rules** on the server. You can access them [**HERE**](/cobblemon-wiki/server-rules) or by running the `/rules` command in-game.
* **If you require any assistance from Staff** then you'll need to **make a ticket** within our Official Discord Server via the [#ticket-support](https://discord.com/channels/1332431737694982209/1332431740563755106) channel.&#x20;

### Getting Started

Once you are on the server, there is a few things you can do.

One of the first things you want to do is access the Trainer Kit for some bonus items to help you out. You can either do `/kit Trainer` or do `/kits` and  hover over the Citrine Ball and left click on it to claim the kit.

<figure><img src="/files/az51eVFkJRNGCfn69D68" alt=""><figcaption><p>Kit Trainer via /kits</p></figcaption></figure>

This **kit can be redeemed once every day** so make sure to redeem it each day! **If you're using our Modrinth Modpack you'll get bonuses** including a daily spin which you'll also want to make sure to keep redeeming for extra gems.

If you're **linked to our Discord server**, then you can go ahead and claim the Discord kit via the same method for a **free shin**y but unfortunately this can **only be claimed once**.

<table data-card-size="large" data-view="cards"><thead><tr><th></th><th data-hidden data-card-target data-type="content-ref"></th></tr></thead><tbody><tr><td>🔗 <strong>Intro to Linking to Discord</strong></td><td><a href="/pages/RdA2Ult1KAHrGsfeqr45">/pages/RdA2Ult1KAHrGsfeqr45</a></td></tr></tbody></table>

### Claim your Starter

The next thing you'll want to do on the server is claim your starter. In order to claim your starter on the server, you'll want to press the `M` button while your party is empty which will bring up a start selection screen for you to choose the start you wish to obtain. You will **only be able to claim one starter** so be sure to **choose wisely**.

<div align="left"><figure><img src="/files/vOL02L8Nk3ckCYFxbXFf" alt=""><figcaption><p>Starter Selection Screen</p></figcaption></figure></div>

### Making your own Realm

You'll want to make your own realm on the server as this will be where you build your base, store your items and have a hub for your friends to play in. Making your own realm is incredibly easy as you can start doing this by doing `/realm` in-game and choose your own realm.&#x20;

You **do not want to build within the wilds** since these **reset regularly** meaning any builds or item left in there through a wipe will be lost with **no way to obtain what was lost** in any form.

If you need help about creating your realm, or just want more information relating to it then please use our Realm Guide created!

<table data-card-size="large" data-view="cards"><thead><tr><th></th><th data-hidden data-card-target data-type="content-ref"></th></tr></thead><tbody><tr><td>🪴 <strong>Realm Guide</strong></td><td><a href="/pages/9bw29qS5cBSGkQyvP3BJ">/pages/9bw29qS5cBSGkQyvP3BJ</a></td></tr></tbody></table>

### The Basics of Cobblemon

#### Healing Machine and PC

Now that you're in your own Realm with your starter, you'll want to start getting some of the basics including creating a PC and a Healing Machine.

<figure><img src="/files/hMvr0OO7khhIGQJJ8yC9" alt=""><figcaption><p>Recipes for Healing Machine (Left) and PC (Right)</p></figcaption></figure>

You'll want to craft a healing machine because it'll heal your party anytime your party has lost HP or fainted. While you can go to `/warp PokeCenter` to heal your party, it'll be more convenient for you to have a healing machine within your Realm so you don't have to keep teleporting back and forth. To craft a healing machine you'll need the following items:

* 4x Iron Ingot
* 2x Copper Ingot
* 1x Diamond
* 1x Revive
* 1x Ghast Tear

Place all the items as shown in the recipe above to craft the healing machine. Alternatively you can buy this from the **PokeMart** via `/shop`. Once you have placed a healing machine all you'll need to do is **right click** on it and it'll start an animation to heal your party.

<figure><img src="/files/m9JzQCPYsq70EF3W6d99" alt="" width="271"><figcaption><p>Healing Machine</p></figcaption></figure>

Next up is the PC. You'll want to create a PC in order to move pokemon from your Party into your Pokemon Storage as the PC is the only way you can access these. If you have 6 pokemon within your party and then catch or obtain another pokemon then the Pokemon will instantly go into your PC. You have 100 boxes which holds 30 pokemon each so you have loads of space for Pokemon, and can customise each box to your liking. To craft a PC you'll need the following items:

* 4x Iron Ingot
* 2x Copper Ingot
* 2x Smooth Stone
* 1x Glass

Place all the items as shown in the recipe above to craft the PC. Alternatively you can buy this from the **PokeMart** via `/shop`. Once you have placed a PC all you'll need to do is **right click** on it and it'll open up your PC storage and all you will need to do is click on the pokemon you want to move from either your PC or Party into the slot of your choice..

<figure><img src="/files/n51FEDfErTvvniUXJXXX" alt="" width="188"><figcaption><p>PC</p></figcaption></figure>

#### Pokeballs

The next thing you're probably hoping to learn more about is how you go about crafting and collection Pokeballs on the server. You can **buy these** from our Pokemart via `/shop` but you can use the **guide found below** to learn **how to obtain all the items needed** as well as all the **recipes** for each different Pokeball found on the server.

<table data-card-size="large" data-view="cards"><thead><tr><th></th><th data-hidden data-card-target data-type="content-ref"></th></tr></thead><tbody><tr><td>🔴 <strong>Complete Guide to Pokeballs</strong></td><td><a href="/pages/5wLMa7w4ETraQL9HXqY5">/pages/5wLMa7w4ETraQL9HXqY5</a></td></tr></tbody></table>


# A Complete Overview of the Wilds

In this guide you'll find out what the wilds are, along with the alternative dimensions, and reasons to explore them.

**Contents**

1. [What are Wilds?](#what-are-wilds)
2. [Available Dimensions](#available-dimensions)
   1. [Overworld](#overworld)
   2. [Nether](#nether)
   3. [End](#end)
3. [Why explore them?](#why-explore-them)
   1. [Legendary Spawns](#legendary-spawns)
   2. [Generated Loot](#generated-loot)
   3. [NPC Trainers](#npc-trainers)
4. [World Resets](#world-resets)

***

## What are Wilds?

The **Wilds** refer to the vast, wilderness style areas designed to mimic the open-ended exploration of a naturally generated survival world, tied together with the conditions needed for Pokemon spawning. Unlike protected regions of the server, the **Wilds** are entirely open to players, featuring a range of biomes, rugged terrain and dynamic landscapes.

Each **Wild** server is generated based on a unique seed, allowing for a greater variety during exploration, ensuring no two locations truly match. You may access the **Wilds** by using the `/rtp` command, which will randomly teleport yourself within a selected dimension.

<figure><img src="/files/gTYP8R204NBHcRMTWVR2" alt=""><figcaption><p>RTP Menu</p></figcaption></figure>

## Available dimensions

Speaking of dimensions, there exists a selection of choices designed to offer different environments for the player, changing the available resources and spawns drastically.

### Overworld

The **Overworld** serves as the classic yet familiar foundation to every players journey. Featuring lush forests, expansive oceans, monumental mountains, and deep cave systems, this dimension offers a diverse set of biomes to suit everyones needs. This is the primary environment for traditional survival, resource gathering, and encountering a wide variety of standard Pokemon.

<figure><img src="/files/HMWz9ZVagAtktNlnCjHL" alt=""><figcaption><p>Overworld example</p></figcaption></figure>

### Nether

A gloomy and fiery contrast to the surface, the **Nether** is a subterranean hell scape dominated by oceans of lava, sparse valleys, and bizarre fungal forests. Navigating this dimension requires extreme caution due to the hostile environment and aggressive native inhabitants. However brave explorers are rewarded with unique survival materials and Pokemon that cannot be found anywhere else.

<figure><img src="/files/wlLlywopLZxNxHMFXQ9D" alt=""><figcaption><p>Nether example</p></figcaption></figure>

### End

Floating in a surreal expanse of a dark void, the **End** is a mysterious otherworldly realm. Characterised by unique packs of strange flora, towering pillars, and floating island chains. This dimension is the ultimate frontier for tracking down rare supernatural Pokemon existing far beyond the reaches of standard civilisation.

<figure><img src="/files/TZ8PtzBLYnHL4AKdJKE9" alt=""><figcaption><p>End example</p></figcaption></figure>

## Why explore them?

Stepping into the untamed wilderness is an essential task for any serious trainer looking to progress. The Wilds offer vast opportunities and rewards that cannot be found within the confines of protected civilisation, making the risk well worth the journey.

### Legendary Spawns

Whilst Pokemon may spawn in a variety of locations including private Realms, Legendary Pokemon strictly only spawn in the dangers of the wilderness. You must step outside of your comfort zone and track down these rare spawns for any chance at encountering them.

Full details covering the spawn conditions of all legendaries can be found in the corresponding page.

{% embed url="<https://wiki.mmorealms.gg/cobblemon-wiki/legendary-and-mythicals-spawns-info>" %}

{% hint style="warning" %}
**If you are marked as AFK, no legends will spawn on you** even while you are within Wilds. Using AFK Machines, Boats, Water, Minecarts etc won't disable this AFK Tracker. If you find methods that do bypass this report it to staff as abusing it yourself will result in a form of **ban and restrictions added to playtime rewards** given.
{% endhint %}

### Generated Loot

Similarly venturing out into the wilderness offers unique opportunities to find generated loot in a variety of forms. Whether that be through ruined structures long forgotten, specialised loot drops, or simply gathering resources from their native environments, everything you will need as a trainer can be scavenged for.

<figure><img src="/files/Pmxfweqg5Zf2V6BUQdom" alt="" width="248"><figcaption><p>Wilderness Pokeloot</p></figcaption></figure>

### NPC Trainers

Beyond the thrill of exploration and gathering, the terrain is also home to wandering NPC trainers looking to test their teams against capable challengers. Engaging these combatants in battle provides a reliable path to earning valuable rewards that help strengthen your team. If you are looking to test your skills and aren't sure where to look, you can utilise `/wildtrainers` at any time in a Wilds server to locate the nearest active challenger in your vicinity.

<figure><img src="/files/4qy4g2yBfdDpp2X2YwXG" alt=""><figcaption><p><code>/wildtrainer</code> Command Feedback</p></figcaption></figure>

<figure><img src="/files/LilfHxswCk6tqnSfHIuM" alt="" width="260"><figcaption><p>NPC Trainer</p></figcaption></figure>

## World Resets

The **Wilds** servers are wiped on a monthly basis, ensuring that all players have plenty of opportunities to explore untouched lands and discover new loot, which has not yet been tampered with.&#x20;

For this reason we suggest that any builds you wish to keep are to be made within your private Realms, which are not reset on the schedule.


# General Guides

Here you'll find all of the General Guides which players might find useful for certain mechanics and additions to our server.

<table data-card-size="large" data-view="cards"><thead><tr><th></th><th data-hidden data-card-target data-type="content-ref"></th></tr></thead><tbody><tr><td>🎨 <strong>Nickname &#x26; Colour Help</strong></td><td><a href="/pages/ZXLB8qTEs0hE2qUzEImA">/pages/ZXLB8qTEs0hE2qUzEImA</a></td></tr><tr><td><strong>💲 Intro to Earning Pokecoins</strong></td><td><a href="/pages/zLm5yxItyG8OOWJm7CVB">/pages/zLm5yxItyG8OOWJm7CVB</a></td></tr><tr><td>💎 <strong>Intro to Earning Gems</strong></td><td><a href="/pages/xwltUN1AddGQNY5OxZmo">/pages/xwltUN1AddGQNY5OxZmo</a></td></tr><tr><td>🎭 <strong>Pokemon Forms and How to Change Them</strong></td><td><a href="/pages/2a4l9CyRm1Ybn5dFXWuV">/pages/2a4l9CyRm1Ybn5dFXWuV</a></td></tr><tr><td>🔴 <strong>Complete Guide to Pokeballs</strong></td><td><a href="/pages/5wLMa7w4ETraQL9HXqY5">/pages/5wLMa7w4ETraQL9HXqY5</a></td></tr><tr><td>✨ <strong>A Complete Guide to Shinies</strong></td><td><a href="/pages/Mp9WAw9ZWCZ0XqRFnidv">/pages/Mp9WAw9ZWCZ0XqRFnidv</a></td></tr><tr><td>🏇 <strong>Complete Overview of Riding Pokemon</strong></td><td><a href="/pages/ZcfGhAhGE2p9D6elChQo">/pages/ZcfGhAhGE2p9D6elChQo</a></td></tr><tr><td><span data-gb-custom-inline data-tag="emoji" data-code="1f389">🎉</span> <strong>A Complete Overview of Events</strong></td><td><a href="/pages/qYcYhePwYTXSq2TZ0YdZ">/pages/qYcYhePwYTXSq2TZ0YdZ</a></td></tr><tr><td>🪨 <strong>Complete Overview of Fossils</strong></td><td><a href="/pages/4kaz5qPYj80fqIODeGPO">/pages/4kaz5qPYj80fqIODeGPO</a></td></tr><tr><td>🥚 <strong>Complete Overview of Breeding</strong></td><td><a href="/pages/OcC0RzuUVIVBDxVeLN5K">/pages/OcC0RzuUVIVBDxVeLN5K</a></td></tr><tr><td>🍒 <strong>Complete Overview of Berries</strong></td><td><a href="/pages/AhQvUbld3ohbRjrCiLni">/pages/AhQvUbld3ohbRjrCiLni</a></td></tr><tr><td><span data-gb-custom-inline data-tag="emoji" data-code="1f370">🍰</span> <strong>A Complete Guide to PokeSnacks</strong></td><td><a href="/pages/0MS7ePwNdVjhfbI51tmh">/pages/0MS7ePwNdVjhfbI51tmh</a></td></tr><tr><td>🔎 <strong>Complete Overview to Hunts</strong></td><td><a href="/pages/G5SgpWImDPV87tDTBrdm">/pages/G5SgpWImDPV87tDTBrdm</a></td></tr><tr><td>🏉 <strong>A Complete Guide to Catch Combo</strong></td><td><a href="/pages/RhGzTdpITC52DjEf56XF">/pages/RhGzTdpITC52DjEf56XF</a></td></tr><tr><td>💪 <strong>Complete Overview to NPC Gyms</strong></td><td><a href="/pages/KkSaTt2tYZQChOgE2rsy">/pages/KkSaTt2tYZQChOgE2rsy</a></td></tr><tr><td>🎣 <strong>Complete Overview of Fishing</strong></td><td><a href="/pages/FCbJoOtg953PP4nvQge2">/pages/FCbJoOtg953PP4nvQge2</a></td></tr><tr><td><span data-gb-custom-inline data-tag="emoji" data-code="1f3cb">🏋️</span><strong>Complete Overview of EV Training</strong></td><td><a href="/pages/z8f3CSy7n4wOKYae6gdt">/pages/z8f3CSy7n4wOKYae6gdt</a></td></tr><tr><td>🪨 <strong>Complete Guide to Mega Pokemon</strong></td><td><a href="/pages/scEgU4Ra1Oevzyfd2MZi">/pages/scEgU4Ra1Oevzyfd2MZi</a></td></tr><tr><td>🤝 <strong>A Complete Guide to Safetrade</strong></td><td><a href="/pages/tGDgEBpEqo0pWvdhmVIR">/pages/tGDgEBpEqo0pWvdhmVIR</a></td></tr></tbody></table>


# Intro to Earning Pokecoins

This page will go over the use of Pokecoins as well as how to earn them on the server.

**Contents**

1. [What are Pokecoins?](#what-are-pokecoins)
2. [What can I use Pokecoins for?](#what-can-i-use-pokecoins-for)
3. [How can I earn Pokecoins?](#how-can-i-earn-pokecoins)
   1. [PokeMart](#pokemart)
   2. [GTS](#gts)
   3. [Pokedex Rewards](#pokedex-rewards)
   4. [Hunts](#hunts)
   5. [Gyms](#gyms)
   6. [Crates](#crates)
   7. [Playtime Rewards](#playtime-rewards)
   8. [Daily (Login) Rewards](#daily-login-rewards)
4. [Is there any other ways to earn Pokecoins?](#is-there-any-other-ways-to-earn-pokecoins)

***

### **💲**What are Pokecoins?**💲**

Pokecoins are a type of **currency** found within the server which have many uses on the server. Pokecoins are a vital currency for players to interact with each other, buy items, trade with players and so on.

You'll be able to keep track of how many Pokecoins  you currently have by doing `/bal` within the server.

<div align="left"><figure><img src="/files/2IEWRlSroBWVK8lGu2fg" alt=""><figcaption><p>Balance by using /bal within the Server</p></figcaption></figure></div>

### **💲**What can I use Pokecoins for?**💲**

Pokecoins can be spent on a variety of things across the server, including:

* `/shop` \~ Opens a menu where you can purchase PokéBalls, items, blocks, and more, all with varying prices.
* `/gts` \~ Brings up the marketplace where players can buy and sell items and Pokémon at set prices.
* `/tms` - Allows you to use PokéCoins to purchase TMs for the Pokémon in your party, depending on their move pool.

More ways to spend PokéCoins will be added in the future!

### **💲**How can I earn Pokecoins?**💲**

There are a few ways you can earn money on the server, but for now here are the main ways to obtain Pokecoins:

#### PokeMart

The PokeMart is currently one of the main way for players to earn PokéCoins while the server is in its Beta phase, though more ways to make money will be added in the future. Each item in the PokéMart has a sell price, so you can gather items through various in-game methods and sell them for a profit.

<div align="left"><figure><img src="/files/HZnVVTcp5D2l4mHb6MfM" alt=""><figcaption><p>PokeMart via <code>/shop</code></p></figcaption></figure></div>

Farming is one of the most popular ways to do this, and you can even set up automatic farms to collect items in bulk. The harder an item is to get, the more you can usually earn from selling it in the PokéMart.

#### GTS

The GTS is another popular way for players to earn money on the server. Since not everything can be sold at the PokéMart, and Pokémon themselves can’t be sold there, the GTS offers a way around this. Players can list both items and Pokémon for sale at a price they choose, and other players can purchase them.

Some Pokémon and items are more in demand than others, so it’s worth paying attention to what players are looking for and what’s selling for a lot. **Shinies** and **Legendaries**, in particular, can earn you a significant amount of PokéCoins if you’re lucky enough to get one. Players used the breeding mechanic as a good way to create Pokemon that players will want to purchase on the GTS.

<div align="left"><figure><img src="/files/GVbhpb2xKumYYuhjI3yC" alt=""><figcaption><p><code>/gts</code> Menu</p></figcaption></figure></div>

#### Pokedex Rewards

Pokédex rewards are another way for players to earn money on the server. As you complete more of your Pokédex, the rewards increase with each milestone which starts from **50,000 PokéCoins** at the first 10% tier and reaching up to **2.5 million PokéCoins** for full 100% completion. You can check your Pokédex progress and claim rewards at any time by using the **`/pokedexrewards`** command.

<div align="left"><figure><img src="/files/aoNl5ez0ZAIyNEN7S6TP" alt=""><figcaption><p>Pokedex Rewards Menu via <code>/pokedexrewards</code></p></figcaption></figure></div>

#### Hunts

Another way to earn PokéCoins on the server is by participating in **hunts**. Using the **`/hunts`** command, you can see specific Pokémon that are being requested. These hunts are free to start, vary in difficulty, and offer a fun new way to play while rewarding players who are actively exploring and catching Pokémon on the server.

<div align="left"><figure><img src="/files/J3dhJetCTjplO4Zq7T0Z" alt=""><figcaption><p>Hunts menu via <code>/hunts</code></p></figcaption></figure></div>

#### Gyms

Gyms are another perfect way for you to earn Pokecoins whether it be the first time you have defeated them, or if you defeat a gym leader every 24 hours for repeated rewards. Not only will you get Pokecoins, but you will earn a lot of other rewards like Gems, EXP Candies and even Crate Keys. You can find out more about Gyms here:

{% embed url="<https://wiki.mmorealms.gg/cobblemon-wiki/general-guides/complete-overview-to-npc-gyms>" %}

<div align="left"><figure><img src="/files/Lwdk4Dz4cdQTzIuLnKBs" alt="" width="270"><figcaption><p>Gyms menu via <code>/gyms</code></p></figcaption></figure></div>

#### **Crates**

Crates are another way players can earn PokeCoins on the server. All 3 of the current crates offer PokeCoins in some capacity with Basic and Premium only obtainable via Rewards from other features, or purchasing them outright via Gems. You can access crates by doing `/crates` in game.

<div align="left"><figure><img src="/files/rNld4KlQH4sqEI4PBxfX" alt=""><figcaption><p>Vote Crate via <code>/crates</code></p></figcaption></figure></div>

#### **Playtime Rewards**

You'll be able to earn PokeCoins for reaching specific Playtime Milestones within Playtime Rewards. The higher your active playtime is, the more rewards you'll gain access to. Start accessing Playtime Rewards via `/playtime`.

<div align="left"><figure><img src="/files/xzHl4yFmjqLY13qdpvwm" alt=""><figcaption><p>Playtime Rewards via <code>/playtime</code></p></figcaption></figure></div>

#### Daily (Login) Rewards

You'll be able to claim Pokecoins for each day you play on the server, with the higher your streak becomes offering more PokeCoins and other rewards as a result. If you miss a day though, your streak will revert back to Day 1 and you will have to start again. Start accessing Daily Rewards via `/daily`.

<div align="left"><figure><img src="/files/gC4Snao0jmzj7uKfenrm" alt=""><figcaption><p>Daily Rewards via <code>/daily</code></p></figcaption></figure></div>

You'll also be able to potentially win PokeCoins via the **Daily Spin** also within `/daily` alongside other rewards listed.

<div align="left"><figure><img src="/files/iHOylWoqQcnMj8VL5YeI" alt=""><figcaption><p>Daily Spin Rewards via <code>/daily</code></p></figcaption></figure></div>

### **💲**Is there any other ways to earn Pokecoins?**💲**

We have plenty of new features and mechanics planned to help players earn PokéCoins on the server. Some of these upcoming additions include:

* Jobs System
* Leaderboards
* Player Trading
* Crates

Plus many more that are currently in the works!


# Intro to Earning Gems

This page will go over the use of Gems as well as how to earn them on the server.

**Contents**

1. [What are Gems and how to use them?](#what-are-gems)
   1. [Crates](#crates)
   2. [Ranks](#ranks)
      * [RANK UPGRADES](#rank-upgrades)
      * [GIFTING RANKS](#gifting-ranks)
   3. [Realm Expansion](#realm-expansion)
2. [How to use the Store](#how-to-use-the-store)
3. [How can I purchase Gems?](#how-can-i-purchase-gems)
4. [Is there any other ways to obtain Gems?](#is-there-any-other-ways-to-obtain-gems)

***

## 💎 What are Gems and how to use them?  💎&#x20;

Gems are a premium currency similar to PokéCoins, with the key difference being that they are used for a variety of specialised features on the server such as opening Crates, purchasing Ranks, and expanding your Realm size. While Gems can be bought directly from the official store, there are also several free-to-play methods available for earning them.

You can check your current Gem balance at any time by using the `/bal` command within the server.

<div align="left"><figure><img src="/files/2IEWRlSroBWVK8lGu2fg" alt=""><figcaption><p>Balance by using /bal within the Server</p></figcaption></figure></div>

Below is a complete list of all current Gem uses available on the server.

### Crates

Crates can be accessed either at Spawn or by using the command **/crates**. They function as loot boxes that grant you the chance to receive a variety of random rewards, such as Legendary Pokémon, Shiny Pokémon, Gems, Keys, and more. Currently, there are three types of Crates available: **Vote** (Free), **Basic** (535 Gems), and **Premium** (2740 Gems), each offering its own unique reward pool. You may also purchase Crate Keys through the **/store**, which is currently the only method for gifting keys to other players.

<div align="left"><figure><img src="/files/CD9nVmv5xq2RZNRjbS2N" alt="" width="563"><figcaption><p>Crates that are found within <code>/spawn</code></p></figcaption></figure></div>

To purchase or open Crates directly, simply run **`/crates`** to bring up a GUI displaying the three Crate categories. If you do not own any keys, the GUI will show the Gem price for each Crate; if you do have keys, it will instead display the number of keys you currently possess.

<div align="left"><figure><img src="/files/BS5MIVdltj7oMsfaa6gI" alt=""><figcaption><p><code>/crates</code> GUI for Vote, Basic and Premium Crates</p></figcaption></figure></div>

After using a key or purchasing a Crate with Gems by `Right Clicking` on the Crate selection, the Crate will begin to spin, and the item or Pokémon it lands on will be awarded to you immediately. If you receive a Pokémon and your party is full, it will be sent directly to your PC for later retrieval. Be sure to keep inventory space available for item rewards as if your inventory is full, you will not receive the items.

### Ranks

There are multiple ranks you are able to Purchase on the server which vary in price of Gems, each coming with more benefits than the last for the more expensive you go with the ranks. These benefits includes likes of Shiny Pokemon, Legendary Pokemon, Custom Nickname in-game,  Access to exclusive kits, access to exclusive channels and giveaways in the Discord server, multiple command and features to benefit players and so on.&#x20;

<div align="left"><figure><img src="/files/pek2wdVDg4CUJhQgYe8V" alt=""><figcaption><p>Ranks Category within <code>/store</code></p></figcaption></figure></div>

To begin purchasing ranks, simply run the **`/store`** command in-game, select the **Ranks** category, and choose the rank you wish to obtain provided you have the required amount of Gems.

<div align="left"><figure><img src="/files/n7noQ9FOQZ3zFcoIrAu1" alt=""><figcaption><p>Ranks Page within <code>/Store</code></p></figcaption></figure></div>

Upon purchasing a rank, all associated perks will be granted to you immediately. Please note that if your Discord account is linked, the corresponding Discord role may take a few minutes to apply. Be sure to claim your one-time rewards by running **`/kit onetime`** and **`/kit RANKonetime`** (*for example, **`/kit masteronetime`***) to receive all rank-exclusive bonuses.

#### **RANK UPGRADES**

If you already possess a lower rank and wish to upgrade to a higher one, you will receive a  discount that is clearly displayed within the rank’s description. This ensures that all players ultimately pay the same total amount of Gems for a given rank regardless if they purchase it outright or upgrade gradually through the tiers.

<div align="left"><figure><img src="/files/CEz7r6J1U2tP6rv0T6s6" alt="" width="536"><figcaption><p>Ex of Gems Discount with Ranks</p></figcaption></figure></div>

#### **GIFTING RANKS**

You are able to purchase ranks for other players using /store by selecting the Gift button within the Ranks page in the store. You will be prompted to type in the name of the player you are purchasing the rank for in which it'll bring back up the GUI for you to continue with purchasing the rank for the player

<div align="left"><figure><img src="/files/tj7Q5uR3QiZjeUFP0mF0" alt=""><figcaption><p>Gift Option within Ranks on <code>/store</code></p></figcaption></figure></div>

### Realm Expansion

One of the main reasons why you may want to obtain gems is by increasing the size of your personal realm. As you go around the borders of your realm you'll see text stating about **Unlocking this chunk for X amount of gems**. You can see exactly what this looks like below:

<div align="left"><figure><img src="/files/DK31lmxDW4LZZWsEtd6o" alt="" width="405"><figcaption></figcaption></figure></div>

As the text implies, in order to get access to this chunk **you will need to pay X gems**. **If you have the gems amount** stated and want to go ahead with purchasing it, all you need to do is `Right Click` which will bring up a confirmation. If you **click on the green section** which will confirm the purchase, the gems will be taken from you and the **chunk will be accessible for you**.

<div align="left"><figure><img src="/files/9ViHXbAmI8655gBvVBHg" alt=""><figcaption><p>Confirmation Page for Purchasing Chunk Expansions</p></figcaption></figure></div>

You are able to do this in any direction you want in whatever pattern you wish to have it. Your realm without any expansions is **10x10 Chunks** in size so increasing the size of your realm is going to be incredibly handy for a lot of players especially if they love to build. There is a limit to how much you can expand your realm to, but there is certainly enough room for any player to have the space and freedom they need.

## 💎 How to use the Store 💎&#x20;

In order to access the store, all you need to do is run the command `/store` which will bring up the store GUI.

<div align="left"><figure><img src="/files/pva4u4Adw8t3SqcfUSJp" alt=""><figcaption><p>Store GUI via <code>/store</code></p></figcaption></figure></div>

From there, you can navigate through each category to select the items you wish to purchase. If you are buying a key, simply click on the desired key and select the **Buy** option. The key will then be delivered directly to your **`/crates`** menu in exchange for the required Gems. This GUI also provides a convenient link to the store should you wish to purchase additional Gems for the server.

## 💎 How can I purchase Gems? 💎&#x20;

One of the easiest way players can obtain Gems is via purchasing them from our Official Store. There are a range of amounts you can purchase on the store corresponding to different amounts of $.&#x20;

You can access our store via this link:&#x20;

{% embed url="<https://store.mmorealms.gg/category/gems>" %}

## 💎 Is there any other ways to obtain Gems? 💎&#x20;

While purchasing Gems from the store is the quickest and most reliable method, there are several additional ways to earn Gems through gameplay, with more methods planned for future updates. The current ways to obtain Gems include:

* **Discord Giveaways** hosted in the **#giveaways** channel. *(Players with donor ranks receive access to bonus giveaways.)*
* **Free Daily Spin** available through our Modrinth Pack. For installation instructions, please refer to our [**Modrinth Installation Guide**](https://wiki.mmorealms.gg/how-to-install-cobblemon-modrinth-and-curseforge/modrinth).
* **Pokédex Rewards**, which begin awarding Gems as early as **20% completion**.
* **Events and Contests** hosted in the **#events** channel on our Discord Server.
* **Crates at Spawn**, which have a chance to reward Gems. Vote Crates, in particular, offer a small chance to receive Gems, and you earn a Vote Key for every daily voting link you complete.
* **Gyms** \[`/gyms`] will also give you chances of earning Gems as the first time for defeating any Gym leader will reward you with Gems.
* **Daily Login Rewards (`/daily`)** and **Playtime Rewards (`/playtime`)** offer Gems for milestones reached in both of them.
* **Insane Hunts** via **`/hunts`** offers 200 Gems if you manage to complete it.
* **Chat Trivia** also gives a small chance to earn Gems if you are the first one to answer it within the chat. You can also earn rewards by being in the top 3 of the month **leaderboards** for Chat Games via `/chatgames lb`.
* **More methods coming soon…**

Be sure to check back on this guide regularly, as new Gem-earning opportunities will continue to be added to the server.


# Nickname & Colour Help

Within this Guide you'll find out everything with how to set up your nickname on the server if you have a donor rank plus how to set them up with colours.

In order to gain access to setting a nickname on the server, you will need to **have at least the Expert rank** on the server. If you are only Trainer rank then you will not have access to this command.

**Contents:**

1. [How do I set my Nickname?](#how-do-i-set-my-nickname)
2. [How do I add colour to my name?](#how-do-i-add-colour-to-my-name)
3. [Adding Multiple Colours to Nickname](#adding-multiple-colours-to-nickname)
4. [Gradient Colours in Nickname](#gradient-colours-in-nickname)
5. [Pokecolor Command](#pokecolor-command)

***

### How do I set my Nickname?

Setting up your nickname is incredibly easy to do! All you need to do is run the command:

* `/nick` **`NAME`**     &#x20;

<div align="left"><figure><img src="/files/sXFOMOIyLRTsPmzioTZl" alt=""><figcaption><p>Example of setting your Nickname</p></figcaption></figure></div>

Now anytime you speak on the server your name will show up as the nickname you have set.

### How do I add colour to my name?

Adding colour into your nickname on the server is also very easy to do. There is two different ways to give your name colour on your nickname with the first option being easy to use but limited with variations of colours with the latter way being a bit more complex but you'll be able to choose any specific colour you wish.

#### Option 1.   Standard Colour Tags

Using any of the colours listed below you can easily add colour to your nickname as simple as:

**EXAMPLES:**

* &#x20;**`/nick <yellow>Butter`**
* **`/nick <dark_purple>Phantom`**

<div align="left"><figure><img src="/files/8Xk4LsJzucXvf278zGeQ" alt=""><figcaption><p>Example of Standard Colour Tag within your Nickname</p></figcaption></figure></div>

You'll be able to use any of the standard colour tags listed here:

<details>

<summary>Standard Colour Tags</summary>

* black
* dark\_blue
* dark\_green
* dark\_aqua
* dark\_red
* dark\_purple
* gold
* gray
* dark\_gray
* blue
* green
* aqua
* red
* light\_purple
* yellow
* white

</details>

#### Option 2.   Hex Colour Tags

The other option is by using hex colour tags you can obtain from various methods. We recommend using the website below to find the exact colour you wish to use for your nickname:

{% embed url="<https://redketchup.io/color-picker>" %}

If you have found a colour that you're happy with you will want to copy the colour hex code which should look similar to this: `#E97804` With this colour code, you can input it in the same format as you was doing with the standard colour codes like this:

**EXAMPLE:**

* **`/nick <#E97804>Butter`**
* **`/nick <#603593>Phantom`**

<div align="left"><figure><img src="/files/BI0rbtET5AHNDa794nvq" alt=""><figcaption><p>Example of Hex Colour Tag within your Nickname</p></figcaption></figure></div>

### Adding Multiple Colours to Nickname

Now that you know how to add colours into your nickname, you can start adding multiple colours into your nickname. Depending on what letters you want to be coloured you'll be slotting the colour tag in-between your name for each corresponding colour. You can combine both standard and hex colour tags for this if this helps you as will be shown in the example shown below:

**EXAMPLES:**

* **`/nick <#E97804>But<yellow>ter`**
* **`/nick <dark_blue>Phan<dark_purple>tom`**

<div align="left"><figure><img src="/files/uxtMGDGp3aPmr7yTfq0S" alt=""><figcaption><p>Example of Multiple Colours within Nickname</p></figcaption></figure></div>

You can customise this as much as you can whether this be by highlighting certain words within your nickname, or even creating a rainbow effect with your nickname. Let your imagination go wild with it!

### Gradient Colours in Nickname

To add more customisation within your name, you can add gradients within your nickname which acts as a bridge of two or more colours from one end to another. You can use multiple gradients if you wish to have multiple different colours blending in together. You will be using the colour codes generated from the Hex generator for this.

**EXAMPLES:**

* **`/nick <gradient:#f5f105:#d1b00a:#f29202:#d1b00a:#f5f105>Butter</gradient>`**
* **`/nick <gradient:#111df7:#8102f7>Phantom</gradient>`**

<figure><img src="/files/ZUE5JKkdfVvlUAEmXnb1" alt=""><figcaption><p>Example of Gradients within Nickname</p></figcaption></figure>

It is important to ensure that you close these gradients properly. While the name may appear correctly even if the command is not ended with `</gradient>`, any text sent afterwards can still be affected by the gradient, despite the general text being set to white. As a result, the gradient on your nickname may appear stretched and not follow the colour scheme you originally set. This effect can be seen in the image below compared to the image above.

<figure><img src="/files/85tsrbLk6YP3l6uCWfLA" alt=""><figcaption></figcaption></figure>

### Pokecolor Command

🌟<mark style="color:purple;">**This section is only relevant for players who have the Mythical Rank or higher on the server.**</mark> 🌟

In addition to your existing perks, you can customise your Pokémon’s name using the same formatting options available for your nickname including colour and bold styling for added flair.

To get started, **use** the **following command**:

* **`/pokecolor <slot of pokemon> <colour/bold> <name> <close colour/bold>`**

This feature also allows you to update the appearance of your entire party. Even better, your customised Pokecolours are permanently saved whether your Pokemon are stored in your PC or traded to another player.

Below are some examples demonstrating how to use the command:

**EXAMPLES:**

* `/pokecolor 1 <gradient:#FF0000:#FF7F00:#FFFF00>Bidoof</gradient>`&#x20;
* `/pokecolor 6 <b><gradient:#111df7:#8102f7>Ditto</gradient></b>`

<figure><img src="/files/cYJMlNilwQl8mNKHeduW" alt=""><figcaption><p>Ditto with a Bold and Gradient Name</p></figcaption></figure>


# Pokemon Forms and How to Change Them

This page will go over all of the Pokemon with different forms, and ways you're able to change them around if at all.

**Contents**

1. [What is a Pokemon Form?](#what-is-a-pokemon-form)
2. [Regional Forms](#regional-forms)
3. [General Pokemon Forms](#general-pokemon-forms)&#x20;
   1. [Mega Pokemon](#mega-pokemon)
   2. [Legendary/Mythical Pokemon with Forms](#legendary-mythical-pokemon-with-forms)
   3. [Normal Pokemon with Forms](#normal-pokemon-with-forms)
4. [Custom Forms](#custom-forms)

***

### What is a Pokemon Form?

Various Pokemon found on the server will only have one general form as well as a shiny varient of said pokemon. However there are a a fair few pokemon that have alternative forms which are significant for the use within battles as well as their appearance.

### Regional Forms

One of the main different forms you'll see with pokemon is with Regional forms. First introduced with Pokemon Sun and Moon, regional pokemon take a much beloved pokemon and gives it's a twist from it's design, moves all the way to it's typing i.e. Vulpix is usually a fire type pokemon however Alolan Vulpix twists it up by making it a Ice type.

Here you can find a **list of all the different regional forms** based on the region they were first intoduced:

<table data-card-size="large" data-view="cards"><thead><tr><th></th><th data-hidden data-card-target data-type="content-ref"></th></tr></thead><tbody><tr><td>🌴 <strong>Regional Forms</strong></td><td><a href="/pages/rgDgbnM2LmJJcHskIz3Y">/pages/rgDgbnM2LmJJcHskIz3Y</a></td></tr></tbody></table>

### General Pokemon Forms

Alongside all of the Regional forms, there are pokemon that already have normal forms you can switch between compared to regionals where you can only have one or the other. How you change these forms varies depending on the pokemon. We will list all of the pokemon with forms below and how you change between them:

#### Mega Pokemon

There is a lot of Pokemon and Legendaries that have Mega Forms which are obtainable on the server. To learn more about them you can read our guide here which includes every Mega Pokemon obtainable on the server:

{% embed url="<https://wiki.mmorealms.gg/cobblemon-wiki/general-guides/complete-guide-to-mega-pokemon>" %}

#### Legendary/Mythical Pokemon with Forms

It's important to note that with most of these legendaries that have multiple forms you will need to revert back to it's normal form if you wish to change it into a different form.

<details>

<summary>Mewtwo  <strong>(AVAILABLE)</strong></summary>

<figure><img src="/files/4SH0edi7sosUDMDx3m23" alt=""><figcaption><p>Shadow Mewtwo</p></figcaption></figure>

**How to change forms**

In order to change **Mewtwo's form into Shadow** all you need to do is give it a **Dark Gem** and evolve it via the status menu.

<figure><img src="/files/2niDSookuI3dABkUpNe5" alt=""><figcaption><p>Status Menu for Mewtwo</p></figcaption></figure>

You can also evolve Mewtwo with a **Steel Gem**.

<figure><img src="/files/WwVb1DR7MKMna36PElYx" alt="" width="375"><figcaption><p>Shadow Mewtwo</p></figcaption></figure>

</details>

<details>

<summary>Lugia  <strong>(AVAILABLE)</strong></summary>

<figure><img src="/files/qgsOipLrOrF4hKBclyDZ" alt=""><figcaption><p>Shadow Lugia</p></figcaption></figure>

**How to change forms**

In order to change **Lugia's form into Shadow** all you need to do is give it a **Dark Gem** and evolve it via the status menu.

<figure><img src="/files/d7nA8UExDgoigIaOgx5e" alt=""><figcaption><p>Status Menu for Lugia</p></figcaption></figure>

</details>

<details>

<summary>Groudon and Kyogre  <strong>(AVAILABLE)</strong></summary>

<figure><img src="/files/BezuApJflGtIuu0PniYU" alt=""><figcaption><p>Primal Kyogre and Groudon</p></figcaption></figure>

**How to change form:**&#x20;

For **Primal Groudon** you will need to give your Groudon a **Flame Orb** and then evolve it via the status menu.

For **Primal Kyogre** you will need to give your Kyogre a **Heart of the Sea** and then evolve it via the status menu.

<figure><img src="/files/49Msu98JKWxBy42X4SDh" alt=""><figcaption></figcaption></figure>

</details>

<details>

<summary>Deoxys  <strong>(AVAILABLE)</strong></summary>

There are 4 main forms you can find for Deoxys each bringing it's own benefit. These forms are as follows:

### **Normal Form:**

<div align="left"><figure><img src="/files/kSe4RcoqsX962skUkvTE" alt="" width="216"><figcaption></figcaption></figure></div>

**How to change form:**&#x20;

This is the general form you will get when you obtain Deoxys. If you have one of the other forms then you will need to give it a **End Stone** and evolve it via the status menu.

### **Attack Form**:

<div align="left"><figure><img src="/files/UaJ2C6C4Ec5NP7Zb6z55" alt="" width="222"><figcaption></figcaption></figure></div>

#### **How to change form:**&#x20;

You will need to give it a **End Crystal** and then evolve it via the status menu.

### **Defense Form**:

<div align="left"><figure><img src="/files/39IHtbYERZlJrxIzfnWk" alt="" width="180"><figcaption></figcaption></figure></div>

#### **How to change form:**&#x20;

You will need to give it a **Shulker Shell** and then evolve it via the status menu.

### **Speed Form**:

<div align="left"><figure><img src="/files/fNIsMV9nD26q5F5BiDN6" alt="" width="175"><figcaption></figcaption></figure></div>

#### **How to change form:**&#x20;

You will need to give it a **Chorus Flower Block** and then evolve it via the status menu.&#x20;

</details>

<details>

<summary>Dialga, Palkia and Giratina  <strong>(AVAILABLE)</strong></summary>

<figure><img src="/files/qYonsVr7bqbtooZlos6y" alt=""><figcaption><p>Origin forms of Dialga, Palkia and Giratina</p></figcaption></figure>

**How to change form:**&#x20;

In order to change the creation trio into their Origin forms, you will need to give them each a **Dawn Stone** by right clicking on with with it and then evolve them via the status menu.

You can also give it a Dawn Stone to revert it back to it's Normal form.

<figure><img src="/files/MgXx3SMVtcxoX6rZc3lm" alt=""><figcaption></figcaption></figure>

**Why change their forms?**

Each form comes with it's own benefits and drawbacks so it's not just a re-skin since some builds might work better for origin form Dialga compared to it's base form when catching it since their stats have been shifted around.

</details>

<details>

<summary>Shaymin  <strong>(AVAILABLE)</strong></summary>

<div align="left"><figure><img src="/files/DDBnuEgWjRMdxIONIzgG" alt=""><figcaption><p>Sky and Normal Forms of Shaymin</p></figcaption></figure></div>

**How to change form:**&#x20;

In order to change Shaymin into it's **Sky Form**, you need to give the Shaymin a **Flowering Azalea** in which you will be able to evolve it via the status menu.

<figure><img src="/files/y4KLG0bZd6LSzHO7y8wE" alt=""><figcaption></figcaption></figure>

Once you have evolved the Shaymin, it will gain the **Flying** typing alongside a increase in **Speed and Attack**.

In order to return Shaymin into it's **Land Form**, you need to give the Shaymin a standard **Azalea** instead.

<div><figure><img src="/files/GMj3cmeRA1r0FPCwkSGC" alt="" width="150"><figcaption><p>Flowering Azalea</p></figcaption></figure> <figure><img src="/files/WexFGHwohdS3nsERGOt1" alt="" width="150"><figcaption><p>Azalea</p></figcaption></figure></div>

</details>

<details>

<summary>Arceus  <strong>(AVAILABLE)</strong></summary>

<div align="left"><figure><img src="/files/I0IDYBSywYHh1gN7pRXJ" alt="" width="368"><figcaption><p>Different forms of Arceus</p></figcaption></figure></div>

**How many forms are there?**

There are 18 different forms for Arceus which players can chose between. Each of these forms correlate to a different typing of not only Arceus itself but the move Judgement.

**How to change form:**&#x20;

You can easily change Arceus's form by giving one of the 18 different gems you can find on the server. You can purchase these from the server's pokemart for easy access to them.&#x20;

<div align="left"><figure><img src="/files/pZxXZXVutNuDi2WqxjbX" alt=""><figcaption></figcaption></figure></div>

Give the Arceus the gem of your choosing and then evolve it via the status menu.

<figure><img src="/files/WEwoXYq5yTs0OiDMYwJb" alt=""><figcaption></figcaption></figure>

</details>

<details>

<summary>Tornadus, Thundurus, Landorus and Enamorus  <strong>(AVAILABLE)</strong></summary>

<figure><img src="/files/yw85zKA8CCWRZN9kfCVi" alt="" width="365"><figcaption><p>Incarnate Forms</p></figcaption></figure>

**How to change form:**&#x20;

Changing the forms for each of these is incredibly easy as it only requires a **Amethyst Shard** in order to change between the two forms for all 4 of the Legends.

<figure><img src="/files/4Hq0vUkh5idDYpJbp3zF" alt=""><figcaption></figcaption></figure>

**Why change forms from Incarnate to Therian?**

Alongside seeing the different forms of the 4 legends, there is actually some changes that come with changing their forms which includes:

* **Tornadus** - Incarnate is faster and higher in Special Attack; Therian has higher Defense and speed.
* **Thundurus** - Incarnate is faster; Therian has a much higher Special Attack.
* **Landorus** - Incarnate is more balanced; Therian has a much higher Physical Attack.
* **Enamorus** - Incarnate has high Speed and Special Attack, Therian has higher Defense and Attack.

<figure><img src="/files/FgZEbGKAhrSJCoXIc0Ti" alt="" width="553"><figcaption><p>Therian Forms</p></figcaption></figure>

</details>

<details>

<summary>Kyurem  <strong>(AVAILABLE)</strong></summary>

<figure><img src="/files/p69NP6jhNVRMd47qVyD5" alt=""><figcaption><p>Base form of Zekrom, Kyurem and Reshiram</p></figcaption></figure>

**How to change form:**&#x20;

In order to change forms for Kyurem you will need to have Kyurem and either Reshiram or Zekrom within your party. Once you do throw Kyurem out and give it a Echo Shard and you will be able to evolve it via the status menu.

<figure><img src="/files/icbhVqRvZYwFrcxBrHIO" alt=""><figcaption></figcaption></figure>

**Why Change forms of Kyurem?**

You'll want to change forms of Kyurem given you'll get updated ability, increased stats and a exclusive move to use.

* **White Kyurem** will get the **Turboblaze** ability.
* **Black Kyurem** will get the **Teravolt** ability.

<figure><img src="/files/ApCCfks3EJiHKes3UNpp" alt=""><figcaption><p>White Kyuren (Reshiram) and Black Kyurem (Zekrom)</p></figcaption></figure>

</details>

<details>

<summary>Hoopa  <strong>(AVAILABLE)</strong></summary>

<figure><img src="/files/f0TyaunDQux08ORlx85e" alt=""><figcaption><p>Confined Hoopa and Unbound Hoopa</p></figcaption></figure>

**How to change form:**&#x20;

In order to change Hoopa between forms you will need to give it a **Totem of Undying** and then evolve it via the status menu.&#x20;

<figure><img src="/files/q7wfYNJAf3uWb9Yb4scG" alt=""><figcaption></figcaption></figure>

**Why change Hoopa's form into Unbound?**

You'll want to change Hoopa's form so that you get increased power, different moves as well as changing Hoopa's typing from **Psychic/Ghost** in it's Confined form into **Pyschic/Dark** within it's Unbound form.

</details>

<details>

<summary>Meloetta  <strong>(AVAILABLE)</strong></summary>

<figure><img src="/files/z78tCfxylJGOGnJwWiDL" alt="" width="409"><figcaption><p>Aria and Pirouette Forms of Meloetta</p></figcaption></figure>

**How to change form:**&#x20;

You can change the forms of Meloetta easily mid-battle by using the move **Relic Song** which will change the form from Aria to Pirouette.

**Why change forms from Aria (Default) to Pirouette (Active)?**

Alongside seeing the different forms of Meloetta, there is actually some changes that come with changing their forms which includes:

* **Aria Forme**
  * `Normal/Psychic` Typing
  * Higher Special Attack and Special Defense.
* **Pirouette Forme**
  * `Normal/Fighting` Typing
  * Higher Attack, Defense, and Speed.

</details>

<details>

<summary>Keldeo  <strong>(AVAILABLE)</strong></summary>

<figure><img src="/files/QrKSdtXlCdX6TF6Ycxbh" alt=""><figcaption><p>Normal and Resolute Forms of Keldeo</p></figcaption></figure>

**How to change form:**&#x20;

In order to change the forms of Keldeo from Normal to Resolute and back, all you need to do is give it a **Diamond Sword** and evolve it via the Status Menu.

<figure><img src="/files/616hL3WQtPrbGU2w5FcK" alt=""><figcaption></figcaption></figure>

</details>

<details>

<summary>Zygarde  <strong>(AVAILABLE)</strong></summary>

<figure><img src="/files/ta3E8EHKWHJKoqmMXSMI" alt="Zygarde Forms: 1%, 10%, 50%, Complete (100%)"><figcaption><p>Zygarde Forms: 1%, 10%, 50%, Complete (100%)</p></figcaption></figure>

**How to change form:**&#x20;

Zygarde forms are defined by their 'cell count', being a naming convention to relate the form to the number of cells required per the games story to create it.

To change Zygardes form, its level must be at least equal to the cell count of the form you wish to change it into. For example, if you want a 50% Zygarde, it must first be at least level 50. Afterward, give the Zygarde a **Slime Block**.

Doing so will let you evolve (or de-evolve) the Zygarde via the status menu.

<figure><img src="/files/a5upIvuBNpiNIRup8Ebi" alt=""><figcaption></figcaption></figure>

<figure><img src="/files/38As6rJfr3M4hBBYir5S" alt=""><figcaption></figcaption></figure>

</details>

<details>

<summary>Necrozma  <strong>(AVAILABLE)</strong></summary>

<figure><img src="/files/DPBgvMNO5g52sLCL9HOF" alt=""><figcaption><p>Dawn Wings (Lunala) and Dusk Mane (Solgaleo) form of Necrozma</p></figcaption></figure>

**How do I change Necrozma's form?**

In order to change Necrozma's form you'll need either Solgaleo or Lunala. Have both of these within your party and throw them out. Use a Diamond on Necrozma which you can then evolve it to the respective form of Necrozma.

<figure><img src="/files/jlt5iGRElOEoFiHDBLSr" alt=""><figcaption><p>Status Menu for Necrozma</p></figcaption></figure>

**Ultra Necrozma**

In order to obtain the **Ultra Necrozma** form all you'll need to do is give the **Normal Form** of Necrozma **3 Diamonds** while **having both Solgaleo and Lunala within your party** which will then give you the option to evolve it via the Status Menu.

<figure><img src="/files/SG6aYSqVXudF0mj3ES0G" alt=""><figcaption><p>Status Menu for Necrozma</p></figcaption></figure>

If you wish to **revert any of the forms** of Necrozma back to normal all you need to do is give it a **Diamond** and revert it back to normal in the status menu.

<figure><img src="/files/2vs0kXVTpGL3E11amjQq" alt=""><figcaption><p>Ultra Necrozma</p></figcaption></figure>

**Why change forms?**

You'll want to change the forms of Necrozma given the fact they'll come with exclusive moves, better stats and designs.&#x20;

* **Dusk Mane** form will become Psychic and Ghost.
* **Dusk Mane** form will become Psychic and Steel.
* **Ultra Necrozma** will become Psychic

</details>

<details>

<summary>Silvally  <strong>(AVAILABLE)</strong></summary>

<div align="left"><figure><img src="/files/cWtlbLFBfQHdOfasqiBP" alt="" width="375"><figcaption><p>Different forms of Silvally</p></figcaption></figure></div>

**How many forms are there?**

Like with Arceus, there are 18 different forms for Silvally which players can chose between. Each of these forms correlate to a different typing from Fire to Dragon.

**How to change form:**&#x20;

You can easily change Silvally's form by giving one of the 18 different gems you can find on the server. You can purchase these from the server's pokemart for easy access to them.&#x20;

<div align="left"><figure><img src="/files/pZxXZXVutNuDi2WqxjbX" alt=""><figcaption></figcaption></figure></div>

Give the Silvally the gem of your choosing and then evolve it via the status menu.

<figure><img src="/files/Ogn9wPjRdQsEzTOqfX8i" alt=""><figcaption></figcaption></figure>

</details>

<details>

<summary>Zacian and Zamazenta  <strong>(AVAILABLE)</strong></summary>

<figure><img src="/files/uJ46Z51MXK54guHEU4au" alt=""><figcaption><p>Resolute Forms of Zamazenta and Zacian</p></figcaption></figure>

**How do I change their forms?**

There are different items used to evolve each of the legends into their respective Resolute Forms.

* To evolve **Zacian** into it's Resolute Form you need to give it a **Iron Sword** and evolve it via the Status Menu.
* To evolve **Zamazenta** into it's Resolute Form you need to give it a **Shield** and evolve it via the Status Menu.

<figure><img src="/files/tdhSbf9GUt5dwVroIW7p" alt=""><figcaption></figcaption></figure>

**Why change their forms?**

You'll want to change their forms so they can learn their signature moves alongside increased stats for both plus also giving both access to their steel typings.

</details>

<details>

<summary>Urshifu  <strong>(AVAILABLE)</strong></summary>

<div align="left"><figure><img src="/files/qVlFB9n1ez3ROaYFWiR8" alt="" width="464"><figcaption><p>Kubfu with both forms of Urshifu</p></figcaption></figure></div>

Unlike with most legendaries with forms where you can change between them easily, which Urshifu you obtain is determined with how you evolve it as you won't be able to revert it once you have chosen your respective Urshifu.

**How do I evolve Kubfu into Urshifu?**

Evolving Kubfu is fairly easy as you can choose one of two items to evolve it, however each of these items will determine which form you get.

* Right click Kubfu with a **Muscle Band** in order to evolve it into it's **Single Strike Form**.
* Right click Kubfu with a **Expert Belt** in order to evolve it into it's **Rapid Strike Style**.

<figure><img src="/files/3y0RZUdjRRhTT4kU4YRR" alt=""><figcaption></figcaption></figure>

**What's the differences between the forms?**

**Single Strike Form** will make your Urshifu into a **Fighting/Dark** Pokemon while **Rapid Strike Form** will make Urshify into a **Fighting/Water** Pokemon.&#x20;

Each form comes with it's own benefits from strengths/weaknesses in battles as well as it's own signature move so make sure you choose the right form for you as once you have evolved it, you unfortunately won't be able to change it to the alternative form.&#x20;

</details>

<details>

<summary>Calyrex  <strong>(AVAILABLE)</strong></summary>

<figure><img src="/files/ajDbXILi9OBtKI5e6mbk" alt=""><figcaption><p>Shadow-Rider and Ice-Rider forms of Calyrex</p></figcaption></figure>

**How do I change its form?**

In order to evolve Calyrex into either **Shadow-Rider Form** (*Spectrier*) or **Ice-Rider Form** (*Glastrie*r) all you need to give is have both Calyrex and either Spectrier or Glastrier within your party and give Calyrex a **Gold Helmet** in which you can evolve it via the status menu.

<figure><img src="/files/BWPdth7lZWNNjXflxwG0" alt=""><figcaption><p>Status Menu for Calyrex</p></figcaption></figure>

**Why change Calyrex's form?**

You'll want to change Calyrex's form as you get updated stats, new typing and a new ability to use.

* **Shadow-Rider** becomes a **Psychic and Ghost** Type and gains the ability **As One.**
* **Ice-Rider** becomes a **Psychic and Ice** Type and gains the ability **As One.**

</details>

<details>

<summary>Ogerpon  <strong>(AVAILABLE)</strong></summary>

There are 4 main forms you can find for Ogerpon each bringing it's own benefit. These forms are as follows:

### **Teal Mask:**

<div align="left"><figure><img src="/files/gefCm3PuRJ3UQxQCOLJO" alt="" width="182"><figcaption></figcaption></figure></div>

**How to change form:**&#x20;

This is the general form you will get when you obtain Ogerpon. If you have one of the other forms then you will need to give it a **Cyan Dye** and evolve it via the status menu.

**Benefits for this form?**

Unlike it's other forms, this is a base Grass type and also has the ability Defiant.

### **Wellspring Mask**:

<div align="left"><figure><img src="/files/GgDzRVWF0kF87kA0apVT" alt="" width="161"><figcaption></figcaption></figure></div>

#### **How to change form:**&#x20;

You will need to give it a **Blue Dye** and then evolve it via the status menu while it's within it's Teal Mask form

**Benefits for this form?**

The typing of Ogerpon will change from Grass to Grass/Water and gains the Water Absorb ability.

### **Hearthflame Mask**:

<div align="left"><figure><img src="/files/pmCyuldC2uBV4O9pjXgn" alt="" width="182"><figcaption></figcaption></figure></div>

#### **How to change form:**&#x20;

You will need to give it a **Red Dye** and then evolve it via the status menu while it's within it's Teal Mask form.

**Benefits for this form?**

The typing of Ogerpon will change from Grass to Grass/Fire and gains the Mold Breaker ability.

### **Cornerstone Mask**:

<div align="left"><figure><img src="/files/H8WhyXqhfbdejCjVZbXz" alt="" width="164"><figcaption></figcaption></figure></div>

#### **How to change form:**&#x20;

You will need to give it a **Grey Dye** and then evolve it via the status menu while it's within it's Teal Mask form

**Benefits for this form?**

The typing of Ogerpon will change from Grass to Grass/Rock and gains the Sturdy ability.

</details>

**Pokemon with Forms currently Unavailable**

Please note at this moment in time most of the forms are inaccessible and will be updated as soon as players can start gaining access to them. Here is a list of all of those that you can't obtain.

<details>

<summary>Genesect</summary>

<figure><img src="/files/02fRXF1LTyjI1flZNlaY" alt=""><figcaption><p>Normal form of Genesect</p></figcaption></figure>

**How to change form:**&#x20;

Unfortunately there is no ways for players to obtain the other drive forms of Genesect on the server as of yet.

</details>

<details>

<summary>Eternatus</summary>

<div align="left"><figure><img src="/files/knAjub8SuDgVvNGJ08bm" alt="" width="289"><figcaption><p>Photo of Eternatus</p></figcaption></figure></div>

**How do I change its form?**

As of now, Dynamaxing pokemon incuding gaining access to their exclusive forms is currently **not implemented** on the server yet.

</details>

<details>

<summary>Terapagos</summary>

<div align="left"><figure><img src="/files/rEf7lNIBtWQ8lUqcBjri" alt=""><figcaption></figcaption></figure></div>

**How do I change their forms?**

As of now, Dynamaxing pokemon incuding gaining access to their exclusive forms is currently **not implemented** on the server yet.

</details>

#### Normal Pokemon with Forms

Alongside Legendaries, general pokemon will also have different forms which range from just from their looks all the way to changing their stats, moves and so on within the game. Here is a list of them all here:

<details>

<summary>Unown</summary>

<figure><img src="/files/5ypQZOvvzO5crjndzQZk" alt=""><figcaption><p>Different forms of Unown</p></figcaption></figure>

Unown is special in that it has 28 different forms you can find on the server with each based on a different alphabet character as well as a exclamation mark and a question mark.

**How do I find a specific form?**

Each of these forms spawns randomly so there's no real way for you to farm for one particular form. You might find the one you want right away, or it could take you 100+. Are you willing to collect them all?

</details>

<details>

<summary>Castform</summary>

<figure><img src="/files/kV6QkbGt6jWheLzjAA4k" alt="" width="563"><figcaption><p><strong>Different form of Castform</strong></p></figcaption></figure>

**How to Change Form:**

To change the form of Castform, you need to get use of **weather effects** within Pokemon Battles. The likes of Hail will cause Castform to change into it's Snowy form, Sunn Day will turn it into it's Sunny Form, Rain Dance will make it become it's Rainy Form. They will all revert at the end of the battle.

**Benefits to Each Form:**

*Depending on the form will determine what type Castform currently is.*

* **Normal** form: It's a Normal Typing
* **Sunny** Form: Becomes a Fire Typing
* **Rainy** Form: Becomes a Water Typing
* **Snowy** Form: Becomes a Ice Typing

</details>

<details>

<summary>Burmy and Wormadam</summary>

<figure><img src="/files/4u7xNCwEGu0DBA0wZCxx" alt="" width="563"><figcaption><p>Plant Cloak (Green), Sandy Cloak (Yellow) and Trash Cloak (Pink) forms of Burmy and Wormadam</p></figcaption></figure>

**How to Change Form:**

You are unable to change the forms of Burmy and Wormadam so you need to get lucky with finding the respective one in the wild.

**Differences between forms:**

Burmy does not have much difference outside of the model changing for it. Wormadam however does get changes which changes it's type depending on the form which are as follows:

* **Plant** Cloak (Bug/Grass)
* **Sandy** Cloak (Bug/Ground)
* **Trash** Cloak (Bug/Steel)

</details>

<details>

<summary>Cherrim</summary>

<figure><img src="/files/jkCbE8YS0XRHuEpylEXH" alt="" width="380"><figcaption><p>Normal and Sunshine form of Cherrim</p></figcaption></figure>

**How to Change Form:**

To change form, you need to have **sunny weather** in affect in the battle by using moves like Sunny Day.

**Benefits to changing form:**

It's benefitial to change form as in Cherrim's Sunshine form, the Flower Gift ability boosts Cherrim's (*and its allies' in doubles*) Attack and Special Defense by 50%.

</details>

<details>

<summary>Shellos and Gastrodon</summary>

<figure><img src="/files/jyYPkjakCMMG9J62sNtI" alt=""><figcaption><p>West Sea (Left) and East Sea (Right) forms of Shellos and Gastrodon</p></figcaption></figure>

The differences between these forms of Shellos and Gastrodon are just purely cosmetic.

**How do I find each form?**

In order to find **West Sea** forms of Shellos and Gastrodon you'll want to be looking within **Cold Oceans** and **Frozen Oceans** via fishing or on the seafloor as well as uncommon spawns within **Beaches**.

In order to find **East Sea** forms of Shellos and Gastrodon you'll want to be looking within **Lukewarm Oceans** and **Warm Oceans** via fishing or on the seafloor as well as uncommon spawns within **Beaches**.

</details>

<details>

<summary>Rotom</summary>

<figure><img src="/files/PreODrwjSmZnZAoqB1dA" alt=""><figcaption><p>All forms of Rotom</p></figcaption></figure>

**How to change form?**

Changing form for Rotom is very easy! All you need to do is craft or purchase a **Data Monitor** and then while holding it right click onto your Rotom in the wild multiple times for the ability to evolve it into your Rotom form of choice.

<figure><img src="/files/uYue4rU2UzuXkoM4i7HO" alt=""><figcaption><p>Status Menu for Rotom</p></figcaption></figure>

**Why change Rotom's form?**

Each rotom form outside of the base form comes with a brand new typing as well as different moves and upgraded stats. Pick the rotom that best fits your team!

</details>

<details>

<summary>Basculin and Basculegion</summary>

<figure><img src="/files/yulKnsHulXuTfNWLqkMx" alt="" width="488"><figcaption><p>White Stripped Basculin with  Male (Red( and Female (White) Basculegion</p></figcaption></figure>

In order to get either version of Basculegion, you need to **evolve a White Stripped** Basculin and **depending on it's gender** you'll either get the red stripped form of Basculegion if it's Male or the white stripped form if it's a Female.

Male Basculegion will focus on **Physical** attacks while Female will focus on **Special attacks**.

</details>

<details>

<summary>Darmanitan</summary>

<figure><img src="/files/WfP9ax051UvImZVgGJR7" alt=""><figcaption><p>Normal and Galrian forms of Darmanitan</p></figcaption></figure>

**How do I change form?**

Unfortunately there is no current way to change Darmanitan's form on the server for either regional form into it's **Zen Mode** form.

</details>

<details>

<summary>Deerling and Sawsbuck</summary>

<figure><img src="/files/19IUu1JQasFX7kUfEAjY" alt="" width="325"><figcaption><p>Spring forms of Deerling and Sawsbuck</p></figcaption></figure>

Currently you can only obtain the **Spring Forms** of these pokemon on the server.

</details>

<details>

<summary>Greninja</summary>

<figure><img src="/files/ZnakYzagkFl5X1PC5p3i" alt=""><figcaption><p>Normal form of Greninja</p></figcaption></figure>

**How do I change form?**

Unfortunately there is no current way to change Greninja's form on the server despite having access to **Battle Bond** which would change it's form elsewhere.

</details>

<details>

<summary>Vivillon</summary>

<figure><img src="/files/vBin6WxHq609lXnSWoGe" alt=""><figcaption><p>Different forms of Vivillon</p></figcaption></figure>

There is currently 23 different forms of Vivillon on the server, which are all just purely cosmetic.

**How do I get a particular form?**

Which form you would like to get will determine on what biome you're currently in when either evolving Spewpa or finding a Vivillon spawn naturally. There are certain forms that are un-available to obtain by normal means.

</details>

<details>

<summary>Flabebe, Floette and Florges</summary>

<figure><img src="/files/CNYs33bSmWWgoaD4Ubvp" alt=""><figcaption><p>Different Colours of Flabebe</p></figcaption></figure>

You'll find all of these within the same biome that Flabebe spawn, so you'll have to get lucky if you wish to find the corresponding colour they you're looking for. When you evolve them it will retain the colour of the flower through the evolution line.

<figure><img src="/files/9HiwkHMqplGOIopaEdTI" alt=""><figcaption><p>Red Flower Floette</p></figcaption></figure>

</details>

<details>

<summary>Furfrou</summary>

<figure><img src="/files/c2bWFvkiIRlcfxdxYSt0" alt=""><figcaption><p>Various Form of Furfrou</p></figcaption></figure>

Unlike with other Pokemon that you can easily change forms between, Furfrou works differently in that you don't actually evolve it since all you need is Shears and a Dye.

**How to change form?**

You will need a **Shear** and a **Dye** of Choice. From there all you need to do is `Shift + Right Click` while holding the dye and there will be a option for you to Change Cosmetic Item which will give the furfrou the dye in your hand.

<div align="center"><figure><img src="/files/D1wEcXpVOaVJ8exuyraU" alt="" width="299"><figcaption></figcaption></figure></div>

After this all you need to do is `Right Click` it with the **Shears** and you'll get a animation of it changing form in which once complete, you'll have the different cut for Furfrou.

<figure><img src="/files/0QBsu5SemTkCpiVBsZlx" alt="" width="269"><figcaption><p>Sheering Animation</p></figcaption></figure>

There is no benefit for changing the forms of Furfrou so it's only cosmetic that will be changing with your Furfrou.

Here you can find a **list of all the different cuts for Furfrou** and the Dye's needed for them:

|                                                       Furfrou Trim                                                       |   Dye Needed   |
| :----------------------------------------------------------------------------------------------------------------------: | :------------: |
|  <div><figure><img src="/files/XlH0ZjGxsrFpCxWugkW2" alt=""><figcaption></figcaption></figure></div><p>Natural Trim</p>  |    White Dye   |
| <div><figure><img src="/files/4ldVXi4fBrbUfcpm1GY4" alt=""><figcaption></figcaption></figure></div><p>Debutante Trim</p> |   Yellow Dye   |
|  <div><figure><img src="/files/frALbJj4Hz4JFjNySqzZ" alt=""><figcaption></figcaption></figure></div><p>Diamond Trim</p>  |   Orange Dye   |
|   <div><figure><img src="/files/sYTBILsll8ZsKgK4oVTy" alt=""><figcaption></figcaption></figure></div><p>Kabuki Trim</p>  |     Red Dye    |
|  <div><figure><img src="/files/PIjmoKQoxg06WNlexh19" alt=""><figcaption></figcaption></figure></div><p>Cinammon Trim</p> |    Brown Dye   |
|  <div><figure><img src="/files/0c9Fx9Sq6jThtF8kJ7y6" alt=""><figcaption></figcaption></figure></div><p>Mourner Trim</p>  |    Black Dye   |
|   <div><figure><img src="/files/nevZtj0Roe4qTmQHGF6G" alt=""><figcaption></figcaption></figure></div><p>Rocker Trim</p>  |    Gray Dye    |
|  <div><figure><img src="/files/FgcAQg0bee2yN25c0pw8" alt=""><figcaption></figcaption></figure></div><p>Crusader Trim</p> | Light Gray Dye |
|   <div><figure><img src="/files/UwP3mfS10vSE3c79dRc7" alt=""><figcaption></figcaption></figure></div><p>Matron Trim</p>  |   Magenta Dye  |
|   <div><figure><img src="/files/blC0mpeiuiE7hTfdj1yL" alt=""><figcaption></figcaption></figure></div><p>Heart Trim</p>   |    Pink Dye    |
|  <div><figure><img src="/files/2ItAdxP5IBm8ILWNEjbY" alt=""><figcaption></figcaption></figure></div><p>Lavender Trim</p> |   Purple Dye   |
|  <div><figure><img src="/files/Bmez8Fy0rQGgDeEAM11G" alt=""><figcaption></figcaption></figure></div><p>Pharoah Trim</p>  |    Blue Dye    |
|    <div><figure><img src="/files/oPYYK019RvOsCiTvZ8t6" alt=""><figcaption></figcaption></figure></div><p>Star Trim</p>   | Light Blue Dye |
|  <div><figure><img src="/files/Q3WLUqrnWI4QdslK97RW" alt=""><figcaption></figcaption></figure></div><p>La Reine Trim</p> |    Cyan Dye    |
|   <div><figure><img src="/files/0JwpaxTiV4Z4Qq8MxxwP" alt=""><figcaption></figcaption></figure></div><p>Matcha Trim</p>  |    Green Dye   |
|   <div><figure><img src="/files/BZ1ahttZTbECuQbGHC4m" alt=""><figcaption></figcaption></figure></div><p>Dandy Trim</p>   |    Lime Dye    |

</details>

<details>

<summary>Meowstic</summary>

<figure><img src="/files/Rf9tttYSvXaog9nYcpgY" alt=""><figcaption><p>Male and Female forms of Mewostic</p></figcaption></figure>

Meowstic has two **forms that are based on it's gender**. In the photo shown above you can see the **male form on the left** and the **female form on the right**. There is no way to change between the forms with a single Meowstic so if you want a certain form you have to hunt for the right gender.

</details>

<details>

<summary>Aegislash</summary>

<figure><img src="/files/vabEQF90dO9mO45CciUB" alt="" width="372"><figcaption><p>Aegislash</p></figcaption></figure>

While Aegislash's ability **Stance Change** is working on the server, it **does not change** the model into it's **Sword Form** despite it stating this is the case within battles.

</details>

<details>

<summary>Oricorio</summary>

<figure><img src="/files/UKMNGBNcmsJODLXL8ohJ" alt="" width="479"><figcaption><p>Baile, Pom-Pom &#x26; Pa'u Forms of Oricorio</p></figcaption></figure>

**How to change forms:**

Unfortunately you can't change forms between the Oricorio's so you will have to get lucky in regards to finding the specific style that you want.

**NOTE**: *Sensu isn't available on the server yet.*

**Differences between forms:**

The different forms will change what typing Oricorio is. These are as follows:

* **Baile** Style - Fire/Flying
* **Pom-Pom** Style - Electric/Flying
* **Pa'u** Style - Psychic/Flying
* **Sensu** Style - Ghost/Flying

</details>

<details>

<summary>Lycanroc</summary>

<figure><img src="/files/ZiGmyB4kTpW3s2eamfZh" alt="" width="554"><figcaption><p>Midnight, Dusk and Midday forms of Lycanroc</p></figcaption></figure>

**How to get these forms of Lycanroc:**

* To get **Midday form** you need to evolve Rockruff in the **Day**.
* To get **Midnight form** you need to evolve Rockruff in the **Night**.
* To get **Dusk form** you need to evolve Rockruff with the ability **Own Tempo** while it's currently **turning into Night**. \[*This is a short period of time compared to the other forms*]

</details>

<details>

<summary>Wishiwashi</summary>

<figure><img src="/files/hpun6HM4jFE5nR8M9Kiv" alt="" width="490"><figcaption><p>Forms of Wishiwashi </p></figcaption></figure>

While wishiwashi is implemented on the server and it's **schooling ability is working**, there is **no current model** for the school form and you'll only tell the difference between forms by the size of the Wishiwashi as if it's **small then it's the normal** form but if it's **large then it's technically in it's schooling** form as seen in the photo above.

</details>

<details>

<summary>Minior</summary>

<figure><img src="/files/2pwPDOdpMQ4D6FfC6lRj" alt=""><figcaption><p>Miniors hiding their True Colours</p></figcaption></figure>

Currently there is **no way for players to change their Miniors form** from the normal form into the shields down form despite the fact it's Shields Down Ability is working in-game.

</details>

<details>

<summary>Toxtricity</summary>

<figure><img src="/files/64T1KwBmkJgsbxN5Nvud" alt=""><figcaption><p>Low Key (Left) and Amped (Right) Forms of Toxtricity</p></figcaption></figure>

In order to get each form of Toxtricity you need to evolve it with the corresponding Nature for each form.

For **Amped Toxtricity** you'll need one of the following natures:

* Hardy
* Brave
* Adamant
* Naughty
* Docile
* Impish
* Lax
* Hasty
* Jolly
* Naive
* Rash
* Sassy
* Quirky

For **Low Key Toxtricity** you'll need one of the following natures:

* Lonely
* Bold
* Relaxed
* Timid
* Serious
* Modest
* Mild
* Quiet
* Bashful
* Calm
* Gentle
* Careful

Once you have leveled your Toxel up to **Lvl 30** you can then evolve it to the Toxtricity **corresponding to the nature** you have within the status menu.

<figure><img src="/files/vXu9SHdTsY9l1yhzAV3p" alt=""><figcaption><p>Status Menu for Toxel</p></figcaption></figure>

</details>

<details>

<summary>Sinistea and Polteageist</summary>

<figure><img src="/files/oOvwWgVixEiSDXc0zZD1" alt=""><figcaption><p>Sinistea and Polteageist</p></figcaption></figure>

While you can obtain both **Cracked Pot** (*Phony Form*) and **Chipped Pot** (*Antique Form*) in order to **evolve Sinistea** into it's respective forms, there unfornately **isn't any way to find differences** between the model in the game as of yet.

</details>

<details>

<summary>Alcremie</summary>

<figure><img src="/files/3o57v9DeV2dN7eL9QxgT" alt="" width="361"><figcaption><p>Different Forms of Alcremie</p></figcaption></figure>

&#x20;There are a fair few different forms of Alcremie you can obtain, each of which you have to evolve into from Milcery.

**How to evolve Milcery**

In order to evolve Milcery into Alcremie you'll need to **give it a sweet to hold**. The full list of sweets include:

* Strawberry Sweet
* Love Sweet
* Berry Sweet
* Clover Sweet
* Flower Sweet
* Start Sweet
* Ribbon Sweet

Now the time of day does also pay a factor into what style you might end up with. Once your milcery has a sweet all you need to do is go into the **status menu** and **evolve it** into the form you wish it to be.

<figure><img src="/files/gPUHEBgEwVEH1EqVEUDA" alt=""><figcaption><p>Status Menu for Milcery</p></figcaption></figure>

Unfortunately once you have evolved your Milcery there is no way to change it's form into a different one so make sure to choose wisely.

</details>

<details>

<summary>Eiscue</summary>

<figure><img src="/files/u9b9R5ALkO7Y01CUFRZC" alt=""><figcaption><p>Ice Face form of Eiscue</p></figcaption></figure>

Currently there is **no way for players to change their Eiscue** from Ice Face form into Noice Face form despite the fact it's Ice Face Ability is working in-game.

</details>

<details>

<summary>Indeedee</summary>

<figure><img src="/files/kQQvPflJ2Qqca5qSi5as" alt=""><figcaption><p>Femal and Male forms of Indeedee</p></figcaption></figure>

Indeedee has two **forms that are based on it's gender**. In the photo shown above you can see the **female form on the left** and the **male form on the right**. There is no way to change between the forms with a single Indeedee so if you want a certain form you have to hunt for the right gender.

</details>

<details>

<summary>Morpeko</summary>

<figure><img src="/files/UQQ1cmJe1QCZkCO4BD9y" alt=""><figcaption><p>Normal form of Morpeko</p></figcaption></figure>

Currently there is **no way for players to change their Morpeko** from Full Belly form into Hangry Mode form despite the fact it's Hunger Switch Ability is working in-game.

</details>

<details>

<summary>Ursaluna</summary>

<figure><img src="/files/P9s4B69SfwwwS2lykzmY" alt=""><figcaption><p>Bloodmoon and Normal forms of Ursulana</p></figcaption></figure>

In order to obtain the **Normal form** of Ursulana, you need to evolve a Urasing with a **Peat Block** while it's **night during a full moon** phase.&#x20;

**Bloodmoon** form is only obtainable as a **ultra-rare spawn** on the server in **magical biomes during a full moon** phase.

</details>

<details>

<summary>Oinkologne</summary>

<figure><img src="/files/PW30VrR2MwKqohK7fOtN" alt=""><figcaption><p>Both forms of Oinkologne</p></figcaption></figure>

Oinkologne has two **forms that are based on it's gender**. In the photo shown above you can see the **male form on the left** and the **female form on the right**. There is no way to change between the forms with a single Oinkologne so if you want a certain form you have to hunt for the right gender.

</details>

<details>

<summary>Maushold</summary>

<figure><img src="/files/YBzk2YP1qTdsMcGwJdTF" alt=""><figcaption><p>Famlly of Four and Three forms of Maushold</p></figcaption></figure>

Most players will end up with the Family of Four form of Maushold, but you have a **1/100 chance of evolving your Tandemaus into the Family of Three form** of Maushold.

</details>

<details>

<summary>Squawkabilly</summary>

<figure><img src="/files/8d662KHYPgWRKIsbNJCB" alt=""><figcaption><p>Each form of Squawkabilly</p></figcaption></figure>

Each form of Squawkabilly is available on the game, but they **all spawn in the same locations** so you'll have to be lucky to find one particular one if you want on particular form. Unlike other forms, there is no certain benefit to one form compared to another.

</details>

<details>

<summary>Palafin</summary>

<figure><img src="/files/OZr2pyK5tu03qMyNSRaK" alt=""><figcaption><p>Normal form of Palafin</p></figcaption></figure>

Unfortunately there is currently **no way for players to turn Palafin into it's Hero form** on the server as of yet.

</details>

<details>

<summary>Tatsugiri</summary>

<figure><img src="/files/l0wOeZynXWiJTVtRzEnO" alt=""><figcaption><p>Droopy (Left), Curly (Middle) &#x26; Stretchy (Right) form of Tatsugiri.</p></figcaption></figure>

Each form of Tatsugiri is available on the game, but they **all spawn in the same locations** so you'll have to be lucky to find one particular one if you want either it's Stretchy, Droopy or Curly forms.

**Benefits to each form**

Outside of different textures, each form comes with their own benefit:

* **Droopy Form** will boost **Defense Stat** when using the move Order Up
* **Curly Form** will boost **Attack Stat** when using the move Order Up
* **Stretchy Form**  will boost **Speed Stat** when using the move Order Up

</details>

<details>

<summary>Dudunsparce</summary>

<figure><img src="/files/598WS4df363XTykyUnsa" alt=""><figcaption><p>Two Segment form of Dudunsparce</p></figcaption></figure>

There us currently **no way** for players to obtain the **Three Segment form** of Dudunsparce on the server.

</details>

<details>

<summary>Gimmighoul and Gholdengo</summary>

<figure><img src="/files/NDNNPIpaUElaD282dmwl" alt=""><figcaption><p>Roaming and Chest form of Gimmighoul alongside Gholdengo</p></figcaption></figure>

Both the Roaming and Chests forms spawn in the same place so you'll have to get lucky to find which version you want, with the Roaming version being a common spawn compared to the chest spawn which is a rare form.

You'll find Gimmighoul's within ruins found throughout the wilds so be sure to keep an eye out for them since they're a great place to earn more coins which you'll need to evolve Gimmighoul into Gholdengo with a whopping **999 relic coins needed**.

Spoiler but if you give Gimmighoul **256 netherite scraps** alongside all of the coins you can actually evolve it into a special Netherite form of Gholdengo.

<figure><img src="/files/5G6hCFJaMfEY3z2pyEvi" alt="" width="204"><figcaption><p>Netherite form of Gholdengo</p></figcaption></figure>

</details>

<details>

<summary>Poltchageist and Sinistcha</summary>

<figure><img src="/files/a6ftylNIbFKgotmEsJOX" alt=""><figcaption><p>Poltchageist and Sinistcha</p></figcaption></figure>

Like with Sinistea and Polteageist, there is **no way to tell the differences** between the forms despite the fact you can obtain the **Masterpiece Teacup** (*Artisan Form*)  and **Unremarkable Teacup** (*Counterfeit Form*) which is needed to evolve Poltchageist into it's respective forms.

</details>

### Custom Forms

Outside of the normal and legendary forms you can find on the server, you'll also be able to find other custom forms of pokemon in the wild. You can find out more about custom pokemon via the **Official Cobblemon Wiki** here:

<https://wiki.cobblemon.com/index.php/Pok%C3%A9mon/Unique_Forms>


# Regional Forms

Here you can find all of the regional forms on the server as well as some information relating to them.

**Contents**

* [Alolan](#alolan)
* [Galarian](#galarian)
* [Hisuian](#hisuian)
* [Paldean](#paldean)

***

Here you can find all of the Pokemon relating to the region the forms were introduced via the official pokemon games. Please not there are some that are yet to be introduced but this guide will be updated once they are in the server!

Regional variants are traits Pokemon retain through evolution, meaning they will not change form if an alternative exists. The exceptions to this lies with regional-bias variants, where an evolution may have differing regional forms, despite the pre-evolution not having such options (such as Alolan Raichu, despite there not existing an Alolan Pikachu). In these cases they will prefer their same variant, but can evolve into other options based on the biome in which the evolution takes place.

### Alolan

<table><thead><tr><th width="119">Pokemon</th><th>Normal Form</th><th>Alolan Form</th><th>Evolution Info</th></tr></thead><tbody><tr><td>Rattata</td><td><p><img src="/files/0LfOwlkK4PrK4uSNycMg" alt="" data-size="original"></p><p><strong>Typing:</strong>  Normal</p></td><td><p><img src="/files/wyvYmWTi4vRwof6M4utH" alt="" data-size="original"></p><p><strong>Typing</strong>: Dark/Normal</p></td><td>---</td></tr><tr><td>Raticate</td><td><p><img src="/files/TIRknuFSAV2scuhbu7bp" alt="" data-size="original"></p><p><strong>Typing:</strong>  Normal</p></td><td><p><img src="/files/7cxrhiVzZKL53lYDTRDq" alt="" data-size="original"></p><p><strong>Typing</strong>: Dark/Normal</p></td><td>Evolve <strong>Alolan</strong> Rattata at Level 20 during the Night</td></tr><tr><td>Raichu</td><td><p><img src="/files/y2IbTkPu64XzaipERRyF" alt="" data-size="original"></p><p><strong>Typing:</strong>  Electric</p></td><td><p><img src="/files/50t1AfZVxI6sjVgsEbxn" alt="" data-size="original"></p><p><strong>Typing:</strong>  Electric/Psychic</p></td><td>Evolve Pikachu with a Thunder Stone at a Beach or Tropical Biome</td></tr><tr><td>Sandshrew</td><td><p><img src="/files/9da5pJtoSWa7ResbJit4" alt="" data-size="original"></p><p><strong>Typing:</strong>  Ground</p></td><td><p><img src="/files/qfqtc8styAIKPxBT4vBo" alt=""></p><p><strong>Typing:</strong>  Ice/Steel</p></td><td>---</td></tr><tr><td>Sandslash</td><td><p><img src="/files/WxdANKztOSdWKg71QH3a" alt="" data-size="original"></p><p><strong>Typing:</strong>  Ground</p></td><td><p><img src="/files/Mwh0rdP3zHpTY4YMfz5E" alt=""></p><p><strong>Typing:</strong>  Ice/Steel</p></td><td>Evolve <strong>Alolan</strong> Sandshrew with a Ice Stone</td></tr><tr><td>Vulpix</td><td><p></p><p><img src="/files/LyaGb3rfimEROUvwrGuj" alt="" data-size="original"></p><p><strong>Typing:</strong>  Fire</p></td><td><p></p><p><img src="/files/aa4O16IBUrtTYBSfTktM" alt="" data-size="original"></p><p><strong>Typing:</strong>  Ice</p></td><td>---</td></tr><tr><td>Ninetales</td><td><p><img src="/files/y5eUOHTAfi1GtFbOzOXf" alt="" data-size="original"></p><p><strong>Typing:</strong>  Fire</p></td><td><p><img src="/files/FLUfsjhqCjTQAmN3o39H" alt="" data-size="original"></p><p><strong>Typing:</strong>  Ice/Fairy</p></td><td>Evolve <strong>Alolan</strong> Vulpix with a Ice Stone</td></tr><tr><td>Diglett</td><td><p><img src="/files/m5tIrhACp3bHPv3hvyrN" alt="" data-size="original"></p><p><strong>Typing:</strong>  Ground</p></td><td><p><img src="/files/BgmowOyaKhut8Yt1EOx5" alt="" data-size="original"></p><p><strong>Typing:</strong>  Ground/Steel</p></td><td>---</td></tr><tr><td>Dugtrio</td><td><p><img src="/files/A64EXMoTUonsoeWNhpQo" alt="" data-size="original"></p><p><strong>Typing:</strong>  Ground</p></td><td><p><img src="/files/PIJavmkwkOlIR71Gbxk8" alt="" data-size="original"></p><p><strong>Typing:</strong>  Ground/Steel</p></td><td>Evolve <strong>Alolan</strong> Diglett at Level 26</td></tr><tr><td>Meowth</td><td><p><img src="/files/rh2Ppq9gV8MtvMT0aDWU" alt="" data-size="original"></p><p><strong>Typing:</strong>  Normal</p></td><td><p><img src="/files/ExiFsSdkMinjHR5mLYcW" alt="" data-size="original"></p><p><strong>Typing:</strong>  Dark</p></td><td>---</td></tr><tr><td>Persian</td><td><p><img src="/files/TvkTaMTzCOjJnqvGjiQ6" alt="" data-size="original"></p><p><strong>Typing:</strong>  Normal</p></td><td><p><img src="/files/2nfp2TxAxFU8RbbZTLQH" alt="" data-size="original"></p><p><strong>Typing:</strong>  Dark</p></td><td>Evolve <strong>Alolan</strong> Meowth through levelling with High Friendship</td></tr><tr><td>Geodude</td><td><p><img src="/files/RwbOyYZnrZ1XbkVG2XVr" alt="" data-size="original"></p><p><strong>Typing:</strong>  Rock/Ground</p></td><td><p><img src="/files/Pysm1jnJNQ0AIdSA0Cyw" alt="" data-size="original"></p><p><strong>Typing:</strong>  Rock/Electric</p></td><td>---</td></tr><tr><td>Graveler</td><td><p><img src="/files/ZrlVmkY1IdIpkrsBiXLX" alt="" data-size="original"></p><p><strong>Typing:</strong>  Rock/Ground</p></td><td><p><img src="/files/562TgrzzrSUfEacfBA1r" alt="" data-size="original"></p><p><strong>Typing:</strong>  Rock/Electric</p></td><td>Evolve <strong>Alolan</strong> Geodude at Level 25</td></tr><tr><td>Golem</td><td><p><img src="/files/PsZ3WSfskMecM0YbIIOx" alt="" data-size="original"></p><p><strong>Typing:</strong>  Rock/Ground</p></td><td><p><img src="/files/GEL3j7rwuZqaNZ8qiS9l" alt="" data-size="original"></p><p><strong>Typing:</strong>  Rock/Electric</p></td><td>Evolve <strong>Alolan</strong> Graveler by Trading</td></tr><tr><td>Grimer</td><td><p><img src="/files/GsPQM6sUKZGiP7DwQC6u" alt="" data-size="original"></p><p><strong>Typing:</strong>  Poison</p></td><td><p><img src="/files/5WyLnMDaMInWj7Dy6ICX" alt="" data-size="original"></p><p><strong>Typing:</strong>  Poison/Dark</p></td><td>---</td></tr><tr><td>Muk</td><td><p><img src="/files/kLvRff1KFwZIJxLccxXg" alt="" data-size="original"></p><p><strong>Typing:</strong>  Poison</p></td><td><p><img src="/files/L43oQXQpW3bG3yBl8dEl" alt="" data-size="original"></p><p><strong>Typing:</strong>  Poison/Dark</p></td><td>Evolve <strong>Alolan</strong> Grimer at Level 38</td></tr><tr><td>Exeggutor</td><td><p><img src="/files/rmglDRSMSRQomGOZ2PrA" alt="" data-size="original"></p><p><strong>Typing:</strong>  Grass/Psychic</p></td><td><p><img src="/files/ug2R37j2lVFmUOgdOqhr" alt="" data-size="original"></p><p><strong>Typing:</strong>  Grass/Dragon</p></td><td>Evolve Exeggcute with a Leaf Stone in a Beach or Tropical Biome</td></tr><tr><td>Marowak</td><td><p><img src="/files/knE7vJPujASmS23fvP5c" alt="" data-size="original"></p><p><strong>Typing:</strong>  Ground</p></td><td><p><img src="/files/Ub9uo9CZjiLrve4JetSX" alt="" data-size="original"></p><p><strong>Typing:</strong>  Fire/Ghost</p></td><td>Evolve Cubone at Level 28 in a Beach or Volcanic Biome during the Night</td></tr></tbody></table>

### Galarian

<table><thead><tr><th width="120.5">Pokemon</th><th>Normal Form</th><th>Galarian Form</th><th>Evolution Info</th></tr></thead><tbody><tr><td>Meowth</td><td><p><img src="/files/NBNzZhqF2l7prqw5ADQ4" alt="" data-size="original"></p><p><strong>Typing:</strong>  Normal</p></td><td><p><img src="/files/6jRnXm3EkqZi9WoyIixE" alt="" data-size="original"></p><p><strong>Typing:</strong>  Steel</p></td><td>---</td></tr><tr><td>Ponyta</td><td><p><img src="/files/WNz2IcDPTdiFzfvscF4I" alt="" data-size="original"></p><p><strong>Typing:</strong>  Fire</p></td><td><p><img src="/files/dG7UBbpGxJFdbKLLd9uZ" alt="" data-size="original"></p><p><strong>Typing:</strong>  Psychic</p></td><td>---</td></tr><tr><td>Rapidash</td><td><p></p><p><img src="/files/iAbeHHiSqoYFpuai61mT" alt="" data-size="original"></p><p><strong>Typing:</strong>  Fire</p></td><td><p><img src="/files/sYk17eyOePTB7sWp7evB" alt="" data-size="original"></p><p><strong>Typing:</strong>  Psychic/Fairy</p></td><td>Evolve <strong>Galarian</strong> Ponyta at Level 40<br></td></tr><tr><td>Slowpoke</td><td><p><img src="/files/U85qwJOLd4AJe3AaQjiL" alt="" data-size="original"></p><p><strong>Typing:</strong>  Water/Psychic</p></td><td><p><img src="/files/c0dr70wtQ3sso4ftpP4z" alt="" data-size="original"></p><p><strong>Typing:</strong>  Psychic</p></td><td>---</td></tr><tr><td>Slowbro</td><td><p><img src="/files/FdKrC9HlmdmbmUFv5zGt" alt="" data-size="original"></p><p><strong>Typing:</strong>  Water/Psychic</p></td><td><p><img src="/files/FEnbarcPuxxhgnTt59Gv" alt="" data-size="original"></p><p><strong>Typing:</strong>  Poison/Psychic </p></td><td>Evolve <strong>Galarian</strong> Slowpoke with a Galarian Cuff</td></tr><tr><td>Slowking</td><td><p><img src="/files/jLabWTxCHG2tYnkOxQPR" alt="" data-size="original"></p><p><strong>Typing:</strong>  Water/Psychic</p></td><td><p><img src="/files/gT1YuhKrfUclUZxGAIvl" alt="" data-size="original"></p><p><strong>Typing:</strong> Poison/Psychic </p></td><td>Evolve <strong>Galarian</strong> Slowpoke with a Galarian Wreath</td></tr><tr><td>Farfetch'd</td><td><p><img src="/files/zGXTx2WpBgIjb6mEodfx" alt="" data-size="original"></p><p><strong>Typing:</strong>  Normal/Flying</p></td><td><p><img src="/files/csUG1bDNWNbcML5hdlCY" alt="" data-size="original"></p><p><strong>Typing:</strong>  Fighting</p></td><td>---</td></tr><tr><td>Weezing</td><td><p><img src="/files/1hNpP7oAAGwhzHOGokxP" alt="" data-size="original"></p><p><strong>Typing:</strong>  Poison</p></td><td><p><img src="/files/pQ18r0gU7eKc6yzgCaK0" alt="" data-size="original"></p><p><strong>Typing:</strong>  Poison/Fairy</p></td><td>Evolve Koffing at Level 35 in a Mushroom Biome</td></tr><tr><td>Mr. Mime</td><td><p><img src="/files/nq29ArZm0QhGPbIsnlBH" alt="" data-size="original"></p><p><strong>Typing:</strong>  Psychic/Fairy</p></td><td><p><img src="/files/ZsV4zXZxjx3dQwe8kEuN" alt="" data-size="original"></p><p><strong>Typing:</strong>  Ice/Psychic</p></td><td>Evolve Mime Jr. through levelling whilst knowing move Mimic in Freezing Biome</td></tr><tr><td>Corsola</td><td><p><img src="/files/mISx1fQCRW58cx1ANXkc" alt="" data-size="original"></p><p><strong>Typing:</strong>  Water/Rock</p></td><td><p><img src="/files/acV3YeDX2OCJiVZa951x" alt="" data-size="original"></p><p><strong>Typing:</strong>  Ghost</p></td><td>---</td></tr><tr><td>Zigzagoon</td><td><p><img src="/files/ewlD62XakyUz3U1OMWe5" alt="" data-size="original"></p><p><strong>Typing:</strong>  Normal</p></td><td><p><img src="/files/IGLHiOUFhV12YH1aTQCh" alt="" data-size="original"></p><p><strong>Typing:</strong>  Dark/Normal</p></td><td>---</td></tr><tr><td>Linoone</td><td><p><img src="/files/SGHlh3t7zHRAMUfBOgId" alt="" data-size="original"></p><p><strong>Typing:</strong>  Normal</p></td><td><p><img src="/files/1XxRsTfc4he1JJVr3Ahp" alt="" data-size="original"></p><p><strong>Typing:</strong>  Dark/Normal</p></td><td>Evolve <strong>Galarian</strong> Zigzagoon at Level 20</td></tr><tr><td>Darumaka</td><td><p><img src="/files/GhSzyztgcPi57uc8DgfF" alt="" data-size="original"></p><p><strong>Typing:</strong>  Fire</p></td><td><p><img src="/files/XkIdCmRFFp8mvFYskbFU" alt="" data-size="original"></p><p><strong>Typing:</strong>  Ice</p></td><td>---</td></tr><tr><td>Darmanitan</td><td><p><img src="/files/fC1eklGnvPOafMEhoFOq" alt="" data-size="original"></p><p><strong>Typing:</strong>  Fire</p></td><td><p><img src="/files/mPQxCzpTQQws2KRhdNQJ" alt="" data-size="original"></p><p><strong>Typing:</strong>  Ice</p></td><td>Evolve <strong>Galarian</strong> Darumaka with a Ice Stone</td></tr><tr><td>Darmanitan (<em>Zen Mode</em>)</td><td><p><img src="/files/4yej4HZZjp0EudrUTe99" alt=""></p><p></p><p><strong>Typing:</strong>  Fire/Psychic</p></td><td><p><strong>GALARIAN FORM NOT IN COBBLEMON YET.</strong></p><p></p><p><strong>Typing:</strong>  Ice/Fire</p></td><td>---</td></tr><tr><td>Yamask</td><td><p><img src="/files/LK0PTLtGcmhVs8ro92A0" alt="" data-size="original"></p><p><strong>Typing:</strong>  Ghost</p></td><td><p><img src="/files/F68e0y5G4Ui2dwrRg3d1" alt="" data-size="original"></p><p><strong>Typing:</strong>  Ground/Ghost</p></td><td>---</td></tr><tr><td>Stunfisk</td><td><p><img src="/files/Q0rpzj6Vl6EuVzd5oEmS" alt="" data-size="original"></p><p><strong>Typing:</strong>  Ground/Electric</p></td><td><p><img src="/files/0IbYmDXUTWwj2QYhqios" alt="" data-size="original"></p><p><strong>Typing:</strong>  Ground/Steel</p></td><td>---</td></tr><tr><td>Articuno</td><td><p><img src="/files/eYNQ84bDA9ddKPRbTFlv" alt="" data-size="original"></p><p><strong>Typing:</strong>  Ice/Flying</p></td><td><p><img src="/files/1mfV6BPEYznqcbC8CmBu" alt="" data-size="original"></p><p><strong>Typing:</strong>  Psychic/Flying</p></td><td>---</td></tr><tr><td>Zapdos</td><td><p><img src="/files/FAX746PVvxufYhoT2Lww" alt="" data-size="original"></p><p><strong>Typing:</strong>  Electric/Flying</p></td><td><p><img src="/files/CLEjYWDTCfA29wUxEGbE" alt="" data-size="original"></p><p><strong>Typing:</strong>  Fighting/Flying</p></td><td>---</td></tr><tr><td>Moltres</td><td><p><img src="/files/0n3QGgs5BkVAnwBPZZKZ" alt="" data-size="original"></p><p><strong>Typing:</strong>  Fire/Flying</p></td><td><p><img src="/files/Tef0E4OmN3BiOOy0Dr1y" alt="" data-size="original"></p><p><strong>Typing:</strong>  Dark/Flying</p></td><td>---</td></tr></tbody></table>

### Hisuian

<table><thead><tr><th width="108.5">Pokemon</th><th>Normal Form</th><th>Hisuian Form</th><th>Evolution Info</th></tr></thead><tbody><tr><td>Decidueye</td><td><p><img src="/files/QvmtI6p6A6wwkny5fJNJ" alt="" data-size="original"></p><p><strong>Typing:</strong>  Grass/Ghost</p></td><td><p><img src="/files/NKp8N1aSdlzgQpUm0dPL" alt="" data-size="original"></p><p><strong>Typing:</strong>  Grass/Fighting</p></td><td>Evolve Dartrix at Level 36 in a Hills or Freezing Biome</td></tr><tr><td>Typhlosion</td><td><p><img src="/files/kGKg6xtCVv5V4fT4CO58" alt="" data-size="original"></p><p><strong>Typing:</strong>  Fire</p></td><td><p><img src="/files/etJHcSeLxrbi3Rv0o7MB" alt="" data-size="original"></p><p><strong>Typing:</strong>  Fire/Ghost</p></td><td>Evolve Quilava at Level 36 in a Taiga, Crimson, Forest or Overgrowth Biome</td></tr><tr><td>Samurott</td><td><p><img src="/files/LGevxoObQt05xuqrAApH" alt="" data-size="original"></p><p><strong>Typing:</strong>  Water</p></td><td><p><img src="/files/7HL1BOqev3x2m3dLUobt" alt="" data-size="original"></p><p><strong>Typing:</strong>  Water/Dark</p></td><td>Evolve Dewott at Level 36 in a Coast, Snowy Beach or <br>Cold Ocean Biome</td></tr><tr><td>Zorua</td><td><p><img src="/files/3FzymbiAjsgEheFkcD3F" alt="" data-size="original"></p><p><strong>Typing:</strong>  Dark</p></td><td><p><img src="/files/ITmeSrCQZmD2JZoolKsK" alt="" data-size="original"></p><p><strong>Typing:</strong>  Normal/Ghost</p></td><td>---</td></tr><tr><td>Zoroark</td><td><p><img src="/files/21AFwkkwBUwn6V9YFY6n" alt="" data-size="original"></p><p><strong>Typing:</strong>  Dark</p></td><td><p><img src="/files/y84WELNtzbWQyfvYSTyy" alt="" data-size="original"></p><p><strong>Typing:</strong>  Normal/Ghost</p></td><td>Evolve <strong>Hisuian</strong> Zorora at Level 30</td></tr><tr><td>Lilligant</td><td><p><img src="/files/B2EgNeWuwJwBoOUlAqjj" alt="" data-size="original"></p><p><strong>Typing:</strong>  Grass</p></td><td><p><img src="/files/6Nojhi90bFBUs0qhStvi" alt="" data-size="original"></p><p><strong>Typing:</strong>  Grass/Fighting</p></td><td>Evolve Petilil with a Sun Stone in a Hills or Freezing Biome</td></tr><tr><td>Qwilfish</td><td><p><img src="/files/NZoqrnYMp1glxsRMvkNn" alt="" data-size="original"></p><p><strong>Typing:</strong>  Water/Poison</p></td><td><p><img src="/files/e6XAgrPjQyu12uVWIrM5" alt="" data-size="original"></p><p><strong>Typing:</strong>  Dark/Poison</p></td><td>---</td></tr><tr><td>Sneasel</td><td><p><img src="/files/t3xRWye1dBQ2gBeQIks4" alt="" data-size="original"></p><p><strong>Typing:</strong>  Dark/Ice</p></td><td><p><img src="/files/pLs58w3aXLewckNLr6m2" alt="" data-size="original"></p><p><strong>Typing:</strong>  Fighting/Poison</p></td><td>---</td></tr><tr><td>Voltorb</td><td><p><img src="/files/74FMWgGGmuz9EKgG7sLL" alt="" data-size="original"></p><p><strong>Typing:</strong>  Electric</p></td><td><p><img src="/files/FzcOjw2mabobPhogoN7i" alt="" data-size="original"></p><p><strong>Typing:</strong>  Electric/Grass</p></td><td>---</td></tr><tr><td>Electrode</td><td><p><img src="/files/hDD1RZrkrMIqjZoMe3LI" alt="" data-size="original"></p><p><strong>Typing:</strong>  Electric</p></td><td><p><img src="/files/jAOsw5ymqoRhjw4ZDpic" alt="" data-size="original"></p><p><strong>Typing:</strong>  Electric/Grass</p></td><td>Evolve <strong>Hisuian</strong> Voltorb with a Leaf Stone</td></tr><tr><td>Growlithe</td><td><p><img src="/files/vAGmkDozl8289iCzS0Ky" alt="" data-size="original"></p><p><strong>Typing:</strong>  Fire</p></td><td><p><img src="/files/40pfRzYiXRoJR7YFPN6J" alt="" data-size="original"></p><p><strong>Typing:</strong>  Fire/Rock</p></td><td>---</td></tr><tr><td>Arcanine</td><td><p><img src="/files/dXr5GgYHLw1vhA8KvBk3" alt="" data-size="original"></p><p><strong>Typing:</strong>  Fire</p></td><td><p><img src="/files/qiKXwpwzRItHXXwypyWZ" alt="" data-size="original"></p><p><strong>Typing:</strong>  Fire/Rock</p></td><td>Evolve <strong>Hisuian</strong> Growlithe with a Fire Stone</td></tr><tr><td>Braviary</td><td><p><img src="/files/af7gby3iAIyWs3DguDKb" alt="" data-size="original"></p><p><strong>Typing:</strong>  Normal/Flying</p></td><td><p><img src="/files/YO0Rjiw6NiIdJGlIAb6A" alt="" data-size="original"></p><p><strong>Typing:</strong>  Psychic/Flying</p></td><td>Evolve Rufflet at Level 54 in a Hills or Freezing Biome</td></tr><tr><td>Sliggoo</td><td><p><img src="/files/weXwXzWWYqHDLSx5vqWC" alt="" data-size="original"></p><p><strong>Typing:</strong>  Dragon</p></td><td><p><img src="/files/hlOwbcNlHgBAeMx2OqGy" alt="" data-size="original"></p><p><strong>Typing:</strong>  Steel/Dragon</p></td><td>Evolve Goomy at Level 40 in a Dripstone or Lush Biome</td></tr><tr><td>Goodra</td><td><p><img src="/files/PeSJ6EAc3opawzHJadkx" alt="" data-size="original"></p><p><strong>Typing:</strong>  Dragon</p></td><td><p><img src="/files/JTIlTZL2iSqRXQqQOUze" alt="" data-size="original"></p><p><strong>Typing:</strong>  Steel/Dragon</p></td><td>Evolve <strong>Hisuian</strong> Sligoo at Level 50 during Rainy Weather</td></tr><tr><td>Avalugg</td><td><p><img src="/files/Ix1j9epUdtosLHREAWRI" alt="" data-size="original"></p><p><strong>Typing:</strong>  Ice</p></td><td><p><img src="/files/WgY2XI4ozTho8GkoQBLl" alt="" data-size="original"></p><p><strong>Typing:</strong>  Ice/Rock</p></td><td>Evolve Bergmite at Level 37 in a Hills Biome</td></tr></tbody></table>

### Paldean

<table><thead><tr><th width="140">Pokemon</th><th>Normal Form</th><th>Paldean Form(s)</th><th>Evolution Info</th></tr></thead><tbody><tr><td>Tauros (<em>Combat Breed</em>)</td><td><p><img src="/files/jNM9Op0KdKOQVk94WliL" alt="" data-size="original"></p><p><strong>Typing</strong>: Normal</p></td><td><p><img src="/files/wTtE4wDlG18v7wPv8jhp" alt="" data-size="original"></p><p><strong>Typing</strong>: Fighting</p></td><td>---</td></tr><tr><td>Tauros (<em>Blaze Breed</em>)</td><td><p><img src="/files/VDMIq06KR7I17Ign9dGl" alt="" data-size="original"></p><p><strong>Typing</strong>: Normal</p></td><td><p><img src="/files/dfjWTo9RPbgZZbbkGkDl" alt="" data-size="original"></p><p><strong>Typing</strong>: Fighting/Fire</p></td><td>---</td></tr><tr><td>Tauros (<em>Aqua Breed</em>)</td><td><p><img src="/files/rL70qObUE13rS5ZgLTvq" alt=""></p><p></p><p><strong>Typing</strong>: Normal</p></td><td><p><img src="/files/hxrSx12hkzb4hSjwE8xu" alt="" data-size="original"></p><p><strong>Typing</strong>: Fighting/Water</p></td><td>---</td></tr><tr><td>Wooper</td><td><p><img src="/files/sm86fVWAgEy54fz8isje" alt=""></p><p></p><p><strong>Typing</strong>: Water/Ground</p></td><td><p><img src="/files/ihivWp6XwfhEZ1ydPvwD" alt="" data-size="original"></p><p><strong>Typing</strong>: Poison/Ground</p></td><td>---</td></tr></tbody></table>


# Complete Guide to Pokeballs

Here you'll find out everything you need to know about Pokeballs from all the items you need to the recipe's for each Pokeball.

**Contents**

1. [What are Pokeballs?](#what-are-pokeballs)
2. [What do I need to craft Pokeballs?](#what-do-i-need-to-craft-pokeballs)
   1. [Ores](#ores)
   2. [Apricorns](#apricorns)
   3. [Tumblestone](#tumblestone)
3. [Recipes and Uses for Pokeballs](#recipes-and-uses-for-pokeballs)
   1. [Normal Pokeballs](#normal-pokeballs)
   2. [Ancient Pokeballs](#ancient-pokeballs)
   3. [Uncraftable Pokeballs](#uncraftable-pokeballs)

***

### What are Pokeballs?

Pokeballs is one of the most important features to not only Cobblemon, but the base games of Pokemon. These are use to catch pokemon you find within the wild so that you can use them on your own team or to fill out your Pokedex.

In order to use your Pokeballs, once obtained **you can either throw them directly at the Pokemon** while holding it within your hand and clicking Right Click on your mouse. If you miss the pokemon then the Pokeball will be dropped on the ground which you can go ahead and pick it back up.

Alternatively you can **get into a fight with the pokemon** in question and you'll have the **option to throw a Pokeball** at them. You'll want to decrease the Pokemons health and give it status affects for a higher chance at catching the Pokemon.

### What do I need to craft Pokeballs?

There are three main ingredients you'll be using to craft any of the Pokeballs on the server with these being **Ores**, **Apricorn** and **Tumbestones**.

#### Ores

You'll need some basic Minecraft ores with each of the Poke Ball recipes on the server, which are obtained in their normal means as well as within the Pokemart. The main ores you'll be using is:

* Iron Ingot
* Gold Ingot
* Copper Ingot
* Diamond

**For any of the Pokeball recipe's you'll only be needing one of these** in order to craft the Pokeball.

#### Apricorns

<div align="left"><figure><img src="/files/IA2NKKnN6kLQDKRwERwg" alt=""><figcaption><p>Each Available Apricorn</p></figcaption></figure></div>

Apricorns are one of the main ingredients you'll be using to craft Pokeballs. Depending on which Pokeball you are trying to craft will determine which Apricorn you will need. There is only **7 different apricorns** you can obtain.&#x20;

If you place these within a furnace you can also turn them into dyes.

You will be able to obtain these by finding Apricorn Tree's within the wild which you can harvest any ready Apricorns on them. Apricorn trees will have leaves that are orange-brown colour so they'll stand out to each other tree you can find. On these tree's you can find sprouts which will start off black but will grow into the colour of apricorn relating to which type of tree it is.

<div align="left"><figure><img src="/files/Ocj8hVGfdaEvCnl6TlJD" alt="" width="211"><figcaption><p>Ex of a Apricorn Tree</p></figcaption></figure></div>

In order to obtain apricorns from these tree's all you need to do is **right click on the sprouts when they're full of colour** as seen in the photo above. When collecting Apricorns from the tree's there will be a 10% chance you can obtain a Apricorn Sprout relating to the Apricorn Colour tree you are harvesting which you can use to place more Apricorn tree's around within your realm.

Like with Ores, you can **purchase** these from the Pokemart via `/shop`

#### Tumblestone

**Tumblestone is only needed for any of the Ancient Pokeballs** if you wish to craft them.

<div align="left"><figure><img src="/files/VkjXCpN0Yvtb3mF1YkoU" alt=""><figcaption><p>Tumblestone, Black Tumblestone &#x26; Sky Tumblestone</p></figcaption></figure></div>

In order to obtain tumblestones on the server you will be looking out for **suspicious gravel and sand within ruins** on the server, and then **using a brush** you'll have a chance to obtain a Tumblestone. These only have slight differences between normal Sand and Gravel so you'll need a keen eye to find them.

<div align="left"><figure><img src="/files/XxjsIZif7KGAmKSHleSz" alt="" width="352"><figcaption><p>Suspicious Sand and Suspicious Gravel (Bottom right is Normal Gravel)</p></figcaption></figure></div>

Once you have obtained a Tumblestone it's actually incredibly easy to start farming them so you don't have to go through the pain of finding more suspicious sand spots. One of the **best ways to farm them** is to **place them onto Magma Blocks**, or you can also farm them on **blocks that are directly next to Lava** for the quickest time taken to grow them.

<div align="left"><figure><img src="/files/1Q4Ok4XwGrc67B9pMOFQ" alt="" width="256"><figcaption><p>Tumblestone growing on Magma Blocks</p></figcaption></figure></div>

You'll want to **mine them once they're at a full cluster** since you'll get 4 tumblestone compared to mining it's starting form which will only give you 1 tumblestone.

<div align="left"><figure><img src="/files/81OFe8JaMbh8UP7kSftM" alt="" width="265"><figcaption><p>Each cluster size of Tumblestone from Small to Large</p></figcaption></figure></div>

Like with Ores and Apricorns, you can **purchase** these from the Pokemart via `/shop`

### Recipes and Uses for Pokeballs

There are numerous amounts of Pokeballs which come with their own uses as well as recipes to craft them. You'll mainly be using the items that are stated above to create each of these. **Some pokeballs have requirements** to get the full potentional of the Pokeball like with the Dusk Ball so be sure to use the fight Pokeball at the right time so you ain't wasting it.

You can purchase most of these Pokeballs on our server via our **Pokemart** which you can access using the command `/shop`

#### Normal Pokeballs

Here you'll find all of the base Pokeball recipe's on the server alongside the uses of them in the list below?

<details>

<summary><strong>Normal Pokeball Recipes &#x26; Uses</strong></summary>

**Poké Ball**

<div align="left"><figure><img src="/files/UR9RXFA4b2vVw3IggD7L" alt=""><figcaption><p>4x Red Apricorn + 1x Copper Ingot</p></figcaption></figure></div>

A Poké Ball has a 1x catch rate of Pokemon on the server.

**Citrine Ball**

<div align="left"><figure><img src="/files/fbYoPFrhf5M4YdguKTOs" alt=""><figcaption><p>4x Yellow Apricorn + 1x Copper Ingot</p></figcaption></figure></div>

A Citrine Ball has a 1x catch rate of Pokemon on the server. This is one of the 6 reskins of the Pokeball.

**Verdant Ball**

<div align="left"><figure><img src="/files/eAq9xUT5uX6puIpx6naU" alt=""><figcaption><p>4x Green Apricorn + 1x Copper Ingot</p></figcaption></figure></div>

A Verdant Ball has a 1x catch rate of Pokemon on the server. This is one of the 6 reskins of the Pokeball.

**Azure Ball**

<div align="left"><figure><img src="/files/gwA0hvjLhYAiTcD0ddZq" alt=""><figcaption><p>4x Blue Apricorn + 1x Copper Ingot</p></figcaption></figure></div>

A Azure Ball has a 1x catch rate of Pokemon on the server. This is one of the 6 reskins of the Pokeball.

**Roseate Ball**

<div align="left"><figure><img src="/files/efRvN995t4HvencDOFAg" alt=""><figcaption><p>4x Pink Apricorn + 1x Copper Ingot</p></figcaption></figure></div>

A Roseate Ball has a 1x catch rate of Pokemon on the server. This is one of the 6 reskins of the Pokeball.

**Slate Ball**

<div align="left"><figure><img src="/files/huUf4h6IKmUOxMzoPx3u" alt=""><figcaption><p>4x Black Apricorn + 1x Copper Ingot</p></figcaption></figure></div>

A Slate Ball has a 1x catch rate of Pokemon on the server. This is one of the 6 reskins of the Pokeball.

**Premier Ball**

<div align="left"><figure><img src="/files/RUCKTMH8Qs4eHpKO4Htp" alt=""><figcaption><p>4x White Apricorn + 1x Copper Ingot</p></figcaption></figure></div>

A Premier Ball has a 1x catch rate of Pokemon on the server. This is one of the 6 reskins of the Pokeball.

**Great Ball**

<div align="left"><figure><img src="/files/iiHce5xRoAy5d4EcStcm" alt=""><figcaption><p>2x Red Apricorn + 2x Blue Apricorn + 1x Iron Ingot</p></figcaption></figure></div>

A Great Ball has a 1.5x catch rate of Pokemon on the server.

**Ultra Ball**

<div align="left"><figure><img src="/files/X7YTZ6CE5vKj7G5R5sGh" alt=""><figcaption><p>2x Black Apricorn + 2x Yellow Apricorn + 1x Gold Ingot</p></figcaption></figure></div>

A Ultra Ball has a 2x catch rate of Pokemon on the server.

**Safari Ball**

<div align="left"><figure><img src="/files/VzRhz1a5xAAm6f1FC4mo" alt=""><figcaption><p>2x Green Apricorn + 1x Yellow Apricorn + 1x White Apricorn + 1x Copper Ingot</p></figcaption></figure></div>

A Safari Ball has a 1.5x catch rate of Pokemon on the server when outside the battle.

**Fast Ball**

<figure><img src="/files/9gO8K9XwVV2PoXitSTxI" alt=""><figcaption><p>1x Red Apricorn + 2x Yellow Apricorn + 1x White Apricorn + 1x Iron Ingot</p></figcaption></figure>

A Fast Ball has a 4x catch rate when used on Pokemon with 100 or more Base Speed.

**Level Ball**

<div align="left"><figure><img src="/files/C7RGwnIvkCnrScuCx7mr" alt=""><figcaption><p>1x Red Apricorn + 1x Yellow Apricorn + 1x Black Apricorn + 1x Pink Apricorn + 1x Iron Ingot</p></figcaption></figure></div>

A Fast Ball has a 1x to 4x catch rate on Pokemon depenant on their level compared to the wild pokemon in  general.&#x20;

I.e. if the highest level pokemon in your party is 4x the level of the target pokemon then the modifier will be 4x. If your level is greater than 2x then the catch modifier will be 2x and so on.

**Lure Ball**

<div align="left"><figure><img src="/files/VaxvkAjLaHDZdN5NGbxG" alt=""><figcaption><p>2x Red Apricorn + 1x Blue Apricorn + 1x Green Apricorn + 1x Iron Ingot</p></figcaption></figure></div>

A Lure Ball has a 2x catch rate on Pokemon caught via a Poke Rod.

**Heavy Ball**

<div align="left"><figure><img src="/files/fd9MbIfGuFOkahF6oXG1" alt=""><figcaption><p>2x Black Apricorn + 2x Blue Apricorn + 1x Iron Ingot</p></figcaption></figure></div>

A Heavy Ball has a 1x to 4x catch rate on Pokemon dependant on their weight of the wild target pokemon.&#x20;

I.e. if target Pokemon is 3000 hectograms or more than it will be 4x effective, if it's between 2000 to 2999 then it will be 2.5 and so on.

**Love Ball**

<div align="left"><figure><img src="/files/yDMEktlhxEU5HrG8FoPY" alt=""><figcaption><p>3x Pink Apricorn + 1x White Apricorn + 1x Gold Ingot</p></figcaption></figure></div>

A Love Ball has a 8x catch rate if the target Pokemon is the opposite gender to any pokemon within your party as otherwise it will be a 1x catch rate.

**Friend Ball**

<figure><img src="/files/QfdowdyVskRPFtNtoSXu" alt=""><figcaption><p>2x Green Apricorn + 1x Red Apricorn + 1x Yellow Apricorn + 1x Iron Ingot</p></figcaption></figure>

A Friend Ball has a 1x catch rate on Pokemon. A Pokemon caught with a friend ball will start off with 150 friendship.

**Moon Ball**

<div align="left"><figure><img src="/files/LRuWbmrr618yB43Liz9Y" alt=""><figcaption><p>1x Blue Apricorn + 1x Black Apricorn + 1x Yellow Apricorn + 1x White Apricorn + 1x Iron Ingot</p></figcaption></figure></div>

A Moon Ball has a catch rate between 1x to 4x dependant on how close the phase of the moon is to being full.

**Sport Ball**

<div align="left"><figure><img src="/files/gpYHt0DCCL45TWfbNqaf" alt=""><figcaption><p>3x Red Apricorn + 1x White Apricorn + 1x Iron Ingot</p></figcaption></figure></div>

A Sport Ball has a static catch rate of 1.5x although this will be changing in the future.

**Park Ball**

<div align="left"><figure><img src="/files/6qHH1b0miYavKoevUzyo" alt=""><figcaption><p>3x Green Apricorn + 1x Red Apricorn + 1x Iron Ingot</p></figcaption></figure></div>

A Park Ball has a 2.5x catch rate on Pokemon currently within a Forest or Plains biome.

**Net Ball**

<div align="left"><figure><img src="/files/sxK4DujapfBhdmvagJ7f" alt=""><figcaption><p>2x Blue Apricorn + 1x Black Apricorn + 1x White Apricorn + 1x Iron Ingot</p></figcaption></figure></div>

A Net Ball has a 3x catch rate on Bug Type and Water Type Pokemon.

**Dive Ball**

<div align="left"><figure><img src="/files/LXeYYIsxbOFa6kV9jGuz" alt=""><figcaption><p>3x Blue Apricorn + 1x White Apricorn + 1x Iron Ingot</p></figcaption></figure></div>

A Dive Ball has a 3.5x catch rate on Pokemon submerged underwater.

**Nest Ball**

<figure><img src="/files/E0ktkj3m7NjfIDQs3Ode" alt=""><figcaption><p>2x Green Apricorn + 2x Yellow Apricorn + 1x Iron Ingot</p></figcaption></figure>

A Nest Ball has a catch rate of 1x to 4x which increases the lower the targets level is from 30.

**Repeat Ball**

<div align="left"><figure><img src="/files/OysUkuqtpIOgphjcQndV" alt=""><figcaption><p>2x Red Apricorn + 1x Yellow Apricorn + 1x Black Apricorn + 1x Gold Ingot</p></figcaption></figure></div>

A Repeat Ball has a 3.5x catch rate on Pokemon already registered as caught within the Pokedex, otherwise it has  a catch rate of 1x.

**Timer Ball**

<div align="left"><figure><img src="/files/oNzlgfyRmSmBwZ1yfp6j" alt=""><figcaption><p>2x White Apricorn + 1x Red Apricorn + 1x Black Apricorn + 1x Gold Ingot</p></figcaption></figure></div>

A Timer Ball has a catch rate of 1x which increases by 0.3xn for each turn passed up to 4x catch rate.

**Luxury Ball**

<div align="left"><figure><img src="/files/R8bbrpl8BlUdusn0sino" alt=""><figcaption><p>2x Black Apricorn + 1x Red Apricorn + 1x White Apricorn + 1x Gold Ingot</p></figcaption></figure></div>

A Luxury Ball has a catch rate of 1x. Any pokemon caught with a Luxury Ball will gain friendship twice as fast.

**Dusk Ball**

<div align="left"><figure><img src="/files/PNqH0ygyqBA6dhrwDBf5" alt=""><figcaption><p>2x Black Apricorn + 2x Green Apricorn + 1x Gold Ingot</p></figcaption></figure></div>

A Dusk Ball has a 3.5x catch rate if the light level is in 0 and 3x if the target is in light level 1-7.

**Heal Ball**

<div align="left"><figure><img src="/files/Dlhsp7RWFTjRjZ2YK3uY" alt=""><figcaption><p>2x Pink Apricorn + 2x White Apricorn + 1x Copper Ingot</p></figcaption></figure></div>

A Heal Ball has a catch rate of 1x. Any pokemon caught with a heal ball will fully restore their PP, HP and any status conditions.

**Quick Ball**

<div align="left"><figure><img src="/files/IZnbOIkbQuF3RLkuDr4C" alt=""><figcaption><p>2x Blue Apricorn + 2x Yellow Apricorn + 1x Gold Ingot</p></figcaption></figure></div>

A Quick Ball has a 5x catch rate if used on the first turn of a battle, otherwise it has a catch rate of 1x.

**Dream Ball**

<div align="left"><figure><img src="/files/zvIOfSW5CaHOdy5tO060" alt=""><figcaption><p>2x Pink Apricorn + 1x Red Apricorn + 1x Blue Apricorn + 1x Diamond</p></figcaption></figure></div>

A Dream Ball has a 4x catch rate on sleeping Pokemon, otherwise it has a catch rate of 1x.

**Beast Ball**

<div align="left"><figure><img src="/files/fDL4ASQaSoswfmBnENDE" alt=""><figcaption><p>4x Gold Ingot, 4x Echo Shard, 1x Diamond</p></figcaption></figure></div>

A Beast Ball has a 5x catch rate on Ultra Beats, otherwise it has a catch rate of 0.1x.

</details>

#### Ancient Pokeballs

Unlike Normal Pokeballs which includes normal ores from Minecraft for crafting Pokeballs, you'll be using Tumblestone instead with the recipe's and uses found below.

<details>

<summary><strong>Ancient Pokeball Recipes &#x26; Uses</strong></summary>

**Ancient Poké Ball**

<div align="left"><figure><img src="/files/J6tUgLHYXLNyWUMTE9fS" alt=""><figcaption><p>2x Red Apricorn, 2x Tumblestone, 1x Copper Ingot</p></figcaption></figure></div>

A Ancient Poké Ball has a 1x catch rate of Pokemon on the server.

**Ancient Citrine Ball**

<div align="left"><figure><img src="/files/wLkV6uewoO7MKIqx9l2I" alt=""><figcaption><p>2x Yellow Apricorn, 2x Tumblestone, 1x Copper Ingot</p></figcaption></figure></div>

A Ancient Citrine Ball has a 1x catch rate of Pokemon on the server. This is one of the 6 reskins of the Pokeball.

**Ancient Verdant Ball**

<div align="left"><figure><img src="/files/SQ9OkzBZ8YKL7Stmh3K8" alt=""><figcaption><p>2x Green Apricorn, 2x Tumblestone, 1x Copper Ingot</p></figcaption></figure></div>

A Ancient Verdant Ball has a 1x catch rate of Pokemon on the server. This is one of the 6 reskins of the Pokeball.

**Ancient Azure Ball**

<div align="left"><figure><img src="/files/9U9jZHzc2W6Dgvb2HZq0" alt=""><figcaption><p>2x Blue Apricorn, 2x Tumblestone, 1x Copper Ingot</p></figcaption></figure></div>

A Ancient Azure Ball has a 1x catch rate of Pokemon on the server. This is one of the 6 reskins of the Pokeball.

**Ancient Roseate Ball**

<div align="left"><figure><img src="/files/c2x9uyS9UBM06T1RLFqQ" alt=""><figcaption><p>2x Pink Apricorn, 2x Tumblestone, 1x Copper Ingot</p></figcaption></figure></div>

A Ancient Roseate Ball has a 1x catch rate of Pokemon on the server. This is one of the 6 reskins of the Pokeball.

**Ancient Slate Ball**

<div align="left"><figure><img src="/files/CqfqWB1r26nazwAnkVdi" alt=""><figcaption><p>2x Black Apricorn, 2x Tumblestone, 1x Copper Ingot</p></figcaption></figure></div>

A Ancient Slate Ball has a 1x catch rate of Pokemon on the server. This is one of the 6 reskins of the Pokeball.

**Ancient Ivory Ball**

<div align="left"><figure><img src="/files/uVQtuZWrJsnaMRb7GWjT" alt=""><figcaption><p>2x White Apricorn, 2x Tumblestone, 1x Copper Ingot</p></figcaption></figure></div>

A Ancient Premier Ball has a 1x catch rate of Pokemon on the server. This is one of the 6 reskins of the Pokeball.

**Ancient Great Ball**

<div align="left"><figure><img src="/files/2v8HakaUeKCk0nPg4qHG" alt=""><figcaption><p>1x Red Apricorn, 1x Blue Apricorn, 2x Tumblestone, 1x Iron Ingot</p></figcaption></figure></div>

A Ancient Great Ball has a 1.5x catch rate of Pokemon on the server.

**Ancient Ultra Ball**

<div align="left"><figure><img src="/files/JGHQJIehagnvmRojTrbd" alt=""><figcaption><p>1x Yellow Apricorn, 1x Black Apricorn, 2x Tumblestone, 1x Gold Ingot</p></figcaption></figure></div>

A Ancient Ultra Ball has a 2x catch rate of Pokemon on the server.

**Ancient Feather Ball**

<div align="left"><figure><img src="/files/HR1gkYZEHPplR2fBFbn3" alt=""><figcaption><p>1x White Apricorn, 1x Blue Apricorn, 2x Sky Tumblestone, 1x Copper Ingot</p></figcaption></figure></div>

A Ancient Feather Ball has a 1x catch rate on the server and can be thrown further than normal Pokeballs.

**Ancient Wing Ball**

<div align="left"><figure><img src="/files/2loRE0lurI52wOL7skcD" alt=""><figcaption><p>1x White Apricorn, 1x Blue Apricorn, 2x Sky Tumblestone, 1x Iron Ingot</p></figcaption></figure></div>

A Ancient Wing Ball has a 1.5x catch rate on the server and can be thrown further than normal Pokeballs.

**Ancient Jet Ball**

<div align="left"><figure><img src="/files/8YDVEIHox2DhPTuyOdUs" alt=""><figcaption><p>1x White Apricorn, 1x Blue Apricorn, 2x Sky Tumblestone, 1x Gold Ingot</p></figcaption></figure></div>

A Ancient Jet Ball has a 2x catch rate on the server and can be thrown further than normal Pokeballs.

**Ancient Heavy Ball**

<div align="left"><figure><img src="/files/ke6jza7EGYT0VWh3eZbH" alt=""><figcaption><p>2x Black Apricorn, 2x Black Tumblestone, 1x Copper Ingot</p></figcaption></figure></div>

A Ancient Heavy Ball has a 1x catch rate on the server although this will change in the future.&#x20;

**Ancient Leaden Ball**

<div align="left"><figure><img src="/files/xSWqVzd6KRGL1TnCrVyB" alt=""><figcaption><p>2x Black Apricorn, 2x Black Tumblestone, 1x Iron Ingot</p></figcaption></figure></div>

A Ancient Leaden Ball has a 1.5x catch rate on the server although this will change in the future.&#x20;

**Ancient Gigaton Ball**

<div align="left"><figure><img src="/files/9KdPnQroM6NtPDQYf89i" alt=""><figcaption><p>2x Black Apricorn, 2x Black Tumblestone, 1x Gold Ingot</p></figcaption></figure></div>

A Ancient Gigaton Ball has a 2x catch rate on the server although this will change in the future.&#x20;

</details>

#### Uncraftable Pokeballs

Here you'll find a list of all the Pokeballs that are currently un-craftable on the server alongside their uses and potential other ways to obtain them.

<details>

<summary><strong>Uncraftable Pokeball &#x26; Uses</strong></summary>

**Master Ball**

<div align="left"><figure><img src="/files/LcN0MagQU5CcxVRldiEG" alt="" width="152"><figcaption><p>Master Ball</p></figcaption></figure></div>

A Master Ball has a 100% catch rate on any pokemon you use it on so this is perfect to use when catching legendaries on the server. You can obtain a master ball from Pokedex rewards as well as using our Modrinth launcher for the first time.&#x20;

**Ancient Origin Ball**

<div align="left"><figure><img src="/files/xWcrVaCuYhXNBdj3Zp8w" alt="" width="152"><figcaption><p>Ancient Origin Ball</p></figcaption></figure></div>

Like the Master Ball, a Ancient Origin Ball has a 100% catch rate on any pokemon you use it on so this is perfect to use when catching legendaries on the server. You can only obtain a ancient origin ball from the 20% Pokedex rewards tier.

**Cherish Ball**

<div align="left"><figure><img src="/files/tFMWzpEJlIVmeONIciQ2" alt="" width="152"><figcaption><p>Cherish Ball</p></figcaption></figure></div>

A Cherish Ball only obtainable via Creative, and like a Poke Ball has a catch rate of only 1x.

**Strange Ball**

<div align="left"><figure><img src="/files/VwpKD03fxt3reGNARDGO" alt="" width="152"><figcaption><p>Strange Ball</p></figcaption></figure></div>

A Stange Ball isn't obtainable on Cobblemon in any means as it's only used as a place holder for datapack or errors if the Pokeballs texture does not exist.

</details>


# A Complete Guide to Shinies

In this guide you'll find out what shinies are as well as all of the ways to obtain shinies on the server.

**Contents**

1. [What are Shinies?](#what-are-shinies)
2. [How can I find shinies on the server?](#how-can-i-find-shinies-on-the-server)
   1. [Breeding](#breeding)
      * [Masuda Method](#masuda-method)
      * [Crystal Method](#crystal-method)
      * [Combined Methods](#combined-methods)
   2. [Catch Combo](#catch-combo)
   3. [Shiny Charm](#shiny-charm) <mark style="color:red;">**\[UNRELEASED]**</mark>
3. [Are there other methods to obtaining shinies?](#are-there-other-methods-to-obtaining-shinies)
   1. [Discord Linking](#discord-linking)
   2. [Pokedex Rewards](#pokedex-rewards)
   3. [Crates](#crates)
   4. [Auction House](#auction-house)
   5. [Playtime Rewards](#playtime-rewards)
   6. [Daily (Login) Rewards](#daily-login-rewards)
   7. [Wondertrade](#wondertrade)

***

## ✨What are Shinies? ✨

<mark style="color:orange;">**Shiny Pokemon**</mark> are alternate variations of Pokemon that feature a different color palette from their standard form. While some have subtle color changes, many are strikingly different and often considered more visually appealing than their regular counterparts. As in most Pokemon games, Shiny Pokemon are significantly more difficult to obtain, and this holds true within Cobblemon as well.

<div align="center"><figure><img src="/files/2HmUprgPxCVQBnwOtY3M" alt="" width="375"><figcaption><p>Normal Metagross with Shiny Metagross</p></figcaption></figure></div>

Shiny Pokémon are always in high demand among players, making them an excellent way to earn PokéCoins in-game. Selling a sought-after Shiny (*or even a Legendary*) through the **`/gts`** can be a highly profitable method if you’re looking to boost your funds.

<div align="center"><figure><img src="/files/6EM0rwWHhuEx8YxuCvdo" alt=""><figcaption><p>Shiny Aegislash</p></figcaption></figure></div>

## ✨How can I find shinies on the server?✨

Here you can find all of the ways you can increase the changes of finding shinies on the server including facts about each of the methods.

### Breeding

Breeding is one of the best ways to increase the chances of finding shinies on the server. While general breeding won't increase your odds, there are different methods you can implement to help increase the chances of you finding a shiny in-game!

#### Masuda Method

Masuda Method is a way for players to have increased shiny chances for Pokemon that comes out of eggs. Unlike in the games where you need one Pokemon parent from another game language (*i.e. English with Japanese*), all you need is a pokemon with a different OT for this to work.

<details>

<summary>METHOD</summary>

Place your Pokemon that has your OT and another Pokemon of choice with a different players OT for the masuda method to work.

For just using Masuda Method for breeding it **increases chances** from `1/4096` to a whopping `1/585!`&#x20;

</details>

#### Crystal Method

Crystal Method is another way for players to increase the chances of shinies from eggs using shinies they already own! If at least one of the Pokemon being bred is already shiny, then you will gain increased offs for getting a shiny from your egg! **Using two shiny pokemon will not increase your odds further, it's only affected by one parent being shiny.**

<details>

<summary>METHOD</summary>

Place a Pokemon that is shiny with another Pokemon into the Pasture block to get the increased chances.

For just using Crystal Method for breeding it **increases chances** from `1/4096` to a whopping `1/1365!`&#x20;

</details>

#### Combined Methods

Here's where you can get the best odds for Shiny Hunting via Eggs. If both of your Pokemon fit the Masuda and Crystal methods of shiny hunting, then both of the odds will stack and you will get the best odds for shiny hunting via eggs!

<details>

<summary>METHOD</summary>

Place **one Pokemon that has your OT** and **another Pokemon of choice with a different players OT** with **one of these pokemon also being Shiny** for the odds to be stacked!

For just using the Masuda Methods and Crystal Method for breeding it will **increases chances** from `1/4096` to a whopping `1/455!`&#x20;

</details>

### Catch Combo

Catch Combo is a mechanic first introduced in the *Let’s Go* games on the Nintendo Switch. By catching a specific number of a particular Pokémon, you can increase both the spawn rate of that Pokémon in the appropriate biome and your chances of encountering it as a Shiny.

If the combo is broken, either by fleeing from the Pokémon mid-combo or by catching/defeating a different Pokémon, the combo will reset, and you must start again from the beginning.&#x20;

The maximum combo is **60**, which boosts the odds of finding that specific Shiny to an impressive **1/520**. &#x20;

### Shiny Charm

<mark style="color:red;">**THIS FEATURE IS YET TO BE FULLY IMPLEMENTED ON THE SERVER SO BELOW CAN BE DISREGARDED UNTIL IT'S OFFICIALLY IN THE SERVER.**</mark>

As in the main series games, players have the opportunity to obtain the Shiny Charm, which permanently increases their chances of encountering Shiny Pokémon on the server. The **Shiny Charm also works in combination with other shiny hunting methods**, making it even easier to find the specific Shinies you are searching for.

With the Shiny Charm, shiny odds are increased by 3×, improving from `1/4096` to `1/1365`.

The Shiny Charm can be obtained by achieving 100% completion of your Pokédex through Pokédex Rewards which is a challenging feat to complete. To check your progress or claim rewards from Pokédex Rewards, simply use the command **`/pokedexrewards`**.

## ✨Are there other methods to obtaining shinies?✨

There are a couple different ways for players to earn shinies on the server which I will list all of the main ways players can obtain them currently:

### Discord Linking

This is a simple way to obtain a free Shiny on the server, requiring only a Discord account. By linking your Discord account to your in-game profile on our server, you can redeem a kit that grants a random Shiny Pokémon. For more information on linking your account, please click [HERE](#discord-linking).

<div align="left"><figure><img src="/files/J6Vd5nzVUGEn6aMWRve6" alt="" width="359"><figcaption><p>Discord Linking channel within MMO Realms Discord</p></figcaption></figure></div>

### Pokedex Rewards

This is another relatively simple way to obtain Shinies on the server, including Legendary, Mythical, and Ultra Beast Pokémon. For every 10% of the Pokédex you complete, you will have the opportunity to claim rewards, with certain tiers offering a Shiny Pokémon. Some rewards may also include Crate Keys, providing an additional method for acquiring Shinies. Pokédex rewards can be accessed using **`/pokedexrewards`**.

<div align="left"><figure><img src="/files/aoNl5ez0ZAIyNEN7S6TP" alt=""><figcaption><p>Pokedex Rewards Menu via <code>/pokedexrewards</code></p></figcaption></figure></div>

### Crates

You can use Crate Keys, obtainable through **`/crates`** with Gems or via other methods such as Pokédex Rewards, to open specific Crates that offer a chance to receive random Shinies, including some Legendary Pokémon. For more information on how to earn Gems, please refer to our guide [HERE](/cobblemon-wiki/general-guides/intro-to-earning-gems).

<div align="left"><figure><img src="/files/BS5MIVdltj7oMsfaa6gI" alt=""><figcaption><p><code>/crates</code> GUI for Vote, Basic and Premium Crates</p></figcaption></figure></div>

### Auction House

You can use the Auction House by running **`/ah`** to see if any players are currently selling Shiny Pokémon for a set amount of PokéCoins. If you have the required amount, you can purchase the Pokémon and add the Shiny to your collection.

<div align="left"><figure><img src="/files/cwwE7oa9QdAr16xXTlIR" alt="" width="266"><figcaption><p>Ex of Auction House</p></figcaption></figure></div>

### Ranks

This is another way for players to obtain Shinies on the server, though it is only available through our Gems Store, as ranks cannot be acquired through any other means outside of giveaways and events. Depending on the rank you select, you may receive a random Shiny, and some ranks even include Legendary or Mythical Pokémon. Ranks can be purchased using **`/store`**, with Gems available for purchase [HERE:](here:https://store.mmorealms.gg/category/gems)

<div align="left"><figure><img src="/files/n7noQ9FOQZ3zFcoIrAu1" alt=""><figcaption><p>Ranks Page within <code>/Store</code></p></figcaption></figure></div>

### Playtime Rewards

You'll be able to earn some Shinies for reaching specific Playtime Milestones within Playtime Rewards. The higher your active playtime is, the more rewards you'll gain access to. Start accessing Playtime Rewards via `/playtime`.

<div align="left"><figure><img src="/files/xzHl4yFmjqLY13qdpvwm" alt=""><figcaption><p>Playtime Rewards via <code>/playtime</code></p></figcaption></figure></div>

### Daily (Login) Rewards

You'll be able to earn some rewards for specific daily milestones reached. Please be aware that if you missing logging onto the server for a day, then your streak will revert back to Day 1. Start accessing Daily Rewards via `/daily`.

<div align="left"><figure><img src="/files/8m6ncxoz6Bi0k80sQlVk" alt=""><figcaption><p>Daily Rewards via <code>/daily</code></p></figcaption></figure></div>

### Wondertrade

Thewre will be a small chance you can pull a shiny from Wondertrade on the server, assuming there is Shinies within the pool. This is based on luck, and what others have currently placed within the pool. Once a week it resets bringing a small chance for System Generated shinies to be pushed in.

Use `/wt` to start a Wondertrading and `/wt pool` to view the current pool.

<div align="left"><figure><img src="/files/vn5Sy3qE0dfccAK6eSd7" alt=""><figcaption><p>Wondertrade Pool via <code>/wt pool</code></p></figcaption></figure></div>

**NOTE:** Wondertraded Pokemon cannot be recovered.


# Complete Overview of Riding Pokemon

Here you will everything you need to know about riding Pokemon alongside what Pokemon you can ride on.

**Contents**

1. [What is Riding Pokemon?](#what-is-riding-pokemon)
2. [How Can I ride my Pokemon?](#how-can-i-ride-my-pokemon)
3. [What are the different riding types?](#what-are-the-different-riding-types)
   1. [Land](#land)
   2. [Water](#water)
   3. [Air](#air)
4. [What Pokemon can we Ride?](#what-pokemon-can-we-ride)
5. [Shoulder Mounts](#shoulder-mounts)
   1. [Shoulder Mount Pokemon List](#shoulder-mount-pokemon-list)

***

### What is Riding Pokemon?

Did you know that not only can you fight and train with your Pokemon, but there are a select few that you can actually ride on?&#x20;

Whether you're climbing a snowy mountain on your Mamoswine, riding across the ocean on your Lapras, or soaring through the skies on your Dragonite, travelling has never been easier. Make sure to take full advantage of these options—especially when you need to get from point A to point B quickly.

<figure><img src="/files/JEwl6kGroAnQYxEEdyoc" alt=""><figcaption></figcaption></figure>

### How Can I ride my Pokemon?

Riding Pokemon is incredibly easy and there is no need for a Saddle like normal mobs.&#x20;

For any compatible pokemon all you need to do is throw out your Pokemon via `R` and press  `Shift` + `Right Click` which will bring up a circle bar which has different options you can choose. You want to click on the option for **Ride** which has the symbol of a Saddle. You can see this in the GIF below:

<figure><img src="/files/mTRAJFprYHnlWZC76vJI" alt=""><figcaption></figcaption></figure>

Once you have selected **Ride**, you will now be on the back of the selected Pokemon you are riding. From there it's just as simple as using WASD to move around alongside using your mouse to point in the direction you wish to travel. You can press **`R`** to dismount once you’re finished riding your mount.

How pokemon travel though will vary due to the different types of ride pokemon there are. This in turn will have an affect on their controls so it's something to take note for the pokemon you wish to traverse on as you can use the list below to find specifics on how they work.

<figure><img src="/files/8Wo8cJMkVDZS2T8tWfji" alt=""><figcaption></figcaption></figure>

### What are the different riding types?

Each pokemon has their own type of riding style which will change how the Pokemon will act when riding. Some of the pokemon will have multiple riding styles relating to Land, Water and Air \[*i.e. Dragonite has a Riding Style in each Category compared to Venusaur which only has a Land riding sytle*]. Certain pokemon will end up being more useful in certain environments compared to others.&#x20;

Here is a list of all the riding styles:

#### Land

**Standard**

> Similar to standard Minecraft riding mechanics, this feature follows the familiar riding style players already know. Pokémon can be ridden much like other rideable mobs such as horses or pigs, allowing you to control movement by looking in your desired direction and using the WASD keys to navigate. Standard rides are also capable of sprinting; however, sprinting is limited by a stamina system.

**Vehicle**

> Vehicle mounts function similarly to boats, but are designed for land-based travel. This allows riders to freely look around without affecting their direction of movement. Instead, directional keys are used to steer the Pokémon as you travel. It’s important to note that vehicle mounts have a wider turning radius than the standard riding style; however, by holding crouch while turning left or right, this radius can be tightened—allowing skilled riders to perform controlled drifts.

#### Water

**Boat**

> These mounts operate almost identically to vanilla Minecraft boats. Movement is controlled entirely using the directional keys, while your camera view has no influence on your direction of travel. This allows you to freely look around without altering your mount’s path.

**Submarine**

> These mounts function similarly to vehicle mounts, with the key distinction being their ability to operate on water. In addition to surface travel, these mounts allow you to dive beneath the waves and traverse underwater environments with ease.

**Dolphin**

> These mounts behave much like submarine mounts, with the key distinction being their ability to leap out of the water—much like a dolphin—adding a dynamic and stylish element to aquatic traversal.

#### Air

**Bird**

> These mounts can fly and hover while in the air, giving you solid control over aerial movement. You move in the direction you’re looking, with the left and right keys letting you strafe side to side. The up and down keys control how you rise or drop while flying.
>
> They also support an elytra-style flight mode, where your movement is affected by both where you’re looking and the keys you press, making flying feel faster and more dynamic.

**Jet**

> Jet mounts are flying mounts that move more like vanilla boats. Your forward movement isn’t affected by where you’re looking, so you’re free to look around while riding, while the left and right keys handle turning.&#x20;
>
> Unlike bird-style mounts, jet mounts can’t hover, but they make up for it with much higher speeds. You can gain or lose altitude using the jump and crouch keys, keeping you in control while flying fast.

**UFO**

> UFO-style mounts are flying mounts that can hover in the air and move freely in any direction, much like creative or spectator flight. That said, they’re generally on the slower side, and flying above their maximum height \[*set by their jump height stat*] will start to drain stamina.

**Rocket**

> These mounts act very similar to UFO mounts, with the key difference being that you'll be able to fly forwards at very high speeds!

### What Pokemon can we Ride?

Here you can find a list of all pokemon that you're able to ride on the server currently.&#x20;

| Pokemon                       | Land Ride Style | Water Rider Style | Air Ride Style |
| ----------------------------- | --------------- | ----------------- | -------------- |
| **Venusaur**                  | Standard        | N/A               | N/A            |
| **Charizard**                 | Standard        | N/A               | Bird           |
| **Blastoise**                 | Standard        | Submarine         | Rocket         |
| **Parasect**                  | Standard        | N/A               | N/A            |
| **Arcanine**                  | Standard        | N/A               | N/A            |
| **Dewgong**                   | Standard        | Dolphin           | N/A            |
| **Rhyhorn**                   | Standard        | N/A               | N/A            |
| **Rhydon**                    | Standard        | N/A               | N/A            |
| **Seaking**                   | N/A             | Submarine         | N/A            |
| **Mr. Mime**                  | Standard        | N/A               | N/A            |
| **Tauros (Excl Paldea-Aqua)** | Standard        | N/A               | N/A            |
| **Tauros (Paldea-Aqua)**      | Standard        | Boat              | N/A            |
| **Gyarados**                  | Standard        | Dolphin           | Jet            |
| **Lapras**                    | Standard        | Boat              | N/A            |
| **Aerodactyl**                | Standard        | N/A               | Bird           |
| **Articuno**                  | Standard        | N/A               | Bird           |
| **Zapdos**                    | Standard        | N/A               | Bird           |
| **Moltres**                   | Standard        | N/A               | Bird           |
| **Dragonite**                 | Standard        | Dolphin           | Jet            |
| **Ariados**                   | Standard        | N/A               | N/A            |
| **Girafarig**                 | Standard        | N/A               | N/A            |
| **Forretress**                | N/A             | N/A               | UFO            |
| **Heracross**                 | Standard        | N/A               | Bird           |
| **Ursaring**                  | Standard        | N/A               | N/A            |
| **Piloswine**                 | Standard        | N/A               | N/A            |
| **Raikou**                    | Standard        | N/A               | N/A            |
| **Suicune**                   | Standard        | Boat              | N/A            |
| **Lugia**                     | Standard        | Dolphin           | Bird           |
| **Ho-oh**                     | Standard        | N/A               | Bird           |
| **Slaking**                   | Standard        | N/A               | N/A            |
| **Sharpedo**                  | N/A             | Dolphin           | N/A            |
| **Wailmer**                   | Standard        | Submarine         | N/A            |
| **Wailord**                   | Standard        | Submarine         | N/A            |
| **Camerupt**                  | Standard        | N/A               | N/A            |
| **Flygon**                    | Standard        | N/A               | Bird           |
| **Altaria**                   | Standard        | N/A               | Bird           |
| **Claydol**                   | N/A             | N/A               | UFO            |
| **Tropius**                   | Standard        | N/A               | Bird           |
| **Relicanth**                 | N/A             | Submarine         | N/A            |
| **Salamence**                 | Standard        | N/A               | Bird           |
| **Metagross**                 | Standard        | N/A               | UFO            |
| **Groudon**                   | Standard        | N/A               | N/A            |
| **Latias**                    | Standard        | N/A               | Jet            |
| **Latios**                    | Standard        | N/A               | Jet            |
| **Staraptor**                 | Standard        | N/A               | Bird           |
| **Bastidon**                  | Standard        | N/A               | N/A            |
| **Gastrodon**                 | Standard        | N/A               | N/A            |
| **Drifblim**                  | N/A             | N/A               | UFO            |
| **Bronzong**                  | N/A             | N/A               | UFO            |
| **Garchomp**                  | Standard        | Boat              | Jet            |
| **Palkia**                    | Standard        | N/A               | Jet            |
| **Regigigas**                 | Standard        | N/A               | N/A            |
| **Magnezone**                 | N/A             | N/A               | UFO            |
| **Lickilicky**                | Standard        | N/A               | N/A            |
| **Rhyperior**                 | Standard        | N/A               | N/A            |
| **Togekiss**                  | Standard        | N/A               | Jet            |
| **Mamoswine**                 | Standard        | N/A               | N/A            |
| **Dusknoir**                  | N/A             | N/A               | UFO            |
| **Serperior**                 | Standard        | N/A               | N/A            |
| **Zebstrika**                 | Standard        | N/A               | N/A            |
| **Scolipede**                 | Standard        | N/A               | N/A            |
| **Darmanitan**                | Standard        | N/A               | N/A            |
| **Crustle**                   | Standard        | N/A               | N/A            |
| **Kinklang**                  | N/A             | N/A               | UFO            |
| **Golurk**                    | Standard        | N/A               | Rocket         |
| **Boffalant**                 | Standard        | N/A               | N/A            |
| **Braviary**                  | Standard        | N/A               | Bird           |
| **Hydreigon**                 | Standard        | N/A               | Bird           |
| **Volcarona**                 | Standard        | N/A               | Bird           |
| **Virizion**                  | Standard        | N/A               | N/A            |
| **Tornadus**                  | Standard        | N/A               | Bird           |
| **Reshiram**                  | Standard        | N/A               | Bird           |
| **Zekrom**                    | Standard        | N/A               | Jet            |
| **Landorus**                  | Standard        | N/A               | Bird           |
| **Kyurem**                    | Standard        | N/A               | UFO            |
| **Skiddo**                    | Standard        | N/A               | N/A            |
| **Gogoat**                    | Standard        | N/A               | N/A            |
| **Tyrantrum**                 | Standard        | N/A               | N/A            |
| **Noivern**                   | Standard        | N/A               | Bird           |
| **Mudsdale**                  | Standard        | N/A               | N/A            |
| **Dhelmise**                  | Standard        | Submarine         | N/A            |
| **Naganadel**                 | Standard        | N/A               | Jet            |
| **Zeraora**                   | Standard        | N/A               | N/A            |
| **Corviknight**               | Standard        | N/A               | Bird           |
| **Dragapult**                 | Standard        | Dolphin           | Jet            |
| **Wyrdeer**                   | Standard        | N/A               | N/A            |
| **Ursaluna**                  | Standard        | N/A               | N/A            |
| **Sneasler**                  | Standard        | N/A               | N/A            |
| **Kilowattrel**               | Standard        | N/A               | Bird           |
| **Espathra**                  | Standard        | N/A               | N/A            |
| **Revaroom**                  | Standard        | N/A               | N/A            |
| **Cyclizar**                  | Standard        | N/A               | N/A            |
| **Orthworm**                  | Standard        | N/A               | N/A            |
| **Dondozo**                   | Standard        | Submarine         | N/A            |
| **Farigiraf**                 | Standard        | N/A               | N/A            |
| **Dudunsparce**               | Standard        | N/A               | N/A            |
| **Wo-Chien**                  | Standard        | N/A               | N/A            |

You'll be able to use this website to find out more specifics about Riding Pokemon, as this guide was used as a basis for a lot of the information found here.

{% embed url="<https://wiki.cobblemon.com/index.php/Pok%C3%A9mon/Riding>" %}

### Shoulder Mounts

Did you know you can put certain pokemon on your shoulder? This is a great way to show off certain pokemon in a unique way and it's incredibly easy to do. For **any compatible pokemon** like Pikachu all you need to do is `Shift` + `Right Click` **onto the pokemon** of choice which will bring up a sub-menu.

<div align="left"><figure><img src="/files/T4y8KTciNcRv8HF2XcYG" alt=""><figcaption></figcaption></figure></div>

You will want to click on the **top left option** which should instantly put the pokemon onto your shoulder.

<div align="left"><figure><img src="/files/74Mlrcv0bJ52MYEKEyiG" alt=""><figcaption></figcaption></figure></div>

In order to **remove the Pokemon from your shoulder** all you need to do is press `R` and your pokemon will now be back on the floor. This is the list of all pokemon you can place onto your shoulder:

<details>

<summary>Shoulder Mount Pokemon List</summary>

* Caterpie
* Weedle
* Pidgey
* Spearow
* Pikachu
* Squirtle
* Cleffa
* Pichu
* Igglybuff
* Bellossom
* Zubat
* Mew
* Celebi
* Spinarak
* Pichu
* Wooper
* Murkrow
* Unown
* Wobbuffet
* Smoochum
* Tyrogue
* Larvitar
* Totodile
* Teddiursa
* Zigzagoon
* Taillow
* Ralts
* Plusle
* Minun
* Sableye
* Shuppet
* Swablu
* Anorith
* Beldum
* Jirachi
* Budew
* Starly
* Pachirisu
* Buizel
* Chatot
* Spiritomb
* Gible
* Mime Jr.
* Happiny
* Munchlax
* Riolu
* Croagunk
* Turtwig
* Stunky
* Chingling
* Combee
* Kricketot
* Manaphy
* Phione
* Shaymin
* Victini
* Pidove
* Roggenrola
* Tympole
* Petilil
* Dwebble
* Scraggy
* Tirtouga
* Archen
* Zorua
* Solosis
* Duosion
* Reuniclus
* Vanillite
* Tynamo
* Litwick
* Axew
* Elgyem
* Joltik
* Espurr
* Dedenne
* Flabébé
* Fletchling
* Scatterbug
* Skrelp
* Klefki
* Rowlet
* Litten
* Popplio
* Cutiefly
* Fomantis
* Morelull
* Comfey
* Togedemaru
* Mimikyu
* Marshadow
* Stakataka
* Grookey
* Scorbunny
* Sobble
* Rookidee
* Blipbug
* Applin
* Sizzlipede
* Milcery
* Alcremie
* Dreepy
* Sprigatito
* Fuecoco
* Quaxly
* Lechonk
* Tarountula
* Nymble
* Pawmi
* Tandemaus
* Capsakid
* Charcadet
* Tadbulb
* Wiglett
* Shroodle
* Flittle
* Tinkatink
* Squawkabilly
* Gimmighoul
* Chien-Pao
* Tatsugiri

</details>

### Increasing Riding Stats

Much like a Pokemons battle capabilities, you can increase their strengths in regard to riding. The corresponding stats are:

* Speed
* Acceleration
* Stamina
* Skill
* Jump

All of which can be modified through use of Aprijuices, where the colour of juice determines which stats are either increased or decreased. For further information on stat changes and crafting recipes, please refer to the Aprijuices section of the Berry guide.

{% embed url="<https://wiki.mmorealms.gg/cobblemon-wiki/general-guides/complete-overview-of-berries#aprijuices>" %}


# A Complete Overview of Events

Here you will find information about all the different types of events we run on the server, as well as how to participate.

**Contents**

1. [What are events?](#what-are-events)
2. [Flash Events](#flash-events)
   1. [Admin Abuse](#admin-abuse)
   2. [Realms Geoguesser](#realms-geoguesser)
   3. [Wondertrade Bonanza](#wondertrade-bonanza)
   4. [CobbleSnap](#cobblesnap)
   5. [Trivia Blitz](#trivia-blitz)
3. [Community Contests](#community-contests)
   1. [Tournaments](#tournaments)
      1. [Smogon](#smogon)
   2. [Submission Events](#submission-events)
4. [Frequently Asked Questions \[FAQ\]](#frequently-asked-questions-faq)

***

## What are events?

Server **events** are organised activities, games and competitions hosted by staff for the community. They are designed to bring members together and provide more to do on the server outside regular gameplay, all with the chance to win prizes.

There are a range of events on offer, all listed below. Each have their own method for participating, ensuring there's something suitable for everyone to enjoy. To ensure you stay up to date on any upcoming events, make sure you have joined our Discord server and subscribe to any roles you find interesting!

{% embed url="<http://discord.gg/mmorealms>" %}

<figure><img src="/files/4eaZHqVkEZsGrzkgd9wG" alt=""><figcaption><p>Discord Role Selection</p></figcaption></figure>

Once set up, you should receive notifications via your relevant announcement channels.

<figure><img src="/files/f6DABJz1h0RF6Mrp5TUF" alt=""><figcaption><p>Events Announcement Channels</p></figcaption></figure>

## Flash Events

**Flash events** are quick and short, designed to allow anyone to get involved at the click of a button. They are primarily focused on in-game experiences, in which you are indirectly competing against everyone else who is online.

We aim to host these on a **weekly** basis, typically covering the whole **weekend**. The specific events hosted are on a **rotation** between all included servers, providing an assortment of options to ensure you do not get bored.

### Admin Abuse

> This event <mark style="background-color:$danger;">is not</mark> in current rotation

This event **boosts legendary spawn rates** drastically, offering increased odds for yourself to get a hold of an elusive rarity of a Pokemon. To participate, you must be playing within the Wilds on the server, as this is the only location in which wild legends may spawn. There's no set time for when they may spawn, so keep your eyes peeled as they could be just around the corner.

<figure><img src="/files/EnV5ACNXfdeTl22iQB9v" alt="" width="346"><figcaption><p>Example Legendary Spawn - Zapdos</p></figcaption></figure>

Additionally, during certain times of the day you may experience a **Legendary Spike**. This rare phenomena will be announced via the Discord server prior to the drop, offering time for users to log in and get involved. During this time, multiple legends will spawn back to back in short succession, giving you multiple chances to get a hold of one.

<figure><img src="/files/EQHRJjie3WylrQaZEQIV" alt=""><figcaption><p>Example Discord Announcement Title</p></figcaption></figure>

It should go without saying, the reward for this event is being able to keep any caught legendaries, whether you wish to battle with them, retain them for a collection, or trade them away.

### Realms Geoguesser

> This event <mark style="background-color:$success;">is</mark> in current rotation

This event takes the idea of the Geoguesser game, and applies the logic to the Minecraft server. Within the `#geoguesser` channel, requests will be posted including both a photo of a location within a publicly accessible area of the server, along with a specific in-game item. To participate, it's your job to figure out where this location is, and submit a screenshot of yourself in third person, in the area whilst holding the specified item.

<figure><img src="/files/RxngYG6d6z7nGht208LF" alt="" width="563"><figcaption><p>Example Geoguesser Request</p></figcaption></figure>

<figure><img src="/files/5ttQ2JP2hyv0QYpLuVj6" alt="" width="563"><figcaption><p>Example Geoguesser Submission</p></figcaption></figure>

The rewards for this event includes a mixture of crate keys, where the specific key granted is tied to the difficulty of the provided request.

### Wondertrade Bonanza

> This event <mark style="background-color:$success;">is</mark> in current rotation

This event utilises the servers **Wondertrade** system to distribute rare and highly sought after Pokemon, including Pokemon that are shiny, posses a hidden ability, legendary, mythical, and have other rare forms that are tricky or impossible to obtain through other means. Staff will periodically drop these Pokemon into the Wondertrade system, so it's your job to get lucky and hopefully pull one by listing your own Pokemon.

Whilst some Pokemon leave a global notification in chat about being listed, not all will. Additionally some listed Pokemon may remain in the Wondertrade pool for quite a while before someone grabs it. As a result it's a good idea to keep submitting Pokemon wherever possible to increase your chances to grab something worthwhile.

<figure><img src="/files/IYwjWvtxD51fp4CdodWW" alt=""><figcaption><p>Example Wondertrade release Announcement</p></figcaption></figure>

The rewards for this event is again being able to keep anything you pull, whether you wish to battle with them, retain them for a collection, or trade them away.

### CobbleSnap

> This event <mark style="background-color:$success;">is</mark> in current rotation

This event takes inspiration from the **Pokemon Snap** games, once again twisting the idea to function to the server. Within the `#cobblesnap` channel, requests will be posted asking that you hunt down a **wild** spawn of a specific species, along with a specific in-game item. To participate, it's your job to track down this Pokemon, and submit a screenshot of yourself with the Pokemon in show whilst holding the specified item.

<figure><img src="/files/aHaDqDzOm51JWR6SXPdt" alt="" width="563"><figcaption><p>Example Snap Request</p></figcaption></figure>

<figure><img src="/files/15wl93wVNNTi3i0aFrqD" alt="" width="563"><figcaption><p>Example Snap Submission</p></figcaption></figure>

The rewards for this event includes a mixture of Pokecoins, rare candy, shinies, plushies, crate keys, and gems, where the specific reward granted is tied to the difficulty of the provided request.

### Trivia Blitz

> This event <mark style="background-color:$danger;">is not</mark> in current rotation

This event aims to build upon the existing **Chat Games** infrastructure, where for a short while, the number of questions asked will be hugely boosted offering chances for yourself to show off your knowledge. The number of correctly answered questions from yourself within this boosted session will be tallied, where the user who answers the most questions correctly gets an additional reward. To participate, you just need to answer any trivia questions shown as quickly as possible.

<figure><img src="/files/3782a44abUGjPBwRj7Zq" alt=""><figcaption><p>Trivia Blitz Announcement</p></figcaption></figure>

The rewards for this event includes a mixture of Pokecoins, rare candy, shinies, plushies, crate keys, and gems.

## Community Contests

**Community Contests** are longer events, often with extended deadlines allowing everyone plenty of time to prepare and perfect any relevant submissions. They are primarily focussed on either planning, or creating art based pieces, in which you are directly competing against any other submissions.

We aim to host these on a **tri-weekly** basis, typically running for **multiple weeks**. The specific events hosted aim to be unique, offering a variety of battle formats or art based requests, ensuring you can let your skills shine across a range of topics.

### Tournaments

This event is a test of skill tied to your battle experience, where players will enter a bracket-style **tournament** restricted to the designated battle format, to show off their understanding and technique to come out on top. To participate, you must follow the registration information outlined in the announcement within the corresponding tournaments channel from the Discord server.

<figure><img src="/files/FClsHoLO4bIKd1yjMeyu" alt=""><figcaption><p>Tournaments Announcement Channels</p></figcaption></figure>

{% hint style="danger" %}
When registering a team, it is crucial that you provide details that **directly** match the Pokemon you already have in-game. We do not provide the listed Pokemon, and you must have access to them at the time of the battle. Any deviation from the provided PokePaste, even as minimal as an EV point may lead to disqualification.
{% endhint %}

If successfully registered, you will be included in the tournament brackets which shows details on who your opponents will be. Please ensure you are available around the stated date and time for participating in battle, as not showing up will also lead to disqualification. All battles will be held as the servers arena, accessible through `/warp arena`.

<figure><img src="/files/thAWD41HKmJnaq6h58Gz" alt="" width="563"><figcaption><p>Tournament Arena</p></figcaption></figure>

The rewards for this event includes a mixture of Pokecoins, Pokemon, plushies, crate keys, gems, and chat tags.

#### Smogon

Each tournament will include it's own restrictions, all of which will be clearly outlined within the initial announcement. However every tournament will be based around Smogon Tiers, being a set of guidelines created by Smogon which is the largest online community and leading authority for competitive Pokemon battling. Each Pokemon is assigned a tier based on its apparent viability for use within battles, where Pokemon of a similar strength are tiered together.&#x20;

{% embed url="<https://www.smogon.com/bw/articles/bw_tiers>" %}

Whilst full details are provided above, as a brief overview the order of tiers is as follows. If a given tournament is set as OU (Overused), you may use any Pokemon that falls into either that tier, or any below it.

<pre class="language-mermaid"><code class="lang-mermaid"><strong>%%{init: {"flowchart": {"rankSpacing": 20, "nodeSpacing": 10}, "theme": "base", "themeVariables": {"fontFamily": "arial", "fontSize": "14px"}}}%%
</strong>flowchart TD
    AG["&#x3C;b>AG&#x3C;/b>&#x3C;br/>Anything Goes"] ==> Ubers["&#x3C;b>Ubers&#x3C;/b>"]
    Ubers ==> OU["&#x3C;b>OU&#x3C;/b>&#x3C;br/>OverUsed"]
    OU ==> UUBL["&#x3C;b>UUBL&#x3C;/b>&#x3C;br/>UnderUsed Banlist"]
    UUBL ==> UU["&#x3C;b>UU&#x3C;/b>&#x3C;br/>UnderUsed"]
    UU ==> RUBL["&#x3C;b>RUBL&#x3C;/b>&#x3C;br/>RarelyUsed Banlist"]
    RUBL ==> RU["&#x3C;b>RU&#x3C;/b>&#x3C;br/>RarelyUsed"]
    RU ==> NUBL["&#x3C;b>NUBL&#x3C;/b>&#x3C;br/>NeverUsed Banlist"]
    NUBL ==> NU["&#x3C;b>NU&#x3C;/b>&#x3C;br/>NeverUsed"]
    NU ==> PUBL["&#x3C;b>PUBL&#x3C;/b>&#x3C;br/>PU Banlist"]
    PUBL ==> PU["&#x3C;b>PU&#x3C;/b>"]
    PU ==> ZU["&#x3C;b>ZU&#x3C;/b>&#x3C;br/>Untiered"]

    style AG fill:#ffcccc,stroke:#333,stroke-width:2px,color:#000
    style Ubers fill:#ffe0b2,stroke:#333,stroke-width:2px,color:#000
    style OU fill:#ffffcc,stroke:#333,stroke-width:2px,color:#000
    style UU fill:#d4edda,stroke:#333,stroke-width:2px,color:#000
    style RU fill:#d1ecf1,stroke:#333,stroke-width:2px,color:#000
    style NU fill:#f8d7da,stroke:#333,stroke-width:2px,color:#000
    style PU fill:#e2d9f3,stroke:#333,stroke-width:2px,color:#000
    style ZU fill:#ffffff,stroke:#333,stroke-width:2px,color:#000
    style UUBL fill:#f2f2f2,stroke:#333,stroke-width:1px,color:#333,stroke-dasharray: 3 3
    style RUBL fill:#f2f2f2,stroke:#333,stroke-width:1px,color:#333,stroke-dasharray: 3 3
    style NUBL fill:#f2f2f2,stroke:#333,stroke-width:1px,color:#333,stroke-dasharray: 3 3
    style PUBL fill:#f2f2f2,stroke:#333,stroke-width:1px,color:#333,stroke-dasharray: 3 3
</code></pre>

### Submission Events

This event is a test of skill tied to your creativity and design, where players be given a prompt and required to submit a suitable **art piece** that meets specified criteria. The format of the request art can vary, with past examples including drawings, in-game builds, and emojis among other things. To participate, you must follow the submission information outlined in the announcement within the corresponding events channel from the Discord server. This is usually in the form of a chat thread.

{% hint style="danger" %}
When submitting an art piece, it is crucial that you ensure it meets all specified criteria, as failing to meet any will result in disqualification. As an example, most drawn art submissions require the inclusion of the server, your Minecraft account, and event names to verify creation for said event.\
\
Additionally we do not permit the use of AI for any submissions. These events are designed to demonstrate your talents, not the talents of an AI agent. Attempting to submit work you had not created yourself is a form of plagiarism, and will result in disqualification, along with potential blacklists from future events.
{% endhint %}

Once the submission deadline has passed, all creations will be reviewed by senior staff to select the best pieces that deserve a reward for their exceptional efforts. Then the responsibility falls on yourself, from these finalists you will be able to submit your vote on who you believe should become the winner. This voting deadline only lasts one day, so be sure you jump in quickly so that your vote counts.

The rewards for this event includes a mixture of Pokecoins, Pokemon, plushies, crate keys, gems, and chat tags.

## Frequently Asked Questions \[FAQ]

**Q \~ Do I need to inform anyone I will be participating in an event prior?**

**A \~** *No, so long as you follow all instructions in the Discord announcement, you are welcome to jump straight in. Flash Events require no form of sign-up, you just need to be in the right place, at the right time. Do be mindful of registration deadlines though when it comes to Community Contests.*

**Q \~ What happens if I disconnect during an event?**

**A \~** *In most cases there unfortunately isn't much we can do, however for the likes of legendary spawns and server bugs, you're welcome to report the issue via a ticket in our Discord server to have the incident reviewed, as we may be able to help after the fact. For the likes of tournaments, immediately contact the staff in charge and make them aware of your connection difficulties, as they **may** be able to provide support and guidance to ensure you don't miss out.*

**Q \~ Where do I submit entries for events requiring a photo?**

**A \~** *Whether this is regarding Snap, Geoguesser, or a Contest Submission, each event will have its own channel or thread in our Discord server. Look out for announcements that direct you toward the right place, however they should all be easy to find near the top of the channel list, named accordingly to match the event.*

**Q \~ Can I submit multiple entries for the same contest?**

**A \~** *To keep things fair, we limit each player to one submission per event unless the specific announcement explicitly states otherwise.*

**Q \~ How and when are prizes distributed?**

**A \~** *Flash Events typically have their rewards issued immediately upon completion of a given round, and should be communicated with you via staff usually via in-game PMs. Community Contest rewards will be distributed after the announcement covering the winners, but might require yourself to open a ticket to claim them, so ensure you read the full post where applicable.*

**Q \~ What happens if someone is caught cheating for exploiting?**

**A \~** *We have a zero-tolerance policy for cheating, exploiting bugs, or using any other unauthorised modifications. Anyone caught doing so will be instantly disqualified, and potentially banned from future events, and may be subject to disciplinary actions tied to server rules.*


# Complete Overview of Fossils

Here you'll find everything you need to know about Fossils on the server from what Pokemon you can get from them to how to actually obtain them.

**Contents**

1. [List of all Fossils and Respective Pokemon](#list-of-all-fossils-and-respective-pokemon)
2. [How to Obtain Fossils](#how-to-obtain-fossils)
3. [How to Revive Fossils](#how-to-revive-fossils)
   1. [Crafting a Fossil Machine](#crafting-the-fossil-machine)
   2. [Organic Material to Power Machine](#organic-material-to-power-machine)
   3. [Operating the Fossil Machine](#operating-the-fossil-machine)
   4. [Gen 8 Fossil Pokemon  (Dracozolt, Arctozolt, Dracovish & Arctovish) ](#gen-8-fossil-pokemon-dracozolt-arctozolt-dracovish-and-arctovish)

***

## List of all Fossils and Respective Pokemon

<table><thead><tr><th width="178" align="center">Fossil</th><th width="213.5" align="center">Pokemon</th><th align="center">Structures</th></tr></thead><tbody><tr><td align="center"><img src="/files/lNIpysUW9xQNzQCDF4Zn" alt=""><strong>Helix Fossil</strong></td><td align="center"><img src="/files/GQbKvT2oAAMYnWSyRI5h" alt=""><strong>Omanyte</strong></td><td align="center">Dripstone Oasis, Enhydro Agate, Eroded Pillar, Preserved Skeleton, Sandy Den, Vibrant Hydrothermal Vents</td></tr><tr><td align="center"><img src="/files/sE4DdlS8vooOIec9oGWm" alt=""><strong>Dome Fossil</strong></td><td align="center"><p><img src="/files/ublhHESzamEIipmAyzr9" alt=""></p><p><strong>Kabuto</strong></p></td><td align="center">Enhydro Agate, Hydrothermal Vents, Rooted Pit, Sunscorched Den, Suspicious Mound</td></tr><tr><td align="center"><p><img src="/files/0YCfcrUG2pAV4R4kU9Lc" alt=""></p><p><strong>Old Amber</strong></p></td><td align="center"><img src="/files/Lt99kkCYQjwDirndblnX" alt=""><strong>Aerodactyl</strong></td><td align="center">Frozen Pond, Lush Den, Oak Tree, Spruce Tree</td></tr><tr><td align="center"><img src="/files/2ywiJiZiZgfJ8QRajB88" alt=""><strong>Claw Fossil</strong></td><td align="center"><img src="/files/bXu48fcjmQuIk1f0dW2v" alt=""><strong>Anorith</strong></td><td align="center">Dripstone Oasis, Frozen Spike, Mossy Pond, Preserved Skeleton, Submerged Impact, Submerged Spike, Underwater Fissure</td></tr><tr><td align="center"><img src="/files/loUi1tFWa9jR6L1X2Fch" alt=""><strong>Root Fossil</strong></td><td align="center"><img src="/files/rP1BoZFHMyANZHXHsk0y" alt=""><strong>Lileep</strong></td><td align="center">Hydrothermal Vents, Rooted Pit, Sandy Den, Submerged Impact, Submerged Spike, Sunscorched Remains, Underwater Fissure, Vibrant Hydrothermal Vents</td></tr><tr><td align="center"><img src="/files/GevBF6ReNeBAQKVmY18v" alt=""><strong>Shield Fossil</strong></td><td align="center"><img src="/files/kfZIQ2L3HZEvBYKm9BSf" alt=""><strong>Shieldon</strong></td><td align="center">Eroded Pillar, Lush Den, Mud Pit,  Sandy Den, Sunscorched Den</td></tr><tr><td align="center"><img src="/files/OHt9zo7Eddo5WzVUU5Cl" alt=""><strong>Skull Fossil</strong></td><td align="center"><img src="/files/IQALLl5qhHRTy38erg9Z" alt=""><strong>Cranidos</strong></td><td align="center">Birch Tree, Mossy Pond, Mud Pit, Oak Tree, Suspicious Mound</td></tr><tr><td align="center"><img src="/files/l188BLHul1pvgqlAV9TK" alt=""><strong>Cover Fossil</strong></td><td align="center"><img src="/files/5LZ7S3Bh9ScaxYr2p0ED" alt=""><strong>Tirtouga</strong></td><td align="center">Frozen Pond, Hydrothermal Vents, Preserved Skeleton, Submerged Impact, Submerged Spike, Underwater Fissure, Vibrant Hydrothermal Vents</td></tr><tr><td align="center"><img src="/files/BEDvnyN7HOcIRA7rdguv" alt=""><strong>Plume Fossil</strong></td><td align="center"><img src="/files/CpIR0BQRjx5cwav9msni" alt=""><strong>Archen</strong></td><td align="center">Birch Tree, Mossy Pond, Powdered Deposit, Rooted Pit, Spruce Tree, Suspicious mound</td></tr><tr><td align="center"><p><img src="/files/B1LHVoJlzATJcAXksAku" alt=""></p><p><strong>Jaw Fossil</strong></p></td><td align="center"><img src="/files/UVTCY5jkwQBn6IdTzBy2" alt=""><strong>Tyrunt</strong></td><td align="center">Eroded Pillar, Lush Den, Mud Pit, Sunscorched Den, Sunscorched Remains</td></tr><tr><td align="center"><img src="/files/NHMr6Ob58u7Q1Ad11HrA" alt=""><strong>Sail Fossil</strong></td><td align="center"><img src="/files/8eHLlfH6vYYCCzbCyulF" alt=""><strong>Amaura</strong></td><td align="center">Eroded Pillar, Frozen Pond, Frozen Spike, Spruce Tree</td></tr><tr><td align="center"><img src="/files/C9CkCM4JNFrtOWLSafUo" alt=""><strong>Fossilized Bird</strong></td><td align="center"><img src="/files/anYN1VwUhzrDsEx2VMWE" alt=""><strong>Dracozolt or Arctozolt</strong></td><td align="center">Birch Tree, Mossy Pond, Oak Tree, Powdered Deposit, Preserved Skeleton (sand), Spruce Tree, Suspicious Mound</td></tr><tr><td align="center"><img src="/files/sORNJ3Zbvee1ja4SoJcD" alt=""><strong>Fossilized Dino</strong></td><td align="center"><img src="/files/PFnjtBj2WR1fjVQdS4cX" alt=""><strong>Arctovish or Arctozolt</strong></td><td align="center">Frozen Pond, Frozen Spike, Oak Tree, Preserved Skeleton (gravel), Sandy Den</td></tr><tr><td align="center"><img src="/files/TtpgdbfFWk61iXiWvZBP" alt=""><strong>Fossilized Drake</strong></td><td align="center"><img src="/files/dxxbRLo76QZIbCGqhh36" alt=""><strong>Dracovish or Dracozolt</strong></td><td align="center">Birch Tree, Lush Den, Mud Pit,Preserved Skeleton (gravel), Rooted Pit, Sunscorched Den, Sunscorched Remains</td></tr><tr><td align="center"><img src="/files/GilmCX2LZsQh3sjOZ8oa" alt=""><strong>Fossilized Fish</strong></td><td align="center"><img src="/files/J1yJWwIj0GSMEQ1RffBK" alt=""><strong>Arctovish or Dracovish</strong></td><td align="center">Dripstone Oasis, Enhydro Agate, Frozen Spike, Hydrothermal Vents,Preserved Skeleton (sand), Submerged Impact, Submerged Spike, Underwater Fissure, Vibrant Hydrothermal Vents</td></tr></tbody></table>

## How to Obtain Fossils

In order to find Fossils you need to search for Dig Sites. There are multiple different structres you can find in the wild where you can find these structures which each comes with their own chances to get specific fossils and other loots.&#x20;

For **more information** about these as well as **how they look** please use the link stated below:

{% embed url="<https://wiki.cobblemon.com/index.php/Fossil_Dig_Sites>" %}

Once you have found a dig site the next step is to find **Suspicious Sand** or **Suspicious Gravel**. These look similar to their original block counterpart so keep a close eye to find the differences between them.&#x20;

You will be able to **see the differences between then within the screenshot below** as the left **two blocks will be normal Sand and Gravel** and the **single block on the right are their suspicious** counterparts.

<figure><img src="/files/YdKJS2LSVoJv7UOt7U3N" alt=""><figcaption><p>Sand and Gravel next to their Suspicious Blocks</p></figcaption></figure>

Once you have located the suspicious block the next thing you'll need is a Brush. You can craft this easily using the recipe shown below:

<div align="left"><figure><img src="/files/w53FpAfgCCsKJ6MQ1eVu" alt=""><figcaption><p>1x Feather, 1x Copper Ingot &#x26; 1x Stick</p></figcaption></figure></div>

Now that you have both the Brush and the Suspicious Sand/Gravel all you need to do is **hold** `Right Click` **on the block** until a item comes out. The **chanes of you getting a fossil is low**, but if you keep trying you can find a fossil in it.&#x20;

**Dig Sites will have multiple blocks you can brush** so make sure to look over each dig site carefully so you ain't missing one.

## How to Revive Fossils

### Crafting the Fossil Machine

Now that you have collected one or multiple fossils, you can now go ahead and start reviving them. You will however need to craft 3 separate machines in order to start this process. You'll need to specifically make a **Fossil Analyzer**, **Data Monitor** and a **Restoration Tank**. Recipe's for these are shown below:

#### Fossil Analyzer

<div align="left"><figure><img src="/files/9o4qY1p0WlMs28l2aUG0" alt=""><figcaption><p>4x Cobbled Deepslate, 2x Iron Ingot, 1x Redstone, 1x Glass, 1x Amethyst SHard</p></figcaption></figure></div>

#### Data Monitor

<div align="left"><figure><img src="/files/iBy9CChdvLiggjiqv90W" alt=""><figcaption><p>5x Iron Ingot, 2x Copper Ingot, 1x Redstone Torch &#x26; 1x Glass</p></figcaption></figure></div>

#### Restoration Tank

<div align="left"><figure><img src="/files/qYREjtvVbV1HMhfEOhbn" alt=""><figcaption><p>3x Iron Ingot, 4x Glass, 1x Composter &#x26; 1x Revive</p></figcaption></figure></div>

Once you have crafted each of these items you'll now need to place them in a particular order. You will want to **place the** **Fossil Analyzer** on the floor and **place the Data Monitor on top of it** in which you can then **place the Restoration Tank to the right** of it.&#x20;

Your machine should look as it is shown below:

<div align="left"><figure><img src="/files/nqfXPEuwuCAEM72gQEEV" alt=""><figcaption><p>Fossil Machine Setup</p></figcaption></figure></div>

### Organic Material to Power Machine

You can't just place a fossil into the machine and wait for it to finish, you'll need some fuel for it to work. You'll be able to use any form of **Organic Material** in order to power up your machine which can range from seeds, food, mob drops, bee nests to even max revives. Each Oraganic Material has their own value with how much they'll power up your machine i.e. **Pumpkin Seeds** will only give you **1 point** compared to a **Max Revive** which will give you **64**.&#x20;

We'd suggest you use **Max Revives or Dragon's Breath** as they're both easy to craft as well as purchasable from `/shop`

### Operating the Fossil Machine

Now that you have all the items needed to revive a fossil lets go over the process. You will want to `Right Click` onto the **Fossil Analyzer** which will place our fossil inside of the machine. From there you will want to **power your machine with Organic Materials**. Once you have given your machine enough materials it should power on and look how it is shown below:

<div align="left"><figure><img src="/files/lYmsDLsd4YjW3a4GQmnc" alt="" width="353"><figcaption><p>Fossil Machine during Revive Process</p></figcaption></figure></div>

From there it's ultimately just a waiting game. This **process will take roughly 10 minutes** but you'll know once it's complete as your machine should look similar to the screenshot shown below:

<div align="left"><figure><img src="/files/xUFlsRHLr6QiwEb8JyoT" alt="" width="385"><figcaption><p>Reviving Process Complete in Fossil Machine</p></figcaption></figure></div>

All you need to to now is `Right Click` onto the **Fossil Machine** with the **Pokeball** you wish to have your Pokemon in and it'll instantly go into your party or PC and that's the whole process. If you wish to revive more fossils you will need to keep giving it Organic Materials per fossil.

#### Gen 8 Fossil Pokemon  (Dracozolt, Arctozolt, Dracovish & Arctovish)&#x20;

For the Gen 8 Fossil Pokemon **you will need to combine two different fossils** in order to gain one of these pokemon unlike all other fossils which you only need the one. It's the same process when you `Right Click` onto the Fossil Machine to place it in, you'll just need to do it again for the corresponding Pokemon you want.&#x20;

You can use the table below to know which **Fossil Combinations are needed for the Respective Pokemon**:

* **Dracozolt \[***Electric/Dragon***]** \~ Fossilized Drake + Fossilized Bird
* **Arctozolt \[***Electric/Ice***]** \~ Fossilized Dino + Fossilized Bird
* **Dracovish \[***Water/Dragon***]** \~ Fossilized Drake + Fossilized Fish
* **Arctovish \[***Water/Ice***]** \~ Fossilized Dino + Fossilized Fish


# Complete Overview of Breeding

Breeding has just been introduced with the latest Beta update 0.21. Here you'll find everything you need to know about breeding on the server!

**Contents**

1. [What is Breeding?](#what-is-breeding)
2. [How to Breed Pokemon](#how-to-breed-pokemon)
   1. [Pasture Block](#pasture-block)
   2. [Egg Groups](#egg-groups)
   3. [Ditto](#ditto)
   4. [Breeding](#breeding)
3. [How to Hatch Pokemon Egg](#how-to-hatch-pokemon-egg)
4. [Breeding for Inherited Stats, Moves and Abilities/Natures](#breeding-for-inheritied-stats-moves-and-abilities-natures)
5. [Items used for Breeding](#items-used-for-breeding)
   1. [Destiny Knot](#destiny-knot)
   2. [Power Items](#power-items)
   3. [Mirror Herb](#mirror-herb)
   4. [Everstone](#everstone)
6. [Shiny Hunt Methods via Breeding](#shiny-hunt-methods-via-breeding)
   1. [Masuda Method](#masuda-method)
   2. [Crystal Method](#crystal-method)
   3. [Combined Methods](#combined-methods)
7. [FAQ \[Frequently Asked Questions\]](#faq-frequently-asked-questions)

***

### What is Breeding?

Like in the base Pokemon Games, breeding is a mechanic where two compatible pokemon can be placed within a Pasture Block to produce a Pokemon Egg based on both parents. You can hatch this egg via walking which will hatch into a Pokemon. There is loads of benefits for breeding for Pokemon like inheriting IVs, Abilities, Natures, Increased Shiny chances plus many more.

While most of the mechanics is the exact same for how it's set up in the base games, **there are a couple changes** to better fit with Cobblemon so it's ideal to read through it all if you don't know 100% how it all works on Cobblemon.

<div align="left"><figure><img src="/files/4Snj1aHz8cifEq0JazAB" alt=""><figcaption><p>Ex of Egg in Pasture Block</p></figcaption></figure></div>

### How to Breed Pokemon

#### Pasture Block

To initially get started with breeding, you first need to craft a Pasture Block. This is a easy recipe to craft as shown below:

<figure><img src="/files/HbwNCMrm3meKWKu7AvSd" alt=""><figcaption><p>Recipe: 5x Any Wood Plank, 1x PC, 2x Wheat, 1x Hopper</p></figcaption></figure>

Alternatively you can purchase one from `/shop`.

Once you have obtained a Pasture Block, you can go ahead and place it down within your realm. You can place up to 16 pokemon within the Pasture Block and all these will be walking in the area around where you placed it. Unfortunately you will only be able to gain one egg at a time with the block unless you create multiple of them within your realm.

<figure><img src="/files/eRfNDsW3g2cnN4vxQRGL" alt=""><figcaption><p>Ex of Pokemon within Pasture Block</p></figcaption></figure>

#### Egg Groups

The next step is to get two compatible pokemon to breed with each other via egg groups. For two pokemon to breed with each other, they need to breed with compatible egg groups. You can find a list of all these below:

<details>

<summary>Egg Groups</summary>

| Egg Groups   | Can Breed With                                                                             |
| ------------ | ------------------------------------------------------------------------------------------ |
| Amorphous    | Dragon, Fairy, Grass, Human-Like, Mineral, Water 1                                         |
| Bug          | Dragon, Fairy, Grass, Human-Like, Mineral, Water 1, Water 3                                |
| Dragon       | Amorphous, Bug, Field, Flying, Grass, Mineral, Monster, Water 1, Water 2                   |
| Fairy        | Amorphous, Bug, Field, Flying, Grass, Human-Like, Mineral, Water 1                         |
| Field        | Dragon, Fairy, Flying, Grass, Human-Like, Mineral, Monster, Water 1, Water 2               |
| Flying       | Dragon, Fairy, Field, Human-Like, Water 1, Water 3                                         |
| Grass        | Amorphous, Bug, Dragon, Fairy, Field, Human-Like, Mineral, Monster, Water 1                |
| Human-Like   | Amorphous, Bug, Fairy, Field, Flying, Grass, Water 1                                       |
| Mineral      | Amorphous, Bug, Dragon, Fairy, Field, Grass, Monster                                       |
| Monster      | Dragon, Field, Grass, Mineral, Water 1                                                     |
| Water 1      | Amorphous, Bug, Dragon, Fairy, Field, Flying, Grass, Human-Like, Monster, Water 2, Water 3 |
| Water 2      | Dragon, Field, Water 1                                                                     |
| Water 3      | Bug, Flying, Water 1                                                                       |
| Undiscovered | **Unable to Breed**                                                                        |

</details>

To find out which Pokemon fits under a certain egg group, you can use the following link to determine this: <https://bulbapedia.bulbagarden.net/wiki/List_of_Pok%C3%A9mon_by_National_Pok%C3%A9dex_number>

#### Ditto

Now Ditto is a little bit different in that **it can breed with any egg group** (*excl Undiscovered and itself*) meaning it is a fantastic addition to your gameplay if you plan on breeding a fair bit. As long as the other pokemon is able to be bred, then you can use Ditto to breed for a egg regardless of the gender of the Pokemon in question.

#### Breeding

Once you have both a Pasture Block and two compatible (*Male and Female*) Pokemon, you can place these within the Pasture block and wait until you see a egg appear at the back of the pasture block. Breeding is attempted every 1 minute so you could get it within a minute, or it could take a couple minutes to obtain a egg.&#x20;

**NOTE:** You will only get a egg while being within your realm. Do not place a Pasture Block down within the wilds so you do not lose it.

You can see an example of what this looks like with the screenshot shown below:

<figure><img src="/files/4Snj1aHz8cifEq0JazAB" alt=""><figcaption><p>Ex of Egg within Pasture Block</p></figcaption></figure>

From there all you need to do is `Right Click` onto the Pasture Block to recieve your egg. This will be placed within your inventory and you can hover over the egg to find out information relating to the Pokemon like the name of the pokemon, how many steps to hatch, steps accumulated and so on.

<figure><img src="/files/EsQuvrdklF1b3NVurcTl" alt=""><figcaption><p>Ex of Info shown via Egg</p></figcaption></figure>

### How to Hatch Pokemon Egg

Hatching the egg is incredibly easy! All you need to do is place the egg within your inventory and walk around with it. Each step will take away from the count you'll be able to see on the egg.&#x20;

As soon as the count reaches 0 you will be able to do `Shift` + `Right Click` **while holding the egg** and it will hatch and it will be **sent directly into your party or PC**.

<div align="left"><figure><img src="/files/7H35ZOEB5cndxJk660cl" alt=""><figcaption><p>Ex of Egg ready to be Hatched</p></figcaption></figure></div>

<div align="left"><figure><img src="/files/6Z7hze15jFTa8YsA079I" alt=""><figcaption><p>Ex of Opened Egg Pokemon being sent to PC</p></figcaption></figure></div>

### Breeding for Inherited Stats, Moves, Forms and Abilities/Natures

One of the best things with Breeding Pokemon is that you can push down certain abilities, natures, IVs and obtain special egg moves via breeding.

**STATS** : Only 3 random IVs stats will be pushed down to the baby pokemon (*if no item is used*) with the other 3 stats being randomized. You can use Destiny Knot and Battle Items to get more IVs/specific IVs pushed down instead. You can see more about these items within the next section of this guide.

**MOVES** : Pokemon that are hatched will start out with all moves they can learn at level 1, but if both parents know a move they can learn via lvl up then the egg will inherit this move. This is true with egg moves as if either parent knows a egg move then it will be pushed down to the baby pokemon.

**NATURES** : You are able to breed down a specific nature from a parent by giving it a Everstone. If you give both parents a Everstone then which nature the Pokemon will have is randomized between the two natures. Natures changed via mints will not be breed down the new nature to the baby pokemon.

**ABILITY** : If you are trying to breed down a specific ability, then it's ideal that you breed with a ditto to ensure that the egg gains the ability. Otherwise you will want to breed with a female parent as you have a 80% chance for their ability (*20% for it to be random*) to be pushed down and a 60% chance for it to be pushed down if it's a hidden ability. This makes female pokemon incredibly valuable for breeders to have especially when working with Hidden Abilities. You can't breed a Male with a Hidden Ability with a Non-Ditto Pokemon as the ability will not be inherited by the baby Pokemon. If neither parent have a Hidden Ability, then you can not gain the Hidden Ability via breeding.

**FORMS** : Due to the server not having any regions which in the main games affects, players can't have forms of the region it is in. Instead, Pokemon will inherit the regional form of the mother or non-ditto parent. Alternatively you can use a everstone on the non-ditto parent to gain the form instead.

### Items used for Breeding

Here you can find a selection of items that have effects for breeding which players will find useful to be using.&#x20;

#### Destiny Knot

You can give a Pokemon a Destiny Knot to one of your Pokemon to Hold in which this will select **5 random IV stats from both parents** \[*not just the Pokemon Holding the item*] which will be inherited to the Pokemon Egg. This means if you have IV stats that are 31, if that specific stats is selected them that will be inherited into the egg. The other IV stat that isn't being selected will be randomized.

There is no way to select what IVs are chosen with the Destiny Knot.

#### Power Items

Power Items \[*Power Weight, Power Bracer, Power Belt, Power Lens, Power Band, Power  Anklet*] **can be given to the pokemon being bred to give a specific IV stat** corresponding to the item used. Below is a table of what each of the items will pass over:

<table><thead><tr><th width="243.5">Power Item</th><th>Stat</th></tr></thead><tbody><tr><td>Power Weight</td><td>HP</td></tr><tr><td>Power Bracer</td><td>Attack</td></tr><tr><td>Power Belt</td><td>Defense</td></tr><tr><td>Power Lens</td><td>Special Attack</td></tr><tr><td>Power Band</td><td>Special Defense</td></tr><tr><td>Power Anklet</td><td>Speed</td></tr></tbody></table>

This means if you give a **Power Anklet to Parent #1** and a **Power Weight to Parent #2** then you will gain the respective Speed and HP stat corresponding to the parent stats.

#### Mirror Herb

If you want to learn a egg move to a respective Pokemon and you have another Pokemon who has this move then you can give the Mirror Herb to the pokemon that you wish to learn it and throw both of these within the Pasture Block. The pokemon will then be able to  learn this move without needing to finishing the breeding process.&#x20;

#### Everstone

You are able to breed down a specific nature from a parent by giving it a Everstone. If you give both parents a Everstone then which nature the Pokemon will have is randomized between the two natures. Natures changed via mints will not be breed down the new nature to the baby pokemon.

Alternatively with everstones you can use them to breed for specific regional forms by giving it to the non-ditto parent while breeding to gain the specific form.

### <mark style="color:yellow;">Shiny</mark> Hunt Methods via Breeding

#### Masuda Method

Masuda Method is a way for players to have increased shiny chances for Pokemon that comes out of eggs. Unlike in the games where you need one Pokemon parent from another game language (i.e. English with Japanese), all you need is a pokemon with a different OT for this to work.

**METHOD:** Place your Pokemon that has your OT and another Pokemon of choice with a different players OT for the masuda method to work.

For just using Masuda Method for breeding it **increases chances** from `1/4096` to a whopping `1/585!`&#x20;

#### Crystal Method

Crystal Method is another way for players to increase the chances of shinies from eggs using shinies they already own! If at least one of the Pokemon being bred is already shiny, then you will gain increased offs for getting a shiny from your egg! **Using two shiny pokemon will not increase your odds further, it's only affected by one parent being shiny.**

**METHOD:** Place a Pokemon that is shiny with another Pokemon into the Pasture block to get the increased chances.

For just using Crystal Method for breeding it **increases chances** from `1/4096` to a whopping `1/1365!`&#x20;

#### Combined Methods

Here's where you can get the best odds for Shiny Hunting via Eggs. If both of your Pokemon fit the Masuda and Crystal methods of shiny hunting, then both of the odds will stack and you will get the best odds for shiny hunting via eggs!

**METHOD:** Place **one Pokemon that has your OT** and **another Pokemon of choice with a different players OT** with **one of these pokemon also being Shiny** for the odds to be stacked!

For just using the Masuda Methods and Crystal Method for breeding it will **increases chances** from `1/4096` to a whopping `1/455!`&#x20;

### FAQ \[Frequently Asked Questions]

**Q \~ Can I breed two Ditto's together to gain a random Pokemon?**

> No you will not gain a egg with a random pokemon by breeding two Ditto's together.

**Q \~ How can I obtain a Phione?**

> You can get Phione by breeding either a Manaphy or Phione with a Ditto via the Pasture Block.

**Q \~ What is the chances of getting a egg every minute?**

> There is a 5% chance you will get a egg every minute for each pair within a pasture. If you have 2 pairs you'll have 6% chance, 3 pairs will be 7%. 4 will be 8%, 5 will be 8.5%. 6 will be 9%, 7 will be 9.5% and 8 will be 10% which is the max a pasture can hold.

**Q \~ Can you get Cobblemon exclusive textures from breeding?**

> As of now it's not designed to take account of custom textures Pokemon have in Cobblemon. This will be something that changes in the future.

**Q \~ Can I breed two genderless Pokemon together?**

> Outside of ditto, you can't breed two genderless pokemon together. Parents have to be a male and a female in order to breed.

**Q \~ Will a egg spawn in my realm while I am in the wilds?**

> No, eggs will only appear while you are within your realm and they are loaded. Soon as you and everyone else leaves, your breeding will essentially be put on hold.

**Q \~ Can I place a egg down within my realm?**

> Yes you can place all eggs down within your realm as breaking them will give you the egg back like breaking any other normal item.

**Q \~ Does hatching eggs give a dex entry?**

> Yes you can hatch eggs in order to gain a dex entry which goes towards `/dexrewards`


# Complete Overview of Berries

Here you'll find everything you need to know about berries from how to obtain them, how to farm then as well as their uses.

**Contents**

1. [List of all Berries and their Uses](#list-of-all-berries-and-their-uses)
2. [How can I find Berries?](#how-can-i-find-berries)
3. [How to farm Berries](#how-to-farm-berries)
   1. [Mulch](#mulch)
   2. [Berries farmed via Mutating](#berries-farmed-via-mutating)
4. [Recipes including Berries](#recipes-including-berries)
   1. [Vitamins](#vitamins)
   2. [X Items](#x-items)
   3. [Other Items](#other-items)

***

### List of all Berries and their Uses

Here you can find a list of all the berries and their uses on Pokemon as well as their fishing effects.

<table data-card-size="large" data-view="cards"><thead><tr><th></th><th data-hidden data-card-target data-type="content-ref"></th></tr></thead><tbody><tr><td>🫐 <strong>List of all Berries and their Uses</strong></td><td><a href="/pages/5YKqLEiWZrFKS1BaQn3z">/pages/5YKqLEiWZrFKS1BaQn3z</a></td></tr></tbody></table>

### How can I find Berries?

<div align="left"><figure><img src="/files/sisJSfeQtLoI2l9HrY99" alt="" width="276"><figcaption><p>Ex of Fully Grown Berry Trees</p></figcaption></figure></div>

Throughout the Overworld you will come across trees Berry Tree's which you can harvest for berries. There is unique tree's for each Berry out there, although **some are not accessible from finding them in the wild** as you will need to grow 2 or more next to each other to get mutated berries.

**\*NOTE\*** - *All berries are accessible from the PokeMart found on our server for a cheap price, so this is the best way to obtain them on our server. You can access this via* `/shop`*.*

**Roseli Berry** is the only berry that is only obtainable via defeating specific Pokemon. These include:&#x20;

> Absol, Sableye, Deino, Scraggy, Zorua, Pancham, Impidimp, Morpeko and Nickit.

You are able to grow and farm each berry to gain more of them. To learn more about this please refer to the next section of this guide found below.

### How to farm Berries

A Berry Tree will give a player berries once harvested. You can actually grow these yourself if you have the corresponding berry for them as they will grow like any other normal Minecraft Crop via a **Farmland block** \[*Grass that has been hit by a Hoe*].

<div align="left"><figure><img src="/files/TJdhrlaVRm3fIfZW1iuw" alt="" width="224"><figcaption><p>Ex of a Berry Growing in First Stage</p></figcaption></figure></div>

There is 4 different stages of the berry trees growth which determines it's age. You can speed this process up with Bone Meal or wait it out by general playtime. Once the berry is at it's final stage with flowers you will start to see berries grow on the tree which you can harvest by `Right Click` on the tree.&#x20;

<div align="left"><figure><img src="/files/1RqHZZB683GQLOYUq2Cz" alt="" width="216"><figcaption><p>Ex of a Fully Grown Tree <strong>prior</strong> Harvesting Berries</p></figcaption></figure></div>

Once you have harvested the berries it will start growing more berries from the leaves instead of restarting the whole growth process.

<div align="left"><figure><img src="/files/fmLvdUk10Zmqd6OqXidu" alt="" width="184"><figcaption><p>Ex of a Fully Grown Tree <strong>after</strong> Harvesting Berri</p></figcaption></figure></div>

#### Mulch

Mulch is a item that will **gives your berry trees a boost** from improving it's growth rate, increases yield of berries obtained to even making the Tree act like it's within another biome.&#x20;

You can use mulch on your tree by pressing `Right Click` and then you can also get it back pressing `Right Click` on the tree with a **Shovel**, or just destroying the tree.

You can find a list of all Mulch below:

<details>

<summary>List of all Mulches</summary>

**Mulch**

> This is a item that is needed to be crafted into any of the Mulches stated below.
>
> ![](/files/GzseJ6huPQ7DebAuyMQF)
>
> **RECIPE**: 1x Bone Meal, 1x Rotten Flesh, 1x Dirt, 1x Paper.

**Growth Mulch**

> This will increase the growth rate of the harvest of the respective tree for 3 harvests.
>
> ![](/files/B0snewQlXIyLCdSSjqyL)
>
> **RECIPE**: 1x Mulch, 1x Bone Meal.

**Rich Mulch**

> This will increase the yield of the harvest of the respective tree for 3 harvests.
>
> ![](/files/SvpGCQq3ffHvOFStiujM)
>
> **RECIPE**: 1x Mulch, 1x Blaze Powder.

**Surprise Mulch**

> This will increase the chance of a Mutation for a Berry to happen for three harvests. It can also mutate a Revival Herb into a Mental, Power, White or Mirror Herb.
>
> ![](/files/Dy3ms7SWt4qOmXUUrCsW)
>
> **RECIPE**: 1x Mulch, 1x Glistering Melon Slice.

**Loamy Mulch**

> This will make the Berry Tree act like it's currently within a Plains Biome.
>
> ![](/files/6lIIks2jw3USHPzfSXiz)
>
> **RECIPE**: 1x Mulch, 1x Dirt.

**Coarse Mulch**

> This will make the Berry Tree act like it's currently within a Mountain or Taiga Biome.
>
> ![](/files/4gEHtNtX4C7DURFr2zcx)
>
> **RECIPE**: 1x Mulch, 1x Coarse Dirt.

**Peat Mulch**

> This will make the Berry Tree act like it's currently within a Forest Biome.
>
> ![](/files/A534viblSgoe2pz78aEc)
>
> **RECIPE**: 1x Mulch, 1x Moss Block.

**Humid Mulch**

> This will make the Berry Tree act like it's currently within a Jungle or Swamp Biome.
>
> ![](/files/ZUbFTovOutL7kSLwaBHI)
>
> **RECIPE**: 1x Mulch, 1x Mud.

**Sandy Mulch**

> This will make the Berry Tree act like it's currently within a Arid Biome.
>
> ![](/files/fHuuQcHXljgzbLArQCyJ)
>
> **RECIPE**: 1x Mulch, 1x Sand.

</details>

#### Berries farmed via Mutating

You can actually plant two or more berries together in order to obtain more berries via Mutating. To learn more about Mutating berries please refer to the **Cobblemon Wiki** accessible here: <https://wiki.cobblemon.com/index.php/Berry_Tree>

### Recipes including Berries \[OUTDATED]

There are multiple recipes you can use berries for on the server. Some of these recipes include the following:

#### Vitamins

Vitamins are perishable items that will improve a Pokemons EV's stat corresponding to the Vitamin used. You can also increase max PP or HP with three other vitamins. Here is a list of all vitamins and their brewing recipes:

> **Calcium**
>
> This will add 10 Special Attack EVs to the Pokemon when used.
>
> ![](/files/r7e0F7Q7zkUla4ZHonq0)
>
> **RECIPE** : 3x PP Up, 1x Hondew Berry.

> **Carbos**
>
> This will add 10 Speed EVs to the Pokemon when used.
>
> ![](/files/nAOkGBxLVpE0BSnHIt5i)
>
> **RECIPE** : 3x PP Up, 1x Tomato Berry.

> **HP Up**
>
> This will add 10 HP EVs to the Pokemon when used.
>
> ![](/files/YlPa5KW1JDqXJA41pVGg)
>
> **RECIPE** : 3x PP Up, 1x Pomeg Berry.

> **Iron**
>
> This will add 10 Defense EVs to the Pokemon when used.
>
> ![](/files/5nKwUtb7T5n2CNuaYmWw)
>
> **RECIPE** : 3x PP Up, 1x Qualot Berry.

> **Protein**
>
> This will add 10 Attack EVs to the Pokemon when used.
>
> <img src="/files/amVUoG04nYDif4Dt8OxO" alt="" data-size="original">
>
> **RECIPE** : 3x PP Up, 1x Kelpsy Berry.

> **Zinc**
>
> This will add 10 Special Defense EVs to the Pokemon when used.
>
> ![](/files/4VC4EAzMTaoTRnxkEoQV)
>
> **RECIPE** : 3x PP Up, 1x Grepa Berry.

> **PP Up**
>
> This will increase the select moves amount of PP by 20% of it's base PP amount. This can be used 3 times per move.
>
> ![](/files/a4k90pqVzRdfeM087r7u)
>
> **RECIPE** : 3x Medicinal Brew, 1x Vivichoke.

> **PP Max**
>
> This will increase the select moves amount of PP to 160% of it's base PP amount. This can only be used once per move.
>
> ![](/files/IthboM8hxDBvR9QluonG)
>
> **RECIPE** : 3x PP Up, 1x Energy Root.

#### X Items

These are items that will increase the targets stat by one stage when used in a battle. Which stat that is increased is dependant on which X item is used. These are as follows:

> **X Attack**
>
> This will raise the targets attack by one stage when used in a battle.
>
> ![](/files/SMjkhhDZtW1MiRrg1y1H)
>
> **RECIPE** : 1x Glass Bottle, 1x Pep-Up Flower, 1x Bonemeal, 1x Liechi Berry.

> **X Defense**
>
> This will raise the targets defense by one stage when used in a battle.
>
> ![](/files/nFJHv9Tf48nIAyrLXaCS)
>
> **RECIPE** : 1x Glass Bottle, 1x Pep-Up Flower, 1x Bonemeal, 1x Ganlon Berry.

> **X Speed**
>
> This will raise the targets speed by one stage when used in a battle.
>
> ![](/files/Vei0tr5E67b2Ggb3KKpz)
>
> **RECIPE** : 1x Glass Bottle, 1x Pep-Up Flower, 1x Bonemeal, 1x Salac Berry.

> **X Special Attack**
>
> This will raise the targets special attack by one stage when used in a battle.
>
> ![](/files/8YWKF6GOnnMEhHTOHOxV)
>
> **RECIPE** : 1x Glass Bottle, 1x Pep-Up Flower, 1x Bonemeal, 1x Petaya Berry.

> **X Special Defense**
>
> This will raise the targets special defense by one stage when used in a battle.
>
> ![](/files/qHtMu89adkRfngqcDKRJ)
>
> **RECIPE** : 1x Glass Bottle, 1x Pep-Up Flower, 1x Bonemeal, 1x Apicot Berry.

> **X Accuracy**
>
> This will raise the targets accuracy by one stage when used in a battle.
>
> ![](/files/FHq6M4WRJ382aQb8onh4)
>
> **RECIPE** : 1x Glass Bottle, 1x Pep-Up Flower, 1x Bonemeal, 1x Micle Berry.

> **Dire Hit**
>
> This will temporarily boost critical hit ratio when used in a battle for the targets Pokemom.
>
> ![](/files/6KsJabKTfg5wmSsttbOX)
>
> **RECIPE** : 1x Glass Bottle, 1x Pep-Up Flower, 1x Bonemeal, 1x Tamato Berry.

#### Aprijuices

These are items that will increase the targets inheret riding stat modifiers based on both the colour of the juice, and the flavour profile gained from additional seasoning of the juice. The additional flavour profiler boosts are as follows:

| Flavour | Stat         |
| ------- | ------------ |
| Spicy   | Acceleration |
| Dry     | Skill        |
| Sweet   | Speed        |
| Sour    | Stamina      |
| Bitter  | Jump         |

The name and model of the Aprijuice corresponds to the number of riding stats it provides, however they all follow the same crafting recipes within a Campfire Pot. The juices recipes are as follows:

> **Red Aprijuice**
>
> This will increase a Pokemons Acceleration by 2, and decrease their Stamina by 1.
>
> ![](/files/ezIMtyuXmKPP9VR3OI1c)
>
> **RECIPE** : 1x Red Apricorn, 1x Pep-Up Flower, 1x Energy Root, 3x Any Flavour Seasoning.

> **Blue Aprijuice**
>
> This will increase a Pokemons Skill by 2, and decrease their Jump by 1.
>
> ![](/files/CbjNClU5hncNZz9x3VHj)
>
> **RECIPE** : 1x Blue Apricorn, 1x Pep-Up Flower, 1x Energy Root, 3x Any Flavour Seasoning.

> **Pink Aprijuice**
>
> This will increase a Pokemons Speed by 2, and decrease their Acceleration by 1.
>
> ![](/files/MuPtqLLeCM4kEAtUa4nQ)
>
> **RECIPE** : 1x Pink Apricorn, 1x Pep-Up Flower, 1x Energy Root, 3x Any Flavour Seasoning.

> **Yellow Aprijuice**
>
> This will increase a Pokemons Stamina by 2, and decrease their Skill by 1.
>
> ![](/files/UERnCOFGMNfXA1TN7HVw)
>
> **RECIPE** : 1x Yellow Apricorn, 1x Pep-Up Flower, 1x Energy Root, 3x Any Flavour Seasoning.

> **Green Aprijuice**
>
> This will increase a Pokemons Jump by 2, and decrease their Speed by 1.
>
> ![](/files/BXoItb9fqSW0gaNfN4zs)
>
> **RECIPE** : 1x Green Apricorn, 1x Pep-Up Flower, 1x Energy Root, 3x Any Flavour Seasoning.

> **Black Aprijuice**
>
> This will make no changes to a Pokemons riding stats.
>
> ![](/files/t8yEL040hwuya5BeRHpe)
>
> **RECIPE** : 1x Black Apricorn, 1x Pep-Up Flower, 1x Energy Root, 3x Any Flavour Seasoning.

> **White Aprijuice**
>
> This will decrease all of a Pokemons riding stats by 2.
>
> ![](/files/Xi1HiO4SXMZTaCZ70jOT)
>
> **RECIPE** : 1x White Apricorn, 1x Pep-Up Flower, 1x Energy Root, 3x Any Flavour Seasoning.

#### Other Items

Here are a list of other items you can create with Berries on the server.

> **Berry Juice**
>
> This is a held item that will restore 20HP of a Pokemon that's holding it that goes below 50% HP in battle.
>
> ![](/files/9g2VZHg9We3j4uF5Nb8m)
>
> * **RECIPE** : 2x Any Berry, 1x Bowl.


# Complete Overview of Berry (Bait) Effects

Here is a list of all available berries including their effects on both Pokemon, as well as for fishing and PokeSnacks.

|                                                  Berry                                                  |                                                Pokemon Effect                                               |                                                                 Bait Effect                                                                |                   Chance                  |
| :-----------------------------------------------------------------------------------------------------: | :---------------------------------------------------------------------------------------------------------: | :----------------------------------------------------------------------------------------------------------------------------------------: | :---------------------------------------: |
|                                Oran Berry![](/files/F5QDh3501hmiWETuFxeM)                               |                                  Restores 10HP when at 1/2 max HP or less.                                  |                                                          Reduces Bite Time by 33%                                                          |                    100%                   |
|                               Cheri Berry![](/files/9lCP17qYYo7zxlA8ymcV)                               |                                   Holder cures itself if it is paralyzed.                                   |    <p>Increases chance of Pokémon of the Fairy Egg Group by 10x</p><hr><p>Increases chance of Pokémon of the Grass Egg Group by 10x</p>    |         <p>100%</p><hr><p>100%</p>        |
|                               Chesto Berry![](/files/twbM1H38vVW43EdcEnVB)                              |                                       Holder wakes up if it is asleep.                                      | <p>Increases chance of Pokémon of the Human-Like Egg Group by 10x</p><hr><p>Increases chance of Pokémon of the Flying Egg Group by 10x</p> |         <p>100%</p><hr><p>100%</p>        |
|                               Pecha Berry![](/files/60aF2DTHRsY5ovZnuUby)                               |                                      Holder wakes up if it is poisoned.                                     |    <p>Increases chance of Pokémon of the Water 3 Egg Group by 10x</p><hr><p>Increases chance of Pokémon of the Bug Egg Group by 10x</p>    |         <p>100%</p><hr><p>100%</p>        |
|                               Rawst Berry![](/files/ieujbjrWmvA4jnNBp0C6)                               |                                       Holder cured up if it is burned.                                      |                                          Increases chance of Pokémon of the Field Egg Group by 10x                                         |         <p>100%</p><hr><p>100%</p>        |
|                               Aspear Berry![](/files/k97FI5YpK1OCGxpDx3cU)                              |                                       Holder cured up if it is frozen.                                      |  <p>Increases chance of Pokémon of the Water 1 Egg Group by 10x</p><hr><p>Increases chance of Pokémon of the Water 2 Egg Group by 10x</p>  |         <p>100%</p><hr><p>100%</p>        |
|                               Persim Berry![](/files/lLMiESCMr1JKqbxlSWMz)                              |                                      Holder is cured if it is confused.                                     | <p>Increases chance of Pokémon of the Mineral Egg Group by 10x</p><hr><p>Increases chance of Pokémon of the Amorphous Egg Group by 10x</p> |         <p>100%</p><hr><p>100%</p>        |
|                                Razz Berry![](/files/Hq80amwfZkcqERjXPoqe)                               |                                                **No Effect.**                                               |                                                Attracts Pokémon with Attack-boosting natures                                               |                    25%                    |
|                                Bluk Berry![](/files/R5zIA46EW0dDnug7GAWN)                               |                                                **No Effect.**                                               |                                            Attracts Pokémon with Special Attack-boosting natures                                           |                    25%                    |
|                               Nanab Berry![](/files/jesBfryxvByQ7MvV3H3W)                               |                                                **No Effect.**                                               |                                                Attracts Pokémon with Speed-boosting natures                                                |                    25%                    |
|                               Wepear Berry![](/files/ANPipikZk3xDN6JwinjP)                              |                                                **No Effect.**                                               |                                           Attracts Pokémon with Special Defense-boosting natures                                           |                    25%                    |
|                               Pinap Berry![](/files/zSaPordPmVCOSbEm2MRt)                               |                                                **No Effect.**                                               |                                               Attracts Pokémon with Defense-boosting natures                                               |                    25%                    |
|                                Occa Berry![](/files/EjQtpZ3jKkKly04KmI9E)                               |                           Halves damage from one super effective Fire-type attack.                          |                                                Increases chance of Fire-type Pokémon by 10x                                                |                    100%                   |
|                               Passho Berry![](/files/WNV7qbAeGRXT0IidTfhp)                              |                          Halves damage from one super effective Water-type attack.                          |                                                Increases chance of Water-type Pokémon by 10x                                               |                    100%                   |
|                               Wacan Berry![](/files/LJah5mevWmpQdIS8GVun)                               |                         Halves damage from one super effective Electric-type attack.                        |                                              Increases chance of Electric-type Pokémon by 10x                                              |                    100%                   |
|                               Rindo Berry![](/files/2YsLHySMVlFzLCWi6pMk)                               |                          Halves damage from one super effective Grass-type attack.                          |                                                Increases chance of Grass-type Pokémon by 10x                                               |                    100%                   |
|                               Yache Berry![](/files/vcUut3289P2wW2FZJZy7)                               |                           Halves damage from one super effective Ice-type attack.                           |                                                 Increases chance of Ice-type Pokémon by 10x                                                |                    100%                   |
|                               Chople Berry![](/files/VrTYfYDuRZqs3P0R8clY)                              |                         Halves damage from one super effective Fighting-type attack.                        |                                              Increases chance of Fighting-type Pokémon by 10x                                              |                    100%                   |
|                               Kebia Berry![](/files/bakQChCrpr7VvnkWZB3p)                               |                          Halves damage from one super effective Poison-type attack.                         |                                               Increases chance of Poison-type Pokémon by 10x                                               |                    100%                   |
|                               Shuca Berry![](/files/uhVPYLnCzb9qEMMMcdqC)                               |                          Halves damage from one super effective Ground-type attack.                         |                                               Increases chance of Ground-type Pokémon by 10x                                               |                    100%                   |
|                                Coba Berry![](/files/ZxThlFigrKRJVXSOoHml)                               |                          Halves damage from one super effective Flying-type attack.                         |                                               Increases chance of Flying-type Pokémon by 10x                                               |                    100%                   |
|                               Payapa Berry![](/files/WEXFWPbFWxaashyrURJG)                              |                         Halves damage from one super effective Psychic-type attack.                         |                                               Increases chance of Psychic-type Pokémon by 10x                                              |                    100%                   |
|                               Tanga Berry![](/files/PXZBBYZV9CnUtsVEWgdQ)                               |                           Halves damage from one super effective Bug-type attack.                           |                                                 Increases chance of Bug-type Pokémon by 10x                                                |                    100%                   |
|                               Charti Berry![](/files/NKVoXcY0vj3JAY1YOp9h)                              |                           Halves damage from one super effective Rock-type attack.                          |                                                Increases chance of Rock-type Pokémon by 10x                                                |                    100%                   |
|                               Kasib Berry![](/files/pqiSh3hMZZgJPd53ITKR)                               |                          Halves damage from one super effective Ghost-type attack.                          |                                                Increases chance of Ghost-type Pokémon by 10x                                               |                    100%                   |
|                               Haban Berry![](/files/QCtWpsuofaq3mHWXldpA)                               |                          Halves damage from one super effective Dragon-type attack.                         |                                               Increases chance of Dragon-type Pokémon by 10x                                               |                    100%                   |
|                               Colbur Berry![](/files/8OAYU0kFPmBM3wcBcyGZ)                              |                           Halves damage from one super effective Dark-type attack.                          |                                                Increases chance of Dark-type Pokémon by 10x                                                |                    100%                   |
|                               Babiri Berry![](/files/LXxoxpFrfVWnjZroC8bg)                              |                          Halves damage from one super effective Steel-type attack.                          |                                                Increases chance of Steel-type Pokémon by 10x                                               |                    100%                   |
|                               Chilan Berry![](/files/EKteK541ak4gx6jO771y)                              |                          Halves damage from one super effective Normal-type attack.                         |                                               Increases chance of Normal-type Pokémon by 10x                                               |                    100%                   |
|                               Roseli Berry![](/files/0c65Wfq8BkLgyCStY230)                              |                          Halves damage from one super effective Fairy-type attack.                          |                                                Increases chance of Fairy-type Pokémon by 10x                                               |                    100%                   |
|                               Leppa Berry![](/files/jC7yFEsnLgzeTW3F4O2k)                               | Restores 10PP to the first of the holder's moves to reach 0PP. Restores 10PP to any move outside of battle. |                                                       Boosts lured Pokémon Level by 5                                                      |                    100%                   |
|                                Lum Berry![](/files/TNFQFb2VDyS75xQKPg7R)                                |                                 Cures any non-volatile status or confusion.                                 |   <p>Increases chance of Pokémon of the Dragon Egg Group by 10x</p><hr><p>Increases chance of Pokémon of the Monster Egg Group by 10x</p>  |         <p>100%</p><hr><p>100%</p>        |
|                                Hopo Berry![](/files/RVIzBikQDBUJwm44QlDf)                               |                 Cannot be eaten by the holder. Restores 10PP to any move outside of battle.                 |                                                      Boosts lured Pokémon Level by 10                                                      |                    100%                   |
|                                Figy Berry![](/files/1Ml5IYw0gKMV0LdiTvFe)                               |            Restores 1/3 max HP at 1/4 HP or less, confuses Pokémon with Attack lowering natures.            |                                                Attracts Pokémon with Attack-boosting natures                                               |                    50%                    |
|                               Iapapa Berry![](/files/Vg7pvHwkqok5D2ALJwig)                              |            Restores 1/3 max HP at 1/4 HP or less, confuses Pokémon with Defense lowering natures.           |                                               Attracts Pokémon with Defense-boosting natures                                               |                    50%                    |
|                                Wiki Berry![](/files/iSuiSVW7Ka3VSRCoNQVe)                               |        Restores 1/3 max HP at 1/4 HP or less, confuses Pokémon with Special attack lowering natures.        |                                            Attracts Pokémon with Special Attack-boosting natures                                           |                    50%                    |
|                               Aguav Berry![](/files/UY1U6FnMqZ9zYtr0hVbQ)                               |        Restores 1/3 max HP at 1/4 HP or less, confuses Pokémon with Special Defense lowering natures.       |                                           Attracts Pokémon with Special Defense-boosting natures                                           |                    50%                    |
|                                Mago Berry![](/files/GiM9aScxFtmcMqQ0Yqn5)                               |             Restores 1/3 max HP at 1/4 HP or less, confuses Pokémon with Speed lowering natures.            |                                                Attracts Pokémon with Speed-boosting natures                                                |                    50%                    |
|                               Sitrus Berry![](/files/Ne2Ezzooz3vF4VRkNR5m)                              |                                    Restores 1/4 max HP at 1/2 HP or less.                                   |                                                          Reduces Bite Time by 50%                                                          |                    100%                   |
|                               Touga Berry![](/files/MWlhD7IKXXzLVnSCzotE)                               |                                               Cures confusion.                                              |                                                Attracts Pokémon with Attack-boosting natures                                               |                    75%                    |
|                               Cornn Berry![](/files/qcb1UWr7nF1sBWFPDZcK)                               |                                                **No Effect.**                                               |                                            Attracts Pokémon with Special Attack-boosting natures                                           |                    75%                    |
|                               Magost Berry![](/files/wv8GcGZMkOTmviBqJPg7)                              |                                                **No Effect.**                                               |                                                Attracts Pokémon with Speed-boosting natures                                                |                    75%                    |
|                               Rabuta Berry![](/files/JxUSS3oBfiU7MJZ5xlNy)                              |                                                **No Effect.**                                               |                                           Attracts Pokémon with Special Defense-boosting natures                                           |                    75%                    |
|                               Nomel Berry![](/files/wcwBHoDL9AggO5TKG6wp)                               |                                                **No Effect.**                                               |                                               Attracts Pokémon with Defense-boosting natures                                               |                    75%                    |
|                               Spelon Berry![](/files/qlfbvQH7theFQtl6Abg8)                              |                                                **No Effect.**                                               |                                                Attracts Pokémon with Attack-boosting natures                                               |                    100%                   |
|                               Pamtre Berry![](/files/9LlWFywtELU67byCFR10)                              |                                                **No Effect.**                                               |                                            Attracts Pokémon with Special Attack-boosting natures                                           |                    100%                   |
|                               Watmel Berry![](/files/QaONwNjD8NTMIfd1yEG5)                              |                                                **No Effect.**                                               |                                         <p></p><p>Attracts Pokémon with Speed-boosting natures</p>                                         |                    100%                   |
|                               Durin Berry![](/files/qQdqnR1dxI6xA57epwkS)                               |                                                **No Effect.**                                               |                                           Attracts Pokémon with Special Defense-boosting natures                                           |                    100%                   |
|                               Belue Berry![](/files/0kjwPwGG3dGTqEaFJklT)                               |                                                **No Effect.**                                               |                                               Attracts Pokémon with Defense-boosting natures                                               |                    100%                   |
|                               Enigma Berry![](/files/3kURVLS4kuXC0bOWIt9j)                              |                        Restore 1/4 max HP after being hit by a super effective move.                        |                                                       Attracts Hidden Ability Pokémon                                                      |                     5%                    |
|                                Kee Berry![](/files/cU4y3Wdb5IM8f1hvi4lF)                                |               Raises holder's Defense stat by one stage after being hit by a physical attack.               |                                                           Attracts female Pokémon                                                          |                    25%                    |
|                              Maranga Berry![](/files/Fat72EE3XHMDQJvkBfgS)                              |            Raises holder's Special Defense stat by one stage after being hit by a special attack.           |                                                            Attracts male Pokémon                                                           |                    25%                    |
|                               Pomeg Berry![](/files/a4hKZpM6m6yCMzthn0bC)                               |                         Lowers the pokémon's HP EVs by 10, while raising friendship.                        |                                                     Attracts Pokémon with HP EV yields                                                     |                    100%                   |
|                               Kelpsy Berry![](/files/p3E8vNuQB3HbCbUlUTMr)                              |                       Lowers the pokémon's Attack EVs by 10, while raising friendship.                      |                                                   Attracts Pokémon with Attack EV yields                                                   |                    100%                   |
|                               Qualot Berry![](/files/yLzQDwSNZdv4lTa4EAjt)                              |                      Lowers the pokémon's Defense EVs by 10, while raising friendship.                      |                                                   Attracts Pokémon with Defense EV yields                                                  |                    100%                   |
|                               Hondew Berry![](/files/Qy9BXaGWdHaceM3yMUxw)                              |                   Lowers the pokémon's Special Attack EVs by 10, while raising friendship.                  |                                               Attracts Pokémon with Special Attack EV yields                                               |                    100%                   |
|                               Grepa Berry![](/files/bvLdmEJq39uq5kKyqEOl)                               |                  Lowers the pokémon's Special Defense EVs by 10, while raising friendship.                  |                                               Attracts Pokémon with Special Defense EV yields                                              |                    100%                   |
|                               Tamato Berry![](/files/K3YBV8hSO9wHFsyyXahY)                              |                       Lowers the pokémon's Speed EVs by 10, while raising friendship.                       |                                                    Attracts Pokémon with Speed EV yields                                                   |                    100%                   |
|                               Liechi Berry![](/files/w0JS8Z0138e27ZPVj5J5)                              |                       Raises the holder's Attack stat by 1 when at 1/4 max HP or less.                      |                                                   Boosts lured Pokémon's Attack IVs by 5                                                   |                    100%                   |
|                               Ganlon Berry![](/files/MDBKMUa9eImJIlz79rBM)                              |                      Raises the holder's Defense stat by 1 when at 1/4 max HP or less.                      |                                                   Boosts lured Pokémon's Defense IVs by 5                                                  |                    100%                   |
|                               Petaya Berry![](/files/KOmeA1Z3rlVWgu6mUov8)                              |                   Raises the holder's Special Attack stat by 1 when at 1/4 max HP or less.                  |                                               Boosts lured Pokémon's Special Attack IVs by 5                                               |                    100%                   |
|                               Apicot Berry![](/files/DfUI5Ro7Y9H0ynUwjb1p)                              |                  Raises the holder's Special Defense stat by 1 when at 1/4 max HP or less.                  |                                               Boosts lured Pokémon's Special Defense IVs by 5                                              |                    100%                   |
|                               Salac Berry![](/files/qJGvuSqIt4OTbFLOCTLY)                               |                       Raises the holder's Speed stat by 1 when at 1/4 max HP or less.                       |                                                    Boosts lured Pokémon's Speed IVs by 5                                                   |                    100%                   |
|                               Lansat Berry![](/files/m7EFmb8W3LTit8YIRppl)                              |                 Raises the holder's Critical Ratio by one stage when at 1/4 max HP or less.                 |                                                     Boosts lured Pokémon's HP IVs by 5                                                     |                    100%                   |
|                               Starf Berry![](/files/Vb6IUG1eGyRODiC6e7bc)                               |                            Raises a random stat by 2 when at 1/4 max HP or less.                            |                                                       Increases chance of Shiny by 5x                                                      |                    100%                   |
|                               Custap Berry![](/files/kciqxJvmTAhwtmsxYBKF)                              |                    Holder moves first in its priority bracket when at 1/4 max HP or less.                   |                             <p>Reduces Bite Time by 25%</p><hr><p>Increases chance of reeling in a Pokémon</p>                             |         <p>100%</p><hr><p>70%</p>         |
|                               Micle Berry![](/files/0T9na1ofRu5W0aAwfaU0)                               |                   Holder gains 1.2x accuracy for its next move when at 1/4 max HP or less.                  |                             <p>Reduces Bite Time by 25%</p><hr><p>Increases chance of reeling in a Pokémon</p>                             |         <p>100%</p><hr><p>100%</p>        |
|                               Jaboca Berry![](/files/LcW8xfT7OSBP7RkzEytn)                              |                If the holder is hit by a physical move, the attacker loses 1/8 of its max HP.               |                                                  Boosts lured Pokémon's friendship by 100                                                  |                    100%                   |
|                               Rowap Berry![](/files/8bnZA3AeH8oKkmY4wsxZ)                               |                If the holder is hit by a special move, the attacker loses 1/8 of its max HP.                |                                                               1x Drops Reroll                                                              |                    100%                   |
|      <p>Golden Apple</p><p><img src="/files/jpJ8eK6hjq5eCxHLTWr0" alt="" data-size="original"></p>      |                                                **No Effect.**                                               |            <p>Reduces Bite Time by 25%</p><hr><p>Boosts Rarity Bucket by 1 Tier(s)</p><hr><p>Increases chance of Shiny by 2x</p>           | <p>100%</p><hr><p>100%</p><hr><p>100%</p> |
| <p>Enchanted Golden Apple</p><p><img src="/files/84NxjhZHng1OPDWxWeYd" alt="" data-size="original"></p> |                                                **No Effect.**                                               |           <p>Reduces Bite Time by 10%</p><hr><p>Boosts Rarity Bucket by 10 Tier(s)</p><hr><p>Increases chance of Shiny by 10x</p>          | <p>100%</p><hr><p>100%</p><hr><p>100%</p> |
|      <p>Golden Carrot</p><p><img src="/files/n0vB3pUSKdAJVxT9YvDG" alt="" data-size="original"></p>     |                                                **No Effect.**                                               |                                                      Boosts Rarity Bucket by 1 Tier(s)                                                     |                    100%                   |
| <p>Glistening Melon Slice</p><p><img src="/files/Jh54yQIOijvHOjcDeMlG" alt="" data-size="original"></p> |                                                **No Effect.**                                               |                                                      Boosts Rarity Bucket by 1 Tier(s)                                                     |                    100%                   |
|                      <p>Apple<br><img src="/files/rHYfOfq6gzwTnqj43uBL" alt=""></p>                     |                                                **No Effect.**                                               |                                                          Reduces Bite Time by 50%                                                          |                    100%                   |
|                  <p>Glow Berries<br><img src="/files/oRpyYjvmqmmPJdjQp86T" alt=""></p>                  |                                                **No Effect.**                                               |                                                          Reduces Bite Time by 25%                                                          |                    100%                   |
|                  <p>Sweet Berries<br><img src="/files/lCQFC5x6nV8juTaeCyrq" alt=""></p>                 |                                                **No Effect.**                                               |                                                         Reduces Bite Time by 12.5%                                                         |                    100%                   |

Credit for this information goes to the **Cobblemon Wiki** found here: <https://wiki.cobblemon.com/index.php/Berry>


# A Complete Guide to PokeSnacks

This guide will go over everything you need to know about PokeSnacks on Cobblemon on MMO Realms.

**Contents**

1. [What are PokeSnacks?](#what-are-pokesnacks)
2. [How to Craft PokeSnack](#how-to-craft-pokesnacks)
   1. [Recipe](#recipe)
   2. [Adding Seasonings](#adding-seasonings)
3. [How to start Luring Pokemon](#how-to-start-luring-pokemon)
4. [FAQ](#faq)

***

## What are PokeSnacks?

**A PokeSnack is a placeable block that acts as a lure for Pokemon**. Once placed, it will periodically attempt to spawn Pokemon nearby.

* Bites: Each snack can be bitten 9 times.
* Consumption: When a Pokemon spawns due to the snack, it will travel to the snack and take a bite, until fully consumed.
* Customisation: By using different ingridients during the cooking process, you can influence the type, rarity and shiny rate of the Pokemon that appear.

<div align="center"><figure><img src="/files/IeV2HWCDvL1wF2ZoIVCw" alt="" width="375"><figcaption><p>PokeSnacks with differing numbers of bites taken, <br>showing progress until fully utilised.</p></figcaption></figure></div>

## How to Craft PokeSnacks

PokeSnacks are **not** made in a crafting table, instead being cooked using a **Campfire Pot**.

### Recipe

To create a PokeSnack, you need the following core ingiridients:

* 3x **Hearty Grains**
* 1x **Vivichoke**
* 2x **Honey Bottles**
* 3x **Milk** (this can either be Buckets of Milk, or Moomoo Milk)

<figure><img src="/files/tiHksPBThd4h9YpAukQf" alt="" width="480"><figcaption><p>Crafting Recipe of PokeSnacks</p></figcaption></figure>

### Adding Seasonings

To customise your snack, you must add **Bait Seasonings** into the top of the Campfire Pot UI. You can use up to 3 seasoning items per batch. Some effects include:

* **Reducing time** in between bites.
* **Increasing spawn rate** of Pokemon from specific **Egg Groups**.
* **Increases chance** to get certain **natures**.
* **Increases spawn rate** of Pokemon with **specific typings**.
* **Increases chance** to get Pokemon of a **specific gender**.
* **Increases** a Pokemons **IVs and EVs**.
* **Inceases chance** to get a **Shiny Pokemon**.

Information about the specific effects of your snack can be reviewed by holding `Left Shift` when hovering over the item in your inventory.

<figure><img src="/files/LkwFR0gLcdOl7fx4PwBZ" alt="" width="563"><figcaption><p>Seasoning Benefits preview within Inventory GUI</p></figcaption></figure>

For full details, review the separate [guide](/cobblemon-wiki/general-guides/complete-overview-of-berries/complete-overview-of-berry-bait-effects) covering all Bait Seasonings and their individual effects.

## How to start Luring Pokemon

Once you have your snack, placement is key to making the most of it.

1. **Check your Biome**: PokeSnacks can only spawn Pokemon that *already* exists in a biome's spawn table. Refer to the [guides](/cobblemon-wiki/general-pokemon-spawns) covering spawn details to figure out the ideal location to get your Pokemon.
2. **Placement**: Place the snack on the ground, with plenty of open space around it. Pokemon will not spawn if the available area is restrictive, or covered.
3. **Boosting Spawns**: Multiple snacks can be placed nearby to have them each spawn Pokemon independently, increasing the frequency of spawns.
4. **Patience**: Snacks operate on the servers tick speed, so it may take several minutes for Pokemon to appear.

## FAQ

<details>

<summary><strong>Q: Why isn't my PokeSnack spawning anything?</strong></summary>

A: Make sure there is a large open area surrounding the snack, as without sufficient blocks for a Pokemon to spawn on, they may be delayed or even never show up.

Additionally, make sure you are not using a different item with a similar model named a PokeCake.

</details>

<details>

<summary><strong>Q: Do PokeSnacks work on Legendaries and Mythicals?</strong></summary>

A: No, Legends have different spawn conditions to wild Pokemon, so are not influenced by the effects of nearby snacks.

</details>

<details>

<summary><strong>Q: Do PokeSnacks work in other dimensions such as the End or Nether?</strong></summary>

A: Yes, so long as your current biome has a spawn table, the snack will function as expected.

</details>


# Complete Overview to Hunts

Here you'll find everything you need to know about hunts, what different type hunts there are and rewards for these hunts.

**Contents**

1. [What are Hunts and how do I access them?](#what-are-hunts-and-how-do-i-access-them)
2. [What is required for each hunt?](#what-is-required-for-each-hunt)
   1. [Beginner](#beginner)
   2. [Challenging](#challenging)
   3. [Insane](#insane)
3. [What are the rewards for hunts?](#what-are-the-rewards)
4. [Can I cancel a hunt?](#can-i-cancel-a-hunt)
5. [Can I do multiple hunts at once?](#can-i-do-multiple-hunts-at-once)

***

### What are Hunts and how do I access them?

Hunts are a way for players to earn rewards for finding specific Pokemon requested from them via `/hunts`. These range from difficulty from <mark style="color:blue;">**Beginner**</mark>, <mark style="color:purple;">**Challenging**</mark> and <mark style="color:red;">**Insane**</mark>. The harder the hunt is, the better reward you will end up with.

<figure><img src="/files/O2JIW8QsBw9U2kuEyi7n" alt=""><figcaption><p>Ex of GUI for <code>/hunts</code></p></figcaption></figure>

**You are only able to complete hunts by catching the Pokemon.** This means you can't trade to complete the hunt or if you already have the Pokemon in your PC/Party as none of these will count to the completion. Once you have completed a hunt you will be notified within the chat like this:

<figure><img src="/files/SYa2zIIwPYQddsUuLivZ" alt=""><figcaption></figcaption></figure>

### What is required for each hunt?

Each hunt brings it's own requirement and challenge for you to follow in order to gain the rewards. Here is all the current hunts you have access to on the server:

#### <mark style="color:blue;">**Beginner**</mark>

As the title implies, this is a easier hunt for players to do. This will typically require the player to find a random Pokemon in the wild in order to claim the hunt. As seen in the screenshot below:

<figure><img src="/files/FEElRxf98rayDfBLKOod" alt="" width="350"><figcaption><p>Example of Beginner Drilbur Hunt</p></figcaption></figure>

You will **only have 2 hours** to complete this hunt before it expires and you will need to start a new hunt. Once completing the Hunt, you will be rewarded with **$1,500 Pokecoins + 1x Random Pokemon + 3x Rare Candy** and you will be able to start a brand new hunt.

#### <mark style="color:purple;">**Challenging**</mark>

These are harder hunts compared to what you find with Beginner Hunts since these will also **ask you to find a specific pokemon with specific gender, nature and min for IVs**. You can see what this looks like within the screenshot below:

<figure><img src="/files/YnuCJRq6Qq1kuqztN7Wp" alt="" width="424"><figcaption><p>Example of Challenging Fennekin Hunt</p></figcaption></figure>

You will **only have 6 hours** to complete this hunt before it expires and you will need to start a new hunt. Once completing the Hunt, you will be rewarded with **$15,000 Pokecoins + 1x Random Shiny Pokemon + 16x Rare Candy** and you will be able to start a brand new hunt.

#### <mark style="color:red;">**Insane**</mark>

These hunts are a lot harder for players to complete, but will gain great rewards if you do so. Players will not only have to **hunt for a specific Pokemon**, but this Pokemon **will have to be** <mark style="color:orange;">**Shiny**</mark>. You can see what this looks like within the screenshot below:

<figure><img src="/files/Pb3ksJa9rx2uDe9NjqqL" alt="" width="416"><figcaption><p>Example of Insane Horsea Hunt</p></figcaption></figure>

This hunt will never expire, which means you do not have to worry about Once completing the Hunt, you will be rewarded with **$50,000 Pokecoins, 1x Random Shiny Pokemon & 200 Gems + 64x Rare Candy** in which you will be able to start a brand new hunt.

### What are the rewards for hunts?

Here is all the rewards obtainable from all available hunts. Please be aware that **these may change over time** as we seem fit for the economy and player feedback so they very likely won't always remain like this:

* Players who complete the <mark style="color:blue;">**Beginner**</mark> hunt will be rewarded with **$1,500 Pokecoins & 1x Random Pokemon**.
  1. **$1,500** Pokecoins
  2. 1x Random Pokemon
  3. 1x Vote Key
  4. 2x Rare Candy
* Players who complete the <mark style="color:purple;">**Challenging**</mark> hunt will be rewarded with:&#x20;
  1. **$15,000** Pokecoins
  2. 1x Random <mark style="color:orange;">**Shiny**</mark> Pokemon
  3. 1x Random Pokemon Plush
  4. 3x Vote Key
  5. 8x Rare Candy
* Players who complete the <mark style="color:red;">**Insane**</mark> hunt will be rewarded with:
  1. **$50,000** Pokecoins
  2. 1x Random <mark style="color:orange;">**Shiny**</mark> Pokemon
  3. 1x Random Pokemon Plush
  4. 200 <mark style="color:blue;">**Gems**</mark>
  5. 24x Rare Candy

### Can I cancel a hunt?

You can cancel a hunt very easily via `/hunts` as all you need to do is click on the Red Glass Block on the line of your hunt which will end the hunt for you. **However**, if you do cancel a hunt then **you won't be able to re-active the specific hunt for 15 mins**. This is in place so that players don't keep starting and cancelling hunts to get a Pokemon they already have spawned on them.

<figure><img src="/files/QcfoG2tesWgtTJKd5cQi" alt=""><figcaption><p>Ex of Cancelling a Hunt with a Timer</p></figcaption></figure>

### Can I do multiple hunts at once?

Unfortunately players are **only able to do one hunt at a time** as the other hunts will be greyed out until you either complete, leave to expire or cancel the current hunt you have active.


# A Complete Guide to Catch Combo

Here you'll find a complete guide for the Catch Combo Mechanic that's been implemented on the server.

**CONTENTS**

1. [What is a Catch Combo?](#what-is-a-catch-combo)
2. [How to build a Catch Combo?](#how-to-build-a-catch-combo)
3. [What are the benefits for having a Catch Combo?](#what-are-the-benefits-for-having-a-catch-combo)
4. [How does the shiny odds work for Catch Combo?](#how-does-the-shiny-odds-work-for-catch-combo)

***

### **What is a Catch Combo?**

**Catch Combo** is a mechanic where repeatedly catching the *same Pokémon species* in a row builds a streak. You'll be familiar with this if you've played the Let's Go games on the Nintendo Switch. The combo increases as long as you successfully catch that species without catching anything else.

As the combo grows, it provides several benefits such as:

* <mark style="color:orange;">**Higher shiny odds**</mark> for that species
* **More frequent spawns** of the combo Pokémon

The combo breaks if:

* You **catch a different species** of Pokemon
* The Pokémon **flees**
* You **defeat the Pokémon**
* You **manually run** from the encounter

### How to build a Catch Combo?

Building your catch combo is incredibly easy to do, as well as keeping track of it! After successfully catching two Pokémon of the same species, your combo will begin and be announced in Public Chat. Each additional successful catch will update your current combo, ensuring you are always informed of your progress.

<div align="center"><figure><img src="/files/vMHxofqnT2gmWGWg31JZ" alt=""><figcaption></figcaption></figure></div>

You can also check your active Catch Combo at any time by using the `/catchcombo` or `/combo` commands, which will display your current streak in Public Chat.

<figure><img src="/files/vSnkVQAM7XkaCti9FsG1" alt=""><figcaption></figcaption></figure>

Be mindful though as your combo will reset if you catch a different Pokémon, flee from a battle, the Pokémon escapes the encounter, or if the Pokémon is defeated. When a combo is broken, you will receive a notification in Public Chat.

<figure><img src="/files/o2BnIaSn0fA6JajbCKB3" alt=""><figcaption></figcaption></figure>

Catch Combos can be built up to a maximum of **60**. Reaching this cap means no further bonuses will be gained to spawn rates or shiny odds beyond that point.

### What are the benefits for having a Catch Combo?

As stated above, building a Catch Combo will not only increases the spawn rate of the selected Pokémon, but will also significantly improves its shiny encounter chance. The increased spawn frequency can also be leveraged to hunt for desirable abilities or high IV combinations.&#x20;

Mastering this mechanic offers an excellent opportunity to earn Pokécoins on the server, as targeting high-demand Pokémon can prove both rewarding and profitable.

<figure><img src="/files/mUZ4mZCj9USBTr6SpxgY" alt="" width="563"><figcaption><p>Dratini, Bagon and Gible</p></figcaption></figure>

### How does the shiny odds work for Catch Combo?

Catch Combos provide an additional and highly effective method for shiny hunting on the server, allowing players to target specific shiny Pokémon providing they are obtainable in the wild.

As your Catch Combo increases, your shiny odds for that specific Pokémon will gradually improve. These odds reach their maximum effectiveness at a combo of **60**, which represents the highest possible shiny chance. Maintaining the combo is crucial, however; if it is broken before a shiny is found, the chain must be rebuilt from the beginning.

At a maximum Catch Combo, shiny odds are dramatically improved from the standard **`1/4096`** to an impressive **`1/520`!**

Once the **Shiny Charm** is implemented on the server, it will further enhance these odds so stay tuned for more information on its release and effects.

<figure><img src="/files/UNYZBZvFbAIJliTMbPaW" alt=""><figcaption><p>Ralts</p></figcaption></figure>


# Complete Overview to NPC Gyms

Here you'll find everything you need to know about Gyms on MMO Realms, how they work, what rewards they can give and so much more!

**Contents**

1. [What are NPC Gyms?](#what-are-npc-gyms)
2. [What are Regions?](#what-are-regions)
3. [How can I start battling in Gyms?](#how-can-i-start-gyms)
4. [What are Clauses?](#what-are-clauses)
   1. [Examples of Clauses](#examples-of-clauses)
5. [What Gyms are Available and their Rewards?](#what-gyms-are-available-and-their-rewards)
   1. [REGIONS](#regions)
      * [Kanto](#kanto)
      * [Johto](#johto)
6. [Frequently Asked Questions \[FAQ\] ](#frequently-asked-questions-faq)

***

## What are NPC Gyms?

Inspired by the mainline Pokémon games, this system lets you challenge powerful Cobblemon trainers and earn amazing rewards as you climb the ranks. Each Gym Battle grows tougher than the last, pushing your strategy and team-building skills to new heights.&#x20;

Every gym specializes in a specific type, giving players a chance to study, prepare, and craft the perfect team before stepping into the arena. Each of these trainers is inspired by iconic Gym Leaders from the main Pokémon series, letting you relive classic battles with a fresh Cobblemon twist. The only leader who does not specialize in a single type is the Champion. Their team features Pokémon of diverse types, making this battle the ultimate test of your skill and strategy.

<figure><img src="/files/1RnZH7KKoJRLruu0Ysfx" alt="" width="407"><figcaption><p>Brock, First Gym Leader of Kanto</p></figcaption></figure>

Defeat all 8 Gym Leaders, and you’ll unlock the ultimate challenge: the Elite Four—four incredibly strong trainers who will test your limits—followed by the Champion, the final battle that brings everything you’ve learned to the ultimate showdown.

## What are Regions?

Did you think defeating the Champion meant you were done with gym challenges? Think again! We’ve introduced an all-new multi-region Gym Challenge system designed to keep players engaged long after their first victory. Each region brings a fresh set of Gyms to defeat, with every new area ramping up the difficulty even further.

Staying true to the main series, these challenges are inspired by the regions you know and love—starting in Kanto and Johto and eventually making your way to the most modern regions like Paldea. These Gym sets will roll out in batches as they’re fully implemented, launching first with Kanto and followed by Johto at a later date.

Every new region adds a tougher layer of difficulty, pushing even the most seasoned players to their limits… and yes, that includes bending traditional rules like the level cap.

This evolving system is designed to keep you busy, challenged, and fully immersed in the server—alongside all the other exciting features we have in store!

## How can I start battling in Gyms?

Getting right into Gyms is incredibly easy and you can do this by just running the command `/gym` or `/gyms` which will bring up a GUI showing you all available regions on the server.

<figure><img src="/files/asj2KNLnkLlDc702nMy2" alt=""><figcaption><p>GUI for Gyms</p></figcaption></figure>

From there, simply select the **Kanto** region and choose the **Rock** Gym to be teleported directly to the appropriate location. Please note that additional Gyms will only become visible once you have completed the preceding one in the sequence. \[ *For example, in order to challenge Lt. Surge, you must first defeat the initial two Gyms.* ]

<figure><img src="/files/Lwdk4Dz4cdQTzIuLnKBs" alt=""><figcaption><p>GUI for Kanto Region</p></figcaption></figure>

Once you have selected a Gym, you will be teleported to the designated area where the Gym Leader can be found. Simply make your way to the Gym Leader and `Right Click` to initiate an interactive dialogue. These prompts will guide you toward the option to challenge the Gym Leader. Upon accepting, the battle will commence, where you will have the opportunity to either claim victory or suffer defeat—unless you choose to forfeit early.

<figure><img src="/files/uQEoUETsnYgskBxVN4sc" alt=""><figcaption></figcaption></figure>

Should you lose, you may attempt the battle again at any time once your party is prepared after a 10 minute cooldown when fighting the first 8 gyms of a region, with 20 minutes for the elite four and champion. If you emerge victorious, the next Gym in the progression will unlock, allowing you to continue your journey. This process repeats as you work your way through all Gyms and the Elite Four within the region.&#x20;

After conquering every Leader in the region, you will gain access to the next available region as it is released on the server, advancing your adventure even further.

## What are Clauses?

Gym Clauses are special rules used in Gym Battles to ensure fair and balanced challenges for players to enjoy. These clauses define what Pokémon, items, moves, or battle mechanics are allowed during a gym match, helping to maintain a consistent difficulty and prevent unfair strategies.

<figure><img src="/files/iH25zzDNDp2raP4UgWkE" alt=""><figcaption><p>Ex of Text given if failing a Clause.</p></figcaption></figure>

### Examples of Clauses

Here you can find examples of clauses that you'll see when competing in NPC Gyms on the server.

<details>

<summary>Examples of Clauses</summary>

#### **1. Level Cap Clause**

Challengers must not exceed the gym’s designated level cap. This ensures gym difficulty stays consistent and prevents over-levelling to brute-force battles.

#### **2. Species Clause**

Players cannot use two or more Pokémon of the same species on their team. This prevents duplicate-spam strategies and promotes more diverse teams.

#### **3. Item Clause**

Each held item may only be used once per team. For example, a player cannot have multiple Pokémon holding Leftovers. This increases strategy variety and prevents item stacking.

#### **4. Legendary / Mythical Clause**

Legendary, Mythical, or otherwise restricted Pokémon are not allowed unless specifically permitted by the gym. This preserves balance and prevents overpowering the challenge.

#### **5. Ability Clause**

Certain abilities (*e.g., Moody, Arena Trap, Shadow Tag, etc.*) may be banned if they create unfair stall or trapping tactics.

#### **6. Move Clause**

Specific moves may be banned if they trivialize gym fights, such as:

* OHKO moves (Sheer Cold, Fissure, Guillotine)
* Evasion-boosting moves (Double Team, Minimize)
* High stall moves (e.g., Baton Pass chains)

#### **7. Item Ban Clause**

Some items may be restricted for balance reasons, such as:

* Focus Sash
* Choice items
* Healing items in battle\
  These bans depend on the gym difficulty you want.

#### **8. Duplicate Pokémon Clause**

Players cannot use two Pokémon from the same evolutionary line (*e.g., two Charizards or a Charizard + Charmander*). This keeps gym battles varied.

#### **9. Sleep Clause**

Only one opposing Pokémon may be put to sleep at a time. This prevents sleep-spam strategies from making the fight unwinnable.

#### **10. Evasion Clause**

Moves that increase evasion or abilities that rely on evasion mechanics may be disallowed to prevent RNG-based strategies from dominating.&#x20;

#### **11. OHKO Clause**

All one-hit KO moves are banned to prevent instant win conditions.

#### **12. Freeze Clause**

Only one opposing Pokémon may be frozen at a time. While freeze is rarer in Cobblemon, some servers adopt this rule for fairness.

#### **13. Healing Clause**

Players may be restricted from using healing items mid-battle to prevent long stall tactics.

#### **14. Weather Clause**

Abusive or permanent weather strategies (*like infinite Sandstorm or Rain setups*) may be limited depending on the gym’s design.

#### **15. Hazard Clause**

Some gyms ban multiple layers of entry hazards (Spikes/Stealth Rock/Toxic Spikes) if they trivialize the challenge.

#### **16.** Smash Pass Clause

Pokémon that have both of the moves Shell Smash and Baton Pass cannot be used.

#### **17.** Bag Clause

Players cannot use items from their bags during battle, such as medicine. Held items can still be used by Pokémon.

</details>

## What Gyms are available and their Rewards?

Here you find all about the Gyms on the server, including their specific rewards, clauses and so on.

### REGIONS

#### Kanto

<details>

<summary><strong>Gym #1 - Brock [ ROCK ]</strong></summary>

<div align="left"><figure><img src="/files/8804tNwgikfssaMnO2Os" alt="" width="272"><figcaption><p>Brock</p></figcaption></figure></div>

#### Level Lock

**Gym Leader** is capped at `20`

**Player** is capped at `25`

#### POKEMON

**Glimmet**  &#x20;

Held Item: Focus Sash\
Ability: Toxic Debris\
Level: 20\
EVs: 252 HP / 4 Def / 252 SpD\
Nature : Calm\
IVs: 0 Atk

**MOVES**

* Light Screen&#x20;
* Reflect&#x20;
* Spikes &#x20;
* Stealth Rock <br>

***

**Rockruff**&#x20;

Held Item: Air Balloon\
Ability: Keen Eye\
Level: 20\
EVs: 252 HP / 252 Atk / 4 SpD\
Nature : Adamant

**MOVES**

* Stone Edge &#x20;
* Stomping Tantrum &#x20;
* Sucker Punch &#x20;
* Zen Headbutt  <br>

***

**Onix**&#x20;

Held Item: Eviolite\
Ability: Rock Head\
Level: 20\
Shiny: Yes\
EVs: 236 HP / 236 Atk / 36 SpD\
Nature : Adamant

**MOVES**

* Rock Slide &#x20;
* Double-Edge&#x20;
* &#x20;Curse &#x20;
* Swagger&#x20;

***

#### CLAUSES

* Baton Pass Clause
* Evasion Moves Clause
* Evasion Abilities Clause
* OHKO Clause
* Species Clause
* Bag Clause
* Smash Pass Clause

#### REWARDS

**FIRST TIME REWARDS**

• $12,000 PokeCoins\
• x1 Small EXP Candy\
• x3 Medium EXP Candies\
• Rock Gem\
• Hard Stone\
• EXP Share\
• x1 Charti Berry\
• Random Pokemon\
• Vote Crate Key\
• 5 Gems

**REPEAT REWARDS** \[`Every 24 Hours`]

• $2,000 PokeCoins\
• x1 Small XP Candy\
• x1 Charti Berry

</details>

<details>

<summary><strong>Gym #2 - Misty [ WATER ]</strong></summary>

<div align="left"><figure><img src="/files/HnWw1zJQJxCL7Y9pAd6g" alt="" width="246"><figcaption></figcaption></figure></div>

#### Level Lock

**Gym Leader** is capped at `40`

**Player** is capped at `45`

#### POKEMON

**Pelipper**  &#x20;

Held Item: Focus Sash\
Ability: Drizzle\
Level: 40\
EVs: 248 HP / 252 SpA / 8 SpD\
Nature : Modest\
IVs: 0 Atk

**MOVES**

* Tailwind
* Hurricane
* Weather Ball
* Feather Dance

***

**Golduck**

Held Item: Focus Sash\
Ability: Drizzle\
Level: 40\
EVs: 248 HP / 252 SpA / 8 SpD\
Nature : Modest\
IVs: 0 Atk

**MOVES**

* Ice Beam
* Focus Blast
* Psychic
* Surf

***

**Seaking**

Held Item: Assault Vest\
Ability: Swift Swim\
Level: 40\
EVs: 252 Atk / 4 SpD / 252 Spe\
Nature : Adamant

**MOVES**

* Megahorn
* Waterfall
* Double-Edge
* Drill Run

***

**Starmie**

Held Item: Expert Belt\
Ability: Analytic\
Level: 40\
Shiny: Yes\
EVs: 248 SpA / 8 SpD / 248 Spe\
Nature : Timid\
IVs: 0 Atk

**MOVES**

* Hydro Pump
* Psychic
* Signal Beam
* Ice Beam

***

#### CLAUSES

* Baton Pass Clause
* Evasion Moves Clause
* Evasion Abilities Clause
* OHKO Clause
* Species Clause
* Bag Clause
* Smash Pass Clause

#### REWARDS

**FIRST TIME REWARDS**

• $14,500 PokeCoins\
• x3 Small EXP Candy\
• x5 Medium EXP Candies\
• Water Gem\
• Mystic Water\
• Water Stone\
• x1 Passho Berry\
• Random Pokemon\
• Vote Crate Key\
• 5 Gems

**REPEAT REWARDS** \[`Every 24 Hours`]

• $2,500 PokeCoins\
• x3 Small XP Candy\
• x1 Passho Berry

</details>

<details>

<summary><strong>Gym #3 - Lt. Surge [ ELECTRIC ]</strong></summary>

<div align="left"><figure><img src="/files/vz6qGgEHtGQzP44VtqAi" alt="" width="230"><figcaption></figcaption></figure></div>

#### Level Lock

**Gym Leader** is capped at `60`

**Player** is capped at `65`

#### POKEMON

**Pinchurchin**

Held Item: Terrain Extender\
Ability: Electric Surge\
Level: 60\
EVs: 252 HP / 252 Atk / 4 SpD\
Nature : Adamant

**MOVES**

* Zing Zang
* Poison Jab
* Memento
* Thunder Wave

***

**Magnezone**

Held Item: Assault Vest\
Ability: Analytic\
Level: 60\
EVs: 248 HP / 8 Atk / 252 SpA\
Nature : Quiet

**MOVES**

* Flash Cannon
* Tri Attack
* Thunderbolt
* Heavy Slam

***

**Manectric**

Held Item: Leftovers\
Ability: Static\
Level: 60\
EVs: 4 Atk / 252 SpA / 252 Spe\
Nature : Hasty

**MOVES**

* Swagger
* Flamethrower
* Rising Voltage
* Quick Attack

***

**Electivire**

Held Item: Life Orb\
Ability: Motor Drive\
Level: 60\
EVs: 252 Atk / 4 SpD / 252 Spe\
Nature : Serious

**MOVES**

* Body Slam
* Bulk Up
* Earthquake
* Ice Punch

***

**Raichu**

Held Item: Air Balloon\
Ability: Static\
Level: 60\
Shiny: Yes\
EVs: 252 Atk / 4 SpD / 252 Spe\
Nature : Jolly

**MOVES**

* Fake Out
* Knock Off
* Volt Tackle
* Play Rough

***

#### CLAUSES

* Baton Pass Clause
* Evasion Moves Clause
* Evasion Abilities Clause
* OHKO Clause
* Species Clause
* Bag Clause
* Smash Pass Clause

#### REWARDS

**FIRST TIME REWARDS**

• $17,000 PokeCoins\
• x1 Medium Candy\
• x1 Large EXP Candy\
• Electric Gem\
• Thunder Stone\
• Electirizer\
• x1 Wacan Berry\
• Random Pokemon\
• Vote Crate Key\
• 5 Gems

**REPEAT REWARDS** \[`Every 24 Hours`]

• $3,000 PokeCoins\
• x1 Medium Candy\
• x1 Wacan Berry

</details>

<details>

<summary><strong>Gym #4 - Erika [ GRASS ]</strong></summary>

<div align="left"><figure><img src="/files/IcthkkUrnsvbY3nKkgBU" alt="" width="225"><figcaption></figcaption></figure></div>

#### Level Lock

**Gym Leader** is capped at `80`

**Player** is capped at `85`

#### POKEMON

**Bellossom**

Held Item: Occa Berry\
Ability: Chlorophyll\
Level: 80\
EVs: 252 HP / 4 SpA / 252 Spe\
Nature : Timid\
IVs: 0 Atk

**MOVES**

* Giga Drain
* Leech Seed
* Strength Sap
* Sunny Day

***

**Victreebel**

Held Item: Salac Berry\
Ability: Gluttony\
Level: 80\
EVs: 252 SpA / 4 SpD / 252 Spe  \
Nature : Timid\
IVs: 0 Atk

**MOVES**

* Solar Beam
* Energy Ball
* Sludge Bomb
* Synthesis

***

**Tropius**

Held Item: Sitrus Berry\
Ability: Harvest\
Level: 80\
EVs: 252 HP / 252 SpA / 4 SpD\
Nature : Modest\
IVs: 0 Atk

**MOVES**

* Air Slash
* Calm Mind
* Energy Ball
* Protect

***

**Tsareena**

Held Item: Life Orb\
Ability: Leaf Guard \
Level: 80  \
EVs: EVs: 252 Atk / 4 SpD / 252 Spe\
Nature : Jolly

**MOVES**

* Knock Off
* Play Rough
* Power Whip
* U-turn

***

**Cradily**

Held Item: Leftovers\
Ability: Suction Cups\
Level: 80\
EVs: 252 HP / 4 Atk / 252 SpD\
Nature : Careful

**MOVES**

* Rock Blast
* Sunny Day
* Toxic
* Recover

***

**Roserade**

Held Item: Choice Specs\
Ability: Technician\
Level: 80\
Shiny: Yes\
EVs: 252 SpA / 4 SpD / 252 Spe\
Nature : Timid\
IVs: 0 Atk

**MOVES**

* Sludge Bomb
* Leaf Storm
* Weather Ball
* Hidden Power \[Water]

***

#### CLAUSES

* Baton Pass Clause
* Evasion Moves Clause
* Evasion Abilities Clause
* OHKO Clause
* Species Clause
* Bag Clause
* Smash Pass Clause

#### REWARDS

**FIRST TIME REWARDS**

• $18,500\
• x2 Medium EXP Candy\
• x2 Large EXP Candy\
• Grass Gem\
• Miracle Seed\
• Grassy Seed\
• Leaf Stone\
• x1 Rindo Berry\
• Random Berry\
• Random Mint\
• Random Pokemon\
• Vote Crate Key\
• 5 Gems

**REPEAT REWARDS** \[`Every 24 Hours`]

• $3,500 PokeCoins\
• x2 Medium EXP Candy\
• x1 Rindo Berry\
• x1 Random Berry

</details>

<details>

<summary><strong>Gym #5 - Koga [ POISON ]</strong></summary>

<div align="left"><figure><img src="/files/8syvlUSMkxwfZQ84a3Im" alt="" width="196"><figcaption></figcaption></figure></div>

#### Level Lock

**Gym Leader** is capped at `100`

**Player** is capped at `100`

#### POKEMON

**Ariados**

Held Item: Focus Sash\
Ability: Swarm\
Level: 100\
EVs: 248 HP / 252 Atk / 8 SpD\
Nature : Adamant

**MOVES**

* Lunge
* Poison Jab
* Sticky Web
* Toxic Spikes

***

**Venomoth**

Held Item: Air Balloon\
Ability: Shield Dust\
Level: 100\
EVs: 252 SpA / 4 SpD / 252 Spe  \
Nature : Modest\
IVs: 0 Atk

**MOVES**

* Air Slash
* Bug Buzz
* Quiver Dance
* Sludge Bomb

***

**Weezing**

Held Item: Payapa Berry\
Ability: Levitate\
Level: 100\
EVs: 252 HP / 4 Atk / 80 SpA / 172 SpD\
Nature : Sassy

**MOVES**

* Clear Smog
* Dark Pulse
* Destiny Bond
* Explosion

***

**Crobat**

Held Item: Sharp Beak\
Ability: Infiltrator\
Level: 100\
EVs: 252 HP / 252 Atk / 4 SpD\
Nature : Adamant

**MOVES**

* Brave Bird
* Super Fang
* Roost
* Leech Life

***

**Skuntank**

Held Item: Assault Vest\
Ability: Aftermath\
Level: 100\
EVs: 252 Atk / 4 SpD / 252 Spe\
Nature : Jolly

**MOVES**

* Sucker Punch
* Play Rough
* Poison Jab
* Explosion

***

**Dragalge**

Held Item: Life Orb\
Ability: Adaptability\
Level: 100\
Shiny: Yes\
EVs: 252 HP / 252 SpA / 4 SpD\
Nature : Modest\
IVs: 0 Atk

**MOVES**

* Draco Meteor
* Dragon Pulse
* Sludge Wave
* Thunderbolt

***

#### CLAUSES

* Baton Pass Clause
* Evasion Moves Clause
* Evasion Abilities Clause
* OHKO Clause
* Species Clause
* Bag Clause
* Smash Pass Clause

#### REWARDS

**FIRST TIME REWARDS**

• $24,000\
• x3 Medium EXP Candy\
• x3 XL EXP Candy\
• Poison Gem\
• Black Sludge\
• Poison Barb\
• Toxic Orb\
• x1 Pecha Berry\
• x1 Antidote\
• Random Shiny Pokemon\
• Vote Crate Key\
• 10 Gems

**REPEAT REWARDS** \[`Every 24 Hours`]

• $4,000 PokeCoins\
• x3 Medium EXP Candy\
• x1 Pecha Berry\
• x1 Antidote

</details>

<details>

<summary><strong>Gym #6 - Sabrina [ PSYCHIC ]</strong></summary>

<div align="left"><figure><img src="/files/W9rvTqrUqKUlEuQS97iY" alt="" width="221"><figcaption></figcaption></figure></div>

#### Level Lock

**Gym Leader** is capped at `100`

**Player** is capped at `100`

#### POKEMON

**Mr. Mime**

Held Item: Rocky Helmet\
Ability: Filter\
Level: 100\
EVs: 252 HP / 124 Def / 132 SpD\
Nature : Calm\
IVs: 0 Atk

**MOVES**

* Reflect
* Light Screen
* Psychic
* Dazzling Gleam

***

**Slowking \[GALARIAN]**

Held Item: Leftovers\
Ability: Regenerator\
Level: 100\
EVs: 252 HP / 252 SpA / 4 SpD\
Nature : Modest\
IVs: 0 Atk

**MOVES**

* Calm Mind
* Expanding Force
* Flamethrower
* Sludge Bomb

***

**Indeedee**

Held Item: Assault Vest\
Ability: Psychic Surge\
Level: 100\
EVs: 252 HP / 252 SpA / 4 SpD\
Nature : Quiet\
IVs: 0 Atk

**MOVES**

* Draining Kiss
* Expanding Force
* Shadow Ball
* Trick Room

***

**Farigiraf**

Held Item: Salac Berry\
Ability: Cud Chew\
Level: 100\
EVs: 252 HP / 4 SpA / 252 SpD\
Nature : Calm\
IVs: 0 Atk

**MOVES**

* Substitute
* Expanding Force
* Nasty Plot
* Wish

***

**Gallade**

Held Item: Life Orb\
Ability: Sharpness\
Level: 100\
EVs: 252 Atk / 4 SpD / 252 Spe\
Nature : Jolly

**MOVES**

* Aqua Cutter
* Close Combat
* Night Slash
* Slash

***

**Armarouge**

Held Item: Assault Vest\
Ability: Weak Armor\
Level: 100\
EVs: 252 HP / 252 SpA / 4 SpD\
Nature : Modest\
IVs: 0 Atk

**MOVES**

* Armor Cannon
* Calm Mind
* Expanding Force
* Shadow Ball

***

#### CLAUSES

* Baton Pass Clause
* Evasion Moves Clause
* Evasion Abilities Clause
* OHKO Clause
* Species Clause
* Bag Clause
* Smash Pass Clause

#### REWARDS

**FIRST TIME REWARDS**

• $35,000 PokeCoins\
• x3 Medium EXP Candy\
• x5 XL EXP Candy\
• Psychic Gem\
• Twisted Spoon\
• Psychic Seed\
• Wise Glasses\
• x1 Payapa Berry\
• Ability Capsule\
• Random Shiny Pokemon\
• Vote Crate Key\
• 10 Gems

**REPEAT REWARDS** \[`Every 24 Hours`]

• $5,000 PokeCoins\
• x3 Medium EXP Candy\
• Payapa Berry

</details>

<details>

<summary><strong>Gym #7 - Blaine [ FIRE ]</strong></summary>

<div align="left"><figure><img src="/files/24MlGhZa4ciQFpfYbZ6I" alt="" width="174"><figcaption></figcaption></figure></div>

#### Level Lock

**Gym Leader** is capped at `100`

**Player** is capped at `100`

#### POKEMON

**Torkoal**

Held Item: Leftovers \
Ability: Drought\
Level: 100\
EVs: 252 HP / 252 SpA / 4 SpD\
Nature : Modest\
IVs: 0 Atk

**MOVES**

* Body Press
* Earth Power
* Fire Blast
* Solar Beam

***

**Blaziken**

Held Item: Focus Sash\
Ability: Speed Boost\
Level: 100\
EVs: 252 Atk / 4 SpD / 252 Spe\
Nature : Adamant

**MOVES**

* Protect
* Blaze Kick
* Close Combat
* U-Turn

***

**Chandelure**

Held Item: Expert Belt\
Ability: Infiltrator\
Level: 100\
EVs: 252 SpA / 4 SpD / 252 Spe\
Nature : Timid\
IVs: 0 Atk

**MOVES**

* Flamethrower
* Hex
* Shadow Ball
* Will-O-Wisp

***

**Magmortar**

Held Item: Assault Vest\
Ability: Flame Body\
Level: 100\
EVs: 252 HP / 252 SpA / 4 Spe\
Nature : Mild

**MOVES**

* Cross Chop
* Flamethrower
* Thunderbolt
* Scorching Sands

***

**Ninetales**

Held Item: Air Balloon\
Ability: Drought\
Level: 100\
EVs: 252 SpA / 4 SpD / 252 Spe\
Nature : Timid\
IVs: 0 Atk

**MOVES**

* Fire Blast
* Nasty Plot
* Solar Beam
* Pain Split

***

**Talonflame**

Held Item: Life Orb\
Ability: Gale Wings\
Level: 100\
EVs: 252 Atk / 4 SpD / 252 Spe\
Nature : Jolly

**MOVES**

* Brave Bird
* Flare Blitz
* Steel Wing
* Quick Attack

***

#### CLAUSES

* Baton Pass Clause
* Evasion Moves Clause
* Evasion Abilities Clause
* OHKO Clause
* Species Clause
* Bag Clause
* Smash Pass Clause

#### REWARDS

**FIRST TIME REWARDS**

• $45,000 PokeCoins\
• x3 Medium EXP Candy\
• x5 XL EXP Candy\
• Fire Gem\
• Magmarizer\
• Fire Stone\
• Charcoal Stick\
• Flame Orb\
• Burn Heal\
• Occa Berry\
• Random Shiny Pokemon\
• Vote Crate Key\
• 15 Gems

**REPEAT REWARDS** \[`Every 24 Hours`]

• $5,000 PokeCoins\
• x3 Medium EXP Candy\
• Burn Heal\
• Occa Berry

</details>

<details>

<summary><strong>Gym #8 - Giovanni [ GROUND ]</strong></summary>

<div align="left"><figure><img src="/files/AwOKKgLww63zn9KhiroJ" alt="" width="166"><figcaption></figcaption></figure></div>

#### Level Lock

**Gym Leader** is capped at `100`

**Player** is capped at `100`

#### POKEMON

**Gastrodon**

Held Item: Rindo Berry\
Ability: Storm Drain\
Level: 100\
EVs: 252 HP / 4 SpA / 252 SpD\
Nature : Calm\
IVs: 0 Atk

**MOVES**

* Spikes
* Stealth Rock
* Sandstorm
* Surf

***

**Golem**

Held Item: Assault Vest\
Ability: Sand Veil\
Level: 100\
EVs: 252 HP / 252 Atk / 4 SpD\
Nature : Adamant

**MOVES**

* Earthquake
* Explosion
* Stone Edge
* Thunder Punch

***

**Sandslash**

Held Item: Life Orb\
Ability: Sand Rush\
Level: 100\
EVs: 252 Atk / 4 SpD / 252 Spe\
Nature : Adamant

**MOVES**

* Double-Edge
* Earthquake
* Poison Jab
* Knock Off

***

**Rhydon**

Held Item: Choice Band\
Ability: Reckless\
Level: 100\
EVs: 252 HP / 252 Atk / 4 SpD\
Nature : Adamant

**MOVES**

* Double-Edge
* Earthquake
* Heat Crash
* Ice Punch

***

**Gliscor**

Held Item: Yache Berry\
Ability: Sand Veil\
Level: 100\
EVs: 252 Atk / 4 SpD / 252 Spe\
Nature : Jolly

**MOVES**

* Crabhammer
* Earthquake
* X-Scissor
* Acrobatics

***

**Donphan**

Held Item: Passho Berry\
Ability: Sand Veil\
Level: 100\
EVs: 248 HP / 252 Atk / 8 SpD\
Nature : Adamant

**MOVES**

* Earthquake
* Gunk Shot
* Head Smash
* Body Press

***

#### CLAUSES

* Baton Pass Clause
* Evasion Moves Clause
* OHKO Clause
* Species Clause
* Bag Clause
* Smash Pass Clause

#### REWARDS

**FIRST TIME REWARDS**

• $50,000 PokeCoins\
• x1 Large EXP Candy\
• x5 XL EXP Candy\
• Ground Gem\
• Soft Sand\
• x1 Full Heal\
• x3 Full Restore\
• x1 Master Ball\
• x1 Ability Capsule\
• x1 PP UP\
• x1 Random Berry\
• Random Shiny Pokemon\
• Vote Crate Key\
• 15 Gems

**REPEAT REWARDS** \[`Every 24 Hours`]

• $5,000 PokeCoins\
• x1 Large EXP Candy\
• x1 Full Heal\
• x1 Random Berry

</details>

<details>

<summary><strong>Elite Four #1 - Lorelei [ ICE ]</strong></summary>

<div align="left"><figure><img src="/files/I2YFSpimkcTajguhI3A4" alt="" width="193"><figcaption></figcaption></figure></div>

#### Level Lock

**Gym Leader** is capped at `100`

**Player** is capped at `95`

#### POKEMON

**Ninetales \[ALOLAN]**

Held Item: Icy Rock\
Ability: Snow Warning\
Level: 100\
EVs: 252 SpA / 4 SpD / 252 Spe\
Nature : Timid\
IVs: 0 Atk

**MOVES**

* Snowscape
* Ice Beam
* Moonblast
* Chilling Water

***

**Lapras**

Held Item: Shuca Berry\
Ability: Water Absorb\
Level: 100\
EVs: 248 HP / 252 SpA / 8 SpD\
Nature : Modest\
IVs: 0 Atk

**MOVES**

* Ice Beam
* Surf
* Thunderbolt
* Reflect

***

**Cloyster**

Held Item: Loaded Dice\
Ability: Skill Link\
Level: 100\
EVs: 252 Atk / 4 SpD / 252 Spe\
Nature : Adamant

**MOVES**

* Ice Shard
* Icicle Spear
* Shell Smash
* Waterfall

***

**Dewgong**

Held Item: Leftovers\
Ability: Ice Body\
Level: 100\
EVs: 252 HP / 4 Atk / 252 SpA\
Nature : Quiet

**MOVES**

* Ice Beam
* Hydro Pump
* Fake Out
* Flip Turn

***

**Articuno**

Held Item: Charti Berry\
Ability: Snow Cloak\
Level: 100\
EVs: 252 SpA / 4 SpD / 252 Spe\
Nature : Timid\
IVs: 0 Atk

**MOVES**

* Air Slash
* Freeze-Dry
* Ice Beam
* Tailwind

***

**Crabominable**

Held Item: Life Orb\
Ability:Iron Fist\
Level: 100\
EVs: 252 HP / 252 Atk / 4 SpD\
Nature : Adamant

**MOVES**

* Close Combat
* Crabhammer
* Drain Punch
* Ice Punch

***

#### CLAUSES

* Baton Pass Clause
* Evasion Moves Clause
* OHKO Clause
* Species Clause
* Bag Clause
* Smash Pass Clause

#### REWARDS

**FIRST TIME REWARDS**

• $55,000 PokeCoins\
• x1 Large EXP Candy\
• x5 XL EXP Candy\
• Ice Gem\
• Never-Melt Ice\
• Ice Stone\
• Icy Rock\
• Random Plushy\
• Random Shiny Pokemon\
• Vote Crate Key\
• Basic Crate Key\
• 25 Gems

**REPEAT REWARDS** \[`Every 24 Hours`]

• $5,000 PokeCoins\
• x1 Large EXP Candy\
• x1 Vote Crate Key

</details>

<details>

<summary><strong>Elite Four #2 - Bruno [ FIGHTING ]</strong></summary>

<div align="left"><figure><img src="/files/QVmTfsYuI7ZhqOtZjLgo" alt="" width="201"><figcaption></figcaption></figure></div>

#### Level Lock

**Gym Leader** is capped at `100`

**Player** is capped at `95`

#### POKEMON

**Flamigo**

Held Item: Focus Sash\
Ability: Scrappy\
Level: 100\
EVs: 252 Atk / 4 SpD / 252 Spe\
Nature : Jolly

**MOVES**

* Tailwind
* U-Turn
* Roost
* Close Combat

***

**Annihilape**

Held Item: Life Orb\
Ability: Defiant\
Level: 100\
EVs: 252 Atk / 4 SpD / 252 Spe\
Nature : Jolly

**MOVES**

* Rage Fist
* Close Combat
* Night Slash
* Seed Bomb

***

**Heracross**

Held Item: Flame Orb\
Ability: Guts\
Level: 100\
EVs: 252 Atk / 4 SpD / 252 Spe\
Nature : Jolly

**MOVES**

* Close Combat
* Megahorn
* Earthquake
* Facade

***

**Hitmontop**

Held Item: Assault Vest\
Ability: Technician\
Level: 100\
EVs: 248 HP / 252 Atk / 8 SpD\
Nature : Adamant

**MOVES**

* Mach Punch
* Fake Out
* Earthquake
* Close Combat

***

**Machamp**

Held Item: Choice Band\
Ability: No Guard\
Level: 100\
EVs: 248 HP / 252 Atk / 8 SpD\
Nature : Adamant

**MOVES**

* Stone Edge
* Dynamic Punch
* Earthquake
* Power-Up Punch

***

**Lucario**

Held Item: Expert Belt\
Ability: Inner Focus\
Level: 100\
EVs: 252 Atk / 4 SpD / 252 Spe\
Nature : Jolly

**MOVES**

* Bulk Up
* Close Combat
* Meteor Mash
* Poison Jab

***

#### CLAUSES

* Baton Pass Clause
* Evasion Moves Clause
* Evasion Abilities Clause
* OHKO Clause
* Species Clause
* Bag Clause
* Smash Pass Clause

#### REWARDS

**FIRST TIME REWARDS**

• $55,000 PokeCoins\
• x1 Large EXP Candy\
• x5 XL EXP Candy\
• Fighting Gem\
• Black Belt\
• Expert Belt\
• Punching Glove\
• Macho Brace\
• Random Plushy\
• Random Shiny Pokemon\
• Vote Crate Key\
• Basic Crate Key\
• 25 Gems

**REPEAT REWARDS** \[`Every 24 Hours`]

• $5,000 PokeCoins\
• x1 Large EXP Candy\
• x1 Vote Crate Key

</details>

<details>

<summary><strong>Elite Four #3 - Agatha [ GHOST ]</strong></summary>

<div align="left"><figure><img src="/files/VXvOjFHdAdhRpHXW0d18" alt="" width="208"><figcaption></figcaption></figure></div>

#### Level Lock

**Gym Leader** is capped at `100`

**Player** is capped at `95`

#### POKEMON

**Sableye**

Held Item: Rocky Helmet\
Ability: Prankster\
Level: 100\
EVs: 248 HP / 8 Atk / 252 Def\
Nature : Impish

**MOVES**

* Fake Out
* Reflect
* Thunder Wave
* Light Screen

***

**Spiritomb**

Held Item: Leftovers\
Ability: Pressure\
Level: 100\
EVs: 248 HP / 8 SpA / 252 SpD\
Nature : Calm\
IVs: 0 Atk

**MOVES**

* Disable
* Foul Play
* Will-O-Wisp
* Hex

***

**Annihilape**

Held Item: Assault Vest\
Ability: Defiant\
Level: 100\
EVs: 248 HP / 252 Atk / 8 SpD\
Nature : Adamant

**MOVES**

* Bulk Up
* Rage Fist
* Drain Punch
* Facade

***

**Mismagius**

Held Item: Life Orb\
Ability: Levitate\
Level: 100\
EVs: 252 SpA / 4 SpD / 252 Spe\
Nature : Timid\
IVs: 0 Atk

**MOVES**

* Energy Ball
* Hex
* Shadow Ball
* Psychic

***

**Typhlosion \[HISUI]**

Held Item: Passho Berry\
Ability: Blaze\
Level: 100\
EVs: 252 SpA / 4 SpD / 252 Spe\
Nature : Timid\
IVs: 0 Atk

**MOVES**

* Eruption
* Flamethrower
* Infernal Parade
* Shadow Ball

***

**Gengar**

Held Item: Choice Scarf\
Ability: Cursed Body\
Level: 100\
EVs: 252 SpA / 4 SpD / 252 Spe\
Nature : Timid\
IVs: 0 Atk

**MOVES**

* Shdow Ball
* Sludge Bomb
* Thunderbolt
* Focus Blast

***

#### CLAUSES

* Baton Pass Clause
* Evasion Moves Clause
* Evasion Abilities Clause
* OHKO Clause
* Species Clause
* Bag Clause
* Smash Pass Clause

#### REWARDS

**FIRST TIME REWARDS**

• $55,000 PokeCoins\
• x1 Large EXP Candy\
• x5 XL EXP Candy\
• Ghost Gem\
• Spell Tag\
• Reaper Cloth\
• Dusk Stone\
• Life Orb\
• Random Plushy\
• Random Shiny Pokemon\
• Vote Crate Key\
• Basic Crate Key\
• 25 Gems

**REPEAT REWARDS** \[`Every 24 Hours`]

• $5,000 PokeCoins\
• x1 Large EXP Candy\
• x1 Vote Crate Key

</details>

<details>

<summary><strong>Elite Four #4 - Lance [ DRAGON ]</strong></summary>

<div align="left"><figure><img src="/files/Xhx0rrXth4wKVFdFGFro" alt="" width="208"><figcaption></figcaption></figure></div>

#### Level Lock

**Gym Leader** is capped at `100`

**Player** is capped at `95`

#### POKEMON

**Dragonair**

Held Item: Eviolite\
Ability: Marvel Scale\
Level: 100\
EVs: 252 HP / 4 Def / 252 SpD\
Nature : Calm\
IVs: 0 Atk

**MOVES**

* Chilling Water
* Light Screen
* Thunder Wave
* Dragon Pulse

***

**Hydrapple**

Held Item: Leftovers\
Ability: Regenerator\
Level: 100\
EVs: 252 HP / 252 SpA / 4 SpD\
Nature : Modest\
IVs: 0 Atk

**MOVES**

* Fickle Beam
* Energy Ball
* Earth Power
* Reflect

***

**Dragonite**

Held Item: Assault Vest\
Ability: Multiscale\
Level: 100\
EVs: 252 HP / 252 Atk / 4 SpD\
Nature : Adamant

**MOVES**

* Earthquake
* Iron Head
* Outrage
* Thunder Punch

***

**Kingdra**

Held Item: Scope Lens\
Ability: Sniper\
Level: 100\
EVs: 252 SpA / 4 SpD / 252 Spe\
Nature : Timid\
IVs: 0 Atk

**MOVES**

* Draco Meteor
* Ice Beam
* Surf
* Ice Beam

***

**Dragonite**

Held Item: Choice Specs\
Ability: Multiscale\
Level: 100\
EVs: 252 SpA / 4 SpD / 252 Spe\
Nature : Timid\
IVs: 0 Atk

**MOVES**

* Air Slash
* Draco Meteor
* Fire Blast
* Thunderbolt

***

**Kommo-o**

Held Item: Life Orb\
Ability: Soundproof\
Level: 100\
EVs: 252 Atk / 4 SpA / 252 Spe\
Nature : Naive

**MOVES**

* Boomburst
* Clanging Scales
* Close Combat
* Iron Head

***

#### CLAUSES

* Baton Pass Clause
* Evasion Moves Clause
* Evasion Ability Clause
* OHKO Clause
* Bag Clause
* Smash Pass Clause

#### REWARDS

**FIRST TIME REWARDS**

• $55,000 PokeCoins\
• x1 Large EXP Candy\
• x5 XL EXP Candy\
• Dragon Gem\
• Dragon Fang\
• Dragon Scale\
• Random Mint\
• x1 Ability Capsule\
• Random Plushy\
• Random Shiny Pokemon\
• Vote Crate Key\
• Basic Crate Key\
• 25 Gems

**REPEAT REWARDS** \[`Every 24 Hours`]

• $5,000 PokeCoins\
• x1 Large EXP Candy\
• x1 Vote Crate Key

</details>

<details>

<summary><strong>Champion - Blue</strong> </summary>

<div align="left"><figure><img src="/files/zYXI1jMh8wG7Lp70tNRT" alt="" width="244"><figcaption></figcaption></figure></div>

#### Level Lock

**Gym Leader** is capped at `100`

**Player** is capped at `90`

#### POKEMON

**Pidgeot**

Held Item: Focus Sash\
Ability: Tangled Feet\
Level: 100\
EVs: 252 Atk / 4 SpD / 252 Spe\
Nature : Jolly

**MOVES**

* Tailwind
* Steel Wing
* Giga Impact
* Feather Dance

***

**Alakazam**

Held Item: Choice Specs\
Ability: Magic Guard\
Level: 100\
EVs: 252 SpA / 4 SpD / 252 Spe\
Nature : Timid\
IVs: 0 Atk

**MOVES**

* Psychic
* Protect
* Shadow Ball
* Dazzling Gleam

***

**Arcanine**

Held Item: N/A\
Ability: Intimidate\
Level: 100\
EVs: 252 Atk / 4 SpD / 252 Spe\
Nature : Jolly

**MOVES**

* Close Conbat
* Extreme Speed
* Flare Blitz
* Play Rough

***

**Exeggutor**

Held Item: Occa Berry\
Ability: Harvest\
Level: 100\
EVs: 252 HP / 252 SpA / 4 SpD\
Nature : Modest\
IVs: 0 Atk

**MOVES**

* Energy Ball
* Giga Drain
* Psychic
* Sludge Bomb

***

**Gyarados**

Held Item: Life Orb\
Ability: Moxie\
Level: 100\
EVs: 252 Atk / 4 SpD / 252 Spe\
Nature : Jolly

**MOVES**

* Crunch
* Outrage
* Waterfall
* Iron Head

***

**Venusaur**

Held Item: Big Root\
Ability: Overgrow\
Level: 100\
EVs: 252 SpA / 4 SpD / 252 Spe\
Nature : Timid\
IVs: 0 Atk

**MOVES**

* Giga Drain
* Sludge Bomb
* Synthesis
* Leech Seed

***

#### CLAUSES

* Baton Pass Clause
* Evasion Moves Clause
* Evasion Abilities Clause
* OHKO Clause
* Species Clause
* Bag Clause
* Smash Pass Clause

#### REWARDS

**FIRST TIME REWARDS**

• $70,000 PokeCoins\
• x1 Large EXP Candy\
• x5 XL EXP Candy\
• Random Evolution Stone\
• Random Mint\
• Ability Patch\
• PP Max\
• Random Evolution Stone\
• Random Shiny Plushy\
• Random Legendary Pokemon\
• Vote Crate Key\
• Premium Crate Key\
• 50 Gems

**REPEAT REWARDS** \[`Every 24 Hours`]

• $5,000 PokeCoins\
• x1 Large EXP Candy\
• x1 Vote Crate Key\
• x1 Random Evolution Stone

</details>

#### Johto

<details>

<summary><strong>Gym #1 - Falkner [ FLYING ]</strong></summary>

<div align="left"><figure><img src="/files/sIIt22ndtsV3UZWFvEt4" alt="" width="297"><figcaption></figcaption></figure></div>

#### Level Lock

**Gym Leader** is capped at `100`

**Player** is capped at `95`

#### POKEMON

**Skarmory**

Held Item: Heavy-Duty Boots\
Ability: Sturdy\
Level: 100\
EVs: 252 HP / 252 Def / 4 SpD\
Nature : Impish\
IVs: 0 Atk

**MOVES**

* Spikes
* Tailwind
* Stealth Rock
* Body Press

***

**Honchkrow**

Held Item: Razor Claw\
Ability: Super Luck\
Level: 100\
EVs: 248 HP / 252 Atk / 8 SpD\
Nature : Adamant

**MOVES**

* Brave Bird
* Night Slash
* Thunder Wave
* U-turn

***

**Toucannon**

Held Item: Assault Vest\
Ability: Sheer Force\
Level: 100\
EVs: 248 HP / 252 Atk / 8 SpD\
Nature : Adamant

**MOVES**

* Brave Bird
* Beak Blast
* Gunk Shot
* Facade

***

**Kilowattrel**

Held Item: Life Orb\
Ability: Wind Power\
Level: 100\
EVs: 252 SpA / 4 SpD / 252 Spe\
Nature : Timid\
IVs: 0 Atk

**MOVES**

* Air Slash
* Thunderbolt
* Tailwind
* Protect

***

**Dodrio**

Held Item: N/A \
Ability: Tangled Feet\
Level: 100\
EVs: 252 Atk / 4 SpD / 252 Spe\
Nature : Jolly

**MOVES**

* Acrobatics
* Double-Edge
* Low Kick
* Tailwind

***

**Gliscor**

Held Item: Toxic Orb\
Ability: Poison Heal\
Level: 100\
EVs: 252 Atk / 4 SpD / 252 Spe\
Nature : Jolly

**MOVES**

* Crabhammer
* Earthquake
* Dual Wingbeat
* Stone Edge

***

#### CLAUSES

* Baton Pass Clause
* Evasion Moves Clause
* Evasion Abilities Clause
* OHKO Clause
* Species Clause
* Bag Clause
* Smash Pass Clause

#### REWARDS

**FIRST TIME REWARDS**

• $35,000 PokeCoins\
• XL EXP Candy ( x5 )\
• Large EXP Candy ( x1 )\
• Flying Gem\
• Sharp Beak\
• Random Pokemon\
• Vote Crate Key\
• Coba Berry\
• 20 Gems

**REPEAT REWARDS** \[`Every 24 Hours`]

• $5,000 PokeCoins\
• Large EXP Candy ( x1 )\
• Coba Berry

</details>

<details>

<summary><strong>Gym #2 - Bugsy [ BUG ]</strong></summary>

<div align="left"><figure><img src="/files/ZVdBoWE10nkA0nh6zxrm" alt="" width="343"><figcaption></figcaption></figure></div>

#### Level Lock

**Gym Leader** is capped at `100`

**Player** is capped at `95`

#### POKEMON

**Galvantula**

Held Item: Focus Sash\
Ability: Compound Eyes\
Level: 100\
EVs: 252 SpA / 4 SpD / 252 Spe\
Nature : Timid\
IVs: 0 Atk

**MOVES**

* Sticky Web
* Light Screen
* Thunder
* Bug Buzz

***

**Vespiquen**

Held Item: Assault Vest\
Ability: Unnerve\
Level: 100\
EVs: 248 HP / 8 Atk / 252 SpD\
Nature : Sassy

**MOVES**

* Air Slash
* Attack Order
* Protect
* Toxic Spikes

***

**Heracross**

Held Item: Flame Orb\
Ability: Guts\
Level: 100\
EVs: 252 Atk / 4 SpD / 252 Spe\
Nature : Jolly

**MOVES**

* Close Combat
* Protect
* Facade
* Megahorn

***

**Araquanid**

Held Item: Life Orb\
Ability: Water Bubble\
Level: 100\
EVs: 248 HP / 8 Atk / 252 SpA\
Nature : Quiet

**MOVES**

* Hydro Pump
* Bug Buzz
* Leech Life
* Ice Beam

***

**Masquerain**

Held Item: Occa Berry\
Ability: Modest\
Level: 100\
EVs: 252 SpA / 4 SpD / 252 Spe\
Nature : Modest\
IVs: 0 Atk

**MOVES**

* Air Slash
* Cilling Water
* Quiver Dance
* Giga Drain

***

**Scizor**

Held Item: Weakness Policy\
Ability: Technician\
Level: 100 \
EVs: 248 HP / 252 Atk / 8 SpD\
Nature : Adamant

**MOVES**

* Bullet Punch
* Bug Bite
* U-turn
* Close Combat

***

#### CLAUSES

* Baton Pass Clause
* Evasion Moves Clause
* Evasion Abilities Clause
* OHKO Clause
* Species Clause
* Bag Clause
* Smash Pass Clause

#### REWARDS

**FIRST TIME REWARDS**

• $40,000 PokeCoins\
• XL EXP Candy ( x5 )\
• Large EXP Candy ( x1 )\
• Bug Gem\
• Silver Powder\
• Random Pokemon\
• Vote Crate Key\
• Tanga Berry\
• 20 Gems

**REPEAT REWARDS** \[`Every 24 Hours`]

• $5,000 PokeCoins\
• Large EXP Candy ( x1 )\
• Tanga Berry

</details>

<details>

<summary><strong>Gym #3 - Whitney [ NORMAL ]</strong></summary>

<div align="left"><figure><img src="/files/ZhxFmnbGv69Pn1huVk1Y" alt="" width="371"><figcaption></figcaption></figure></div>

#### Level Lock

**Gym Leader** is capped at `100`

**Player** is capped at `95`

#### POKEMON

**Miltank**

Held Item: Leftovers \
Ability: Scrappy\
Level: 100\
EVs: 252 HP / 252 Atk / 4 SpD\
Nature : Adamant

**MOVES**

* Double-Edge
* Earthquake
* Milk Drink
* Stealth Rock

***

**Ambipom**

Held Item: Silk Scarf\
Ability: Technician\
Level: 100\
EVs: 252 Atk / 4 SpD / 252 Spe\
Nature : Jolly

**MOVES**

* Fake Out
* Double-Edge
* Acrobatics
* Protect

***

**Porygon-Z**

Held Item: Life Orb\
Ability: Adaptability\
Level: 100\
EVs: 252 SpA / 4 SpD / 252 Spe\
Nature : Timid\
IVs: 0 Atk

**MOVES**

* Tri Attack
* Thunderbolt
* Ice Beam
* Psychic

***

**Braviary**

Held Item: Expert Belt\
Ability: Sheer Force\
Level: 100\
EVs: 252 Atk / 4 SpD / 252 Spe\
Nature : Jolly

**MOVES**

* Brave Bird
* Close Combat
* Double-Edge
* Zen Headbutt

***

**Lickilicky**

Held Item: Assault Vest\
Ability: Own Tempo\
Level: 100\
EVs: 248 HP / 252 Atk / 8 SpD\
Nature : Brave\
IVs: 0 Atk

**MOVES**

* Power Whip
* Knock Off
* Giga Impact
* Gyro Ball

***

**Maushold \[FOUR]**

Held Item: Loaded Dice \
Ability: Technician\
Level: 100\
EVs: 252 Atk / 4 SpD / 252 Spe\
Nature : Jolly

**MOVES**

* Tidy Up
* Play Rough
* Population Bomb
* Bullet Seed

***

#### CLAUSES

* Baton Pass Clause
* Evasion Moves Clause
* Evasion Abilities Clause
* OHKO Clause
* Species Clause
* Bag Clause
* Smash Pass Clause

#### REWARDS

**FIRST TIME REWARDS**

• $51,000 PokeCoins\
• XL EXP Candy ( x5 )\
• Large EXP Candy ( x1 )\
• Normal Gem\
• Silk Scarf\
• Oval Stone\
• Random Pokemon\
• Random Plushie\
• Vote Crate Key\
• Moomoo Milk ( x3 )\
• Chilan Berry\
• 25 Gems

**REPEAT REWARDS** \[`Every 24 Hours`]

• $6,000 PokeCoins\
• Large EXP Candy ( 1 )\
• Chilan Berry\
• Moomoo Milk

</details>

<details>

<summary><strong>Gym #4 - Morty [ GHOST ]</strong></summary>

<div align="left"><figure><img src="/files/CAuXpn644EysfgroUdSG" alt="" width="248"><figcaption></figcaption></figure></div>

#### Level Lock

**Gym Leader** is capped at `100`

**Player** is capped at `95`

#### POKEMON

**Palossand**

Held Item: Passho Berry\
Ability: Water Compaction\
Level: 100\
EVs: 252 HP / 252 SpA / 4 SpD\
Nature : Modest\
IVs: 0 Atk

**MOVES**

* Stealth Rock
* Earth Power
* Shadow Ball
* Shore Up

***

**Ceruledge**

Held Item: Life Orb\
Ability: Weak Armor\
Level: 100\
EVs: 252 Atk / 4 SpD / 252 Spe\
Nature : Jolly

**MOVES**

* Bitter Blade
* Close Combat
* Poltergeist
* Poison Jab

***

**Mismagius**

Held Item: Expert Belt\
Ability: Levitate\
Level: 100\
EVs: 252 SpA / 4 SpD / 252 Spe\
Nature : Timid\
IVs: 0 Atk

**MOVES**

* Mystical Fire
* Psychic
* Shadow Ball
* Energy Ball

***

**Dusknoir**

Held Item: Assault Vest \
Ability: Pressure\
Level: 100\
EVs: 252 HP / 252 Atk / 4 SpD\
Nature : Adamant

**MOVES**

* Earthquake
* Leech Life
* Poltergeist
* Thunder Punch

***

**Typhlosion \[HISUI]**

Held Item: Focus Sash\
Ability: Blaze\
Level: 100\
EVs: 252 SpA / 4 SpD / 252 Spe\
Nature : Timid\
IVs: 0 Atk

**MOVES**

* Eruption
* Infernal Parade
* Shadow Ball
* Focus Blast

***

**Dragapult**

Held Item: Kasib Berry \
Ability: Infiltrator\
Level: 100\
EVs: 252 Atk / 4 SpD / 252 Spe\
Nature : Jolly

**MOVES**

* Dragon Darts
* Phantom Force
* Psychic Fangs
* Sucker Punch

***

#### CLAUSES

* Baton Pass Clause
* Evasion Moves Clause
* Evasion Abilities Clause
* OHKO Clause
* Species Clause
* Bag Clause
* Smash Pass Clause

#### REWARDS

**FIRST TIME REWARDS**

• $56,000\
• XL EXP Candy ( x5 )\
• Large EXP Candy ( x1 )\
• Ghost Gem\
• Spell Tag\
• Reaper Cloth\
• Random Shiny Pokemon\
• Random Plushie\
• Vote Crate Key\
• Kasib Berry\
• 25 Gems

**REPEAT REWARDS** \[`Every 24 Hours`]

• $6,000 PokeCoins\
• Large EXP Candy ( x1 )\
• Kasib Berry

</details>

<details>

<summary><strong>Gym #5 - Chuck [ FIGHTING ]</strong></summary>

<div align="left"><figure><img src="/files/HGK4IPpo8x4vC4fAho8T" alt="" width="341"><figcaption></figcaption></figure></div>

#### Level Lock

**Gym Leader** is capped at `100`

**Player** is capped at `90`

#### POKEMON

**Sneasler**

Held Item: Focus Sash \
Ability: Unburden\
Level: 100\
EVs: 252 Atk / 4 SpD / 252 Spe\
Nature : Adamant

**MOVES**

* Close Combat
* Fake Out
* Poison Jab
* Toxic Spikes

***

**Meinshao**

Held Item: Salac Berry\
Ability: Regenerator\
Level: 100\
EVs: 252 Atk / 4 SpD / 252 Spe\
Nature : Jolly

**MOVES**

* Fake Out
* Bulk Up
* Drain Punch
* Close Combat

***

**Poliwrath**

Held Item: Assault Vest\
Ability: Water Absorb\
Level: 100\
EVs: 248 HP / 252 Atk / 8 SpD\
Nature : Adamant

**MOVES**

* Brick Break
* Close Combat
* Earthquake
* Liquidation

***

**Hitmonlee**

Held Item: Choice Scarf\
Ability: Reckless\
Level: 100\
EVs: 252 Atk / 4 SpD / 252 Spe\
Nature : Jolly

**MOVES**

* High Jump Kick
* Double-Edge
* Protect
* Sucker Punch

***

**Hitmonchan**

Held Item: Choice Scarf\
Ability: Reckless\
Level:  100\
EVs: 252 Atk / 4 SpD / 252 Spe\
Nature : Jolly

**MOVES**

* Bullet Punch
* Ice Punch
* Thunder Punch
* Fire Punch

***

**Hitmontop**

Held Item: Life Orb\
Ability: Technician\
Level: 100\
EVs: 252 Atk / 4 SpD / 252 Spe\
Nature : Jolly

**MOVES**

* Triple Axel
* Sucker Punch
* Stone Edge
* Close Combat

***

#### CLAUSES

* Baton Pass Clause
* Evasion Moves Clause
* Evasion Abilities Clause
* OHKO Clause
* Species Clause
* Bag Clause
* Smash Pass Clause

#### REWARDS

**FIRST TIME REWARDS**

• $61,000 PokeCoins\
• XL EXP Candy ( x5 )\
• Large EXP Candy ( x1 )\
• Fighting Gem\
• Black Belt\
• Expert Belt\
• Focus Sash\
• Random Shiny Pokemon\
• Random Plushie\
• Vote Crate Key\
• Chople Berry\
• Lansat Berry\
• 25 Gems

**REPEAT REWARDS** \[`Every 24 Hours`]

• $6,000 PokeCoins\
• Large EXP Candy ( x1 )\
• Chople Berry\
• Lansat Berry

</details>

<details>

<summary><strong>Gym #6 - Jasmine [ STEEL ]</strong></summary>

<div align="left"><figure><img src="/files/kPQ14CD3qtdVYzQnwcRg" alt="" width="374"><figcaption></figcaption></figure></div>

#### Level Lock

**Gym Leader** is capped at `100`

**Player** is capped at `90`

#### POKEMON

**Skarmory**

Held Item: Occa Berry \
Ability: Sturdy\
Level: 100\
EVs: 252 HP / 232 Def / 24 Spe\
Nature : Impish

**MOVES**

* Tailwind
* Spikes
* Stealth Rock
* Iron Head

***

**Magnezone**

Held Item: Life Orb\
Ability: Analytic\
Level: 100\
EVs: 248 HP / 252 SpA / 8 SpD\
Nature : Modest\
IVs: 0 Atk

**MOVES**

* Thunderbolt
* Tri Attack
* Steel Beam
* Light Screen

***

**Metagross**

Held Item: Assault Vest\
Ability: Clear Body\
Level: 100\
EVs: 252 HP / 252 Atk / 4 SpD\
Nature : Adamant

**MOVES**

* Body Press
* Iron Head
* Zen Headbutt
* Rock Slide

***

**Klinklang**

Held Item: Leftovers\
Ability: Clear Body\
Level: 100\
EVs: 252 HP / 4 Atk / 252 Spe\
Nature : Jolly

**MOVES**

* Gear Grind
* Shift Gear
* Thunder Wave
* Protect

***

**Tinkaton**

Held Item: Choice Band\
Ability: Mold Breaker\
Level: 100\
EVs: 252 Atk / 4 SpD / 252 Spe\
Nature : Jolly

**MOVES**

* Gigaton Hammer
* Fake Out
* Stone Edge
* Play Rough

***

**Gholdengo**

Held Item: Air Balloon\
Ability: Good as Gold\
Level: 100\
EVs: 252 HP / 252 SpA / 4 SpD\
Nature : Modest\
IVs: 0 Atk

**MOVES**

* Make it Rain
* Shadow Ball
* Focus Blast
* Recover

***

#### CLAUSES

* Baton Pass Clause
* Evasion Moves Clause
* Evasion Abilities Clause
* OHKO Clause
* Species Clause
* Bag Clause
* Smash Pass Clause

#### REWARDS

**FIRST TIME REWARDS**

• $66,000 PokeCoins\
• XL EXP Candy ( x5 )\
• Large EXP Candy ( x1 )\
• Steel Gem\
• Metal Coat\
• Iron Ball\
• Random Shiny Pokemon\
• Random Plushie\
• Ability Capsule\
• Vote Crate Key\
• Babiri Berry\
• 30 Gems

**REPEAT REWARDS** \[`Every 24 Hours`]

• $6,000 PokeCoins\
• Large EXP Candy ( x1 )\
• Babiri Berry

</details>

<details>

<summary><strong>Gym #7 - Pryce [ ICE ]</strong></summary>

<div align="left"><figure><img src="/files/hHz7tXjdXFqf1IrfLKZQ" alt="" width="234"><figcaption></figcaption></figure></div>

#### Level Lock

**Gym Leader** is capped at `100`

**Player** is capped at `90`

#### POKEMON

**Abomasnow**

Held Item: Assault Vest\
Ability: Snow Warning\
Level: 100\
EVs: 248 HP / 252 Atk / 8 SpD\
Nature : Adamant

**MOVES**

* Wood Hammer
* Earthquake
* Avalanche
* Ice Shard

***

**Mamoswine**

Held Item: Choice Band\
Ability: Snow Cloak\
Level: 100\
EVs: 252 Atk / 4 SpD / 252 Spe\
Nature : Jolly

**MOVES**

* Earthquake
* Icicle Crash
* Iron Head
* Heavy Slam

***

**Glaceon**

Held Item: Life Orb \
Ability: Snow Cloak\
Level: 100\
EVs: 252 HP / 252 SpA / 4 SpD\
Nature : Modest\
IVs: 0 Atk

**MOVES**

* Alluring Voice
* Ice Beam
* Shadow Ball
* Weather Ball

***

**Ninetales \[ALOLA]**

Held Item: Salac Berry\
Ability: Snow Warning\
Level: 100\
EVs: 252 SpA / 4 SpD / 252 Spe\
Nature : Timid\
IVs: 0 Atk

**MOVES**

* Aurora Veil
* Ice Beam
* Moonblast
* Nasty Plot

***

**Walrein**

Held Item: Leftovers \
Ability: Ice Body\
Level: 100\
EVs: 252 HP / 252 SpA / 4 SpD\
Nature : Modest\
IVs: 0 Atk

**MOVES**

* Ice Beam
* Hydro Pump
* Rest
* Snore

***

**Iron Bundle**

Held Item: Never-Melt Ice\
Ability: Quark Drive\
Level: 100\
EVs: 252 SpA / 232 SpD / 24 Spe\
Nature : Timid

**MOVES**

* Blizzard
* Hydro Pump
* Ice Beam
* Flip Turn

***

#### CLAUSES

* Baton Pass Clause
* Evasion Moves Clause
* OHKO Clause
* Species Clause
* Bag Clause
* Smash Pass Clause

#### REWARDS

**FIRST TIME REWARDS**

• $71,000 PokeCoins\
• XL EXP Candy ( x5 )\
• Large EXP Candy ( x1 )\
• Ice Gem\
• Never-Melt Ice\
• Ice Stone\
• Icy Rock\
• Random Shiny Pokemon\
• Random Plushie\
• Eviolite\
• Vote Crate Key\
• Yache Berry\
• 40 Gems

**REPEAT REWARDS** \[`Every 24 Hours`]

• $6,000 PokeCoins\
• Large EXP Candy ( x1 )\
• Yache Berry

</details>

<details>

<summary><strong>Gym #8 - Clair [ DRAGON ]</strong></summary>

<div align="left"><figure><img src="/files/mYB54WOSqBpeHTJzZtXS" alt="" width="391"><figcaption></figcaption></figure></div>

#### Level Lock

**Gym Leader** is capped at `100`

**Player** is capped at `90`

#### POKEMON

**Kommo-o**

Held Item: Focus Sash\
Ability: Overcoat\
Level: 100\
EVs: 252 Atk / 4 SpD / 252 Spe\
Nature : Jolly

**MOVES**

* Sandstorm
* Outrage
* Stealth Rock
* Close Combat

***

**Dragalge**

Held Item: Air Balloon \
Ability: Adaptability\
Level: 100\
EVs: 252 HP / 252 SpA / 4 SpD\
Nature : Modest

**MOVES**

* Toxic Spikes
* Flip Turn
* Draco Meteor
* Sludge Bomb

***

**Dragonite**

Held Item: Assault Vest\
Ability: Multiscale\
Level: 100\
EVs: 252 HP / 252 Atk / 4 SpD\
Nature : Adamant

**MOVES**

* Earthquake
* Extreme Speed
* Ice Spinner
* Iron Head

***

**Dracovish**

Held Item: Choice Scarf\
Ability: Sand Rush\
Level: 100\
EVs: 252 Atk / 4 SpD / 252 Spe\
Nature : Adamant

**MOVES**

* Dragon Rush
* Fishious Rend
* Crunch
* Iron Head

***

**Flygon**

Held Item: Smooth Rock\
Ability: Levitate\
Level: 100\
EVs: 252 SpA / 4 SpD / 252 Spe\
Nature : Timid\
IVs: 0 Atk

**MOVES**

* Sandstorm
* Draco Meteor
* Earth Power
* Tailwind

***

**Kingdra**

Held Item: Life Orb\
Ability: Sniper\
Level: 100\
EVs: 252 Atk / 4 SpA / 252 Spe\
Nature : Lonely

**MOVES**

* Dragon Dance
* Iron Head
* Waterfall
* Flash Cannon

***

#### CLAUSES

* Baton Pass Clause
* Evasion Moves Clause
* OHKO Clause
* Species Clause
* Bag Clause
* Smash Pass Clause

#### REWARDS

**FIRST TIME REWARDS**

• $76,000 PokeCoins\
• XL EXP Candy ( x5 )\
• Large EXP Candy ( x1 )\
• Dragon Gem\
• Dragon Fang\
• Dragon Scale\
• Dragon’s Breath\
• Random Shiny Pokemon\
• Random Plushie\
• Master Ball ( x1 )\
• Vote Crate Key\
• Haban Berry\
• 40 Gems

**REPEAT REWARDS** \[`Every 24 Hours`]

• $6,000 PokeCoins\
• Large EXP Candy ( x1 )\
• Haban Berry\
• Random Berry ( x1 )

</details>

<details>

<summary><strong>Elite Four #1 - Will [ PSYCHIC ]</strong></summary>

<div align="left"><figure><img src="/files/dpfSRQOwjo39vBLiYXn0" alt="" width="170"><figcaption></figcaption></figure></div>

#### Level Lock

**Gym Leader** is capped at `100`

**Player** is capped at `85`

#### POKEMON

**Xatu**

Held Item: Mental Herb\
Ability: Magic Bounce\
Level: 100\
EVs: 252 HP / 4 SpA / 252 SpD\
Nature : Sassy\
IVs: 0 Atk

**MOVES**

* Trick Room
* Power Swap
* Confuse Ray
* Future Sight

***

**Jynx**

Held Item: Room Service\
Ability: Oblivious\
Level: 100\
EVs: 4 HP / 252 SpA / 252 SpD\
Nature : Quiet\
IVs: 0 Atk

**MOVES**

* Lovely Kiss
* Psychic
* Ice Beam
* Shadow Ball

***

**Gallade**

Held Item: Colbur Berry\
Ability: Justified\
Level: 100\
EVs: 252 Atk / 252 Def / 4 SpD\
Nature : Brave

**MOVES**

* Close Combat
* Zen Headbutt
* Leaf Blade
* Throat Chop

***

**Slowking**

Held Item: Leftovers \
Ability: Regenerator\
Level: 100\
EVs: 252 HP / 252 SpA / 4 SpD\
Nature : Quiet\
IVs: 0 Atk

**MOVES**

* Trick Room
* Future Sight
* Hydro Pump
* Power Gem

***

**Hatterene**

Held Item: Life Orb\
Ability: Magic Bounce\
Level: 100\
EVs: 252 HP / 252 SpA / 4 SpD\
Nature : Modest\
IVs: 0 Atk

**MOVES**

* Giga Drain
* Psychic
* Shadow Ball
* Dark Pulse

***

**Metagross**

Held Item: Clear Body\
Ability: Pure Power\
Level: 100\
EVs: 252 HP / 252 Atk / 4 SpD\
Nature : Adamant

**MOVES**

* Body Press
* Earthquake
* Zen Headbutt
* Iron Head

***

#### CLAUSES

* Baton Pass Clause
* Evasion Moves Clause
* Evasion Abilities Clause
* OHKO Clause
* Species Clause
* Bag Clause
* Smash Pass Clause

#### REWARDS

**FIRST TIME REWARDS**

• $81,000 PokeCoins\
• XL EXP Candy ( x5 )\
• Large EXP Candy ( x1 )\
• Psychic Gem\
• Twisted Spoon\
• Psychic Seed\
• Random Shiny Pokemon\
• Random Shiny Plushie\
• Vote Crate Key\
• Basic Crate Key\
• 50 Gems

**REPEAT REWARDS** \[`Every 24 Hours`]

• $6,000 PokeCoins\
• Large EXP Candy ( x1 )\
• Vote Crate Key

</details>

<details>

<summary><strong>Elite Four #2 - Koga [ POISON ]</strong></summary>

<div align="left"><figure><img src="/files/AgDs0UeUGjkbwke4amka" alt="" width="217"><figcaption></figcaption></figure></div>

#### Level Lock

**Gym Leader** is capped at `100`

**Player** is capped at `85`

#### POKEMON

**Araidos**

Held Item: Focus Sash \
Ability: Swarm\
Level: 100\
EVs: 248 HP / 8 SpA / 252 SpD\
Nature : Calm\
IVs: 0 Atk

**MOVES**

* Sticky Web
* Toxic Spikes
* Protect
* Infestation

***

**Clodsire**

Held Item: Assault Vest \
Ability: Unaware\
Level: 100\
EVs: 248 HP / 252 Atk / 8 SpD\
Nature : Adamant

**MOVES**

* Body Press
* Earthquake
* Iron Head
* Poison Jab

***

**Venomoth**

Held Item: Choice Scarf\
Ability: Tinted Lens\
Level: 100\
EVs: 252 SpA / 4 SpD / 252 Spe\
Nature : Timid\
IVs: 0 Atk

**MOVES**

* Sludge Bomb
* Energy Ball
* Focus Blast
* Hydro Pimp

***

**Slowking \[GALAR]**

Held Item: Leftovers\
Ability: Regenator\
Level: 100\
EVs: 252 HP / 252 SpA / 4 SpD\
Nature : Modest\
IVs: 0 Atk

**MOVES**

* Flamethrower
* Focus Blast
* Hydro Pump
* Psychic

***

**Sneasler**

Held Item: Life Orb \
Ability: Poison Touch\
Level: 100\
EVs: 252 Atk / 4 SpD / 252 Spe\
Nature : Jolly

**MOVES**

* Poison Jab
* Throat Chop
* Close Combat
* Fake Out

***

**Crobat**

Held Item: Heavy-Duty Boots\
Ability: Infiltrator\
Level: 100\
EVs: 252 Atk / 4 SpD / 252 Spe\
Nature : Jolly

**MOVES**

* Brave Bird
* Leech Life
* Zen Headbutt
* Night Slash

***

#### CLAUSES

* Baton Pass Clause
* Evasion Moves Clause
* Evasion Abilities Clause
* OHKO Clause
* Species Clause
* Bag Clause
* Smash Pass Clause

#### REWARDS

**FIRST TIME REWARDS**

• $81,000 PokeCoins\
• XL EXP Candy ( x5 )\
• Large EXP Candy ( x1 )\
• Poison Gem\
• Toxic Orb\
• Black Sludge\
• Poison Barb\
• Random Shiny Pokemon\
• Random Shiny Plushie\
• Vote Crate Key\
• Basic Crate Key\
• 50 Gems

**REPEAT REWARDS** \[`Every 24 Hours`]

• $6,000 PokeCoins\
• Large EXP Candy ( x1 )\
• Vote Crate Key\\

</details>

<details>

<summary><strong>Elite Four #3 - Bruno [ FIGHTING ]</strong></summary>

<div align="left"><figure><img src="/files/43YQ1krXTtT6rt2oA3Ca" alt="" width="251"><figcaption></figcaption></figure></div>

#### Level Lock

**Gym Leader** is capped at `100`

**Player** is capped at `85`

#### POKEMON

**Hitmontop**

Held Item: Payapa Berry\
Ability: Technician\
Level: 100\
EVs: 248 HP / 252 Atk / 8 SpD\
Nature : Adamant

**MOVES**

* Fake Out
* Close Combat
* Earthquake
* Sucker Punch

***

**Conkeldurr**

Held Item: Flame Orb\
Ability: Guts\
Level: 100\
EVs: 252 HP / 252 Atk / 4 SpD\
Nature : Adamant

**MOVES**

* Close Combat
* Facade
* Thunder Punch
* Poison Jab

***

**Machamp**

Held Item: Assault Vest \
Ability: No Guard\
Level: 100\
EVs: 252 HP / 252 Atk / 4 SpD\
Nature : Adamant

**MOVES**

* Dynamic Punch
* Mega Kick
* Stone Edge
* Knock Off

***

**Hitmonchan**

Held Item: Expert Belt\
Ability: Iron Fist\
Level: 100\
EVs: 248 HP / 252 Atk / 8 SpD\
Nature : Adamant

**MOVES**

* Fire Punch
* Ice Punch
* Thunder Punch
* Drain Punch

***

**Hitmonlee**

Held Item: Life Orb\
Ability: Reckless\
Level: 100\
EVs: 252 Atk / 4 SpD / 252 Spe\
Nature : Jolly

**MOVES**

* High Jump Kick
* Fake Out
* Swords Dance
* Double-Edge

***

**Poliwrath**

Held Item: Leftovers \
Ability: Absorb\
Level: 100\
EVs: 248 HP / 252 Atk / 8 SpD\
Nature : Adamant

**MOVES**

* Ice Punch
* Knock Off
* Liquidation
* Drain Punch

***

#### CLAUSES

* Baton Pass Clause
* Evasion Moves Clause
* Evasion Abilities Clause
* OHKO Clause
* Species Clause
* Bag Clause
* Smash Pass Clause

#### REWARDS

**FIRST TIME REWARDS**

• $81,000 PokeCoins\
• XL EXP Candy ( x5 )\
• Large EXP Candy ( x1 )\
• Fighting Gem\
• Choice Band\
• Choice Scarf\
• Choice Specs\
• Muscle Band\
• Punching Glove\
• Random Shiny Pokemon\
• Random Shiny Plushie\
• Vote Crate Key\
• Basic Crate Key\
• 50 Gems

**REPEAT REWARDS** \[`Every 24 Hours`]

• $6,000 PokeCoins\
• Large EXP Candy ( x1 )\
• Vote Crate Key

</details>

<details>

<summary><strong>Elite Four #4 - Karen [ DARK ]</strong></summary>

<div align="left"><figure><img src="/files/OPkt8K7mMl0xpIUxs0YH" alt="" width="230"><figcaption></figcaption></figure></div>

#### Level Lock

**Gym Leader** is capped at `100`

**Player** is capped at `85`

#### POKEMON

**Umbreon**

Held Item: Rocky Helmet \
Ability: Synchronize\
Level: 100\
EVs: 252 HP / 4 Def / 252 SpD\
Nature : Calm\
IVs: 0 Atk

**MOVES**

* Foul Play
* Light Screen
* Moonlight
* Toxic

***

**Honchkrow**

Held Item: Scope Lens\
Ability: Super Luck\
Level: 100\
EVs: 248 HP / 252 Atk / 8 SpD\
Nature : Adamant

**MOVES**

* Night Slash
* Thunder Wave
* Brave Bird
* Tailwind

***

**Hydreigon**

Held Item: Life Orb\
Ability: Levitate\
Level: 100\
EVs: 252 SpA / 4 SpD / 252 Spe\
Nature : Timid\
IVs: 0 Atk

**MOVES**

* Sunny Day
* Fire Blast
* Dark Pulse
* Draco Meteor

***

**Brute Bonnet**

Held Item: Leftovers\
Ability: Photosynthesis\
Level: 100\
EVs: 252 HP / 252 Atk / 4 SpD\
Nature : Adamant

**MOVES**

* Sunny Day
* Seed Bomb
* Sucker Punch
* Stomping Tantrum

***

**Spiritomb**

Held Item: Flame Orb \
Ability: Pressure\
Level: 100\
EVs: 248 HP / 252 SpA / 8 SpD\
Nature : Modest\
IVs: 0 Atk

**MOVES**

* Sunny Day
* Calm Mind
* Stored Power
* Trick

***

**Meowscarada**

Held Item: Choice Band\
Ability: Protean\
Level: 100\
EVs: 252 Atk / 4 SpD / 252 Spe\
Nature : Jolly

**MOVES**

* Flower Trick
* Foul Play
* Play Rough
* Shadow Claw

***

#### CLAUSES

* Baton Pass Clause
* Evasion Moves Clause
* Evasion Abilities Clause
* OHKO Clause
* Species Clause
* Bag Clause
* Smash Pass Clause

#### REWARDS

**FIRST TIME REWARDS**

• $81,000 PokeCoins\
• XL EXP Candy ( x5 )\
• Large EXP Candy ( x1 )\
• Dark Gem\
• Black Glasses\
• Life Orb\
• Random Mint\
• Ability Capsule\
• Random Shiny Pokemon\
• Random Shiny Plushie\
• Vote Crate Key\
• Basic Crate Key\
• 50 Gems

**REPEAT REWARDS** \[`Every 24 Hours`]

• $6,000 PokeCoins\
• Large EXP Candy ( x1 )\
• Vote Crate Key

</details>

<details>

<summary><strong>Champion - Lance</strong></summary>

<div align="left"><figure><img src="/files/8RN1jeQp9oiqe1JlUNEj" alt="" width="246"><figcaption></figcaption></figure></div>

#### Level Lock

**Gym Leader** is capped at `100`

**Player** is capped at `80`

#### POKEMON

**Flygon**

Held Item: Focus Sash\
Ability: Levitate\
Level: 100\
EVs: 252 HP / 4 SpA / 252 Spe\
Nature : Timid\
IVs: 0 Atk

**MOVES**

* Stealth Rock
* Tailwind
* Draco Meteor
* Protect

***

**Dragonite**

Held Item: Assault Vest\
Ability: Multiscale\
Level: 100\
EVs: 252 HP / 252 Atk / 4 SpD\
Nature : Adamant

**MOVES**

* Dragon Claw
* Earthquake
* Extreme Speed
* Fire Punch

***

**Noivern**

Held Item: Choice Specs\
Ability: Infiltrator\
Level: 100\
EVs: 252 SpA / 4 SpD / 252 Spe\
Nature : Timid\
IVs: 0 Atk

**MOVES**

* Air Slash
* Draco Meteor
* Flamethrower
* Shadow Ball

***

**Garchomp**

Held Item: Yache Berry\
Ability: Rough Skin\
Level: 100\
EVs: 252 Atk / 4 SpD / 252 Spe\
Nature : Jolly

**MOVES**

* Earthquake
* Outrage
* Poison Jab
* Stone Edge

***

**Hydrapple**

Held Item: Leftovers\
Ability: Regenerator\
Level: 100\
EVs: 252 HP / 252 SpA / 4 SpD\
Nature : Modest\
IVs: 0 Atk

**MOVES**

* Fickle Beam
* Energy Ball
* Giga Drain
* Hydro Pump

***

**Salamence**

Held Item: Life Orb\
Ability: Intimidate\
Level: 100\
EVs: 252 Atk / 4 SpD / 252 Spe\
Nature : Jolly

**MOVES**

* Crunch
* Double-Edge
* Outrage
* Dual Wingbeat

***

#### CLAUSES

* Baton Pass Clause
* Evasion Moves Clause
* Evasion Abilities Clause
* OHKO Clause
* Species Clause
* Bag Clause
* Smash Pass Clause

#### REWARDS

**FIRST TIME REWARDS**

• $100,000 PokeCoins\
• XL EXP Candy ( x5 )\
• Large EXP Candy ( x1 )\
• Random Evolution Stone\
• Random Mint\
• Random Mega-Stone\
• Ability Patch\
• PP Max\
• Random Legendary Plushie\
• Random Legendary Pokemon\
• Random Shiny Pokemon\
• Basic Crate Key\
• Premium Crate Key\
• 75 Gems

**REPEAT REWARDS** \[`Every 24 Hours`]

• $6,000 PokeCoins\
• Large EXP Candy ( x1 )\
• Vote Crate Key\
• Random Evolution Stone

</details>

## Frequently Asked Questions \[FAQ]&#x20;

**Q \~ Are we able to re-battle the Gym Leaders to earn more rewards?**

**A \~** *After defeating the Gym Leader for the first time, every 24 hours you'll be able to defeat them again for more rewards which are listed above.*

**Q \~ Are there badges you can collect from the Gyms?**

**A \~** *Yes! You can access all of the Gyms you have currently collected by running the command `/`*`badge` or `/badges` respectively.

**Q \~ When will the next Region be made available on the server?**

**A \~** *Ultimately we have no ETA for when the next region will be accessible on the server. Be sure to keep an eye on our Discord server for any updates that is made to Gyms.*

**Q \~ Can I apply to be a Gym Leader?**

**A \~** *Since these Gyms are NPC, no players can apply to become a Gym Leader. We will eventually be adding a brand new system to benefit players who wish to become Gym Leaders with their own badge and rewards.*

**Q \~ Why are the Gyms NPC and not actual players?**

**A \~** *We designed these gyms in question so that any player is able to have access to the gym at any time they wish, and to show some progression they can work towards which isn't something that fully works with player run gyms since it's dependant on how active they are, how often they'll be doing battles since they'll still be playing, we then have to keep track to make sure it's all fair for everyone involved plus so many more reasons. This is why we plan to have systems for both to keep everyone happy, with both giving badges for players to get but progression will remain locked into NPC Gyms.*

**Q \~ I can only see one Gym when trying to attempt the gyms, where are the rest?**

**A \~** *New gyms will start appearing once you have completed the previous one. This means once you defeat the Pewter City, the GUI will now start showing Cerulean City gym and so on.*

**Q \~ Can multiple people fight the gym at the same time?**

**A \~** *Unfortunately this isn't possible at this time since we're still actively testing that for it to work since it was creating a lot of bugs when we had it implemented. Once we have it ready, this will be pushed into the server.*

**Q \~ I attempted a gym but it said I failed a clause, how do I fix this?**

**A \~** *If it's stating that you have failed a clause \[i.e. Baton Pass Clause] then one of your pokemon has an ability or move that is banned within that specific Gym. You can find out more information about* [*Clauses here*](#examples-of-clauses) *as well as the specifics for each* [*Gym clauses*](#what-gyms-are-available-and-their-rewards) *here.*

**Q \~ Do all gyms have the same clauses?**

**A \~** *No, each gym generally will have their own set of clauses. While a fair few gyms will be the same as one another, there will be specific gyms that have different clauses set for them.*

**Q \~ Why are my Pokemon levels being decreased in Gym battles?**

**A \~** *We have added level locks meaning your pokemon will be levelled to the specific lock of the Gym you are fighting. This is to encourage a bit of challenge, and encourage players to try different strategies in order to win!*


# Complete Overview of Fishing

This guide will go over everything you need to know about Fishing within Cobblemon on MMO Realms.

**Contents**

1. [Intro to Fishing in Cobblemon](#intro-to-fishing-in-cobblemon)
2. [How to start Fishing in Cobblemon](#how-to-start-fishing-in-cobblemon)
   1. [Poke Rods](#poke-rods)
      * [Pokeballs](#pokeballs-and-their-benefits)
   2. [Poke Bait](#poke-bait)
   3. [Enhancements](#enhancements)
3. [What Can you fish for?](#what-can-you-fish-for)
   1. [Fishing for Pokemon](#fishing-for-pokemon)
   2. [Fishing for Items](#fishing-for-items)
   3. [Magikarp Jump Forms](#magikarp-jump-forms)

***

## Intro to Fishing in Cobblemon

**Fishing** functions similarly to Vanilla Minecraft in that you cast your rod, wait for the bobber to be pulled underwater, then reel in your catch.

However, unlike Vanilla gameplay, Cobblemon introduces exclusive Fishing Rods that allow you to obtain Pokemon and special items. These rods can be further customized with a variety of effects and enhancements, influenced by the rod you’re using as well as the bait attached. Together, these features create a deeper and more rewarding fishing experience.

<figure><img src="/files/QRw8y8vxsYtpKPvaBFsk" alt=""><figcaption><p>Fishing in Cobblemon</p></figcaption></figure>

## How to start Fishing in Cobblemon

To start fishing in Cobblemon there are a few things you need to collect and craft. These are as follows:

### Poke Rods

The primary item required for fishing is a **Poke Rod.** These can be easily crafted by combining a standard **Fishing Rod**, any type of **Poke Ball**, and a **Smithing Upgrade (Poke Rod Upgrade)**.

Placing these components into a Smithing Table will create a Poke Rod corresponding to the Poke Ball used.

<figure><img src="/files/x0hzcBCnBINI2ouExTLX" alt=""><figcaption><p>Recipe for a Poke Rod in Smithing Table</p></figcaption></figure>

To obtain a **Smithing Upgrade \[***Poke Rod Upgrade***]** you can find them within Shipwreck Cove and Fishing Boat structures as well as from fishing. You are also able to purchase it from the **Poke Mart** via `/shop`.

#### Pokeballs

**Pokeballs** do not provide any direct bonuses to your Poke Rod and are currently cosmetic only. Each Pokeball corresponds to its own unique Poke Rod variant, which can then be further enhanced through the use of baits and other upgrades.

Be sure to choose the rod design you like most and customize it to suit your fishing style, you have 48 unique rods to choose from!

<figure><img src="/files/N4H9adTiFh68RfAsiDnC" alt=""><figcaption><p>Different Poke Rods</p></figcaption></figure>

### Poke Baits

**Bait** can be attached to your Poke Rod to grant additional bonuses while fishing. To apply bait, simply drag it over your Poke Rod in your inventory and `Right Click`. The bait will automatically attach to the rod, and you’ll be notified of which bait is currently equipped.

Once applied, the bait will remain on the Poke Rod until it is used during a successful reel in. If you wish to remove it beforehand, you can do so by pressing `Right Click` on the Poke Rod in your inventory again to retrieve the bait.

**Each bait provides its own unique effects**. A full list of compatible baits can be found below:

<table data-card-size="large" data-view="cards"><thead><tr><th></th><th data-hidden data-card-target data-type="content-ref"></th></tr></thead><tbody><tr><td>🐟 <strong>List of all Fishing Baits</strong></td><td><a href="/pages/gJb3Lz4VzibTEzwpPylA">/pages/gJb3Lz4VzibTEzwpPylA</a></td></tr></tbody></table>

There is a item known as **Poke Bait**, which can be crafted through cooking and is capable of absorbing up to **three effects at once** from Fishing Baits, making it an ideal choice for efficient and rewarding fishing experience.

To create Poke Bait, combine any **three Fishing Baits** with a **Honey Bottle**, **Brown Mushroom**, and **Wheat** in a **Cooking Pot** placed over a **Campfire**.

<figure><img src="/files/buDA0BDk75vgXd4SvRbz" alt=""><figcaption><p>Campfire Pot recipe for a Unique Bait</p></figcaption></figure>

### Enhancements

Poke Rods can also be enchanced via enchanting for better effect when fishing.&#x20;

* **Lure** will affect spawn pools of certain Pokemon. You'll have higher chance of finding specific pokemon the higher the level of Lure you have active on your Rod. Pokemon have different levels of lure level for their availability.
* **Luck of the Sea** will increase the chance of obtaining a higher rarity bucket

## What Can you fish for?

You'll be able to not only fish for Pokemon, but also Cobblemon items. There is a chance for you to obtain nothing from a reel even if you did all the steps correctly, so please keep that in mind.

### Fishing for Pokemon

You'll be able to find Pokemon through fishing within Cobblemon, with some of them being only obtainable via fishing. You'll be able to find out more about Pokemon you can catch via fishing and other general pokemon with out Pokemon Spawns guide found here:

<table data-card-size="large" data-view="cards"><thead><tr><th></th><th data-hidden data-card-cover data-type="files"></th><th data-hidden data-card-target data-type="content-ref"></th></tr></thead><tbody><tr><td>🌳 <strong>General Pokemon Spawns</strong></td><td><a href="/files/z8PLIOjBr4wLtRuhMUI7">/files/z8PLIOjBr4wLtRuhMUI7</a></td><td><a href="/pages/ooXag4X9v0BgELF5b3ml">/pages/ooXag4X9v0BgELF5b3ml</a></td></tr></tbody></table>

### Fishing for Items

You can fish for unique items with Poke Rods, although you need to have at least **`Luck of The Sea I`** to start obtaining these items. The items you can pull are as follows:

<table><thead><tr><th width="173.015625" valign="middle">Treasure</th></tr></thead><tbody><tr><td valign="middle">Deep Sea Scale   <img src="/files/zdSOEebCPCXX0D5H6TV4" alt=""></td></tr><tr><td valign="middle">Deep Sea Tooth   <img src="/files/s2EJIarERObMqW8oJ25p" alt=""></td></tr><tr><td valign="middle">Dragon Scale   <img src="/files/jfKOI0dMSbzGl7JfssQY" alt=""></td></tr><tr><td valign="middle">King's Rock   <img src="/files/p7Nfn5BjAlN5ZwVuRNqd" alt=""></td></tr><tr><td valign="middle">Prism Scale   <img src="/files/32LtDFEAXW6vVhv8HcGC" alt=""></td></tr></tbody></table>

### Magikarp Jump Forms

While fishing, there is a chance to reel in a **Magikarp** featuring a unique **Jump Form** skin. Multiple Jump Forms are available to collect, with each one influenced by the biome you are currently fishing in. There is no battle benefit for these skins, and as such are just purely cosmetical. These skins are also carried over when you evolve it into Gyarados!

Every Jump Form has a **5% base chance** of being caught, regardless of lure level. The **Luck of the Sea** enchantment further increases this chance by **2.5% per level**, allowing you to reach a maximum chance of **12.5%**.

For detailed information on each Jump Form and the biomes they can be found in, please refer to the Official Cobblemon Wiki linked below:

{% embed url="<https://wiki.cobblemon.com/index.php/Pok%C3%A9mon/Unique_Forms#Pok%C3%A9mon:_Magikarp_Jump_Forms>" %}


# List of all Fishing Baits

Here you'll find a list of all Fishing Baits and the effect they have on the Poke Rod.

|                                              Bait                                              |                                                              Bait Effect                                                             |
| :--------------------------------------------------------------------------------------------: | :----------------------------------------------------------------------------------------------------------------------------------: |
|        Golden Apple  <img src="/files/v4zoAVnEOBHVlGhTMeQU" alt="" data-size="original">       |                      Reduces Bite Time by 25%, Boosts Rarity Bucket by 1 Tier & Increases chance of Shiny by 2x                      |
|    Enchanted Golden Apple<img src="/files/ErWXNBCm6djccrOqdRTs" alt="" data-size="original">   |                     Reduces Bite Time by 10%, Boosts Rarity Bucket by 10 Tiers & Increases chance of Shiny by 10x                    |
|    Glistering Melon Slice<img src="/files/njfl0stYB52PDNcuCv4P" alt="" data-size="original">   |                                                   Boosts Rarity Bucket by 1 Tier(s)                                                  |

| <p>Golden Carrot<img src="/files/ntgYgzHX0eZ7gSNYOFrd" alt="" data-size="original"></p><p></p> |                                                   Boosts Rarity Bucket by 1 Tier(s)                                                  |
| <p>Sweet Berries<img src="/files/0EcNuYGDCmYzU9Qgzbe9" alt="" data-size="original"></p><p></p> |                                                      Reduces Bite Time by 12.5%                                                      |
|                           Oran Berry![](/files/F5QDh3501hmiWETuFxeM)                           |                                                       Reduces bite time by 33%.                                                      |
|                           Cheri Berry![](/files/9lCP17qYYo7zxlA8ymcV)                          |                          Makes Pokémon in the Fairy and Grass Egg Groups 10x more likely to be encountered.                          |
|                          Chesto Berry![](/files/twbM1H38vVW43EdcEnVB)                          |                       Makes Pokémon in the Human-Like and Flying Egg Groups 10x more likely to be encountered.                       |
|                           Pecha Berry![](/files/60aF2DTHRsY5ovZnuUby)                          |                          Makes Pokémon in the Water 3 and Bug Egg Groups 10x more likely to be encountered.                          |
|                           Rawst Berry![](/files/ieujbjrWmvA4jnNBp0C6)                          |                                Makes Pokémon in the Field Egg Group 10x more likely to be encountered.                               |
|                          Aspear Berry![](/files/k97FI5YpK1OCGxpDx3cU)                          |                        Makes Pokémon in the Water 1 and Water 2 Egg Groups 10x more likely to be encountered.                        |
|                          Persim Berry![](/files/lLMiESCMr1JKqbxlSWMz)                          | Makes Pokémon in the Mineral and Amorphous Egg Groups 10x more likely to be encountered, chance to attract a special Wooper variant. |
|                           Razz Berry![](/files/Hq80amwfZkcqERjXPoqe)                           |                                    25% chance to attract a Pokémon with an Attack boosting nature.                                   |
|                           Bluk Berry![](/files/R5zIA46EW0dDnug7GAWN)                           |                                25% chance to attract a Pokémon with a Special Attack boosting nature.                                |
|                           Nanab Berry![](/files/jesBfryxvByQ7MvV3H3W)                          |                                     25% chance to attract a Pokémon with a Speed boosting nature.                                    |
|                          Wepear Berry![](/files/ANPipikZk3xDN6JwinjP)                          |                                25% chance to attract a Pokémon with a Special Defense boosting nature.                               |
|                           Pinap Berry![](/files/zSaPordPmVCOSbEm2MRt)                          |                                 Has a 25% chance to attract a Pokémon with a Defense boosting nature.                                |
|                           Occa Berry![](/files/EjQtpZ3jKkKly04KmI9E)                           |                                      Makes Fire Type Pokemon 10x more likely to be encountered.                                      |
|                          Passho Berry![](/files/WNV7qbAeGRXT0IidTfhp)                          |                                      Makes Water Type Pokémon 10x more likely to be encountered.                                     |
|                           Wacan Berry![](/files/LJah5mevWmpQdIS8GVun)                          |                                    Makes Electric Type Pokémon 10x more likely to be encountered.                                    |
|                           Rindo Berry![](/files/2YsLHySMVlFzLCWi6pMk)                          |                                      Makes Grass Type Pokémon 10x more likely to be encountered.                                     |
|                           Yache Berry![](/files/vcUut3289P2wW2FZJZy7)                          |                                       Makes Ice Type Pokémon 10x more likely to be encountered.                                      |
|                          Chople Berry![](/files/VrTYfYDuRZqs3P0R8clY)                          |                                    Makes Fighting Type Pokémon 10x more likely to be encountered.                                    |
|                           Kebia Berry![](/files/bakQChCrpr7VvnkWZB3p)                          |                                     Makes Poison Type Pokémon 10x more likely to be encountered.                                     |
|                           Shuca Berry![](/files/uhVPYLnCzb9qEMMMcdqC)                          |                                     Makes Ground Type Pokémon 10x more likely to be encountered.                                     |
|                           Coba Berry![](/files/ZxThlFigrKRJVXSOoHml)                           |                                     Makes Flying Type Pokémon 10x more likely to be encountered.                                     |
|                          Payapa Berry![](/files/WEXFWPbFWxaashyrURJG)                          |                                     Makes Psychic Type Pokémon 10x more likely to be encountered.                                    |
|                           Tanga Berry![](/files/PXZBBYZV9CnUtsVEWgdQ)                          |                                       Makes Bug Type Pokémon 10x more likely to be encountered.                                      |
|                          Charti Berry![](/files/NKVoXcY0vj3JAY1YOp9h)                          |                                      Makes Rock Type Pokémon 10x more likely to be encountered.                                      |
|                           Kasib Berry![](/files/pqiSh3hMZZgJPd53ITKR)                          |                                      Makes Ghost Type Pokémon 10x more likely to be encountered.                                     |
|                           Haban Berry![](/files/QCtWpsuofaq3mHWXldpA)                          |                                     Makes Dragon Type Pokémon 10x more likely to be encountered.                                     |
|                          Colbur Berry![](/files/8OAYU0kFPmBM3wcBcyGZ)                          |                                       Make Dark Type Pokémon 10x more likely to be encountered.                                      |
|                          Babiri Berry![](/files/LXxoxpFrfVWnjZroC8bg)                          |                                      Makes Steel Type Pokémon 10x more likely to be encountered.                                     |
|                          Chilan Berry![](/files/EKteK541ak4gx6jO771y)                          |                                     Makes Normal Type Pokémon 10x more likely to be encountered.                                     |
|                          Roseli Berry![](/files/0c65Wfq8BkLgyCStY230)                          |                                      Makes Fairy Type Pokémon 10x more likely to be encountered.                                     |
|                           Leppa Berry![](/files/jC7yFEsnLgzeTW3F4O2k)                          |                                                  Increases the Pokémon's level by 5.                                                 |
|                            Lum Berry![](/files/TNFQFb2VDyS75xQKPg7R)                           |                         Makes Pokémon in the Dragon and Monster Egg Groups 10x more likely to be encountered.                        |
|                           Hopo Berry![](/files/RVIzBikQDBUJwm44QlDf)                           |                                                 *I*ncreaes the Pokémon's level by 10.                                                |
|                           Figy Berry![](/files/1Ml5IYw0gKMV0LdiTvFe)                           |                                    50% chance to attract a Pokémon with an Attack boosting nature.                                   |
|                          Iapapa Berry![](/files/Vg7pvHwkqok5D2ALJwig)                          |                                    50% chance to attract a Pokémon with a Defense boosting nature.                                   |
|                           Wiki Berry![](/files/iSuiSVW7Ka3VSRCoNQVe)                           |                                50% chance to attract a Pokémon with a Special Attack boosting nature.                                |
|                           Aguav Berry![](/files/UY1U6FnMqZ9zYtr0hVbQ)                          |                                50% chance to attract a Pokémon with a Special Defense boosting nature.                               |
|                           Mago Berry![](/files/GiM9aScxFtmcMqQ0Yqn5)                           |                                     50% chance to attract a Pokémon with a Speed boosting nature.                                    |
|                          Sitrus Berry![](/files/Ne2Ezzooz3vF4VRkNR5m)                          |                                                       Reduces bite time by 50%.                                                      |
|                           Touga Berry![](/files/MWlhD7IKXXzLVnSCzotE)                          |                                    75% chance to attract a Pokémon with an Attack boosting nature.                                   |
|                           Cornn Berry![](/files/qcb1UWr7nF1sBWFPDZcK)                          |                                75% chance to attract a Pokémon with a Special Attack boosting nature.                                |
|                          Magost Berry![](/files/wv8GcGZMkOTmviBqJPg7)                          |                                     75% chance to attract a Pokémon with a Speed boosting nature.                                    |
|                          Rabuta Berry![](/files/JxUSS3oBfiU7MJZ5xlNy)                          |                                75% chance to attract a Pokémon with a Special Defense boosting nature.                               |
|                           Nomel Berry![](/files/wcwBHoDL9AggO5TKG6wp)                          |                                    75% chance to attract a Pokémon with a Defense boosting nature.                                   |
|                          Spelon Berry![](/files/qlfbvQH7theFQtl6Abg8)                          |                                   100% chance to attract a Pokémon with an Attack boosting nature.                                   |
|                          Pamtre Berry![](/files/9LlWFywtELU67byCFR10)                          |                               100% chance to attract a Pokémon with an Special Attack boosting nature.                               |
|                          Watmel Berry![](/files/QaONwNjD8NTMIfd1yEG5)                          |                                    100% chance to attract a Pokémon with an Speed boosting nature.                                   |
|                           Durin Berry![](/files/qQdqnR1dxI6xA57epwkS)                          |                               100% chance to attract a Pokémon with an Special Defense boosting nature.                              |
|                           Belue Berry![](/files/0kjwPwGG3dGTqEaFJklT)                          |                                   100% chance to attract a Pokémon with an Defense boosting nature.                                  |
|                          Enigma Berry![](/files/3kURVLS4kuXC0bOWIt9j)                          |                                         5% chance to attract a Pokémon with a Hidden Ability.                                        |
|                            Kee Berry![](/files/cU4y3Wdb5IM8f1hvi4lF)                           |                                                25% chance to attract a female Pokémon.                                               |
|                          Maranga Berry![](/files/Fat72EE3XHMDQJvkBfgS)                         |                                                 25% chance to attract a male Pokémon.                                                |
|                           Pomeg Berry![](/files/a4hKZpM6m6yCMzthn0bC)                          |                                                  Attracts Pokémon with HP EV Yields.                                                 |
|                          Kelpsy Berry![](/files/p3E8vNuQB3HbCbUlUTMr)                          |                                            Attracts Pokémon with Special Attack EV Yields.                                           |
|                          Qualot Berry![](/files/yLzQDwSNZdv4lTa4EAjt)                          |                                                Attracts Pokémon with Speed EV Yields.                                                |
|                          Hondew Berry![](/files/Qy9BXaGWdHaceM3yMUxw)                          |                                           Attracts Pokémon with Special Defense EV Yields.                                           |
|                           Grepa Berry![](/files/bvLdmEJq39uq5kKyqEOl)                          |                                               Attracts Pokémon with Defense EV Yields.                                               |
|                          Tamato Berry![](/files/K3YBV8hSO9wHFsyyXahY)                          |                                                Attracts Pokémon with Attack EV Yields.                                               |
|                          Liechi Berry![](/files/w0JS8Z0138e27ZPVj5J5)                          |                                                Increases the Pokémon's Attack IV by 5.                                               |
|                          Ganlon Berry![](/files/MDBKMUa9eImJIlz79rBM)                          |                                               Increases the Pokémon's Defense IV by 5.                                               |
|                          Petaya Berry![](/files/KOmeA1Z3rlVWgu6mUov8)                          |                                            Increases the Pokémon's Special Attack IV by 5.                                           |
|                          Apicot Berry![](/files/DfUI5Ro7Y9H0ynUwjb1p)                          |                                           Increases the Pokémon's Special Defense IV by 5.                                           |
|                           Salac Berry![](/files/qJGvuSqIt4OTbFLOCTLY)                          |                                                Increases the Pokémon's Speed IV by 5.                                                |
|                           Starf Berry![](/files/Vb6IUG1eGyRODiC6e7bc)                          |                                                       Adds an extra shiny roll.                                                      |
|                          Lansat Berry![](/files/m7EFmb8W3LTit8YIRppl)                          |                                                  Increases the Pokémon's HP IV by 5.                                                 |
|                           Micle Berry![](/files/0T9na1ofRu5W0aAwfaU0)                          |                                      Reduces bite time by 25%, prevents items from being caught.                                     |
|                          Custap Berry![](/files/kciqxJvmTAhwtmsxYBKF)                          |                                  Reduces bite time by 25%, increases chance for items to be caught.                                  |
|                          Jaboca Berry![](/files/LcW8xfT7OSBP7RkzEytn)                          |                                            Increases the Pokémon's base friendship by 100.                                           |
|                           Rowap Berry![](/files/8bnZA3AeH8oKkmY4wsxZ)                          |                                 No effect (Will increase chance for marks when they are implemented).                                |


# Complete Overview of EV Training

This guide will go over everything you need to know about EV Training within Cobblemon on MMO Realms.

**Contents**

1. [Intro to EV Training in Cobblemon](#intro-to-ev-training-in-cobblemon)
   1. [Core Rules to EVs](#core-rules-to-evs)
2. [EV Training Methods](#ev-training-methods)
   1. [Defeating Pokémon](#defeating-pokemon)
   2. [Training Warp](#training-warp)
   3. [Vitamins and Feathers](#vitamins-and-feathers)
   4. [Power Items](#power-items)
   5. [Mochi](#mochi)
3. [EV Reduction Methods](#ev-reduction-methods)
   1. [Reduction Berries](#reduction-berries)
   2. [Fresh-Start Mochi](#fresh-start-mochi)

***

## Intro to EV Training in Cobblemon

**Effort Values (EVs)** are hidden attributes that directly increase a Pokémon’s stats as it grows. Customizing your Pokémon's **EVs** allows you to tailor their strengths for battle, whether that means maximizing Attack for a physical sweeper or boosting HP and Defense for a tank.

### Core Rules to EVs

* The maximum number of **EVs** a single Pokémon can hold are **510**.
* The maximum number of **EVs** a single stat can hold are **252**.
* At **Level 100**, every **4 EVs** equals a **+1 stat increase** to the final stat value.
* **EVs** can be previewed from a Pokémon's summary screen.

<figure><img src="/files/bJIQxLqhGdaNfwnFabcG" alt="" width="563"><figcaption><p>Example of EV Summary Screen</p></figcaption></figure>

## EV Training Methods

There exist a range of methods to increase a Pokémon's **EVs**, granting you variety in choice on how to properly train your Pokémon.&#x20;

### Defeating Pokémon

Whenever a Pokémon gains Experience Points from defeating a wild Pokémon, **every non-fainted** Pokémon in your party that **participated** in the battle receives **EVs** based on the defeated species.

* EV Yields: **Wild Pokémon yield between 1 to 3 EVs** in a specific stat based on their evolutionary stage.
  * ***Stage 1** (e.g., Caterpie, Rattata):* **Yields 1 EV** (e.g., 1 Speed EV).
  * ***Stage 2** (e.g., Metapod, Pidgeotto):* **Yields 2 EVs**.
  * ***Stage 3** / Fully Evolved (e.g., Butterfree, Pidgeot):* **Yields 3 EVs**.
* EXP Share Functionality: If an **EXP Share** is held by a Pokémon that does not participate in battle, they will **receive the exact same EVs**, just as if they had participated. They do not get split or diluted.

### Training Warp

<mark style="color:$danger;">**NOTE:**</mark> *This warp currently isn't live yet. It's expected to be pushed live within one of the next few updates released on the server.*

MMO Realms features a dedicated **EV Training Zone** (`/warp EV Training`) designed to remove the grind of searching for wild Pokémon. This is by far the **fastest and most efficient** way to **EV** train on the server.

<figure><img src="/files/8D8su9ptRILdPKiiXg1m" alt="" width="563"><figcaption><p>EV Training Zone</p></figcaption></figure>

* The Setup: The hub contains 6 designated arenas or NPC stations, one for each primary stat:
  1. **HP**
  2. **Attack**
  3. **Defense**
  4. **Special Attack**
  5. **Special Defense**
  6. **Speed**

<div><figure><img src="/files/MfLDj1m4qVZAJSRuYwAq" alt="" width="563"><figcaption><p>EV Training Sections</p></figcaption></figure> <figure><img src="/files/sDN3a6bbdSOOY2JKnFQ9" alt="" width="563"><figcaption><p>EV Training NPCs</p></figcaption></figure></div>

* NPC Team Composition: Each NPC holds a full team of 6 Pokémon that yield either **low or high EVs**, in which they are designed to have no damaging moves to fight back.
* Cooldowns: You can battle these NPCs repeatedly without issue.

### Vitamins and Feathers

Vitamins and Feathers are consumable items that immediately add **EVs** to a Pokémon **without requiring battle**. In Cobblemon, Vitamins can brewed using Medicinal Brews and specific ingredients.

* **Vitamins: Grant +10 EVs** in a specified stat per use.
* **Feathers: Grant +1 EV** in a specified stat per use. These are ideal for fine-tuning precise EV spreads.

| Stat            | Vitamin                                  | Feather                                         |
| --------------- | ---------------------------------------- | ----------------------------------------------- |
| HP              | HP Up ![](/files/5g8vYrtVnDqxuhDtf3IN)   | Health Feather ![](/files/KjiQV89DT2g7EH3ieOT0) |
| Attack          | Protein ![](/files/HUh1JpgVXKeDDevY8ZIw) | Muscle Feather ![](/files/OLMYbd9ypUyMVFxGYmaH) |
| Defense         | Iron ![](/files/bUlrjiOWMkTE0706GWOp)    | Resist Feather ![](/files/oP25yXRqOF4uEvJSZlMl) |
| Special Attack  | Calcium ![](/files/xoOh1eO1EbrN2NOwBh5j) | Genius Feather ![](/files/tVwdix26r6XQb7kDRQLJ) |
| Special Defense | Zinc ![](/files/eK5WRCPB2upXlqR2iGth)    | Clever Feather ![](/files/jFmzrbK4QL2tXkWRaFER) |
| Speed           | Carbos ![](/files/YfJomvP5fgwzzqqcDJFq)  | Swift Feather ![](/files/uXNcXq47DMjPhzYMq1MD)  |

For details on how to craft Vitamins, refer to the [Berry guide.](https://wiki.mmorealms.gg/cobblemon-wiki/general-guides/complete-overview-of-berries)

### Power Items

Power Items are held items that dramatically speed up battle-based training (both against wild Pokémon and in the `/warp EV Training` zone).

When a Pokémon **holding a Power Item gains EVs in battle**, it receives an **extra +8 EVs in that specific stat** per defeated Pokémon, regardless of the target's base EV yield.

* Power Weight ![](/files/kjQd6Ek3wD3qr1hcHNFa): **+8 HP EVs**
* Power Bracer ![](/files/4efTTlSSmF6FqSyGPkYE): **+8 Attack EVs**
* Power Belt ![](/files/GEpKyWzlzqyvrabcWDVh): **+8 Defense EVs**
* Power Lens ![](/files/dS5ZIo6cBp8GSaiwIC3L): **+8 Special Attack EVs**
* Power Band ![](/files/SotFxMA814xk9LibBOtQ): **+8 Special Defense EVs**
* Power Anklet ![](/files/b0KLS3o9QtZwb3RMMxG7): **+8 Speed EVs**

> Tip: Equipping a Power Item while battling an NPC in the EV Training Warp allows you to max out a stat (252 EVs) in just a few short battles!

### Mochi

Mochi is a consumable item introduced alongside Gen 9 mechanics that functions similarly to Vitamins. **Eating a Stat Mochi** grants an immediate **boost** to a **Pokémon's EVs** without requiring any battle encounters.

* EV Increase: Each **Mochi** increases a specific stat by **+4 EVs**.
* Crafting: Obtained through campfire recipes.

> **Health Mochi**
>
> Increases HP EVs by 4.
>
> ![](/files/Yd1nCBMEnvgpgPERKuKm)
>
> **RECIPE** : 1x Hearty Grain, 1x Honey Bottle, 1x Pomeg Berry.

> **Muscle Mochi**
>
> Increases Attack EVs by 4.
>
> ![](/files/LwaSSrCxxQVnKmuXTthz)
>
> **RECIPE** : 1x Hearty Grain, 1x Honey Bottle, 1x Kelpsy Berry.

> **Resist Mochi**
>
> Increases Defense EVs by 4.
>
> ![](/files/VObTVxaFznauKdZUv48B)
>
> **RECIPE** : 1x Hearty Grain, 1x Honey Bottle, 1x Qualot Berry.

> **Genius Mochi**
>
> Increases Special Attack EVs by 4.
>
> ![](/files/q63PpvJUP45b5OaA00wc)
>
> **RECIPE** : 1x Hearty Grain, 1x Honey Bottle, 1x Hondew Berry.

> **Clever Mochi**
>
> Increases Special Defense EVs by 4.
>
> ![](/files/g6jZucUr8du9Gx9ZdY7G)
>
> **RECIPE** : 1x Hearty Grain, 1x Honey Bottle, 1x Grepa Berry.

> **Swift Mochi**
>
> Increases Speed EVs by 4.
>
> ![](/files/ooSiLT5twTHVN7mGB6P5)
>
> **RECIPE** : 1x Hearty Grain, 1x Honey Bottle, 1x Tamato Berry.

## EV Reduction Methods

If you make a mistake, mess up an **EV** spread, or want to re-train a Pokémon for a different competitive role, you can **lower or completely reset its EVs**.

### Reduction Berries

Consuming specific **berries** will **reduce a Pokémon's EVs by 10 points** per berry while also increasing its Friendship level.

| Stat            | Berry                                   |
| --------------- | --------------------------------------- |
| HP              | Pomeg ![](/files/yaoBPA7iE9PjxlP0H0rt)  |
| Attack          | Kelpsy ![](/files/4J4DTyhM9HaIAA0BO7Jn) |
| Defense         | Qualot ![](/files/slmwqGFszwydPQeh53LY) |
| Special Attack  | Hondew ![](/files/OFEZXjhuw5B3rBqPjZZI) |
| Special Defense | Grepa ![](/files/hwz1Fn8KIIsCHgXaS4DD)  |
| Speed           | Tamato ![](/files/FTAIrmSsANRHbHmWLA67) |

### Fresh-Start Mochi

Unlike EV-reducing berries which lower stats incrementally, **Fresh-Start Mochi completely resets a Pokémon's Effort Values**.

> **Fresh-Start Mochi**
>
> Resets all EVs to 0.
>
> ![](/files/bMf8c24EsPo0uePsKxeV)
>
> **RECIPE** : 1x Hearty Grain, 1x Honey Bottle, 1x Enigma Berry.

* Effect: **Instantly wipes ALL EVs** across every single stat back to **0**.
* Best Used For: Pokémon that were raised normally during play and accrued random EV gains across multiple stats, saving you from having to feed them dozens of berries individual by individual.

> Warning: Using a Fresh-Start Mochi cannot be undone! Make sure you actually want to clear the entire EV spread before using it.


# Complete Guide to Mega Pokemon

Here you will find out everything you need to know about Mega Pokemon on the server from what they are, how to obtain and more.

**Contents**

1. [What are Mega Pokemon?](#what-are-mega-pokemon)
   1. [List of all current Mega Pokemon](#list-of-all-current-mega-pokemon)
2. [How to obtain Mega Pokemon on the server](#how-can-i-obtain-mega-pokemon-on-the-server)
3. [How to obtain a Mega Bracelet](#how-to-obtain-a-mega-bracelet)
4. [How do I Mega Evolve Pokemon?](#how-do-i-mega-evolve-pokemon)
   1. [Mega Evolving within a Battle](#mega-evolving-within-a-battle)
5. [Frequently Asked Questions \[FAQ\] ](#frequently-asked-questions-faq)

***

## What are Mega Pokemon?

<figure><img src="/files/Wo2p2CIAkH1pNg8jRAHY" alt=""><figcaption></figcaption></figure>

**Mega Pokémon** are special forms of certain Pokémon introduced in *Pokémon X and Y* for the Nintendo 3DS. By using a specific item called a **Mega Stone** unique to each Pokémon, a Pokémon can temporarily undergo **Mega Evolution** during battle, transforming into a more powerful form for the duration of that battle.

Mega Evolution boosts a Pokémon’s **stats**, sometimes changes its **ability**, and can even alter its **type**, giving it strategic advantages in combat. Once the battle ends, the Pokémon reverts to its normal form.&#x20;

You can Mega Evolve your pokemon outside of battles so that you can stroll around on the server with your favourite Mega Pokemon at your side!

### List of all current Mega Pokemon

Here you will find a complete **list of all Mega Pokemon** from the main series, their respective **Mega Stones** along with their current **availability** on the server.

<table data-card-size="large" data-view="cards"><thead><tr><th></th><th data-hidden data-card-target data-type="content-ref"></th><th data-hidden data-card-cover data-type="image">Cover image</th></tr></thead><tbody><tr><td>🌘 <strong>Mega Pokemon</strong></td><td><a href="/pages/i2bH2AXHjL0hMirZXPlR">/pages/i2bH2AXHjL0hMirZXPlR</a></td><td><a href="/files/copYgcE0DhCcS6jlPMxE">/files/copYgcE0DhCcS6jlPMxE</a></td></tr></tbody></table>

## How to obtain Mega Pokemon on the server

This is where our system diverges from the traditional Pokémon games, introducing a **Minecraft-inspired twist**.

Between **Y-levels -64 and 16**, you’ll have a rare chance to encounter **Mega Stone Ore**. When mined, this ore will drop a Mega Stone corresponding to the type displayed. Mega Stone Ores generate only in **single-block clusters** and can be mined with **Silk Touch** to preserve their ore form. However, **Fortune enchantments will not increase the number of Mega Stones obtained** from these ores.

{% hint style="info" %}
**Mega Stone Ore** requires a Diamond Pickaxe or better to break for the stone.
{% endhint %}

The deeper you venture into the caves, the greater your chances of discovering these rare ores so keep a sharp eye while mining, as you won’t want to miss out on these truly valuable finds.

<figure><img src="/files/rm6gHZRRbn1ckUArTInJ" alt="" width="375"><figcaption><p>Lucarionite Mega Ore</p></figcaption></figure>

Each Mega Stone Ore has its own distinct appearance, meaning the ore shown in the image above may differ from the one you encounter in your own adventures. Additionally, Mega Stones can be **traded, bought, or sold between players**, offering even more opportunities to obtain the specific Mega Stone you need—especially when hunting for a particular Mega Pokémon.&#x20;

<figure><img src="/files/ttAsmZA1YMMvA1lGmdHY" alt="" width="375"><figcaption><p>Different Vartiations of Mega Stone Ore</p></figcaption></figure>

## How to obtain a Mega Bracelet

Obtaining a Mega Bracelet is a straightforward process. The primary component required is a Mega Stone, which will be used as part of the crafting recipe. Any Mega Stone may be used, provided you are willing to consume it for this purpose.

To begin, you must first acquire a **Keystone**. This can be done by placing any Mega Stone into a Stonecutter, where it can be processed into a Keystone. The Keystone is an essential component in crafting the Mega Bracelet.

<figure><img src="/files/z1kBXunWPIPtsE15zhgm" alt=""><figcaption><p>Keystone Recipe via Stonecutter</p></figcaption></figure>

Once you have obtained a Keystone, **collect the following items**:

* 1x Keystone
* 4x Iron Ingot
* 2x Redstone Dust
* 1x Cell Battery

After gathering all required materials, use the c**rafting recipe below** to create the **Mega Bracelet**.

<figure><img src="/files/6uTfpcDID5USRUIFDQt1" alt=""><figcaption><p>Recipe for Mega Bracelet</p></figcaption></figure>

Once crafted, the Mega Bracelet can be held in either your main hand or off-hand. If your Pokemon is holding its corresponding Mega Stone, you may `Right Click` while holding the bracelet to initiate Mega Evolution.

With these steps completed, you are now ready to begin Mega Evolving your Pokemon in battle.

## How do I Mega Evolve Pokemon?

Once you have obtained the appropriate Mega Stone and a Mega Bracelet, you’re ready to begin Mega Evolving your Pokemon and the process is both simple and exciting!

To get started, assign the correct Mega Stone to a compatible Pokémon by **`Crouching` +  `Right Clicking`** to have it hold the stone. Then, with your **Mega Bracelet** in either your main hand or offhand, simply **`Right Click` on the Pokémon** to trigger its Mega Evolution animation.

<figure><img src="/files/6LkDNxDejtkovKM2bTyA" alt=""><figcaption><p>Mega Evolution Method</p></figcaption></figure>

If you wish to Mega Evolve a different Pokémon in your party, just repeat this process by **`Right Clicking`** the desired Pokémon with the Mega Bracelet. The previously Mega Evolved Pokémon will automatically revert to its base form.

**NOTE** - Only **one Mega Pokémon** can be active at any given time. It is not possible to have multiple Mega Evolved Pokémon in your party simultaneously.

<figure><img src="/files/8viVhiesqKWmmDGD1Imw" alt=""><figcaption><p>Warning for when attempting to Mega Evolve another Pokemon with a Active Mega</p></figcaption></figure>

### Mega Evolving within a Battle

Mega Evolution during battles functions slightly differently from the standard method. To begin, ensure that your Pokemon is holding its corresponding Mega Stone and that you have your Mega Bracelet equipped.

Once these requirements are met, enter a battle and select **Fight**. On the battle screen, a new **Mega Evolution icon** will appear. You may activate this option alongside your chosen move for that turn. When selected, your Pokemon will Mega Evolve and execute the selected move simultaneously.

Your Pokemon will remain in its Mega Evolved form until either the opposing Pokemon is defeated or your Pokemon is knocked out. Following these steps will allow you to effectively utilize Mega Evolution in battle.

<figure><img src="/files/RjmnbLVgv6Bew8l098km" alt=""><figcaption><p>Mega Option via Battle Screen</p></figcaption></figure>

## Frequently Asked Questions \[FAQ]&#x20;

**Q \~ Do I need to download a extra mod in order to access the Megas?**

**A \~** *No! The only mod needed for the server is for Cobblemon, after that any content pushed into the server will not require any mod to be installed. This means you don't need to download the likes of Mega Showdown in order to access megas on our server unlike a lot of other servers.*

**Q \~ Are we able to use Mega Pokemon within gym battles?**

**A \~** *Yes, we have no clause against this currently so you're free to use Mega's within Gyms. In the future Gyms will also include Mega Pokemon you will have to fight for extra challenge!*

**Q \~ Do Mega Pokemon have their own shiny palletes?**

**A \~** *All mega pokemon will have their own unique Shiny Skin like within the main series games.*

**Q \~ Can we have more than one Mega Pokemon active at a time?**

**A \~** *No, you won't be able to mega evolve other pokemon until you either de-mega evolve the mega pokemon you already have active, or you delete/trade it away to another player. If you've got two or more mega's active at a time then this isn't intentional and you need to report it to staff to patch this issue.*

**Q \~ Are every single Mega Pokemon live in the server including ZA and it's DLC Megas?**

**A \~** *Yes! We've worked very hard to get all of the Mega Pokemon within the server so you can use all and any from ones that were introduced back in 2013 for X and Y, to those that were released for the DLC for Legends ZA.*

**Q \~ When mining Mega Ore, are we able to use Fortune to get multiple?**

**A \~** *No, using fortune will not grant you with any additional Mega Stones.*

**Q \~ Are there any custom Mega Pokemon in the server?**

**A \~** *At this time we have no plans to introduce any custom mega pokemon into the server. We will look into this in the future once we have left BETA and going off player feedback, but yeah currently we have no custom Mega Pokemon in the server.*

**Q \~ Can I access the Mega Bracelet recipe within JEI?**

**A \~** *Due to how we've set up Mega's without the reliance of a Mod, unfortunately any recipe's we create will not show up within JEI which includes the likes of the Mega Bracelet Recipe.*

**Q \~ What mega stones can I use to cut a Keystone?**

**A \~** *You are able to use any Mega Stone accessible on the server in order to cut it within a Stonecutter to obtain a Keystone. There is no other way to obtain a Keystone outside of buying them from other players.*

**Q \~ Some megas don't have animations or cries, what gives?**

**A \~** *Some pokemon will unfortunately will have missing animations or cries but please be aware that we are still actively working on Mega's to polish all of these issues out. Since most other aspects are ready with them, we don't see a issue with players having access to them instead of pulling them away and updating it at a later date.*

**Q \~ Can you ride on Mega Pokemon and if so which ones?**

**A \~** *Yes you're able to ride on Mega Pokemon assuming the normal form of that pokemon is already rideable. This includes the following Pokemon:*

> Venusaur, Charizard, Blastoise, Gyarados, Aerodactyl, Dragonite, Sharpedo, Camerupt, Altaria, Salamance, Metagross, Latias, Latios, Staraptor, Garchomp, Scolipede, Golurk&#x20;

**Q \~ Is there a Mega Stone for Rayquaza? How do I mega evolve Rayquaza?**

**A \~** *Rayquaza is the only Mega Pokemon that does not need a Mega Stone in order to mega evolve, although you will need to have the move Dragon Ascent on the Rayquaza in order to be able to mega evolve it. Once you have Rayquaza with Dragon Ascent, you can mega evolve it like any other general pokemon with the same restrictions.*


# Mega Pokemon

Here is a list of all current Mega Pokemon from the main series including if it's obtainable on the Cobblemon server.

**Contents**

1. [MEGA POKEMON](#mega-pokemon)
2. [PRIMAL REVERSION](#primal-reversion)

***

#### MEGA POKEMON

As of now, there is currently **87 different pokemon** that have the ability to **Mega Evolve \[*****93 different forms*****]** released within the main series of Pokemon Games. This includes a whopping **92 mega stones** for you to collect. Here is a list of all of them currently alongside their availability.

<table><thead><tr><th width="137" align="center" valign="middle">Pokemon</th><th width="151" align="center">Typing</th><th width="141.5" align="center">Stone</th><th width="235" align="center">Benefits</th></tr></thead><tbody><tr><td align="center" valign="middle"><p><img src="/files/d2LyjUOlL2BycedlPtLY" alt="" data-size="original"></p><p><strong>Venusaur</strong></p></td><td align="center">Grass/Poison</td><td align="center"><p><img src="/files/WgfoiBuq6aexSKP9CP5z" alt="" data-size="original"></p><p>Venusaurite</p></td><td align="center"><p>Gains 18 in <strong>Attack</strong>, 40 in <strong>Defense</strong>, 22 in <strong>Sp. Atk</strong> and 20 in <strong>Sp. Def</strong>.</p><p></p><p> Gains the Ability <strong>Thick Fat</strong>.</p></td></tr><tr><td align="center" valign="middle"><p><img src="/files/82NGlbZ2QbIRcYOkbchc" alt="" data-size="original"></p><p><strong>Charizard X</strong></p></td><td align="center">Fire/Dragon</td><td align="center"><p><img src="/files/OCDm7vFoCF3XmLMFznJk" alt="" data-size="original"></p><p>Charizardite X</p></td><td align="center"><p>Gains 46 in <strong>Attack</strong>, 33 in <strong>Defense</strong> and 21 in <strong>Sp. Atk.</strong> </p><p>Gains the Ability <strong>Tough Claws</strong>.</p></td></tr><tr><td align="center" valign="middle"><p><img src="/files/ke70WijSSUZJFUsVavco" alt="" data-size="original"></p><p><strong>Charizard Y</strong></p></td><td align="center">Fire/Flying</td><td align="center"><p><img src="/files/HniRo8h5AaxQG7nzoBgw" alt="" data-size="original"></p><p>Charizardite Y</p></td><td align="center"><p>Gains 20 in <strong>Attack</strong>, 50 in <strong>Sp. Atk</strong> and 30 in <strong>Sp. Def</strong>.</p><p></p><p> Gains the Ability <strong>Drought</strong>.</p></td></tr><tr><td align="center" valign="middle"><p><img src="/files/RcDhsuDTsphzFUv5c9vz" alt="" data-size="original"></p><p><strong>Blastoise</strong></p></td><td align="center">Water</td><td align="center"><p><img src="/files/3CqCpRWYt2VNcx6sxkJE" alt="" data-size="original"></p><p>Blastoisinite</p></td><td align="center"><p>Gains 20 in <strong>Attack</strong>, 20 in <strong>Defense</strong>, 50 in <strong>Sp. Atk</strong> and 10 in <strong>Sp. Def</strong>.</p><p></p><p> Gains the Ability <strong>Mega Launcher</strong>.</p></td></tr><tr><td align="center" valign="middle"><p><img src="/files/pQdVPpQ6diVIGmBn4WkQ" alt="" data-size="original"></p><p><strong>Beedrill</strong></p></td><td align="center">Bug/Poison</td><td align="center"><p><img src="/files/vKmajuw3E3lVIpsiMwQf" alt="" data-size="original"></p><p>Beedrillite</p></td><td align="center">Gains 60 in <strong>Attack</strong> and 70 in <strong>Speed</strong>. Loses 30 in <strong>Sp. Atk</strong>.<br><br>Gains the Ability <strong>Adaptibility</strong>.</td></tr><tr><td align="center" valign="middle"><p><img src="/files/8SHvpVe0T1lgc9S9Woxz" alt="" data-size="original"></p><p><strong>Pidgeot</strong></p></td><td align="center">Normal/Flying</td><td align="center"><p><img src="/files/IPgDjTExFeC38WfVg8bR" alt="" data-size="original"></p><p>Pidgeotite</p></td><td align="center">Gains 5 in <strong>Defence</strong>, 65 in <strong>Sp. Atk</strong>, 10 in <strong>Sp. Def</strong> and 20 in <strong>Speed</strong>.<br><br>Gains the Ability <strong>No Guard</strong>.</td></tr><tr><td align="center" valign="middle"><p><img src="/files/D6LiDfT2fiLQkbHF7Lcc" alt=""></p><p><strong>Raichu X</strong></p></td><td align="center">Electric</td><td align="center"><p><img src="/files/5Gcl3jtGyAET8XIrnvyZ" alt="" data-size="original"></p><p>Raichunite X</p></td><td align="center">Gains 45 in <strong>Attack</strong>, 40 in <strong>Defence</strong> and 15 in <strong>Sp. Def</strong>.<br><br>Gains the Ability <strong>Levitate</strong>.</td></tr><tr><td align="center" valign="middle"><p><img src="/files/k79IMFLm520inLyNOZFj" alt="" data-size="original"></p><p><strong>Raichu Y</strong></p></td><td align="center">Electric</td><td align="center"><p><img src="/files/6o1bByz62RnFz7W8a2PI" alt="" data-size="original"></p><p>Raichunite Y</p></td><td align="center">Gains 10 in <strong>Attack</strong>, 70 in <strong>Sp. Atk</strong> and 20 in <strong>Speed</strong>.<br><br>Gains the Ability <strong>Transistor</strong>.</td></tr><tr><td align="center" valign="middle"><p><img src="/files/14hIs2sjLL2TmlMEWZKX" alt=""></p><p><strong>Clefable</strong></p></td><td align="center">Fairy/Flying</td><td align="center"><p><img src="/files/EMUIFAyWnQCE9GzSj3uC" alt=""></p><p>Clefablite</p></td><td align="center">Gains 10 in <strong>Attack</strong>, 20 in <strong>Defence</strong>, 40 in <strong>Sp. Atk</strong>, 20 in <strong>Sp. Def</strong> and 10 in <strong>Speed</strong>.<br><br>Gains the Ability <strong>Moonshot</strong>.</td></tr><tr><td align="center" valign="middle"><p><img src="/files/K7vwfORG6E53b1vKq6kU" alt="" data-size="original"></p><p><strong>Alakazam</strong></p></td><td align="center">Psychic</td><td align="center"><p><img src="/files/sadVdPnggLnzpBQB2qk9" alt="" data-size="original"></p><p>Alakazite</p></td><td align="center"><p>Gains 20 in <strong>Defense</strong>, 40 in <strong>Sp. Atk,</strong> 10 in <strong>Sp. Def</strong> and 30 in <strong>Speed</strong>.</p><p></p><p> Gains the Ability <strong>Trace</strong>.</p></td></tr><tr><td align="center" valign="middle"><p><img src="/files/cm2yltsnEp3Z8ZeVXuRD" alt=""></p><p><strong>Victreebel</strong></p></td><td align="center">Grass/Poison</td><td align="center"><p><img src="/files/5P9yzwUYrP2YW1BnDcFd" alt="" data-size="original"></p><p>Victreebeite</p></td><td align="center">Gains 20 in <strong>Attack</strong>, 20 in <strong>Defence</strong>, 30 in <strong>Sp. Atk</strong> and 20 in <strong>Sp. Def</strong>.<br><br>Gains the Ability <strong>Triage</strong>.</td></tr><tr><td align="center" valign="middle"><p><img src="/files/bWeQinWrNUhETxsN9AUw" alt="" data-size="original"></p><p><strong>Slowbro</strong></p></td><td align="center">Water/Psychic</td><td align="center"><p><img src="/files/oCUauzEyQgagNtxY6Nuc" alt="" data-size="original"></p><p>Slowbronite</p></td><td align="center">Gains 70 in <strong>Defence</strong> and 30 in <strong>Sp. Atk</strong>.<br><br>Gains the Ability <strong>Shell Armour</strong>.</td></tr><tr><td align="center" valign="middle"><p><img src="/files/E2Cg7HQGMN1UYx58Q1rj" alt="" data-size="original"></p><p><strong>Gengar</strong></p></td><td align="center">Ghost/Poison</td><td align="center"><p><img src="/files/2s1VQt1oFS8YQt4OSF87" alt="" data-size="original"></p><p>Gengarite</p></td><td align="center"><p>Gains 20 in <strong>Defense</strong>, 40 in <strong>Sp. Atk, 2</strong>0 in <strong>Sp. Def</strong> and 20 in <strong>Speed</strong>.</p><p></p><p> Gains the Ability <strong>Levitate</strong>.</p></td></tr><tr><td align="center" valign="middle"><p><img src="/files/HXaCh11ZGAL15Og7isxM" alt="" data-size="original"></p><p><strong>Kangaskhan</strong></p></td><td align="center">Normal</td><td align="center"><p><img src="/files/dM8iFZC9yFAY5MLyWKfN" alt="" data-size="original"></p><p>Kangaskhanite</p></td><td align="center"><p>Gains 30 in <strong>Attack</strong>, 20 in <strong>Defense</strong>, 20 in <strong>Sp. Atk,</strong> 20 in <strong>Sp. Def</strong> and 10 in <strong>Speed</strong>.</p><p></p><p> Gains the Ability <strong>Parental Bond</strong>.</p></td></tr><tr><td align="center" valign="middle"><p><img src="/files/poedp7LSq194653ABgiX" alt=""></p><p><strong>Starmie</strong></p></td><td align="center">Water/Psychic</td><td align="center"><p><img src="/files/SYUtx0TGDaYGSTFWkO2A" alt=""></p><p>Starminite</p></td><td align="center">Gains 65 in <strong>Attack</strong>, 20 in <strong>Defence</strong>, 30 in <strong>Sp. Atk</strong>, 20 in <strong>Sp. Def</strong> and 5 in <strong>Speed</strong>.<br><br>Gains the Ability <strong>Pure Power</strong>.</td></tr><tr><td align="center" valign="middle"><p><img src="/files/gUICBsc3E1WX8y7hXjuZ" alt="" data-size="original"></p><p><strong>Pinsir</strong></p></td><td align="center">Bug/Flying</td><td align="center"><p><img src="/files/7CsEjjGAeRB0jCojazWh" alt="" data-size="original"></p><p>Pinsirite</p></td><td align="center"><p>Gains 30 in <strong>Attack</strong>, 20 in <strong>Defense</strong>, 10 in <strong>Sp. Atk,</strong> 20 in <strong>Sp. Def</strong> and 20 in <strong>Speed</strong>.</p><p></p><p> Gains the Ability <strong>Aerilate</strong>.</p></td></tr><tr><td align="center" valign="middle"><p><img src="/files/5O0YpyeCFZmbxfDHqgmC" alt="" data-size="original"></p><p><strong>Gyarados</strong></p></td><td align="center">Water/Dark</td><td align="center"><p><img src="/files/kOwMjhnWCOdZrEwzEhh6" alt="" data-size="original"></p><p>Gyaradosite</p></td><td align="center"><p>Gains 30 in <strong>Attack</strong>, 30 in <strong>Defense</strong>, 10 in <strong>Sp. Atk</strong> and 30 in <strong>Sp. Def.</strong></p><p></p><p> Gains the Ability <strong>Mold Breaker</strong>.</p></td></tr><tr><td align="center" valign="middle"><p><img src="/files/FDeZgQsGQ2ykNKHYWe35" alt="" data-size="original"></p><p><strong>Aerodactyl</strong></p></td><td align="center">Rock/Flying</td><td align="center"><p><img src="/files/xukYXNGzqP5pr5XFuyIF" alt="" data-size="original"></p><p>Aerodactylite</p></td><td align="center"><p>Gains 30 in <strong>Attack</strong>, 20 in <strong>Defense</strong>, 10 in <strong>Sp. Atk,</strong> 20 in <strong>Sp. Def</strong> and 20 in <strong>Speed.</strong></p><p></p><p> Gains the Ability <strong>Tough Claws</strong>.</p></td></tr><tr><td align="center" valign="middle"><p><img src="/files/C1LDTBg1FGDzfkndu5ZQ" alt="" data-size="original"></p><p><strong>Dragonite</strong></p></td><td align="center">Dragon/Flying</td><td align="center"><p><img src="/files/anBGDcn3wumtFDIXWeFh" alt="" data-size="original"></p><p>Dragoninite</p></td><td align="center">Gains 20 in <strong>Defence</strong>, 45 in <strong>Sp. Atk</strong>, 25 in <strong>Sp. Def</strong> and 20 in <strong>Speed</strong>. Loses 10 in <strong>Attack</strong>.<br><br>Gains the Ability <strong>Soul-Heart</strong>.</td></tr><tr><td align="center" valign="middle"><p><img src="/files/f8QTqDuly6wkJW4PTrpg" alt=""></p><p><strong>Mewtwo X</strong></p></td><td align="center">Psychic/Fighting</td><td align="center"><p><img src="/files/NbxmRcS2dOaeEJNysxIC" alt="" data-size="original"></p><p>Mewtwonite X</p></td><td align="center"><p>Gains 80 in <strong>Attack</strong>, 10 in <strong>Defense</strong> and <strong>1</strong>0 in <strong>Sp. Def.</strong></p><p></p><p> Gains the Ability <strong>Steadfast</strong>.</p></td></tr><tr><td align="center" valign="middle"><p><img src="/files/09xiLQHWJuAajpvgXkqH" alt=""></p><p><strong>Mewtwo Y</strong></p></td><td align="center">Psychic</td><td align="center"><p><img src="/files/7iWeje7q7pEnet2QYt3a" alt="" data-size="original"></p><p>Mewtwonite Y</p></td><td align="center"><p>Gains 40 in <strong>Attack</strong>, 40 in <strong>Sp. Atk,</strong> 30 in <strong>Sp. Def,</strong> 10 in <strong>Speed</strong> and loses 20 in <strong>Defense.</strong></p><p></p><p> Gains the Ability <strong>Insomnia</strong>.</p></td></tr><tr><td align="center" valign="middle"><p><img src="/files/LyifAxToKr4JN0lzMj9u" alt=""></p><p><strong>Meganium</strong></p></td><td align="center">Grass/Fairy</td><td align="center"><p><img src="/files/lQVcUWTan4eO26QLttuw" alt=""></p><p>Meganiumite</p></td><td align="center">Gains 10 in <strong>Attack</strong>, 15 in <strong>Defence</strong>, 60 in <strong>Sp. Atk</strong> and 15 in <strong>Sp. Def</strong>.<br><br>Gains the Ability <strong>Flower Veil</strong>.</td></tr><tr><td align="center" valign="middle"><p><img src="/files/rZQohrqFGtjMcgzytB6T" alt=""></p><p><strong>Feraligatr</strong></p></td><td align="center">Water/Dragon</td><td align="center"><p><img src="/files/NNzVqSfU7oVKErOnQfCq" alt=""></p><p>Feraligite</p></td><td align="center">Gains 55 in <strong>Attack</strong>, 25 in <strong>Defence</strong>, 10 in <strong>Sp. Atk</strong> and 10 in <strong>Sp. Def</strong>.<br><br>Gains the Ability <strong>Dragon's Maw</strong>.</td></tr><tr><td align="center" valign="middle"><p><img src="/files/HU87nHqWwJAvK3pOgnoS" alt="" data-size="original"></p><p><strong>Ampharos</strong></p></td><td align="center">Electric/Dragon</td><td align="center"><p><img src="/files/E8pqSg2gf8ndn1OwujO9" alt="" data-size="original"></p><p>Ampharosite</p></td><td align="center"><p>Gains 20 in <strong>Attack</strong>, 10 in <strong>Defense</strong>, 50 in <strong>Sp. Atk,</strong> 20 in <strong>Sp. Def</strong> and loses 10 in <strong>Speed.</strong></p><p></p><p> Gains the Ability <strong>Mold Breaker</strong>.</p></td></tr><tr><td align="center" valign="middle"><p><img src="/files/LDwnYcJeJ5MBPPPj4ZwU" alt="" data-size="original"></p><p><strong>Steelix</strong></p></td><td align="center">Steel/Ground</td><td align="center"><p><img src="/files/Jr0u6Zum1jHm2Oua7MCy" alt="" data-size="original"></p><p>Steelixite</p></td><td align="center">Gains 40 in <strong>Attack</strong>, 30 in <strong>Defence</strong> and 30 in <strong>Sp. Def</strong>.<br><br>Gains the Ability <strong>Sand Force</strong>.</td></tr><tr><td align="center" valign="middle"><p><img src="/files/jeSa2zrvZHAmjNYeFWIk" alt="" data-size="original"></p><p><strong>Scizor</strong></p></td><td align="center">Bug/Steel</td><td align="center"><p><img src="/files/ie6vSH2srTPZ1fwXBGcH" alt="" data-size="original"></p><p>Scizorite</p></td><td align="center"><p>Gains 20 in <strong>Attack</strong>, 40 in <strong>Defense</strong>, 10 in <strong>Sp. Atk,</strong> 20 in <strong>Sp. Def</strong> and 10 in <strong>Speed.</strong></p><p></p><p> Gains the Ability <strong>Technician</strong>.</p></td></tr><tr><td align="center" valign="middle"><p><img src="/files/JHAD2Umj44BwkurrSrBE" alt="" data-size="original"></p><p><strong>Heracross</strong></p></td><td align="center">Bug/Fighting</td><td align="center"><p><img src="/files/gK6ggEnJVoCEyFaSL7tG" alt="" data-size="original"></p><p>Heracronite</p></td><td align="center"><p>Gains 60 in <strong>Attack</strong>, 40 in <strong>Defense</strong>, <strong>1</strong>0 in <strong>Sp. Def</strong> and loses 10 in <strong>Speed.</strong></p><p></p><p> Gains the Ability <strong>Skill Link</strong>.</p></td></tr><tr><td align="center" valign="middle"><p><img src="/files/mBJOAB5371kac8F6BqYS" alt=""></p><p><strong>Skarmory</strong></p></td><td align="center">Steel/Flying</td><td align="center"><p><img src="/files/KIpBVGfiZx3LduGuhxlp" alt=""></p><p>Skarmorite</p></td><td align="center">Gains 60 in <strong>Attack</strong>, 30 in <strong>Sp. Def</strong> and 40 in <strong>Speed</strong>. Loses 30 in <strong>Defence</strong>.<br><br>Gains the Ability <strong>Tough Claws</strong>.</td></tr><tr><td align="center" valign="middle"><p><img src="/files/iPGsFnKt1XghZqL1U6CA" alt=""></p><p><strong>Houndoom</strong></p></td><td align="center">Dark/Fire</td><td align="center"><p><img src="/files/O6FJIownZaM1YLRmC4Xq" alt="" data-size="original"></p><p>Houndoominite</p></td><td align="center"><p>Gains 40 in <strong>Defense</strong>, 30 in <strong>Sp. Atk,</strong> 10 in <strong>Sp. Def</strong> and 20 in <strong>Speed.</strong></p><p></p><p> Gains the Ability <strong>Solar Power</strong>.</p></td></tr><tr><td align="center" valign="middle"><p><img src="/files/LUpntqDTNeG8GMGd6LXh" alt="" data-size="original"></p><p><strong>Tyranitar</strong></p></td><td align="center">Rock/Dark</td><td align="center"><p><img src="/files/oHsBpitpAihc2S3uvN10" alt="" data-size="original"></p><p>Tyranitarite</p></td><td align="center"><p>Gains 30 in <strong>Attack</strong>, 40 in <strong>Defense</strong>, 20 in <strong>Sp. Def</strong> and 10 in <strong>Speed.</strong></p><p></p><p> Gains the Ability <strong>Sand Stream</strong>.</p></td></tr><tr><td align="center" valign="middle"><img src="/files/frHx70Z7mEcKfdWfhrbK" alt=""><strong>Sceptile</strong></td><td align="center">Grass/Dragon</td><td align="center"><p><img src="/files/nsIzJzITvf379ii4tA2a" alt="" data-size="original"></p><p>Sceptilite</p></td><td align="center">Gains 25 in <strong>Attack</strong>, 10 in <strong>Defence</strong>, 40 in <strong>Sp. Atk</strong> and 25 in <strong>Speed</strong>.<br><br>Gains the Ability <strong>Lightning Rod</strong>.</td></tr><tr><td align="center" valign="middle"><p><img src="/files/CUXgYjtdF41WAkcd9UVW" alt=""></p><p><strong>Blaziken</strong></p></td><td align="center">Fire/Fighting</td><td align="center"><p><img src="/files/wRGi1CY62dnt9PuGwQa2" alt="" data-size="original"></p><p>Blazikenite</p></td><td align="center"><p>Gains 40 in <strong>Attack</strong>, 10 in <strong>Defense</strong>, 20 in <strong>Sp. Atk</strong>, 10 in <strong>Sp. Def</strong> and 20 in <strong>Speed.</strong></p><p></p><p> Gains the Ability <strong>Speed Boost</strong>.</p></td></tr><tr><td align="center" valign="middle"><p><img src="/files/xBpzn2h6QBXm0Jp8bON9" alt="" data-size="original"></p><p><strong>Swampert</strong></p></td><td align="center">Water/Ground</td><td align="center"><p><img src="/files/aL6R6RYIBpfNZEerEryv" alt="" data-size="original"></p><p>Swampertite</p></td><td align="center">Gains 40 in <strong>Attack</strong>, 20 in <strong>Defence</strong>, 10 in <strong>Sp. Atk</strong>, 20 in <strong>Sp. Def</strong> and 10 in <strong>Speed</strong>.<br><br>Gains the Ability <strong>Swift Swim</strong>.</td></tr><tr><td align="center" valign="middle"><p><img src="/files/ETNQG6ifYEDvNMj4IwnW" alt="" data-size="original"></p><p><strong>Gardevoir</strong></p></td><td align="center">Psychic/Fairy</td><td align="center"><p><img src="/files/ZCAgMYMpkiKWrqX3MUZA" alt="" data-size="original"></p><p>Gardevoirite</p></td><td align="center"><p>Gains 20 in <strong>Attack</strong>, 40 in <strong>Sp. Atk</strong>, 20 in <strong>Sp. Def</strong> and 20 in <strong>Speed.</strong></p><p></p><p> Gains the Ability <strong>Pixilate</strong>.</p></td></tr><tr><td align="center" valign="middle"><p><img src="/files/m9iaO5bBdPd9Nk4X8mlV" alt="" data-size="original"></p><p><strong>Sableye</strong></p></td><td align="center">Dark/Ghost</td><td align="center"><p><img src="/files/z0oIobCy6KnUAHDooYfg" alt="" data-size="original"></p><p>Sablenite</p></td><td align="center">Gains 10 in <strong>Attack</strong>, 50 in <strong>Defence</strong>, 20 in <strong>Sp. Atk</strong> and 50 in <strong>Sp. Def</strong>. Loses 30 in <strong>Speed</strong>.<br><br>Gains the Ability <strong>Magic Bounce</strong>.</td></tr><tr><td align="center" valign="middle"><p><img src="/files/qqIMUEyWBI2SRAgWfcGG" alt="" data-size="original"></p><p><strong>Mawile</strong></p></td><td align="center">Steel/Fairy</td><td align="center"><p><img src="/files/4Md1gVkdVeoBqmMcXERX" alt="" data-size="original"></p><p>Mawilite</p></td><td align="center"><p>Gains 20 in <strong>Attack</strong>, 40 in <strong>Defense</strong> and 40 in <strong>Sp. Def.</strong></p><p></p><p> Gains the Ability <strong>Huge Power</strong>.</p></td></tr><tr><td align="center" valign="middle"><p><img src="/files/DDwnpNxLOPQlOXw0khPz" alt="" data-size="original"></p><p><strong>Aggron</strong></p></td><td align="center">Steel</td><td align="center"><p><img src="/files/GhDQInv4m5H7WUehHDJ5" alt=""></p><p>Aggronite</p></td><td align="center"><p>Gains 30 in <strong>Attack</strong>, 50 in <strong>Defense</strong> and 20 in <strong>Sp. Def.</strong></p><p></p><p> Gains the Ability <strong>Filter</strong>.</p></td></tr><tr><td align="center" valign="middle"><p><img src="/files/wTA7ClWGrbYvqfHKBsdq" alt="" data-size="original"></p><p><strong>Medicham</strong></p></td><td align="center">Fighting/Psychic</td><td align="center"><p><img src="/files/h6LAMtaBBEskBB9BovfS" alt="" data-size="original"></p><p>Medichamite</p></td><td align="center"><p>Gains 40 in <strong>Attack</strong>, 10 in <strong>Defense</strong>, 20 in <strong>Sp. Atk</strong>, 10 in <strong>Sp. Def</strong> and 20 in <strong>Speed.</strong></p><p></p><p> Gains the Ability <strong>Pure Power</strong>.</p></td></tr><tr><td align="center" valign="middle"><p><img src="/files/jCtE02ZCvscWXmfs2SZ1" alt="" data-size="original"></p><p><strong>Manectric</strong></p></td><td align="center">Electric</td><td align="center"><p><img src="/files/NTh6ZtpfJ73FNhqEJ1FB" alt="" data-size="original"></p><p>Manectite</p></td><td align="center"><p>Gains 20 in <strong>Defense</strong>, 30 in <strong>Sp. Atk</strong>, 20 in <strong>Sp. Def</strong> and 30 in <strong>Speed.</strong></p><p></p><p> Gains the Ability <strong>Intimidate</strong>.</p></td></tr><tr><td align="center" valign="middle"><p><img src="/files/aGo8naPJHfbL9yjWUX0e" alt="" data-size="original"></p><p><strong>Sharpedo</strong></p></td><td align="center">Water/Dark</td><td align="center"><p><img src="/files/kQAWTx6gOhBu4KaZPOSN" alt="" data-size="original"></p><p>Sharpedonite</p></td><td align="center">Gains 20 in <strong>Attack</strong>, 30 in <strong>Defence</strong>, 15 in <strong>Sp. Atk</strong>, 25 in <strong>Sp. Def</strong> and 10 in <strong>Speed</strong>.<br><br>Gains the Ability <strong>Strong Jaw</strong>.</td></tr><tr><td align="center" valign="middle"><p><img src="/files/D5rgjRPjMMfsIwq5hHdr" alt="" data-size="original"></p><p><strong>Camerupt</strong></p></td><td align="center">Fire/Ground</td><td align="center"><p><img src="/files/pAsF30tb9GMY7zqx50Sn" alt="" data-size="original"></p><p>Cameruptite</p></td><td align="center">Gains 20 in <strong>Attack</strong>, 30 in <strong>Defence</strong>, 40 in <strong>Sp. Atk</strong> and 30 in <strong>Sp. Def</strong>. Loses 20 in Speed.<br><br>Gains the Ability <strong>Sheer Force</strong>.</td></tr><tr><td align="center" valign="middle"><p><img src="/files/aIiC9vUy6molVFjXAiIR" alt="" data-size="original"></p><p><strong>Altaria</strong></p></td><td align="center">Dragon/Fairy</td><td align="center"><p><img src="/files/PRpRZCiJqsKxfPBr4ycN" alt="" data-size="original"></p><p>Altarianite</p></td><td align="center">Gains 40 in <strong>Attack</strong>, 20 in <strong>Defence</strong> and 40 in <strong>Sp. Atk</strong>.<br><br>Gains the Ability <strong>Pixilate</strong>.</td></tr><tr><td align="center" valign="middle"><p><img src="/files/7MlMJxfJrWSOwTboLSHX" alt="" data-size="original"></p><p><strong>Banette</strong></p></td><td align="center">Ghost</td><td align="center"><p><img src="/files/WaXNOxUiWl1y987rZXNF" alt="" data-size="original"></p><p>Banettite</p></td><td align="center"><p>Gains 50 in <strong>Attack</strong>, 10 in <strong>Defense</strong>, 10 in <strong>Sp. Atk</strong>, 20 in <strong>Sp. Def</strong> and 10 in <strong>Speed.</strong></p><p></p><p> Gains the Ability <strong>Prankster</strong>.</p></td></tr><tr><td align="center" valign="middle"><p><img src="/files/VcBY8j1SslW1NDyf8MOX" alt=""></p><p><strong>Chimecho</strong></p></td><td align="center">Psychic/Steel</td><td align="center"><p><img src="/files/9OvXA03XqblTTgqIjOJc" alt=""></p><p>Chimechite</p></td><td align="center">Gains 30 <strong>Defence</strong>, 40 <strong>Sp. Atk</strong> and 30 <strong>Sp. Def</strong>.<br><br>Keeps the Ability <strong>Levitate</strong>.</td></tr><tr><td align="center" valign="middle"><p><img src="/files/BJzTaqBOcCcrQb75RAs5" alt="" data-size="original"></p><p><strong>Absol</strong></p></td><td align="center">Dark</td><td align="center"><p><img src="/files/qK5NPCgRHFokFupiykhY" alt="" data-size="original"></p><p>Absolite</p></td><td align="center"><p>Gains 20 in <strong>Attack</strong>, 40 in <strong>Sp. Atk</strong> and 40 in <strong>Speed.</strong></p><p></p><p> Gains the Ability <strong>Magic Bounce</strong>.</p></td></tr><tr><td align="center" valign="middle"><img src="/files/6gJgNJencbk2WEsGucMQ" alt="" data-size="original"><strong>Absol Z</strong></td><td align="center">Dark/Ghost</td><td align="center"><img src="/files/UJeOSob4LbKEXEwOFnSN" alt="">Absolite Z</td><td align="center">Gains 24 in <strong>Attack</strong> and 76 in <strong>Speed.</strong><br><br>Gains the Ability <strong>Technician</strong>.</td></tr><tr><td align="center" valign="middle"><p><img src="/files/4CWnkqUO3f5ji6kIcHMM" alt="" data-size="original"></p><p><strong>Glalie</strong></p></td><td align="center">Ice</td><td align="center"><p><img src="/files/prLqwGpyRdqWojkJpQUC" alt="" data-size="original"></p><p>Glalitite</p></td><td align="center">Gains 40 in <strong>Attack</strong>, 40 in <strong>Sp. Atk</strong> and 20 in <strong>Speed</strong>.<br><br>Gains the Ability <strong>Refrigerate</strong>.</td></tr><tr><td align="center" valign="middle"><p><img src="/files/XJavRYnAcczZiUfJjFBs" alt="" data-size="original"></p><p><strong>Salamence</strong></p></td><td align="center">Dragon/Flying</td><td align="center"><p><img src="/files/c4TCisV0FemJG57aZdLO" alt="" data-size="original"></p><p>Salamencite</p></td><td align="center">Gains 10 in <strong>Attack</strong>, 50 in <strong>Defence</strong>, 10 in <strong>Sp. Atk</strong>, 10 in <strong>Sp. Def</strong> and 20 in Speed.<br><br>Gains the Ability <strong>Aerilate</strong>.</td></tr><tr><td align="center" valign="middle"><img src="/files/lptYbTie9dbsJB7oFhk2" alt=""><strong>Metagross</strong></td><td align="center">Steel/Psychic</td><td align="center"><p><img src="/files/Mt8BWLME9uNhxGEiVmR7" alt="" data-size="original"></p><p>Metagrossite</p></td><td align="center">Gains 10 in <strong>Attack</strong>, 20 in <strong>Defence</strong>, 10 in <strong>Sp. Atk</strong>, 20 in <strong>Sp. Def</strong> and 40 in <strong>Speed</strong>.<br><br>Gains the Ability <strong>Tough Claws</strong>.</td></tr><tr><td align="center" valign="middle"><p><img src="/files/MyyjfwvhanjT4LGdaJJB" alt="" data-size="original"></p><p><strong>Latias</strong></p></td><td align="center">Dragon/Psychic</td><td align="center"><p><img src="/files/NF5oBR762UFzP5bgLWOp" alt="" data-size="original"></p><p>Latiasite</p></td><td align="center">Gains 20 in <strong>Attack</strong>, 30 in <strong>Defense</strong>, 30 in <strong>Sp. Atk</strong> and 20 in <strong>Sp. Def.</strong><br><br>Keeps the Ability <strong>Levitate</strong>.</td></tr><tr><td align="center" valign="middle"><p><img src="/files/JrOUliJaUxyPmpd0CH2K" alt="" data-size="original"></p><p><strong>Latios</strong></p></td><td align="center">Dragon/Psychic</td><td align="center"><p><img src="/files/8SPFTqmHCfY7Dpa8Xo7j" alt="" data-size="original"></p><p>Latiosite</p></td><td align="center">Gains 40 in <strong>Attack</strong>, 20 in <strong>Defense</strong>, 30 in <strong>Sp. Atk</strong> and 10 in <strong>Sp. Def.</strong><br><br>Keeps the Ability <strong>Levitate</strong>.</td></tr><tr><td align="center" valign="middle"><p><img src="/files/6PCraeeIQ5Bcif04czfl" alt="" data-size="original"></p><p><strong>Rayquaza</strong></p></td><td align="center">Dragon/Flying</td><td align="center"><strong>N/A</strong></td><td align="center">Gains 30 in <strong>Attack</strong>, 10 in <strong>Defence</strong>, 30 in <strong>Sp. Atk</strong>, 10 in <strong>Sp. Def</strong> and 20 in <strong>Speed</strong>.<br><br>Gains the Ability <strong>Delta Stream</strong>.</td></tr><tr><td align="center" valign="middle"><img src="/files/l6Urq6dv1jH3VKyx8Dee" alt="" data-size="original"><strong>Staraptor</strong></td><td align="center">Fighting/Flying</td><td align="center"><img src="/files/IuosfThXlBp2O9wURKwL" alt="">Staraptite</td><td align="center">Gains 20 in <strong>Attack</strong>, 30 in <strong>Defence</strong>, 10 in <strong>Sp. Atk</strong>, 30 in <strong>Sp.Def</strong> and 10 in <strong>Speed</strong>.<br><br>Gains the Ability <strong>Tough Claws</strong>.</td></tr><tr><td align="center" valign="middle"><p><img src="/files/FKPuoyeLMZbUI0mWOGAy" alt="" data-size="original"></p><p><strong>Lopunny</strong></p></td><td align="center">Normal/Fighting</td><td align="center"><p></p><p><img src="/files/6ylXl9b9Nyhba1eXdBAo" alt=""></p><p></p><p>Lopunnite</p></td><td align="center">Gains 60 in <strong>Attack</strong>, 10 in <strong>Defence</strong> and 30 in <strong>Speed</strong>.<br><br>Gains the Ability <strong>Scrappy</strong>. </td></tr><tr><td align="center" valign="middle"><p><img src="/files/dEYj8RXrAQfgyaCOdPjC" alt="" data-size="original"></p><p><strong>Garchomp</strong></p></td><td align="center">Dragon/Ground</td><td align="center"><p><img src="/files/VN4fIeFjYUMbRPyasaLC" alt="" data-size="original"></p><p>Garchompite</p></td><td align="center"><p>Gains 40 in <strong>Attack</strong>, 20 in <strong>Defense</strong>, 40 in <strong>Sp. Atk</strong>, 10 in <strong>Sp. Def</strong> and loses 10 in <strong>Speed.</strong></p><p></p><p> Gains the Ability <strong>Sand Force</strong>.</p></td></tr><tr><td align="center" valign="middle"><img src="/files/KF5qtYaGo4nvGuZj81Hf" alt=""><strong>Garchomp Z</strong></td><td align="center">Dragon</td><td align="center"><img src="/files/BkZHZMwwiXAOvC0XS6Re" alt="">Garchompite Z</td><td align="center">Gains 61 in <strong>Sp. Atk,</strong> 49 in <strong>Speed</strong> and loses 10 in <strong>Defense.</strong> <br><br>Gains the Ability <strong>Rough Skin</strong>.</td></tr><tr><td align="center" valign="middle"><p><img src="/files/SFmrv2ea22UxzFmUfEcI" alt="" data-size="original"></p><p><strong>Lucario</strong></p></td><td align="center">Fighting/Steel</td><td align="center"><p><img src="/files/uXFmJYJDA8ufAQidzvJw" alt="" data-size="original"></p><p>Lucarionite</p></td><td align="center"><p>Gains 35 in <strong>Attack</strong>, 18 in <strong>Defense</strong>, 25 in <strong>Sp. Atk</strong> and 22 in <strong>Speed.</strong></p><p></p><p> Gains the Ability <strong>Adaptability</strong>.</p></td></tr><tr><td align="center" valign="middle"><p><img src="/files/Q8vTy44AdNQIc7k5GRBu" alt=""></p><p><strong>Lucario Z</strong></p></td><td align="center">Fighting/Steel</td><td align="center"><p><img src="/files/Hc2EMB2fLdpKfLnRTRrb" alt=""></p><p>Lucarionite Z</p></td><td align="center">Gains 49 in <strong>Sp. Atk,</strong> 61 in <strong>Speed</strong> and loses <strong>1</strong>0 in <strong>Attack.</strong> <br><br>Gains the Ability <strong>Mind's Eye</strong>.</td></tr><tr><td align="center" valign="middle"><p><img src="/files/uZbawkS1fMnurVywoCH7" alt="" data-size="original"></p><p><strong>Abomasnow</strong></p></td><td align="center">Grass/Ice</td><td align="center"><p><img src="/files/eP88sEKnSjrqI7cHYDWh" alt="" data-size="original"></p><p>Abomasite</p></td><td align="center"><p>Gains 40 in <strong>Attack</strong>, 30 in <strong>Defense</strong>, 40 in <strong>Sp. Atk</strong>, 20 in <strong>Sp. Def</strong> and loses 30 in <strong>Speed.</strong></p><p></p><p> Gains the Ability <strong>Snow Warning</strong>.</p></td></tr><tr><td align="center" valign="middle"><p><img src="/files/43i3D3UMJIBQgoEAl1ne" alt="" data-size="original"></p><p><strong>Gallade</strong></p></td><td align="center">Psychic/Fighting</td><td align="center"><p><img src="/files/G9bR7zXF6e5aaL0jSFlq" alt="" data-size="original"></p><p>Galladite</p></td><td align="center">Gains 40 in <strong>Attack</strong>, 30 in <strong>Defence</strong> and 30 in <strong>Speed</strong>.<br><br>Gains the Ability <strong>Inner Focus</strong>.</td></tr><tr><td align="center" valign="middle"><p><img src="/files/2AjAdqKdAMbmaS5Dnxt7" alt=""></p><p><strong>Froslass</strong></p></td><td align="center">Ice/Ghost</td><td align="center"><p><img src="/files/Ncb1kKDeiO4vcAXieszT" alt=""></p><p>Froslassite</p></td><td align="center">Gains 60 in <strong>Sp. Atk</strong>, 30 in <strong>Sp. Def</strong> and 10 in <strong>Speed</strong>.<br><br>Gains the Ability <strong>Snow Warning</strong>.</td></tr><tr><td align="center" valign="middle"><img src="/files/3MjTd0pyU3dETvpESJ6E" alt=""><strong>Heatran</strong></td><td align="center">Fire/Steel</td><td align="center"><img src="/files/PJRC8tURnJArQhJDUNfg" alt="">Heatranite</td><td align="center">Gains 30 in <strong>Attack</strong>, 45 in <strong>Sp. Atk</strong> and 35 in <strong>Sp. Def</strong>. Loses 10 in <strong>Speed</strong>.<br><br>Gains the Ability <strong>Filter</strong>.</td></tr><tr><td align="center" valign="middle"><img src="/files/5XxjTlnJGjGp3yp9W2VJ" alt=""><strong>Darkrai</strong></td><td align="center">Dark</td><td align="center"><img src="/files/EVHtjzaGZZRxCMZdtC7L" alt="">Darkranite</td><td align="center">Gains 30 in <strong>Attack</strong>, 40 in <strong>Defence</strong>, 30 in <strong>Sp. Atk</strong> and 40 in <strong>Sp. Def</strong>. Loses 40 in <strong>Speed</strong>.<br><br>Keeps the Ability <strong>Dark Aura</strong>.</td></tr><tr><td align="center" valign="middle"><p><img src="/files/gR2QdgJbnAnm7FM2z2de" alt=""></p><p><strong>Emboar</strong></p></td><td align="center">Fire/Fighting</td><td align="center"><p><img src="/files/HiCqUMzH4OvHeLlMlZsf" alt=""></p><p>Emboarite</p></td><td align="center">Gains 25 in <strong>Attack</strong>, 10 in <strong>Defence</strong>, 10 in <strong>Sp. Atk</strong>, 45 in <strong>Sp. Def</strong> and 10 in <strong>Speed</strong>.<br><br>Gains the Ability <strong>Supreme Overloard</strong>.</td></tr><tr><td align="center" valign="middle"><p><img src="/files/L0Tm7Q6IytDIXVlf99n8" alt=""></p><p><strong>Excadrill</strong></p></td><td align="center">Ground/Steel</td><td align="center"><p><img src="/files/Mp7nzEY5j9Aolm8vdw8i" alt=""></p><p>Excadrite</p></td><td align="center">Gains 30 in <strong>Attack</strong>, 40 in <strong>Defence</strong>, 15 in <strong>Sp. Atk</strong> and 15 in <strong>Speed</strong>.<br><br>Gains the Ability <strong>Sand Rush</strong>.</td></tr><tr><td align="center" valign="middle"><p><img src="/files/hQNJ0KO5kkZQDwlfHrKF" alt="" data-size="original"></p><p><strong>Audino</strong></p></td><td align="center">Normal/Fairy</td><td align="center"><p><img src="/files/ApPlOJdPHmH0RMam6qhh" alt="" data-size="original"></p><p>Audinite</p></td><td align="center">Gains 40 in <strong>Defence</strong>, 20 in <strong>Sp. Atk</strong> and 40 in <strong>Sp. Def</strong>.<br><br>Gains the Ability <strong>Healer</strong>.</td></tr><tr><td align="center" valign="middle"><p><img src="/files/8LtZhAwJxwgg6GRjv7NL" alt=""></p><p><strong>Scolipede</strong></p></td><td align="center">Bug/Poison</td><td align="center"><p><img src="/files/vdAYuIZ7FxfVpdALo7jC" alt=""></p><p>Scolipite</p></td><td align="center">Gains 40 in <strong>Attack</strong>, 60 in <strong>Defence</strong>, 20 in <strong>Sp. Atk</strong> and 30 in <strong>Sp. Def</strong>. Loses 50 in <strong>Speed</strong>.<br><br>Gains the Ability <strong>Tinted Lens</strong>.</td></tr><tr><td align="center" valign="middle"><p><img src="/files/lTLUxOfAnjFpzXmI7kUS" alt=""></p><p><strong>Scrafty</strong></p></td><td align="center">Fighting/Dark</td><td align="center"><p><img src="/files/hBwJPDUMH6yjsnnqfWaE" alt=""></p><p>Scraftinite</p></td><td align="center">Gains 40 in <strong>Attack</strong>, 20 in <strong>Defence</strong>, 10 in <strong>Sp. Atk</strong>, 20 in <strong>Sp. Def</strong> and 10 in <strong>Speed</strong>.<br><br>Gains the Ability <strong>Shed Skin</strong>.</td></tr><tr><td align="center" valign="middle"><p><img src="/files/iW9d7TQMs3VF9onxlBFb" alt=""></p><p><strong>Eelektross</strong></p></td><td align="center">Electric</td><td align="center"><p><img src="/files/NtycOblvPgqiMYgvWcxA" alt=""></p><p>Elektrossite</p></td><td align="center">Gains 30 in <strong>Attack</strong>, 30 in <strong>Sp. Atk</strong>, 10 in <strong>Sp. Def</strong> and 30 in <strong>Speed</strong>.<br><br>Gains the Ability <strong>Hadron Engine</strong>.</td></tr><tr><td align="center" valign="middle"><p><img src="/files/gRvgS6P8SiM9ks8jWhhv" alt=""></p><p><strong>Chandelure</strong></p></td><td align="center">Fire/Ghost</td><td align="center"><p><img src="/files/zLtlTFP8pQqtIob0tJ6N" alt=""></p><p>Chandelurite</p></td><td align="center">Gains 20 in <strong>Attack</strong>, 20 in <strong>Defence</strong>, 30 in <strong>Sp. Atk</strong>, 20 in <strong>Sp. Def</strong> and 10 in <strong>Speed</strong>.<br><br>Gains the Ability <strong>Magic Guard</strong>.</td></tr><tr><td align="center" valign="middle"><img src="/files/6CrO4coG0ahflklid5qv" alt=""><strong>Golurk</strong></td><td align="center">Ground/Ghost</td><td align="center"><img src="/files/vBqoawSdQI4GNcsoLife" alt="">Golurkite</td><td align="center">Gains 35 in <strong>Attack</strong>, 25 in <strong>Defence</strong>, 15 in <strong>Sp. Atk</strong> and 25 in <strong>Sp. Def</strong>.<br><br>Gains the Ability <strong>Adaptability</strong>.</td></tr><tr><td align="center" valign="middle"><p><img src="/files/8u300PQJACz2gcsB5ZnF" alt="" data-size="original"></p><p><strong>Chesnaught</strong></p></td><td align="center">Grass/Fighting</td><td align="center"><p><img src="/files/NiZsZpEds2yt00ojKLEs" alt="" data-size="original"></p><p>Chesnaughtite</p></td><td align="center">Gains 30 in <strong>Attack</strong>, 50 in <strong>Defence</strong> and 40 in <strong>Sp. Def</strong>. Loses 20 in <strong>Speed</strong>.<br><br>Gains the Ability <strong>Grassy Surge</strong>.</td></tr><tr><td align="center" valign="middle"><p><img src="/files/msuOKNF0gh6NySsKX3EU" alt=""></p><p><strong>Delphox</strong></p></td><td align="center">Fire/Psychic</td><td align="center"><p><img src="/files/tITPg9BHqflIUH4PIjFd" alt="" data-size="original"></p><p>Delphoxite</p></td><td align="center">Gains 45 in <strong>Sp. Atk</strong>, 25 in <strong>Sp. Def</strong> and 30 in <strong>Speed</strong>.<br><br>Gains the Ability <strong>Levitate</strong>.</td></tr><tr><td align="center" valign="middle"><p><img src="/files/kVFttjEfRnqCBbiW5pVe" alt="" data-size="original"></p><p><strong>Greninja</strong></p></td><td align="center">Water/Dark</td><td align="center"><p><img src="/files/9bldnLbaNki7G5eGbaN6" alt="" data-size="original"></p><p>Greninjite</p></td><td align="center">Gains 30 in <strong>Attack</strong>, 10 in <strong>Defence</strong>, 30 in <strong>Sp. Atk</strong>, 10 in <strong>Sp. Def</strong> and 20 in <strong>Speed</strong>.<br><br>Gains the Ability <strong>Protean</strong>.</td></tr><tr><td align="center" valign="middle"><p><img src="/files/KHIgtEVouRCU5G31eMd6" alt=""></p><p><strong>Pyroar</strong></p></td><td align="center">Fire/Normal</td><td align="center"><p><img src="/files/3xG6iSd3vU7Zhv3S2m8O" alt=""></p><p>Pyroarite</p></td><td align="center">Gains 20 in <strong>Attack</strong>, 20 in <strong>Defence</strong>, 20 in <strong>Sp. Atk</strong>, 20 in <strong>Sp. Def</strong> and 20 in <strong>Speed</strong>.<br><br>Gains the Ability <strong>Drought</strong>.</td></tr><tr><td align="center" valign="middle"><img src="/files/p02UhAWSdSZhBtk9SL2Y" alt=""><strong>Floette (AZ)</strong></td><td align="center">Fairy</td><td align="center"><p><img src="/files/OghyCCAMvcmxAYLME27s" alt=""></p><p>Floettite</p></td><td align="center">Gains 20 in <strong>Attack</strong>, 20 in <strong>Defence</strong>, 30 in <strong>Sp. Atk</strong>, 20 in <strong>Sp. Def</strong> and 10 in <strong>Speed</strong>.<br><br>Gains the Ability <strong>Regenerator</strong>.</td></tr><tr><td align="center" valign="middle"><img src="/files/i9xiUwNR2HcfTDEbED7x" alt=""><strong>Meowstic</strong></td><td align="center">Psychic</td><td align="center"><img src="/files/IMQ2hritYuIOVHx1CgMt" alt="">Meowsticite</td><td align="center">Gains 60 in <strong>Sp. Atk</strong>, 20 in <strong>Sp. Def</strong> and 20 in <strong>Speed</strong>.<br><br>Gains the Ability <strong>Psychic Surge</strong>.</td></tr><tr><td align="center" valign="middle"><p><img src="/files/JfuULb29d75eqetFSyDl" alt="" data-size="original"></p><p><strong>Malamar</strong></p></td><td align="center">Dark/Psychic</td><td align="center"><p><img src="/files/sinAYKwYYk6Uf8liaIKo" alt="" data-size="original"></p><p>Malamarite</p></td><td align="center">Gains 10 in <strong>Attack</strong>, 30 in <strong>Sp. Atk</strong>, 45 in <strong>Sp. Def</strong> and 15 in <strong>Speed</strong>.<br><br>Gains the Ability <strong>Contrary</strong>.</td></tr><tr><td align="center" valign="middle"><p><img src="/files/i5vDX1h4PEIwvekL7KiA" alt=""></p><p><strong>Barbaracle</strong></p></td><td align="center">Rock/Fighting</td><td align="center"><p><img src="/files/m1hTdHEmlhd1qgy9ILg9" alt=""></p><p>Barbaracite</p></td><td align="center">Gains 35 in <strong>Attack</strong>, 15 in <strong>Defence</strong>, 10 in <strong>Sp. Atk</strong>, 20 in <strong>Sp. Def</strong> and 20 in <strong>Speed</strong>.<br><br>Gains the Ability <strong>Tough Claws</strong>.</td></tr><tr><td align="center" valign="middle"><p><img src="/files/c7OxXgojQRG7w4jmQczi" alt=""></p><p><strong>Dragalge</strong></p></td><td align="center">Poison/Dragon</td><td align="center"><p><img src="/files/gLxhyHhHGyp9gTVsab71" alt=""></p><p>Dragalgite</p></td><td align="center">Gains 10 in <strong>Attack</strong>, 15 in <strong>Defence</strong>, 35 in <strong>Sp. Atk</strong> and 40 in <strong>Sp. Def</strong>.<br><br>Gains the Ability <strong>Regenerator</strong>.</td></tr><tr><td align="center" valign="middle"><p><img src="/files/qa8LvvX7Ypp5xB3wivyY" alt="" data-size="original"></p><p><strong>Hawlucha</strong></p></td><td align="center">Fightng/Flying</td><td align="center"><p><img src="/files/9sr6Xxk9Nf7s3CyvnNW4" alt="" data-size="original"></p><p>Hawluchanite</p></td><td align="center">Gains 45 in <strong>Attack</strong>, 25 in <strong>Defence</strong> and 30 in <strong>Sp. Def</strong>.<br><br>Gains the Ability <strong>Stamina</strong>.</td></tr><tr><td align="center" valign="middle"><p><img src="/files/jHa8265Baur9qPwUaUWl" alt=""></p><p><strong>Zygarde</strong></p></td><td align="center">Dragon/Ground</td><td align="center"><p><img src="/files/WMHnx28CUmTsrPlh2SoY" alt=""></p><p>Zygardite</p></td><td align="center">Gains 108 <strong>Hp</strong>,  135 <strong>Sp. Atk</strong> and 5 <strong>Speed</strong>. Loses 30 <strong>Attack</strong>, 30 <strong>Defence</strong> and 10 <strong>Sp. Def</strong>.<br><br>Gains the Ability <strong>Aura Break</strong>.</td></tr><tr><td align="center" valign="middle"><p><img src="/files/LQQcgPwW4G2E1s4Beqlb" alt="" data-size="original"></p><p><strong>Diancie</strong></p></td><td align="center">Rock/Fairy</td><td align="center"><p><img src="/files/vNHtRrLCKGExFGKDq5ce" alt="" data-size="original"></p><p>Diancite</p></td><td align="center">Gains 60 <strong>Attack</strong>, 60 <strong>Sp. Atk</strong> and 60 <strong>Speed</strong>. Loses 40 <strong>Defence</strong> and 40 <strong>Sp. Def</strong>.<br><br>Gains the Ability <strong>Magic Bounce</strong>.</td></tr><tr><td align="center" valign="middle"><img src="/files/MVEB8RI2qy9uSNtv6GxC" alt=""><strong>Crabominable</strong></td><td align="center">Fighting/Ice</td><td align="center"><img src="/files/hKpsJkERhGLiP53mCz9s" alt=""><br>Crabominite</td><td align="center">Gains 25 <strong>Attack</strong>, 45 <strong>Defence</strong> and 40 <strong>Sp. Def</strong>. Loses 10 <strong>Speed</strong>.<br><br>Gains the Ability <strong>Ice Scales</strong>.</td></tr><tr><td align="center" valign="middle"><img src="/files/yuo3Tzwy5jwA8AkqBr5V" alt=""><strong>Golisopod</strong></td><td align="center">Bug/Steel</td><td align="center"><img src="/files/5rdEaAWzDeFQzK9atJxm" alt="">Golisopite</td><td align="center">Gains 25 <strong>Attack</strong>, 35 <strong>Defence</strong>, 10 <strong>Sp. Atk</strong> and 30 <strong>Sp Def</strong>.<br><br>Gains the Ability <strong>Heatproof</strong>.</td></tr><tr><td align="center" valign="middle"><p><img src="/files/4dPSeHY8ENGFUW3U7kop" alt=""></p><p><strong>Drampa</strong></p></td><td align="center">Normal/Dragon</td><td align="center"><p><img src="/files/dbvvbqyFoOqOQM0tdsLA" alt=""></p><p>Drampanite</p></td><td align="center">Gains 25 <strong>Attack</strong>, 25 <strong>Defence</strong>, 25 <strong>Sp. Atk</strong> and 25 <strong>Sp. Def</strong>.<br><br>Gains the Ability <strong>Adaptability</strong>.</td></tr><tr><td align="center" valign="middle"><img src="/files/ucBBW6TmMHWjITDvt2re" alt=""><strong>Magearna</strong></td><td align="center">Steel/Fairy</td><td align="center"><img src="/files/Hw8uTIuGfDNS0J2rfy9G" alt="">Magearnite</td><td align="center">Gains 30 <strong>Attack</strong>, 40 <strong>Sp. Atk</strong> and 30 <strong>Speed</strong>.<br><br>Keeps the Ability <strong>Soul-Heart</strong>.</td></tr><tr><td align="center" valign="middle"><p><img src="/files/ePhcCwlGR5qtWHyKOd3F" alt=""></p><p><strong>Zeraora</strong></p></td><td align="center">Electric</td><td align="center"><p><img src="/files/H0HscMrI8jJsu6cDNIZO" alt=""></p><p>Zeraorite</p></td><td align="center">Gains 45 <strong>Attack</strong>, 22 <strong>Defence</strong>, 45 <strong>Sp. Atk</strong> and 10 <strong>Speed</strong>.<br><br>Gains the Ability <strong>Volt Absorb</strong>.</td></tr><tr><td align="center" valign="middle"><p><img src="/files/Soe47BLltemEhoErtddo" alt=""></p><p><strong>Falinks</strong></p></td><td align="center">Fighting</td><td align="center"><p><img src="/files/7zilte7PiwYfEYXT85ns" alt=""></p><p>Falinksite</p></td><td align="center">Gains 35 <strong>Attack</strong>, 35 <strong>Defence</strong>, 5 <strong>Sp. Def</strong> and 25 <strong>Speed</strong>.<br><br>Gains the Ability <strong>Dauntless Shield</strong>.</td></tr><tr><td align="center" valign="middle"><img src="/files/rL7JROuD09JG4wcaKt1Z" alt=""><strong>Scovillan</strong></td><td align="center">Grass/Fire</td><td align="center"><img src="/files/mEQUzANieCuhh2GzO1lL" alt="">Scovillianite</td><td align="center">Gains 30 <strong>Attack</strong>, 20 <strong>Defence</strong>, 30 <strong>Sp. Atk</strong> and 20 <strong>Sp. Def</strong>.<br><br>Gains the Ability <strong>Contrary</strong>.</td></tr><tr><td align="center" valign="middle"><img src="/files/vjsixsQE8qd5gxbM5qEZ" alt=""><strong>Glimmora</strong></td><td align="center">Rock/Poison</td><td align="center"><img src="/files/3bJ0cuwQfjRFMqKJCF4Q" alt="">Glimmoranite</td><td align="center">Gains 35 <strong>Attack</strong>, 15 <strong>Defence</strong>, 20 <strong>Sp. Atk</strong>, 15 <strong>Sp. Def</strong> and 15 <strong>Speed</strong>.<br><br>Gains the Ability <strong>Levitate</strong>.</td></tr><tr><td align="center" valign="middle"><img src="/files/Pqdw3CA4FBu8zSTjfUye" alt=""><strong>Tatsugiri</strong></td><td align="center">Dragon/Water</td><td align="center"><img src="/files/OAIIOqiFf4vv4nTdGsWF" alt="">Tatsugirinite</td><td align="center">Gains 15 <strong>Attack</strong>, 30 <strong>Defence</strong>, 15 <strong>Sp. Atk</strong>, 30 <strong>Sp. Def</strong> and 10 <strong>Speed</strong>.<br><br>Gains the Ability <strong>Drizzle</strong>.</td></tr><tr><td align="center" valign="middle"><p><img src="/files/je4QTE8UiRmWrbWq5Hcs" alt=""></p><p><strong>Baxcalibur</strong></p></td><td align="center">Dragon/Ice</td><td align="center"><p><img src="/files/CtrLyFrYlErW2TKaX9F8" alt=""></p><p>Baxcalibrite</p></td><td align="center">Gains 30 <strong>Attack</strong>, 25 <strong>Defence</strong>, 30 <strong>Sp. Atk</strong> and 15 <strong>Sp. Def</strong>.<br><br>Gains the Ability <strong>Thermal Exchange</strong>.</td></tr></tbody></table>

#### PRIMAL REVERSION

Unlike standard Mega Evolutions, there exists a similar mechanism that applies exclusively to two Legendary Pokémon. These Pokémon each require a unique stone to Mega Evolve, unlocking powerful benefits in their transformed state.&#x20;

The key distinction is that this evolution occurs automatically, instantly changing the Pokémon’s form, rather than requiring manual activation in battle like traditional Mega Evolutions.

|                                                  Pokemon                                                  |    Typing   |       Stone      |                                                                             Benefits                                                                            |
| :-------------------------------------------------------------------------------------------------------: | :---------: | :--------------: | :-------------------------------------------------------------------------------------------------------------------------------------------------------------: |
|  <p><img src="/files/dNVcp9zgdoRcEEwwwvzU" alt="" data-size="original"></p><p><strong>Kyogre</strong></p> |    Water    | Heart of the Sea | <p>Gains 50 <strong>Attack</strong>, 30 <strong>Sp. Atk</strong> and 20 <strong>Sp. Def</strong>.<br><br>Gains the Ability <strong>Primordial Sea</strong>.</p> |
| <p><img src="/files/B7RAh7vbhAdqFDPl4OAV" alt="" data-size="original"></p><p><strong>Groudon</strong></p> | Ground/Fire |     Flame Orb    |  <p>Gains 30 <strong>Attack</strong>, 20 <strong>Defence</strong> and 50 <strong>Sp. Atk</strong>.<br><br>Gains the Ability <strong>Desolate Land</strong>.</p> |

For more information relating to Mega Pokemon, please refer to this link:

{% embed url="<https://bulbapedia.bulbagarden.net/wiki/Mega_Evolution>" %}


# A Complete Guide to Safetrade

Here you'll find everything you need to know about the Safetrade mechanic found on the server.

**Contents**

1. [What is Safetrade?](#what-is-safetrade)
2. [How do I perform a Safetrade](#how-do-i-perform-a-safetrade)?
3. [What are the benefits to Safetrade?](#what-are-the-benefits-to-safetrade)
4. [Frequently Asked Questions \[FAQ\]](#frequently-asked-questions-faq)

***

### What is Safetrade?

SafeTrade is a server feature designed to allow players to trade securely with one another. Through this system, players can exchange Pokemon, PokeCoins, Gems and items in a protected trading system.

<figure><img src="/files/oyvbjR1yZ1lzIpiQ6s3Q" alt=""><figcaption><p><code>/trade</code> GUI</p></figcaption></figure>

Both parties must confirm the trade before it is finalized, ensuring that neither side can modify the agreement without both parties agreeing on it. Additionally there is logs that are saved which are maintained behind the scenes allowing staff to review transactions and address any issues that may arise, including attempted scams or other disputes between players.

<figure><img src="/files/MzLCJh9VhJiqEZlEVwfa" alt="" width="563"><figcaption><p>Accepting and Adding to <code>/trade</code></p></figcaption></figure>

### How do I perform a Safetrade?

Performing a Safetrade is a straightforward process. However, to proceed, another player must first accept your Safetrade request before you can begin using this feature. To initiate a trade, simply use the command `/trade <user>`, which will send a trade request to the specified player.

<figure><img src="/files/EtnGeUXpzMni3VA0xHhk" alt=""><figcaption><p>Trade Request Sent</p></figcaption></figure>

If a player sends you a trade request, you will receive a notification in the public chat. From there, you may click the accept option to initiate the trade.&#x20;

<figure><img src="/files/KnXR0Vda4E1Fiv2drqw0" alt=""><figcaption><p>Trade Request</p></figcaption></figure>

Once in the Safetrade menu you can begin to add specific items, pokemon and currencies into the trade. If you wish to cancel the trade at anytime all you need to do is press **`ESC`** and trade will be cancelled for both sides.

<figure><img src="/files/vOGkuab2xFKQ1e5s73AC" alt=""><figcaption><p>Safetrade Menu GUI</p></figcaption></figure>

From there, you will be able to add the items or Pokémon you wish to include in the trade. You are able to select how much of a particular item you want to add instead of needing to set specific amounts prior the trade.

<figure><img src="/files/ltTMOtENW91TusF4uJdv" alt=""><figcaption><p>Item Select Count</p></figcaption></figure>

You may select Pokémon from your party to place into the trade, as illustrated in the images below:

<div align="left"><figure><img src="/files/pT3LWfceyAXSH0MEttmP" alt=""><figcaption></figcaption></figure> <figure><img src="/files/cxTZ7fTJHQDVo0KBIFrx" alt="" width="305"><figcaption></figcaption></figure></div>

You may also add **PokeCoins** and **Gems** to the trade by selecting the “Add Money” option and entering the exact amounts alongside which currency you are offering \[*i.e. 100 Gems, 5000 Pokecoins etc*] you wish to include, as shown in the images below:

<div align="left"><figure><img src="/files/JyGTn36vjKWPKX5tZPP8" alt=""><figcaption></figcaption></figure> <figure><img src="/files/eKY6dscSFcfdclkRPmNy" alt="" width="479"><figcaption></figcaption></figure></div>

Once you are satisfied with the trade, you will see several red glass panes displayed at the bottom of the trade interface.

<figure><img src="/files/zoflz9LSRtTdYmvAy5PJ" alt=""><figcaption><p>Confirmation Button via <code>/trade</code></p></figcaption></figure>

Once you click to confirm the trade, you will be locked in. After the other player confirms as well, a timer will begin for the trade to be completed. If you decide to cancel the trade during this period, you may click the same buttons again to stop the timer.

<figure><img src="/files/EM7fft93n9VadxZ4SNrD" alt="" width="563"><figcaption><p>Trade Confirmation Timer</p></figcaption></figure>

Once the trade has been completed and the interface has closed, you will receive a notification in the chat confirming its completion. Any items or Pokémon you offered will be transferred to the other player, and you will likewise receive the items or Pokémon they offered in return.

<figure><img src="/files/FQrtZQyN9nYJFmkX5VFU" alt=""><figcaption><p>Trade Confirmation Text</p></figcaption></figure>

### What are the benefits to Safetrade?

It is **highly recommended that players use SafeTrade** to avoid instances of attempted scams, which can occur easily without this feature. For example a player could receive an item and then teleport away without completing the trade.

SafeTrade also provides the convenience of trading everything you need in a single location, eliminating the need to navigate multiple trading paths. Additionally it supports cross server trades allowing you to trade from your realm while the other player is in the wilds without any issues arising.

SafeTrade is the only method for exchanging **PokeCoins** and **Gems**, so any trades involving these as payment must be completed through this feature.

Finally, Safetrade maintains full logs of all completed trades, enabling staff to quickly and efficiently handle any disputes or reports of scams should they arise within support tickets.

### Frequently Asked Questions \[FAQ]

<details>

<summary><strong>Q ~ Are we allowed to access our trade logs in-game?</strong></summary>

**A** \~ *Unfortunately this is not something general players will have access to and is restricted to Admin+ in the case of needing to check through the transaction.*

</details>

<details>

<summary><strong>Q ~ How do I leave the Safetrade menu if I don't want to complete a trade?</strong></summary>

**A** \~ *Leaving the menu is incredibly easy! All you need to do is press **`ESC`** and both players will be removed from the trade.*

</details>

<details>

<summary><strong>Q ~ Will trading pokemon that need to be evolved through Safetrade allow it to evolve?</strong></summary>

**A** \~ *Currently this isn't the case, but we will be looking into this to see if we can implement it or not.*

</details>

<details>

<summary><strong>Q ~ Can one player not provide anything in a trade if both players accept it?</strong></summary>

**A** \~ *Yes, one side is able to provide nothing in return for the trade to be completed if both parties are happy with this. You may end up doing this for payment or even giveaways.*

</details>

<details>

<summary><strong>Q ~ If I send a request which gets accepted while I am in another menu, will I get pushed into the trade?</strong></summary>

**A** \~ *If you send a request and you jump into another menu (i.e. Wondertrade Pool) then the trade will not go through and the other player will be notified that you are currently busy.*

</details>

<details>

<summary><strong>Q ~ I accidentally did a Safetrade and added something I didn't want to add, can I get this back?</strong></summary>

**A** \~ *Unfortunately no since you had already confirmed the trade though the menu which you are able to see clearly what you are offering and what the other player is offering. This would be your fault and they player has the right to refuse to give you it back.*

</details>

<details>

<summary><strong>Q ~ I made a deal with another player, but they keep changing it through the Safetrade menu, what should I do?</strong></summary>

**A** \~ *Luckily with Safetrade both parties need to agree to the trade before it will go through, and you have the 5 seconds to back out of it if you decide it's not fair. If you think the player is trying to scam you then please report it in a Discord support ticket so staff can handle accordingly.*

</details>

<details>

<summary><strong>Q ~ Will trading through Safetrade provide dex entries?</strong></summary>

**A** \~ *Unfortunately trading through Safetrade will not give dex entries as is the case with the Cobblemon base trading system.*

</details>

<details>

<summary><strong>Q ~ Can I send multiple Safetrade requests?</strong></summary>

**A** \~ *Yes you are able to send as many safetrade requests as you like, although only the most recent will be the one that's active. This means if you send a request to a player and then another to a new player, that original player who tries to accept the trade won't end up going through.*

</details>

<details>

<summary><strong>Q ~ How long does a trade request last for?</strong></summary>

**A** \~ *A safetrade request lasts for 2 minutes, so if the player does not accept it after that time then it won't go through.*

</details>

<details>

<summary><strong>Q ~ Can I add crate keys into trades?</strong></summary>

**A** \~ *Unfortunately at this time you are unable to trade keys via Safetrade. Once we implement Physical Keys in a future update you will be able to trade these within Safetrade.*

</details>


# Technical Guide

Here you'll find all of the Technical Guides which players might find useful for accessing stuff outside the main Cobblemon server.

<table data-card-size="large" data-view="cards"><thead><tr><th></th><th data-hidden data-card-target data-type="content-ref"></th></tr></thead><tbody><tr><td>🔗 <strong>Intro to Linking to Discord</strong></td><td><a href="/pages/RdA2Ult1KAHrGsfeqr45">/pages/RdA2Ult1KAHrGsfeqr45</a></td></tr><tr><td>🎫 <strong>Complete Overview of Support Tickets</strong></td><td><a href="/pages/FpVvrRPE2oCJNziD9ijb">/pages/FpVvrRPE2oCJNziD9ijb</a></td></tr><tr><td>📖 <strong>A Complete Guide to Appeals</strong></td><td><a href="/pages/l1hDQ5aLu0GnGsqgjmS2">/pages/l1hDQ5aLu0GnGsqgjmS2</a></td></tr><tr><td>🛒 <strong>A Complete Guide to the Store</strong></td><td><a href="/pages/BIQx5mAY54iHgSdPJQ4f">/pages/BIQx5mAY54iHgSdPJQ4f</a></td></tr><tr><td>📁 <strong>A Complete Guide to Logs</strong></td><td><a href="/pages/EbfdlbOcJjFD1a7E8cnb">/pages/EbfdlbOcJjFD1a7E8cnb</a></td></tr><tr><td>🖋️ <strong>How to Change Minecraft Username</strong></td><td><a href="/pages/AXkANkIlfR6oavlqd9C7">/pages/AXkANkIlfR6oavlqd9C7</a></td></tr></tbody></table>


# Intro to Linking to Discord

Here you'll find out how to link your in-game account to Discord + bonuses for doing so!

**Contents**

* [How to install Discord](#how-to-install-discord)
* [How to link in-game account to Discord](#how-to-link-in-game-account-to-discord)
* [Benefits for linking to Discord](#benefits-for-linking-to-discord)
* [What else is the MMO Realms Discord server useful for?](#what-else-is-the-mmo-realms-discord-server-useful-for)

***

### How to install Discord

The first step understandably is downloading Discord. You can download this directly to your PC/Laptop or you can download it on your phone via the **Google Play Store** or **Apple App Store**.  You can find the download link for computers below:

<table data-card-size="large" data-view="cards"><thead><tr><th></th><th data-type="content-ref"></th></tr></thead><tbody><tr><td><strong>Download Discord for Computers Here!</strong></td><td><a href="https://discord.com/">https://discord.com/</a></td></tr></tbody></table>

Once you have downloaded Discord on your device of choice, the next step you will need to do is **create an account**. You should be able to **do this through the app** itself asking the basic create an account questions you'll see from other apps and websites.

**\*NOTE\*** - It's important to note that **you need to be at least aged 13 or older to use Discord** so if you're below the age of 13 then you will need a parent or guardian to create an account and follow the steps below themselves so you can gain access to the free shiny.

<div align="left"><figure><img src="/files/WnPeG18vqZLNPlK9SDlT" alt="" width="247"><figcaption><p>Create an Account menu on Discord</p></figcaption></figure></div>

Now that you have created an account, you should be able to **log into Discord** and start being able to join different Discord server which is needed for the next steps outlined below.

### How to link in-game account to Discord

Once you have access to a Discord account as well as the app on either your PC, Laptop or Mobile you can now **join our official Discord Server**. You can click the link below in order to join:

<table data-card-size="large" data-view="cards"><thead><tr><th></th><th></th><th data-hidden></th><th data-hidden data-card-target data-type="content-ref"></th><th data-hidden data-card-cover data-type="files"></th></tr></thead><tbody><tr><td><strong>MMO Realms Discord</strong></td><td>Click here to join our Official Discord Server for giveaways, server updates, direct support plus more!</td><td></td><td><a href="https://discord.gg/4pmEJjq6Cu">https://discord.gg/4pmEJjq6Cu</a></td><td><a href="/files/PV7SnEuVJgBtGjk9VRoX">/files/PV7SnEuVJgBtGjk9VRoX</a></td></tr></tbody></table>

Once you're in the Discord server and have gone through the intro of our server (*in order to gain access to roles like notifications to Giveaways and more*) the next step is for you head back onto the server.

Once you're in-game you will want to **run the command** `/discord link` which will bring up text within the chat which will include a **code you will need to note down** as we'll need that for later.

<div align="left"><figure><img src="/files/GNzpk3eAMQTAwabDdfe9" alt=""><figcaption><p>Example of /link being run in-game.</p></figcaption></figure></div>

With that code you will want to **head back over to Discord** and specifically make your way to the [**#🔗-linking**](https://discord.com/channels/1332431737694982209/1332431738609336436) **channel** and **input that code** within the chat box.

<div align="left"><figure><img src="/files/lfeU5hq38N9woTeelGnt" alt=""><figcaption><p>This is how it should look when you're inputting the code into the channel.</p></figcaption></figure></div>

If done correctly you should get notified that you have linked in-game and then both messages will be deleted within the Discord Channel. Congratulations, you have linked your Discord account!

<div align="left"><figure><img src="/files/hWuqn8Df5YLU7C7Q66IQ" alt=""><figcaption><p>Confirmation that you have linked your account.</p></figcaption></figure></div>

You can now **claim your free linking shiny** in-game by either running the command `/kit Discord` or inputting `/kits` and clicking it within the sub-menu.

### Benefits for linking to Discord

Benefits for linking to our Official MMO Realms Discord include:

* **1x Free Shiny** (Redeemable via `/kit Discord` in-game)
* **Linking role** given in the Discord Server.
* Rank roles relating to which **donor rank** you are in-game! (**Still to be implemented**)

### What else is the MMO Realms Discord server useful for?

The Discord server has multiple different things you'll find useful for you if you're planning on playing on our server for the long haul. Benefits to being part of our Discord server include:

* **Direct support** from our Staff Team via our Tickets system (via [#ticket-support](https://discord.com/channels/1332431737694982209/1332431740563755106))
* Notifications for any **Events or Contests** running on the server.
* Get notified for **Updates and Announcements** made on the server.
* **Discord giveaways** for players the chance to earn rewards in-game!
* **Community channels** for you to talk with others, show off your art skills, your pets or speak about other topics altogether!
* **Sneak Peaks** to future content coming to the server!
* **Suggestions** channel for you to make suggestions you would like to see on the server.

Our Discord Server is the best place for players to keep upto date with everything happening with the server so you'll want to join to keep an eye on everything!


# Complete Overview of Support Tickets

Here you can find everything you need to know about creating tickets for support on the server.

**Contents**

1. [Intro](#intro)
2. [What is a Ticket?](#what-is-a-ticket)
3. [How to Make a Ticket](#how-to-make-a-ticket)
4. [What are the different Ticket Categories?](#what-are-the-different-ticket-categories)
   1. [General Support](#general-support)
   2. [Bug Report](#bug-report)
   3. [Realm Issue](#realm-issue)
   4. [Missing Items / Pokemon](#missing-items-pokemon)
   5. [Player Report](#player-report)
   6. [Griefing / Stolen Items](#griefing-stolen-items)
5. [Frequently Asked Questions \[FAQ\]](#frequently-asked-questions-faq)

***

### Intro

If you're reading this guide, then you either need help with making a ticket or just want more information about the ticket process as well as questions you may have about them. **Please be aware that you can only create a ticket within our Discord server** in which you can find a invite link if you ain't already in our server. There is no way to create a ticket without being within our Discord server so if you need to contact staff you'll either have to try in-game, or if you see a staff member online on the forums.

If you are not within our **Discord server** then you can **join via the link provided below**:

{% embed url="<https://discord.gg/muGmwBkAFB>" %}

### **What is a Ticket?**

**A ticket is a system in place where players can have direct contact with multiple staff members for any issues or questions they may have for the server.** This can range from reporting a bug on the server, reporting another player for scamming or harassing, disputing or requesting proof for a punishment given, asking a question about the server or Cobblemon and so on.&#x20;

**Creating a ticket is better than contacting a member of staff directly as any staff member is able to respond to a ticket if one is free as it's part of the responsibilities for staff members.** This means if one staff member has to go away, another staff member can deal with it instead. Tickets will also remain open until it's been dealt with, or if there is no response from you after us trying to contact you. **Please do not create multiple tickets for the same issue as this will only delay things rather than speed up the process for you.**

### **How to Make a Ticket**

When you are in our Discord server, you want to head down the channels until you find a category that's called **Support**, and then click on the channel that's called **#ticket-support**.

<p align="center"><img src="/files/7LRgkRZg0ZQDomMrY9lv" alt=""></p>

Once you click onto **#ticket-support**, you will be greeted with a drop down menu which includes one of 5 different options you can choose from. Please pick the one that is in relation to what you want to create the ticket about.

<figure><img src="/files/fBDvPt9e358bZhs2kE8m" alt="" width="375"><figcaption></figcaption></figure>

Once you have picked a option that's best suited to what you wish to speak to staff about, you will then be given a fill out forum asking for information about yourself, as well as about what you are reporting. **Depending on which option you chose, you may have to give more information** than others like coordinates if you are reporting a grief, or a case ID if you are trying to reclaim a egg lost due to full inventory.&#x20;

Once you have filled it out, you can then select **Submit** in which will create the ticket for you.

<p align="center"><img src="/files/gXWgB2oLTqDbTamt0Byk" alt=""></p>

After clicking **Submit**, your ticket will be created. This ticket, alongside any other active tickets you have open, will be found underneath the support section so that you can keep track of it. Please **keep a close eye on this ticket** as responses will not always be immediate and depending on availability you may have to wait a bit before you receive a response. As long as your ticket is open, you will get a response to it.&#x20;

We do try and @ you in tickets so you know when we are responding but this might not always be the case so it's always a good idea to keep an eye on it in case.

<p align="center"><img src="/files/vAFF68hDa65jGts1s5Je" alt=""></p>

Please keep an eye on the ticket for any responses you get as depending on what the ticket is about, we may ask for more information or files from you for example logs. We will deal with your ticket as soon as we can to the best of our ability but please be aware that our staff team is only voluntary and as a result won't be there to deal with your ticket 24/7. We will let you know about the outcome of your ticket, before we start asking you if there is anything else that you need and if we're free to close the ticket.

### **What are the different Ticket Categories?**

As you may have seen, there are 5 different ticket categories you can pick from when creating a ticket. While yes you can use any of these for any particular reason, to help the process of getting all the corresponding information needed for your ticket so that it can be dealt with as soon as we can, it's advised that you pick the category that's best for you. I will go over each of the ticket categories and what tickets are best being created for it.

#### **General Support**

If you're creating a ticket that does not fall under any of the sections stated below, then please make a ticket for this category. This can be for whatever you need to contact us for, and we will do our best to get back to you. Please make a ticket in this section even if you think it's only minor as our staff will be there to help you to the best of our ability.

Examples for what you may create a ticket for in this section includes but is not limited to:

* Asking a question about Cobblemon or the Server
* Asking for proof about a punishment given to yourself on the server
* Disputing a punishment you have been given on the server
* Reporting a issue with logging into the server (*I.e. Crash, Login error, blocked from a specific realm etc*)
* Asking for a update for an Appeal with 7+ days of no response
* Issues with payments made on our Official Store

#### **Bug Report**

If you want to make a ticket to report a bug or exploit that you have witness on the server, then this is what you want to choose. Please be aware that there is a log of issues with the mod that we're unable to fix ourselves and as such can't take it further but please make a ticket anyway even if you want confirmation this is the case. Please report anything you see or hear as we will do our best to look into it and fix as and when we can.

Examples for what you may create a ticket for in this section includes but is not limited to:

* Reporting a bug or exploit on the server
* Reporting a issue with prices on the server
* Reporting a issue with text or commands on the server
* Reporting issues with new features on the server

#### **Realm Issue**

If you want to make a ticket to report a problem regarding your Realm on the server, then this is what you want to choose. Whilst we are aware of many issues regarding Realms (and actively fixing them), they still appear to be problematic in a few select cases. Luckily these issues are simple fixes in most cases, so by opening a ticket we are able to direct you on getting it resolved with minimal or no loss.

Examples for what you may create a ticket for in this section includes but is not limited to:

* Reporting a Realm that fails to load
* Reporting a Realm that is inaccessible
* Reporting a Realm which has experienced data loss
* Reporting a Realm which is partially or fully corrupted
* Reporting concerns regarding a Realms functionality

#### **Missing Items / Pokemon**

If you want to create a ticket in order to claim back Keys, Eggs or other items/pokemon that you lost due to full inventory, glitches or other issues then this is the section you want to choose. We will do our best to refund you the items to the best of our ability, but please be aware that we may not be able to refund you if insufficient evidence and/or lost due to player error. **You can keep the option for Case Number empty since this isn't applicable for the server.**

Examples for what you may create a ticket for in this section includes but is not limited to:

* Lost egg or key due to full inventory
* Lost pokemon due to bug
* Money/Tokens lost after logging back into the server
* Skins lost on Pokemon when evolving

#### **Player Report**

If you are trying to create a ticket to report another player, then unsurprisingly this is the option you want to pick outside of it being related to anything claim or build related. When you make this ticket, please make sure to provide their full In-Game Name (*Do not provide their Nick*) so that we're easily able to track down the player you wish to report. In these tickets we will ask you for proof so if you have any photos or videos then please provide them otherwise your logs may do the trick. We will then go over all the information we have provided, and punish accordingly.

Examples for what you may report a player for in this section includes but is not limited to:

* Reporting a Scam
* Reporting a Chat Offense (*Racism, Spam, Non-English in Public Chat etc*)
* Reporting a player for harassing you in-game or outside the server
* Reporting a player for cheating or exploiting a bug

#### **Griefing / Stolen Items**

Finally if you are attempting to make a ticket to report a issue with your realm, grief to your realms and/or stolen items within your realms then this is the section you want to choose. When you make this ticket, please make sure to provide the specific coordinates to the claim/grief in question so that a member of staff is able to teleport to the location to look into it for you. We will go over all the block logs, and punish accordingly if applicable to your report or help you to the best of our ability.

Examples for what you may create a ticket for in this section includes but is not limited to:

* Reporting a grief to your realm
* Reporting stolen items from your realm
* Issues with finding your realm
* Rollback/Corruption issues with your Realm
* Reporting a inappropriate build or sign
* Reporting a troll claim

**\*NOTE\*** - Any builds created within the Wilds will be wiped and any players will be able to take from it as we won't refund or punish players for this. Please make sure to keep all builds within your own personal realm or friends realms.

### Frequently Asked Questions \[FAQ]

**Q \~ My ticket got closed and I don't know what happened to it? Can I make another ticket asking about it?**\
A \~ If your ticket was closed without you knowing, then it will have likely been closed due to inactivity. If we respond to you, and there is no response after 24 hours then we will close the ticket due to this. We have transcripts for all tickets so if there is information needed to be recovered then we can do this easily enough.

**Q \~ I want to report a member of the MMO Realms Staff Team. Do I make a ticket in player report?**\
A \~ If you want to report a staff member, then please contact a Head Admin or Manager about it as we do not deal with staff reports in a ticket.

**Q \~ I purchased Gems from the website and haven't got them in-game. How can I get them back?**\
A \~ If you purchased gems from the website but have yet to get them in-game, then make a ticket in the support section and provide all the proof you can for it i.e. Receipt. We will track down the transaction to the best of our ability and fix it for you.

**Q \~ I lost a item(s) due to full inventory. How do I get the items back?**\
A \~ Unfortunately we won't be able refund you these items back due to it being a issue with player error regardless for what is lost.

**Q \~ No one is responding to my Ticket. Can I message or @ staff into the ticket so that I get a response?**\
A \~ Ultimately no you can't, tickets will be dealt with as soon as possible but depending on staff availability due to staff being voluntary as is, you will have to wait until you get a response. As long as your ticket is open, you will get a response as soon as possible.

**Q \~ Can I use a single ticket for multiple reasons, instead of multiple different tickets?**\
A \~ To keep things as easy as possible for staff to deal with tickets and punish accordingly, we only deal with one set of issue per ticket. This means if you want to report a player, but then also report a issue with your realm then you got then you will have to create a new ticket for it.

**Q \~ One of my friends has been punished on the server? Can I ask why they were punished as well as the proof for their punishment?**\
A \~ No, only the player in question is allowed to ask for proof for their punishment regardless if you're close to the player or not. If they can't make a ticket, then they'll have to contact a staff member directly asking for proof or more info about their punishment.

**Q \~ I have linked to the wrong account on the server. Am I able to change it?**\
A \~ Ultimately if you have linked to the wrong discord account then you won't be able to have it moved over I am afraid. The only times we will move a link over for you is if you have lost access to the account that was linked to and are able to provide proof of this.


# A Complete Guide to Supporting Evidence

This guide covers everything you need to know about gathering supporting evidence to assist in tickets, whether that be for reports about bugs, another players actions, or anything in between.

**Contents**

1. [The Purpose of Evidence](#the-purpose-of-evidence)
2. [What Type of Evidence is Needed?](#what-type-of-evidence-is-needed)
3. [How do I gather Evidence?](#how-do-i-gather-evidence)
   1. [Logs](#logs)
   2. [Screenshots](#screenshots)
   3. [Video Recording](#video-recording)

***

### The Purpose of Evidence

Some may wonder why evidence is needed in the first place. To be clear, some types of support tickets will require evidence to be able to be handled by staff, to ensure accuracy in the details provided by the reporter, and to assist staff in reproducing the issue if needed to try and correct it. Some reasons include:

* Player Reports - To be able to issue punishment against any player, staff need clear evidence showing the players actions that broke the rules. This prevents malicious use of staff perms, and ensuring all players are treated fairly.
* Bug Reports - Whilst steps to reproduce may be provided, they are not guaranteed to be sufficient for staff to run into the same bug. Providing evidence of the bug itself shows clearly an issue is present, and may lead to a better understanding on how to reproduce it.
* Missing Items - Similar to reporting a bug, having concrete evidence of items going missing is a clear way to show staff that you are missing out on something as a result of a server fault, and will help in getting the right items returned to you.

### What Type of Evidence is Needed?

When it comes to defining what evidence is relevant, one should consider what they are reporting. Simply the evidence should demonstrate or show what the player would like to report. If they are reporting a player, they must show the players actions that violate server rules. If they are reporting a bug, they must show the bug itself and it's steps / outcome. If they are reporting missing items, they must show what items went missing and how.

As a result, there is no singular clear format that covers everything, as what is needed will vary by situation. However, what is recommended is to focus on video evidence, as this is more likely to pick up relevant details to show staff.

<details>

<summary>Are Staff able to gather Evidence?</summary>

In some cases, yes. Staff have access to additional logging server-side that allow them to review finer details of specific actions between players. However, this does not mean they will always have proof. This is why we strongly urge players to gather their own proof in all cases, even if they think staff might have enough.&#x20;

</details>

{% hint style="info" %}
Evidence supplied must be relevant to the situation you are reporting. This means it should either clearly show the exact issue and how it happened, or even something recent to just before the issue happened (note this may not be sufficient for **all** problems being reported).\
\
The time for which evidence is considered "recent" varies drastically based on the specific issue, but something around 2 weeks or newer is a good time to aim for.
{% endhint %}

### How do I gather Evidence?

Luckily, there are many ways for players to gather evidence of their own without the need for specalist paid software, in-fact, some even come preinstalled into all major operating systems.

#### Logs

Logs are a set of files created by Minecraft during play that record everything happening within your in-game chat. As a result, they are very handy in reviewing what had happened earlier, and to show anything either another player had said, or feedback from the server resulting from certain actions, such as AH sales.

There is a guide covering logs in great detail available [here](/cobblemon-wiki/technical-guide/a-complete-guide-to-logs).

<figure><img src="/files/XD5M3RNQfrZBRVHxVepM" alt=""><figcaption><p>Ex of Logs Folder with Dated Logs</p></figcaption></figure>

#### Screenshots

All major operating systems come with screenshot capabilities baked into the operating system. There are a few ways to gather them.

<details>

<summary>Print Screen</summary>

Many keyboards come with a key labelled "Prnt Scr", standing for print screen. Pressing this will take a screenshot of everything currently visible on your screen, which can then be pasted into other apps through use of `Ctrl` + `V`

On certain operating systems, the key can be reassigned to run Snipping Tool instead.

<figure><img src="/files/NtKtyCKpxWfm8yVdIT8j" alt="" width="563"><figcaption><p>Windows 11 settings for Print Screen reassignment</p></figcaption></figure>

</details>

<details>

<summary>Snipping Tool</summary>

Snipping tool is an app that comes preinstalled on Windows devices, allowing for more customisability in what is included within a screenshot, and how to export it.&#x20;

<figure><img src="/files/ut1UBUGGswgnb8DiFfcJ" alt="" width="563"><figcaption><p>Snipping Tool App</p></figcaption></figure>

Upon opening the app, select "New" and drag your cursor across the screen, covering everything you would like to be included. Afterwards, the image of what you had snipped will appear in the window, and can be annotated, copied, or saved as a file.

<figure><img src="/files/h1z7TaPEAgBQmAcgJEOL" alt="" width="563"><figcaption><p>Snipping Tool App with Image</p></figcaption></figure>

Alternatively, there is a keybind which allows for snipping tool to be run without opening the app, and automatically copies any snipped image to your devices clipboard, allowing it to be pasted elsewhere. This keybind is `Windows` + `Shift` + `S`

</details>

<details>

<summary>Third Party Apps</summary>

Third party apps offering similar functionality exist, however are generally not recommended unless they offer a unique feature you plan on using, since the two methods mentioned above are generally sufficient for all cases of image evidence.

</details>

#### Video Recording

Video recording is generally recommended to players by staff for all situations. It gathers much more detail than other options, and can always be trimmed down, or even screenshot later if the whole recording is not needed.

Specifically, certain software allow the user 'clip past gameplay'. This means that with the software running, as soon as an issue occurs the user can press a preset keybind to save everything recorded within the past 60 seconds (or whatever buffer time is set). This ensures players only save relevant video, without filling up an otherwise limited storage. This functionality comes in a few different pieces of software, however popular free options include:

<details>

<summary>OBS</summary>

Open Broadcaster Software is widely known for use in hosting streams, however also supports the ability to record locally, and with the playback option. It can be downloaded from their website, <https://obsproject.com/>

Once setup, use the follow steps to create a profile for playback recording.

1. At the bottom of the screen, select `+` within the sources tab.&#x20;

<figure><img src="/files/JbtMUsKeBVqTSK75Lrs7" alt="" width="563"><figcaption></figcaption></figure>

2. Select either `Display Capture` if you would like to record all windows open on a specific monitor, or `Window Capture` if you would like to only record one window, such as Minecraft or Discord.

<figure><img src="/files/bAbExKJv7BbsdD6Vb5Dr" alt="" width="440"><figcaption></figcaption></figure>

3. Grant the capture a name (this has no relevance on the output, just how it shows up within OBS).
4. Select either the Display or Window you would like to capture. Capture method should be kept on automatic unless you are facing difficulties in viewing an output. If available, enable `Capture Audio` as this ensures audio is saved within the recording without the need of setting up another capture.

<figure><img src="/files/PBoDUpyCUjy2aAL91zey" alt="" width="563"><figcaption></figcaption></figure>

5. Head to `File` -> `Settings` -> `Output`, and scroll down until you see `Replay Buffer`. Here you can set how long back you want the recording to save, note that increasing the time length, or resolution of the video will require additional memory to remain stable. Unfortunately we cannot recommend a balance that suits everyone, so it's worthwhile to experiment here to find what works for your system.

<figure><img src="/files/lcC9v6pQTvbrz2jRwk2u" alt="" width="563"><figcaption></figcaption></figure>

6. Finally, you are able to record using the playback feature. At the home page of OBS, under the controls submenu there will be an option to `Start Replay Buffer`. Once running, the download symbol can be used to save any recent gameplay to your device.

<figure><img src="/files/yASLR36GQOcFAmbk5VSf" alt="" width="375"><figcaption></figcaption></figure>

<figure><img src="/files/BpKk1hwbujXU6R68J4Hx" alt="" width="375"><figcaption></figcaption></figure>

</details>

<details>

<summary>Medal</summary>

Medal is very similar in functionality, with greater focus on the playback system to allow for quick clipping with use of a keybind. It can be downloaded from their website, <https://medal.tv/>

Once setup, use the follow steps to create a profile for playback recording.

1. Upon launch, Medal will begin to search for a suitable game to begin recording. If no game is found, or the user would prefer to record everything, they can select `Desktop Capture` instead.

<figure><img src="/files/3keSildPUcOw7ykgpWU1" alt="" width="540"><figcaption></figcaption></figure>

2. Within the clip settings, the user can set a keybind so save recent clips, as well as how long the replay buffer should last.

<figure><img src="/files/e6XEBUgqGGvFMuJcEozu" alt="" width="563"><figcaption></figcaption></figure>

3. The quality may be adjusted to define how clear the output should be, along with audio settings to ensure relevant sounds are picked up.

<figure><img src="/files/5PdB7pmuTqh1GwSTGRUX" alt="" width="563"><figcaption></figcaption></figure>

<figure><img src="/files/8k5A3p46lZZxkorS7bIk" alt="" width="563"><figcaption></figcaption></figure>

</details>


# A Complete Guide to Appeals

In this guide you'll find everything you need to know about creating appeals, and how to get yourself unbanned or unmuted.

If you're reading this Guide, then you've likely got banned or muted on either the Discord server or the Cobblemon server and are now trying to figure out how to get yourself unbanned. The process is pretty straight forward however there is a lot of common mistakes we are seeing when it comes to people making appeals which ultimately get denied. Lets start off with the basic process on how to make an appeal.

**Contents**

1. [Process of Making an Appeal](#process-of-making-an-appeal)
2. [Frequently Asked Questions \[FAQ\]](#frequently-asked-questions-faq)

***

### Process of Making an Appeal

Currently all appeals are dealt with via a **thread** on our **Forums**.

{% embed url="<https://forum.mmorealms.gg/>" %}

There are different sections based on what exactly you are appealing. It is **vital** that you create your appeal in the right section so that it may be considered, as the questions may vary between sections, so failing to do so would lead to non relevant questioning. For simplicity, you may use the links below which direct to the specified sections.

* [Ban Appeals](https://forum.mmorealms.gg/t/ban-appeal)
* [Mute Appeals](https://forum.mmorealms.gg/t/mute-appeal)

Prior to making an appeal, you will need to create an account on the Forums.

<figure><img src="/files/p0uBkaUPJkU6gNZ4T235" alt="" width="563"><figcaption></figcaption></figure>

Afterwards, it's as simple as navigating to the relevant section, and selecting `Start a Discussion`.

<figure><img src="/files/G1g5tR78VLK5vuJJD6eP" alt="" width="563"><figcaption></figcaption></figure>

Then filling in the responses to all proposed questions.

<figure><img src="/files/k7h4xYshwgx78cHGO7fL" alt="" width="563"><figcaption></figcaption></figure>

### Frequently Asked Questions \[FAQ]

**Q \~ Hey I have been banned but I didn't do anything wrong. Should I create an appeal and dispute it there? Where can I see proof of my ban?**\
**A \~** *If you think your ban is unjust then you will have to make a ticket within our Discord Server in which we can easily discuss the punishment with you and provide the proof if you require it.*\
\
**Q \~ My ban is only temporary (*****set amount of days*****). Can I appeal it to get unbanned sooner?**\
**A \~** *If your ban is only temp, then you will unfortunately not be able to appeal it as it will just be denied. You will have to wait out your ban like everyone else. Appeals are only for permanent Discord or Cobblemon bans.*\
\
**Q \~ How long does it take to get a response to my Appeal?**\
**A \~** *You should get a response to your appeal within a few days. If you have not had a response after 7 days then you're best making a ticket within our Discord server and asking for an update to your appeal.*\
\
**Q \~ Will I lose my Pokemon/Items after getting banned on the server?**\
**A \~** *It depends on what you're being banned for, but regardless you won't get a complete wipe. For example if you have been banned for X-Ray then we will likely remove anything associated with mining or dungeons, even if you got them legit. If you get banned prior a reset and you appeal after it, then you will be reset like everyone else.*\
\
**Q \~ I have had my main and alt(s) account banned for using Alts for Personal Gain. Am I able to get all the accounts unbanned?**\
**A \~** *You will be able to have your main account unbanned, however any alts (regardless if it's someone else's or not) will remain banned without any chance of getting unbanned.*\
\
**Q \~ My ban states (No Appeal) at the end of it. Am I still able to appeal?**\
**A \~** *If you get a No Appeal ban (which is usually only given on repeated offense after an initial ban + appeal) then that means there is no possibility for you to be unbanned on the server. Any appeals you create will either be denied, deleted or straight up ignored.*\
\
**Q \~ Can I appeal my Discord and Pixelmon bans within one Appeal?**\
**A \~** *If you want to be unbanned on both the Cobblemon and Discord servers then you will need to make a separate appeal for each ban in which you show understanding about why you got banned and that you won't do anything like this again. If you make an appeal for both, then only one of the bans will be dealt with within the appeal.*\
\
**Q \~ My Appeal keeps getting denied. What am I doing wrong?**\
**A \~** *If you keep getting denied, then you are either not being 100% truthful about your actions and/or are missing stuff out. We will leave a response to your appeal if it's been denied stating why this is the case. Make sure to take notes of this and make a new appeal with it. Disputing your appeal within the appeal itself and/or blaming others is also going to get your appeal denied since that isn't the place for them. If you are disputing the appeal and/or reporting someone else then you will need to make a ticket within our Discord server.*\
\
**Q \~ I have been banned for Chargeback. How do I appeal it?**\
**A \~** *If you have been banned for Chargeback then you will have to make a ticket within our Discord server as we will need to get more information from you as these will ultimately be dealt with by the owner due to the nature of the bans.*


# A Complete Guide to the Store

If you're reading this guide, then you either need help with making purchase, purchases issues you are having or just want some more information about the store.

**Our store provider in which we use for the server is Tebex**, and while for the most part purchases will go through fine with no issues there are times where you may not be able to make a purchase and/or purchases have gone through yet you have not received your gems. I'm going to make this guide to go over everything about the store which you can access on the store, as well as potential fixes to issues players have via a FAQ.

**Contents**

1. [How to Access the Store](#how-to-access-the-store)
2. [How to Make a Purchase](#how-to-make-a-purchase)
3. [What are Gem Subscriptions](#what-are-gem-subscriptions)
   1. [How to cancel Subscriptions](#how-to-cancel-subscriptions)
4. [Frequently Asked Questions \[FAQ\]](#frequently-asked-questions-faq)

***

### How to Access the Store

You can access the store using the following link:

{% embed url="<https://store.mmorealms.gg/>" %}

Once you have made any purchase, you will get these purchases on the server within 5-10 minutes from your purchase time. You will be able to access `/store` to use your Gems if you purchased these from the store.

### How to Make a Purchase

Once you are on the store page, click the **Login** button located at the top right of the screen. Enter your Minecraft IGN (this is **not** your /nick or your real name). Using anything other than your actual **IGN** may prevent your purchases from appearing in-game and could require submitting a ticket to resolve the issue. After entering your **IGN**, click the green **Login** button to access the store.\
![](/files/C6xT0LXtdzYP0xwBrgBs)

Once you reach the next page, click on the **Menu** option on the left side of the store, then select the category from which you wish to make a purchase to open the corresponding page. **\[AT THIS TIME, YOU CAN NOW ONLY PURCHASE GEMS]**

<div align="left"><figure><img src="/files/NVpb8ESwmC9ii04FouqS" alt="" width="563"><figcaption></figcaption></figure></div>

Alternatively, if you are on the webpage and do not see the **Menu** option as shown in the screenshots above, you should instead see the page categories listed directly within the same bar, as illustrated in the screenshot below:

<figure><img src="/files/fmTm1AOBMhCbkY1Lj9HI" alt=""><figcaption></figcaption></figure>

Once you are on the **Respective Store** page, select the package you wish to purchase and add it to your cart. This will take you to a new page where you’ll need to choose the realm you play on. After selecting your realm, click **Add to Cart** to place the package in your cart.

Repeat this process for any additional packages you would like to purchase. When you’re satisfied with your selections, click the **Cart** icon in the top right corner, followed by **Checkout**.

<div align="left"><figure><img src="/files/YvIMGRhXcih63YHERBVq" alt="" width="257"><figcaption></figcaption></figure></div>

If this is your first purchase on the server, you can use the coupon code **`15OFF`** to receive 15% off your order. Any other coupon codes you may have can also be entered here to apply discounts to your purchase.

Once you’re satisfied with your selection, click **Pay Now**, which will take you to the payment page. Choose the payment method you would like to use and enter your contact information. After completing your payment, if it is successful, you will be taken to an order confirmation page that includes an Order Number, similar to the example shown below:

<div align="left"><figure><img src="/files/0XalskSIb1PIByTOK01A" alt=""><figcaption></figcaption></figure></div>

Once your payment has gone through, you should receive your purchase on the server within a few minutes. A message will appear in chat confirming your donation, after which your items will be delivered to you.

### What are Gem Subscriptions?

<mark style="color:red;">**NOTE: GEM SUBSCRIPTIONS HAVE BEEN REMOVED FROM THE STORE, INFORMATION WILL BE RELEVANT BELOW IF YOU'RE TRYING TO CANCEL AN ACTIVE SUBSCRIPTION.**</mark>

There are two types of payments you can make on the store. The first is **one-time purchases**, where you pay only once for the item. The second is **Gem subscriptions**, which automatically charge the payment method you used each month, delivering your Gems in-game on the scheduled date. Subscribing also gives you Gems at a discounted rate compared to purchasing them through one-time packages.

#### How to Cancel Subscriptions

If you wish to cancel one of these subscriptions, you will need to do so directly through **Tebex**. The process is very simple and only requires the email you used for the original payment.

When you purchase a subscription, **Tebex** will show you the date of your next payment, and from that same page you can access your Payment History — which is what you’ll need if you decide to cancel your subscription. You can see an example of this in the screenshot below:

<figure><img src="/files/hS9gCXpBV2miCvgDP1bg" alt="" width="563"><figcaption></figcaption></figure>

If you no longer have access to this page but need to check your payment dates or cancel your subscription, you can use the link below to view your payment history. Simply enter the email used for the purchase, and Tebex will send you an email with a link that provides direct access to all of your payment history.

{% embed url="<https://checkout.tebex.io/payment-history>" %}

Once you have opened the email and accessed your recent purchases, navigate to the **Subscriptions** tab. This will take you to a page displaying all subscriptions made through any Tebex store. If done correctly, the page should resemble what is shown in the screenshot below:

<figure><img src="/files/mT7CzzOOKeZ8j4KRJy7E" alt=""><figcaption></figcaption></figure>

From there, simply click **Manage** on the subscription you wish to cancel. In the menu that appears, select **Cancel**, and you will be prompted to provide a reason for the cancellation.

<figure><img src="/files/oa3qaCNrpRohGHHxzAtT" alt=""><figcaption></figcaption></figure>

Once you have completed all of these steps, your subscription should now be cancelled. You can confirm this by checking that it now shows **Renew** for the subscription you ended, in case you decide to restart it in the future. Here is what a cancelled subscription will look like:

<figure><img src="/files/PNiTSoQAoYjCKx1Fk7pi" alt=""><figcaption></figcaption></figure>

There is no minimum number of months you are required to pay before cancelling your subscription, meaning you are free to cancel at any time.

### Frequently Asked Questions \[FAQ]

**Q \~ I want to make a purchase, but the payment method I want to use isn't listed. Am I able to use my payment method to make a purchase?**

**A \~** *Ultimately no, if your payment method is not listed then there isn't any way around for you to use that payment method either directly through the server or the server.*

**Q \~ My Payment method keeps getting declined, why is this the case? Any way I can help make the purchase go through?**

**A \~** *Your payment may keep getting declined for a number of reasons like not enough money in your payment method, your bank provider does not authorize the payment due to scam prevention, your payment method isn't compatible with the store (I.e. Visa Prepaid Card) and so on. You may want to try using another payment method if you have the money but it still does not go through and/or use Paypal in which you can add a balance to your Paypal account in which you make a purchase with that.*

**Q \~ My purchase has gone through, yet I have not got the purchase in-game?**

**A \~** *Please be aware the purchase may take a few minutes to go through, but if you still do not receive it then you may have put wrong information within the purchase. Jump into every realm to confirm that you have not accidentally purchased it for another realm as otherwise you are best making a ticket via our Discord server in which we can help you out further to get to the bottom of it.*

**Q \~ My transaction did not go through on the server, yet money was taken from my bank. Can I get my money back?**

**A \~** *If money has been taken from your bank despite the fact the payment was declined for whatever reason, you should receive the payment back to you over the next couple of days. If this is not the case you will have to contact Tebex further in order to try and get your money back as it's not an issue we're able to help with further other than confirming it was declined via a ticket.*

**Q \~ I don't play on the server anymore and want to get a refund for my purchases, how do I get my money back?**

**A \~** *All purchases made on the store are final, meaning there is no way for you to be given a refund for the purchases you have made regardless if you have stopped playing, have been banned, accidental purchase and so on.*

**Q \~ The 15OFF code does not work despite the fact I have not made a purchase on the server, why is this the case?**

**A \~** *If you are no longer able to claim the 15OFF coupon then you will have either already made a purchase in the past and/or you've attempted to make a purchase with the coupon which got declined. If you have had the latter happen to you, then you can make a ticket for a HA+ to look into it to potentially give you a fresh coupon to use on the server however if the same thing happens again after the new code being given to you then a new one will not be issued.*

**Q \~ I put the wrong IGN for the purchase, can I get this fixed?**

**A \~** *If you accidentally put the wrong name when purchasing from the Store, you can make a ticket via our Discord server for a HA+ to help fix the purchase for you.*

**Q \~ Can I make a purchase for another person by putting their IGN into the store instead?**

**A \~** *Yes you are able to make purchases for other players, you can put their IGN into the store for them to recieve them in-game!*

**Tebex Support if needed:** <https://www.tebex.io/support>


# A Complete Guide to Logs

In this guide you'll find out everything needed when it comes to log, and most importantly how to access them.

**Contents**

1. [What are Logs?](#what-are-logs)
2. [How can I access them?](#how-can-i-access-them)
   1. [Modrinth Launcher](#modrinth-launcher)
   2. [Curseforge Launcher](#curseforge-launcher)
   3. [Minecraft Launcher](#minecraft-launcher)
   4. [Prism Launcher](#prism-launcher)

***

## What are Logs?

Logs are information that are saved locally on your computer storing all information from your latest minecraft session. Information usually stored in here is all your messages, messages recieved from players, any chat you recieved i.e from crates, pokemon and so on. You will only need logs when requested by staff within a ticket to help you out further for the issue reported.&#x20;

You **won't be able to open these logs** without having a **.zip application**, but if you're just sending logs over this isn't fully needed for you to install as staff can handle looking through the logs themselves.

**7-Zip Download**: <https://www.7-zip.org/download.html>

## How can I access them?

Depending on the launcher you are using to play on our server will have their own way to access the logs needed. Here is a couple launchers players typically use and how to access the logs from them.&#x20;

### Modrinth Launcher

Open up your Modrinth launcher and head over to the **MMO Realms** (*or other Modpack you are playing*) and next to the play button will be **three dots on top of each other** which once pressed will bring up a drop down menu in which you will want to click on `Open Folder`.

<figure><img src="/files/mE9T5jwXtYg6i3pIj7y0" alt=""><figcaption><p>Ex of MMO Realms Modpack via Modrinth Launcher</p></figcaption></figure>

This will open the Modpack folder and from there all you need to do is **open the Logs folder** which will show you all logs you have created on this launcher.

<div align="left"><figure><img src="/files/mqKjvmSPutW3w4l1JbhO" alt="" width="483"><figcaption><p>Ex of MMO Realms Modpack Folder via Modrinth</p></figcaption></figure></div>

You'll want to **send over the log(s)** from the **date from the incident** reported within the ticket.&#x20;

<div align="left"><figure><img src="/files/z4AZpoaAM5p3o52T9rRT" alt="" width="499"><figcaption><p>Ex of Logs Folder with Dated Logs</p></figcaption></figure></div>

Once you have **sent the logs over within the ticket**, then that it's all sent unless staff request more logs.

### Curseforge Launcher

Open up your Curseforge launcher and head over to the **MMO Realms** (*or other Modpack you are playing*) and next to the play button will be **three dots on top of each other** which once pressed will bring up a drop down menu in which you will want to click on `Open Folder`.

<figure><img src="/files/pEBIS0LhwDrz6g47AOzf" alt=""><figcaption><p>Ex of MMO Realms Modpack via Curseforge Launcher</p></figcaption></figure>

This will open the Modpack folder and from there all you need to do is **open the Logs folder** which will show you all logs you have created on this launcher.

<div align="left"><figure><img src="/files/il78VfZg0RImFryDP9cM" alt="" width="489"><figcaption><p>Ex of MMO Realms Modpack Folder via Curseforge</p></figcaption></figure></div>

You'll want to **send over the log(s)** from the **date from the incident** reported within the ticket.&#x20;

<div align="left"><figure><img src="/files/pFdNmiVg2c6qnliEql11" alt="" width="497"><figcaption><p>Ex of Logs Folder with Dated Logs</p></figcaption></figure></div>

Once you have **sent the log over within the ticket**, then that it's all sent unless staff request more logs.

### Minecraft Launcher

Within your **Windows Search Bar**, you want to type the following `%appdata%` and open the folder that appears.

<figure><img src="/files/qPKfDrF8spriapRxYZuy" alt=""><figcaption><p>Ex of Windows Search Bar</p></figcaption></figure>

<figure><img src="/files/swBZ41oAmoFRi4yjsnG9" alt=""><figcaption><p>Ex of <code>%appdata%</code> folder when searching for it via Windows Bar</p></figcaption></figure>

Once you have opened the folder, you will want to **open the** **.minecraft** **folder** and from there all you need to do is **open the Logs folder** which will show you all logs you have created on the Minecraft launcher.

<div align="left"><figure><img src="/files/y08nn6uiLKnCagRXeRVK" alt="" width="486"><figcaption><p>Ex of Minecraft Launcher Folder</p></figcaption></figure></div>

You'll want to **send over the log(s)** from the **date from the incident** reported within the ticket.&#x20;

<div align="left"><figure><img src="/files/WlAgOS2eJJVFAmXDopC0" alt="" width="506"><figcaption><p>Ex of Logs Folder with Dated Logs</p></figcaption></figure></div>

Once you have **sent the log over within the ticket**, then that it's all sent unless staff request more logs.

### Prism Launcher

Open up your Curseforge launcher and head over to the **modpack you are playing** and `Right Click` **on the modpack** which will bring up a drop down menu in which you will want to **click on** `Folder`.

<div align="left"><figure><img src="/files/DvbSfLIAIYMCGWPr6ez4" alt="" width="563"><figcaption><p>Ex of Modpack via Prism Launcher</p></figcaption></figure></div>

This will open the Modpack folder in which you **want to open the minecraft folder** then all you need to do is **open the Logs folder** which will show you all logs you have created on this launcher.

<div align="left"><figure><img src="/files/dX33Yhc5kOrHnUMKt471" alt="" width="513"><figcaption><p>Ex of Modpack Folder via Prism Launcher</p></figcaption></figure></div>

You'll want to **send over the log(s)** from the **date from the incident** reported within the ticket.&#x20;

<figure><img src="/files/DONIgGE5mefjkhwV0oRH" alt=""><figcaption><p>Ex of Logs Folder with Dated Logs</p></figcaption></figure>

Once you have **sent the logs over within the ticket**, then that it's all sent unless staff request more logs.


# How to Change Minecraft Username

This guide will go over everything you need to know when it comes to updating your username relating to your Minecraft Account.

**Contents**

1. [Introduction](#introduction)
2. [How to Change Username](#how-to-change-username)
3. [Why don't we allow certain usernames?](#why-dont-we-allow-certain-usernames)

***

### Introduction

This guide covers everything you need to know about changing your Minecraft username. Whether you’re doing it by choice or need to update it to play on the server as told by a member of the staff team. It also explains why certain usernames aren’t allowed, helping everyone better understand the rules we in place on the server.

It's worth noting that your name change will be reflected on any other server you join after you have updated it.

### How to Change Username

To change your username, head to the official Minecraft website and log in using your current account. You can access it using the link below:

{% embed url="<https://www.minecraft.net/en-us/msaprofile>" %}

From there, you’ll see a **Minecraft: Java** section with an option labelled **Change Profile Name**. Select this option to update your username.

<figure><img src="/files/BcdF6skqlahwtyFq0LYF" alt="" width="563"><figcaption></figcaption></figure>

You'll be taken to a brand new page where you can input a brand new name and, assuming that name hasn't already been taken, once submitted you will have the brand new username the next time you log in.

<figure><img src="/files/R7ElSPu7t08nckkcA0rZ" alt="" width="445"><figcaption></figcaption></figure>

It’s worth keeping in mind that once you change your username, **you won’t be able to change it again for 30 days**. Because of this, make sure your new name follows the server rules as choosing an inappropriate username could result in a ban until you’re able to change it again.

### Why don't we allow certain usernames?

Our server is PG-13 meaning, while we do allow some certain language on the server, we have to implement some limits to this for the safety of all players involved. Due to this any form of inappropriate name, regardless if it's meant to be inappropriate or not, will also be included with this.

We **do not provide nicknames** for players with inappropriate usernames since their official username remains visible to others in the tab list, auction house listings, private messages and other similar areas.


# FAQ (Frequently Asked Questions)

Here you can find all of the frequently asked questions given to you on the server with the answers to them.

<details>

<summary><strong>Frequently asked Questions</strong></summary>

* [How can I create my own realm?](#how-can-i-create-my-own-realm)
* [Are there any Gyms on the server?](#are-there-any-gyms-on-the-server)
* [Why isn't (*insert feature here*) implemented on the server?](#why-isnt-insert-feature-here-implemented-on-the-server)
* [When will the server come out of BETA?](#when-will-the-server-come-out-of-beta)
* [How do I earn Pokecoins or Gems?](#how-do-i-earn-pokecoins-or-gems)
* [How do I claim my starter?](#how-do-i-claim-my-starter)
* [Can I build within the Wilds?](#can-i-build-within-the-wilds)
* [Where does X pokemon spawn?](#where-does-x-pokemon-spawn)
* [How do I join the staff team? Are there any perks?](#how-do-i-join-the-staff-team-are-there-any-perks)
* [How do I open crates on the server?](#how-do-i-open-crates-on-the-server)
* [How can I speak with my friends in-game?](#how-can-i-speak-with-my-friends-in-game)
* [How do I sell Items or Pokemon on the Auction House?](#how-do-i-sell-items-or-pokemon-on-the-auction-house)
* [How do I link my account to Discord?](#how-do-i-link-my-account-to-discord)
* [Do legendries/mythicals spawn? How do I get them?](#do-legendries-mythicals-spawn-how-do-i-get-them)
* [How do I give a pokemon a held item?](#how-do-i-give-a-pokemon-a-held-item)
* [Why won't it let me give my pokemon a Held Item?](#why-wont-it-let-me-give-my-pokemon-a-held-item)
* [How do I get a new rank on the server?](#how-do-i-get-a-new-rank-on-the-server)
* [How do I extend the size of my realm?](#how-do-i-extend-the-size-of-my-realm)
* [How do I switch between Pokemon and throw/retrieve them from their poke ball?](#how-do-i-switch-between-pokemon-and-throw-retrieve-them-from-their-poke-ball)
* [How do I enter the wilds or explore the world?](#how-do-i-enter-the-wilds-or-explore-the-world)
* [How do I heal my party and see pokemon within my PC?](#how-do-i-heal-my-party-and-see-pokemon-within-my-pc)
* [How do I teleport to my friends?](#how-do-i-teleport-to-my-friends)
* [How do I add people into my realm?](#how-do-i-add-people-into-my-realm)
* [Do I lose items when I die? Are there monsters or hostile mobs?](#do-i-lose-items-when-i-die-are-there-monsters-or-hostile-mobs)
* [How do I make my party show on the side of the screen again? Can I hide this?](#how-do-i-make-my-party-show-on-the-side-of-the-screen-again-can-i-hide-this)
* [How do I access the end or nether?](#how-do-i-access-the-end-or-nether)
* [How do I get more pokeballs?](#how-do-i-get-more-pokeballs)
* [What are shinies? How will I know if I have found a shiny? Is there a way to find them easily?](#what-are-shinies-how-will-i-know-if-i-have-found-a-shiny-is-there-a-way-to-find-them-easily)
* [What is the server IP?](#what-is-the-server-ip)
* [Can I install different mods to the server?](#can-i-install-different-mods-to-the-server)
* [How can I hide my scoreboard?](#how-can-i-hide-my-scoreboard)
* [My realm has completely changed biome? How can I fix this?](#my-realm-has-completely-changed-biome-how-can-i-fix-this)

</details>

***

### How can I create my own realm?

Creating your own realm is incredibly easy! We actually have a in-depth guide where it goes over everything you need to know about Realms from creating them as well as all relevant commands. You can access it here:

<table data-card-size="large" data-view="cards"><thead><tr><th></th><th data-hidden data-card-target data-type="content-ref"></th></tr></thead><tbody><tr><td>🪴 <strong>Realm Guide</strong></td><td><a href="/pages/9bw29qS5cBSGkQyvP3BJ">/pages/9bw29qS5cBSGkQyvP3BJ</a></td></tr></tbody></table>

### Are there any Gyms on the server?

Yes, there are Gyms you can challenge and earn rewards for on the server. You can start challenging these via the command `/gyms`. To learn more about Gyms you can use the following link:

{% embed url="<https://wiki.mmorealms.gg/cobblemon-wiki/general-guides/complete-overview-to-npc-gyms>" %}

Players in-game have created their own un-official gyms that players are free to fight and possibly earn some rewards from doing so. This isn't something we monitor so please be aware these will range in difficulty as well as availability.

### Why isn't (*insert feature here*) implemented on the server?

The server is still in BETA with loads of features to be implemented on the server like with Warzone, Playtime Rewards, Battletower plus many many more. We're trying to push new content on a regular basis but please bare with us as we implement things since this may take time.

### When will the server come out of BETA?

This isn't something we can answer as of now due to a number of factors. The main goal for us right now is to get all of the main features and functions implemented on the server in a stable and polished state. Some of these things take time to implement from creating, testing and then polishing it. We're listening to all feedback given to us and we're tweaking everything as we go along so it's something perfect for all players. We're hoping to be out of BETA by the end of the year as this could be sooner than we hope, it could also a bit longer.

Whenever we have decided it's time to come out of BETA this will be officially announced within our Discord server so make sure to be within these to keep an eye out for that and other announcements.

### How do I earn Pokecoins or Gems?

There is multiple ways for players to earn both Pokecoins and Gems. You can easily find out how by accessing our guides respective to both of them here:

<table data-card-size="large" data-view="cards"><thead><tr><th></th><th data-hidden data-card-target data-type="content-ref"></th></tr></thead><tbody><tr><td><strong>💲 Intro to Earning Pokecoins</strong></td><td><a href="/pages/zLm5yxItyG8OOWJm7CVB">/pages/zLm5yxItyG8OOWJm7CVB</a></td></tr><tr><td>💎 <strong>Intro to Earning Gems</strong></td><td><a href="/pages/xwltUN1AddGQNY5OxZmo">/pages/xwltUN1AddGQNY5OxZmo</a></td></tr></tbody></table>

### How do I claim my starter?

In order to claim your starter on the server, press the `M` button while your party is empty which will bring up a start selection screen for you to choose the start you wish to obtain. You will only be able to claim one starter so be sure to choose wisely.

<div align="left"><figure><img src="/files/DvJlckrdzdxVGyPCqNJu" alt=""><figcaption></figcaption></figure></div>

### Can I build within the Wilds?

It's **highly recommended that you do not build within any of the wilds** as these are **frequently updated which will wipe any builds** within there. Please make sure to build within your realms so that you don't lose anything you have build or stored on the server as that'll be the only place you can save these.

### Where does X pokemon spawn?

You can find out all information relating to pokemon spawns on the server via the list we have pushed within the Wiki. You can access them here:

<table data-view="cards"><thead><tr><th></th><th data-hidden data-card-cover data-type="files"></th><th data-hidden data-card-target data-type="content-ref"></th></tr></thead><tbody><tr><td>🌳 <strong>General Pokemon Spawns</strong></td><td><a href="/files/z8PLIOjBr4wLtRuhMUI7">/files/z8PLIOjBr4wLtRuhMUI7</a></td><td><a href="/pages/ooXag4X9v0BgELF5b3ml">/pages/ooXag4X9v0BgELF5b3ml</a></td></tr><tr><td>🐉 <strong>Legendary and Mythicals Spawns</strong></td><td><a href="/files/s3Sdc5NveXh0ybSRhI9D">/files/s3Sdc5NveXh0ybSRhI9D</a></td><td><a href="/pages/Pdj36wXa5OJ31QESKvar">/pages/Pdj36wXa5OJ31QESKvar</a></td></tr><tr><td>🌌 <strong>Ultra Beasts and Paradox Spawns</strong></td><td><a href="/files/ltj2JBWDAit3p2xJpLfU">/files/ltj2JBWDAit3p2xJpLfU</a></td><td><a href="/pages/JmSW8PfiF1kk72CYPRX5">/pages/JmSW8PfiF1kk72CYPRX5</a></td></tr></tbody></table>

### How do I join the staff team? Are there any perks?

You can easily join the staff team through our Discord server by creating a ticket via [#ticket-support](https://discord.com/channels/1332431737694982209/1332431740563755106) and asking for an application. This will eventually be pushed into our Forums for a more streamlined experience. Requirements for joining the staff team are as follows:

* At least **24 hours** of playtime within the current reset.
* **Aged 16** or over.
* Have access to a **Microphone**. (*required for Interview process*)
* No form of **Ban or Permanent Mute** within the **past 2 months**.
* **No active Ban or Mute** (*Appealable or Not*) on the server.

Being part of the staff team means you're able to help monitor the community and grow it into a better place for all players. While part of the staff team you can get access to staff exclusive giveaways, rewards based on staff activity plus access to commands general players won't get access to.

### How do I open crates on the server?

In order to open crates on the server, you will first need to get access to the crate keys. You can obtain these from using Gems which are obtained from multiple means via our Official Store, Pokedex Rewards, Daily Spin plus more. You are able to keep track of any keys you currently have via `/crates` and hover over the respective crate.

<div align="left"><figure><img src="/files/M7PIpyKQ24JL4cCPj44d" alt="" width="324"><figcaption><p>Crates GUI via <code>/crates</code></p></figcaption></figure></div>

If you have the gems needed or key in order to open the chest, head to `/crates` and click on your respective crate of choice in order to open it and receive your reward.

### How can I speak with my friends in-game?

<mark style="color:$danger;">**THIS IS CURRENTLY DISABLED ON THE SERVER DUE TO BUGS.**</mark>

You can easily speak with your friends on the server by doing `/msg IGN` to privately message your friends. You can also voicechat with friends and other players on the server by doing `/voicechat` on the server and following the respective commands to either join or invite people.

### How do I sell Items or Pokemon on the Auction House?

You can easily start listing Items or Pokemon within the auction house by running the commands:

* For **items** you'll do `/ah sell item price` while **holding the item** you wish to sell. If you are selling multiple make sure to hold the exact amount you're planning to sell on the Auction House.
* For **pokemon** you'll do `/ah sell pokemon slot price` to easily list your Pokemon on the Auction House. Make sure the pokemon is in the right slot that you wish to sell on there.

You'll be able to keep an eye on your listing on the Auction House in which you can remove your item/pokemon by clicking on your own item/pokemon and confirming the purchase which will just remove it from being listed.

<div align="left"><figure><img src="/files/00nlbaLBojSUW5FBkNBH" alt=""><figcaption><p>Auction House via /ah</p></figcaption></figure></div>

### How can I give myself a nickname with colour?

The ability to give yourself a nickname as well as giving your in-game name colour is locked behind having a **Expert+ rank** on the server which is only purchasable from our official store.

If you wish to know more about how to change your nickname as well as giving your name colours then please use our guide found below:

<table data-card-size="large" data-view="cards"><thead><tr><th></th><th data-hidden data-card-target data-type="content-ref"></th></tr></thead><tbody><tr><td>🎨 <strong>Nickname &#x26; Colour Help</strong></td><td><a href="/pages/ZXLB8qTEs0hE2qUzEImA">/pages/ZXLB8qTEs0hE2qUzEImA</a></td></tr></tbody></table>

### How do I link my account to Discord?

Linking to Discord is incredibly easy and we actually already have a guide for this which you can access below:

<table data-card-size="large" data-view="cards"><thead><tr><th></th><th data-hidden data-card-target data-type="content-ref"></th></tr></thead><tbody><tr><td>🔗 <strong>Intro to Linking to Discord</strong></td><td><a href="/pages/RdA2Ult1KAHrGsfeqr45">/pages/RdA2Ult1KAHrGsfeqr45</a></td></tr></tbody></table>

### Do legendries/mythicals spawn? How do I get them?

Most legendaries and mythicals actually spawn on the server and you can see how each of these spawns via our Legendary and Mythical spawns list.

<table data-card-size="large" data-view="cards"><thead><tr><th></th><th data-hidden data-card-cover data-type="files"></th><th data-hidden data-card-target data-type="content-ref"></th></tr></thead><tbody><tr><td>🐉 <strong>Legendary and Mythicals Spawns</strong></td><td><a href="/files/s3Sdc5NveXh0ybSRhI9D">/files/s3Sdc5NveXh0ybSRhI9D</a></td><td><a href="/pages/Pdj36wXa5OJ31QESKvar">/pages/Pdj36wXa5OJ31QESKvar</a></td></tr></tbody></table>

### How do I give a pokemon a held item?

Giving your pokemon a held item is also very easy. All you need to do is throw out your pokemon via `R` and then press `Shift` + `Right-Click` which will bring up a sub-menu with the top right having a symbol in it.

<div align="left"><figure><img src="/files/Za1WIZ1CFp6QUVX6lKFi" alt="" width="174"><figcaption></figcaption></figure></div>

If you click onto it then the item you were holding will now be given to your Pokemon of choice. You will be notified about this within the chat as shown below.

<div align="left"><figure><img src="/files/7wWRvH9Z9w3PHUhuvvBF" alt=""><figcaption></figcaption></figure></div>

If you want to retrieve the item back, or wish to replace it with another, then all you need to is `Shift` + `Right-Click` again to retrieve/swap the item.

### Why won't it let me give my pokemon a Held Item?

If you can't give your pokemon a held item and you're following the steps stated above then it's likely due to a Mod which isn't supported on the server causing issues. Try either using our modpacks or removing any server related modpacks to see if that fixes the issue for you.

### How do I get a new rank on the server?

In order to gain a new rank on the server, you have to purchase them from our official store as there is currently no way for players to earn ranks on the server. You can purchase the ranks here:

{% embed url="<https://store.mmorealms.gg/category/ranks>" %}

### How do I extend the size of my realm?

Player are freely able to extend the size of their realm by purchasing chunks on the edges of their realm via Gems which will unlock the chunk for them. You can find more information about this via the Realm Guide here:

<table data-card-size="large" data-view="cards"><thead><tr><th></th><th data-hidden data-card-target data-type="content-ref"></th></tr></thead><tbody><tr><td>🪴 <strong>Realm Guide</strong></td><td><a href="/pages/9bw29qS5cBSGkQyvP3BJ">/pages/9bw29qS5cBSGkQyvP3BJ</a></td></tr></tbody></table>

### How do I switch between Pokemon and throw/retrieve them from their poke ball?

Switching between pokemon is incredibly easy! All you need to do is **press** `Up Arrow Key` or `Down Arrow Key` to go between pokemon within your party.

In order to throw out your pokemon as well as retrieving your Pokemon all you need to do is **press** `R` while hovering over it within your party to throw it out as well as putting the Pokemon back in the Poke ball.

### How do I enter the wilds or explore the world?

All you need to do enter the wilds on the server is by **running the command** `/rtp` or `/wild` which will teleport you into a random spot in the wilds. You can use the command `/back` to return back to your original spot prior teleporting to a new area.

### How do I heal my party and see pokemon within my PC?

In order to heal your party you will need a **Healing Machine** in which you can **right click** on it which will start an animation of healing your current party. You can access some Healing Machines within `/warp pokecenter` if you do not currently have a Healing Machine in your realm.

Similary to see Pokemon you own that's not within your party you will need access to a **PC** in which you can **right click** on it which will open up a menu where you'll be able to change pages, move your pokemon around and more. You can access some PC's within `/warp pokecenter` if you do not currently have a PC in your realm.

If you wish to know more about Healing Machine and PC's like with the recipe's to make them you can find out more within our [**Beginners Guide to the Server**](/cobblemon-wiki/beginners-guide-to-the-server)

### How do I teleport to my friends?

In order to **teleport to your friends** all you need to do is **run the command** `/tpa <player>` which will send a request to the player in question. All the **receiver** will need to do is **run the command** `/tpa accept` and then you should be teleported to their location.

If you want players to **come to your location** you can do so via `/tpahere` in which the receiver just has to do is `/tpa accept` and they'll be teleported to your location.

### How do I add people into my realm?

You can easily **add players into your realm by running the command** `/realm invite <player>` so they are able to join into your realm. If you want them to have some **permission** in there then you can do so via `/realm trust <role>` to either make them just a visitor to full perms within there.

You can **check any current member** of your realm via `/realm members` and remove any players from your realm via `/realm remove <player>`

For **more information** about realms you can do so via our Realms Guide:

<table data-card-size="large" data-view="cards"><thead><tr><th></th><th data-hidden data-card-target data-type="content-ref"></th></tr></thead><tbody><tr><td>🪴 <strong>Realm Guide</strong></td><td><a href="/pages/9bw29qS5cBSGkQyvP3BJ">/pages/9bw29qS5cBSGkQyvP3BJ</a></td></tr></tbody></table>

### Do I lose items when I die? Are there monsters or hostile mobs?

**Keeping Inventory is on** meaning that you if die on the server, you will not lose any items you're currently holding.

The **server is currently on Easy** but **hostile mobs are currently turned off** meaning you won't get any issues with hostile mobs **outside of any that spawn from spawners, wardens and drowned**.

### How do I make my party show on the side of the screen again? Can I hide this?

In order to hide and show your party within the HUD of the cobblemon experience, all you need to do is **press** `O` **which will remove/add it from your HUD**.

<div align="left"><figure><img src="/files/Ek6SI7rJvpTZNliZRKmt" alt="" width="382"><figcaption><p>Left shows Party Active with Right showing Party Inactive</p></figcaption></figure></div>

### How do I access the end or nether?

Players are able to access the End and Nether by using the `/rtp` command which will bring up a GUI that will allow you to select a dimension for you to teleport into in a random spot. You can use `/rtp <dimension>` to teleport dirtectly without the need of using the GUI. Normal methods of entering portals will also gain you access to these dimensions.

<div align="left"><figure><img src="/files/RTUtKLcaAOCLyAiRGpdx" alt=""><figcaption></figcaption></figure></div>

### How do I get more pokeballs?

You can either purchase Poke Balls from the pokemart via `/shop` or craft them on the server. You can find everything you need to know about crafting poke balls and all the items needed for crafting them via our guide created about it:

<table data-card-size="large" data-view="cards"><thead><tr><th></th><th data-hidden data-card-target data-type="content-ref"></th></tr></thead><tbody><tr><td>🔴 <strong>Complete Guide to Pokeballs</strong></td><td><a href="/pages/5wLMa7w4ETraQL9HXqY5">/pages/5wLMa7w4ETraQL9HXqY5</a></td></tr></tbody></table>

### What are shinies? How will I know if I have found a shiny? Is there a way to find them easily?

Shiny Pokemon are those that have a different colour palette compared to their normal palette. These are typically a extremely rare to find in most of the games and the same is true for our server. We actually have a guide which goes over everything you'll need to know about shinies below:

<table data-card-size="large" data-view="cards"><thead><tr><th></th><th data-hidden data-card-target data-type="content-ref"></th></tr></thead><tbody><tr><td>✨ <strong>Complete Guide to Shinies</strong></td><td><a href="/pages/Mp9WAw9ZWCZ0XqRFnidv">/pages/Mp9WAw9ZWCZ0XqRFnidv</a></td></tr></tbody></table>

### What is the server IP?

To join the server, you can use the following IP:

**Server IP**: `mp.mmorealms.gg`

### Can I install different mods to the server?

You can, although some will not work and be useless for the server, and others might just ruin the experience for you by causing conflcts which may lead to broken textures or unintended crashes as a result like with Cobbleverse. You can install ones on the server that only affect the client side like E19 as we only have one rule when it comes to adding mods to the server and that is not using any exploitable mods like X-Ray or Freecam to gain an advantage on other players. You can use this video guide to help you install mods like with E19 as shown in the video:

{% embed url="<https://www.youtube.com/watch?v=l-GEyFD2HTI>" %}

### How can I hide my Scoreboard?

At the time of writing this, players can not disable the Scoreboard on the server so you will have to leave it for now. In a update very soon however you will be able to do `/scoreboard_toggle` which will remove it from your screen, and running the command again will enable it.

<div align="left"><figure><img src="/files/AgVM4latBoCdf5m2QcLI" alt=""><figcaption><p>Scoreboard</p></figcaption></figure></div>

### My realm has completely changed biome? How can I fix this?

There may be occasions where you log onto the server and access your realm only to find it's completely changed biome and anything built in there has been lost. Don't stress too much about it, you've experienced a bad realm load. You can fix this easily by logging off the server for 30+ minutes to allow your realm to unload, and then once you log back on your realm should be back to normal. If your realm is still bugged after this then feel free to make a ticket via our Discord server for support.

**NOTE**: Do not build/store anything in your realm while you're in this bad load state as once it's fixed you will lose anything placed inside of it.

### How do I evolve certain Pokemon, especially with special conditions?

Many Pokemon remain faithful to the official games, ensuring their evolution conditions are unchanged for familiarity benefits. This isn't always possible due to the clear changes in features for a Minecraft server. As such, we ask that you look towards online tools that assist in explaining how these are done.&#x20;

{% embed url="<https://www.cobbledex.info/evolution-guide>" %}

Cobbledex is a great option and clearly lists requirements.

{% hint style="danger" %}
This external source is not 100% accurate. It covers details of all Pokemon included in the base mod, however any we have added ourselves from additional datapacks are not covered, so will require enlisting the support of either other players, or staff.
{% endhint %}


# Realm Guide

Within this page you'll find everything you need to know about Realms from what they are, how they work, commands used within realms and more.

**Contents:**

1. [What is a Realm?](#what-is-a-realm)
2. [Realm Specific Commands](#realm-specific-commands)
3. [How do I create my own Realm?](#how-do-i-create-my-own-realm)
4. [What can I do within my Realm? Can I invite Friends?](#what-can-i-do-within-my-realm-can-i-invite-friends)
5. [Can I expand the size of my Realm or own multiple Realms?](#can-i-expand-the-size-of-my-realm-or-own-multiple-realms)
6. [Can I delete my realm and start fresh?](#can-i-delete-my-realm-and-start-fresh)
7. [Realm Settings](#realm-settings)
8. [Realm Expansion](#realm-expansion)

***

### What is a Realm?

Instead of building within the same world as every other player on the server, you'll instead be given your own world with a slot that you're able to build in, customize to your liking, invite whoever you want as well as blocking any player you wish not to join into it. This is a system that makes our server stand out compared to the rest on the market.&#x20;

You'll still have access to the wilds where you can collect blocks and items, find pokemon as well as interacting with other players, but realms are your own personal space which you can do as you please in without worrying about others finding your area and building next to you or ruining the area.

### Realm Specific Commands

Here you'll find all the commands that you will find useful when playing within your realm.

<table><thead><tr><th width="209">Command</th><th>Use of Command</th></tr></thead><tbody><tr><td><code>/realm</code></td><td>This command will bring up the submenu for Realms in which you can teleport back to your own Realm as well as checking members.</td></tr><tr><td><code>/realm add IGN</code>&#x26; <code>/realm invite IGN</code></td><td>You can use this command to add players into your Realm.</td></tr><tr><td><code>/realm ban IGN</code>&#x26; <code>/realm unban IGN</code></td><td>Use the commands to ban and unban certain players from entering from entering your realm.</td></tr><tr><td><code>/realm delete</code></td><td>Use this command to delete the current realm you have on the server. <strong>You have to be standing in the realm you wish to delete.</strong> </td></tr><tr><td><code>/realm help</code></td><td>This menu will bring up text where you can find info relating to realm commands.</td></tr><tr><td><code>/realm leave</code></td><td>Use this command to leave the realm that you're currently in.</td></tr><tr><td><code>/realm members</code></td><td>This command will show all current members within a realm.</td></tr><tr><td><code>/realm remove IGN</code></td><td>Use this command to remove a player from the realm.</td></tr><tr><td><code>/realm teleport</code></td><td>Use this command to jump straight back into your personal realm.</td></tr><tr><td><code>/realm trust IGN RANK</code></td><td>You can use this command to give certain players more permission than others</td></tr><tr><td><code>/realm visit IGN</code></td><td>Use this command to visit another players realm.</td></tr><tr><td><code>/realm set_spawn</code></td><td>You'll use this command to set your spawn with your own personal realm.</td></tr><tr><td><code>/realm legendarycapture ownerOnly</code></td><td>Using this command will mean any legendary that spawns on you will only be catch-able by you.</td></tr><tr><td><code>/realm legendarycapture shared</code></td><td>Using this command will mean any legendary that spawns on you will also be catchable for players you have shared access to within your realm.</td></tr><tr><td><code>/realm visitor_message</code></td><td>You can use this command to set a message which players will see upon joining your realm.</td></tr></tbody></table>

### How do I create my own Realm?

Creating your own realm is incredibly easy! Once you first boot up onto the server, you'll be able to create your own realm by running the command `/realm` which will bring up a custom sub menu.&#x20;

From here you'll be able to chose what Realm Type you would like your own personal realm to be in by clicking on the arrows on both sides of the image of the biome. You can currently choose from:

* Cherry Grove
* Forest
* Plains
* Savanna

<div align="left"><figure><img src="/files/4hPhUWkEn7GU0H8zc3LR" alt="" width="294"><figcaption><p>Menu for Realm Creation</p></figcaption></figure></div>

&#x20;Once you have picked your desired realm type, you'll then once to click **CREATE** which will then teleport you into your brand new realm! Anytime you wish to return back to your Realm all you'll need to do is run the command `/realm` and click the **TELEPORT** button.

<div align="left"><figure><img src="/files/GEpIXoPVR8b7VT5WMrCN" alt="" width="375"><figcaption><p>Example of Cherry Grove Realm created.</p></figcaption></figure></div>

### What can I do within my Realm? Can I invite friends?

You will want to use your realm to create your own build and store all your items collected instead of the wilds since the **wilds is frequently reset** which will wipe anything built or stored within them and there is **no way to obtain anything back**. You can use your realm as a way to **show off your building skills** to other players especially since we will eventually be hosting build contests on the server where you can go ahead and win some prizes for it!

You can **use your realm as a hub for your friends** to join as inviting them is as easy as `/realm add IGN` and they can easily join your realm by running the command `/realm visit IGN`. How much permissions you wish to give them is determined by you as you can easily edit friends permissions by running the `/realm trust IGN RANK` in which you can give out the following ranks:

* Manager \[*This will give the player full permissions within your realm*]
* Officer \[*This will give the player access to building within your realm*]
* Member \[*This will give the player interact and drop perms within your realm*]
* Visitor \[*This will give the player no perms besides visiting your realm*]

You'll run the command like: `/realm trust LaughingButterC Manager`

If you wish to **promote or demote** a certain players permission then all you need to re-run the command but give them a respective rank you want them to have.

### Can I expand the size of my Realm or own multiple Realms?

As of now, **there is no way for players to increase the size of their own personal realm** on the server however this is something we will be adding in the future for players to have access to with the use of Gems. There is no ETA for when this will be added onto the server so make sure to keep an eye out on our Discord server for more information relating to it.

Likewise with increasing your realm size, there is **no way for players to have multiple realms** on the server. If playing with friends you can then create within their realms if given permission so you have more areas to create, but players are only allowed one realm at a time.

### Can I delete my realm and start fresh?

If you're not happy with your realm and wish to start over from scratch you can easily do so by doing `/realm delete` while you are currently standing within your realm. You will be given a confirmation about your deletion so make sure this is what you want.

<figure><img src="/files/Xa9DQcUfzsz8Z5Z033vC" alt=""><figcaption><p>Confirmation Screen for Realm Deletion</p></figcaption></figure>

**\*NOTE\*** - Deleting your realm will wipe everything within it and there is no way to retrieve your realm once deleted. Make sure to keep hold of everything you wish to take over with you into your new realm since we won't be able to help you retrieve items lost due to the deletion.

### Realm Settings

There are a few different things you can actually edit while within the `/realm` submenu if you click onto the settings option at the bottom right of the menu.&#x20;

You are able to **check current members** within your current realm via the **bottom left** option of the submenu within `/realms`.

When you have entered the **settings section of the Submenu** it'll bring up a new GUI in which you have the **ability to change factors** within your realm. Stuff you're able to edit in here as currently as follows:

* Setting **pokemon spawning** On or Off.
* Setting a **Day or Night cycle**.
* Changing weather from **Normal to Raining** and vice versa.
* Making your **Realm either Private or Public.**

<figure><img src="/files/2KG9Xotbc0IpyZ2rFfdx" alt=""><figcaption><p>Setting Submenu via /realms</p></figcaption></figure>

### Realm Expansion

Players are now able to expand their realm size on the server so there is a lot more freedom for players to build what they like solo or with friends, and it's incredibly easy to do so! As you go around the borders of your realm you'll see text stating about Unlocking this chunk for X amount of gems. You can see exactly what this looks like below:

<div align="center"><figure><img src="/files/DK31lmxDW4LZZWsEtd6o" alt="" width="405"><figcaption></figcaption></figure></div>

As the text implies, in order to get access to this chunk **you will need to pay X gems**. You can earn this in multiple ways as well as purchasing them from our official store. You can find out more about how to earn gems via this guide:

<table data-card-size="large" data-view="cards"><thead><tr><th></th><th data-hidden data-card-target data-type="content-ref"></th></tr></thead><tbody><tr><td>💎 <strong>Intro to Earning Gems</strong></td><td><a href="/pages/xwltUN1AddGQNY5OxZmo">/pages/xwltUN1AddGQNY5OxZmo</a></td></tr></tbody></table>

**If you have the gems amount** stated and want to go ahead with purchasing it, all you need to do is `Right Click` which will bring up a confirmation. If you **click on the green section** which will confirm the purchase, the gems will be taken from you and the **chunk will be accessible for you**.

<figure><img src="/files/9ViHXbAmI8655gBvVBHg" alt=""><figcaption><p>Confirmation Page for Purchasing Chunk Expansions</p></figcaption></figure>

You are able to do this in any direction you want in whatever pattern you wish to have it. Your realm without any expansions is **10x10 Chunks** in size so increasing the size of your realm is going to be incredibly handy for a lot of players especially if they love to build. There is a limit to how much you can expand your realm to, but there is certainly enough room for any player to have the space and freedom they need.


# Datapacks

Here you'll find all of the Datapacks that we use on the server to give them full credit for additions into our Server.

| <div><figure><img src="/files/GDlhVkV5CtMrRIWjvOAF" alt=""><figcaption><p>by <strong>Raspix</strong></p></figcaption></figure></div><p><a href="https://modrinth.com/datapack/cobble-cats"><strong>CobbleCats</strong></a></p>                      | <div><figure><img src="/files/dF1VP43JulIzwBPL5uG7" alt=""><figcaption><p>by <strong>LegenTM</strong></p></figcaption></figure></div><p><a href="https://modrinth.com/datapack/hiddenmons-cobblemon"><strong>HiddenMons</strong></a></p>  | <div><figure><img src="/files/8OKfaLqUwUcCxOtfHCG0" alt=""><figcaption><p>by <strong>NetImmerse</strong></p></figcaption></figure></div><p><a href="https://modrinth.com/datapack/the-jewel-pokmon-cobblemon"><strong>The Jewel Pokemon</strong></a></p> | <div><figure><img src="/files/rqpXUpMz6oU8zNGonh1l" alt=""><figcaption><p>by <strong>Beezy</strong> and <strong>IZetyXX</strong></p></figcaption></figure></div><p><a href="https://modrinth.com/datapack/lackingmons"><strong>LackingMons</strong></a></p> |
| --------------------------------------------------------------------------------------------------------------------------------------------------------------------------------------------------------------------------------------------------- | ----------------------------------------------------------------------------------------------------------------------------------------------------------------------------------------------------------------------------------------- | -------------------------------------------------------------------------------------------------------------------------------------------------------------------------------------------------------------------------------------------------------- | ----------------------------------------------------------------------------------------------------------------------------------------------------------------------------------------------------------------------------------------------------------- |
| <p></p><div><figure><img src="/files/UOAxO2OqagQwjqLvRxFW" alt=""><figcaption><p>by <strong>RedRibbon</strong></p></figcaption></figure></div><p><a href="https://modrinth.com/datapack/missingmons-cobblemon"><strong>MissingMons</strong></a></p> | <p></p><div><figure><img src="/files/IVIGvrwRXqxreuRx2bvK" alt=""><figcaption><p>by <strong>YaBoiBruno</strong></p></figcaption></figure></div><p><a href="https://modrinth.com/resourcepack/moremons"><strong>MoreMons</strong></a> </p> | <p></p><div><figure><img src="/files/u66vkq79gNDH5LrIGLJe" alt=""><figcaption><p>by <strong>BifeSalgado</strong></p></figcaption></figure></div><p><a href="https://modrinth.com/resourcepack/odysseymons"><strong>OdysseyMons</strong></a> </p>         | <p></p><div><figure><img src="/files/N7dDSkcyJxsU5KL3GL11" alt=""><figcaption><p>by <strong>Salt</strong></p></figcaption></figure></div><p><a href="https://modrinth.com/datapack/saltmons"><strong>SaltMons</strong></a> </p>                             |
| <p></p><div><figure><img src="/files/gn8Cx5ggNFLy64CcQqnj" alt=""><figcaption><p>by <strong>lastgreenseer</strong></p></figcaption></figure></div><p><a href="https://modrinth.com/datapack/cobbletowns"><strong>CobbleTowns</strong></a></p>       |                                                                                                                                                                                                                                           |                                                                                                                                                                                                                                                          |                                                                                                                                                                                                                                                             |


# How to Install Cobblemon (Modrinth & CurseForge)

Looking to play Cobblemon on MMO Realms?

This guide will help you **install Cobblemon** on the best Minecraft launchers available in 2026. Whether you're new to modding or just need help getting started, we’ll walk you through everything **step-by-step** to get you playing as quickly as possible.

For the **best Cobblemon experience**, we highly recommend using the **Modrinth launcher**, which offers faster downloads, smoother performance, and seamless updates tailored specifically to **MMO Realms**.

👉 Scroll down to find the full **Cobblemon installation guide** for **Modrinth**, **CurseForge**, and other supported launchers and start your adventure on **MMO Realms**, the top Cobblemon server, today!

<table data-card-size="large" data-view="cards"><thead><tr><th></th><th data-hidden data-card-cover data-type="image">Cover image</th><th data-hidden data-card-target data-type="content-ref"></th></tr></thead><tbody><tr><td><sup><strong>Modrinth (RECOMMENDED)</strong></sup></td><td><a href="/files/shCeNASw5kP6DNC36e2W">/files/shCeNASw5kP6DNC36e2W</a></td><td><a href="/pages/tFhYRs3a74ghwRD468fH">/pages/tFhYRs3a74ghwRD468fH</a></td></tr><tr><td><sup><strong>Curseforge</strong></sup> </td><td><a href="/files/9zDMIYpvQ1pJ2piul4Tc">/files/9zDMIYpvQ1pJ2piul4Tc</a></td><td><a href="/pages/wQsRrT2DztOaZNiquno4">/pages/wQsRrT2DztOaZNiquno4</a></td></tr><tr><td><strong>Minecraft Launcher</strong></td><td><a href="/files/rWR5QcqixVR2lDt5wbXy">/files/rWR5QcqixVR2lDt5wbXy</a></td><td><a href="/pages/RLXzAzIissqdwcEkUn0J">/pages/RLXzAzIissqdwcEkUn0J</a></td></tr></tbody></table>


# Modrinth

This page will go over how to install MMO Realms using Modrinth, which is one of the best way to experience our server as it comes with bonuses you won't get using other launchers.

## Bonus Rewards for Modrinth Users

Before we jump into the process of installing Modrinth we'll quickly go over why **Modrinth is one of the best way to play MMO Realms**! Bonuses for using the Modrinth Modpack includes:

* 1x Free Master Ball  *\[Redeemable via **/kits**]*
* *Free Daily Spin for Gems  \[Redeemable via **/kit Daily**]*

{% embed url="<https://bit.ly/mmorealms>" %}

***

**Contents**

1. [Installing Modrinth](#step-1-installing-modrinth)
2. [Logging into Minecraft](#step-2-logging-into-minecraft)
3. [Installing MMO Realms Modpack](#step-3-installing-mmo-realms-cobblemon)
4. [Play Cobblemon](#step-4-play-cobblemon)

***

### Step #1 \~ Installing Modrinth

Before you can start playing Cobblemon you'll need to install the **Modrinth launcher** from their official website. You can access the website by following this link: [ ](https://modrinth.com/app)<https://modrinth.com/app>

<figure><img src="/files/O8H5kGDyL8Xa8FaNXpbS" alt=""><figcaption></figcaption></figure>

**NOTE** - Make sure to **download the launcher which correlates with the OS** of your computer otherwise you won't be able to play on the launcher.

Once you have downloaded the launcher, you'll want to go through the installation process following all the instructions listed by the download.

### Step #2 \~ Logging into Minecraft

Once you have the Modrinth launcher installed you will need to log into your official Minecraft account in order to play. You will find this on the right side of your launch which will push you into the Microsoft account sign in process.

<div><figure><img src="/files/ezcXsWmg2LHqipjAq37Y" alt=""><figcaption></figcaption></figure> <figure><img src="/files/4faniZkIaDTyoSXcMhNH" alt="" width="297"><figcaption></figcaption></figure></div>

Once you have gone through the process of signing in your account should now be shown on the **Modrinth launcher** in the same place that you originally signed in on. Example of what it should look like in the screenshot shown below:

<figure><img src="/files/qANGZN7Kr9Ggey7uE0Ly" alt=""><figcaption></figcaption></figure>

### Step #3 \~ Installing MMO Realms Cobblemon

You can download it directly via this link: [**MODRINTH PACK**](https://bit.ly/mmorealms)

Alternatively you'll be able to search it by following the steps outlined below:

Once you have signed in on Modrinth you will now be able to start installing our Modpack. You will want to **click on "*****Discover a modpack*****" to proceed further** into installing MMO Realms Cobblemon.

<figure><img src="/files/96xSOGZDKcdF7TNrzX6t" alt=""><figcaption></figcaption></figure>

Once you have click onto "**Discover a Modpack**" you will now be able to search for modpacks with the search bar. In order to find our modpack you will need search **MMO REALMS** within the search bar. Your launcher should like the photo shown below if you have done everything correct so far.

<figure><img src="/files/Nt5muevpwfJc0rJkmxVF" alt=""><figcaption></figcaption></figure>

You'll want to click on the **Install** option and let that install on the launcher. You should now see the server icon on the left side of the launcher as well as if you click on **Library** you should see the modpack listed there plus anymore you decide to install.&#x20;

<figure><img src="/files/I7a8m90vy5cfEQLIMhCt" alt=""><figcaption></figcaption></figure>

### Step #4 \~ Play Cobblemon

From there you can click **Play** which will load up Minecraft which you can then choose **Multiplayer** and our server will be listed for you to choose from. You can hover over the logo and click the **Play** symbol or **double click** to start loading into the MMO Realms server!

<figure><img src="/files/TMpIhJn5dfzMaiVj9JzI" alt=""><figcaption></figcaption></figure>


# Curseforge

This page will go over how to install MMO Realms using Curseforge, which is one of the official ways to experience our server.

***

**Contents**

1. [Installing Curseforge](#step-1-installing-curseforge)
2. [Installing MMO Realms Cobblemon](#step-2-installing-mmo-realms-cobblemon)
3. [Play Cobblemon](#step-3-play-cobblemon)

***

### Step #1 \~ Installing Curseforge

Before you can start playing Cobblemon you'll need to install the Curseforge launcher from their official website. You can access the website by following this link: <https://www.curseforge.com/download/app>&#x20;

<figure><img src="/files/0nMcu1CO42JkfpxAfGFY" alt=""><figcaption></figcaption></figure>

**NOTE** - Make sure to **download the launcher which correlates with the OS** of your computer otherwise you won't be able to play on the launcher.

Once you have downloaded the launcher, you'll want to go through the installation process following all the instructions listed by the download.

## Step #2 \~ Installing MMO Realms Cobblemon

Once you have finished the installation process of Curseforge you will now be able to **open the launcher**. In doing so you should see something similar to the photo shown below. You will want to **click on Minecraft to proceed further** into installing MMO Realms Cobblemon.

<figure><img src="/files/i3XN9AY5sHNCKBNlwjy2" alt="" width="563"><figcaption></figcaption></figure>

Once you have click onto Minecraft you will now be able to search for modpacks with the search bar. In order to find our modpack you will need search **Cobblemon MMO Realms** within the search bar. Your launcher should like the photo shown below if you have done everything correct so far.

<figure><img src="/files/pFx4lvolWe7st7XLSbUG" alt=""><figcaption></figcaption></figure>

Alternatively you can download it directly via this link: <https://bit.ly/playcobblemon>

You'll want to click on the **Install** option and let that install on the launcher. If you click on **My Modpacks** you should see the modpack listed there plus anymore you decide to install.&#x20;

## Step #3 \~ Play Cobblemon

From there you can click Play which will push you into the official Minecraft Launcher. You'll know if you have done this correct as it'll state the modpack name on the left of the green Play button. This can be seen with the screenshot stated below:

<figure><img src="/files/XtH3ACGSfAli1jmnzs86" alt=""><figcaption></figcaption></figure>

From there you can click **Play** which will load up Minecraft which you can then choose **Multiplayer** and our server will be listed for you to choose from. You can hovcer over the logo and click the **Play symbol** or **double click** to start loading into the MMO Realms server!

<figure><img src="/files/TMpIhJn5dfzMaiVj9JzI" alt=""><figcaption></figcaption></figure>


# Minecraft Launcher

This page will go over how to install MMO Realms using just the Minecraft Launcher, which is one of the official ways to experience our server.

Please be aware that this guide will generally go over how to install the Cobblemon Mod which is the only mod required to play on the server. It's **suggested you use the Modrinth modpack** for the best experience on the server especially since they're easier installs for players.

**Server IP**: `mp.mmorealms.gg`

***

**Contents**

1. [Installing Minecraft Launcher](#installing-minecraft-launcher)
2. [Installing Fabric](#installing-fabric)
3. [Installing Fabric API Mod](#installing-fabric-api-mod)
4. [Installing Cobblemon Mod](#installing-cobblemon-mod)
5. [Play Cobblemon](#step-3-play-cobblemon)

***

## Installing Minecraft Launcher

Downloading the launcher is incredibly easy, and there is two ways you can actually get access to it. You can either download it directly from the website via this link: <https://www.minecraft.net/en-us/download>

<figure><img src="/files/zUBm6S9Mhe9tZnSnqwfH" alt=""><figcaption></figcaption></figure>

Or alternatively you can download it through the Xbox App / Microsoft Store: \[<https://www.microsoft.com/store/productId/9PGW18NPBZV5>]

<figure><img src="/files/DB0ajRABeRbTdYrhkrOJ" alt="" width="563"><figcaption><p>Ex of Minecraft Launcher on Xbox App</p></figcaption></figure>

From there all you need to do is log into your Minecraft/Microsoft account to log into the launcher. This is the **same log-in** used for any other supported Minecraft launcher like Modrinth or Curseforge.

## Installing Fabric

Now that you have the Launcher installed, the next step is to download the Fabric Launcher which will act as a profile for you to chose when you want to run mods. You can **download fabric from this link**: <https://fabricmc.net/use/installer/>

<div align="left"><figure><img src="/files/LsVXLfhwYOk3wwReT6Y7" alt="" width="563"><figcaption></figcaption></figure></div>

Once you have opened the website, you will need to click on the **Download for Windows** which will download the Fabric Launcher directly to your computer.&#x20;

In this launcher you want to make sure you choose the **Minecraft Version** as `1.21.1` in order to have the profile compatible with the server. If you have done it correctly, it should look as it is shown in the screenshot below:

<div align="left"><figure><img src="/files/4bZUYdt6qzBlmzbFMJ53" alt=""><figcaption></figcaption></figure></div>

From there make sure you have **Create Profile ticked** and then you can choose the **Install** option. From there you can go ahead and open your **Minecraft Launcher** and you should see it state **Fabric Loader** within the launcher as shown in the screenshot below:

<figure><img src="/files/pQ1V3tkA32s85uBhgiaZ" alt=""><figcaption></figcaption></figure>

You can now click on **Play** which will bring up a warning. You can **confirm that you understand the risks** and this will start installing everything needed for that version of Minecraft. It will then launch Minecraft and if you have done everything right up to this point, **it will state the version of Minecraft as well as Fabric in the bottom left of the Minecraft game**.

<figure><img src="/files/r0bEr0PDR4K7Px5W6bXa" alt=""><figcaption></figcaption></figure>

You can now close down Minecraft, and we go ahead and start the Fabric API Mod.

## Installing Fabric API Mod

**You will also need the Fabric API Mod** in order to play Cobblemon on the server with Fabric. You can download via this link: <https://modrinth.com/mod/fabric-api/versions?c=release&g=1.20.1&version=1.21.1>

<div align="left"><figure><img src="/files/YLNVAMSuj9Q2DisG3iak" alt="" width="563"><figcaption></figcaption></figure></div>

From there you want to click on **Download** which will bring up a Submenu. You want to press **Select** **Game Version** and choose `1.21.1` followed by **Fabric**. If you have done everything correct, it show as it is within the screenshot below:

<div align="left"><figure><img src="/files/OGmyXTfzGN5lajAj3uy6" alt="" width="375"><figcaption></figcaption></figure></div>

This will download the **Fabric API mod** needed. You will want to **keep this for later** for when you're installing the Cobblemon Mod.

## Installing Cobblemon Mod

Now that you have the Launcher and Fabric installed, the next step is to download the **official Cobblemon mod** via this link: <https://modrinth.com/mod/cobblemon>&#x20;

If you are on the correct page, it should be similar as to what is shown below. From there you want to click on the big green **Download** button underneath the Cobblemon Icon.

<div align="left"><figure><img src="/files/CvL3vtKC91s2HvlezArz" alt="" width="563"><figcaption></figcaption></figure></div>

From there you want to click on **Select** **Game Version** and choose `1.21.1` followed by **Fabric**. If you have done everything correct, it show as it is within the screenshot below:

<div align="left"><figure><img src="/files/az9CKpA1Gu2nWT2kI88a" alt="" width="563"><figcaption></figcaption></figure></div>

Now you can click on **Download** which will download the most recent version of Cobblemon. Please note that every time there is a **new update** you will have to **manually download the latest version** of the Mod and replace the old one.

Now that you have the Cobblemon Mod, you will want to head back into the Minecraft Launcher. Jump over to Installations and in the Fabric Profile created you want to click onto the Folder symbol which will open the Installations Folder.

<figure><img src="/files/Cmfg33grSyRsS5amRSMF" alt=""><figcaption></figcaption></figure>

Now that you are within your Installations Folder, you want to open the **Mods** folder and place both the **Cobblemon Mod** and the **Fabric API Mod** you downloaded into there. Your folder should look as shown below:

<figure><img src="/files/APxrGYYTNfzaHAtvrgfC" alt=""><figcaption></figcaption></figure>

You can add anymore compatible mods you wish into this folder. Please be aware that **using any exploitable mods on the server will result in a permanent ban**.

## Play Cobblemon

Now that you have both Fabric and Cobblemon installed, the only thing you need to start doing now is playing Cobblemon. Press Play on the Minecraft Launcher to load Minecraft and click onto the Multiplayer button.&#x20;

<div align="left"><figure><img src="/files/YWgcxEkuzSvbXjnuu0Sb" alt="" width="563"><figcaption></figcaption></figure></div>

From there, click onto Add Server, and enter the IP `mp.mmorealms.gg` into the Server Address bar and then make sure Server Resource Packs is on Prompt which will download the servers resource pack instantly when joining which is needed for playing on the server. If you have done it correct, your screen should show as follows:

<div align="left"><figure><img src="/files/hQ3E01CqjJVot5MlBDEd" alt="" width="347"><figcaption></figcaption></figure></div>

Now you click on Done which will bring up the Server within the server list. You can hover over the logo and click the **Play symbol** or **double click** to start loading into the MMO Realms server!


# Pixelmon Wiki

Within this Wiki, you'll find out everything you need to know about Pixelmon including it's mechanics found within MMO Realms Cobblemon.

## Legendary, Ultra Beast and Paradox Spawns

All of the Pokemon listed will show each of the biome(s) you can obtain the Pokemon.&#x20;

<table data-card-size="large" data-view="cards"><thead><tr><th></th><th data-hidden data-card-target data-type="content-ref"></th><th data-hidden data-card-cover data-type="image">Cover image</th></tr></thead><tbody><tr><td>🐉 <strong>Legendary and Mythicals Spawns</strong></td><td><a href="/pages/02LuBTZKAriJdkbrVzeO">/pages/02LuBTZKAriJdkbrVzeO</a></td><td><a href="/files/WtAZXjtIh3uxXEaA6ASV">/files/WtAZXjtIh3uxXEaA6ASV</a></td></tr><tr><td>🌌 <strong>Ultra Beasts and Paradox Spawns</strong></td><td><a href="/pages/YQKKSC8LGeL7ANo24AFM">/pages/YQKKSC8LGeL7ANo24AFM</a></td><td><a href="/files/ZgMfBVHYbDFk2et55Z4d">/files/ZgMfBVHYbDFk2et55Z4d</a></td></tr></tbody></table>

***

## General Information for MMO Realms Pixelmon

**CONTENTS**

<table data-card-size="large" data-view="cards"><thead><tr><th></th><th data-hidden data-card-target data-type="content-ref"></th></tr></thead><tbody><tr><td><strong>⚠️ Server Rules</strong></td><td><a href="/pages/JkDGLdtop97VyWxNm1qX">/pages/JkDGLdtop97VyWxNm1qX</a></td></tr><tr><td>🏏 <strong>Server Features and Mechanics</strong></td><td><a href="/pages/oSexVU1sJiFslcDEdiSB">/pages/oSexVU1sJiFslcDEdiSB</a></td></tr><tr><td>⌨️ <strong>Commands and Uses</strong></td><td><a href="/pages/mfPKizz9XWcTLGqCIVrN">/pages/mfPKizz9XWcTLGqCIVrN</a></td></tr><tr><td>💸 <strong>Donor Ranks Info</strong></td><td><a href="/pages/MfT8MhF2lVfKjOuSlMLj">/pages/MfT8MhF2lVfKjOuSlMLj</a></td></tr><tr><td>🤝 <strong>Beginners Guide to the Server</strong></td><td><a href="/pages/GFznAyPHq0QZFiLesQaR">/pages/GFznAyPHq0QZFiLesQaR</a></td></tr><tr><td><span data-gb-custom-inline data-tag="emoji" data-code="1f332">🌲</span><strong>A Complete Overview of the Wilds</strong></td><td><a href="/pages/hNYnv62MGOsZxBmbpF8A">/pages/hNYnv62MGOsZxBmbpF8A</a></td></tr><tr><td>🆘 <strong>General Guides</strong></td><td><a href="/pages/H1oDV509BvrpC4ykWwa8">/pages/H1oDV509BvrpC4ykWwa8</a></td></tr><tr><td>📚 <strong>Technical Guides</strong></td><td><a href="/pages/raNJzApYarJ24VMCLeds">/pages/raNJzApYarJ24VMCLeds</a></td></tr><tr><td>🪴 <strong>Realm Guide</strong></td><td><a href="/pages/at7d16QD2LlTP5TtwTrw">/pages/at7d16QD2LlTP5TtwTrw</a></td></tr><tr><td>❓<strong>FAQ (Frequently Asked Questions)</strong></td><td><a href="/pages/kk8FZGbdMWSrwbEI9SIR">/pages/kk8FZGbdMWSrwbEI9SIR</a></td></tr><tr><td>📝 <strong>Wiki Changelogs</strong></td><td><a href="/pages/NtmaTfd1YiRvubQbE1LP">/pages/NtmaTfd1YiRvubQbE1LP</a></td></tr><tr><td>⚙️ <strong>How to Install Pixelmon (Modrinth &#x26; CurseForge)</strong></td><td><a href="/pages/lHHO7C65cSBhRzs9bStw">/pages/lHHO7C65cSBhRzs9bStw</a></td></tr></tbody></table>

***


# Legendary and Mythicals Spawns Info

Here you will find how to find all of the Legendaries and Mythicals on our server letting you know how exactly to obtain them and if they're available yet.

**Contents**

1. [How do Legend and Mythical spawns work?](#how-do-legend-and-mythical-spawns-work)
2. [Mythical Spawns](#mythical-spawns)
3. [Legendary Spawns](#legendary-spawns)
4. [Shrines](#shrines-1)

***

### How do Legend and Mythical spawns work?

Legendary and Mythical Pokemon do not spawn like standard Pokémon, as they are the rarest Pokemon obtainable available on the server. Every so often, a random Legendary or Mythical Pokemon will spawn, and its appearance will be announced in Public Chat, including the Pokemon and the biome it has spawned in. The announcement will not reveal which player it has spawned near or its exact location, but if you are not in the correct biome or nearby, it will not appear for you.

<figure><img src="/files/hV5HWigSlGDlOFI1RxnM" alt=""><figcaption><p>Chat Notification of a Legendary that's Spawned</p></figcaption></figure>

Legendaries always spawn next to a player rather than randomly in the wild. Once a Legendary has been caught, defeated, or despawned then this will also be announced within the public chat. Legendaries and Mythicals also **do not spawn within personal realms**, so if you wish to obtain one then you need to be within the wilds.

{% hint style="success" %}
Legends that spawn naturally have a small chance to be shiny, currently set to 3%.
{% endhint %}

There is no fixed timer for Legendary or Mythical spawns. However, higher player counts increase the overall spawn frequency. Be sure to keep an eye on Discord for special events, such as weekends with double Legendary spawns, which offer the best opportunity to encounter a Legendary or Mythical Pokemon. Legendaries **will spawn between 10 to 40 blocks from your current position** of it's landed on you.

{% hint style="warning" %}
**If you are marked as AFK, no legends will spawn on you** even while you are within Wilds. Using AFK Machines, Boats, Water, Minecarts etc won't disable this AFK Tracker. If you find methods that do bypass this report it to staff as abusing it yourself will result in a form of **ban and restrictions added to playtime rewards** given.
{% endhint %}

Although the spawn tick is random, a Legendary or Mythical Pokemon’s ability to spawn depends on your current biome and the time of day when the tick occurs. Certain Pokemon require specific conditions, such as clear weather, being underground, or being underwater. When a Vote Party occurs as well, it'll automatically spawn a Legendary on a random player. Be sure to review the information below carefully so you know exactly where and when to position yourself for the best chance of encountering one.

### Mythical Spawns

<table><thead><tr><th width="126">Mythicals</th><th width="111">Is it Avilable?</th><th width="149.75">Biome(s)</th><th width="116.5">Time</th><th>Location</th><th width="128">Condition</th></tr></thead><tbody><tr><td><strong>Mew</strong></td><td>Yes</td><td>Jungles</td><td>Day</td><td>Land / Manmade / Indoors</td><td>Jungle Pyramid</td></tr><tr><td><strong>Celebi</strong></td><td>Yes</td><td>Forest</td><td>-</td><td>Ilex Shrine</td><td>-</td></tr><tr><td><strong>Jirachi</strong></td><td>Yes</td><td>Mountainous</td><td>Dawn / Morning</td><td>Land</td><td>Min Y=100</td></tr><tr><td><strong>Deoxys</strong></td><td>Yes</td><td>End Highlands / Freezing Forests</td><td>Afternoon</td><td>Land</td><td>Min Y=100</td></tr><tr><td><strong>Phione</strong></td><td>Yes</td><td>Does Not Spawn</td><td>-</td><td>Offspring from Manaphy</td><td>-</td></tr><tr><td><strong>Manaphy</strong></td><td>Yes</td><td>Lukewarm Ocean / Warm Ocean</td><td>Morning</td><td>Water</td><td>Clear Weather</td></tr><tr><td><strong>Darkrai</strong></td><td>Yes</td><td>Roofed</td><td>Night</td><td>Land</td><td>New Moon / Min Y=85</td></tr><tr><td><strong>Shaymin</strong></td><td>Yes</td><td>Flowery</td><td>Morning</td><td>Land</td><td>-</td></tr><tr><td><strong>Arceus</strong></td><td>Yes</td><td>Desert</td><td>-</td><td>Timespace Altar</td><td>-</td></tr><tr><td><strong>Victini</strong></td><td>Yes</td><td>Savannas</td><td>Day</td><td>Land</td><td>Clear Weather / May Y=90</td></tr><tr><td><strong>Keldeo</strong></td><td>Yes</td><td>Ice Spikes</td><td>Afternoon / Dusk</td><td>Land</td><td>-</td></tr><tr><td><strong>Meloetta</strong></td><td>Yes</td><td>Flowery</td><td>Night</td><td>Land</td><td>-</td></tr><tr><td><strong>Genesect</strong></td><td>Yes</td><td>Mountainous Forests</td><td>Night</td><td>Land</td><td>-</td></tr><tr><td><strong>Diancie</strong></td><td>Yes</td><td>Mountainous</td><td>Morning</td><td>Underground</td><td>May Y=50</td></tr><tr><td><strong>Hoopa</strong></td><td>Yes</td><td>Desert</td><td>Afternoon</td><td>Land</td><td>Desert Pyramid</td></tr><tr><td><strong>Volcanion</strong></td><td>Yes</td><td>Arid / Volcanic</td><td>Dawn / Morning</td><td>Liquid Floor</td><td>-</td></tr><tr><td><strong>Magearna</strong></td><td>Yes</td><td>Dark Forest</td><td>Day</td><td>Indoors</td><td>Woodland Mansion</td></tr><tr><td><strong>Marshadow</strong></td><td>Yes</td><td>Hellish / Mesas</td><td>Night</td><td>Land</td><td>-</td></tr><tr><td><strong>Zeraora</strong></td><td>Yes</td><td>Savannas</td><td>Afternoon</td><td>Land</td><td>Min Y=90</td></tr><tr><td><strong>Meltan</strong></td><td>Yes</td><td>Overworld</td><td>Dawn / Dusk</td><td>Land</td><td>Max Y=0</td></tr><tr><td><strong>Melmetal</strong></td><td>Yes</td><td>Does Not Spawn</td><td>-</td><td>Evolves from Meltan</td><td>-</td></tr><tr><td><strong>Zarude</strong></td><td>Yes</td><td>Jungles</td><td>Night</td><td>Tree Top</td><td>Min Y=90</td></tr><tr><td><strong>Pecharunt</strong></td><td>No</td><td>Dark Forest / Mushroom</td><td>Dawn / Dusk</td><td>-</td><td>-</td></tr></tbody></table>

### Legendary Spawns

<table><thead><tr><th width="102.25">Legendaries</th><th width="94">Is it Avilable?</th><th width="115.75">Biome(s)</th><th width="121.5">Time</th><th width="124">Location</th><th width="113">Conditions</th><th width="100">Biome Exclusions</th></tr></thead><tbody><tr><td><strong>Articuno</strong></td><td>Yes</td><td>Icy</td><td>-</td><td>Frozen Shrine</td><td>-</td><td>-</td></tr><tr><td><strong>Zapdos</strong></td><td>Yes</td><td>Savannas</td><td>-</td><td>Static Shrine</td><td>-</td><td>-</td></tr><tr><td><strong>Moltres</strong></td><td>Yes</td><td>Mesas</td><td>-</td><td>Fiery Shrine</td><td>-</td><td>-</td></tr><tr><td><strong>Mewtwo</strong></td><td>Yes</td><td>Does Not Spawn</td><td>-</td><td>Cloning Machine</td><td>-</td><td>-</td></tr><tr><td><strong>Raikou</strong></td><td>Yes</td><td>Savannas</td><td>Dawn / Morning</td><td>Land</td><td>-</td><td>-</td></tr><tr><td><strong>Entei</strong></td><td>Yes</td><td>Mountainous / Volcanic</td><td>Day</td><td>Land</td><td>May Y=100</td><td>Mountains Forests</td></tr><tr><td><strong>Suicune</strong></td><td>Yes</td><td>Beaches</td><td>Night</td><td>Land</td><td>-</td><td>-</td></tr><tr><td><strong>Lugia</strong></td><td>Yes</td><td>Does Not Spawn</td><td>Dusk</td><td>Tidal Bell</td><td>-</td><td>-</td></tr><tr><td><strong>Ho-oh</strong></td><td>Yes</td><td>Does Not Spawn</td><td>Dusk</td><td>Clear Bell</td><td>-</td><td>-</td></tr><tr><td><strong>Regirock</strong></td><td>Yes</td><td>Mesas</td><td>Afternoon</td><td>Underground</td><td>May Y=30</td><td>-</td></tr><tr><td><strong>Regice</strong></td><td>Yes</td><td>Freezing</td><td>Morning</td><td>Underground</td><td>Max Y=30</td><td>-</td></tr><tr><td><strong>Registeel</strong></td><td>Yes</td><td>Arid</td><td>Dawn / Morning</td><td>Underground</td><td>Max Y=30</td><td>-</td></tr><tr><td><strong>Latias</strong></td><td>Yes</td><td>Ocean / Warm Ocean</td><td>Morning</td><td>Air</td><td>-</td><td>-</td></tr><tr><td><strong>Latios</strong></td><td>Yes</td><td>Ocean / Warm Ocean</td><td>Afternoon</td><td>Air</td><td>-</td><td>-</td></tr><tr><td><strong>Kyogre</strong></td><td>Yes</td><td>Deep Oceans</td><td>Night</td><td>Water</td><td>Rainy or Stormy Weather / Max Y=40</td><td>-</td></tr><tr><td><strong>Groudon</strong></td><td>Yes</td><td>Arid</td><td>Day</td><td>Land</td><td>Clear Weather / Max Y=90</td><td>-</td></tr><tr><td><strong>Rayquaza</strong></td><td>Yes</td><td>Mountainous</td><td>Afternoon / Dusk</td><td>Air</td><td>-</td><td>-</td></tr><tr><td><strong>Uxie</strong></td><td>Yes</td><td>Lakes / Roofed</td><td>Afternoon</td><td>Surface Water</td><td>-</td><td>-</td></tr><tr><td><strong>Mesprit</strong></td><td>Yes</td><td>Lakes / Birches</td><td>Dawn / Morning</td><td>Surface Water</td><td>-</td><td>-</td></tr><tr><td><strong>Azelf</strong></td><td>Yes</td><td>Lakes / Forests</td><td>Morning</td><td>Surface Water</td><td>-</td><td>-</td></tr><tr><td><strong>Dialga</strong></td><td>Yes</td><td>Desert</td><td>-</td><td>Timespace Alatar</td><td>-</td><td>-</td></tr><tr><td><strong>Palkia</strong></td><td>Yes</td><td>Desert</td><td>-</td><td>Timespace Altar</td><td>-</td><td>-</td></tr><tr><td><strong>Giratina</strong></td><td>Yes</td><td>Desert</td><td>-</td><td>Timespace Altar</td><td>-</td><td>-</td></tr><tr><td><strong>Heatran</strong></td><td>Yes</td><td>Mesas / Basalt Deltas</td><td>-</td><td>Underground Lava / Surface Lava</td><td>Max Y=50 for Underground</td><td>-</td></tr><tr><td><strong>Regigigas</strong></td><td>Yes</td><td>Deep Dark</td><td>Afternoon / Dusk</td><td>Underground</td><td>Ancient City</td><td>-</td></tr><tr><td><strong>Cresselia</strong></td><td>Yes</td><td>Old Growth Birch Forest</td><td>Night</td><td>Land</td><td>Full Moon</td><td>-</td></tr><tr><td><strong>Tornadus</strong></td><td>Yes</td><td>Plains</td><td>Afternoon</td><td>Air</td><td>Rainy or Stormy Weather</td><td>-</td></tr><tr><td><strong>Thundurus</strong></td><td>Yes</td><td>Plains</td><td>Morning</td><td>Air</td><td>Rainy or Stormy Weather</td><td>-</td></tr><tr><td><strong>Landorus</strong></td><td>Yes</td><td>Mesas</td><td>Dawn / Morning</td><td>Air</td><td>-</td><td>-</td></tr><tr><td><strong>Reshiram</strong></td><td>Yes</td><td>Redwoods</td><td>Day</td><td>Land</td><td>-</td><td>-</td></tr><tr><td><strong>Zekrom</strong></td><td>Yes</td><td>Redwoods</td><td>Night</td><td>Land</td><td>-</td><td>-</td></tr><tr><td><strong>Kyurem</strong></td><td>Yes</td><td>Ice Spikes</td><td>Afternoon / Dusk</td><td>Land</td><td>-</td><td>-</td></tr><tr><td><strong>Cobalion</strong></td><td>Yes</td><td>Birches / Forests</td><td>Night</td><td>Land</td><td>Min Y=85</td><td>-</td></tr><tr><td><strong>Terrakion</strong></td><td>Yes</td><td>Birches / Forests</td><td>Night</td><td>Land</td><td>Min Y=85</td><td>-</td></tr><tr><td><strong>Virizion</strong></td><td>Yes</td><td>Birches / Forests</td><td>Day</td><td>Land</td><td>Min Y=85</td><td>-</td></tr><tr><td><strong>Xerneas</strong></td><td>Yes</td><td>Magical / Roofed</td><td>Day</td><td>Land</td><td>-</td><td>Flowery</td></tr><tr><td><strong>Yveltal</strong></td><td>Yes</td><td>Taigas / Evil</td><td>Night</td><td>Air</td><td>-</td><td>Redwoods</td></tr><tr><td><strong>Zygarde</strong></td><td>Yes</td><td>Badlands / Desert / Savanna</td><td>Dawn / Dusk</td><td>Land</td><td>Max Y=40</td><td>-</td></tr><tr><td><strong>Tapu Koko</strong> </td><td>Yes</td><td>Jungles</td><td>Morning</td><td>Land</td><td>Max Y=90</td><td>-</td></tr><tr><td><strong>Tapu Lele</strong></td><td>Yes</td><td>Jungles</td><td>Night</td><td>Land</td><td>Max Y=90</td><td>-</td></tr><tr><td><strong>Tapu Bulu</strong></td><td>Yes</td><td>Jungles</td><td>Day</td><td>Land</td><td>Max Y=90</td><td>-</td></tr><tr><td><strong>Tapu Fini</strong></td><td>Yes</td><td>Jungles</td><td>Afternoon</td><td>Land</td><td>Max Y=90</td><td>-</td></tr><tr><td><strong>Cosmog</strong></td><td>Yes</td><td>Sunflower Plains / Ultraspace</td><td>Dusk / Night</td><td>Land</td><td>-</td><td>-</td></tr><tr><td><strong>Cosmoem</strong></td><td>Yes</td><td>Does Not Spawn</td><td>-</td><td>Evolves from Cosmog</td><td>-</td><td>-</td></tr><tr><td><strong>Solgaleo</strong></td><td>Yes</td><td>Does Not Spawn</td><td>-</td><td>Evolves from Cosmoem</td><td>-</td><td>-</td></tr><tr><td><strong>Lunala</strong></td><td>Yes</td><td>Does Not Spawn</td><td>-</td><td>Evolves from Cosmoem</td><td>-</td><td>-</td></tr><tr><td><strong>Necrozma</strong></td><td>Yes</td><td>Roofed</td><td>Night</td><td>Land</td><td>Max Y=85</td><td>-</td></tr><tr><td><strong>Type-Null</strong></td><td>Yes</td><td>Overworld</td><td>Dusk / Night</td><td>Indoors</td><td>Stronghold</td><td>-</td></tr><tr><td><strong>Silvally</strong></td><td>Yes</td><td>Does Not Spawn</td><td>-</td><td>Evolves from Type-Null</td><td>-</td><td>-</td></tr><tr><td><strong>Zacian</strong></td><td>Yes</td><td>Birches / Forests</td><td>Day</td><td>Land</td><td>Max Y=85</td><td>-</td></tr><tr><td><strong>Zamazenta</strong></td><td>Yes</td><td>Birches / Forests</td><td>Night</td><td>Land</td><td>Max Y=85</td><td>-</td></tr><tr><td><strong>Eternatus</strong></td><td>Yes</td><td>Swamps / End Barrens</td><td>Dawn / Morning</td><td>Land</td><td>-</td><td>-</td></tr><tr><td><strong>Kubfu</strong></td><td>Yes</td><td>Bamboo Jungle</td><td>Afternoon</td><td>Land</td><td>-</td><td>-</td></tr><tr><td><strong>Urshifu</strong></td><td>Yes</td><td>Does Not Spawn</td><td>-</td><td>Evolves from Kubfu</td><td>-</td><td>-</td></tr><tr><td><strong>Regieleki</strong></td><td>Yes</td><td>End</td><td>Afternoon</td><td>Manmade</td><td>-</td><td>-</td></tr><tr><td><strong>Regidrago</strong></td><td>Yes</td><td>Hellish</td><td>Day</td><td>Manmade</td><td>-</td><td>-</td></tr><tr><td><strong>Galar-Articuno</strong></td><td>Yes</td><td>Icy / Snowy Taiga</td><td>Night</td><td>Air</td><td>-</td><td>-</td></tr><tr><td><strong>Galar-Zapdos</strong></td><td>Yes</td><td>Savanna</td><td>Night</td><td>Land</td><td>-</td><td>-</td></tr><tr><td><strong>Galar-Moltres</strong></td><td>Yes</td><td>Badlands</td><td>Night</td><td>Air</td><td>-</td><td>-</td></tr><tr><td><strong>Glastrier</strong></td><td>Yes</td><td>Freezing</td><td>Day</td><td>Land</td><td>-</td><td>Freezing Forests</td></tr><tr><td><strong>Spectrier</strong></td><td>Yes</td><td>Swamps</td><td>Night</td><td>Land</td><td>-</td><td>-</td></tr><tr><td><strong>Calyrex</strong></td><td>Yes</td><td>Freezing Forests</td><td>Morning</td><td>Land</td><td>-</td><td>-</td></tr><tr><td><strong>Enamorous</strong></td><td>Yes</td><td>Flowery</td><td>Dawn / Dusk</td><td>Air</td><td>-</td><td>-</td></tr><tr><td><strong>Koraidon</strong></td><td>Yes</td><td>Small End Islands</td><td>Day</td><td>Land</td><td>-</td><td>-</td></tr><tr><td><strong>Miraidon</strong></td><td>Yes</td><td>Small End Islands</td><td>Night</td><td>Land</td><td>-</td><td>-</td></tr><tr><td><strong>Chien-Pao</strong></td><td>Yes</td><td>Freezing Mountains</td><td>Night</td><td>Land</td><td>Min Y=100</td><td>-</td></tr><tr><td><strong>Ting-Lu</strong></td><td>Yes</td><td>Taigas</td><td>Night</td><td>Land</td><td>-</td><td>-</td></tr><tr><td><strong>Wo-Chien</strong></td><td>Yes</td><td>Swamps</td><td>Night</td><td>Land</td><td>-</td><td>-</td></tr><tr><td><strong>Chi-Yu</strong></td><td>Yes</td><td>Mesas / Volcanic</td><td>Day</td><td>Lava Floor</td><td>Min Y=100</td><td>-</td></tr><tr><td><strong>Okidogi</strong></td><td>No</td><td>Flowery / Plains / Forest</td><td>Morning</td><td>Land</td><td>-</td><td>-</td></tr><tr><td><strong>Munkidori</strong></td><td>No</td><td>River / Swamp / Lush</td><td>Noon</td><td>Land</td><td>-</td><td>-</td></tr><tr><td><strong>Fezandipiti</strong></td><td>No</td><td>Flowery</td><td>Dawn</td><td>Land</td><td>Clear Weather</td><td>-</td></tr><tr><td><strong>Ogerpon</strong></td><td>No</td><td>Flowery / Lush</td><td>Night</td><td>Land</td><td>-</td><td>Sunflower Plains</td></tr><tr><td><strong>Terapagos</strong></td><td>No</td><td>Beach</td><td>Dawn / Dusk</td><td>Land</td><td>-</td><td>-</td></tr></tbody></table>

***

### Shrines

As listed above, a select few Pokemon are not obtainable through wild spawns, and are instead restricted to shrines. Whilst this may sound more elusive, they are in-fact readily available at `/warp shrines` within our Spawn.

<figure><img src="/files/asy5iIjzLnFgGpjtuJo7" alt="" width="563"><figcaption><p>Shrine Warp</p></figcaption></figure>

Below you will find details on each of the individual shrines, what items are required to summon the Legendary Pokemon, and how to go about using them.

| Shrine (name + image)                                                           | How to Use                                                                                                                                                                                                                                                                                                                                                                                                                                                                                                                                                                                                                                       |
| ------------------------------------------------------------------------------- | ------------------------------------------------------------------------------------------------------------------------------------------------------------------------------------------------------------------------------------------------------------------------------------------------------------------------------------------------------------------------------------------------------------------------------------------------------------------------------------------------------------------------------------------------------------------------------------------------------------------------------------------------ |
| Frozen Shrine <img src="/files/yCRsqy5nhXzVTwf5HevN" alt="" data-size="line">   | Interact with the shrine using a fully charged Orb of Frozen Souls <img src="/files/8YLP1NWoAApBdi4miKF8" alt="" data-size="line"> to summon Articuno.                                                                                                                                                                                                                                                                                                                                                                                                                                                                                           |
| Static Shrine <img src="/files/X0TxB0rReYifQnGJNkvj" alt="" data-size="line">   | Interact with the shrine using a fully charged Orb of Static Souls <img src="/files/aPXcSzyydKc3xZ4baSUT" alt="" data-size="line"> to summon Zapdos.                                                                                                                                                                                                                                                                                                                                                                                                                                                                                             |
| Fiery Shrine <img src="/files/UDhrEWS1pa8j9LvO8G4J" alt="" data-size="line">    | Interact with the shrine using a fully charged Orb of Fiery Souls <img src="/files/5rXEJw7ucQyMfVKbIiFO" alt="" data-size="line"> to summon Moltres.                                                                                                                                                                                                                                                                                                                                                                                                                                                                                             |
| Ilex Shrine <img src="/files/XObXbHHMgZWNLh21IKz5" alt="" data-size="line">     | Interact with the shrine using the GS Ball <img src="/files/HA7ThJN4PeB776UxRVBb" alt="" data-size="line"> to summon Celebi.                                                                                                                                                                                                                                                                                                                                                                                                                                                                                                                     |
| Timespace Altar <img src="/files/ZrXD7k6VldS5y0d8149t" alt="" data-size="line"> | <p>Use an Azure Flute <img src="/files/M3nDNNUa6tDAoNPjsRgB" alt="" data-size="line"> (obtained from the Arc Chalice <img src="/files/w0HqT3vhcVmdovGXUOJ2" alt=""> ) near the altar to summon Arceus.<br><br>Interaction with the altar using a Red Chain <img src="/files/0cs6lWlVflv3w1HfmNef" alt="" data-size="line">, and after the respective Creation Trio Orb to summon Dialga (Adamant <img src="/files/TeSr14aKzAu0rK6pU2ZY" alt="" data-size="line">), Palkia (Lustrous <img src="/files/2CZjKsonkDj80aG0iEtw" alt="" data-size="line">) or Giratina (Griseous <img src="/files/kwdoqlYemJSHeXJOh5EY" alt="" data-size="line">).</p> |

{% hint style="info" %}
To ensure everyone may utilise the same set of shrines, there is a system that allows you to reset them, bypassing the typical one-time use nature of them.\
\
By interacting with a used shrine using an end crystal, there is a chance the shrine will be reset, allowing it to be used to summon a Legend again.
{% endhint %}


# Ultra Beasts and Paradox Spawns Info

Here you will find how to find all of the Ultra Beasts and Mythicals on our server letting you know how exactly to obtain them and if they're available yet.

**Contents**

1. [Ultra Beasts](#ultra-beasts)
2. [Paradox Pokemon](#paradox-pokemon)

***

#### Ultra Beasts

<table><thead><tr><th width="144">Ultra Beast</th><th width="173.5">Biome(s)</th><th width="106">Time</th><th width="187">Location</th><th data-hidden>Conditions</th></tr></thead><tbody><tr><td><strong>Nihilego</strong></td><td>Ultra Deep Sea</td><td>-</td><td>Land</td><td>-</td></tr><tr><td><strong>Buzzwole</strong></td><td>Ultra Jungle</td><td>-</td><td>Land / Tree Top</td><td>-</td></tr><tr><td><strong>Celesteela</strong></td><td>Ultra Crater</td><td>-</td><td>Land</td><td>-</td></tr><tr><td><strong>Pheromosa</strong></td><td>Ultra Desert</td><td>-</td><td>Land</td><td>-</td></tr><tr><td><strong>Xurkitree</strong></td><td>Ultra Plant</td><td>-</td><td>Land</td><td>-</td></tr><tr><td><strong>Kartana</strong></td><td>Ultra Forest</td><td>-</td><td>Land</td><td>-</td></tr><tr><td><strong>Guzzlord</strong></td><td>Ultra Desert</td><td>-</td><td>Land</td><td>-</td></tr><tr><td><strong>Poipole</strong></td><td>Ultra Jungle</td><td>-</td><td>Land</td><td>-</td></tr><tr><td><strong>Naganadel</strong></td><td>Does Not Spawn</td><td>-</td><td>Evolves from Poipole</td><td>-</td></tr><tr><td><strong>Blacephalon</strong></td><td>Ultra Forest</td><td>-</td><td>Land</td><td>-</td></tr><tr><td><strong>Stakataka</strong></td><td>Ultra Desert</td><td>-</td><td>Land</td><td>-</td></tr></tbody></table>

#### Paradox Pokemon

<table><thead><tr><th width="149.25">Paradox Pokemon</th><th width="158">Biome(s)</th><th width="123">Time</th><th>Location</th><th data-hidden>Conditions</th></tr></thead><tbody><tr><td><strong>Great Tusk</strong></td><td>Small End Islands</td><td>Any</td><td>Land</td><td>-</td></tr><tr><td><strong>Scream Tail</strong></td><td>Small End Islands</td><td>Any</td><td>Land</td><td>-</td></tr><tr><td><strong>Brute Bonnet</strong></td><td>Small End Islands</td><td>Any</td><td>Land</td><td>-</td></tr><tr><td><strong>Flutter Mane</strong></td><td>Small End Islands</td><td>Any</td><td>Land</td><td>-</td></tr><tr><td><strong>Slither Wing</strong></td><td>Small End Islands</td><td>Any</td><td>Land</td><td>-</td></tr><tr><td><strong>Sandy Shocks</strong></td><td>Small End Islands</td><td>Any</td><td>Land</td><td>-</td></tr><tr><td><strong>Roaring Moon</strong></td><td>Small End Islands</td><td>Any</td><td>Land</td><td>-</td></tr><tr><td><strong>Walking Wake</strong></td><td>End</td><td>Any</td><td>5 Star Raids</td><td>-</td></tr><tr><td><strong>Raging Bolt</strong></td><td>Does Not Spawn</td><td>-</td><td>Research</td><td>-</td></tr><tr><td><strong>Gouging Fire</strong></td><td>Does Not Spawn</td><td>-</td><td>Research</td><td>-</td></tr><tr><td><strong>Iron Treads</strong></td><td>Small End Islands</td><td>Any</td><td>Land</td><td>-</td></tr><tr><td><strong>Iron Bundle</strong></td><td>Small End Islands</td><td>Any</td><td>Land</td><td>-</td></tr><tr><td><strong>Iron Hands</strong></td><td>Small End Islands</td><td>Any</td><td>Land</td><td>-</td></tr><tr><td><strong>Iron Jugulis</strong></td><td>Small End Islands</td><td>Any</td><td>Land</td><td>-</td></tr><tr><td><strong>Iron Moth</strong></td><td>Small End Islands</td><td>Any</td><td>Land</td><td>-</td></tr><tr><td><strong>Iron Thorns</strong></td><td>Small End Islands</td><td>Any</td><td>Land</td><td>-</td></tr><tr><td><strong>Iron Valiant</strong></td><td>Small End Islands</td><td>Any</td><td>Land</td><td>-</td></tr><tr><td><strong>Iron Leaves</strong></td><td>End</td><td>Any</td><td>5 Star Raids</td><td>-</td></tr><tr><td><strong>Iron Crown</strong></td><td>Does Not Spawn</td><td>-</td><td>Research</td><td>-</td></tr><tr><td><strong>Iron Boulder</strong></td><td>Does Not Spawn</td><td>-</td><td>Research</td><td>-</td></tr></tbody></table>


# Server Rules

Here you'll find all the rules that apply when playing Cobblemon on our server.

Breaking any of these rules listed below on the server will result in some form of punishment given from warnings to permanent bans.

<table><thead><tr><th width="91.666748046875">Number</th><th width="656.9998779296875">Rule</th></tr></thead><tbody><tr><td><strong>Rule 1.</strong></td><td>Keep chat PG-13 - no inappropriate roleplaying, no swearing, use common sense and don't disrupt other players.</td></tr><tr><td><strong>Rule 2.</strong></td><td>Do not advertise, spam, use racial slurs, discuss politics/religion.</td></tr><tr><td><strong>Rule 3.</strong></td><td>Do not grief/steal/raid build within realms without permission from the owner. Builds within wilds are not protected and will be deleted when wilds reset.</td></tr><tr><td><strong>Rule 4.</strong></td><td>Do not use any harmful / objectionable language towards any players or staff.</td></tr><tr><td><strong>Rule 5.</strong></td><td>Do not use any mods/ resource packs or clients which grant an unfair advantage.</td></tr><tr><td><strong>Rule 6.</strong></td><td>The use of Macro's (regardless if with a client/mod or not) are not allowed on the server, especially within AFK farms.</td></tr><tr><td><strong>Rule 7.</strong></td><td>While AFKing is allowed, do not circumvent AFK detection by using objects or methods that make you appear active while away from your keyboard.</td></tr><tr><td><strong>Rule 8.</strong></td><td>Do not cheat or exploit server bugs, instead report them on discord.</td></tr><tr><td><strong>Rule 9.</strong></td><td>Do not scam players on the server under any capacity.</td></tr><tr><td><strong>Rule 10.</strong></td><td>No inappropriate names/skins/text/builds/signs for users/pokemon/items &#x26; no nickname impersonations.</td></tr><tr><td><strong>Rule 11.</strong></td><td>Any form of wagers, casino's or luck based games with prizes are not allowed under any capacity.</td></tr><tr><td><strong>Rule 12.</strong></td><td>No entry fee's for unofficial Gyms or Tournaments especially when giving out prizes.</td></tr><tr><td><strong>Rule 13.</strong></td><td>Do not beg players or staff for Items/Pokemon/Tokens/Etc.</td></tr><tr><td><strong>Rule 14.</strong></td><td>Selling/Buying Items/Pokemon/Tokens/Etc with money or gift cards outside the MMO Realms Store is strictly forbidden.</td></tr><tr><td><strong>Rule 15.</strong></td><td>Do not sell teleport requests or sell shiny/ub/legendaries catches.</td></tr><tr><td><strong>Rule 16.</strong></td><td>Using 'alts' or alternative accounts for personal advantage is forbidden.</td></tr><tr><td><strong>Rule 17.</strong></td><td>Do not discuss punishments within chat. If you wish to report a player then please make a ticket within the Discord server.</td></tr><tr><td><strong>Rule 18.</strong></td><td>Do not avoid the chat filter in place by swearing or using any words that's currently blocked.</td></tr><tr><td><strong>Rule 19.</strong></td><td>Do not use abbreviations which includes words or swears blocked by the censor. If you can't say it unabbreviated then don't say it at all.</td></tr><tr><td><strong>Rule 20.</strong></td><td>Do not argue with staff in public or private chats, listen to what they say and follow it. If you wish to report a staff member then contact a Head Admin or Manager.</td></tr><tr><td><strong>Rule 21.</strong></td><td>Do not grief/kill legends that spawn on another player. If you can't catch it then leave it alone for the player.</td></tr><tr><td><strong>Rule 22.</strong></td><td>Do not impersonate staff under any capacity, regardless of intentions behind it.</td></tr></tbody></table>

You'll be able to access the rules at any point while playing on the server when running the command `/rules` as you can go through each of the pages to see each one listed above.

### Want to Appeal a Punishment?

If you wish to appeal a permanent mute or ban you can do so by creating a ticket within our Discord  in which you'll need to show understanding to what you did wrong, why it's not allowed and that you won't do it again on the server.&#x20;

{% embed url="<https://forum.mmorealms.gg/>" %}

If you think you punishment given, regardless of the length, is unfair then please make a ticket to state your case to the staff member in which proof will be provided for your punishment. If there is sufficient proof to state your punishment as false we can then go ahead and reverse your punishment.

<mark style="color:red;">**\*NOTE\* - If you have a temp ban or mute you will not be able to appeal it and as such you will just have to wait it out.**</mark>

Not in our Discord Server? You can join it by clicking this link -> [**DISCORD**](https://discord.gg/muGmwBkAFB)


# Server Features and Mechanics

Here you'll find all features and mechanics that are accessible exclusively within Cobblemon MMO Realms.

**Contents**

1. [What are Features and Mechanics?](#what-are-features-and-mechanics)
2. [List of all current Features and Mechanics](#list-of-all-current-features-and-mechanics)
   1. [Realms](#realms)
   2. [NPC Gyms](#npc-gyms)
   3. [Chat Games](#chat-games)
   4. [Pokedex Rewards](#pokedex-rewards)
   5. [Hunts](#hunts)
   6. [Auction House](#auction-house)
   7. [Plushies](#plushies)
   8. [Pokemart \[Shop\]](#pokemart-shop)
   9. [Wondertrade](#wondertrade)
   10. [Daily (Login) Rewards](#daily-login-rewards)
   11. [Playtime Rewards](#playtime-rewards)
   12. [RTP (Random Teleport)](#rtp-random-teleport)
3. [Features and Mechanics planned for the future](#features-and-mechanics-planned-for-the-future)

***

### What are Features and Mechanics?

While the base Pixelmon mod already includes plenty of exciting features for players to enjoy (*including mechanics such as Pokémon Riding*), MMO Realms expands the experience even further with a wide variety of custom features you won’t find in the base mod or on many other Pixelmon servers.

This guide will showcase the many custom systems and features we have implemented ourselves, along with a preview of the exciting content and additions planned for the future.

### List of all current Features and Mechanics

#### Realms

We couldn’t begin this list without mentioning Realms, the flagship feature that sets MMO Realms apart from many other servers on the market. Instead of every player sharing a single world for building and gathering resources, which can often lead to griefing, resource shortages, or trolling, MMO Realms gives every player access to their very own private world. Here, you have complete freedom to build, explore, and create while choosing exactly who can access your Realm, making it a truly personal experience.

You can begin your Realm adventure as soon as you join the server by using the `/realms` command.

<figure><img src="/files/XLk73UJOu5aJzc7UPnhi" alt="" width="375"><figcaption><p>Private Realm via <code>/realms</code></p></figcaption></figure>

You'll be able to find out more information about Realms via this guide:

{% embed url="<https://wiki.mmorealms.gg/pixelmon-wiki/realm-guide>" %}

#### NPC Gyms

A core feature of the server is its NPC Gyms, where players can take on challenges inspired by the main series Pokemon games in order to earn badges and valuable rewards. With over 25 unique gyms already available and hundreds more planned for the future, there is no shortage of battles and progression for trainers to experience. Whether you’re testing your strategy, building the perfect team, or collecting every badge, NPC Gyms provide an exciting long-term challenge for every battler on the server.

You can start battling Gyms via the command `/gyms`

<figure><img src="/files/uyJoyH0zTVv26yQY1aEO" alt=""><figcaption><p>GUI for Kanto Region</p></figcaption></figure>

You'll be able to find out more information about NPC Gyms via this guide:

{% embed url="<https://wiki.mmorealms.gg/pixelmon-wiki/general-guides/complete-overview-to-npc-gyms>" %}

#### Chat Games

Chat Games is an interactive feature that allows every player to participate directly through the main public chat. Every few minutes, a question will appear for all players to answer, and the first player to respond correctly will earn the point along with a reward prize.

<figure><img src="/files/EcH8Bg0tZvhTeDXcQpLp" alt=""><figcaption><p>Chat Games within Public Chat</p></figcaption></figure>

For players who enjoy competition, Chat Games also features a monthly leaderboard where the top 3 players can earn exclusive bonus rewards. Whether you’re testing your Pokemon knowledge or competing to prove who knows the most, Chat Games offers a fun and rewarding challenge for everyone. You can view your Chat Games statistics and leaderboard rankings at any time using`/cg lb`.

<figure><img src="/files/yJBa65ueWoYls3vsTK9f" alt=""><figcaption><p>Chat Games Leaderboard</p></figcaption></figure>

#### Pokedex Rewards

Pokedex Rewards is the perfect feature for players who love catching them all while earning valuable rewards along the way. As you progress through your Pokedex completion, you’ll unlock milestone rewards for every 10% completed, giving you even more incentive to continue your journey. However, Pokedex entries cannot be obtained through trading, you’ll need to truly earn them by catching Pokémon in the wild, breeding, and evolving them to fully complete your collection.

You can start collecting Pokedex Rewards via the command `/pokedex` or `/pokedexrewards`

<figure><img src="/files/2tD9OP59IFgjVTYGvFY0" alt=""><figcaption><p>Pokedex Rewards GUI via <code>/pokedex</code></p></figcaption></figure>

#### Hunts

Hunts are one of the best ways for players to earn exciting rewards while doing what Pokémon is best known for, catching Pokémon. With three different hunt types available, players can take on challenges ranging from finding a specific Pokémon, catching one with certain IVs and Natures, or even tracking down a rare Shiny Pokémon. Completing Hunts can reward you with valuable prizes such as PokeCoins, Gems, rare shinies, and much more.

<figure><img src="/files/3esuyRJ3TE8wEgB0B41U" alt=""><figcaption><p>Hunts GUI via <code>/hunts</code></p></figcaption></figure>

You'll be able to find out more information about Hunts via this guide:

{% embed url="<https://wiki.mmorealms.gg/pixelmon-wiki/general-guides/complete-overview-to-hunts>" %}

#### Auction House

The Auction House is the perfect place to buy and sell Pokemon, items, and valuable resources with other players across the server. Easily list your items for any price you choose, and once purchased, the buyer receives the item while you earn the money instantly.&#x20;

Whether you’re looking to make profits, trade rare finds, or search for something specific, the Auction House provides a simple and convenient marketplace for every player.

<figure><img src="/files/1XRY7kSGBCe5nfAOSN8Y" alt="" width="381"><figcaption><p>Auction House via <code>/AH</code></p></figcaption></figure>

You can start selling items or pokemon via the `/ah sell` command. Items and Pokemon commands work slightly different as follows:

* **POKEMON** - `/ah sell pokemon <slot> <amount>`
* **ITEM** - `/ah sell pokemon <amount>`   \[*While holding the item*]

#### Plushies

Plushies are the perfect way to bring your Realm to life with the Pokemon of your choice. Obtainable through Crates, Mechanics, Trading, or Ranks, these collectible decorations can be placed anywhere within your personal Realm, allowing your favorite Pokemon to stand proudly as lifelike statues and displays. Whether it’s a majestic Gyarados resting within a lake or a powerful Rayquaza soaring across the skies, Plushies give you the freedom to unleash your creativity and design a Realm that feels truly alive.

<figure><img src="/files/URAR9L2WOXARTTjaPLka" alt="" width="375"><figcaption><p>Plushies Placed within a Realm</p></figcaption></figure>

#### Pokemart \[Shop]

This is another feature which will allow you to easily buy and sell stuff on the server regardless of your location. From Pokeballs, to Wood, to Decorations to even Music Discs; there's bound to be something to catch your eye. You can start accessing the shop via the command `/shop` .

<figure><img src="/files/TubjYBmRRYxawM8ew8Bj" alt=""><figcaption><p>PokeMart via /<code>shop</code></p></figcaption></figure>

#### **Wondertrade**

Wondertrade, originally introduced in Pokemon X and Y (2013), lets you trade a Pokemon and receive a random Pokemon from another player. On the server it works similarly, but you can view the Wondertrade Pool at any time and may receive a system generated Pokemon which grants a Pokedex entry if you don't already have it.

Use `/wt` to start a Wondertrading and `/wt pool` to view the current pool.

<figure><img src="/files/HlynrWBnGDyMGiR5zXm4" alt=""><figcaption><p>Wondertrade Pool via <code>/wt pool</code></p></figcaption></figure>

**NOTE:** Wondertraded Pokemon cannot be recovered. Pokemon received from other players do not grant Pokédex entries. The Wondertrade Pool resets weekly, removing existing entries and creating opportunities for new shiny and legendary Pokémon to enter the pool.

#### **Daily (Login) Rewards**

Daily Login Rewards reward players for logging in each day, increasing their streak and unlocking better rewards for up to 365 days. Missing a login day will reset your streak back to Day 1. Your daily timer begins when you log in and after 24 hours have passed, you have until the 48 hour mark to log in again and maintain your streak. If you fail to do so, your streak will be lost and cannot be restored.

**Access Daily Login Rewards** with `/daily`, or through the Calendar Rewards pop up shown when you join the server.

<figure><img src="/files/6j2EBJMjhoC2XtMp2vHF" alt=""><figcaption><p>Login Rewards via <code>/daily</code></p></figcaption></figure>

Players also receive one **Daily Spin** per day, offering a chance to win rewards ranging from Poke Balls and Rare Candies to Keys and Gems. You can access this within the same GUI as `/daily`.

<figure><img src="/files/yn8L8hen9fsFYqfmMuTW" alt=""><figcaption><p>Daily Spin Rewards via <code>/daily</code></p></figcaption></figure>

#### **Playtime Rewards**

Playtime Rewards allow players to earn rewards simply by spending time on the server. As your playtime increases, you'll unlock milestone rewards, with higher playtime milestones offering better rewards.

Start accessing Playtime Rewards by using `/playtime`.

<figure><img src="/files/fh5crwM3J4aXwp6x1C53" alt=""><figcaption></figcaption></figure>

**NOTE:** Playtime is only counted while actively playing. Time spent AFK or remaining in water, boats, or minecarts for more than 5 minutes will not contribute to your playtime total.

#### RTP (Random Teleport)

All players will be able to easily teleport to different dimensions without needing to worry about finding or creating portals. You are currently able to randomly teleported to a random spot within the Wilds (*Overworld*), Nether, End and Ultra Space.

Start accessing different dimensions via using `/rtp` to bring up a GUI to select the Dimension of your choice!

<figure><img src="/files/8qgpZYLWJ08GLCtqSkzf" alt=""><figcaption></figcaption></figure>

### Features and Mechanics planned for the future

Here is a list of future Features and Mechanics we have planned on the server with future updates:

* Safetrade
* Jobs
* Player Run Gyms
* Battle Tower
* Warzone
* Mail System
* Party Chat
* Drop Crates

Among many other features and mechanics planned to be introduced in future updates made on the server. Be sure to keep an eye out on all news from our Discord server here:

{% embed url="<https://discord.gg/wtFANZWC4a>" %}


# Commands and Uses

Here you can find a list of the main commands you can use on the server that are not connected with those found with donor ranks.

**Contents**

1. [General Commands](#general-commands)
2. [Donor Commands](#donor-commands)

***

#### **GENERAL COMMANDS**

Here you'll find all the commands you have access to on the server regardless if you have a rank or not.

<table><thead><tr><th width="209">Command</th><th>Use of Command</th></tr></thead><tbody><tr><td><code>/ah</code> or <code>/gts</code></td><td>This command will bring up the Auction House for you to use.</td></tr><tr><td><code>/ah sell pokemon SLOT PRICE</code> or <code>/gts sell pokemon SLOT PRICE</code> </td><td>You can use this command to sell Pokemon you have on the Auction House. Make sure you're picking the right slot of the pokemon you wish to sell and the amount you want for it within Pokecoins.</td></tr><tr><td><code>/ah sell item PRICE</code></td><td>You can use this command to sell item(s) you have on the Auction House. Make sure you're holding the items you wish to sell and the amount you want for it within Pokecoins.</td></tr><tr><td><code>/apply</code></td><td>Using this command in-game will bring up a link to the forums in where you can apply for staff.</td></tr><tr><td><code>/back</code></td><td>This command will take you back to the last spot you were in prior teleporting or warping to another area.</td></tr><tr><td><code>/bal</code></td><td>Using this command will show your current Pokecoins and Gems on the server.</td></tr><tr><td><code>/berries</code></td><td>This'll bring up a command to the wiki guide on all information relating to Berries.</td></tr><tr><td><code>/breedinghelp</code></td><td>This'll bring up a command to the wiki guide on all information relating to Breeding.</td></tr><tr><td><code>/builder</code></td><td>This will bring you up a command for how to apply for Builder and a link to our Discord server.</td></tr><tr><td><code>/buy</code> &#x26; <code>/store</code></td><td>This will bring up a link that'll direct you to the official MMO Realms store.</td></tr><tr><td><code>/catchcombo_info</code></td><td>This'll bring up a command that will link to the Catch Combo Guide found on this wiki.</td></tr><tr><td><code>/clauses</code></td><td>Gives a direct link to the clauses section within the NPC Gyms guide.</td></tr><tr><td><code>/colour</code> &#x26; <code>/color</code></td><td>This will bring up a link that'll direct you to the guide within the Wiki for help creating your Nickname and Colour help.</td></tr><tr><td><code>/combo</code> or <code>/catchcombo</code></td><td>You can use these commands to keep track on your active Catch Combo on the server.</td></tr><tr><td><code>/commands</code></td><td>This will bring up a link to this current guide for you to check all commands and their uses.</td></tr><tr><td><code>/crate</code> &#x26; <code>/crates</code></td><td>Using either of these commands will bring up a menu where you can access the crates on the server.</td></tr><tr><td><code>/daily</code></td><td>Opens up a GUI for selecting either Calander Rewards or Daily Spin Rewards.</td></tr><tr><td><code>/daily spin</code></td><td>Use this command to open the Daily Spin Rewards directly.</td></tr><tr><td><code>/daily streak</code></td><td>Use this command to see information relating to your current daily streak on the server.</td></tr><tr><td><code>/dexrewards</code> or <code>/pokedex</code></td><td>You can use this command to access the dex rewards, claim prizes for tiers or just check progress.</td></tr><tr><td><code>/discord</code></td><td>This command will bring up a link for you to join our Official Discord Server.</td></tr><tr><td><code>/discord link</code> and <code>/link</code>  </td><td>You'll be using this command to get access to the linking code needed to link your account to discord.</td></tr><tr><td><code>/discord_link_info</code></td><td>This command will show you how to link your minecraft account to discord in order to claim the discord kit.</td></tr><tr><td><code>/donate</code></td><td>This will bring up a link that'll direct you to the official MMO Realms store.</td></tr><tr><td><code>/end_battle</code></td><td>This command will allow you to end battles automatically. This is there in case you get stuck in a broken battle like within <code>/gyms</code>.</td></tr><tr><td><code>/fishing</code></td><td>This'll bring up a command that will link to the Fishing Guide found on this wiki.</td></tr><tr><td><code>/faq</code></td><td>Using this command will bring up a link to the FAQ page found within the Wiki.</td></tr><tr><td><code>/forms</code></td><td>This will bring up a link to the guide for all pokemon with forms on the server like Legendaries as well as regionals.</td></tr><tr><td><code>/fossils</code></td><td>This'll bring up a command to the wiki guide on all information relating to Fossils.</td></tr><tr><td><code>/gems</code></td><td>This'll bring up a command that will link to the Gems Guide found on this wiki.</td></tr><tr><td><code>/gts</code></td><td>This command will bring up the GTS for you to use.</td></tr><tr><td><code>/guide</code> &#x26; <code>/guides</code></td><td>Using either command will bring up a link to the Guides page found within the Wiki.</td></tr><tr><td><code>/gym</code> and <code>/gyms</code></td><td>This command allows you to access all Gyms currently available on the server.</td></tr><tr><td><code>/gyms_info</code></td><td>This'll bring up a command that will link to the Gyms Guide found on this wiki.</td></tr><tr><td><code>/help</code> &#x26; <code>/wiki</code></td><td>Using this command will give you a link which will direct you to this wiki.</td></tr><tr><td><code>/home</code> &#x26; <code>/homes</code></td><td>This command will show you all the homes you have on the server so you can teleport to if you set it up with <code>/sethome</code>.</td></tr><tr><td><code>/hunt</code> &#x26; <code>/hunts</code></td><td>This will bring up a GUI in which players will have a choice of 3 different hunts to complete on the server for some rewards.</td></tr><tr><td><code>/ignore</code></td><td>Blocks chats from being received by a specified user.</td></tr><tr><td><code>/ignorelist</code></td><td>Displays all users you currently have ignored.</td></tr><tr><td><code>/ip</code></td><td>This command will show you the IP for the server.</td></tr><tr><td><code>/kit</code> &#x26; <code>/kits</code></td><td><p>Using either command will bring up a submenu where you can see all the kits and which ones are accessible or not for you. </p><p>[<em>There are also kits exclusive to each Donor Rank.</em>]</p></td></tr><tr><td><code>/keys</code></td><td>This will direct you into the store where you can purchase Gems.</td></tr><tr><td><code>/legendaries</code> and <code>/mythicalspawns</code></td><td>This will bring up a link that will direct you to the Legends and Mythicals spawn page on the Wiki.</td></tr><tr><td><code>/megas</code></td><td>This'll bring up a command that will link to the Mega Pokemon Guide found on this wiki.</td></tr><tr><td><code>/modpack</code></td><td>This command will give you a direct link to our official Modrinth Pack.</td></tr><tr><td><code>/modpack_info</code></td><td>Using this command will show you information relating to the modpack.</td></tr><tr><td><code>/mutechat</code></td><td>You can use this command to mute the global chat or re-activate it if you already have it muted.</td></tr><tr><td><code>/msg IGN</code></td><td>You can use this command to message people privately on the server.</td></tr><tr><td><code>/neuter</code></td><td>You can use this command to neuter any pokemon you have on you so that it will no longer be breedable.</td></tr><tr><td><code>/p2w</code></td><td>This command will bring up a mini text message explaining why we have a store on the server.</td></tr><tr><td><code>/playtime</code> or <code>/playtimerewards</code></td><td>Use this to open the Playtime Rewards GUI feature.</td></tr><tr><td><code>/playtime info</code> or <code>/playtimerewards info</code></td><td>Use this command to check your current playtime stats on the server.</td></tr><tr><td><code>/pokecoins</code></td><td>This'll bring up a command that will link to the Pokecoins Guide found on this wiki.</td></tr><tr><td><code>/pokesnacks</code></td><td>Gives a direct link to the Pokesnacks guide found on this wiki.</td></tr><tr><td><code>/realm</code></td><td>This command will bring up the submenu for Realms in which you can teleport back to your own Realm as well as checking members.</td></tr><tr><td><code>/realm add IGN</code>&#x26; <code>/realm invite IGN</code></td><td>You can use this command to add players into your Realm.</td></tr><tr><td><code>/realm ban IGN</code>&#x26; <code>/realm unban IGN</code></td><td>Use the commands to ban and unban certain players from entering from entering your realm.</td></tr><tr><td><code>/realm delete</code></td><td>Use this command to delete the current realm you have on the server. <strong>You have to be standing in the realm you wish to delete.</strong> </td></tr><tr><td><code>/realm help</code></td><td>This menu will bring up text where you can find info relating to realm commands.</td></tr><tr><td><code>/realm leave</code></td><td>Use this command to leave the realm that you're currently in.</td></tr><tr><td><code>/realm members</code></td><td>This command will show all current members within a realm.</td></tr><tr><td><code>/realm remove IGN</code></td><td>Use this command to remove a player from the realm.</td></tr><tr><td><code>/realm teleport</code></td><td>Use this command to jump straight back into your personal realm.</td></tr><tr><td><code>/realm trust IGN RANK</code></td><td>You can use this command to give certain players more permission than others</td></tr><tr><td><code>/realm visit IGN</code></td><td>Use this command to visit another players realm.</td></tr><tr><td><code>/realm set_spawn</code></td><td>You'll use this command to set your spawn with your own personal realm.</td></tr><tr><td><code>/realm legendarycapture ownerOnly</code></td><td>Using this command will mean any legendary that spawns on you will only be catch-able by you.</td></tr><tr><td><code>/realm legendarycapture shared</code></td><td>Using this command will mean any legendary that spawns on you will also be catchable for players you have shared access to within your realm.</td></tr><tr><td><code>/realm visitor_message</code></td><td>You can use this command to set a message which players will see upon joining your realm.</td></tr><tr><td><code>/rank</code> &#x26; <code>/ranks</code></td><td>Use this command to bring up a link to the ranks page on our Official Store.</td></tr><tr><td><code>/rewards</code></td><td>This a command players can use to obtain rewards from supporting the server. <strong>[NOT IMPLEMENTED]</strong></td></tr><tr><td><code>/rideable</code></td><td>This will give a link to the guide for riding pokemon where you can find all current rideable pokemon on the server.</td></tr><tr><td><code>/rtp</code></td><td>Using this command will bring up a GUI for RTP (Random Teleport) where you can choose the respective dimension to teleport to.</td></tr><tr><td><code>/rtp overworlds</code> or <code>/rtp wilds</code></td><td>Using either command will take you in a random spot within the Wilds. [<em>Cooldown = 10 Seconds</em>]</td></tr><tr><td><code>/rtp nether</code></td><td>Using this command will take you in a random spot within the Nether. [<em>Cooldown = 2 Minutes</em>]</td></tr><tr><td><code>/rtp end</code></td><td>Using this command will take you in a random spot within the End. [<em>Cooldown = 2 Minutes</em>]</td></tr><tr><td><code>/rtp ultra_space</code></td><td>Using this command will take you in a random spot within the Ultra Space. [<em>Cooldown = 2 Minutes</em>]</td></tr><tr><td><code>/rules</code></td><td>This will show you all the rules you have to follow on the server.</td></tr><tr><td><code>/scoreboard_toggle</code></td><td>Use this to hide (<em>or unhide</em>) the Scoreboard on the right side of your screen.</td></tr><tr><td><code>/shinies</code></td><td>This'll bring up a command that will link to the Shinies Guide found on this wiki.</td></tr><tr><td><code>/sethome NAME</code></td><td><p>Use this command to set homes on the server with the names you wish for them. </p><p>[<em>You can gain more Sethomes with donor ranks</em>]</p></td></tr><tr><td><code>/shop</code> or <code>/store</code></td><td>Use this command to bring up a submenu for the Pokemart on the server.</td></tr><tr><td><code>/tags</code></td><td>This command will bring up a GUI for players to select and look over tags available on the server.</td></tr><tr><td><code>/ticket</code> , <code>/tickets</code> or <code>/support</code></td><td>This will direct you into our Official Discord Server where you can create a ticket.</td></tr><tr><td><code>/tms</code></td><td>This will open a menu where you can click a Pokemon in your party and purchase a move from their moveset.</td></tr><tr><td><code>/tpa</code></td><td>Use this command to send a TP request to a player so you can teleport to their position.</td></tr><tr><td><code>/tpahere</code></td><td>Use this command to send a TP request to a player so you can teleport them to your position.</td></tr><tr><td><code>/trade &#x3C;user></code></td><td>Players can use this command to send Safetrade requests to others. They will receive the request within the Public Chat to accept.</td></tr><tr><td><code>/unignore</code></td><td>Removes a specified user from your ignore list, allowing for them to send you chats again.</td></tr><tr><td><code>/voicechat</code></td><td>This command is used to access the voice chat submenu on the server.</td></tr><tr><td><code>/vote</code></td><td>This command will bring up a link to where you can find all the places you can vote to earn vote keys on the server.</td></tr><tr><td><code>/warp &#x3C;WARP></code> </td><td>Use this command to teleport to any warps that are currently set up on the server.</td></tr><tr><td><code>/warps</code></td><td>This will state all warps available on the server.</td></tr><tr><td><code>/website</code></td><td>This will direct you to our official Wesbite Forums,</td></tr><tr><td><code>/wiki</code></td><td>This will open up the Pixelmon Wiki information searches.</td></tr><tr><td><code>/wildtrainer</code> or <code>/wildtrainers</code></td><td>Displays the location of the nearest wild trainer NPC. This command only functions on the Wilds server type.</td></tr><tr><td><code>/wondertrade</code> or <code>/wt</code></td><td>Use this command to open the GUI for wondertrading a Pokemon from your party.</td></tr><tr><td><code>/wondertrade pool</code> or <code>/wt pool</code></td><td>Use this command to see the current Wondertrade pool on the server.</td></tr><tr><td><code>/wt info</code> or <code>/wondertrade info</code></td><td>Use either of these commands to get a bit of info relating to Wondertrade.</td></tr><tr><td><code>/wt history</code> or <code>/wondertrade history</code></td><td>Use either of these commands to see your previous pulls from Wondertrade.</td></tr></tbody></table>

#### DONOR COMMANDS

This will go over all the commands found within ranks and give a brief bit of info relating to the command for you to fully understand. You can find out about more of the ranks and which command relates to which rank here:

{% embed url="<https://wiki.mmorealms.gg/cobblemon-wiki/donor-ranks-info>" %}

<table><thead><tr><th>Command</th><th>Use of Command</th><th align="center" valign="middle">Donor Rank Availability</th></tr></thead><tbody><tr><td><code>/anvil</code></td><td>Using this command will open up a anvil menu wherever you are.</td><td align="center" valign="middle"><strong>LEGEND</strong></td></tr><tr><td><code>/breed</code></td><td>This command lets you breed two pokemon together in a 10 minute cooldown.</td><td align="center" valign="middle"><strong>OMEGA</strong></td></tr><tr><td><code>/craft</code></td><td>Using this command will open up a crafting table menu wherever you are.</td><td align="center" valign="middle"><strong>ACE</strong></td></tr><tr><td><code>/enchant</code></td><td>Using this command will open up a enchantment table menu wherever you are.</td><td align="center" valign="middle"><strong>LEGEND</strong></td></tr><tr><td><code>/enderchest</code></td><td>Using this command will open up your personal ender chest menu wherever you are.</td><td align="center" valign="middle"><strong>MYTHIC</strong></td></tr><tr><td><code>/fly</code></td><td>This command will allow you to activate and de-active the ability to fly on the server.</td><td align="center" valign="middle"><strong>MYTHIC</strong></td></tr><tr><td><code>/hatch</code></td><td>This command lets you hat Pokemon Eggs with a 10 minute cooldown per egg hatched.</td><td align="center" valign="middle"><strong>DYNAMAX</strong></td></tr><tr><td><code>/hat</code></td><td>This command will allow you equip items as your hat on the server.</td><td align="center" valign="middle"><strong>PRO</strong></td></tr><tr><td><code>/nightvision</code></td><td>This command will allow you to activate and de-active nightvision on yourself on the server.</td><td align="center" valign="middle"><strong>MASTER</strong></td></tr><tr><td><code>/nick</code></td><td>Using this command, you'll be able to give yourself a nickname including adding colour to your name. For more info refer to our <a href="https://wiki.mmorealms.gg/cobblemon-wiki/general-guides/nickname-and-colour-help">Nickname &#x26; Colour Guide</a></td><td align="center" valign="middle"><strong>PRO</strong></td></tr><tr><td><code>/pc</code></td><td>Using this command will open up the Pokemon PC menu wherever you are.</td><td align="center" valign="middle"><strong>ULTRA</strong></td></tr><tr><td><code>/pokeheal</code></td><td>This command will heal your pokemon that are currently within your party.</td><td align="center" valign="middle"><strong>ACE</strong></td></tr><tr><td><code>/pokecolor</code></td><td>Using this command will allow you change your pokemon name colours within your party.</td><td align="center" valign="middle"><strong>MASTER</strong></td></tr><tr><td><code>/pokesee</code></td><td>Using this command will allow you to see other players Pokemon within their party.</td><td align="center" valign="middle"><strong>LEGEND</strong></td></tr><tr><td><code>/repair</code></td><td>This command will allow you to repair tools and armour on the server.</td><td align="center" valign="middle"><strong>ALPHA</strong></td></tr><tr><td><code>/sethome</code></td><td>This command is used to be able to set multiple homes on the server. The higher the rank you are, the more you have access to. You will need to name each of your homes in order to go to your corresponding home.</td><td align="center" valign="middle"><strong>ALL RANKS</strong></td></tr><tr><td><code>/smelt</code></td><td>This command will allow you to smelt ores on the server.</td><td align="center" valign="middle"><strong>DYNAMAX</strong></td></tr><tr><td><code>/stonecutter</code></td><td>Using this command will open up a stonecutter menu wherever you are.</td><td align="center" valign="middle"><strong>OMEGA</strong></td></tr><tr><td><code>/trash</code></td><td>Using this command will allow you to trash items you have within your hotbar.</td><td align="center" valign="middle"><strong>ULTRA</strong></td></tr></tbody></table>


# Donor Ranks Info

You'll find all the information connected to each of the ranks and what you'll obtain from all of them and how commands work.

**Contents**

1. [What are Donor Ranks?](#what-are-donor-ranks)
2. [How can I buy ranks?](#how-can-i-buy-ranks)
3. [All Ranks and their Benefits](#all-ranks-and-their-benefits)
   1. [Rank Upgrade](#rank-upgrade)
4. [Rank Commands](#rank-commands)

***

### What are Donor Ranks?

**Donor Ranks** are a way to support the server while unlocking a range of exclusive benefits in return. Unlike Keys, which are only single use and will grant a specific reward, Ranks provide ongoing perks such as unique commands, one time rewards (*including Legendaries*), and access to exclusive kits designed to enhance your overall experience.

No Pokemon are permanently locked behind ranks or any form of IRL payment. Rank rewards are designed to help streamline progression, speed up certain tasks, and provide bonus items that support you on your Pokemon journey without creating unfair advantages (*i.e. extra attack within battles*).

Your Rank will also be displayed in-game through distinctive chat and tab tags, and all donor ranks unlock perks such as custom nicknames that regular trainers won’t have access to. Every donation made through the store directly supports the server, allowing us to stay online while continuing to deliver new content and QOL improvements for *all* players, whether they donate or not.

### How can I buy ranks?

In order to buy ranks on the server, you will have to purchase gems from our official store which can be accessed below:

{% embed url="<https://store.pixelmonrealms.com/category/gems>" %}

From there all you need to do is head to /store in-game, click on **Ranks** and select the rank you wish to purchase.

<figure><img src="/files/cOcSGjuGFaaRfxXJtLva" alt="" width="286"><figcaption><p>In-game store via <code>/store</code></p></figcaption></figure>

For more ways to obtain Gems outside of buying them from our store, you can use the following guide:

{% embed url="<https://wiki.mmorealms.gg/cobblemon-wiki/general-guides/intro-to-earning-gems>" %}

### All Ranks and their Benefits

**Here is a list of all the Ranks, their price and what you obtain from purchasing them outright:**

> Please note that **you will only get the differences between ranks if you're upgrading your rank from a previous one**. To see specifics about what you get from each rank-upgrade [refer to the guide here](#rank-upgrade).

<details>

<summary><strong>Pro</strong>   [1350 Gems]</summary>

#### **On purchase, you will receive:** 🎁 **One Time Items (`/kit onetime` or `/`**`kit proonetime`**)**

* 8 x Rare Candies
* 1 x Random Pokémon
* 1 x Random Fossil
* $5,000 Pokecoins
* 1x Random Evolution Item
* 1x Random Pokemon Plushy

#### ✨ **Command Perks**

* 2 x /sethome
* /hat
* /nick

#### 📦 **Kits**

* **/kit pro** (4x Poké Balls, 4x Great Balls, 2x Rare Candies — **Daily**)

</details>

<details>

<summary><strong>Ace</strong>   [3390 Gems]</summary>

#### **On purchase, you will receive:** 🎁 **One Time Items (`/kit onetime` or `/`**`kit aceonetime`**)**

* 16 x Rare Candies
* 1 x Master Ball
* 1 x Random Fossil
* 2 x Random Pokémon
* $12,500 Pokecoins
* 1x Random Evolution Item & Stone
* 2x Random Pokemon Plushy

<mark style="color:red;">**NOTE \~ You only get the differences between ranks if choosing this as a rank up for one time rewards.**</mark>

#### ✨ **Command Perks**

* 4 x /sethome
* /hat
* /nick
* /craft
* /pokeheal (5 min cooldown)

#### 📦 **Kits**

* **/kit pro** (4x Poké Balls, 4x Great Balls, 2x Rare Candies — **Daily**)
* **/kit ace** (5x Poké Balls, 5x Great Balls, 3x Rare Candies — **Daily**)

</details>

<details>

<summary><strong>Ultra</strong>   [6900 Gems]</summary>

#### **On purchase, you will receive:** 🎁 **One Time Items (`/kit onetime` or `/`**`kit ultraonetime`**)**

* 24 x Rare Candies
* 2 x Master Balls
* 2 x Random Fossils
* 2 x Random Pokémon
* 1 x Random Shiny Pokémon
* $22,500 Pokecoins
* 1x Random Evolution Item & Stone
* 1x Random Held Item
* 2x Random Pokemon Plushy
* 1x Random Shiny Pokemon Plushy

<mark style="color:red;">**NOTE \~ You only get the differences between ranks if choosing this as a rank up for one time rewards.**</mark>

#### ✨ **Command Perks**

* 6 x /sethome
* /hat
* /nick
* /craft
* /pokeheal (5 min cooldown)
* /pc
* /trash

#### 📦 **Kits**

* **/kit pro** (4x Poké Balls, 4x Great Balls, 2x Rare Candies — **Daily**)
* **/kit ace** (5x Poké Balls, 5x Great Balls, 3x Rare Candies — **Daily**)
* **/kit ultra** (8x Poké Balls, 8x Great Balls, 4x Rare Candies — **Daily**)

</details>

<details>

<summary><strong>Master</strong>   [10400 Gems]</summary>

#### **On purchase, you will receive:** 🎁 **One Time Items (`/kit onetime` or `/`**`kit masteronetime`**)**

* 36 x Rare Candies
* 4 x Master Balls
* 2 x Random Fossils
* 2 x Random Pokémon
* 2 x Random Shiny Pokémon
* $35,000 Pokecoins
* 1x Random Evolution Item & Stone
* 1x Random Held Item
* 1x EXP Share & Lucky Egg
* 2x Random Pokemon Plushy
* 2x Random Shiny Pokémon Plushy

<mark style="color:red;">**NOTE \~ You only get the differences between ranks if choosing this as a rank up for one time rewards.**</mark>

#### ✨ **Command Perks**

* 8 x /sethome
* /hat
* /nick
* /craft
* /pokeheal (5 min cooldown)
* /pc
* /trash
* /pokecolor
* /nightvision

#### 📦 **Kits**

* **/kit pro** (4x Poké Balls, 4x Great Balls, 2x Rare Candies — **Daily**)
* **/kit ace** (5x Poké Balls, 5x Great Balls, 3x Rare Candies — **Daily**)
* **/kit ultra**  (8x Poké Balls, 8x Great Balls, 4x Rare Candies — **Daily**)
* **/kit master** (8x Great Balls, 12x Ultra Balls, 8x Quick Balls, 6x Rare Candies — **Daily**)

</details>

<details>

<summary><strong>Mythic</strong>   [13900 Gems]</summary>

#### **On purchase, you will receive:** 🎁 **One Time Items (`/kit onetime` or `/`**`kit mythiconetime`**)**

* 48 x Rare Candies
* 6 x Master Balls
* 3 x Random Fossils
* 2 x Random Pokémon
* 3 x Random Shiny Pokémon
* 1 x Random Legendary
* $50,000 PokeCoins
* 1x Random Evolution Item & Stone
* 2x Random Held Item
* 1x Random Mint
* 1x EXP Share & Lucky Egg
* 2x Random Pokémon Plushy
* 3x Random Shiny Pokémon Plushy

<mark style="color:red;">**NOTE \~ You only get the differences between ranks if choosing this as a rank up for one time rewards.**</mark>

#### ✨ **Command Perks**

* 10 x /sethome
* /hat
* /nick
* /craft
* /pokeheal (5 min cooldown)
* /pc
* /trash
* /pokecolor
* /nightvision
* /enderchest
* /fly

#### 📦 **Kits**

* **/kit pro** (4x Poké Balls, 4x Great Balls, 2x Rare Candies — **Daily**)
* **/kit ace** (5x Poké Balls, 5x Great Balls, 3x Rare Candies — **Daily**)
* **/kit ultra**  (8x Poké Balls, 8x Great Balls, 4x Rare Candies — **Daily**)
* **/kit master** (8x Great Balls, 12x Ultra Balls, 8x Quick Balls, 6x Rare Candies — **Daily**)
* **/kit mythic** (16x Great Balls, 16x Ultra Balls, 12x Quick Balls, 6x Rare Candies — **Daily**)

</details>

<details>

<summary><strong>Legend</strong>   [17450 Gems]</summary>

#### **On purchase, you will receive:** 🎁 **One Time Items (`/kit onetime` or `/`**`kit legendonetime`**)**

* 64x Rare Candies
* 8x Master Balls
* 3 x Random Fossils
* 2 x Random Pokemon
* 4x Random Shiny Pokémon
* 1x Random Legendary & 1x Random Shiny Legendary
* $70,000 PokeCoins
* 1x Random Evolution Item & Stone
* 2x Random Held Items & Random Mints
* 1x EXP Share & Lucky Egg
* 2x Random Pokémon Plushy
* 4x Random Shiny Pokémon Plushy

<mark style="color:red;">**NOTE \~ You only get the differences between ranks if choosing this as a rank up for one time rewards.**</mark>

#### ✨ **Command Perks**

* 12 x /sethome
* /hat
* /nick
* /craft
* /pokeheal (5 min cooldown)
* /pc
* /trash
* /pokecolor
* /nightvision
* /enderchest
* /fly
* /enchant
* /pokesee
* /anvil

#### 📦 **Kits**

* **/kit pro** (4x Poké Balls, 4x Great Balls, 2x Rare Candies — **Daily**)
* **/kit ace** (5x Poké Balls, 5x Great Balls, 3x Rare Candies — **Daily**)
* **/kit ultra**  (8x Poké Balls, 8x Great Balls, 4x Rare Candies — **Daily**)
* **/kit master** (8x Great Balls, 12x Ultra Balls, 8x Quick Balls, 6x Rare Candies — **Daily**)
* **/kit mythic** (16x Great Balls, 16x Ultra Balls, 12x Quick Balls, 6x Rare Candies — **Daily**)
* **/kit legend** (16x Great Balls, 20x Ultra Balls, 16x Level Balls, 10x Rare Candies — **Daily**)
* **/kit legendmonthly** (1x Basic Key — **Monthly**)

</details>

<details>

<summary><strong>Alpha</strong>   [23070 Gems]</summary>

#### **On purchase, you will receive:** 🎁 **One Time Items (`/kit onetime` or `/`**`kit alphaonetime`**)**

* 80x Rare Candies
* 11x Master Balls
* 4 x Random Fossils
* 2 x Random Pokemon
* 4x Random Shiny Pokémon
* 2x Random Legendary & 1x Random Shiny Legendary
* $95,000 PokeCoins
* 1x Random Evolution Item & Stone
* 2x Random Held Items & Random Mints
* 1x EXP Share & Lucky Egg
* 2x Random Pokémon Plushy
* 4x Random Shiny Pokémon Plushy
* 1x Random Ultra Beast Plushy

<mark style="color:red;">**NOTE \~ You only get the differences between ranks if choosing this as a rank up for one time rewards.**</mark>

#### ✨ **Command Perks**

* 14 x /sethome
* /hat
* /nick
* /craft
* /pokeheal (5 min cooldown)
* /pc
* /trash
* /pokecolor
* /nightvision
* /enderchest
* /fly
* /enchant
* /pokesee
* /anvil
* /repair

#### 📦 **Kits**

* **/kit pro** (4x Poké Balls, 4x Great Balls, 2x Rare Candies — **Daily**)
* **/kit ace** (5x Poké Balls, 5x Great Balls, 3x Rare Candies — **Daily**)
* **/kit ultra**  (8x Poké Balls, 8x Great Balls, 4x Rare Candies — **Daily**)
* **/kit master** (8x Great Balls, 12x Ultra Balls, 8x Quick Balls, 6x Rare Candies — **Daily**)
* **/kit mythic** (16x Great Balls, 16x Ultra Balls, 12x Quick Balls, 6x Rare Candies — **Daily**)
* **/kit legend** (16x Great Balls, 20x Ultra Balls, 16x Level Balls, 10x Rare Candies — **Daily**)
* **/kit alpha** (16x Great Balls, 16x Ultra Balls, 16x Level Balls, 10x Rare Candies — **Daily**)
* **/kit legendmonthly** (1x Basic Key — **Monthly**)
* **/kit alphamonthly** (1x Basic Key — **Monthly**)

</details>

<details>

<summary><strong>Omega</strong>   [28690 Gems]</summary>

#### **On purchase, you will receive:** 🎁 **One Time Items (`/kit onetime` or `/`**`kit omegaonetime`**)**

* 104 x Rare Candies
* 14 x Master Balls
* 4 x Random Fossils
* 2 x Random Pokemon
* 4x Random Shiny Pokémon
* 2x Random Legendary & 2x Random Shiny Legendary
* $130,000 PokeCoins
* 1x Random Evolution Item & Stone
* 2x Random Held Items & Random Mints
* 1x EXP Share & Lucky Egg
* 2x Random Pokémon Plushy
* 4x Random Shiny Pokémon Plushy
* 1x Random Legendary & Ultra Beast Plushies

<mark style="color:red;">**NOTE \~ You only get the differences between ranks if choosing this as a rank up for one time rewards.**</mark>

#### ✨ **Command Perks**

* 16 x /sethome
* /hat
* /nick
* /craft
* /pokeheal (5 min cooldown)
* /pc
* /trash
* /pokecolor
* /nightvision
* /enderchest
* /fly
* /enchant
* /pokesee
* /anvil
* /repair
* /breed (10 min cooldown)
* /stonecutter

#### 📦 **Kits**

* **/kit pro** (4x Poké Balls, 4x Great Balls, 2x Rare Candies — **Daily**)
* **/kit ace** (5x Poké Balls, 5x Great Balls, 3x Rare Candies — **Daily**)
* **/kit ultra**  (8x Poké Balls, 8x Great Balls, 4x Rare Candies — **Daily**)
* **/kit master** (8x Great Balls, 12x Ultra Balls, 8x Quick Balls, 6x Rare Candies — **Daily**)
* **/kit mythic** (16x Great Balls, 16x Ultra Balls, 12x Quick Balls, 6x Rare Candies — **Daily**)
* **/kit legend** (16x Great Balls, 20x Ultra Balls, 16x Level Balls, 10x Rare Candies — **Daily**)
* **/kit alpha** (16x Great Balls, 16x Ultra Balls, 16x Level Balls, 10x Rare Candies — **Daily**)
* **/kit omega** (24x Great Balls, 24x Ultra Balls, 24x Level Balls, 12x Rare Candies — **Daily**)
* **/kit legendmonthly** (1x Basic Key — **Monthly**)
* **/kit alphamonthly** (1x Basic Key — **Monthly**)
* **/kit omegamonthly** (1x Premium Key — **Monthly**)

</details>

<details>

<summary><strong>Dynamax</strong>   [58170 Gems]</summary>

#### **On purchase, you will receive:** 🎁 **One Time Items (`/kit onetime` or `/`**`kit dynamaxonetime`**)**

* 128x Rare Candies
* 16x Master Balls
* 5 x Random Fossils
* 2 x Random Pokemon
* 5x Random Shiny Pokémon
* 3x Random Legendary & 2x Random Shiny Legendary
* $180,000 PokeCoins
* 1x Random Evolution Item & Stone
* 2x Random Held Items & Random Mints
* 1x EXP Share & Lucky Egg
* 2x Random Pokémon Plushy
* 4x Random Shiny Pokémon Plushy
* 1x Random Mythical, Legendary & Ultra Beast Plushies

<mark style="color:red;">**NOTE \~ You only get the differences between ranks if choosing this as a rank up for one time rewards.**</mark>

#### ✨ **Command Perks**

* 20 x /sethome
* /hat
* /nick
* /craft
* /pokeheal (5 min cooldown)
* /pc
* /trash
* /pokecolor
* /nightvision
* /enderchest
* /fly
* /enchant
* /pokesee
* /anvil
* /repair
* /breed (10 min cooldown)
* /stonecutter
* /hatch (10 min cooldown)
* /smelt

#### 📦 **Kits**

* **/kit pro** (4x Poké Balls, 4x Great Balls, 2x Rare Candies — **Daily**)
* **/kit ace** (5x Poké Balls, 5x Great Balls, 3x Rare Candies — **Daily**)
* **/kit ultra** (8x Poké Balls, 8x Great Balls, 4x Rare Candies — **Daily**)
* **/kit master** (8x Great Balls, 12x Ultra Balls, 8x Quick Balls, 6x Rare Candies — **Daily**)
* **/kit mythic** (16x Great Balls, 16x Ultra Balls, 12x Quick Balls, 6x Rare Candies — **Daily**)
* **/kit legend** (16x Great Balls, 20x Ultra Balls, 16x Level Balls, 10x Rare Candies — **Daily**)
* **/kit alpha** (16x Great Balls, 16x Ultra Balls, 16x Level Balls, 10x Rare Candies — **Daily**)
* **/kit omega** (24x Great Balls, 24x Ultra Balls, 24x Level Balls, 12x Rare Candies — **Daily**)
* **/kit dynamax** (32x Quick Balls, 32x Dusk Balls, 14x Rare Candies — **Daily**)
* **/kit legendmonthly** (1x Basic Key — **Monthly**)
* **/kit alphamonthly** (1x Basic Key — **Monthly**)
* **/kit omegamonthly** (1x Premium Key — **Monthly**)
* **/kit dynamaxmonthly** (1x Premium Key — **Monthly**)<br>

</details>

#### Rank Upgrade

This section is for players who want to know what you get with the differences between the ranks instead of the former section which just shows the bonuses combined.

<details>

<summary><strong>Pro to Ace</strong>   [2040 Gems]</summary>

#### **On purchase, you will receive:** 🎁 **One Time Items (`/kit onetime` or `/`**`kit aceonetime`**)**

* 8 x Rare Candies
* 1 x Master Ball
* 1 x Random Pokémon
* $7,500 Pokecoins
* 1x Random Evolution Stone
* 1x Random Pokemon Plushy

#### ✨ **Command Perks**

* 4 x /sethome
* /craft
* /pokeheal (5 min cooldown)

#### 📦 **Kits**

* **/kit ace** (5x Poké Balls, 5x Great Balls, 3x Rare Candies — **Daily**)

</details>

<details>

<summary><strong>Ace to Ultra</strong>   [3510 Gems]</summary>

#### **On purchase, you will receive:** 🎁 **One Time Items (`/kit onetime` or `/`**`kit ultraonetime`**)**

* 8 x Rare Candies
* 1 x Master Balls
* 1 x Random Shiny Pokémon
* $10,000 Pokecoins
* 1x Random Held Item
* 1x Random Shiny Pokemon Plushy

#### ✨ **Command Perks**

* 6 x /sethome
* /pc
* /trash

#### 📦 **Kits**

* **/kit ultra** (8x Poké Balls, 8x Great Balls, 4x Rare Candies — **Daily**)

</details>

<details>

<summary><strong>Ultra to Master</strong>   [3500 Gems]</summary>

#### **On purchase, you will receive:** 🎁 **One Time Items (`/kit onetime` or `/`**`kit masteronetime`**)**

* 12 x Rare Candies
* 2 x Master Balls
* 1 x Random Shiny Pokémon
* $12,500 Pokecoins
* 1x EXP Share & Lucky Egg
* 1x Random Shiny Pokémon Plushy

#### ✨ **Command Perks**

* 8 x /sethome
* /pokecolor
* /nightvision

#### 📦 **Kits**

* **/kit master** (8x Great Balls, 12x Ultra Balls, 8x Quick Balls, 6x Rare Candies — **Daily**)

</details>

<details>

<summary><strong>Master to</strong> <strong>Mythic</strong>   [3500 Gems]</summary>

#### **On purchase, you will receive:** 🎁 **One Time Items (`/kit onetime` or `/`**`kit mythiconetime`**)**

* 12 x Rare Candies
* 2 x Master Balls
* 1 x Fossil
* 1 x Random Shiny Pokémon
* 1x Random Legendary
* $15,000 PokeCoins
* 1x Random Held Item
* 1x Random Mint
* 1x Random Shiny Pokémon Plushy

#### ✨ **Command Perks**

* 10 x /sethome
* /enderchest
* /fly

#### 📦 **Kits**

* **/kit mythic** (16x Great Balls, 16x Ultra Balls, 12x Quick Balls, 6x Rare Candies — **Daily**)

</details>

<details>

<summary><strong>Mythic to Legend</strong>   [3500 Gems]</summary>

#### **On purchase, you will receive:** 🎁 **One Time Items (`/kit onetime` or `/`**`kit legendonetime`**)**

* 16x Rare Candies
* 2x Master Balls
* 1x Random Shiny Pokémon
* 1x Random Shiny Legendary&#x20;
* $20,000 PokeCoins
* 2x Random Mints
* 1x Random Shiny Pokémon Plushy

#### ✨ **Command Perks**

* 12 x /sethome
* /enchant
* /pokesee
* /anvil

#### 📦 **Kits**

* **/kit legend** (16x Great Balls, 20x Ultra Balls, 16x Level Balls, 10x Rare Candies — **Daily**)
* **/kit legendmonthly** (1x Basic Key — **Monthly**)

</details>

<details>

<summary><strong>Legend to Alpha</strong>   [5620 Gems]</summary>

#### **On purchase, you will receive:** 🎁 **One Time Items (`/kit onetime` or `/`**`kit alphaonetime`**)**

* 16x Rare Candies
* 3x Master Balls
* 1x Random Fossil
* 1x Random Legendary
* $25,000 PokeCoins
* 1x Random Ultra Beast Plushy

#### ✨ **Command Perks**

* 14 x /sethome
* /repair

#### 📦 **Kits**

* **/kit alpha** (16x Great Balls, 16x Ultra Balls, 16x Level Balls, 10x Rare Candies — **Daily**)
* **/kit alphamonthly** (1x Basic Key — **Monthly**)

</details>

<details>

<summary><strong>Alpha to Omega</strong>   [5620 Gems]</summary>

#### **On purchase, you will receive:** 🎁 **One Time Items (`/kit onetime` or `/`**`kit omegaonetime`**)**

* 24x Rare Candies
* 3x Master Balls
* 1x Random Fossil
* 1x Random Shiny Legendary
* $35,000 PokeCoins
* 1x Random Legendary Plushiy

#### ✨ **Command Perks**

* 16 x /sethome
* /breed (10 min cooldown)
* /stonecutter

#### 📦 **Kits**

* **/kit omega** (24x Great Balls, 24x Ultra Balls, 24x Level Balls, 12x Rare Candies — **Daily**)
* **/kit omegamonthly** (1x Premium Key — **Monthly**)

</details>

<details>

<summary><strong>Omega to Dynamax</strong>   [29080 Gems]</summary>

#### **On purchase, you will receive:** 🎁 **One Time Items (`/kit onetime` or `/`**`kit dynamaxonetime`**)**

* 24x Rare Candies
* 2x Master Balls
* 1x Random Fossil
* 1x Shiny Pokemon
* 1x Random Legendary
* $50,000 PokeCoins
* 1x Random Mythical Plushy

#### ✨ **Command Perks**

* 20 x /sethome
* /hatch (10 min cooldown)
* /smelt

#### 📦 **Kits**

* **/kit dynamax** (32x Quick Balls, 32x Dusk Balls, 14x Rare Candies — **Daily**)
* **/kit dynamaxmonthly** (1x Premium Key — **Monthly**)<br>

</details>

### Rank Commands

Now we will go over all the commands found within ranks and give a brief bit of info relating to the command for you to fully understand.

* `/sethome` \[*This command is used to be able to set multiple homes on the server. The higher the rank you are, the more you have access to. You will need to name each of your homes in order to go to your corresponding home.*]
* `/hat` \[*This command will allow you equip items as your hat on the server.*]
* `/nick` \[*Using this command, you'll be able to give yourself a nickname including adding colour to your name. For more info refer to our* [*Nickname & Colour Guide*](/pixelmon-wiki/general-guides/nickname-and-colour-help)]
* `/craft` \[*Using this command will open up a crafting table menu wherever you are.*]
* `/pokeheal` \[*This command will heal your pokemon that are currently within your party.*]
* `/pc` \[*Using this command will open up the Pokemon PC menu wherever you are.*]
* `/trash` \[*Using this command will allow you to trash items you have within your hot bar.*]
* `/pokecolor` \[*Using this command will allow you change your pokemon name colours within your party.*]
* `/nightvision` \[*This command will allow you to activate and de-active night vision on yourself on the server.*]
* `/enderchest` \[*Using this command will open up your personal ender chest menu wherever you are.*]
* `/fly` \[*This command will allow you to activate and de-active the ability to fly on the server.*]
* `/enchant` \[*Using this command will open up a enchantment table menu wherever you are.*]
* `/pokesee` \[*Using this command will allow you to see other players Pokemon within their party.*]
* `/anvil` \[*Using this command will open up a anvil menu wherever you are.*]
* `/repair` \[*This command will allow you to repair tools and armour on the server.*]
* `/breed` \[*This command lets you breed two pokemon together in a 10 minute cooldown.*]
* `/stonecutter` \[*Using this command will open up a stonecutter menu wherever you are.*]
* `/hatch` \[*This command lets you hat Pokemon Eggs with a 10 minute cooldown per egg hatched.*]
* `/smelt` \[*This command will allow you to smelt ores on the server.*]


# Beginners Guide to the Server

Welcome to MMO Realms Cobblemon! We're happy to have you here with us on our server and we want your experience to be as smooth as can be. If you're a brand new player you'll find this guide useful!

**Contents**

1. [Important Notes about the Server](#important-notes-about-the-server)
2. [Getting Started](#getting-started)
3. [Claim your Starter](#claim-your-starter)
4. [Making your own Realm](#making-your-own-realm)
5. [The Basics of Cobblemon](#the-basics-of-cobblemon)
   1. [Healer and PC](#healer-and-pc)
   2. [Pokeballs](#pokeballs)

***

### Important Notes about the Server

* You'll want to join our server on a compatible fabric or forge launcher. We have [guides](/how-to-install-cobblemon-and-pixelmon) for both [**Modrinth**](/pixelmon-wiki/how-to-install-pixelmon-modrinth-and-curseforge/modrinth) and [**Curseforge**](/pixelmon-wiki/how-to-install-pixelmon-modrinth-and-curseforge/curseforge) for now players to be able to join the server easily. We suggest you **use Modrinth for bonuses** you won't get from playing any other version.
* If you're not using one of our launchers, make sure you're using the most up to date versions of both Pixelmon and Minecraft
  * Pixelmon version: **9.3.16**
  * Minecraft version: **1.21.1**
  * The **Server IP** is **`play.mmorealms.gg`**
* You'll want to **look over all of the rules** on the server. You can access them [**HERE**](/pixelmon-wiki/server-rules) or by running the `/rules` command in-game.
* **If you require any assistance from Staff** then you'll need to **make a ticket** within our Official Discord Server via the [#ticket-support](https://discord.com/channels/1332431737694982209/1332431740563755106) channel.&#x20;

### Getting Started

Once you are on the server, there is a few things you can do.

One of the first things you want to do is access the Trainer Kit for some bonus items to help you out. You can either do `/kit Trainer` or do `/kits` and  hover over the Citrine Ball and left click on it to claim the kit.

<figure><img src="/files/az51eVFkJRNGCfn69D68" alt=""><figcaption><p>Kit Trainer via /kits</p></figcaption></figure>

This **kit can be redeemed once every day** so make sure to redeem it each day! **If you're using our Modrinth Modpack you'll get bonuses** including a daily spin which you'll also want to make sure to keep redeeming for extra gems.

If you're **linked to our Discord server**, then you can go ahead and claim the Discord kit via the same method for a **free shin**y but unfortunately this can **only be claimed once**.

<table data-card-size="large" data-view="cards"><thead><tr><th></th><th data-hidden data-card-target data-type="content-ref"></th></tr></thead><tbody><tr><td>🔗 <strong>Intro to Linking to Discord</strong></td><td><a href="/pages/yZ2EvdqihemHGcaGzyj6">/pages/yZ2EvdqihemHGcaGzyj6</a></td></tr></tbody></table>

### Claim your Starter

The next thing you'll want to do on the server is claim your starter. In order to claim your starter on the server, you'll be shown the starter selection UI upon first joining the server, allowing you to choose which starter you would like to obtain. You will **only be able to claim one starter** so be sure to **choose wisely**.

<figure><img src="/files/5xmJuZvyLgWKp8nFZTBf" alt=""><figcaption><p>Starter Selection Screen</p></figcaption></figure>

### Making your own Realm

You'll want to make your own realm on the server as this will be where you build your base, store your items and have a hub for your friends to play in. Making your own realm is incredibly easy as you can start doing this by doing `/realm` in-game and choose your own realm.&#x20;

You **do not want to build within the wilds** since these **reset regularly** meaning any builds or item left in there through a wipe will be lost with **no way to obtain what was lost** in any form.

If you need help about creating your realm, or just want more information relating to it then please use our Realm Guide created!

<table data-card-size="large" data-view="cards"><thead><tr><th></th><th data-hidden data-card-target data-type="content-ref"></th></tr></thead><tbody><tr><td>🪴 <strong>Realm Guide</strong></td><td><a href="/pages/at7d16QD2LlTP5TtwTrw">/pages/at7d16QD2LlTP5TtwTrw</a></td></tr></tbody></table>

### The Basics of Cobblemon

#### Healing Machine and PC

Now that you're in your own Realm with your starter, you'll want to start getting some of the basics including obtaining a PC and a Healing Machine.

<figure><img src="/files/tb2iKgQawfv7Y3LMdfEt" alt="" width="446"><figcaption><p>Recipe for Red Healer</p></figcaption></figure>

You'll want to craft a healing machine because it'll heal your party anytime your party has lost HP or fainted. While you can go to `/warp PokeCenter` to heal your party, it'll be more convenient for you to have a healing machine within your Realm so you don't have to keep teleporting back and forth. To craft a healing machine you'll need the following items:

* 4x Aluminium Ingot
* 3x Iron Ingot
* 1x Diamond
* 1x Dye (for choosing the machine colour)

Place all the items as shown in the recipe above to craft the healing machine. Alternatively you can buy this from the **PokeMart** via `/shop`. Once you have placed a healing machine all you'll need to do is **right click** on it and it'll start an animation to heal your party.

<figure><img src="/files/slzU9cFqod1qEXOxj3js" alt="" width="279"><figcaption><p>Healing Machine</p></figcaption></figure>

<figure><img src="/files/8dPo6Z6HgagbRH5Q7kUe" alt="" width="447"><figcaption><p>Recipe for Red PC</p></figcaption></figure>

Next up is the PC. You'll want to create a PC in order to move pokemon from your Party into your Pokemon Storage as the PC is the only way you can access these. If you have 6 pokemon within your party and then catch or obtain another pokemon then the Pokemon will instantly go into your PC. You have 100 boxes which holds 30 pokemon each so you have loads of space for Pokemon, and can customise each box to your liking. To craft a PC you'll need the following items:

* 6x Aluminium Ingot
* 1x Glass Pane
* 1x Redstone Lamp
* 1x Redstone Dust (PCs can be died after first creating a red one)

Place all the items as shown in the recipe above to craft the PC. Alternatively you can buy this from the **PokeMart** via `/shop`. Once you have placed a PC all you'll need to do is **right click** on it and it'll open up your PC storage and all you will need to do is click on the pokemon you want to move from either your PC or Party into the slot of your choice..

<figure><img src="/files/aVkNjXAgoRQeG2BJFton" alt="" width="375"><figcaption><p>PC</p></figcaption></figure>

#### Pokeballs

The next thing you're probably hoping to learn more about is how you go about crafting and collection Pokeballs on the server. You can **buy these** from our Pokemart via `/shop` but you can use the **guide found below** to learn **how to obtain all the items needed** as well as all the **recipes** for each different Pokeball found on the server.

<table data-card-size="large" data-view="cards"><thead><tr><th></th><th data-hidden data-card-target data-type="content-ref"></th></tr></thead><tbody><tr><td>🔴 <strong>Complete Guide to Pokeballs</strong></td><td><a href="/pages/QWRBa8tJpt9GuMIRHwgb">/pages/QWRBa8tJpt9GuMIRHwgb</a></td></tr></tbody></table>


# A Complete Overview of the Wilds

In this guide you'll find out what the wilds are, along with the alternative dimensions, and reasons to explore them.

**Contents**

1. [What are Wilds?](#what-are-wilds)
2. [Available Dimensions](#available-dimensions)
   1. [Overworld](#overworld)
   2. [Nether](#nether)
   3. [End](#end)
   4. [Ultraspace](#ultraspace)
3. [Why explore them?](#why-explore-them)
   1. [Legendary Spawns](#legendary-spawns)
   2. [Generated Loot](#generated-loot)
4. [World Resets](#world-resets)

***

## What are Wilds?

The **Wilds** refer to the vast, wilderness style areas designed to mimic the open-ended exploration of a naturally generated survival world, tied together with the conditions needed for Pokemon spawning. Unlike protected regions of the server, the **Wilds** are entirely open to players, featuring a range of biomes, rugged terrain and dynamic landscapes.

Each **Wild** server is generated based on a unique seed, allowing for a greater variety during exploration, ensuring no two locations truly match. You may access the **Wilds** by using the `/rtp` command, which will randomly teleport yourself within a selected dimension.

<figure><img src="/files/nFOzX52aL0tO6Y2TYccv" alt="" width="356"><figcaption><p>RTP Menu</p></figcaption></figure>

## Available dimensions

Speaking of dimensions, there exists a selection of choices designed to offer different environments for the player, changing the available resources and spawns drastically.

### Overworld

The **Overworld** serves as the classic yet familiar foundation to every players journey. Featuring lush forests, expansive oceans, monumental mountains, and deep cave systems, this dimension offers a diverse set of biomes to suit everyones needs. This is the primary environment for traditional survival, resource gathering, and encountering a wide variety of standard Pokemon.

<figure><img src="/files/Y49IHAdlHLHFUKQioFMe" alt=""><figcaption><p>Overworld example</p></figcaption></figure>

### Nether

A gloomy and fiery contrast to the surface, the **Nether** is a subterranean hell scape dominated by oceans of lava, sparse valleys, and bizarre fungal forests. Navigating this dimension requires extreme caution due to the hostile environment and aggressive native inhabitants. However brave explorers are rewarded with unique survival materials and Pokemon that cannot be found anywhere else.

<figure><img src="/files/wlLlywopLZxNxHMFXQ9D" alt=""><figcaption><p>Nether example</p></figcaption></figure>

### End

Floating in a surreal expanse of a dark void, the **End** is a mysterious otherworldly realm. Characterised by unique packs of strange flora, towering pillars, and floating island chains. This dimension is the ultimate frontier for tracking down rare supernatural Pokemon existing far beyond the reaches of standard civilisation.

<figure><img src="/files/TZ8PtzBLYnHL4AKdJKE9" alt=""><figcaption><p>End example</p></figcaption></figure>

### Ultraspace

A twisted and disorienting space, the Ultraspace stands as a cosmic nexus existing beyond reality. Characterised by shifting skies, otherworldly terrain, and dimensional portals, this realm defies the laws of nature. Navigating these fractured lands requires courage and adaptability as the environment morphs around you. This dimension is home to the peculiar strand of Pokemon labelled Ultra Beasts.

{% embed url="<https://wiki.mmorealms.gg/pixelmon-wiki/ultra-beasts-and-paradox-spawns-info>" %}

<figure><img src="/files/v8UbmojLJkkSoVa5vCNX" alt=""><figcaption><p>Ultraspace example</p></figcaption></figure>

## Why explore them?

Stepping into the untamed wilderness is an essential task for any serious trainer looking to progress. The Wilds offer vast opportunities and rewards that cannot be found within the confines of protected civilisation, making the risk well worth the journey.

### Legendary Spawns

Whilst Pokemon may spawn in a variety of locations including private Realms, Legendary Pokemon strictly only spawn in the dangers of the wilderness. You must step outside of your comfort zone and track down these rare spawns for any chance at encountering them.

Full details covering the spawn conditions of all legendaries can be found in the corresponding page.

{% embed url="<https://wiki.mmorealms.gg/pixelmon-wiki/legendary-and-mythicals-spawns-info>" %}

{% hint style="warning" %}
**If you are marked as AFK, no legends will spawn on you** even while you are within Wilds. Using AFK Machines, Boats, Water, Minecarts etc won't disable this AFK Tracker. If you find methods that do bypass this report it to staff as abusing it yourself will result in a form of **ban and restrictions added to playtime rewards** given.
{% endhint %}

### Generated Loot

Similarly venturing out into the wilderness offers unique opportunities to find generated loot in a variety of forms. Whether that be through ruined structures long forgotten, specialised loot drops, or simply gathering resources from their native environments, everything you will need as a trainer can be scavenged for.

<figure><img src="/files/xs2BAK1SQy21TXj5WdRV" alt="" width="354"><figcaption><p>Wilderness Pokeloot</p></figcaption></figure>

## World Resets

The **Wilds** servers are wiped on a monthly basis, ensuring that all players have plenty of opportunities to explore untouched lands and discover new loot, which has not yet been tampered with.&#x20;

For this reason we suggest that any builds you wish to keep are to be made within your private Realms, which are not reset on the schedule.


# General Guides

Here you'll find all of the General Guides which players might find useful for certain mechanics and additions to our server.

<table data-card-size="large" data-view="cards"><thead><tr><th></th><th data-hidden data-card-target data-type="content-ref"></th></tr></thead><tbody><tr><td>🎨 <strong>Nickname &#x26; Colour Help</strong></td><td><a href="/pages/nNh6GTsrhd0GyXDC2iL7">/pages/nNh6GTsrhd0GyXDC2iL7</a></td></tr><tr><td><strong>💲 Intro to Earning Pokecoins</strong></td><td><a href="/pages/OnWo3VrYXxfCj1oxmaTI">/pages/OnWo3VrYXxfCj1oxmaTI</a></td></tr><tr><td>💎 <strong>Intro to Earning Gems</strong></td><td><a href="/pages/TEft6otvbPHJl5E99ruF">/pages/TEft6otvbPHJl5E99ruF</a></td></tr><tr><td>🎭 <strong>Pokemon Forms and How to Change Them</strong></td><td><a href="/pages/EhQ6qBWr8cKL4uUirDiv">/pages/EhQ6qBWr8cKL4uUirDiv</a></td></tr><tr><td>🔴 <strong>Complete Guide to Pokeballs</strong></td><td><a href="/pages/QWRBa8tJpt9GuMIRHwgb">/pages/QWRBa8tJpt9GuMIRHwgb</a></td></tr><tr><td>✨ <strong>A Complete Guide to Shinies</strong></td><td><a href="/pages/WMrMJFqPCIULr2dgISJe">/pages/WMrMJFqPCIULr2dgISJe</a></td></tr><tr><td>🏇 <strong>Complete Overview of Riding Pokemon</strong></td><td><a href="/pages/S2U5prpkyZpvicro5KRZ">/pages/S2U5prpkyZpvicro5KRZ</a></td></tr><tr><td><span data-gb-custom-inline data-tag="emoji" data-code="1f389">🎉</span> <strong>A Complete Overview of Events</strong></td><td><a href="/pages/afcGuSHXIN1HNrO6v1z0">/pages/afcGuSHXIN1HNrO6v1z0</a></td></tr><tr><td>🪨 <strong>Complete Overview of Fossils</strong></td><td><a href="/pages/nedAE4hxSyvdgD28E2hA">/pages/nedAE4hxSyvdgD28E2hA</a></td></tr><tr><td>🥚 <strong>Complete Overview of Breeding</strong></td><td><a href="/pages/5odUvsTvetEsRbZihDHJ">/pages/5odUvsTvetEsRbZihDHJ</a></td></tr><tr><td>🍒 <strong>Complete Overview of Berries</strong></td><td><a href="/pages/crLU72x58g59CG3c7j1r">/pages/crLU72x58g59CG3c7j1r</a></td></tr><tr><td>🔎 <strong>Complete Overview to Hunts</strong></td><td><a href="/pages/mVO1xQLvccvY8fauUYwf">/pages/mVO1xQLvccvY8fauUYwf</a></td></tr><tr><td>🏉 <strong>A Complete Guide to Catch Combo</strong></td><td><a href="/pages/DacNA6kmCYWFy176kFBw">/pages/DacNA6kmCYWFy176kFBw</a></td></tr><tr><td>💪 <strong>Complete Overview to NPC Gyms</strong></td><td><a href="/pages/mO9LbcJ0OeQMhFHrz3V2">/pages/mO9LbcJ0OeQMhFHrz3V2</a></td></tr><tr><td>🎣 <strong>Complete Overview of Fishing</strong></td><td><a href="/pages/abiEp0NWsYZMv4vqcKUt">/pages/abiEp0NWsYZMv4vqcKUt</a></td></tr><tr><td>🪨 <strong>Complete Guide to Mega Pokemon</strong></td><td><a href="/pages/bxJiHuoKfTwALDmclrPa">/pages/bxJiHuoKfTwALDmclrPa</a></td></tr><tr><td>💥 <strong>Complete Guide to Dynamax Pokemon</strong></td><td><a href="/pages/yxGkcL8XYGpiTs41X0dN">/pages/yxGkcL8XYGpiTs41X0dN</a></td></tr><tr><td><span data-gb-custom-inline data-tag="emoji" data-code="1f536">🔶</span><strong>Complete Guide to Z-Moves</strong></td><td><a href="/pages/Uk63RX88F07bzpuKyX5T">/pages/Uk63RX88F07bzpuKyX5T</a></td></tr></tbody></table>


# Intro to Earning Pokecoins

This page will go over the use of Pokecoins as well as how to earn them on the server.

**Contents**

1. [What are Pokecoins?](#what-are-pokecoins)
2. [What can I use Pokecoins for?](#what-can-i-use-pokecoins-for)
3. [How can I earn Pokecoins?](#how-can-i-earn-pokecoins)
   1. [PokeMart](#pokemart)
   2. [Auction House](#auction-house)
   3. [Pokedex Rewards](#pokedex-rewards)
   4. [Hunts](#hunts)
   5. [Crates](#crates)
   6. [Playtime Rewards](#playtime-rewards)
   7. [Daily (Login) Rewards](#daily-login-rewards)
4. [Is there any other ways to earn Pokecoins?](#is-there-any-other-ways-to-earn-pokecoins)

***

### **💲**What are Pokecoins?**💲**

Pokecoins are a type of **currency** found within the server which have many uses on the server. Pokecoins are a vital currency for players to interact with each other, buy items, trade with players and so on.

You'll be able to keep track of how many Pokecoins  you currently have by doing `/bal` within the server.

<div align="left"><figure><img src="/files/2IEWRlSroBWVK8lGu2fg" alt=""><figcaption><p>Balance by using /bal within the Server</p></figcaption></figure></div>

### **💲**What can I use Pokecoins for?**💲**

Pokecoins can be used for a range of things on the server. Some of these include:

* `/shop` \~ Using this command on the server will bring up a sub-menu in which you can purchase a range of pokeballs, items, blocks and more on the server ranging in prices.
* `/gts` \~ Using this command will bring up a marketplace where players will sell items and pokemon with a set price for them
* More to be added....

### **💲**How can I earn Pokecoins?**💲**

There are a few ways you can earn money on the server, but for now here are the main ways to obtain Pokecoins:

#### PokeMart

The PokeMart is currently one of the main way for players to earn PokéCoins while the server is in its Beta phase, though more ways to make money will be added in the future. Each item in the PokéMart has a sell price, so you can gather items through various in-game methods and sell them for a profit.

<div align="left"><figure><img src="/files/aqp5K3zubxWv96J9AQf5" alt=""><figcaption><p>PokeMart via <code>/shop</code></p></figcaption></figure></div>

Farming is one of the most popular ways to do this, and you can even set up automatic farms to collect items in bulk. The harder an item is to get, the more you can usually earn from selling it in the PokéMart.

#### Auction House

The Auction House is another popular way for players to earn money on the server. Since not everything can be sold at the PokéMart, and Pokémon themselves can’t be sold there, the GTS offers a way around this. Players can list both items and Pokémon for sale at a price they choose, and other players can purchase them.

<figure><img src="/files/Zsc47iAU7yfmOvgNKVvO" alt=""><figcaption><p>Auction House via <code>/ah</code></p></figcaption></figure>

Farming is one of the most popular ways to do this, and you can even set up automatic farms to collect items in bulk. The harder an item is to get, the more you can usually earn from selling it in the PokéMart.

#### Pokedex Rewards

Pokédex rewards are another way for players to earn money on the server. As you complete more of your Pokédex, the rewards increase with each milestone which starts from **50,000 PokéCoins** at the first 10% tier and reaching up to **2.5 million PokéCoins** for full 100% completion. You can check your Pokédex progress and claim rewards at any time by using the **`/pokedexrewards`** command.

<div align="left"><figure><img src="/files/7xavIH3aYiq3dY2Btg8i" alt=""><figcaption><p>Pokedex Rewards Menu via <code>/pokedexrewards</code></p></figcaption></figure></div>

#### Hunts

Another way to earn PokéCoins on the server is by participating in **hunts**. Using the **`/hunts`** command, you can see specific Pokémon that are being requested. These hunts are free to start, vary in difficulty, and offer a fun new way to play while rewarding players who are actively exploring and catching Pokémon on the server.

<div align="left"><figure><img src="/files/3Ox3uSqOjybGykMCsQ9e" alt=""><figcaption><p>Hunts menu via <code>/hunts</code></p></figcaption></figure></div>

#### **Crates**

Crates are another way players can earn PokeCoins on the server. All 3 of the current crates offer PokeCoins in some capacity with Basic and Premium only obtainable via Rewards from other features, or purchasing them outright via Gems. You can access crates by doing `/crates` in game.

<div align="left"><figure><img src="/files/9gDgMdW8WjFqn1IZtTfi" alt=""><figcaption><p>Vote Crate via <code>/crates</code></p></figcaption></figure></div>

#### **Playtime Rewards**

You'll be able to earn PokeCoins for reaching specific Playtime Milestones within Playtime Rewards. The higher your active playtime is, the more rewards you'll gain access to. Start accessing Playtime Rewards via `/playtime`.

<div align="left"><figure><img src="/files/fh5crwM3J4aXwp6x1C53" alt=""><figcaption><p>Playtime Rewards via <code>/playtime</code></p></figcaption></figure></div>

#### Daily (Login) Rewards

You'll be able to claim Pokecoins for each day you play on the server, with the higher your streak becomes offering more PokeCoins and other rewards as a result. If you miss a day though, your streak will revert back to Day 1 and you will have to start again. Start accessing Daily Rewards via `/daily`.

<div align="left"><figure><img src="/files/DHSxMXKREDnijtL0iwM5" alt="" width="326"><figcaption><p>Daily Rewards via <code>/daily</code></p></figcaption></figure></div>

You'll also be able to potentially win PokeCoins via the **Daily Spin** also within `/daily` alongside other rewards listed.

<div align="left"><figure><img src="/files/yn8L8hen9fsFYqfmMuTW" alt=""><figcaption><p>Daily Spin Rewards via <code>/daily</code></p></figcaption></figure></div>

### **💲**Is there any other ways to earn Pokecoins?**💲**

We have plenty of new features and mechanics planned to help players earn PokéCoins on the server. Some of these upcoming additions include:

* Jobs System
* Leaderboards
* Player Trading
* Crates

Plus many more that are currently in the works!


# Intro to Earning Gems

This page will go over the use of Gems as well as how to earn them on the server.

**Contents**

1. [What are Gems and how to use them?](#what-are-gems-and-how-to-use-them)
   1. [Crates](#crates)
   2. [Ranks](#ranks)
      * [RANK UPGRADES](#rank-upgrades)
      * [GIFTING RANKS](#gifting-ranks)
   3. [Realm Expansion](#realm-expansion)
2. [How to use the Store](#how-to-use-the-store)
3. [How can I purchase Gems?](#how-can-i-purchase-gems)
4. [Is there any other ways to obtain Gems?](#is-there-any-other-ways-to-obtain-gems)

***

## 💎 What are Gems and how to use them?  💎&#x20;

Gems are a premium currency similar to PokéCoins, with the key difference being that they are used for a variety of specialised features on the server such as opening Crates, purchasing Ranks, and expanding your Realm size. While Gems can be bought directly from the official store, there are also several free-to-play methods available for earning them.

You can check your current Gem balance at any time by using the `/bal` command within the server.

<div align="left"><figure><img src="/files/2IEWRlSroBWVK8lGu2fg" alt=""><figcaption><p>Balance by using /bal within the Server</p></figcaption></figure></div>

Below is a complete list of all current Gem uses available on the server.

### Crates

Crates can be accessed either at Spawn or by using the command **/crates**. They function as loot boxes that grant you the chance to receive a variety of random rewards, such as Legendary Pokémon, Shiny Pokémon, Gems, Keys, and more. Currently, there are three types of Crates available: **Vote** (Free), **Basic** (535 Gems), and **Premium** (2740 Gems), each offering its own unique reward pool. You may also purchase Crate Keys through the **/store**, which is currently the only method for gifting keys to other players.

<div align="left"><figure><img src="/files/LgdI1FfnEHjZUCnfJHSL" alt="" width="368"><figcaption><p>Crates that are found within <code>/warp Crates</code></p></figcaption></figure></div>

To purchase or open Crates directly, simply run **`/crates`** to bring up a GUI displaying the three Crate categories. If you do not own any keys, the GUI will show the Gem price for each Crate; if you do have keys, it will instead display the number of keys you currently possess.

<div align="left"><figure><img src="/files/BS5MIVdltj7oMsfaa6gI" alt=""><figcaption><p><code>/crates</code> GUI for Vote, Basic and Premium Crates</p></figcaption></figure></div>

After using a key or purchasing a Crate with Gems by `Right Clicking` on the Crate selection, the Crate will begin to spin, and the item or Pokémon it lands on will be awarded to you immediately. If you receive a Pokémon and your party is full, it will be sent directly to your PC for later retrieval. Be sure to keep inventory space available for item rewards as if your inventory is full, you will not receive the items.

### Ranks

There are multiple ranks you are able to Purchase on the server which vary in price of Gems, each coming with more benefits than the last for the more expensive you go with the ranks. These benefits includes likes of Shiny Pokemon, Legendary Pokemon, Custom Nickname in-game,  Access to exclusive kits, access to exclusive channels and giveaways in the Discord server, multiple command and features to benefit players and so on.&#x20;

<div align="left"><figure><img src="/files/pek2wdVDg4CUJhQgYe8V" alt=""><figcaption><p>Ranks Category within <code>/store</code></p></figcaption></figure></div>

To begin purchasing ranks, simply run the **`/store`** command in-game, select the **Ranks** category, and choose the rank you wish to obtain provided you have the required amount of Gems.

<div align="left"><figure><img src="/files/wi9THm4FOkQ9nHRJFjNE" alt=""><figcaption><p>Ranks Page within <code>/Store</code></p></figcaption></figure></div>

Upon purchasing a rank, all associated perks will be granted to you immediately. Please note that if your Discord account is linked, the corresponding Discord role may take a few minutes to apply. Be sure to claim your one-time rewards by running **`/kit onetime`** and **`/kit RANKonetime`** (*for example, **`/kit masteronetime`***) to receive all rank-exclusive bonuses.

#### **RANK UPGRADES**

If you already possess a lower rank and wish to upgrade to a higher one, you will receive a  discount that is clearly displayed within the rank’s description. This ensures that all players ultimately pay the same total amount of Gems for a given rank regardless if they purchase it outright or upgrade gradually through the tiers.

<div align="left"><figure><img src="/files/4Od7HM0Jo8LMEAinqFpW" alt="" width="464"><figcaption><p>Ex of Gems Discount with Ranks</p></figcaption></figure></div>

#### **GIFTING RANKS**

You are able to purchase ranks for other players using /store by selecting the Gift button within the Ranks page in the store. You will be prompted to type in the name of the player you are purchasing the rank for in which it'll bring back up the GUI for you to continue with purchasing the rank for the player

<div align="left"><figure><img src="/files/tj7Q5uR3QiZjeUFP0mF0" alt=""><figcaption><p>Gift Option within Ranks on <code>/store</code></p></figcaption></figure></div>

### Realm Expansion

One of the main reasons why you may want to obtain gems is by increasing the size of your personal realm. As you go around the borders of your realm you'll see text stating about **Unlocking this chunk for X amount of gems**. You can see exactly what this looks like below:

<div align="left"><figure><img src="/files/DK31lmxDW4LZZWsEtd6o" alt="" width="405"><figcaption></figcaption></figure></div>

As the text implies, in order to get access to this chunk **you will need to pay X gems**. **If you have the gems amount** stated and want to go ahead with purchasing it, all you need to do is `Right Click` which will bring up a confirmation. If you **click on the green section** which will confirm the purchase, the gems will be taken from you and the **chunk will be accessible for you**.

<div align="left"><figure><img src="/files/9ViHXbAmI8655gBvVBHg" alt=""><figcaption><p>Confirmation Page for Purchasing Chunk Expansions</p></figcaption></figure></div>

You are able to do this in any direction you want in whatever pattern you wish to have it. Your realm without any expansions is **10x10 Chunks** in size so increasing the size of your realm is going to be incredibly handy for a lot of players especially if they love to build. There is a limit to how much you can expand your realm to, but there is certainly enough room for any player to have the space and freedom they need.

## 💎 How to use the Store 💎&#x20;

In order to access the store, all you need to do is run the command `/store` which will bring up the store GUI.

<div align="left"><figure><img src="/files/pva4u4Adw8t3SqcfUSJp" alt=""><figcaption><p>Store GUI via <code>/store</code></p></figcaption></figure></div>

From there, you can navigate through each category to select the items you wish to purchase. If you are buying a key, simply click on the desired key and select the **Buy** option. The key will then be delivered directly to your **`/crates`** menu in exchange for the required Gems. This GUI also provides a convenient link to the store should you wish to purchase additional Gems for the server.

## 💎 How can I purchase Gems? 💎&#x20;

One of the easiest way players can obtain Gems is via purchasing them from our Official Store. There are a range of amounts you can purchase on the store corresponding to different amounts of $.&#x20;

You can access our store via this link:&#x20;

{% embed url="<https://store.mmorealms.gg/>" %}

## 💎 Is there any other ways to obtain Gems? 💎&#x20;

While purchasing Gems from the store is the quickest and most reliable method, there are several additional ways to earn Gems through gameplay, with more methods planned for future updates. The current ways to obtain Gems include:

* **Discord Giveaways** hosted in the **#giveaways** channel. *(Players with donor ranks receive access to bonus giveaways.)*
* **Free Daily Spin** available through our Modrinth Pack. For installation instructions, please refer to our [**Modrinth Installation Guide**](https://wiki.mmorealms.gg/how-to-install-cobblemon-modrinth-and-curseforge/modrinth).
* **Pokédex Rewards**, which begin awarding Gems as early as **20% completion**.
* **Events and Contests** hosted in the **#events** channel on our Discord Server.
* **Crates at Spawn**, which have a chance to reward Gems. Vote Crates, in particular, offer a small chance to receive Gems, and you earn a Vote Key for every daily voting link you complete.
* **Gyms** \[`/gyms`] will also give you chances of earning Gems as the first time for defeating any Gym leader will reward you with Gems.
* **Daily Login Rewards (`/daily`)** and **Playtime Rewards (`/playtime`)** offer Gems for milestones reached in both of them.
* **Insane Hunts** via **`/hunts`** offers 200 Gems if you manage to complete it.
* **Chat Trivia** also gives a small chance to earn Gems if you are the first one to answer it within the chat. You can also earn rewards by being in the top 3 of the month **leaderboards** for Chat Games via `/chatgames lb`.
* **More methods coming soon…**

Be sure to check back on this guide regularly, as new Gem-earning opportunities will continue to be added to the server.


# Nickname & Colour Help

Within this Guide you'll find out everything with how to set up your nickname on the server if you have a donor rank plus how to set them up with colours.

In order to gain access to setting a nickname on the server, you will need to **have at least the Pro rank** on the server. If you are only Trainer rank then you will not have access to this command.

**Contents:**

1. [How do I set my Nickname?](#how-do-i-set-my-nickname)
2. [How do I add colour to my name?](#how-do-i-add-colour-to-my-name)
3. [Adding Multiple Colours to Nickname](#adding-multiple-colours-to-nickname)
4. [Gradient Colours in Nickname](#gradient-colours-in-nickname)
5. [Pokecolor Command](#pokecolor-command)

***

### How do I set my Nickname?

Setting up your nickname is incredibly easy to do! All you need to do is run the command:

* `/nick` **`NAME`**     &#x20;

<div align="left"><figure><img src="/files/sXFOMOIyLRTsPmzioTZl" alt=""><figcaption><p>Example of setting your Nickname</p></figcaption></figure></div>

Now anytime you speak on the server your name will show up as the nickname you have set.

### How do I add colour to my name?

Adding colour into your nickname on the server is also very easy to do. There is two different ways to give your name colour on your nickname with the first option being easy to use but limited with variations of colours with the latter way being a bit more complex but you'll be able to choose any specific colour you wish.

#### Option 1.   Standard Colour Tags

Using any of the colours listed below you can easily add colour to your nickname as simple as:

**EXAMPLES:**

* &#x20;**`/nick <yellow>Butter`**
* **`/nick <dark_purple>Phantom`**

<div align="left"><figure><img src="/files/8Xk4LsJzucXvf278zGeQ" alt=""><figcaption><p>Example of Standard Colour Tag within your Nickname</p></figcaption></figure></div>

You'll be able to use any of the standard colour tags listed here:

<details>

<summary>Standard Colour Tags</summary>

* black
* dark\_blue
* dark\_green
* dark\_aqua
* dark\_red
* dark\_purple
* gold
* gray
* dark\_gray
* blue
* green
* aqua
* red
* light\_purple
* yellow
* white

</details>

#### Option 2.   Hex Colour Tags

The other option is by using hex colour tags you can obtain from various methods. We recommend using the website below to find the exact colour you wish to use for your nickname:

{% embed url="<https://redketchup.io/color-picker>" %}

If you have found a colour that you're happy with you will want to copy the colour hex code which should look similar to this: `#E97804` With this colour code, you can input it in the same format as you was doing with the standard colour codes like this:

**EXAMPLE:**

* **`/nick <#E97804>Butter`**
* **`/nick <#603593>Phantom`**

<div align="left"><figure><img src="/files/BI0rbtET5AHNDa794nvq" alt=""><figcaption><p>Example of Hex Colour Tag within your Nickname</p></figcaption></figure></div>

### Adding Multiple Colours to Nickname

Now that you know how to add colours into your nickname, you can start adding multiple colours into your nickname. Depending on what letters you want to be coloured you'll be slotting the colour tag in-between your name for each corresponding colour. You can combine both standard and hex colour tags for this if this helps you as will be shown in the example shown below:

**EXAMPLES:**

* **`/nick <#E97804>But<yellow>ter`**
* **`/nick <dark_blue>Phan<dark_purple>tom`**

<div align="left"><figure><img src="/files/uxtMGDGp3aPmr7yTfq0S" alt=""><figcaption><p>Example of Multiple Colours within Nickname</p></figcaption></figure></div>

You can customise this as much as you can whether this be by highlighting certain words within your nickname, or even creating a rainbow effect with your nickname. Let your imagination go wild with it!

### Gradient Colours in Nickname

To add more customisation within your name, you can add gradients within your nickname which acts as a bridge of two or more colours from one end to another. You can use multiple gradients if you wish to have multiple different colours blending in together. You will be using the colour codes generated from the Hex generator for this.

**EXAMPLES:**

* **`/nick <gradient:#f5f105:#d1b00a:#f29202:#d1b00a:#f5f105>Butter</gradient>`**
* **`/nick <gradient:#111df7:#8102f7>Phantom</gradient>`**

<figure><img src="/files/ZUE5JKkdfVvlUAEmXnb1" alt=""><figcaption><p>Example of Gradients within Nickname</p></figcaption></figure>

It is important to ensure that you close these gradients properly. While the name may appear correctly even if the command is not ended with `</gradient>`, any text sent afterwards can still be affected by the gradient, despite the general text being set to white. As a result, the gradient on your nickname may appear stretched and not follow the colour scheme you originally set. This effect can be seen in the image below compared to the image above.

<figure><img src="/files/85tsrbLk6YP3l6uCWfLA" alt=""><figcaption></figcaption></figure>

### Pokecolor Command

🌟<mark style="color:purple;">**This section is only relevant for players who have the Master Rank or higher on the server.**</mark> 🌟

In addition to your existing perks, you can customise your Pokémon’s name using the same formatting options available for your nickname including colour and bold styling for added flair. Unlike with Nicknames, giving colours to pokemon works slightly different as they have different codes to the Hex Format Codes.

To get started, **use** the **following command**:

* **`/pokecolor <slot of pokemon> <colour/bold> <name>`**

This feature also allows you to update the appearance of your entire party. Even better, your customised Pokecolours are permanently saved whether your Pokemon are stored in your PC or traded to another player.

<details>

<summary>Colour and Formatting Codes</summary>

**COLOUR CODES**

<table><thead><tr><th width="158">Colour</th><th width="100.5625">Code</th></tr></thead><tbody><tr><td>Black</td><td>&#x26;0</td></tr><tr><td>Dark Blue</td><td>&#x26;1</td></tr><tr><td>Dark Green</td><td>&#x26;2</td></tr><tr><td>Dark Aqua</td><td>&#x26;3</td></tr><tr><td>Dark Red</td><td>&#x26;4</td></tr><tr><td>Dark Purple</td><td>&#x26;5</td></tr><tr><td>Gold</td><td>&#x26;6</td></tr><tr><td>Gray</td><td>&#x26;7</td></tr><tr><td>Dark Grey</td><td>&#x26;8</td></tr><tr><td>Blue</td><td>&#x26;9</td></tr><tr><td>Green</td><td>&#x26;a</td></tr><tr><td>Aqua</td><td>&#x26;b</td></tr><tr><td>Red</td><td>&#x26;c</td></tr><tr><td>Light Purple</td><td>&#x26;d</td></tr><tr><td>Yellow</td><td>&#x26;e</td></tr><tr><td>White</td><td>&#x26;f</td></tr></tbody></table>

**FORMATING CODES**

<table><thead><tr><th width="140">Format</th><th width="90.0625">Code</th></tr></thead><tbody><tr><td>Bold</td><td>&#x26;l</td></tr><tr><td>Underline</td><td>&#x26;n</td></tr><tr><td>Italic</td><td>&#x26;o</td></tr><tr><td>Strikethrough</td><td>&#x26;m</td></tr></tbody></table>

</details>

Below are some examples demonstrating how to use the command:

**EXAMPLES:**

* `/pokecolor 1 &6&lBid&eoof`&#x20;
* `/pokecolor 6 &dD&5i&dt&5t&do`

<figure><img src="/files/KkngV1FU16rf8b0GomXO" alt=""><figcaption><p>Bidoof with a Bold and Colour Name</p></figcaption></figure>


# Pokemon Forms and How to Change Them

This page will go over all of the Pokemon with different forms, and ways you're able to change them around if at all.

**(TAKE PHOTOS ON DIAMOND)**

**Contents**

1. [What is a Pokemon Form?](#what-is-a-pokemon-form)
2. [Regional Forms](#regional-forms)
3. [General Pokemon Forms](#general-pokemon-forms)&#x20;
   1. [Mega Pokemon](#mega-pokemon)
   2. [Legendary/Mythical Pokemon with Forms](#legendary-mythical-pokemon-with-forms)
   3. [Normal Pokemon with Forms](#normal-pokemon-with-forms)
4. [Custom Forms](#custom-forms)

***

### What is a Pokemon Form?

Various Pokemon found on the server will only have one general form as well as a shiny varient of said pokemon. However there are a a fair few pokemon that have alternative forms which are significant for the use within battles as well as their appearance.

### Regional Forms

One of the main different forms you'll see with pokemon is with Regional forms. First introduced with Pokemon Sun and Moon, regional pokemon take a much beloved pokemon and gives it's a twist from it's design, moves all the way to it's typing i.e. Vulpix is usually a fire type pokemon however Alolan Vulpix twists it up by making it a Ice type.

Here you can find a **list of all the different regional forms** based on the region they were first intoduced:

<table data-card-size="large" data-view="cards"><thead><tr><th></th><th data-hidden data-card-target data-type="content-ref"></th></tr></thead><tbody><tr><td>🌴 <strong>Regional Forms</strong></td><td><a href="/pages/rgDgbnM2LmJJcHskIz3Y">/pages/rgDgbnM2LmJJcHskIz3Y</a></td></tr></tbody></table>

### General Pokemon Forms

Alongside all of the Regional forms, there are pokemon that already have normal forms you can switch between compared to regionals where you can only have one or the other. How you change these forms varies depending on the pokemon. We will list all of the pokemon with forms below and how you change between them:

#### Mega Pokemon

There is a lot of Pokemon and Legendaries that have Mega Forms which are obtainable on the server. To learn more about them you can read our guide here which includes every Mega Pokemon obtainable on the server:

{% embed url="<https://wiki.mmorealms.gg/pixelmon-wiki/general-guides/complete-guide-to-mega-pokemon>" %}

#### Legendary/Mythical Pokemon with Forms

It's important to note that with most of these legendaries that have multiple forms you will need to revert back to it's normal form if you wish to change it into a different form.

<details>

<summary>Groudon and Kyogre  <strong>(AVAILABLE)</strong></summary>

<figure><img src="/files/U1kUWD3z0rsXa1ZiLm0q" alt="" width="563"><figcaption><p>Primal Kyogre and Groudon</p></figcaption></figure>

**How to change form:**&#x20;

For **Primal Kyogre** you will need to give your Kyogre a **Blue Orb** to hold and send it into battle.

For **Primal Groudon** you will need to give your Groudon a **Red Orb** to hold and send it into battle.

***

The **Blue Orb** is created by first obtaining 10 Alpha Shards, and placing them down on the same block to construct a full Orb. These shards can be found by fishing in Oceanic Biomes. The **Red Orb** is created in much the same way, instead of Omega Shards from fishing in Arid Biomes.

<figure><img src="/files/y5JRJFPctHvdenRwtB3D" alt="" width="281"><figcaption><p>Incomplete Orbs beside their corresponding Shards</p></figcaption></figure>

<figure><img src="/files/ztrPvVhIxQdnA3R9ovAX" alt=""><figcaption><p>Complete Orbs</p></figcaption></figure>

</details>

<details>

<summary>Deoxys  <strong>(AVAILABLE)</strong></summary>

There are 4 main forms you can find for Deoxys each bringing it's own benefit. These forms are as follows:

**Normal Form:**

<figure><img src="/files/Ni2bw0gqeMJQDWc6n0Z3" alt="" width="375"><figcaption></figcaption></figure>

**Attack Form**:

<figure><img src="/files/FJK6yFgoU5flyfoKDPcz" alt="" width="290"><figcaption></figcaption></figure>

**Defense Form**:

<figure><img src="/files/LEJUVRI4XnFMZo7k01P7" alt="" width="330"><figcaption></figcaption></figure>

**Speed Form**:

<figure><img src="/files/oJjLK2tWGayDGMPMHSko" alt="" width="360"><figcaption></figcaption></figure>

#### **How to change form:**&#x20;

You will need to interact with the Deoxys using a **Meteorite**, which cycles through the available forms upon each use. The **Meteorite** can be crafted using the following recipe:

<figure><img src="/files/xXuA0S4ZdU753BLFKVlr" alt="" width="356"><figcaption><p>3x End Stone + 1x Moon Stone + 2x Moon Stone Shards</p></figcaption></figure>

</details>

<details>

<summary>Dialga, Palkia and Giratina  <strong>(AVAILABLE)</strong></summary>

<figure><img src="/files/jQtpNuz5895jQEXV49LX" alt=""><figcaption><p>Origin Dialga, Palkia and Giratina</p></figcaption></figure>

**How to change form:**&#x20;

In order to change the creation trio into their Origin forms, you will need to give them each their corresponding item to interact with.

| Pokemon  | Item                                                                            |
| -------- | ------------------------------------------------------------------------------- |
| Dialga   | Adamant Crystal <img src="/files/XAw6Rcih5dqj4eNvdE3K" alt="" data-size="line"> |
| Palkia   | Lustrous Globe <img src="/files/gX6XKsBznHn5XCnL3ZBC" alt="" data-size="line">  |
| Giratina | Griseous Core <img src="/files/mhRW5WlRVEwBxf2hxxbW" alt="" data-size="line">   |

**Why change their forms?**

Each form comes with it's own benefits and drawbacks so it's not just a re-skin since some builds might work better for origin form Dialga compared to it's base form when catching it since their stats have been shifted around.

</details>

<details>

<summary>Shaymin  <strong>(AVAILABLE)</strong></summary>

<figure><img src="/files/tex5iA6VyNtjM8XQf2XH" alt=""><figcaption><p>Land Shaymin and Sky Shaymin</p></figcaption></figure>

**How to change form:**&#x20;

In order to change Shaymin into it's **Sky Form**, you need to use the **Gracidea** flower on it.

<figure><img src="/files/Axk0K6Dz7pofHi7IdGwl" alt=""><figcaption><p>Gracidea</p></figcaption></figure>

Once you have evolved the Shaymin, it will gain the **Flying** typing alongside a increase in **Speed and Attack**.

In order to return Shaymin into it's **Land Form**, you can throw it out of its Pokeball during the Night.

</details>

<details>

<summary>Arceus  <strong>(AVAILABLE)</strong></summary>

<figure><img src="/files/RfRF6dnIxePikUi77sSK" alt=""><figcaption><p>Variety of Arceus Forms</p></figcaption></figure>

**How many forms are there?**

There are 18 different forms for Arceus which players can chose between. Each of these forms correlate to a different typing of not only Arceus itself but the move Judgement.

**How to change form:**&#x20;

You can easily change Arceus' form by giving it one of the 18 different Elemental Plates to hold.

| Type     | Plate                                         |
| -------- | --------------------------------------------- |
| Normal   | Blank Plate ![](/files/mYU7FWBjJ7wuNCRCxYxM)  |
| Dragon   | Draco Plate ![](/files/Apb4xfbd8bChvrG2ZDMu)  |
| Dark     | Dread Plate ![](/files/Ndf9vQjCa3Frc5OeVk6s)  |
| Ground   | Earth Plate ![](/files/IfK87g60jpLZQ7XS5QDv)  |
| Fighting | Fist Plate ![](/files/XxrLOM8wFRjUDAw4Ayno)   |
| Fire     | Flame Plate ![](/files/3sPWhycNOEkC73bdJuhF)  |
| Ice      | Icicle Plate ![](/files/EuVBrmjZRRosJrdzxWno) |
| Bug      | Insect Plate ![](/files/34siwb4ksl4iZK9sBeqG) |
| Steel    | Iron Plate ![](/files/elRL08Udr7qAgKy8E9q4)   |
| Grass    | Meadow Plate ![](/files/JGvD5PCcPc6xNH6OmlZz) |
| Psychic  | Mind Plate ![](/files/ohSjpI3hqoAAAxwlhJdn)   |
| Fairy    | Pixie Plate ![](/files/GtIztkMBZFWJhIiC1rgJ)  |
| Flying   | Sky Plate ![](/files/oD6vbhMlOZwMJJayy07j)    |
| Water    | Splash Plate ![](/files/EiK7bTIsQrOm6JCQqfwC) |
| Ghost    | Spooky Plate ![](/files/PwVME4wAhanoHbcTAHa9) |
| Rock     | Stone Plate ![](/files/IV3svhLbI1vpJUXM0nvY)  |
| Poison   | Toxic Plate ![](/files/8xy2q9ovaw7h7Y01ZhRQ)  |
| Electric | Zap Plate ![](/files/Z4fNo9cUI4byWHgsmLCZ)    |

</details>

<details>

<summary>Tornadus, Thundurus, Landorus and Enamorus  <strong>(AVAILABLE)</strong></summary>

<figure><img src="/files/9DFhk07WmrfX38y5rVk4" alt=""><figcaption><p>Incarnate Tornadus, Thundurus, Landorus and Enamorus</p></figcaption></figure>

**How to change form:**&#x20;

Changing the forms for each of these is incredibly easy as it only requires a **Reveal Glass** in order to change between the two forms for all 4 of the Legends.

**Why change forms from Incarnate to Therian?**

Alongside seeing the different forms of the 4 legends, there is actually some changes that come with changing their forms which includes:

* **Tornadus** - Incarnate is faster and higher in Special Attack; Therian has higher Defense and speed.
* **Thundurus** - Incarnate is faster; Therian has a much higher Special Attack.
* **Landorus** - Incarnate is more balanced; Therian has a much higher Physical Attack.
* **Enamorus** - Incarnate has high Speed and Special Attack, Therian has higher Defense and Attack.

<figure><img src="/files/ti3bZxT8wYkVierQrnEU" alt=""><figcaption><p>Therian Tornadus, Thundurus, Landorus and Enamorus</p></figcaption></figure>

</details>

<details>

<summary>Kyurem  <strong>(AVAILABLE)</strong></summary>

<figure><img src="/files/0ns6jG2GTtYnG3cFqSvo" alt=""><figcaption><p>Zekrom, Kyurem and Reshiram</p></figcaption></figure>

**How to change form:**&#x20;

In order to change forms for Kyurem you will need to have Kyurem and either Reshiram or Zekrom within your party. Once you do throw Kyurem and the partner out, and interact with the pair using **DNA Splicers**.

<figure><img src="/files/ZYK4p2oArGYqdM46teBv" alt=""><figcaption><p>DNA Splicers</p></figcaption></figure>

**Why Change forms of Kyurem?**

You'll want to change forms of Kyurem given you'll get updated ability, increased stats and a exclusive move to use.

* **White Kyurem** will get the **Turboblaze** ability.
* **Black Kyurem** will get the **Teravolt** ability.

<figure><img src="/files/cM4uiBIBhuIV4z8XpZ4p" alt=""><figcaption><p>Black Kyurem and White Kyurem</p></figcaption></figure>

</details>

<details>

<summary>Keldeo  <strong>(AVAILABLE)</strong></summary>

<figure><img src="/files/ZUPdUP5UhIKs3VW5tfuJ" alt=""><figcaption><p>Ordinary and Resolute Keldeo</p></figcaption></figure>

**How to change form:**&#x20;

In order to change the forms of Keldeo from Normal to Resolute, all you need to do is teach it the move **Secret Sword**.

</details>

<details>

<summary>Meloetta  <strong>(AVAILABLE)</strong></summary>

<figure><img src="/files/A9Vnf3LJIMzokQa65khP" alt=""><figcaption><p>Aria and Pirouette Meloetta</p></figcaption></figure>

**How to change form:**&#x20;

You can change the forms of Meloetta easily mid-battle by using the move **Relic Song** which will change the form from Aria to Pirouette.

**Why change forms from Aria (Default) to Pirouette (Active)?**

Alongside seeing the different forms of Meloetta, there is actually some changes that come with changing their forms which includes:

* **Aria Forme**
  * `Normal/Psychic` Typing
  * Higher Special Attack and Special Defense.
* **Pirouette Forme**
  * `Normal/Fighting` Typing
  * Higher Attack, Defense, and Speed.

</details>

<details>

<summary>Genesect <strong>(AVAILABLE)</strong></summary>

<figure><img src="/files/dH1w86fALVe0dsDpWrUM" alt=""><figcaption><p>Genesect with Different Drives</p></figcaption></figure>

**How to change form:**&#x20;

You can change the forms of Genesect by giving it a different drive to hold, reflected by the drive connected to its back on the model.

**Why change forms?**

By default Genesects move **Techno Blast** will be a normal type move, however it changes to match any drives currently held by the Pokemon.

| Type     | Drive                                        |
| -------- | -------------------------------------------- |
| Normal   | None                                         |
| Fire     | Burn Drive ![](/files/OsW1ozJ8t4w4XHzcf4l3)  |
| Ice      | Ice Drive ![](/files/OVYNB9xZAvJiJgQFXXmj)   |
| Water    | Douse Drive ![](/files/bWn47PNUtMLOZixbUu7T) |
| Electric | Shock Drive ![](/files/oYLOF0QwfQudmaZEccvU) |

</details>

<details>

<summary>Xerneas (AVAILABLE)</summary>

<figure><img src="/files/p5qkJJXNj6gF1EUAZune" alt=""><figcaption><p>Neutral and Active Xerneas</p></figcaption></figure>

**How to change form:**&#x20;

Xerneas will change forms automatically, using the Neutral form outside of battle, and the active form inside of battle.

</details>

<details>

<summary>Zygarde  <strong>(AVAILABLE) ============================== INCOMPLETE</strong></summary>

<figure><img src="/files/BCJ5wYBz39HJFsFaj03s" alt=""><figcaption><p>Zygarde 10%, 50% and Complete (100%) Forms</p></figcaption></figure>

**How to change form:**&#x20;

<mark style="color:$danger;">Zygarde forms are defined by their 'cell count', being a naming convention to relate the form to the number of cells required per the games story to create it.</mark>

<mark style="color:$danger;">To change Zygardes form, its level must be at least equal to the cell count of the form you wish to change it into. For example, if you want a 50% Zygarde, it must first be at least level 50. Afterward, give the Zygarde a</mark> <mark style="color:$danger;"></mark><mark style="color:$danger;">**Slime Block**</mark><mark style="color:$danger;">.</mark>

</details>

<details>

<summary>Hoopa  <strong>(AVAILABLE)</strong></summary>

<figure><img src="/files/iV4mUYy3NjvIa6N4JpAb" alt=""><figcaption><p>Confined and Unbound Hoopa</p></figcaption></figure>

**How to change form:**&#x20;

In order to change Hoopa between forms you will need to interact with it using the **Prison Bottle**. After 3 in-game days, Hoopa will revert to its confined form.

<figure><img src="/files/Zz1NnJtrvD0MIesXM0yl" alt=""><figcaption></figcaption></figure>

**Why change Hoopa's form into Unbound?**

You'll want to change Hoopa's form so that you get increased power, different moves as well as changing Hoopa's typing from **Psychic/Ghost** in it's Confined form into **Pyschic/Dark** within it's Unbound form.

</details>

<details>

<summary>Silvally  <strong>(AVAILABLE)</strong></summary>

<figure><img src="/files/tVIbbRTdmLMhxQo1iwol" alt=""><figcaption><p>Variety of Silvally Forms</p></figcaption></figure>

**How many forms are there?**

Like with Arceus, there are 18 different forms for Silvally which players can chose between. Each of these forms correlate to a different typing from Fire to Dragon.

**How to change form:**&#x20;

You can easily change Silvallys form by giving it one of the 18 different Elemental Memories to hold.

| Type     | Memory                                           |
| -------- | ------------------------------------------------ |
| Bug      | Bug Memory ![](/files/sam0wMLXFKupmyjHDYAC)      |
| Dark     | Dark Memory ![](/files/Sgznb84DcJErrLN6e9Uw)     |
| Dragon   | Dragon Memory ![](/files/ePRsPpbmlmDYe6Eu5NGQ)   |
| Electric | Electric Memory ![](/files/eJzL95k7sz8i6xxcjJtF) |
| Fairy    | Fairy Memory ![](/files/Zv3S9pnfHTft1C0XdRP7)    |
| Fighting | Fighting Memory ![](/files/kOupUF1uihOwFDqwJjPl) |
| Fire     | Fire Memory ![](/files/FN5UMx4FzO08SK1rDRRA)     |
| Flying   | Flying Memory ![](/files/w5bXZQaGdRilaHPQ6g9T)   |
| Ghost    | Ghost Memory ![](/files/8zBEbCnlUgLZr5zlTmsw)    |
| Grass    | Grass Memory ![](/files/l9vKjAzQGFtKGImesLf1)    |
| Ground   | Ground Memory ![](/files/7VdYa7BSgaCsztmHAl9x)   |
| Ice      | Ice Memory ![](/files/sWkstFX2uLzFWIGNHKTA)      |
| Poison   | Poison Memory ![](/files/Om6hb34YC116HNqTx4x6)   |
| Psychic  | Psychic Memory ![](/files/UeqvMK7nmJr56urdGb7b)  |
| Rock     | Rock Memory ![](/files/KPIikoqzvuxO9cUXUeMq)     |
| Steel    | Steel Memory ![](/files/tkT6LmxYUJhF3CdG4uho)    |
| Water    | Water Memory ![](/files/VznJ0LVYbddikjGzt1Ix)    |

</details>

<details>

<summary>Necrozma  <strong>(AVAILABLE)</strong></summary>

<figure><img src="/files/oWlVXD9DgYDTQfIRoz1Y" alt=""><figcaption><p>Solgaleo, Necrozma and Lunala</p></figcaption></figure>

**How do I change Necrozma's form?**

In order to change Necrozma's form you'll need either Solgaleo or Lunala, and their corresponding item.&#x20;

For Dusk Mane Necrozma, use an **N-Solarizer** ![](/files/jhZWaxpvRBSeHQsV7nTS) on Necrozma and Solgaleo

For Dawn Wings Necrozma, use an **N-Lunarizer** ![](/files/7mTwGzum0qlU4tuSVEAI) on Necrozma and Lunala

<figure><img src="/files/PG8RpkOs515oUIIcrCXD" alt=""><figcaption><p>Dusk Mane and Dawn Wings Necrozma</p></figcaption></figure>

**Ultra Necrozma**

In order to obtain the **Ultra Necrozma** form all you'll need to do is give one of the **Fused Forms** of Necrozma **a Necrozmium-Z** to hold, and equip a **Mega Band.** Then once in-battle, you may use the Z-Move variant of Necrozmas signature move, **Photon Geyser** to initiate the transformation.

<figure><img src="/files/DGiEPz3o0pWgbC702yLx" alt=""><figcaption><p>Ultra Necrozma</p></figcaption></figure>

**Why change forms?**

You'll want to change the forms of Necrozma given the fact they'll come with exclusive moves, better stats and designs.&#x20;

* **Dusk Mane** form will become Psychic and Ghost.
* **Dusk Mane** form will become Psychic and Steel.
* **Ultra Necrozma** will become Psychic

</details>

<details>

<summary>Zacian and Zamazenta  <strong>(AVAILABLE)</strong></summary>

<figure><img src="/files/q926HFrh4TDTagu6qahr" alt=""><figcaption><p>Crowned Zacian and Zamazenta</p></figcaption></figure>

**How do I change their forms?**

* To transform **Zacian** into it's Crowned Form you need to give it a **Rusted Sword** <img src="/files/NzcsX4Uzits2bBt53KMg" alt="" data-size="line">.
* To transform **Zamazenta** into it's Crowned Form you need to give it a **Rusted Shield** <img src="/files/f9bVCi3flKBKynBBq6aO" alt="" data-size="line">.

**Why change their forms?**

You'll want to change their forms so they can learn their signature moves alongside increased stats for both plus also giving both access to their steel typings.

</details>

<details>

<summary>Urshifu  <strong>(AVAILABLE)</strong></summary>

<figure><img src="/files/dJAgbKV0RTokNNVIZbBw" alt=""><figcaption><p>Urshifu (Single Strike), Kubfu and Urshifu (Rapid Strike)</p></figcaption></figure>

Unlike with most legendaries with forms where you can change between them easily, which Urshifu you obtain is determined with how you evolve it as you won't be able to revert it once you have chosen your respective Urshifu.

**How do I evolve Kubfu into Urshifu?**

Evolving Kubfu is fairly easy as you can choose one of two items to evolve it, however each of these items will determine which form you get.

* Evolve Kubfu whilst it is standing near a **Scroll of Darkness** ![](/files/wTF0OXu4Jm8tp3OTZZHy) in order to evolve it into it's **Single Strike Form**.
* Evolve click Kubfu whilst it is standing near a **Scroll of Waters** ![](/files/7u7jVVWO5oIR9IZCY9C0) in order to evolve it into it's **Rapid Strike Style**.

<figure><img src="/files/gTAuYCmRGEpi9IxSHyUK" alt=""><figcaption><p>Scroll of Darkness and Scroll of Waters</p></figcaption></figure>

**What's the differences between the forms?**

**Single Strike Form** will make your Urshifu into a **Fighting/Dark** Pokemon while **Rapid Strike Form** will make Urshify into a **Fighting/Water** Pokemon.&#x20;

Each form comes with it's own benefits from strengths/weaknesses in battles as well as it's own signature move so make sure you choose the right form for you as once you have evolved it, you unfortunately won't be able to change it to the alternative form.&#x20;

</details>

<details>

<summary>Calyrex  <strong>(AVAILABLE)</strong></summary>

<figure><img src="/files/Irn9xSsoegfYIQVC08YE" alt=""><figcaption><p>Ice-Rider and Shadow-Rider Calyrex</p></figcaption></figure>

**How do I change its form?**

In order to evolve Calyrex into either **Shadow-Rider Form** (*Spectrier*) or **Ice-Rider Form** (*Glastrie*r) all you need to give is have both Calyrex and either Spectrier or Glastrier within your party and interact with them both using the **Reins of Unity** <img src="/files/F2cAZvIqCZkL9KbO2bcL" alt="" data-size="line">.

**Why change Calyrex's form?**

You'll want to change Calyrex's form as you get updated stats, new typing and a new ability to use.

* **Shadow-Rider** becomes a **Psychic and Ghost** Type and gains the ability **As One.**
* **Ice-Rider** becomes a **Psychic and Ice** Type and gains the ability **As One.**

</details>

**Pokemon with Forms currently Unavailable**

Please note at this moment in time most of the forms are inaccessible and will be updated as soon as players can start gaining access to them. Here is a list of all of those that you can't obtain.

<details>

<summary>Eternatus</summary>

<figure><img src="/files/3B5fSUQvgsX3mNeBnuC2" alt=""><figcaption><p>Eternamax Eternatus</p></figcaption></figure>

**How do I change its form?**

As of now, there is no way to obtain an Eternamax Eternatus.

</details>

<details>

<summary>Magearna</summary>

<figure><img src="/files/c9wvRhUvbDPO7KV59tYY" alt=""><figcaption><p>Normal and Origin Form Magearna</p></figcaption></figure>

**How do I change its form?**

As of now, there is no way to obtain an Origin Form Magearna.

</details>

<details>

<summary>Marshadow</summary>

<figure><img src="/files/FBiuTA5EeIXmCFgGyLyL" alt=""><figcaption><p>Normal and Zenith Marshadow</p></figcaption></figure>

**How do I change its form?**

As of now, there is no way to obtain an Zenith Marshadow.

</details>

#### Normal Pokemon with Forms

Alongside Legendaries, general pokemon will also have different forms which range from just from their looks all the way to changing their stats, moves and so on within the game. Here is a list of them all here:

<details>

<summary>Pikachu</summary>

<figure><img src="/files/6VH823eITH9QvtRN4tiF" alt=""><figcaption><p>Cosplay Pikachu Forms</p></figcaption></figure>

**How to Obtain:**

Pikachu posses many forms corresponding to the different Cosplay outfits introduced in Hoenn. Whilst a single Pikachu cannot switch between these forms at will, they can all be obtained individually as rare spawns through [creating a specific curry](https://pixelmonmod.com/wiki/Curry) that matches their own tastes whilst within a forest.

**Curry Preferences:**

* **Rockstar** form: Spicy Curry
* **Belle** Form: Dry Curry
* **Popstar** Form: Sweet Curry
* **Libre** Form: Sour Curry
* **Phd** Form: Bitter Curry

</details>

<details>

<summary>Pichu</summary>

<figure><img src="/files/c9Eab08JvZ7oRrK8RWJq" alt=""><figcaption><p>Spiky-Eared Pichu</p></figcaption></figure>

**How to Change Form:**

Spiky-Eared Pichu is a form that can only be obtained through permanently altering an existing standard Pichu. This is done through using the Forage external move on an Ilex Shrine whilst it has maximum friendship, changing both its form and stats.

**Form Changes:**

By altering your Pichu into the Spiky-Eared form, it will undergo the following changes.

* Level will be set to 30
* Gender will be set to Female
* Ability will be set to Static
* Moves will be set to Volt Tackle, Helping Hand, Swagger, and Pain Split
* Held Item will be set to Zap Plate
* Evolution into Pikachu will be blocked

</details>

<details>

<summary>Mareep</summary>

<figure><img src="/files/64fTUXu7qoSDXEPK813s" alt=""><figcaption><p>Mareep Forms</p></figcaption></figure>

**How to Change Form:**

Mareep is able to have its wool coat temporarily removed by using a pair of shears to obtain the **Shorn** form. This wool coat will naturally regrow by allowing your Mareep to eat grass much like a Vanilla Minecraft Sheep.

</details>

<details>

<summary>Lunatone</summary>

<figure><img src="/files/41W8CVZrQZ9XsCefuse9" alt=""><figcaption><p>Lunatone Forms</p></figcaption></figure>

**How to Obtain:**

By default, Lunatone will appear in the Gibbous Form, however the alternative forms have increase spawn rates depending on the current cycle of the moon phases.

The Minecraft moon undergoes physical changes in shape due to the progression of the in-game daylight cycle.

<figure><img src="/files/KixZrXFeH12zS4ccz3a7" alt=""><figcaption><p>Moon Phases</p></figcaption></figure>

* Full Moon - Phase 0
* Waning Gibbous - Phase 1
* Last Quarter - Phase 2
* Waning Crescent - Phase 3
* New Moon - Phase 4
* Waxing Crescent - Phase 5
* First Quarter - Phase 6
* Waxing Gibbous - Phase 7

**Moon Phases:**

In the order shown within the above image, the different forms have a 17x increase to their spawn rates in the following moon phases.

* **Gibbous** Form: Phases 1 and 7
* **Quarter** Form: Phases 2 and 6
* **Full** Form: Phase 0
* **New** Form: Phase 4
* **Crescent** Form: Phases 3 and 5

</details>

<details>

<summary>Castform</summary>

<figure><img src="/files/noYJ6n5ViisI68He7gwo" alt=""><figcaption><p>Castform Forms</p></figcaption></figure>

**How to Change Form:**

Castform is able to undergo transformations to better adapt to its current environment. This means that due to changes in either the mid-battle weather effects, or the external Minecraft weather, Castform will automatically change.

| Form   | Mid-Battle              | External                                  |
| ------ | ----------------------- | ----------------------------------------- |
| Normal | No weather or Sandstorm | Dawn, Dusk or Night with no precipitation |
| Sunny  | Sun                     | Day with no precipitation                 |
| Rainy  | Rain                    | Rain                                      |
| Snowy  | Hail                    | Snow                                      |

**Typings:**

Dependant on Castforms current form, it will experience a change to its typing.

* **Normal** form: Normal Typing
* **Sunny** Form: Fire Typing
* **Rainy** Form: Water Typing
* **Snowy** Form: Ice Typing

</details>

<details>

<summary>Bidoof</summary>

<figure><img src="/files/NfBgdn19eqaXxwxFucmr" alt=""><figcaption><p>Sir Doofus III</p></figcaption></figure>

**How to Obtain:**

Sir Doofus the Third is a rare variant obtained as a 1/30 chance from catching a wild Bidoof in a Luxury ball. Beyond cosmetic differences, there is nothing unique about the form. Sir Doofus is unable to evolve.

</details>

<details>

<summary>Burmy and Wormadam</summary>

<figure><img src="/files/FKq2Q4g8PKKo7JG8Znyy" alt=""><figcaption><p>Burmy and Wormadam Forms</p></figcaption></figure>

**How to Change Form:**

Burmy will protect itself with materials from its environment to create a cloak. The form that Burmy, and subsequently Wormadam take on is dependant on the ground for which it is currently battling on.

* **Plant** Cloak - Grass, Wood, and other Plant-Based materials
* **Sandy** Cloak - Dirt, Sand, Clay, Stone
* **Trash** Cloash - Other

**Differences between forms:**

Burmy does not have many differences outside of the different models. Wormadam however does change type to match the current form.

* **Plant** Cloak - (Bug/Grass)
* **Sandy** Cloak - (Bug/Ground)
* **Trash** Cloak - (Bug/Steel)

</details>

<details>

<summary>Cherrim</summary>

<figure><img src="/files/IR6wJujk6dAjC3tL2TTI" alt=""><figcaption><p>Cherrim Forms</p></figcaption></figure>

**How to Change Form:**

Cherrim much appreciates bright sunlight so it can properly undergo photosynthesis. In the presence of clear or bright skies, Cherrim will transform into its **Sunshine** form. Whereas if the weather is Rainy or Stormy, it will revert into the **Overcast** form.

**Benefits:**

Upon transforming into the **Sunshine** form, Cherrims ability Flower Gift activates to boost both its own, and allies Attack and Special Defence by 50%.

</details>

<details>

<summary>Shellos and Gastrodon</summary>

<figure><img src="/files/GhZCWd0kfJ0lUc2Ku8RJ" alt=""><figcaption><p>Shellos and Gastrodon Forms. East in blue, and West in pink.</p></figcaption></figure>

**How do I find each form?**

Shellos and Gastrodon typically acclimate to their surroundings, defining which form they take on. This is not the case in Pixelmon, where the chance of finding each form is equal and random. Additionally the forms are purely cosmetic.

</details>

<details>

<summary>Rotom</summary>

<figure><img src="/files/jAgZNrjqo74E9TpcxfW9" alt=""><figcaption><p>Rotom Forms</p></figcaption></figure>

**How to change form?**

Rotom can inhabit many different household appliances. All you need to do is interact with the block corresponding to the Rotom form you would like to receive, in which it will transform. Similarly to revert any changes, interact with the same block and it will transform back into the standard form.

| Form   | Typing            | Block                                    |
| ------ | ----------------- | ---------------------------------------- |
| Normal | Electric / Ghost  | Interact with last block again to revert |
| Heat   | Electric / Fire   | Furnace                                  |
| Wash   | Electric / Water  | Washing Machine                          |
| Frost  | Electric / Ice    | Fridge                                   |
| Fan    | Electric / Flying | Fan                                      |
| Mow    | Electric / Grass  | Mower                                    |

**Why change Rotom's form?**

Each rotom form outside of the base form comes with a brand new typing as well as different moves and upgraded stats. Pick the rotom that best fits your team!

</details>

<details>

<summary>Unown</summary>

<figure><img src="/files/zapTQlOHzIMV6ecAJTvP" alt=""><figcaption><p>Example Unown Forms</p></figcaption></figure>

**How to obtain these forms:**

Unown can take on one of 28 forms, being either a standard alphabet character, along with either an exclamation or question mark. There are no differences between forms beyond cosmetics.

**How do I find a specific form?**

Each of these forms spawns randomly so there's no real way for you to farm for one particular form. You might find the one you want right away, or it could take you 100+. Are you willing to collect them all?

</details>

<details>

<summary>Basculin and Basculegion</summary>

<figure><img src="/files/bc2uP1PrVYDBl3gLaSIS" alt=""><figcaption><p>Basculin and Basculegion Forms</p></figcaption></figure>

**How to obtain these forms:**

Basculin has a variety of forms, each with different purposes. **Red-Stripe** and **Blue-Stripe** are identical in functionality, offering no changes beyond cosmetic differences. On the other hand, **White-Stripe** is a much rarer find, and posses the ability to undergo evolution into Basculgeion upon losing 294 HP through recoil without fainting.

Then depending on the gender of your Basculegion, you will either get the **Red** or **White** form, where Male (**Red**) focusses on Physical attacks, and Female (**White**) focuses on Special attacks.

</details>

<details>

<summary>Darmanitan</summary>

<figure><img src="/files/KdkSCLRehvFDSjuxN2LQ" alt=""><figcaption><p>Darmanitan Forms</p></figcaption></figure>

**How do I change form?**

Darmanitan is able to transform mid-battle thanks to its hidden ability, **Zen Mode**. Either at the start of the battle, or at the end of a turn, if Darmanitans HP is below half its maximum value, it will transform, changing both typing and stats, to serve as a more defensive unit.

**Type Differences:**

| Form                             | Typing       |
| -------------------------------- | ------------ |
| **Unovan** Darmanitan            | Fire         |
| **Unovan Zen-Mode** Darmanitan   | Fire/Psychic |
| **Galarian** Darmanitan          | Ice          |
| **Galarian Zen-Mode** Darmanitan | Ice/FIre     |

</details>

<details>

<summary>Deerling and Sawsbuck</summary>

<figure><img src="/files/kmBoHFgjlQm7DvsWlLIl" alt=""><figcaption><p>Deerlink and Sawsbuck Forms</p></figcaption></figure>

**How to obtain these forms:**

Deerlings and Sawsbucks forms are dependant on the current season, adapted into Pixelmon as a biome variation, where the form that can spawn is dependant on which biome it is currently located in.

* **Spring** - Birches, Flowery
* **Summer** - Forests, Magical, Roofed
* **Autumn** - Redwoods, Taigas
* **Winter** - Freezing Forests, Mt Lanakila

</details>

<details>

<summary>Greninja</summary>

<figure><img src="/files/1MmmbyqeM43P2nDcBeYQ" alt=""><figcaption><p>Greninja Forms</p></figcaption></figure>

**How to obtain these forms:**

Greninja is unique, in the fact it has a secret ability beyond the standard hidden ability. Any Greninja with this secret ability **Battle Bond** is labelled an **Ash-Greninja**. To obtain an **Ash-Greninja**, you must catch it through fishing per the following requirements:

* Fish using a Super Rod
* Fish within the Jungle or Ultra Jungle biome categories
* Fish within deep water

All Ash-Greninja posses the same IVs, being&#x20;

| HP | Attack | Defence | Special Attack | Special Defence | Speed |
| -- | ------ | ------- | -------------- | --------------- | ----- |
| 20 | 31     | 20      | 31             | 20              | 31    |

</details>

<details>

<summary>Vivillon</summary>

<figure><img src="/files/E6Sz2oQ9rL1c6QAedFkE" alt=""><figcaption><p>Examples of Vivillon Forms</p></figcaption></figure>

**How to obtain these forms:**

Vivillon currently posses 21 forms on the server, each of which is restricted to a select set of biomes. The differences are cosmetic only, however with the wide availability, it's possibly a nice collection to obtain.

**How do I get a particular form?**

To obtain a given form, you must either catch a Vivillon, or evolve a Spewpa in the biome corresponding to the wing pattern.

| Archipelago | [Mushroom](https://pixelmonmod.com/wiki/Mushroom)                                                                                                                                                                                                                                                                                                                  |
| ----------- | ------------------------------------------------------------------------------------------------------------------------------------------------------------------------------------------------------------------------------------------------------------------------------------------------------------------------------------------------------------------ |
| Continental | [Mesas](https://pixelmonmod.com/wiki/Mesas)                                                                                                                                                                                                                                                                                                                        |
| Elegant     | [Roofed](https://pixelmonmod.com/wiki/Roofed)                                                                                                                                                                                                                                                                                                                      |
| Fancy       | [Plains (Category)](https://pixelmonmod.com/wiki/Plains_\(Category\))                                                                                                                                                                                                                                                                                              |
| Garden      | [Birches](https://pixelmonmod.com/wiki/Birches)                                                                                                                                                                                                                                                                                                                    |
| High Plains | [Redwoods](https://pixelmonmod.com/wiki/Redwoods)                                                                                                                                                                                                                                                                                                                  |
| Icy Snow    | [Freezing Forests](https://pixelmonmod.com/wiki/Freezing_Forests)                                                                                                                                                                                                                                                                                                  |
| Jungle      | [Jungles](https://pixelmonmod.com/wiki/Jungles)                                                                                                                                                                                                                                                                                                                    |
| Marine      | [Beaches](https://pixelmonmod.com/wiki/Beaches)                                                                                                                                                                                                                                                                                                                    |
| Meadow      | [Flower Forest](https://pixelmonmod.com/wiki/Flower_Forest)                                                                                                                                                                                                                                                                                                        |
| Modern      | [Mountainous](https://pixelmonmod.com/wiki/Mountainous)                                                                                                                                                                                                                                                                                                            |
| Monsoon     | [Swamps](https://pixelmonmod.com/wiki/Swamps)                                                                                                                                                                                                                                                                                                                      |
| Ocean       | [Deep Lukewarm Ocean](https://pixelmonmod.com/wiki/Deep_Lukewarm_Ocean), [Deep Ocean](https://pixelmonmod.com/wiki/Deep_Ocean), [Deep Warm Ocean](https://pixelmonmod.com/wiki/Deep_Warm_Ocean), [Lukewarm Ocean](https://pixelmonmod.com/wiki/Lukewarm_Ocean), [Ocean](https://pixelmonmod.com/wiki/Ocean), [Warm Ocean](https://pixelmonmod.com/wiki/Warm_Ocean) |
| Polar       | [Cold Ocean](https://pixelmonmod.com/wiki/Cold_Ocean), [Deep Cold Ocean](https://pixelmonmod.com/wiki/Deep_Cold_Ocean), [Deep Frozen Ocean](https://pixelmonmod.com/wiki/Deep_Frozen_Ocean), [Frozen Ocean](https://pixelmonmod.com/wiki/Frozen_Ocean), [Frozen River](https://pixelmonmod.com/wiki/Frozen_River)                                                  |
| River       | [River](https://pixelmonmod.com/wiki/River)                                                                                                                                                                                                                                                                                                                        |
| Sandstorm   | [Arid](https://pixelmonmod.com/wiki/Arid)                                                                                                                                                                                                                                                                                                                          |
| Savanna     | [Savannas](https://pixelmonmod.com/wiki/Savannas)                                                                                                                                                                                                                                                                                                                  |
| Sun         | [Sunflower Plains](https://pixelmonmod.com/wiki/Sunflower_Plains)                                                                                                                                                                                                                                                                                                  |
| Tundra      | [Freezing](https://pixelmonmod.com/wiki/Freezing), Except in [Frozen Ocean](https://pixelmonmod.com/wiki/Frozen_Ocean), [Frozen River](https://pixelmonmod.com/wiki/Frozen_River) & [Snowy Beach](https://pixelmonmod.com/wiki/Snowy_Beach)                                                                                                                        |

</details>

<details>

<summary>Flabebe, Floette and Florges</summary>

<figure><img src="/files/SfkzINIQb74lkgqLhob9" alt=""><figcaption><p>Flabebe, Floette and Florges Forms</p></figcaption></figure>

**How to obtain these forms:**

Flabebe, Floette and Florges can all spawn naturally as one of 5 different flower colours, with no differences besides cosmetic. This flower colour is retained through evolution.

**AZ Floette:**

There does also exist a unique form of Floette, labelled the **AZ** form. This form can be obtained by using the Sweet Scent external move within either a Flowery or Magical biome. AZ Floette cannot evolve, learns the unique move Light of Ruin, and has improved stats beyond its counterparts.

<figure><img src="/files/3CscsynKp4nZNCaOkX9w" alt="" width="188"><figcaption><p>AZ Floette</p></figcaption></figure>

</details>

<details>

<summary>Meowstic</summary>

<figure><img src="/files/fMLdIkFbm0wwfTDngEcq" alt=""><figcaption><p>Meowstic Forms</p></figcaption></figure>

**How to obtain these forms:**

Meowstics forms are gender dependant and primarily cosmetic only, switching their primary colours between the pair. The only real difference beyond this is their hidden abilities.

**Differences:**

* Meowstic **Female** - Competitive Hidden Ability
* Meowstic **Male** - Prankster Hidden Ability

</details>

<details>

<summary>Aegislash</summary>

<figure><img src="/files/lFP2xEioCxpwZS22CSC9" alt=""><figcaption><p>Aegislash Forms</p></figcaption></figure>

**How to change forms:**

Aegislashs forms are tied to its ability, **Stance Change**. Upon using a damaging move during battle, Aegislash will transform into Blade form at the start of the turn. Similarly upon using the move King's Shield, it will transform into Shield form at the start of the turn.

Each form redistributes Aegislashs stats to better support its planned form of attack or defence.

</details>

<details>

<summary>Oricorio</summary>

<figure><img src="/files/sgPOa1xdR2Qvm3yNUwJ3" alt=""><figcaption><p>Oricorio Forms (Baile, Pa'u, Sensu, Pom-Pom)</p></figcaption></figure>

**How to obtain these forms:**

Oricoios form is dependant on the biome of the forest in which it was caught, mimicing its adaption to its environment (or island) from the mainline games.

* **Baile** Style - Forests
* **Pom-Pom** Style - Birches
* **Pa'u** Style - Taigas
* **Sensu** Style - Roofed

**Differences between forms:**

The different forms will change what typing Oricorio is. These are as follows:

* **Baile** Style - Fire/Flying
* **Pom-Pom** Style - Electric/Flying
* **Pa'u** Style - Psychic/Flying
* **Sensu** Style - Ghost/Flying

</details>

<details>

<summary>Lycanroc</summary>

<figure><img src="/files/WiGdZjMlau8rP5puSpEu" alt=""><figcaption><p>Lycanroc Forms (Midday, Middnight and Dusk)</p></figcaption></figure>

**How to obtain these forms:**

Lycanroc can naturally spawn in their different forms, depending on the time of day that corresponds with the form itself. Alternatively, you can evolve a Rockruff in the same time that once again matches the form itself.

* To get **Midday form** you need to evolve Rockruff in the **Day**.
* To get **Midnight form** you need to evolve Rockruff in the **Night**.
* To get **Dusk form** you need to evolve Rockruff in the **Dusk**.

</details>

<details>

<summary>Wishiwashi</summary>

<figure><img src="/files/15XQiouhcDCnRGAMPLOp" alt=""><figcaption><p>Wishwashi Forms</p></figcaption></figure>

**How to change forms:**

Wishiwashis forms are tied to its ability, **Schooling**. Assuming the Wishiwashi is at least level 20, at the start of a turn it will transform into its **School** form assuming its HP exceeds 25%, offering major boosts to all stats besides HP. Once its HP drops below 25%, it will transform back into its **Solo** form at the end of the turn.

</details>

<details>

<summary>Minior</summary>

<figure><img src="/files/rJVkbKGgg2qxrLDSTxPM" alt=""><figcaption><p>Minior Forms</p></figcaption></figure>

**How to change forms:**

Miniors forms are tied to its ability, **Shields Down**. Upon having its HP drop below half during battle, it will lose the **Meteorite** and transform into its **Core** form, redistributing its defence focused stats into offense, along with a speed increase.

Additionally Miniors core can come as one of 7 different colours, being entirely random during first spawn / creation of the Pokemon itself.

</details>

<details>

<summary>Wooloo / Dubwool</summary>

<figure><img src="/files/54nPkijX3OBMMqvsLUkz" alt=""><figcaption><p>Wooloo / Dubwool Forms</p></figcaption></figure>

**How to Change Form:**

Wooloo and Dubwool are able to have its wool coat temporarily removed by using a pair of shears to obtain the **Shorn** form. This wool coat will naturally regrow by allowing your Pokemon to eat grass much like a Vanilla Minecraft Sheep.

</details>

<details>

<summary>Toxtricity</summary>

<figure><img src="/files/6yFXNxV7P1TI3QC9nKmL" alt=""><figcaption><p>Toxtricity Forms</p></figcaption></figure>

**How to obtain these forms:**

Toxtricity will take on one of two forms depending on its nature and how it tends to act, where **Low Key** (Blue) is more reserved, and **Amped** (Yellow) is more outgoing. As such the form is decided when the Pokemon is first created, either through wild spawns or through evolving from a Toxel.

**Nature Requirements:**

For **Amped Toxtricity** you'll need one of the following natures:

* Hardy
* Brave
* Adamant
* Naughty
* Docile
* Impish
* Lax
* Hasty
* Jolly
* Naive
* Rash
* Sassy
* Quirky

For **Low Key** Toxtricity you'll need one of the following natures:

* Lonely
* Bold
* Relaxed
* Timid
* Serious
* Modest
* Mild
* Quiet
* Bashful
* Calm
* Gentle
* Careful

</details>

<details>

<summary>Sinistea and Polteageist</summary>

<figure><img src="/files/JGnCRkmrc2OzUks8cUyo" alt=""><figcaption><p>Sinistea and Polteageist Forms</p></figcaption></figure>

<figure><img src="/files/inq5L6EjySNLao7E35XR" alt=""><figcaption><p>Underside of Sinistea and Polteageist, showing the Antique labels</p></figcaption></figure>

**How to obtain these forms:**

Sinistea and Polteageist exhibit cosmetic differences based on the origins of the tea pot in which they inhabit. They may either be **Phony** forms, where the pot comes from unknown sources, or **Antique** forms, displayed by the mark of authenticity on their underside (shown on the right).

**Evolving:**

Sinistea requires a specific item to evolve, being a pot corresponding to its own authenticity. To evolve a **Phony** Sinistea, you need a **cracked pot**, whereas to evolve an **Antique** Sinistea, you need a **chipped pot**.

</details>

<details>

<summary>Alcremie</summary>

<figure><img src="/files/KcCTKKfQuAgkkpsP6Li4" alt=""><figcaption><p>Examples of Alcremie Forms</p></figcaption></figure>

**How to obtain these forms:**

Alcremie's form is influenced by its evolution conditions from Milcery, including both which evolution item (sweet) is used along with the time and location.&#x20;

**How to evolve Milcery:**

In order to evolve Milcery into Alcremie you'll need to **give it a sweet to hold**. The full list of sweets include:

* Strawberry Sweet
* Love Sweet
* Berry Sweet
* Clover Sweet
* Flower Sweet
* Start Sweet
* Ribbon Sweet

Now the time of day does also pay a factor into what style you might end up with. Once your Milcery has a sweet all you need to do is go into the **status menu** and **evolve it** into the form you wish it to be.

Below you will find a detailed graph sourced from the Pixelmon Wiki which shows the combinations needed to achieve every form.

<figure><img src="/files/2w0AVLBR9Joh3LoQurvP" alt=""><figcaption></figcaption></figure>

</details>

<details>

<summary>Eiscue</summary>

<figure><img src="/files/hRaFIMnJcflb2OUybepL" alt=""><figcaption><p>Eiscue Forms</p></figcaption></figure>

**How to change forms:**

Eiscues forms are tied to its ability, **Ice Face**. Upon being hit by a physical attack, the ice head will absorb all damage and crack, redistributing many defence focused stats into speed. Whilst the battle is under the hail condition, the ice face may be restored.

</details>

<details>

<summary>Indeedee</summary>

<figure><img src="/files/0YktAREtlMJl5W6fOzFH" alt=""><figcaption><p>Indeedee Forms</p></figcaption></figure>

**How to obtain these forms:**

Indeedee has two forms based on its gender, with male shown on the left, and female on the right. The differences between both gender exceeds beyond cosmetic only, being relevant to both stat distribution and abilities.

Male Indeedee offers greater attack and speed, whilst being able to posses the ability **Inner Focus**. Whereas Female Indeedee offers greater defences, whilst being able to posses the ability **Own Tempo**.

</details>

<details>

<summary>Morpeko</summary>

<figure><img src="/files/RUYuYUfeBYPUtVXNsqPF" alt=""><figcaption><p>Morpeko Forms</p></figcaption></figure>

**How to change forms:**

Eiscues forms are tied to its ability, **Hunger Switch**. At the end of every turn, Morpeko will switch between **Fully Belly** Form and **Hangry** Form, allowing the typing of its signature move **Aura Wheel** to change between Electric and Dark respectively.

</details>

<details>

<summary>Ursaluna</summary>

<figure><img src="/files/rwOx5z5InhEpxkACAggV" alt=""><figcaption><p>Ursalune Forms</p></figcaption></figure>

Currently only Ursalunas **Base** form is available, whilst the **Blood-Moon** can only be obtained through cheats, making it unavailable entirely on the server, as demonstrated by its lack of an in-game model.

</details>

<details>

<summary>Oinkologne</summary>

<figure><img src="/files/68qw7FQCdhFXFXMtK6gt" alt=""><figcaption></figcaption></figure>

**How to obtain these forms:**

Oinkologne has two forms based on its gender, with female shown on the left, and male on the right. The differences between both gender includes stat changes.

Male Oinkologne offers greater attack and physical defence, whilst female Oinkologne offers greater HP and special defence.

</details>

<details>

<summary>Maushold</summary>

<figure><img src="/files/mgJuDkrvm2AYy0ckbZR5" alt=""><figcaption></figcaption></figure>

**How to obtain these forms:**

Upon evolution from Tandemaus, Maushold expands its family in which the number of children can vary. In a majority of cases, Maushold will be in its **Family-Of-4** form, however with a **1% chance** during evolution, it may instead turn into the **Family-Of-3** form, being a cosmetic difference only.

</details>

<details>

<summary>Squawkabilly</summary>

<figure><img src="/files/E3aJfOJkQa0PmAMCiAQs" alt=""><figcaption></figcaption></figure>

**How to obtain these forms:**

Each form of Squawkabilly is available on the game, but they **all spawn in the same locations** so you'll have to be lucky to find one particular one if you want on particular form.&#x20;

The hidden ability of the **Blue** and **Green** forms is **Guts**, whilst form the **Yellow** and **White** forms it is **Sheer Force**.

</details>

<details>

<summary>Palafin</summary>

<figure><img src="/files/49PXzFfkm4HCT3x1iolO" alt=""><figcaption></figcaption></figure>

**How to change forms:**

Palafins forms are tied to its ability, **Zero to Hero**. When first sent into battle, it will be in its **Zero** form, however after switching out and later switching back into the same battle, it changes into its **Hero** form, offering increased stats in all offences and defences.

</details>

<details>

<summary>Tatsugiri</summary>

<figure><img src="/files/djshvQRKaHORBjsfAbgl" alt=""><figcaption></figcaption></figure>

**How to obtain these forms:**

Each form of Tatsugiri is available on the game, but they **all spawn in the same locations** so you'll have to be lucky to find one particular one if you want either it's Stretchy, Droopy or Curly forms.

**Benefits to each form**

Outside of different textures, each form comes with their own benefit:

* **Droopy Form** will boost **Defense Stat** when using the move Order Up
* **Curly Form** will boost **Attack Stat** when using the move Order Up
* **Stretchy Form**  will boost **Speed Stat** when using the move Order Up

</details>

<details>

<summary>Dudunsparce</summary>

<figure><img src="/files/A3rhDv6HUdGc95NscLMk" alt=""><figcaption></figcaption></figure>

**How to obtain these forms:**

Upon evolution from Dunsparce, Dudunspace expands its body length in which the number of segments can vary. In a majority of cases, Dudunsparce will be in its **2-Segment** form, however with a **1% chance** during evolution, it may instead turn into the **3-Segment** form, being a cosmetic difference only.

</details>

<details>

<summary>Poltchageist and Sinistcha</summary>

<figure><img src="/files/17O3yjrK6e44ZPbD6YBE" alt=""><figcaption></figcaption></figure>

Currently Sinistcha and Poltchageist are not available within the mod, so cannot be obtained on the server. This is demonstrated by their lack of in-game models, meaning there are also no visual differences between forms at the moment.

</details>

### Custom Palettes

Outside of the normal and legendary forms you can find on the server, you'll also be able to find other custom palettes of pokemon in the wild. You can find out more about custom pokemon via the **Official Pixelmon Wiki** here:

<https://pixelmonmod.com/wiki/Special_textures>


# Regional Forms

Here you can find all of the regional forms on the server as well as some information relating to them.

**Contents**

* [Alolan](#alolan)
* [Galarian](#galarian)
* [Hisuian](#hisuian)
* [Paldean](#paldean)

***

Here you can find all of the Pokemon relating to the region the forms were introduced via the official pokemon games. Please not there are some that are yet to be introduced but this guide will be updated once they are in the server!

Regional variants are traits Pokemon retain through evolution, meaning they will not change form if an alternative exists. The exceptions to this lies with regional-bias variants, where an evolution may have differing regional forms, despite the pre-evolution not having such options (such as Alolan Raichu, despite there not existing an Alolan Pikachu). In these cases they will prefer their same variant, but can evolve into other options based on the biome in which the evolution takes place.

### Alolan

<table><thead><tr><th width="119">Pokemon</th><th>Normal Form</th><th>Alolan Form</th><th>Evolution Info</th></tr></thead><tbody><tr><td>Rattata</td><td><p><img src="/files/XnXNK4eSQKroP4sEzKuT" alt="" data-size="original"></p><p><strong>Typing:</strong>  Normal</p></td><td><p><img src="/files/VcLHgKAZDeXe8wVRnFms" alt="" data-size="original"></p><p><strong>Typing</strong>: Dark/Normal</p></td><td>---</td></tr><tr><td>Raticate</td><td><p><img src="/files/N67IDL7m9SwK0e4YsVKo" alt="" data-size="original"></p><p><strong>Typing:</strong>  Normal</p></td><td><p><img src="/files/mD1E1hnYhTY1Pb5UyKg3" alt="" data-size="original"></p><p><strong>Typing</strong>: Dark/Normal</p></td><td>Evolve <strong>Alolan</strong> Rattata at Level 20 during the Night</td></tr><tr><td>Raichu</td><td><p><img src="/files/KsVBzuAk7MXmZkecQqK3" alt="" data-size="original"></p><p><strong>Typing:</strong>  Electric</p></td><td><p><img src="/files/Dba0u3IPwQjhwBuKnSjP" alt="" data-size="original"></p><p><strong>Typing:</strong>  Electric/Psychic</p></td><td>Evolve Pikachu with a Thunder Stone whilst another <strong>Alolan</strong> Pokemon is in the party</td></tr><tr><td>Sandshrew</td><td><p><img src="/files/nOBaFKackQSS3lPb9Dxc" alt="" data-size="original"></p><p><strong>Typing:</strong>  Ground</p></td><td><p><img src="/files/m5hnde9UNzGmCNhRVqLx" alt="" data-size="original"></p><p><strong>Typing:</strong>  Ice/Steel</p></td><td>---</td></tr><tr><td>Sandslash</td><td><p><img src="/files/v5syghF6cU2rz7mCiwYU" alt="" data-size="original"></p><p><strong>Typing:</strong>  Ground</p></td><td><p><img src="/files/Eh073gPmLSlwK04J0lRm" alt="" data-size="original"></p><p><strong>Typing:</strong>  Ice/Steel</p></td><td>Evolve <strong>Alolan</strong> Sandshrew with a Ice Stone</td></tr><tr><td>Vulpix</td><td><p></p><p><img src="/files/D9uglmPrjz9gCzb3tDWJ" alt="" data-size="original"></p><p><strong>Typing:</strong>  Fire</p></td><td><p></p><p><img src="/files/WxjI0YinnW7hudYdoDnD" alt="" data-size="original"></p><p><strong>Typing:</strong>  Ice</p></td><td>---</td></tr><tr><td>Ninetales</td><td><p><img src="/files/7KOAMcDoxnZcM613OB1v" alt="" data-size="original"></p><p><strong>Typing:</strong>  Fire</p></td><td><p><img src="/files/nu2DGo8uz0HcECMiOPNg" alt="" data-size="original"></p><p><strong>Typing:</strong>  Ice/Fairy</p></td><td>Evolve <strong>Alolan</strong> Vulpix with a Ice Stone</td></tr><tr><td>Diglett</td><td><p><img src="/files/6P0Hh2SHRzDdyeOmi5wE" alt="" data-size="original"></p><p><strong>Typing:</strong>  Ground</p></td><td><p><img src="/files/dkkc37eSLpVdiwiiaVqK" alt="" data-size="original"></p><p><strong>Typing:</strong>  Ground/Steel</p></td><td>---</td></tr><tr><td>Dugtrio</td><td><p><img src="/files/1gWxuzQyHxPt9IrWkLFL" alt="" data-size="original"></p><p><strong>Typing:</strong>  Ground</p></td><td><p><img src="/files/Wu6PHXJHiRM3pA30PA78" alt="" data-size="original"></p><p><strong>Typing:</strong>  Ground/Steel</p></td><td>Evolve <strong>Alolan</strong> Diglett at Level 26</td></tr><tr><td>Meowth</td><td><p><img src="/files/RZKo2CHWuBv9sOpbn6Yg" alt="" data-size="original"></p><p><strong>Typing:</strong>  Normal</p></td><td><p><img src="/files/YPxbohlBqxuMqgRVI3B0" alt="" data-size="original"></p><p><strong>Typing:</strong>  Dark</p></td><td>---</td></tr><tr><td>Persian</td><td><p><img src="/files/ImVIk4u6PpNToGdnlZNE" alt="" data-size="original"></p><p><strong>Typing:</strong>  Normal</p></td><td><p><img src="/files/XncX6aLlL3jZk5iABgkq" alt="" data-size="original"></p><p><strong>Typing:</strong>  Dark</p></td><td>Evolve <strong>Alolan</strong> Meowth through levelling with High Friendship</td></tr><tr><td>Geodude</td><td><p><img src="/files/53AZL4sYa7AmaL4AqPwF" alt="" data-size="original"></p><p><strong>Typing:</strong>  Rock/Ground</p></td><td><p><img src="/files/G1QWlrLBh6UvYEFesRjW" alt="" data-size="original"></p><p><strong>Typing:</strong>  Rock/Electric</p></td><td>---</td></tr><tr><td>Graveler</td><td><p><img src="/files/NTRN7mU0HSUKDlHEqEPV" alt="" data-size="original"></p><p><strong>Typing:</strong>  Rock/Ground</p></td><td><p><img src="/files/O9dnLZjwu88XjJusTDqw" alt="" data-size="original"></p><p><strong>Typing:</strong>  Rock/Electric</p></td><td>Evolve <strong>Alolan</strong> Geodude at Level 25</td></tr><tr><td>Golem</td><td><p><img src="/files/j4KWV8LreB6rBQuPPq2Q" alt="" data-size="original"></p><p><strong>Typing:</strong>  Rock/Ground</p></td><td><p><img src="/files/uNQrDhQqaVcjkD5l2vJA" alt="" data-size="original"></p><p><strong>Typing:</strong>  Rock/Electric</p></td><td>Evolve <strong>Alolan</strong> Graveler by Trading</td></tr><tr><td>Grimer</td><td><p><img src="/files/uR8wuKwihZnuSV7kgYVY" alt="" data-size="original"></p><p><strong>Typing:</strong>  Poison</p></td><td><p><img src="/files/SAAYdMcjx1PwLeWQnaxA" alt="" data-size="original"></p><p><strong>Typing:</strong>  Poison/Dark</p></td><td>---</td></tr><tr><td>Muk</td><td><p><img src="/files/EcAPwbQqyRScGvf7LmRG" alt="" data-size="original"></p><p><strong>Typing:</strong>  Poison</p></td><td><p><img src="/files/8lRBzWPCKhx22UBHka7S" alt="" data-size="original"></p><p><strong>Typing:</strong>  Poison/Dark</p></td><td>Evolve <strong>Alolan</strong> Grimer at Level 38</td></tr><tr><td>Exeggutor</td><td><p><img src="/files/yueGiVAxsRFSwDcTwkBt" alt="" data-size="original"></p><p><strong>Typing:</strong>  Grass/Psychic</p></td><td><p><img src="/files/u3MUiN0q1yqZddGHaRqu" alt="" data-size="original"></p><p><strong>Typing:</strong>  Grass/Dragon</p></td><td>Evolve Exeggcute with a Leaf Stone whilst another <strong>Alolan</strong> Pokemon is in the party</td></tr><tr><td>Marowak</td><td><p><img src="/files/JWX7ZFvSPw7ZY7FUbhax" alt="" data-size="original"></p><p><strong>Typing:</strong>  Ground</p></td><td><p><img src="/files/sfLAbGIZ9ulY2bm3ChdF" alt="" data-size="original"></p><p><strong>Typing:</strong>  Fire/Ghost</p></td><td>Evolve Cubone at Level 28 whilst another Alolan Pokemon is in the party</td></tr></tbody></table>

### Galarian

<table><thead><tr><th width="120.5">Pokemon</th><th>Normal Form</th><th>Galarian Form</th><th>Evolution Info</th></tr></thead><tbody><tr><td>Meowth</td><td><p><img src="/files/QCUvBqTWghjL4tZ9VmVg" alt="" data-size="original"></p><p><strong>Typing:</strong>  Normal</p></td><td><p><img src="/files/B8VFjlH0nRTn7LWxkjI2" alt="" data-size="original"></p><p><strong>Typing:</strong>  Steel</p></td><td>---</td></tr><tr><td>Ponyta</td><td><p><img src="/files/w2B7GwvnIXV5D4WbODct" alt="" data-size="original"></p><p><strong>Typing:</strong>  Fire</p></td><td><p><img src="/files/cOAFOEx7Wt31JvgimgLO" alt="" data-size="original"></p><p><strong>Typing:</strong>  Psychic</p></td><td>---</td></tr><tr><td>Rapidash</td><td><p></p><p><img src="/files/SN37QgR6LR46C7Jj9loW" alt="" data-size="original"></p><p><strong>Typing:</strong>  Fire</p></td><td><p><img src="/files/4mKgC0L0NzKrgPVaZ4tK" alt="" data-size="original"></p><p><strong>Typing:</strong>  Psychic/Fairy</p></td><td>Evolve <strong>Galarian</strong> Ponyta at Level 40<br></td></tr><tr><td>Slowpoke</td><td><p><img src="/files/WQZVMcFMlwPRnFwdASKP" alt="" data-size="original"></p><p><strong>Typing:</strong>  Water/Psychic</p></td><td><p><img src="/files/GIT0oLjAEnAsXPTlK0oC" alt="" data-size="original"></p><p><strong>Typing:</strong>  Psychic</p></td><td>---</td></tr><tr><td>Slowbro</td><td><p><img src="/files/KkaD2ZXUS1R8B2YNEAym" alt="" data-size="original"></p><p><strong>Typing:</strong>  Water/Psychic</p></td><td><p><img src="/files/TKv5HLmNlqmtRIgAntqE" alt="" data-size="original"></p><p><strong>Typing:</strong>  Poison/Psychic </p></td><td>Evolve <strong>Galarian</strong> Slowpoke with a Galarian Cuff</td></tr><tr><td>Slowking</td><td><p><img src="/files/bFTqHBo1WeDVdZHgeP8S" alt="" data-size="original"></p><p><strong>Typing:</strong>  Water/Psychic</p></td><td><p><img src="/files/C4ZKgEwJAGCweG4ph81T" alt="" data-size="original"></p><p><strong>Typing:</strong> Poison/Psychic </p></td><td>Evolve <strong>Galarian</strong> Slowpoke with a Galarian Wreath</td></tr><tr><td>Farfetch'd</td><td><p><img src="/files/gmWaioWgJsDZLblklj25" alt="" data-size="original"></p><p><strong>Typing:</strong>  Normal/Flying</p></td><td><p><img src="/files/w77IUeIOH3pmwRlOClwY" alt="" data-size="original"></p><p><strong>Typing:</strong>  Fighting</p></td><td>---</td></tr><tr><td>Weezing</td><td><p><img src="/files/VOoL1NoIoGv1to3cjRuz" alt="" data-size="original"></p><p><strong>Typing:</strong>  Poison</p></td><td><p><img src="/files/shxfKNWD7mA9k5aKYOuk" alt="" data-size="original"></p><p><strong>Typing:</strong>  Poison/Fairy</p></td><td>Evolve Koffing at Level 35 whilst it has the burn status condition</td></tr><tr><td>Mr. Mime</td><td><p><img src="/files/6P54ioeHkQQg9Syf1fUW" alt="" data-size="original"></p><p><strong>Typing:</strong>  Psychic/Fairy</p></td><td><p><img src="/files/3KWULAV30rluWJG7Wcoq" alt="" data-size="original"></p><p><strong>Typing:</strong>  Ice/Psychic</p></td><td>Evolve Mime Jr. through levelling whilst knowing move Mimic in Freezing Biome</td></tr><tr><td>Corsola</td><td><p><img src="/files/D5rSdpRt3TpeMNKr20JY" alt="" data-size="original"></p><p><strong>Typing:</strong>  Water/Rock</p></td><td><p><img src="/files/WgKhWV7zY6qg4ZOJTrhf" alt="" data-size="original"></p><p><strong>Typing:</strong>  Ghost</p></td><td>---</td></tr><tr><td>Zigzagoon</td><td><p><img src="/files/OsKJnz16pgNuzfHnjpQp" alt="" data-size="original"></p><p><strong>Typing:</strong>  Normal</p></td><td><p><img src="/files/G2RI6ENwGpncGCY80zbz" alt="" data-size="original"></p><p><strong>Typing:</strong>  Dark/Normal</p></td><td>---</td></tr><tr><td>Linoone</td><td><p><img src="/files/CdQUsw67Py0Yx2SRLUaJ" alt="" data-size="original"></p><p><strong>Typing:</strong>  Normal</p></td><td><p><img src="/files/A9mK6AXmpfY5Am7tVz31" alt="" data-size="original"></p><p><strong>Typing:</strong>  Dark/Normal</p></td><td>Evolve <strong>Galarian</strong> Zigzagoon at Level 20</td></tr><tr><td>Darumaka</td><td><p><img src="/files/hS6SM03lX88TRoYL64Nz" alt="" data-size="original"></p><p><strong>Typing:</strong>  Fire</p></td><td><p><img src="/files/7dnFzQNQhfPFaKZf4Dph" alt="" data-size="original"></p><p><strong>Typing:</strong>  Ice</p></td><td>---</td></tr><tr><td>Darmanitan</td><td><p><img src="/files/qSbNgpHFcjogly1laapa" alt="" data-size="original"></p><p><strong>Typing:</strong>  Fire</p></td><td><p><img src="/files/0YLaPlrRzecOyHVy8xcW" alt="" data-size="original"></p><p><strong>Typing:</strong>  Ice</p></td><td>Evolve <strong>Galarian</strong> Darumaka with a Ice Stone</td></tr><tr><td>Darmanitan (<em>Zen Mode</em>)</td><td><p><img src="/files/GnWtkEf9kvgmchlMqBdh" alt="" data-size="original"></p><p><strong>Typing:</strong>  Fire/Psychic</p></td><td><p><img src="/files/f3iHsR6fsuw6nQhVUM8h" alt="" data-size="original"></p><p><strong>Typing:</strong>  Ice/Fire</p></td><td>---</td></tr><tr><td>Yamask</td><td><p><img src="/files/wxuqCp2fYJ5ZZupYrOv5" alt="" data-size="original"></p><p><strong>Typing:</strong>  Ghost</p></td><td><p><img src="/files/bz6kIxgSoq3DZawpTAUv" alt="" data-size="original"></p><p><strong>Typing:</strong>  Ground/Ghost</p></td><td>---</td></tr><tr><td>Stunfisk</td><td><p><img src="/files/HsgwHHheQoKk2jc4gVPq" alt="" data-size="original"></p><p><strong>Typing:</strong>  Ground/Electric</p></td><td><p><img src="/files/AjS951sy4zv5FhE3S40e" alt="" data-size="original"></p><p><strong>Typing:</strong>  Ground/Steel</p></td><td>---</td></tr><tr><td>Articuno</td><td><p><img src="/files/BnOCv0J0GGS0VIo25X7m" alt="" data-size="original"></p><p><strong>Typing:</strong>  Ice/Flying</p></td><td><p><img src="/files/GdGS5aZNgto39gmVoLNj" alt="" data-size="original"></p><p><strong>Typing:</strong>  Psychic/Flying</p></td><td>---</td></tr><tr><td>Zapdos</td><td><p><img src="/files/H0bAaR1Lw0Lqg4rVnbh7" alt="" data-size="original"></p><p><strong>Typing:</strong>  Electric/Flying</p></td><td><p><img src="/files/7kgh3AKNar6YEwMGKZ3Y" alt="" data-size="original"></p><p><strong>Typing:</strong>  Fighting/Flying</p></td><td>---</td></tr><tr><td>Moltres</td><td><p><img src="/files/cBqm8ORRxxTjvJQLygUe" alt="" data-size="original"></p><p><strong>Typing:</strong>  Fire/Flying</p></td><td><p><img src="/files/qGiTtsHQNhasYcp8cvJl" alt="" data-size="original"></p><p><strong>Typing:</strong>  Dark/Flying</p></td><td>---</td></tr></tbody></table>

### Hisuian

<table><thead><tr><th width="108.5">Pokemon</th><th>Normal Form</th><th>Hisuian Form</th><th>Evolution Info</th></tr></thead><tbody><tr><td>Decidueye</td><td><p><img src="/files/dNZJB0er1X5YYF4OEeil" alt="" data-size="original"></p><p><strong>Typing:</strong>  Grass/Ghost</p></td><td><p><img src="/files/63Z3RAkkjvL81MP6r9S7" alt="" data-size="original"></p><p><strong>Typing:</strong>  Grass/Fighting</p></td><td>Evolve Dartrix at Level 36 at Dawn</td></tr><tr><td>Typhlosion</td><td><p><img src="/files/RmPU4vgVqRV6QSRmquVG" alt="" data-size="original"></p><p><strong>Typing:</strong>  Fire</p></td><td><p><img src="/files/QcYMt3mmriSW5ErzwgHY" alt="" data-size="original"></p><p><strong>Typing:</strong>  Fire/Ghost</p></td><td>Evolve Quilava at Level 36 at Night</td></tr><tr><td>Samurott</td><td><p><img src="/files/95nWpQxNO9rIWKwzTYGN" alt="" data-size="original"></p><p><strong>Typing:</strong>  Water</p></td><td><p><img src="/files/wy3qYGqhP6femkLEAqMa" alt="" data-size="original"></p><p><strong>Typing:</strong>  Water/Dark</p></td><td>Evolve Dewott at Level 36 at Night</td></tr><tr><td>Zorua</td><td><p><img src="/files/id9ghHnsiWGgITnQC44s" alt="" data-size="original"></p><p><strong>Typing:</strong>  Dark</p></td><td><p><img src="/files/BLkJxSFaRIYVKSBXEsg1" alt="" data-size="original"></p><p><strong>Typing:</strong>  Normal/Ghost</p></td><td>---</td></tr><tr><td>Zoroark</td><td><p><img src="/files/3R2uWguqk8biREOyxs2y" alt="" data-size="original"></p><p><strong>Typing:</strong>  Dark</p></td><td><p><img src="/files/knBcbXZbbjwsHnkJvZiI" alt="" data-size="original"></p><p><strong>Typing:</strong>  Normal/Ghost</p></td><td>Evolve <strong>Hisuian</strong> Zorora at Level 30</td></tr><tr><td>Lilligant</td><td><p><img src="/files/L34dfOOTBQYtjrUVjOvf" alt="" data-size="original"></p><p><strong>Typing:</strong>  Grass</p></td><td><p><img src="/files/xbjHCwVM4Ig4phay0zp2" alt="" data-size="original"></p><p><strong>Typing:</strong>  Grass/Fighting</p></td><td>Evolve Petilil with a Sun Stone at Dawn</td></tr><tr><td>Qwilfish</td><td><p><img src="/files/nRy0FfO1JTDwig8PDwXS" alt="" data-size="original"></p><p><strong>Typing:</strong>  Water/Poison</p></td><td><p><img src="/files/wW3Zw8nmXR8mWBc3BBtx" alt="" data-size="original"></p><p><strong>Typing:</strong>  Dark/Poison</p></td><td>---</td></tr><tr><td>Sneasel</td><td><p><img src="/files/dLwV7oziXWwhc7J3egEQ" alt="" data-size="original"></p><p><strong>Typing:</strong>  Dark/Ice</p></td><td><p><img src="/files/oFu0daNeyPnBqOGHI8cV" alt="" data-size="original"></p><p><strong>Typing:</strong>  Fighting/Poison</p></td><td>---</td></tr><tr><td>Voltorb</td><td><p><img src="/files/yB6fDitRRa1OWfb4NEaj" alt="" data-size="original"></p><p><strong>Typing:</strong>  Electric</p></td><td><p><img src="/files/bJZCYVlkMRSFHjDOAf5d" alt="" data-size="original"></p><p><strong>Typing:</strong>  Electric/Grass</p></td><td>---</td></tr><tr><td>Electrode</td><td><p><img src="/files/Ml3hHjrpEnuknwdPsCC7" alt="" data-size="original"></p><p><strong>Typing:</strong>  Electric</p></td><td><p><img src="/files/kVAkVwH868PRsHNMpdo2" alt="" data-size="original"></p><p><strong>Typing:</strong>  Electric/Grass</p></td><td>Evolve <strong>Hisuian</strong> Voltorb with a Leaf Stone</td></tr><tr><td>Growlithe</td><td><p><img src="/files/Jww4drFtiqS5qh0nWjCS" alt="" data-size="original"></p><p><strong>Typing:</strong>  Fire</p></td><td><p><img src="/files/22QuardDO4YyHEz53mID" alt="" data-size="original"></p><p><strong>Typing:</strong>  Fire/Rock</p></td><td>---</td></tr><tr><td>Arcanine</td><td><p><img src="/files/bWl6i3FHJzKWDDC7fdXN" alt="" data-size="original"></p><p><strong>Typing:</strong>  Fire</p></td><td><p><img src="/files/udzQrLsbtXRutUtW9V0y" alt="" data-size="original"></p><p><strong>Typing:</strong>  Fire/Rock</p></td><td>Evolve <strong>Hisuian</strong> Growlithe with a Fire Stone</td></tr><tr><td>Braviary</td><td><p><img src="/files/lILfg4p8nb28t89UQ8h5" alt="" data-size="original"></p><p><strong>Typing:</strong>  Normal/Flying</p></td><td><p><img src="/files/OYlTz2Osr9IRZMJNwCXz" alt="" data-size="original"></p><p><strong>Typing:</strong>  Psychic/Flying</p></td><td>Evolve Rufflet at Level 54 at Night</td></tr><tr><td>Sliggoo</td><td><p><img src="/files/jQcfyhuy5zTq8DCHu2B2" alt="" data-size="original"></p><p><strong>Typing:</strong>  Dragon</p></td><td><p><img src="/files/NO8pePauwB0DV9GFfuoK" alt="" data-size="original"></p><p><strong>Typing:</strong>  Steel/Dragon</p></td><td>Evolve Goomy at Level 40 during Stormy Weather</td></tr><tr><td>Goodra</td><td><p><img src="/files/WqtznnE7xfe786gWThPZ" alt="" data-size="original"></p><p><strong>Typing:</strong>  Dragon</p></td><td><p><img src="/files/ojMN6RpCEox9WoCFjQcL" alt="" data-size="original"></p><p><strong>Typing:</strong>  Steel/Dragon</p></td><td>Evolve <strong>Hisuian</strong> Sligoo at Level 50 during Stormy Weather</td></tr><tr><td>Avalugg</td><td><p><img src="/files/EGLIrLAqIaWwHIhU8csf" alt="" data-size="original"></p><p><strong>Typing:</strong>  Ice</p></td><td><p><img src="/files/ffIAludO8B2Mgxcr62LH" alt="" data-size="original"></p><p><strong>Typing:</strong>  Ice/Rock</p></td><td>Evolve Bergmite at Level 37 in a Snowy Taiga Hills Biome</td></tr></tbody></table>

### Paldean

<table><thead><tr><th width="140">Pokemon</th><th>Normal Form</th><th>Paldean Form(s)</th><th>Evolution Info</th></tr></thead><tbody><tr><td>Tauros (<em>Combat Breed</em>)</td><td><p><img src="/files/f5Z845TOCmpwL4mJyzFJ" alt="" data-size="original"></p><p><strong>Typing</strong>: Normal</p></td><td><p><img src="/files/mHWBai8qmMCYYLGl2PmK" alt="" data-size="original"></p><p><strong>Typing</strong>: Fighting</p></td><td>---</td></tr><tr><td>Tauros (<em>Blaze Breed</em>)</td><td><p><img src="/files/C8yd7ETaUubljlVA5IU3" alt="" data-size="original"></p><p><strong>Typing</strong>: Normal</p></td><td><p><img src="/files/PsBPZraXqjDcGOWNbymT" alt="" data-size="original"></p><p><strong>Typing</strong>: Fighting/Fire</p></td><td>---</td></tr><tr><td>Tauros (<em>Aqua Breed</em>)</td><td><p><img src="/files/fzxU6AYHEKitsu5vkabR" alt="" data-size="original"></p><p><strong>Typing</strong>: Normal</p></td><td><p><img src="/files/T9DMx5FJY1EK3H6Se2v8" alt="" data-size="original"></p><p><strong>Typing</strong>: Fighting/Water</p></td><td>---</td></tr><tr><td>Wooper</td><td><p><img src="/files/OJQAdkR0Q9l1Zg6w8fxC" alt="" data-size="original"></p><p><strong>Typing</strong>: Water/Ground</p></td><td><p><img src="/files/oqGBSThmzul8AFhRSPjZ" alt="" data-size="original"></p><p><strong>Typing</strong>: Poison/Ground</p></td><td>---</td></tr></tbody></table>


# Complete Guide to Pokeballs

Here you'll find out everything you need to know about Pokeballs from all the items you need to the recipe's for each Pokeball.

**Contents**

1. [What are Pokeballs?](#what-are-pokeballs)
2. [What do I need to craft Pokeballs?](#what-do-i-need-to-craft-pokeballs)
   1. [Ores](#ores)
   2. [Apricorns](#apricorns)
   3. [Tumblestone](#tumblestone)
3. [Recipes and Uses for Pokeballs](#recipes-and-uses-for-pokeballs)
   1. [Normal Pokeballs](#normal-pokeballs)
   2. [Ancient Pokeballs](#ancient-pokeballs)
   3. [Uncraftable Pokeballs](#uncraftable-pokeballs)

***

### What are Pokeballs?

Pokeballs are one of the most important features to not only Pixelmon, but the base games of Pokemon. These are used to catch pokemon you find within the wild so that you can use them on your own team or to fill out your Pokedex.

In order to use your Pokeballs, once obtained **you can either throw them directly at the Pokemon** while holding it within your hand and clicking Right Click on your mouse. If you miss the pokemon then the Pokeball will be dropped on the ground which you can go ahead and pick it back up.

Alternatively you can **get into a fight with the pokemon** in question and you'll have the **option to throw a Pokeball** at them. You'll want to decrease the Pokemons health and give it status affects for a higher chance at catching the Pokemon.

### What do I need to craft Pokeballs?

There are three main ingredients you'll be using to craft any of the Pokeballs on the server with these being **Ores**, **Apricorn** and **Tumbestones**.

#### Ores

You will need to create the base of the Poke Ball, using some basic Minecraft and Pixelmon ores which each of the recipes on the server, obtained in their normal means as well as the Pokemart. The main ores you'll be using are:

* Iron Ingot
* Aluminium Ingot
* Silver Ingot
* Platinum Ingot

<figure><img src="/files/Fe2fGglGQe9SJDFV0nDf" alt="" width="188"><figcaption><p>Example of a Base Recipe</p></figcaption></figure>

**For any of the Pokeball recipe's you'll only be needing one of these** in order to craft the Pokeball.

#### Apricorns

<figure><img src="/files/x898qBbvypBsh1GmYilX" alt="" width="375"><figcaption><p>All available Apricorns</p></figcaption></figure>

<figure><img src="/files/om3C1McKFYIGMpga9nbH" alt="" width="375"><figcaption><p>All available Cooked Apricorns</p></figcaption></figure>

Apricorns are one of the main ingredients you'll be using to craft Pokeballs. Depending on which Pokeball you are trying to craft will determine which Apricorns you will need. There are only **7 different apricorns** you can obtain.&#x20;

If you place these within a furnace you will cook them, allowing them to be crafted in lids for the Poke Balls.

You will be able to obtain these by finding Apricorn Tree's within the wild which you can harvest any ready Apricorns on them. Apricorn trees will have leaves that are dark green in colour. On these tree's you can find flowers blossoming within the leaves, whos center will match the colour of the Apricorn, which later turn into ripe Apricorns.

<figure><img src="/files/Paqzoi4TpwKjh2BCplV9" alt="" width="188"><figcaption><p>Example for an Apricorn Tree</p></figcaption></figure>

In order to obtain apricorns from these tree's all you need to do is **right click on the sprouts when they're full of colour** as seen in the photo above. You can use the Apricorns themselves to grow more trees, by planting them as if they were a seed.

Like with Ores, you can **purchase** these from the Pokemart via `/shop`

#### Tumblestone

**Tumblestone is only needed for any of the Ancient Pokeballs** if you wish to craft them.

<figure><img src="/files/Da6TlZScRsOrlRjyvYau" alt="" width="232"><figcaption><p>All available Tumblestone</p></figcaption></figure>

In order to obtain tumblestones on the server you will be looking out for **tumblestone mounds** on the server, and then **using a hammer** you'll be able to harvest Tumblestone.

<figure><img src="/files/UPDEiTlXwGFOTfJaGBVf" alt="" width="188"><figcaption><p>Example of Tumblestone Mound</p></figcaption></figure>

Like with Ores and Apricorns, you can **purchase** these from the Pokemart via `/shop`

### Recipes and Uses for Pokeballs

There are numerous amounts of Pokeballs which come with their own uses as well as recipes to craft them. You'll mainly be using the items that are stated above to create each of these. **Some pokeballs have requirements** to get the full potentional of the Pokeball like with the Dusk Ball so be sure to use the fight Pokemon at the right time so you ain't wasting it.

All Pokeballs required a base made one specific materials related to the strength of the Pokeball, a stone / blackstone button, and the lid corresponding to the specific Pokeball (crafted with cooked Apricorns)

You can purchase most of these Pokeballs on our server via our **Pokemart** which you can access using the command `/shop`

#### Normal Pokeballs

Here you'll find all of the base Pokeball recipe's on the server alongside the uses of them in the list below?

<details>

<summary><strong>Normal Pokeball Recipes &#x26; Uses</strong></summary>

**Poké Ball**

<div align="left"><figure><img src="/files/aigaaDLv8w9qDywn4zbF" alt="" width="188"><figcaption><p>Iron/Aluminium Base</p></figcaption></figure> <figure><img src="/files/C5r7165dinq5hapH9lLk" alt="" width="188"><figcaption><p>3x Red</p></figcaption></figure></div>

A Poké Ball has a 1x catch rate of Pokemon on the server.

**Premier Ball**

<div align="left"><figure><img src="/files/Dtid2JozDxfruFdIUKsd" alt="" width="188"><figcaption><p>Iron/Aluminium Base</p></figcaption></figure> <figure><img src="/files/CyQwTqFKLnhTj2W3jE0a" alt="" width="188"><figcaption><p>2x White + 1x Red</p></figcaption></figure></div>

A Premier Ball has a 1x catch rate of Pokemon on the server. This is one of the 6 reskins of the Pokeball.

**Great Ball**

<div align="left"><figure><img src="/files/QDrId9b4plCv1GD8izx2" alt="" width="188"><figcaption><p>Silver Base</p></figcaption></figure> <figure><img src="/files/VFkGkkgvhpoacYfh9u0W" alt="" width="188"><figcaption><p>2x Blue + 1x Red</p></figcaption></figure></div>

A Great Ball has a 1.5x catch rate of Pokemon on the server.

**Ultra Ball**

<div align="left"><figure><img src="/files/0agg4hP1DPwqMYcaZGMY" alt="" width="188"><figcaption><p>Platinum Base</p></figcaption></figure> <figure><img src="/files/dgqFIlnLBxol0LUX4ECK" alt="" width="188"><figcaption><p>2x Black + 1x Yellow</p></figcaption></figure></div>

A Ultra Ball has a 2x catch rate of Pokemon on the server.

**Safari Ball**

<div align="left"><figure><img src="/files/MtGjngWvJtPYggI47Zy7" alt="" width="188"><figcaption><p>Iron/Aluminium Base</p></figcaption></figure> <figure><img src="/files/8UtNpekpPSFRT8l52ZOo" alt="" width="188"><figcaption><p>2x Green + 1x Yellow</p></figcaption></figure></div>

A Safari Ball has a 1.5x catch rate of Pokemon on the server when outside the battle.

**Fast Ball**

<div align="left"><figure><img src="/files/KWRPlSExJVyAZpC7jwTF" alt="" width="188"><figcaption><p>Silver Base</p></figcaption></figure> <figure><img src="/files/mvftWbF4pGzhgT0LGlYU" alt="" width="188"><figcaption><p>2x Red + 1x Yellow</p></figcaption></figure></div>

A Fast Ball has a 4x catch rate when used on Pokemon with 100 or more Base Speed.

**Level Ball**

<div align="left"><figure><img src="/files/oPwojHv0jyMAE7wbkOKk" alt="" width="188"><figcaption><p>Silver Base</p></figcaption></figure> <figure><img src="/files/CCcGAVFUtotVC6ZXi2S0" alt="" width="188"><figcaption><p>1x Yellow + 1x Red + 1x Black</p></figcaption></figure></div>

A Fast Ball has a 1x to 4x catch rate on Pokemon depenant on their level compared to the wild pokemon in  general.&#x20;

I.e. if the highest level pokemon in your party is 4x the level of the target pokemon then the modifier will be 4x. If your level is greater than 2x then the catch modifier will be 2x and so on.

**Lure Ball**

<div align="left"><figure><img src="/files/W0tnM09WNRtJnv5yEhlD" alt="" width="188"><figcaption><p>Silver Base</p></figcaption></figure> <figure><img src="/files/GcZKfA1oGXW05AiDik05" alt="" width="188"><figcaption><p>2x Green + 1x Red</p></figcaption></figure></div>

A Lure Ball has a 2x catch rate on Pokemon caught via a Poke Rod.

**Heavy Ball**

<div align="left"><figure><img src="/files/dGSyPHjhTfKK46sc7jfu" alt="" width="188"><figcaption><p>Silver Base</p></figcaption></figure> <figure><img src="/files/ZFoavL02VVd1upoZhueJ" alt="" width="188"><figcaption><p>3x Blue</p></figcaption></figure></div>

A Heavy Ball has a 1x to 4x catch rate on Pokemon dependant on their weight of the wild target pokemon.&#x20;

I.e. if target Pokemon is 3000 hectograms or more than it will be 4x effective, if it's between 2000 to 2999 then it will be 2.5 and so on.

**Love Ball**

<div align="left"><figure><img src="/files/6vKNK9cIYTURAk8erG0T" alt="" width="188"><figcaption><p>Silver Base</p></figcaption></figure> <figure><img src="/files/7TXvJJLDUB9H8UVAGe5f" alt="" width="188"><figcaption><p>3x Pink</p></figcaption></figure></div>

A Love Ball has a 8x catch rate if the target Pokemon is the opposite gender to any pokemon within your party as otherwise it will be a 1x catch rate.

**Friend Ball**

<div align="left"><figure><img src="/files/00Y104ZYoxvr5f7hegQH" alt="" width="188"><figcaption><p>Silver Base</p></figcaption></figure> <figure><img src="/files/J6WaO02J8zAuKdZadnBF" alt="" width="188"><figcaption><p>1x Red + 1x Yellow + 1x Green</p></figcaption></figure></div>

A Friend Ball has a 1x catch rate on Pokemon. A Pokemon caught with a friend ball will start off with 150 friendship.

**Moon Ball**

<div align="left"><figure><img src="/files/sZfUqlsjToOQtVR03QtC" alt="" width="188"><figcaption><p>Silver Base</p></figcaption></figure> <figure><img src="/files/gHPNMZTD9z79AUXHUsKT" alt="" width="188"><figcaption><p>1x Blue + 1x Yellow + 1x Black</p></figcaption></figure></div>

A Moon Ball has a catch rate between 1x to 4x dependant on how close the phase of the moon is to being full.

**Sport Ball**

<div align="left"><figure><img src="/files/J9mCND5tLWO5cD79ND10" alt="" width="188"><figcaption><p>Iron/Aluminium Base</p></figcaption></figure> <figure><img src="/files/LvgqGMngSYhrHZep553Y" alt="" width="188"><figcaption><p>2x Red + 1x White</p></figcaption></figure></div>

A Sport Ball has a static catch rate of 1.5x although this will be changing in the future.

**Net Ball**

<div align="left"><figure><img src="/files/RblVvTuH71Gs459fSE67" alt="" width="188"><figcaption><p>Silver Base</p></figcaption></figure> <figure><img src="/files/k2p32e9CGRF3qOGrsTDi" alt="" width="188"><figcaption><p>2x Black + 1x Blue</p></figcaption></figure></div>

A Net Ball has a 3x catch rate on Bug Type and Water Type Pokemon.

**Dive Ball**

<div align="left"><figure><img src="/files/VCCw6qlifrzdp0J5JY11" alt="" width="188"><figcaption><p>Silver Base</p></figcaption></figure> <figure><img src="/files/3GCs3eeNErGrVZgS0eKZ" alt="" width="188"><figcaption><p>2x Blue + 1x Pink</p></figcaption></figure></div>

A Dive Ball has a 3.5x catch rate on Pokemon submerged underwater.

**Nest Ball**

<div align="left"><figure><img src="/files/j9OiWmj9GKORylgxG7Zd" alt="" width="188"><figcaption><p>Iron/Aluminium Base</p></figcaption></figure> <figure><img src="/files/pocpkJBHQ0m8CTEuMwl0" alt="" width="188"><figcaption><p>2x Green + 1x Yellow</p></figcaption></figure></div>

A Nest Ball has a catch rate of 1x to 4x which increases the lower the targets level is from 30.

**Repeat Ball**

<div align="left"><figure><img src="/files/NhfmdtPGoCzGYIp2Wxn3" alt="" width="188"><figcaption><p>Platinum Base</p></figcaption></figure> <figure><img src="/files/nxoI1sXcp08uWKX6zVow" alt="" width="188"><figcaption><p>2x Red + 1x Black</p></figcaption></figure></div>

A Repeat Ball has a 3.5x catch rate on Pokemon already registered as caught within the Pokedex, otherwise it has  a catch rate of 1x.

**Timer Ball**

<div align="left"><figure><img src="/files/hEN0GnK4wfv7shyGYQgv" alt="" width="188"><figcaption><p>Platinum Base</p></figcaption></figure> <figure><img src="/files/fEN45D1KUlzDruEse3cj" alt="" width="188"><figcaption><p>1x Red + 1x Black + 1x White</p></figcaption></figure></div>

A Timer Ball has a catch rate of 1x which increases by 0.3xn for each turn passed up to 4x catch rate.

**Luxury Ball**

<div align="left"><figure><img src="/files/i3DCt8VouKUSHaTGg7JB" alt="" width="188"><figcaption><p>Platinum Base</p></figcaption></figure> <figure><img src="/files/OpL5ihsC5epLsOqQWQQ2" alt="" width="188"><figcaption><p>1x White + 1x Red + 1x Black</p></figcaption></figure></div>

A Luxury Ball has a catch rate of 1x. Any pokemon caught with a Luxury Ball will gain friendship twice as fast.

**Dusk Ball**

<div align="left"><figure><img src="/files/jLKomNQLwXQUDpeRVvCY" alt="" width="188"><figcaption><p>Platinum Base</p></figcaption></figure> <figure><img src="/files/cF9BXcwDNwEJa1l4KtU1" alt="" width="188"><figcaption><p>2x Green + 1x Black</p></figcaption></figure></div>

A Dusk Ball has a 3.5x catch rate if the light level is in 0 and 3x if the target is in light level 1-7.

**Heal Ball**

<div align="left"><figure><img src="/files/Zn7ouqhH6VDeImEETd7d" alt="" width="188"><figcaption><p>Iron/Aluminium Base</p></figcaption></figure> <figure><img src="/files/mVF9TkanJ6sMDAOUDA3t" alt="" width="188"><figcaption><p>2x White + 1x Pink</p></figcaption></figure></div>

A Heal Ball has a catch rate of 1x. Any pokemon caught with a heal ball will fully restore their PP, HP and any status conditions.

**Quick Ball**

<div align="left"><figure><img src="/files/5P5yx4gEPiUrv2tPBgIY" alt="" width="188"><figcaption><p>Platinum Base</p></figcaption></figure> <figure><img src="/files/f6YdXhfY6Mx1XnCTELfZ" alt="" width="188"><figcaption><p>2x Blue + 1x Yellow</p></figcaption></figure></div>

A Quick Ball has a 5x catch rate if used on the first turn of a battle, otherwise it has a catch rate of 1x.

**Dream Ball**

<div align="left"><figure><img src="/files/5N9zVeZmAJmPW5XNPbES" alt="" width="165"><figcaption><p>Infuse a Dusk Ball with a Chesto Berry inside an Infuser</p></figcaption></figure></div>

A Dream Ball has a 4x catch rate on sleeping Pokemon, otherwise it has a catch rate of 1x.

</details>

#### Ancient Pokeballs

Unlike Normal Pokeballs which includes normal ores from Minecraft for crafting Pokeballs, you'll be using Tumblestone instead with the recipe's and uses found below.

<details>

<summary><strong>Ancient Pokeball Recipes &#x26; Uses</strong></summary>

**Ancient Poké Ball**

<div align="left"><figure><img src="/files/8Dv7FKYcJ9RZtaW7ODvs" alt="" width="188"><figcaption><p>Wooden Base</p></figcaption></figure> <figure><img src="/files/o2VV5ZWlU1NXltxTfj6w" alt="" width="188"><figcaption><p>3x Tumblestone + 2 Iron Ingots</p></figcaption></figure></div>

An Ancient Poké Ball has a 1x catch rate of Pokemon on the server.

**Ancient Great Ball**

<div align="left"><figure><img src="/files/pXD5Wh0qpqWgHkjP4hQU" alt="" width="188"><figcaption><p>Wooden Base</p></figcaption></figure> <figure><img src="/files/araY6yHWUOg7y3zMuXUT" alt="" width="188"><figcaption><p>3x Tumblestone + 2x Silver Ingots</p></figcaption></figure></div>

An Ancient Great Ball has a 1.5x catch rate of Pokemon on the server.

**Ancient Ultra Ball**

<div align="left"><figure><img src="/files/if2scKXWw3K5MOZ0o5zy" alt="" width="188"><figcaption><p>Wooden Base</p></figcaption></figure> <figure><img src="/files/Tb9QyYFP4l3DcZ8ilLHi" alt="" width="188"><figcaption><p>3x Tumblestone + 2x Platinum Ingots</p></figcaption></figure></div>

An Ancient Ultra Ball has a 2x catch rate of Pokemon on the server.

**Feather Ball**

<div align="left"><figure><img src="/files/DOoUx0SUNlogfGjigmg5" alt="" width="188"><figcaption><p>Wooden Base</p></figcaption></figure> <figure><img src="/files/ZfgaZMKoWEklppcYR7zF" alt="" width="188"><figcaption><p>3x Sky Tumblestone + 2x Iron Ingots</p></figcaption></figure></div>

A Feather Ball has a 1x catch rate on the server and can be thrown further than normal Pokeballs.

**Wing Ball**

<div align="left"><figure><img src="/files/se21ycJiw7SoFqwg0GCn" alt="" width="188"><figcaption><p>Wooden Base</p></figcaption></figure> <figure><img src="/files/Za6ZomqfDF1vch8lBedN" alt="" width="188"><figcaption><p>3x Sky Tumblestone + 2x Silver Ingots</p></figcaption></figure></div>

A Wing Ball has a 1.5x catch rate on the server and can be thrown further than normal Pokeballs.

**Jet Ball**

<div align="left"><figure><img src="/files/EsyWyW7EoykYgCzQppio" alt="" width="188"><figcaption><p>Wooden Base</p></figcaption></figure> <figure><img src="/files/tn6cvYjRC4yPBh0htSV3" alt="" width="188"><figcaption><p>3x Sky Tumblestone + 2x Platinum Ingots</p></figcaption></figure></div>

A Jet Ball has a 2x catch rate on the server and can be thrown further than normal Pokeballs.

**Heavy Ball**

<div align="left"><figure><img src="/files/KQBcKM6qErLrY1WuF1DF" alt="" width="188"><figcaption><p>Wooden Base</p></figcaption></figure> <figure><img src="/files/TGncrn04xgKnIUGl7A4P" alt="" width="188"><figcaption><p>3x Black Tumblestone + 2x Iron Ingots</p></figcaption></figure></div>

A Heavy Ball has a 1x catch rate on the server although this will change in the future.&#x20;

**Leaden Ball**

<div align="left"><figure><img src="/files/CDTaDT1O5mckYsaXvyIk" alt="" width="188"><figcaption><p>Wooden Base</p></figcaption></figure> <figure><img src="/files/JFeYdpTh7pAtfEgeISAp" alt="" width="188"><figcaption><p>3x Black Tumblestone + 2x Silver Ingots</p></figcaption></figure></div>

A Leaden Ball has a 1.5x catch rate on the server although this will change in the future.&#x20;

**Gigaton Ball**

<div align="left"><figure><img src="/files/O3RULNc9PP6eUK2ri74h" alt="" width="188"><figcaption><p>Wooden Base</p></figcaption></figure> <figure><img src="/files/nQYqew5kFJr4vkus0Ozd" alt="" width="188"><figcaption><p>3x Black Tumblestone + 2x Platinum Ingots</p></figcaption></figure></div>

A Gigaton Ball has a 2x catch rate on the server although this will change in the future.&#x20;

</details>

#### Uncraftable Pokeballs

Here you'll find a list of all the Pokeballs that are currently un-craftable on the server alongside their uses and potential other ways to obtain them.

<details>

<summary><strong>Uncraftable Pokeball &#x26; Uses</strong></summary>

**Master Ball**

<div align="left"><figure><img src="/files/RYrYFXBWRe7cYSrekOPO" alt="" width="111"><figcaption></figcaption></figure></div>

A Master Ball has a 100% catch rate on any pokemon you use it on so this is perfect to use when catching legendaries on the server. You can obtain a master ball from Pokedex rewards as well as using our Modrinth launcher for the first time.&#x20;

**Park Ball**

<div align="left"><figure><img src="/files/pBlSc9hqDjwFle179x07" alt="" width="111"><figcaption></figcaption></figure></div>

A Park Ball also has a 100% catch rate on any pokemon you use it on.

**Beast Ball**

<div align="left"><figure><img src="/files/StspQjEae3JO4CqErNIa" alt="" width="108"><figcaption></figcaption></figure></div>

A Beast Ball has a 5x catch rate on Ultra Beats, otherwise it has a catch rate of 0.1x.

**Origin Ball**

<div align="left"><figure><img src="/files/fr3EyXSO6MyPhGeYoevF" alt="" width="108"><figcaption></figcaption></figure></div>

Like the Master Ball, an Origin Ball has a 100% catch rate on any pokemon you use it on so this is perfect to use when catching legendaries on the server. You can only obtain a ancient origin ball from the 20% Pokedex rewards tier.

**Cherish Ball**

<div align="left"><figure><img src="/files/qs824mCGsH2zC8FZQnvy" alt="" width="114"><figcaption></figcaption></figure></div>

A Cherish Ball only obtainable via Creative, and like a Poke Ball has a catch rate of only 1x.

**Strange Ball**

<div align="left"><figure><img src="/files/SwW2iZCrncS3bIVC9esO" alt="" width="108"><figcaption></figcaption></figure></div>

A Stange Ball isn't obtainable on Pixelmon in any means as it's only used as a place holder for datapack or errors if the Pokeballs texture does not exist.

**Christmas Ball**

<div align="left"><figure><img src="/files/Pr49fbGjvdgdOrqQUcrF" alt="" width="116"><figcaption></figcaption></figure></div>

A Christmas Ball can be found within naturally generated chests within the Mt Lanakila biome.

**GS Ball**

<div align="left"><figure><img src="/files/mz1EaCUmVgbv7kJa0y8v" alt="" width="113"><figcaption></figcaption></figure></div>

A GS Ball isn't obtainable on Pixelmon in any means.

</details>


# A Complete Guide to Shinies

In this guide you'll find out what shinies are as well as all of the ways to obtain shinies on the server.

**Contents**

1. [What are Shinies?](#what-are-shinies)
2. [How can I find shinies on the server?](#how-can-i-find-shinies-on-the-server)
3. [Are there other methods to obtaining shinies?](#are-there-other-methods-to-obtaining-shinies)
   1. [Discord Linking](#discord-linking)
   2. [Pokedex Rewards](#pokedex-rewards)
   3. [Crates](#crates)
   4. [Auction House](#auction-house)
   5. [Ranks](#ranks)
   6. [Playtime Rewards](#playtime-rewards)
   7. [Daily (Login) Rewards](#daily-login-rewards)
   8. [Wondertrade](#wondertrade)

***

### ✨What are Shinies? ✨

<mark style="color:orange;">**Shiny Pokemon**</mark> are different variations of Pokemon that will have a different colour palette compared to it's normal form. While some of these are very mild with their colour changes, most are vastly different and arguably look better than the normal form. Unfortunately Shiny Pokemon are a lot harder to obtain in most of the Pokemon games and this is the same within Pixelmon.

<figure><img src="/files/xphf8gF4e48ptVEYTuTY" alt=""><figcaption><p>Normal and Shiny Metagross</p></figcaption></figure>

### ✨How can I find shinies on the server?✨

The current rate of finding shines on the server is 1/4096 which means the chances of you finding a shiny pokemon within the wild is incredibly low.

As of now **there is no main way for you increase your odds on finding shinies** on the server while it's in BETA but **we are planning to introduce more way**s for players to farm shinies on the server from adding a **shiny charm** for Pokedex completion all the way to having **catch combos** for easiness of farming a specific Pokemon.

### ✨Are there other methods to obtaining shinies?✨

There are a couple different ways for players to earn shinies on the server which I will list all of the main ways players can obtain them currently:

#### Discord Linking

This is a easy way for you to obtain a free shiny on the server and all you need is a Discord account. If you go through the process of linking your Discord account with your in-game account within our server you'll be able to redeem a kit for a free random shiny in-game. For more about linking to discord please click [HERE](#discord-linking).

<div align="left"><figure><img src="/files/wUU1ij7R6nfY5grUrbP4" alt=""><figcaption><p>Discord Linking channel within MMO Realms Discord</p></figcaption></figure></div>

#### Pokedex Rewards

This is another fairly easy way to obtain shinies on the server, which also includes legendaries, mythicals and ultra beasts. For each 10% of the Pokedex you complete you'll have a chance to claim some rewards with a few of the tiers including some form of Shiny Pokemon you can obtain. These can also include keys which is another way for players to get shinies. You can access pokedex rewards via `/pokedexrewards`

<div align="left"><figure><img src="/files/7xavIH3aYiq3dY2Btg8i" alt=""><figcaption><p>Pokedex Rewards Menu via <code>/pokedexrewards</code></p></figcaption></figure></div>

#### Crates

You can use crate keys (*purchasable via `/crates` with gems or unlocking them in other means like Pokedex Rewards*) to open up certain crates which include chances of obtaining random shinies on the server including some legendaries. You can find out ways of obtaining Gems via our Guide you can access [HERE](/pixelmon-wiki/general-guides/intro-to-earning-gems).

<div align="left"><figure><img src="/files/YcctDjtCgeu9dh0avaMf" alt=""><figcaption><p><code>/crates</code> GUI for Vote, Basic and Premium Crates</p></figcaption></figure></div>

#### Auction House

You can use the auction house via `/ah` to see if any players are currently selling any Shiny Pokemon on the server for X amount of pokecoins. If you have the asking price for them you can go ahead and purchase it to obtain that shiny.

<div align="left"><figure><img src="/files/7G7sVuM8R1akUiqzMepj" alt="" width="254"><figcaption><p>Example of Auction House</p></figcaption></figure></div>

#### Ranks

This is another way for players to obtain Shinies on the server, though it is only available through our Gems Store, as ranks cannot be acquired through any other means outside of giveaways and events. Depending on the rank you select, you may receive a random Shiny, and some ranks even include Legendary or Mythical Pokémon. Ranks can be purchased using **`/store`**, with Gems available for purchase [HERE:](here:https://store.mmorealms.gg/category/gems)

<div align="left"><figure><img src="/files/wi9THm4FOkQ9nHRJFjNE" alt=""><figcaption><p>Ranks Page within <code>/Store</code></p></figcaption></figure></div>

#### Playtime Rewards <a href="#playtime-rewards" id="playtime-rewards"></a>

You'll be able to earn some Shinies for reaching specific Playtime Milestones within Playtime Rewards. The higher your active playtime is, the more rewards you'll gain access to. Start accessing Playtime Rewards via `/playtime`.

<div align="left"><figure><img src="/files/yn8L8hen9fsFYqfmMuTW" alt=""><figcaption><p>Playtime Rewards via <code>/playtime</code></p></figcaption></figure></div>

#### Daily (Login) Rewards <a href="#daily-login-rewards" id="daily-login-rewards"></a>

You'll be able to earn some rewards for specific daily milestones reached. Please be aware that if you missing logging onto the server for a day, then your streak will revert back to Day 1. Start accessing Daily Rewards via `/daily`.

<div align="left"><figure><img src="/files/D5U8nzfMGD9o17rpZEW8" alt=""><figcaption><p>Daily Rewards via <code>/daily</code></p></figcaption></figure></div>

#### Wondertrade <a href="#wondertrade" id="wondertrade"></a>

Thewre will be a small chance you can pull a shiny from Wondertrade on the server, assuming there is Shinies within the pool. This is based on luck, and what others have currently placed within the pool. Once a week it resets bringing a small chance for System Generated shinies to be pushed in.

Use `/wt` to start a Wondertrading and `/wt pool` to view the current pool.

<div align="left"><figure><img src="/files/HlynrWBnGDyMGiR5zXm4" alt=""><figcaption><p>Wondertrade Pool via <code>/wt pool</code></p></figcaption></figure></div>

**NOTE:** Wondertraded Pokemon cannot be recovered.


# Complete Overview of Riding Pokemon

Here you will everything you need to know about riding Pokemon alongside what Pokemon you can ride on.

**Contents**

1. [What is Riding Pokemon?](#what-is-riding-pokemon)
2. [How Can I ride my Pokemon?](#how-can-i-ride-my-pokemon)
3. [What Pokemon can we Ride?](#what-pokemon-can-we-ride)

***

### What is Riding Pokemon?

Did you know that not only can you fight and train with your Pokemon, but there are a select few that you can actually ride on?&#x20;

Whether that be traversing a Snowy Mountain on the back of your Mamoswine, Traversing the Ocean on the back of your Lapras or even Soaring through the skies on your Dragonite. Travelling can never be easier than it is so make sure to take full advantage of this especially if you're trying to get from point A to B.

<figure><img src="/files/pMjwXGcaqnildswKqhUA" alt="" width="375"><figcaption><p>Ex of Riding Pokemon</p></figcaption></figure>

### How Can I ride my Pokemon?

Riding Pokemon is incredibly easy. For any compatible pokemon all you need to do is throw out your Pokemon via `R` and press `Right Click` onto it and you'll be push right on the back of the Pokemon. From there you can start travelling as you would normally by using `WASD` to move around and `Space` to **jump**

If you're in the **air** you can hold the `Space` bar to fly up into the sky, and use `C` to fly back down.&#x20;

This is the same process as if you're on the **water** as you can use `C` to swim down and holding `Space` to swim back up.

To **dismount** of your Pokemon all you need to do is press `Left Shift` and you'll be thrown off your Pokemon. Alternatively you can just press `R` which will put the Pokemon back into it's Pokeball.

### What Pokemon can we Ride?

Here you can find a list of all pokemon that you're able to ride on the server currently. More will be added at later dates.

<details>

<summary>Land Mounts</summary>

* Abomasnow
* Absol
* Aegislash (Shield)
* Aggron
* Alakazam
* Amoonguss
* Arbok
* Arcanine
* Arcanine (Hisuian)
* Arctozolt
* Ariados
* Armaldo
* Audino
* Aurorus
* Bastiodon
* Bayleef
* Beartic
* Bewear
* Bisharp
* Blastoise
* Blaziken
* Blissey
* Boldore
* Boltund
* Bouffalant
* Breloom
* Bronzong
* Cacturne
* Camerupt
* Centiskorch
* Chansey
* Chesnaught
* Cinderace
* Clefable
* Coalossal
* Cobalion
* Conkeldurr
* Copperajah
* Crabominable
* Crustle
* Cryogonal
* Cufant
* Cyclizar
* Darmanitan
* Delphox
* Diggersby
* Dodrio
* Donphan
* Dracovish
* Dracozolt
* Drampa
* Drapion
* Druddigon
* Dubwool
* Duraludon
* Dusclops
* Dusknoir
* Eiscue (Ice Face)
* Electrode
* Emboar
* Entei
* Espeon
* Excadrill
* Exeggutor
* Exploud
* Falinks
* Feraligatr
* Ferrothorn
* Flareon
* Forretress
* Furfrou (Dandy)
* Furfrou (Debutante)
* Furfrou (Heart)
* Furfrou (Matron)
* Furfrou (Natural)
* Furfrou (Star)
* Gabite
* Galvantula
* Garbodor
* Gengar
* Gigalith
* Girafarig
* Glaceon
* Glalie
* Glastrier
* Gogoat
* Golduck
* Golem
* Goodra
* Goodra (Hisuian)
* Granbull
* Graveler
* Greninja
* Groudon
* Gurdurr
* Guzzlord
* Hariyama
* Hatterene
* Haunter
* Haxorus
* Heatran
* Heracross
* Hippopotas
* Hippowdon
* Houndoom
* Incineroar
* Infernape
* Inteleon
* Jolteon
* Kangaskhan
* Keldeo (Ordinary)
* Kommo-o
* Krookodile
* Kyurem
* Lairon
* Leafeon
* Lickilicky
* Lickitung
* Liepard
* Lucario
* Ludicolo
* Lurantis
* Luxray
* Lycanroc (Midday)
* Machamp
* Machoke
* Mamoswine
* Manectric
* Meganium
* Melmetal
* Mienshao
* Morpeko (Full Belly)
* Mudbray
* Mudsdale
* Muk
* Musharna
* Nidoking
* Nidoqueen
* Ninetales
* Numel
* Obstagoon
* Onix
* Oranguru
* Palossand
* Pangoro
* Parasect
* Passimian
* Persian
* Pheromosa
* Piloswine
* Pinsir
* Poliwrath
* Ponyta
* Probopass
* Purugly
* Pyroar
* Quagsire
* Quilava
* Raikou
* Rampardos
* Rapidash
* Raticate
* Regice
* Regidrago
* Regigigas
* Regirock
* Registeel
* Reuniclus
* Rhydon
* Rhyhorn
* Rhyperior
* Rillaboom
* Salazzle
* Sandaconda
* Sawk
* Sawsbuck (Spring)
* Sceptile
* Scolipede
* Scyther
* Seismitoad
* Serperior
* Seviper
* Shelgon
* Shiftry
* Silvally
* Slaking
* Slowbro
* Slowking
* Snorlax
* Spectrier
* Stakataka
* Stantler
* Steelix
* Stonjourner
* Stoutland
* Suicune
* Swalot
* Sylveon
* Tangrowth
* Tauros
* Terrakion
* Thievul
* Throh
* Ting-Lu
* Torkoal
* Torracat
* Torterra
* Trevenant
* Turtonator
* Type: Null
* Typhlosion
* Tyranitar
* Tyrantrum
* Umbreon
* Ursaring
* Urshifu (Single Strike)
* Vanilluxe
* Vaporeon
* Venusaur
* Victreebel
* Vileplume
* Virizion
* Weezing
* Wo-Chien
* Wyrdeer
* Xerneas (Neutral)
* Xurkitree
* Zacian (Hero)
* Zamazenta (Hero)
* Zangoose
* Zapdos (Galarian)
* Zarude
* Zebstrika
* Zeraora
* Zoroark
* Zweilous
* Zygarde (50%)

</details>

<details>

<summary>Flying Mounts</summary>

* Aerodactyl
* Altaria
* Arceus
* Archeops
* Articuno
* Braviary
* Braviary (Hisuian)
* Buzzwole
* Celesteela
* Chandelure
* Charizard
* Chatot
* Claydol
* Corviknight
* Cramorant
* Cresselia
* Crobat
* Darkrai
* Decidueye
* Decidueye (Hisuian)
* Deoxys
* Dialga
* Dialga (Origin)
* Dragapult
* Dragonite
* Drifblim
* Emolga
* Eternatus (Ordinary)
* Fearow
* Flygon
* Frosmoth
* Garchomp
* Genesect
* Giratina (Altered)
* Gliscor
* Golurk
* Ho-Oh
* Honchkrow
* Hydreigon
* Klinklang
* Koraidon
* Latias
* Latios
* Lugia
* Lunala
* Magnezone
* Mandibuzz
* Metagross
* Mewtwo
* Miraidon
* Moltres
* Naganadel
* Necrozma
* Noctowl
* Noivern
* Orbeetle
* Palkia
* Palkia (Origin)
* Pelipper
* Pidgeot
* Rayquaza
* Regieleki
* Reshiram
* Roaring Moon
* Salamence
* Scizor
* Sigilyph
* Skarmory
* Solgaleo
* Staraptor
* Swanna
* Swellow
* Swoobat
* Talonflame
* Tapu Bulu
* Tapu Fini
* Tapu Koko
* Tapu Lele
* Togekiss
* Toucannon
* Tropius
* Unfezant
* Venomoth
* Vespiquen
* Vibrava
* Vikavolt
* Volcanion
* Volcarona
* Xatu
* Yanmega
* Yveltal
* Zapdos
* Zekrom

</details>

<details>

<summary>Swimming Mounts</summary>

* Araquanid
* Arctovish
* Avalugg
* Barbaracle
* Barraskewda
* Bibarel
* Carracosta
* Clawitzer
* Clodsire
* Cloyster
* Crawdaunt
* Dewgong
* Dragalge
* Drednaw
* Eelektross
* Empoleon
* Floatzel
* Gastrodon (East)
* Golisopod
* Gorebyss
* Grapploct
* Gyarados
* Huntail
* Jellicent
* Kabutops
* Kingdra
* Koraidon
* Kyogre
* Lanturn
* Lapras
* Lugia
* Lumineon
* Malamar
* Mantine
* Milotic
* Miraidon
* Nihilego
* Primarina
* Samurott
* Samurott (Hisuian)
* Seaking
* Sealeo
* Sharpedo
* Starmie
* Swampert
* Swanna
* Tapu Fini
* Tentacruel
* Wailmer
* Wailord
* Walrein
* Whiscash

</details>


# A Complete Overview of Events

Here you will find information about all the different types of events we run on the server, as well as how to participate.

**Contents**

1. [What are events?](#what-are-events)
2. [Flash Events](#flash-events)
   1. [Admin Abuse](#admin-abuse)
   2. [Realms Geoguesser](#realms-geoguesser)
   3. [Wondertrade Bonanza](#wondertrade-bonanza)
   4. [PixelSnap](#pixelsnap)
   5. [Trivia Blitz](#trivia-blitz)
3. [Community Contests](#community-contests)
   1. [Tournaments](#tournaments)
      1. [Smogon](#smogon)
   2. [Submission Events](#submission-events)
4. [Frequently Asked Questions \[FAQ\]](#frequently-asked-questions-faq)

***

## What are events?

Server **events** are organised activities, games and competitions hosted by staff for the community. They are designed to bring members together and provide more to do on the server outside regular gameplay, all with the chance to win prizes.

There are a range of events on offer, all listed below. Each have their own method for participating, ensuring there's something suitable for everyone to enjoy. To ensure you stay up to date on any upcoming events, make sure you have joined our Discord server and subscribe to any roles you find interesting!

{% embed url="<http://discord.gg/mmorealms>" %}

<figure><img src="/files/4eaZHqVkEZsGrzkgd9wG" alt=""><figcaption><p>Discord Role Selection</p></figcaption></figure>

Once set up, you should receive notifications via your relevant announcement channels.

<figure><img src="/files/f6DABJz1h0RF6Mrp5TUF" alt=""><figcaption><p>Events Announcement Channels</p></figcaption></figure>

## Flash Events

**Flash events** are quick and short, designed to allow anyone to get involved at the click of a button. They are primarily focused on in-game experiences, in which you are indirectly competing against everyone else who is online.

We aim to host these on a **weekly** basis, typically covering the whole **weekend**. The specific events hosted are on a **rotation** between all included servers, providing an assortment of options to ensure you do not get bored.

### Admin Abuse

> This event <mark style="background-color:$danger;">is not</mark> in current rotation

This event **boosts legendary spawn rates** drastically, offering increased odds for yourself to get a hold of an elusive rarity of a Pokemon. To participate, you must be playing within the Wilds on the server, as this is the only location in which wild legends may spawn. There's no set time for when they may spawn, so keep your eyes peeled as they could be just around the corner.

<figure><img src="/files/bp20X7d4VduZSpFTcA0v" alt="" width="375"><figcaption><p>Example Legendary Spawn - Zacian</p></figcaption></figure>

Additionally, during certain times of the day you may experience a **Legendary Spike**. This rare phenomena will be announced via the Discord server prior to the drop, offering time for users to log in and get involved. During this time, multiple legends will spawn back to back in short succession, giving you multiple chances to get a hold of one.

<figure><img src="/files/EQHRJjie3WylrQaZEQIV" alt=""><figcaption><p>Example Discord Announcement Title</p></figcaption></figure>

It should go without saying, the reward for this event is being able to keep any caught legendaries, whether you wish to battle with them, retain them for a collection, or trade them away.

### Realms Geoguesser

> This event <mark style="background-color:$success;">is</mark> in current rotation

This event takes the idea of the Geoguesser game, and applies the logic to the Minecraft server. Within the `#geoguesser` channel, requests will be posted including both a photo of a location within a publicly accessible area of the server, along with a specific in-game item. To participate, it's your job to figure out where this location is, and submit a screenshot of yourself in third person, in the area whilst holding the specified item.

<figure><img src="/files/PPDV8OkfEmQZOt8rz880" alt="" width="563"><figcaption><p>Example Geoguesser Request</p></figcaption></figure>

<figure><img src="/files/kgDqVspJNoUUA2jAMEAG" alt="" width="563"><figcaption><p>Example Geoguesser Submission</p></figcaption></figure>

The rewards for this event includes a mixture of crate keys, where the specific key granted is tied to the difficulty of the provided request.

### Wondertrade Bonanza

> This event <mark style="background-color:$success;">is</mark> in current rotation

This event utilises the servers **Wondertrade** system to distribute rare and highly sought after Pokemon, including Pokemon that are shiny, posses a hidden ability, legendary, mythical, and have other rare forms that are tricky or impossible to obtain through other means. Staff will periodically drop these Pokemon into the Wondertrade system, so it's your job to get lucky and hopefully pull one by listing your own Pokemon.

Whilst some Pokemon leave a global notification in chat about being listed, not all will. Additionally some listed Pokemon may remain in the Wondertrade pool for quite a while before someone grabs it. As a result it's a good idea to keep submitting Pokemon wherever possible to increase your chances to grab something worthwhile.

<figure><img src="/files/IYwjWvtxD51fp4CdodWW" alt=""><figcaption><p>Example Wondertrade release Announcement</p></figcaption></figure>

The rewards for this event is again being able to keep anything you pull, whether you wish to battle with them, retain them for a collection, or trade them away.

### PixelSnap

> This event <mark style="background-color:$success;">is</mark> in current rotation

This event takes inspiration from the **Pokemon Snap** games, once again twisting the idea to function to the server. Within the `#pixelsnap` channel, requests will be posted asking that you hunt down a **wild** spawn of a specific species, along with a specific in-game item. To participate, it's your job to track down this Pokemon, and submit a screenshot of yourself with the Pokemon in show whilst holding the specified item.

<figure><img src="/files/aHaDqDzOm51JWR6SXPdt" alt="" width="563"><figcaption><p>Example Snap Request</p></figcaption></figure>

<figure><img src="/files/15wl93wVNNTi3i0aFrqD" alt="" width="563"><figcaption><p>Example Snap Submission</p></figcaption></figure>

The rewards for this event includes a mixture of Pokecoins, rare candy, shinies, plushies, crate keys, and gems, where the specific reward granted is tied to the difficulty of the provided request.

### Trivia Blitz

> This event <mark style="background-color:$danger;">is not</mark> in current rotation

This event aims to build upon the existing **Chat Games** infrastructure, where for a short while, the number of questions asked will be hugely boosted offering chances for yourself to show off your knowledge. The number of correctly answered questions from yourself within this boosted session will be tallied, where the user who answers the most questions correctly gets an additional reward. To participate, you just need to answer any trivia questions shown as quickly as possible.

<figure><img src="/files/3782a44abUGjPBwRj7Zq" alt=""><figcaption><p>Trivia Blitz Announcement</p></figcaption></figure>

The rewards for this event includes a mixture of Pokecoins, rare candy, shinies, plushies, crate keys, and gems.

## Community Contests

**Community Contests** are longer events, often with extended deadlines allowing everyone plenty of time to prepare and perfect any relevant submissions. They are primarily focussed on either planning, or creating art based pieces, in which you are directly competing against any other submissions.

We aim to host these on a **tri-weekly** basis, typically running for **multiple weeks**. The specific events hosted aim to be unique, offering a variety of battle formats or art based requests, ensuring you can let your skills shine across a range of topics.

### Tournaments

This event is a test of skill tied to your battle experience, where players will enter a bracket-style **tournament** restricted to the designated battle format, to show off their understanding and technique to come out on top. To participate, you must follow the registration information outlined in the announcement within the corresponding tournaments channel from the Discord server.

<figure><img src="/files/FClsHoLO4bIKd1yjMeyu" alt=""><figcaption><p>Tournaments Announcement Channels</p></figcaption></figure>

{% hint style="danger" %}
When registering a team, it is crucial that you provide details that **directly** match the Pokemon you already have in-game. We do not provide the listed Pokemon, and you must have access to them at the time of the battle. Any deviation from the provided PokePaste, even as minimal as an EV point may lead to disqualification.
{% endhint %}

If successfully registered, you will be included in the tournament brackets which shows details on who your opponents will be. Please ensure you are available around the stated date and time for participating in battle, as not showing up will also lead to disqualification. All battles will be held as the servers arena, accessible through `/warp arena`.

<figure><img src="/files/thAWD41HKmJnaq6h58Gz" alt="" width="563"><figcaption><p>Tournament Arena</p></figcaption></figure>

The rewards for this event includes a mixture of Pokecoins, Pokemon, plushies, crate keys, gems, and chat tags.

#### Smogon

Each tournament will include it's own restrictions, all of which will be clearly outlined within the initial announcement. However every tournament will be based around Smogon Tiers, being a set of guidelines created by Smogon which is the largest online community and leading authority for competitive Pokemon battling. Each Pokemon is assigned a tier based on its apparent viability for use within battles, where Pokemon of a similar strength are tiered together.&#x20;

{% embed url="<https://www.smogon.com/bw/articles/bw_tiers>" %}

Whilst full details are provided above, as a brief overview the order of tiers is as follows. If a given tournament is set as OU (Overused), you may use any Pokemon that falls into either that tier, or any below it.

<pre class="language-mermaid"><code class="lang-mermaid"><strong>%%{init: {"flowchart": {"rankSpacing": 20, "nodeSpacing": 10}, "theme": "base", "themeVariables": {"fontFamily": "arial", "fontSize": "14px"}}}%%
</strong>flowchart TD
    AG["&#x3C;b>AG&#x3C;/b>&#x3C;br/>Anything Goes"] ==> Ubers["&#x3C;b>Ubers&#x3C;/b>"]
    Ubers ==> OU["&#x3C;b>OU&#x3C;/b>&#x3C;br/>OverUsed"]
    OU ==> UUBL["&#x3C;b>UUBL&#x3C;/b>&#x3C;br/>UnderUsed Banlist"]
    UUBL ==> UU["&#x3C;b>UU&#x3C;/b>&#x3C;br/>UnderUsed"]
    UU ==> RUBL["&#x3C;b>RUBL&#x3C;/b>&#x3C;br/>RarelyUsed Banlist"]
    RUBL ==> RU["&#x3C;b>RU&#x3C;/b>&#x3C;br/>RarelyUsed"]
    RU ==> NUBL["&#x3C;b>NUBL&#x3C;/b>&#x3C;br/>NeverUsed Banlist"]
    NUBL ==> NU["&#x3C;b>NU&#x3C;/b>&#x3C;br/>NeverUsed"]
    NU ==> PUBL["&#x3C;b>PUBL&#x3C;/b>&#x3C;br/>PU Banlist"]
    PUBL ==> PU["&#x3C;b>PU&#x3C;/b>"]
    PU ==> ZU["&#x3C;b>ZU&#x3C;/b>&#x3C;br/>Untiered"]

    style AG fill:#ffcccc,stroke:#333,stroke-width:2px,color:#000
    style Ubers fill:#ffe0b2,stroke:#333,stroke-width:2px,color:#000
    style OU fill:#ffffcc,stroke:#333,stroke-width:2px,color:#000
    style UU fill:#d4edda,stroke:#333,stroke-width:2px,color:#000
    style RU fill:#d1ecf1,stroke:#333,stroke-width:2px,color:#000
    style NU fill:#f8d7da,stroke:#333,stroke-width:2px,color:#000
    style PU fill:#e2d9f3,stroke:#333,stroke-width:2px,color:#000
    style ZU fill:#ffffff,stroke:#333,stroke-width:2px,color:#000
    style UUBL fill:#f2f2f2,stroke:#333,stroke-width:1px,color:#333,stroke-dasharray: 3 3
    style RUBL fill:#f2f2f2,stroke:#333,stroke-width:1px,color:#333,stroke-dasharray: 3 3
    style NUBL fill:#f2f2f2,stroke:#333,stroke-width:1px,color:#333,stroke-dasharray: 3 3
    style PUBL fill:#f2f2f2,stroke:#333,stroke-width:1px,color:#333,stroke-dasharray: 3 3
</code></pre>

### Submission Events

This event is a test of skill tied to your creativity and design, where players be given a prompt and required to submit a suitable **art piece** that meets specified criteria. The format of the request art can vary, with past examples including drawings, in-game builds, and emojis among other things. To participate, you must follow the submission information outlined in the announcement within the corresponding events channel from the Discord server. This is usually in the form of a chat thread.

{% hint style="danger" %}
When submitting an art piece, it is crucial that you ensure it meets all specified criteria, as failing to meet any will result in disqualification. As an example, most drawn art submissions require the inclusion of the server, your Minecraft account, and event names to verify creation for said event.\
\
Additionally we do not permit the use of AI for any submissions. These events are designed to demonstrate your talents, not the talents of an AI agent. Attempting to submit work you had not created yourself is a form of plagiarism, and will result in disqualification, along with potential blacklists from future events.
{% endhint %}

Once the submission deadline has passed, all creations will be reviewed by senior staff to select the best pieces that deserve a reward for their exceptional efforts. Then the responsibility falls on yourself, from these finalists you will be able to submit your vote on who you believe should become the winner. This voting deadline only lasts one day, so be sure you jump in quickly so that your vote counts.

The rewards for this event includes a mixture of Pokecoins, Pokemon, plushies, crate keys, gems, and chat tags.

## Frequently Asked Questions \[FAQ]

**Q \~ Do I need to inform anyone I will be participating in an event prior?**

**A \~** *No, so long as you follow all instructions in the Discord announcement, you are welcome to jump straight in. Flash Events require no form of sign-up, you just need to be in the right place, at the right time. Do be mindful of registration deadlines though when it comes to Community Contests.*

**Q \~ What happens if I disconnect during an event?**

**A \~** *In most cases there unfortunately isn't much we can do, however for the likes of legendary spawns and server bugs, you're welcome to report the issue via a ticket in our Discord server to have the incident reviewed, as we may be able to help after the fact. For the likes of tournaments, immediately contact the staff in charge and make them aware of your connection difficulties, as they **may** be able to provide support and guidance to ensure you don't miss out.*

**Q \~ Where do I submit entries for events requiring a photo?**

**A \~** *Whether this is regarding Snap, Geoguesser, or a Contest Submission, each event will have its own channel or thread in our Discord server. Look out for announcements that direct you toward the right place, however they should all be easy to find near the top of the channel list, named accordingly to match the event.*

**Q \~ Can I submit multiple entries for the same contest?**

**A \~** *To keep things fair, we limit each player to one submission per event unless the specific announcement explicitly states otherwise.*

**Q \~ How and when are prizes distributed?**

**A \~** *Flash Events typically have their rewards issued immediately upon completion of a given round, and should be communicated with you via staff usually via in-game PMs. Community Contest rewards will be distributed after the announcement covering the winners, but might require yourself to open a ticket to claim them, so ensure you read the full post where applicable.*

**Q \~ What happens if someone is caught cheating for exploiting?**

**A \~** *We have a zero-tolerance policy for cheating, exploiting bugs, or using any other unauthorised modifications. Anyone caught doing so will be instantly disqualified, and potentially banned from future events, and may be subject to disciplinary actions tied to server rules.*


# Complete Overview of Fossils

Here you'll find everything you need to know about Fossils on the server from what Pokemon you can get from them to how to actually obtain them.

**Contents**

1. [List of all Fossils and Respective Pokemon](#list-of-all-fossils-and-respective-pokemon)
2. [How to Obtain Fossils](#how-to-obtain-fossils)
3. [How to Revive Fossils](#how-to-revive-fossils)
   1. [Crafting a Fossil Machine](#crafting-the-fossil-machine)
   2. [Operating the Fossil Machine](#operating-the-fossil-machine)
   3. [Gen 8 Fossil Pokemon (Dracozolt, Arctozolt, Dracovish & Arctovish) ](#gen-8-fossil-pokemon-dracozolt-arctozolt-dracovish-and-arctovish)

***

## List of all Fossils and Respective Pokemon

<table><thead><tr><th width="178" align="center">Fossil</th><th width="213.5" align="center">Pokemon</th></tr></thead><tbody><tr><td align="center"><img src="/files/oKw5cKn5Ly2MVTtohDCr" alt=""><strong>Helix Fossil</strong></td><td align="center"><img src="/files/0ti9Ws61Syvafg4iGaSq" alt=""><strong>Omanyte</strong></td></tr><tr><td align="center"><img src="/files/cfnEgQeKd6syphSRiogH" alt=""><strong>Dome Fossil</strong></td><td align="center"><img src="/files/FyofUt8Vp9quhvKMwQFV" alt=""><strong>Kabuto</strong></td></tr><tr><td align="center"><img src="/files/SsJL8NMKdxuy0WIS0Mh2" alt=""><strong>Old Amber</strong></td><td align="center"><img src="/files/Z6775BJ5wNpoMSmcPQA9" alt=""><strong>Aerodactyl</strong></td></tr><tr><td align="center"><img src="/files/mbYwgF77DNXZDj2lZHQm" alt=""><strong>Claw Fossil</strong></td><td align="center"><img src="/files/QV2B8fKo3hfXOSffYuY6" alt=""><strong>Anorith</strong></td></tr><tr><td align="center"><img src="/files/zy7IXLI7dhFpq0q1Tb4H" alt=""><strong>Root Fossil</strong></td><td align="center"><img src="/files/miUedtcM5uWehwQpoa2Z" alt=""><strong>Lileep</strong></td></tr><tr><td align="center"><img src="/files/SM4Hr4asmUDFCiW5Q3QD" alt=""><strong>Shield Fossil</strong></td><td align="center"><img src="/files/RGXEhsBzgoEUOG2u2vHY" alt=""><strong>Shieldon</strong></td></tr><tr><td align="center"><img src="/files/iFb477kBqtM0wl2rHTSy" alt=""><strong>Skull Fossil</strong></td><td align="center"><img src="/files/08i8D8Qbc8NpFqjzn4qq" alt=""><strong>Cranidos</strong></td></tr><tr><td align="center"><img src="/files/H1ENtqb6BRApbsUA8sHm" alt=""><strong>Cover Fossil</strong></td><td align="center"><img src="/files/gGhfD0EwmRx9GmjsAKId" alt=""><strong>Tirtouga</strong></td></tr><tr><td align="center"><img src="/files/EPdidbxlduftU9FgCBbw" alt=""><strong>Plume Fossil</strong></td><td align="center"><img src="/files/6JtCOah3AZFcgsfq9vFu" alt=""><strong>Archen</strong></td></tr><tr><td align="center"><img src="/files/FYUl0mF0Tbn5zS7Nu7om" alt=""><strong>Jaw Fossil</strong></td><td align="center"><img src="/files/Z4V1VdKy6LlSPxQH028J" alt=""><strong>Tyrunt</strong></td></tr><tr><td align="center"><img src="/files/PmkTYrDzMSwhUD5HbAIy" alt=""><strong>Sail Fossil</strong></td><td align="center"><img src="/files/Ssj4sUXTX3rewcTjYWD2" alt=""><strong>Amaura</strong></td></tr><tr><td align="center"><img src="/files/4nEmAxA8xa2A10bubz3x" alt=""><strong>Bird Fossil</strong></td><td align="center"><img src="/files/dRZKtYzK5E2iz2hRkZHB" alt=""><strong>Arctozolt or Dracozolt</strong></td></tr><tr><td align="center"><img src="/files/rLURtL6Zot0EGzaWgP06" alt=""><strong>Dino Fossil</strong></td><td align="center"><img src="/files/XO8ELHSFQxjGHqa1XfM4" alt=""><strong>Arctozolt or Arcovish</strong></td></tr><tr><td align="center"><img src="/files/bvPWw2IfbZMCwRw9u42d" alt=""><strong>Drake Fossil</strong></td><td align="center"><img src="/files/zM31tifHy8DaGLhAmhYZ" alt=""><strong>Dracovish or Dracozolt</strong></td></tr><tr><td align="center"><img src="/files/c03VtnAWUbXJIbAbqCum" alt=""><strong>Fish Fossil</strong></td><td align="center"><img src="/files/azKdRLg9nxaKSGfT2hLT" alt=""><strong>Dracovish or Arctovish</strong></td></tr></tbody></table>

## How to Obtain Fossils

In order to find Fossils you need to search for **Fossil Blocks** whilst mining underground, between Y-Level -64 and 100.

<div><figure><img src="/files/g33w9yPEETmcqmC43FH0" alt="" width="150"><figcaption><p>Fossil Block</p></figcaption></figure> <figure><img src="/files/cSjBlBVVaMy9AkBObtct" alt="" width="150"><figcaption><p>Deepslate Fossil Block</p></figcaption></figure></div>

Upon mining a **Fossil Block** with a pickaxe, you will obtain 1 Covered Fossil. The number obtained can be increased through use of the Fortune enchantment.

<figure><img src="/files/gkGNznbdnmH1haMQzPnY" alt="" width="187"><figcaption><p>Covered Fossil</p></figcaption></figure>

The Fossil can be cleaned by being placed into a **Fossil Cleaner**, wiping off the dirt and revealing exactly what Fossil you have managed to find. With this clean Fossil, you can proceed with reviving it to get yourself the Ancient Pokemon.

<div align="left"><figure><img src="/files/DtyoqNaTopXB1HUX0dXp" alt="" width="246"><figcaption><p>6x Aluminium Ingots + 2x Redstone Dust + 1x Glass Pane</p></figcaption></figure></div>

## How to Revive Fossils

### Crafting the Fossil Machine

Now that you have collected one or multiple fossils, you can now go ahead and start reviving them. You will however need to craft a **Fossil Machine** in order to start this process. To do so, you will specifically need to make the 4 components that make up the machine. Recipe's for these are shown below:

#### Fossil Machine Top

<div align="left"><figure><img src="/files/5LLPyLUd5Kq7oCr4BENo" alt="" width="243"><figcaption><p>5x Aluminium Ingots + 1x Redstone Dust</p></figcaption></figure></div>

#### Fossil Machine Tank

<div align="left"><figure><img src="/files/TTixN1paaU60mlKSxLVf" alt="" width="243"><figcaption><p>6x Glass Panes + 3x Buckets of Water</p></figcaption></figure></div>

#### Fossil Machine Display

<div align="left"><figure><img src="/files/10Wh1emkjFcrV7BI778F" alt="" width="245"><figcaption><p>4x Redstone Dust + 1x Obsidian</p></figcaption></figure></div>

#### Fossil Machine Base

<div align="left"><figure><img src="/files/D7NlTVkLvioCehhHcf26" alt="" width="243"><figcaption><p>6x Aluminium Ingots</p></figcaption></figure></div>

Once you have crafted each of these items you'll now need to place them in a particular order within the crafting table to create the Fossil Machine itself.

<div align="left"><figure><img src="/files/vJqEkC8pSyzcLbAtWVO5" alt="" width="243"><figcaption><p>Fossil Machine Recipe</p></figcaption></figure></div>

### Operating the Fossil Machine

Now that you have all the items needed to revive a fossil lets go over the process. You will want to `Right Click` the Fossil onto the Fossil Machine, which will beging the ressurection procedure. The process will be displayed on front of the machine as shown below.

<figure><img src="/files/oomU4j63e9cyrOuazao9" alt="" width="188"><figcaption><p>Fossil Machine during the Revival Process</p></figcaption></figure>

From there it's ultimately just a waiting game. This **process will take a couple minutes minutes** but you'll know once it's complete as the display on your machine will mention such, as shown below:

<figure><img src="/files/st7E0cjcZZwioZbAkU5T" alt="" width="188"><figcaption><p>Fossil Machine after the Revival Process</p></figcaption></figure>

All you need to to now is `Right Click` onto the **Fossil Machine** with the **Pokeball** you wish to have your Pokemon in and it'll instantly go into your party or PC and that's the whole process. If you wish to revive more fossils you will need to keep giving it Organic Materials per fossil.

#### Gen 8 Fossil Pokemon  (Dracozolt, Arctozolt, Dracovish & Arctovish)&#x20;

For the Gen 8 Fossil Pokemon **you will need to combine two different fossils** in order to gain one of these pokemon unlike all other fossils which you only need the one. It's the same process when you `Right Click` onto the Fossil Machine to place it in, you'll just need to do it again for the corresponding Pokemon you want.&#x20;

You can use the table below to know which **Fossil Combinations are needed for the Respective Pokemon**:

* **Dracozolt \[***Electric/Dragon***]** \~ Fossilized Drake + Fossilized Bird
* **Arctozolt \[***Electric/Ice***]** \~ Fossilized Dino + Fossilized Bird
* **Dracovish \[***Water/Dragon***]** \~ Fossilized Drake + Fossilized Fish
* **Arctovish \[***Water/Ice***]** \~ Fossilized Dino + Fossilized Fish


# Complete Overview of Breeding

Breeding has just been introduced with the latest Beta update 0.21. Here you'll find everything you need to know about breeding on the server!

**Contents**

1. [What is Breeding?](#what-is-breeding)
2. [How to Breed Pokemon](#how-to-breed-pokemon)
   1. [Pasture Block](#pasture-block)
   2. [Egg Groups](#egg-groups)
   3. [Ditto](#ditto)
   4. [Breeding](#breeding)
3. [How to Hatch Pokemon Egg](#how-to-hatch-pokemon-egg)
4. [Breeding for Inherited Stats, Moves and Abilities/Natures](#breeding-for-inheritied-stats-moves-and-abilities-natures)
5. [Items used for Breeding](#items-used-for-breeding)
   1. [Destiny Knot](#destiny-knot)
   2. [Power Items](#power-items)
   3. [Mirror Herb](#mirror-herb)
   4. [Everstone](#everstone)
6. [Shiny Hunt Methods via Breeding](#shiny-hunt-methods-via-breeding)
   1. [Masuda Method](#masuda-method)
   2. [Crystal Method](#crystal-method)
   3. [Combined Methods](#combined-methods)
7. [FAQ \[Frequently Asked Questions\]](#faq-frequently-asked-questions)

***

### What is Breeding?

Like in the base Pokemon Games, breeding is a mechanic where two compatible pokemon can be placed within a Day Care to produce a Pokemon Egg based on both parents. You can hatch this egg via walking which will hatch into a Pokemon. There is loads of benefits for breeding for Pokemon like inheriting IVs, Abilities, Natures, Increased Shiny chances plus many more.

While most of the mechanics is the exact same for how it's set up in the base games, **there are a couple changes** to better fit with Pixelmon so it's ideal to read through it all if you don't know 100% how it all works on Pixelmon.

<figure><img src="/files/G9UW2b3wBz1olwn3Hojn" alt="" width="182"><figcaption><p>Example of a Day Care</p></figcaption></figure>

### How to Breed Pokemon

#### Day Care

To initially get started with breeding, you first need to obtain a Day Care. This is easy by being accessible through the shop, or generated in relevant structures.

Once you have a Day Care, you can go ahead and place it down within your realm. You can place up to 6 Pokemon within the Day Care, being 3 pairs. Each of these pairs will function independantly, allowing you to obtain multiple eggs at once.

<figure><img src="/files/DsZfBEWP0LPtRryeuIqm" alt="" width="341"><figcaption><p>Example of Pokemon in a Day Care</p></figcaption></figure>

Before the Pokemon begin to breed, you must provide a list of items for the Day Care, based on the typings of the species involved. These can be submitted using the green tick button, with the items in your inventory.

<figure><img src="/files/yZ66JcXmU81ff0dMRpgV" alt="" width="375"><figcaption><p>Example of Breeding Materials</p></figcaption></figure>

Once the requested materials are satisified, the Pokemon will begin breeding and be placed onto a timer. Once this expires the breeding will have completed and the egg can be collected from any Day Care. During this time, you may track the progress of the pair through the breeding interface within the inventory.

<figure><img src="/files/7iB8uVk5wVtX52Qbt0q4" alt="" width="347"><figcaption><p>Day Care Timer and Inventory Menu</p></figcaption></figure>

#### Egg Groups

The next step is to get two compatible pokemon to breed with each other via egg groups. For two pokemon to breed with each other, they need to breed with compatible egg groups. You can find a list of all these below:

<details>

<summary>Egg Groups</summary>

| Egg Groups   | Can Breed With                                                                             |
| ------------ | ------------------------------------------------------------------------------------------ |
| Amorphous    | Dragon, Fairy, Grass, Human-Like, Mineral, Water 1                                         |
| Bug          | Dragon, Fairy, Grass, Human-Like, Mineral, Water 1, Water 3                                |
| Dragon       | Amorphous, Bug, Field, Flying, Grass, Mineral, Monster, Water 1, Water 2                   |
| Fairy        | Amorphous, Bug, Field, Flying, Grass, Human-Like, Mineral, Water 1                         |
| Field        | Dragon, Fairy, Flying, Grass, Human-Like, Mineral, Monster, Water 1, Water 2               |
| Flying       | Dragon, Fairy, Field, Human-Like, Water 1, Water 3                                         |
| Grass        | Amorphous, Bug, Dragon, Fairy, Field, Human-Like, Mineral, Monster, Water 1                |
| Human-Like   | Amorphous, Bug, Fairy, Field, Flying, Grass, Water 1                                       |
| Mineral      | Amorphous, Bug, Dragon, Fairy, Field, Grass, Monster                                       |
| Monster      | Dragon, Field, Grass, Mineral, Water 1                                                     |
| Water 1      | Amorphous, Bug, Dragon, Fairy, Field, Flying, Grass, Human-Like, Monster, Water 2, Water 3 |
| Water 2      | Dragon, Field, Water 1                                                                     |
| Water 3      | Bug, Flying, Water 1                                                                       |
| Undiscovered | **Unable to Breed**                                                                        |

</details>

To find out which Pokemon fits under a certain egg group, you can use the following link to determine this: <https://bulbapedia.bulbagarden.net/wiki/List_of_Pok%C3%A9mon_by_National_Pok%C3%A9dex_number>

#### Ditto

Now Ditto is a little bit different in that **it can breed with any egg group** (*excl Undiscovered and itself*) meaning it is a fantastic addition to your gameplay if you plan on breeding a fair bit. As long as the other pokemon is able to be bred, then you can use Ditto to breed for a egg regardless of the gender of the Pokemon in question.

#### Breeding

Once you have both a Day Care and two compatible (*Male and Female*) Pokemon, you can place these within the Day Care and wait until the timer ends.

**NOTE:** The egg timer will progress no matter your current location.

You can see an example of what this looks like with the screenshot shown below:

<figure><img src="/files/9IfWt9ADHiuyEOU3MydK" alt="" width="342"><figcaption><p>Example of Complete Breeding</p></figcaption></figure>

From there all you need to do is interact with a Day Care and select the tick once again to obtain your egg. This will be placed within your party or PC.&#x20;

<figure><img src="/files/ihj5mPb9SKSVAMBAr8Hc" alt="" width="221"><figcaption><p>Egg in Pokemon Party</p></figcaption></figure>

### Hourglasses

Hourglasses are a set of powerful items that assist in breeding, making the process easier through lifting certain restrictions. They may be utilised by placing them onto the breeding box within the Day Care to alleviate whatever restriction they directly apply to.

<figure><img src="/files/rVckR9bk5uTkopyaTAAU" alt="" width="357"><figcaption><p>Applying Hourglass to Breeding Box</p></figcaption></figure>

The abilities of each hourglass are as follows:

|                         Hourglass                        |                                              Effect                                              |
| :------------------------------------------------------: | :----------------------------------------------------------------------------------------------: |
|  Isi's Copper Hourglass ![](/files/fTR3QaWOZ0yWvJperuFD) |                   Skip a single item requirement for a pair of breeding Pokémon                  |
|  Isi's Silver Hourglass ![](/files/0W01u9puy7C3dHnQRr87) |                   Skip 25% of the overall timer for a pair of breeding Pokémon                   |
|   Isi's Gold Hourglass ![](/files/H8IhQ9nRROTiZSKPDaOP)  |      Skip all item requirements and 100% of the overall timer for a pair of breeding Pokémon     |
| Isi's Diamond Hourglass ![](/files/V2scb9BJmjusxhDJrqR6) | Skip all item requirements and 100% of the overall timer for all three pairs of breeding Pokémon |

### How to Hatch Pokemon Egg

Hatching the egg is incredibly easy! All you need to do is place the egg within your party and walk around with it. Each step will take away from the count you'll be able to see on the egg. Progress can be checked through use of the `/eggsteps` command, providing information on how much farther you must walk.

<figure><img src="/files/lM1092ZLQC8IBI9VSCY0" alt=""><figcaption></figcaption></figure>

As soon as the count reaches 0, a pop-up with the egg will appear ready to be hatched, after which you will get the Pokemon in your party.

<div><figure><img src="/files/t5M6YUB9tqemgB5BV80g" alt="" width="375"><figcaption></figcaption></figure> <figure><img src="/files/NroWoTJivz5y6sjFfdj1" alt="" width="375"><figcaption></figcaption></figure></div>

### Breeding for Inherited Stats, Moves, Forms and Abilities/Natures

One of the best things with Breeding Pokemon is that you can push down certain abilities, natures, IVs and obtain special egg moves via breeding.

**STATS** : Only 3 random IVs stats will be pushed down to the baby pokemon (*if no item is used*) with the other 3 stats being randomized. You can use Destiny Knot and Battle Items to get more IVs/specific IVs pushed down instead. You can see more about these items within the next section of this guide.

**MOVES** : Pokemon that are hatched will start out with all moves they can learn at level 1, but if both parents know a move they can learn via lvl up then the egg will inherit this move. This is true with egg moves as if either parent knows a egg move then it will be pushed down to the baby pokemon. Additionally any moves known by the father which the offspring can learn via TMs will be passed along.

**NATURES** : You are able to breed down a specific nature from a parent by giving it a Everstone. If you give both parents a Everstone then which nature the Pokemon will have is randomized between the two natures. Natures changed via mints will not be breed down the new nature to the baby pokemon.

**ABILITY** : If you are trying to breed down a specific ability, then it's ideal that you breed with a ditto to ensure that the egg gains the ability. Otherwise you will want to breed with a female parent as you have a 80% chance for their ability (*20% for it to be random*) to be pushed down and a 60% chance for it to be pushed down if it's a hidden ability. This makes female pokemon incredibly valuable for breeders to have especially when working with Hidden Abilities. You can't breed a Male with a Hidden Ability with a Non-Ditto Pokemon as the ability will not be inherited by the baby Pokemon. If neither parent have a Hidden Ability, then you can not gain the Hidden Ability via breeding.

**FORMS** : Offspring will always prioritise the default version of the species, i.e. without any regional form, unless a parent with a regional form is holding an everstone.

**POKE BALL** : If both parents are of the same species, the Poke Ball passed along to the offspring has equal chance to derive from either parent. Otherwise if the parents are of different species, the mothers Poke Ball will be passed along. For genderless pairs, the Poke Ball of the Pokemon in the right slot is favoured. Exceptions include Master Balls and Cherish Balls, which cannot be passed to offspring.

**GROWTH** : The offspring typically inherits the growth value lying between both parents, acting as an average. However there exists some variation allowing for either growth lying directly beside the averaged value (occuring even if both parents are of the same growth).

### Items used for Breeding

Here you can find a selection of items that have effects for breeding which players will find useful to be using.&#x20;

#### Destiny Knot

You can give a Pokemon a Destiny Knot to one of your Pokemon to Hold in which this will select **5 random IV stats from both parents** \[*not just the Pokemon Holding the item*] which will be inherited to the Pokemon Egg. This means if you have IV stats that are 31, if that specific stats is selected them that will be inherited into the egg. The other IV stat that isn't being selected will be randomized.

There is no way to select what IVs are chosen with the Destiny Knot.

#### Power Items

Power Items \[*Power Weight, Power Bracer, Power Belt, Power Lens, Power Band, Power  Anklet*] **can be given to the pokemon being bred to give a specific IV stat** corresponding to the item used. Below is a table of what each of the items will pass over:

<table><thead><tr><th width="243.5">Power Item</th><th>Stat</th></tr></thead><tbody><tr><td>Power Weight</td><td>HP</td></tr><tr><td>Power Bracer</td><td>Attack</td></tr><tr><td>Power Belt</td><td>Defense</td></tr><tr><td>Power Lens</td><td>Special Attack</td></tr><tr><td>Power Band</td><td>Special Defense</td></tr><tr><td>Power Anklet</td><td>Speed</td></tr></tbody></table>

This means if you give a **Power Anklet to Parent #1** and a **Power Weight to Parent #2** then you will gain the respective Speed and HP stat corresponding to the parent stats.

#### Mirror Herb

If you want to learn a egg move to a respective Pokemon and you have another Pokemon who has this move then you can give the Mirror Herb to the pokemon that you wish to learn it and throw both of these within the Day Care. The pokemon will then be able to learn this move without needing to finishing the breeding process.&#x20;

#### Everstone

You are able to breed down a specific nature from a parent by giving it a Everstone. If you give both parents a Everstone then which nature the Pokemon will have is randomized between the two natures. Natures changed via mints will not be breed down the new nature to the baby pokemon.

Alternatively with everstones you can use them to breed for specific regional forms by giving it to the non-ditto parent while breeding to gain the specific form.

### <mark style="color:yellow;">Shiny</mark> Hunt Methods via Breeding

#### Masuda Method

Masuda Method is a way for players to have increased shiny chances for Pokemon that comes out of eggs. Unlike in the games where you need one Pokemon parent from another game language (i.e. English with Japanese), all you need is a pokemon with a different OT for this to work.

**METHOD:** Place your Pokemon that has your OT and another Pokemon of choice with a different players OT for the masuda method to work.

For just using Masuda Method for breeding it **increases chances** from `1/4096` to a whopping `1/585!`&#x20;

### FAQ \[Frequently Asked Questions]

**Q \~ Can I breed two Ditto's together to gain a random Pokemon?**

> No you will not gain a egg with a random pokemon by breeding two Ditto's together.

**Q \~ How can I obtain a Phione?**

> You can get Phione by breeding a Manaphy or Phione with a Ditto via the Day Care.

**Q \~ Can you get Pixelomon exclusive textures from breeding?**

> As of now it's not designed to take account of custom textures Pokemon have in Pixelmon. This will be something that changes in the future.

**Q \~ Can I breed two genderless Pokemon together?**

> Outside of ditto, you can't breed two genderless pokemon together. Parents have to be a male and a female in order to breed.

**Q \~ Does hatching eggs give a dex entry?**

> Yes you can hatch eggs in order to gain a dex entry which goes towards `/dexrewards`


# Complete Overview of Berries

Here you'll find everything you need to know about berries from how to obtain them, how to farm then as well as their uses.

**Contents**

1. [List of all Berries and their Uses](#list-of-all-berries-and-their-uses)
2. [How can I find Berries?](#how-can-i-find-berries)
3. [How to farm Berries](#how-to-farm-berries)
4. [Recipes including Berries](#recipes-including-berries)
   1. [Lures](#lures)

***

### List of all Berries and their Uses

Here you can find a list of all the berries and their uses on Pokemon as well as their fishing effects.

<table data-card-size="large" data-view="cards"><thead><tr><th></th><th data-hidden data-card-target data-type="content-ref"></th></tr></thead><tbody><tr><td>🫐 <strong>List of all Berries and their Uses</strong></td><td><a href="/pages/4e5HfhlDxHo7QUJufLQQ">/pages/4e5HfhlDxHo7QUJufLQQ</a></td></tr></tbody></table>

### How can I find Berries?

<figure><img src="/files/4v0QKqXZudIZMxJTKTAt" alt="" width="375"><figcaption><p>Example of Fully Grown Berry Trees</p></figcaption></figure>

Throughout the Overworld you will come across trees Berry Tree's which you can harvest for berries. There are unique trees for each Berry out there.

**\*NOTE\*** - *All berries are accessible from the PokeMart found on our server for a cheap price, so this is the best way to obtain them on our server. You can access this via* `/shop`*.*

You are able to grow and farm each berry to gain more of them. To learn more about this please refer to the next section of this guide found below.

Berries can also be obtained as Tier 1 and Tier 2 drops through Foraging, and as drops upon defeating wild Pokemon.

### How to farm Berries

A Berry Tree will give a player berries once harvested. You can actually grow these yourself if you have the corresponding berry for them as they will grow like any other normal Minecraft Crop via a **Grass block**.

<figure><img src="/files/4nNH6TsvIGj6RVm6RIVp" alt="" width="177"><figcaption><p>Example of a Berry Sapling</p></figcaption></figure>

There are 4 different stages of the berry trees growth which determines it's age. You can speed this process up with Bone Meal or wait it out by general playtime. Once the tree is at it's final stage with berries, you can harvest them individually by `Right Click` on the tree.&#x20;

<figure><img src="/files/zqsO00tQQLfYBreFk35I" alt="" width="375"><figcaption><p>Example of Grown Berry Tree</p></figcaption></figure>

Once you have harvested the berries it will start growing more berries from the leaves instead of restarting the whole growth process.

<figure><img src="/files/ygt61DZ9o14IXYyCnfGG" alt="" width="375"><figcaption><p>Example of Blossoming Berry Tree</p></figcaption></figure>

### Recipes including Berries

There are multiple recipes you can use berries for on the server. Some of these recipes include the following:

#### Lures

Lures are equippable items that will boost the spawn rates for a particular category of Pokemon, corresponding to the buff granted by the lure itself. Here is a list of all lures and their recipes:

> **Weak Normal Lure**
>
> This will boost the spawn rates of Normal type Pokemon
>
> ![](/files/B0Df9dEL7w2IblCeWdZe)
>
> **RECIPE** : 1x Silver Lure Casing, 1x Chilian Berry, 1x Oran Berry, 1x Leppa Berry

> **Weak Fire Lure**
>
> This will boost the spawn rates of Fire type Pokemon
>
> ![](/files/6jr4xDnsiU8OJzm4UHAa)
>
> **RECIPE** : 1x Silver Lure Casing, 1x Occa Berry, 1x Oran Berry, 1x Leppa Berry

> **Weak Water Lure**
>
> This will boost the spawn rates of Water type Pokemon
>
> ![](/files/NtXedzDvMiiOQyUfSupy)
>
> **RECIPE** : 1x Silver Lure Casing, 1x Passho Berry, 1x Oran Berry, 1x Leppa Berry

> **Weak Electric Lure**
>
> This will boost the spawn rates of Elecric type Pokemon
>
> ![](/files/6wZuwPxAUNmpFHEj1MEr)
>
> **RECIPE** : 1x Silver Lure Casing, 1x Wacan Berry, 1x Oran Berry, 1x Leppa Berry

> **Weak Grass Lure**
>
> This will boost the spawn rates of Grass type Pokemon
>
> ![](/files/2SnyDSl96fvgcc5thU7w)
>
> **RECIPE** : 1x Silver Lure Casing, 1x Rindo Berry, 1x Oran Berry, 1x Leppa Berry

> **Weak Ice Lure**
>
> This will boost the spawn rates of Ice type Pokemon
>
> ![](/files/CfwuCR0vLFfrIKjU9SDH)
>
> **RECIPE** : 1x Silver Lure Casing, 1x Yache Berry, 1x Oran Berry, 1x Leppa Berry

> **Weak Fighting Lure**
>
> This will boost the spawn rates of Fighting type Pokemon
>
> ![](/files/UL4JzSEUL8jAWGmaN6qP)
>
> **RECIPE** : 1x Silver Lure Casing, 1x Chople Berry, 1x Oran Berry, 1x Leppa Berry

> **Weak Poison Lure**
>
> This will boost the spawn rates of Poison type Pokemon
>
> ![](/files/8Tr2CKkj94iz1koQFqSq)
>
> **RECIPE** : 1x Silver Lure Casing, 1x Kebia Berry, 1x Oran Berry, 1x Leppa Berry

> **Weak Ground Lure**
>
> This will boost the spawn rates of Ground type Pokemon
>
> ![](/files/IVIlIMfW3cxGJGhIlYwB)
>
> **RECIPE** : 1x Silver Lure Casing, 1x Shuca Berry, 1x Oran Berry, 1x Leppa Berry

> **Weak Flying Lure**
>
> This will boost the spawn rates of Flying type Pokemon
>
> ![](/files/fEGRgARYXUMRdF48BJoq)
>
> **RECIPE** : 1x Silver Lure Casing, 1x Coba Berry, 1x Oran Berry, 1x Leppa Berry

> **Weak Psychic Lure**
>
> This will boost the spawn rates of Psychic type Pokemon
>
> ![](/files/8KxNU6N9ZPSAa0J3fmqb)
>
> **RECIPE** : 1x Silver Lure Casing, 1x Payapa Berry, 1x Oran Berry, 1x Leppa Berry

> **Weak Bug Lure**
>
> This will boost the spawn rates of Bug type Pokemon
>
> ![](/files/x1Wv77k539xQhzopvyZH)
>
> **RECIPE** : 1x Silver Lure Casing, 1x Tanga Berry, 1x Oran Berry, 1x Leppa Berry

> **Weak Rock Lure**
>
> This will boost the spawn rates of Rock type Pokemon
>
> ![](/files/Bj7rQnjlwVlOXso4JJQR)
>
> **RECIPE** : 1x Silver Lure Casing, 1x Charti Berry, 1x Oran Berry, 1x Leppa Berry

> **Weak Ghost Lure**
>
> This will boost the spawn rates of Ghost type Pokemon
>
> ![](/files/C1pNnGg0FMOynpxANueV)
>
> **RECIPE** : 1x Silver Lure Casing, 1x Kasib Berry, 1x Oran Berry, 1x Leppa Berry

> **Weak Dragon Lure**
>
> This will boost the spawn rates of Dragon type Pokemon
>
> ![](/files/pOgQfW1EYKixCt8JV1g9)
>
> **RECIPE** : 1x Silver Lure Casing, 1x Haban Berry, 1x Oran Berry, 1x Leppa Berry

> **Weak Dark Lure**
>
> This will boost the spawn rates of Dark type Pokemon
>
> ![](/files/DTunWqYud8EjkNp8MYhj)
>
> **RECIPE** : 1x Silver Lure Casing, 1x Colbur Berry, 1x Oran Berry, 1x Leppa Berry

> **Weak Steel Lure**
>
> This will boost the spawn rates of Steel type Pokemon
>
> ![](/files/6jMLQUPUMeaXDLXgCWKV)
>
> **RECIPE** : 1x Silver Lure Casing, 1x Babiri Berry, 1x Oran Berry, 1x Leppa Berry

> **Weak Fairy Lure**
>
> This will boost the spawn rates of Fairy type Pokemon
>
> ![](/files/9HYpIPPqRTRbufrMlS1E)
>
> **RECIPE** : 1x Silver Lure Casing, 1x Roseli Berry, 1x Oran Berry, 1x Leppa Berry

> **Weak Shiny Lure**
>
> This will boost the spawn rates of Shiny Pokemon
>
> ![](/files/spPInHlO8BcBl4EV3Du4)
>
> **RECIPE** : 1x Silver Lure Casing, 1x Salac Berry, 1x Lansat Berry, 1x Leppa Berry, 1x Apicot Berry

> **Weak Hidden Ability Lure**
>
> This will boost the spawn rates of Pokemon with their Hidden Ability
>
> ![](/files/Alqt9iUphuOD1Wf9PRjp)
>
> **RECIPE** : 1x Silver Lure Casing, 1x Salac Berry, 1x Petaya Berry, 1x Leppa Berry, 1x Apicot Berry

> **Strong Normal Lure**
>
> This will boost the spawn rates of Normal type Pokemon
>
> ![](/files/yjiBP7FrORz4UiE23ZEN)
>
> **RECIPE** : 1x Gold Lure Casing, 1x Chilan Berry, 1x Sitrus Berry, 1x Lum Berry, 1x Enigma Berry

> **Strong Fire Lure**
>
> This will boost the spawn rates of Fire type Pokemon
>
> ![](/files/s2E9YmwpAg0ajLTifGAd)
>
> **RECIPE** : 1x Gold Lure Casing, 1x Occa Berry, 1x Sitrus Berry, 1x Lum Berry, 1x Enigma Berry

> **Strong Water Lure**
>
> This will boost the spawn rates of Water type Pokemon
>
> ![](/files/VHFFzTBGnkkpYNy2z7R3)
>
> **RECIPE** : 1x Gold Lure Casing, 1x Passho Berry, 1x Sitrus Berry, 1x Lum Berry, 1x Enigma Berry

> **Strong Electric Lure**
>
> This will boost the spawn rates of Electric type Pokemon
>
> ![](/files/xpfp9laHxcFTIjBOt2hd)
>
> **RECIPE** : 1x Gold Lure Casing, 1x Wacan Berry, 1x Sitrus Berry, 1x Lum Berry, 1x Enigma Berry

> **Strong Grass Lure**
>
> This will boost the spawn rates of Grass type Pokemon
>
> ![](/files/Vv9RZo0gzHOQPN8UYOr0)
>
> **RECIPE** : 1x Gold Lure Casing, 1x Rindo Berry, 1x Sitrus Berry, 1x Lum Berry, 1x Enigma Berry

> **Strong Ice Lure**
>
> This will boost the spawn rates of Ice type Pokemon
>
> ![](/files/fdbM3JF2GCwJ35qUY4t8)
>
> **RECIPE** : 1x Gold Lure Casing, 1x Yache Berry, 1x Sitrus Berry, 1x Lum Berry, 1x Enigma Berry

> **Strong Fighting Lure**
>
> This will boost the spawn rates of Fighting type Pokemon
>
> ![](/files/RW1ER1Xcd2JfGxlMS1SD)
>
> **RECIPE** : 1x Gold Lure Casing, 1x Chople Berry, 1x Sitrus Berry, 1x Lum Berry, 1x Enigma Berry

> **Strong Poison Lure**
>
> This will boost the spawn rates of Poison type Pokemon
>
> ![](/files/qtaRbTupXVgHscMe7Q0E)
>
> **RECIPE** : 1x Gold Lure Casing, 1x Kebia Berry, 1x Sitrus Berry, 1x Lum Berry, 1x Enigma Berry

> **Strong Ground Lure**
>
> This will boost the spawn rates of Ground type Pokemon
>
> ![](/files/Cwj9Fi5LXPaIYm1hKa4i)
>
> **RECIPE** : 1x Gold Lure Casing, 1x Shuca Berry, 1x Sitrus Berry, 1x Lum Berry, 1x Enigma Berry

> **Strong Flying Lure**
>
> This will boost the spawn rates of Flying type Pokemon
>
> ![](/files/qQalJnQn4jPVc5nm0PQc)
>
> **RECIPE** : 1x Gold Lure Casing, 1x Coba Berry, 1x Sitrus Berry, 1x Lum Berry, 1x Enigma Berry

> **Strong Psychic Lure**
>
> This will boost the spawn rates of Psychic type Pokemon
>
> ![](/files/zQvSC8eyaDsV4ShaUgNi)
>
> **RECIPE** : 1x Gold Lure Casing, 1x Payapa Berry, 1x Sitrus Berry, 1x Lum Berry, 1x Enigma Berry

> **Strong Bug Lure**
>
> This will boost the spawn rates of Bug type Pokemon
>
> ![](/files/GnCaIYN43mk0Y8PWNu9F)
>
> **RECIPE** : 1x Gold Lure Casing, 1x Tanga Berry, 1x Sitrus Berry, 1x Lum Berry, 1x Enigma Berry

> **Strong Rock Lure**
>
> This will boost the spawn rates of Rock type Pokemon
>
> ![](/files/E03R46WPzlLVlf1CneTE)
>
> **RECIPE** : 1x Gold Lure Casing, 1x Charti Berry, 1x Sitrus Berry, 1x Lum Berry, 1x Enigma Berry

> **Strong Ghost Lure**
>
> This will boost the spawn rates of Ghost type Pokemon
>
> ![](/files/xprcXa1F5wj8PO8dNYRh)
>
> **RECIPE** : 1x Gold Lure Casing, 1x Kasib Berry, 1x Sitrus Berry, 1x Lum Berry, 1x Enigma Berry

> **Strong Dragon Lure**
>
> This will boost the spawn rates of Dragon type Pokemon
>
> ![](/files/1tCPTMgk6dKNAQfqdEnd)
>
> **RECIPE** : 1x Gold Lure Casing, 1x Haban Berry, 1x Sitrus Berry, 1x Lum Berry, 1x Enigma Berry

> **Strong Dark Lure**
>
> This will boost the spawn rates of Dark type Pokemon
>
> ![](/files/ZvILGp61ja3IX4cyzVB1)
>
> **RECIPE** : 1x Gold Lure Casing, 1x Colbur Berry, 1x Sitrus Berry, 1x Lum Berry, 1x Enigma Berry

> **Strong Steel Lure**
>
> This will boost the spawn rates of Steel type Pokemon
>
> ![](/files/g0mtjW9X08JFZ9FPU8UQ)
>
> **RECIPE** : 1x Gold Lure Casing, 1x Babiri Berry, 1x Sitrus Berry, 1x Lum Berry, 1x Enigma Berry

> **Strong Fairy Lure**
>
> This will boost the spawn rates of Fairy type Pokemon
>
> ![](/files/m2my0e9p8CgVzholXV56)
>
> **RECIPE** : 1x Gold Lure Casing, 1x Roseli Berry, 1x Sitrus Berry, 1x Lum Berry, 1x Enigma Berry

> **Strong Shiny Lure**
>
> This will boost the spawn rates of Shiny Pokemon
>
> ![](/files/UsihxglhONtnGvDFnzoP)
>
> **RECIPE** : 1x Silver Lure Casing, 1x Starf Berry, 1x Lansat Berry, 1x Lum Berry, 1x Apicot Berry

> **Strong Hidden Ability Lure**
>
> This will boost the spawn rates of Pokemon with their Hidden Ability
>
> ![](/files/2fLrjooqF3xeYBPnAoY1)
>
> **RECIPE** : 1x Silver Lure Casing, 1x Starf Berry, 1x Petaya Berry, 1x Lum Berry, 1x Apicot Berry


# List of all Berries and their Uses

Here is a list of all available berries including their effects on both Pokemon as well as for fishing.

**Contents**

1. [Restorative](#restorative)
2. [EV-Reducing](#ev-reducing)
3. [Type-Reducing](#type-reducing)
4. [Pinch](#pinch)
5. [Damage](#damage)
6. [Infuse](#infuse)

***

### Restorative

When held by a Pokémon, the majority of these Berries automatically activate when their effects are needed. These Berries can also be manually used inside or outside of battle to heal a Pokémon.

|                                     Berry                                    |                                    Pokemon Effect                                    |
| :--------------------------------------------------------------------------: | :----------------------------------------------------------------------------------: |
|  Aguav Berry <img src="/files/fUylJvIOVmh9p43RsMf3" alt="" data-size="line"> | Restores 12.5% of maximum HP, confuses Pokémon with Special Defense-lowering Natures |
| Aspear Berry <img src="/files/rfDwilEPVQV887yOlgLW" alt="" data-size="line"> |                                     Cures freeze                                     |
|  Cheri Berry <img src="/files/FgPWtqH5KsXaTfl4LZew" alt="" data-size="line"> |                                    Cures paralysis                                   |
|  Chest Berry <img src="/files/ze1ClqExFZdzaLCLAudm" alt="" data-size="line"> |                                      Cures sleep                                     |
|  Drash Berry <img src="/files/ij6ou6ntH7j4tIe1aufO" alt="" data-size="line"> |                                     Cures poison                                     |
| Eggant Berry <img src="/files/WEGiRMLEbwT7YlsJNiiZ" alt="" data-size="line"> |                                   Cures infatuation                                  |
| Enigma Berry <img src="/files/V6CwbqlCvqtsqe0mB9YH" alt="" data-size="line"> |            Restores 25% of maximum HP when hit by a super effective attack           |
|  Figy Berry <img src="/files/5R1jc2XxWOD2eUPPDZ8q" alt="" data-size="line">  |      Restores 12.5% of maximum HP, confuses Pokémon with Attack-lowering Natures     |
| Ginema Berry <img src="/files/N0qi9a59UF3iz3KSfO4S" alt="" data-size="line"> |                                   Cures stat drops                                   |
| Iapapa Berry <img src="/files/vfO7BrqYIe9zJZoqWa5f" alt="" data-size="line"> |     Restores 12.5% of maximum HP, confuses Pokémon with Defense-lowering Natures     |
|  Leppa Berry <img src="/files/YVaRXNVk9ckdNp92KpjX" alt="" data-size="line"> |                                    Restores 10 PP                                    |
|   Lum Berry <img src="/files/HPLHT062nO8FTHMGUC1K" alt="" data-size="line">  |        Cures paralysis, poison, burn, sleep, freeze, confusion, or infatuation       |
|  Mago Berry <img src="/files/PNQV2ATgnOga3IIwJrgm" alt="" data-size="line">  |      Restores 12.5% of maximum HP, confuses Pokémon with Speed-lowering Natures      |
|  Oran Berry <img src="/files/g0IH6nZXabYZIeX0Gapa" alt="" data-size="line">  |                      Restores 10 HP when health drops below 50%                      |
|  Pecha Berry <img src="/files/tV6l6ZYjGGk7ux4mRb77" alt="" data-size="line"> |                                     Cures poison                                     |
| Perism Berry <img src="/files/8PND50sTsuMNi1drCTUZ" alt="" data-size="line"> |                                    Cures confusion                                   |
| Pumkin Berry <img src="/files/mZjdiz5hgGyK3yeeRlaL" alt="" data-size="line"> |                                     Cures freeze                                     |
|  Rawst Berry <img src="/files/GfBjgKy5eSJCcGDuZ1K2" alt="" data-size="line"> |                                      Cures burn                                      |
| Sitrus Berry <img src="/files/73iwbtE4QZevCTMJGYLg" alt="" data-size="line"> |                              Restores 25% of maximum HP                              |
|  Touga Berry <img src="/files/wDYdlsd9kxx409rLmyld" alt="" data-size="line"> |                                    Cures confusion                                   |
|  Wiki Berry <img src="/files/KjC1zFJqRfvvNZ5K1I7v" alt="" data-size="line">  |  Restores 12.5% of maximum HP, confuses Pokémon with Special Attack-lowering Natures |
|  Yago Berry <img src="/files/MrZGNsy4B3qCYugS1VCM" alt="" data-size="line">  |                                      Cures burn                                      |

### EV-Reducing

When used on a Pokémon, each of these Berries lowers a specific EV by 10 and slightly raises the Pokémon happiness.

|                                     Berry                                    |    Reduced EV   |
| :--------------------------------------------------------------------------: | :-------------: |
|  Pomeg Berry <img src="/files/ZmylxdmQtFy3wAnN2pJ0" alt="" data-size="line"> |        HP       |
| Kelpsy Berry <img src="/files/2J4OwutjcMElkCdVGI8h" alt="" data-size="line"> |      Attack     |
| Qualot Berry <img src="/files/yB8fUbXZzh2thamFBYLF" alt="" data-size="line"> |     Defense     |
| Hondew Berry <img src="/files/4lF93KzbwshbqVYUu2yg" alt="" data-size="line"> |  Special Attack |
|  Grepa Berry <img src="/files/2Crw4EHAGkKzqOPiU31u" alt="" data-size="line"> | Special Defence |
| Tamato Berry <img src="/files/1G4sOT4Uda5mOo2scZS1" alt="" data-size="line"> |      Speed      |

### Type-Reducing

Each of these Berries reduces the power of a single super effective move of the corresponding type by 50%. If a Pokémon that is not weak to a certain type holds the corresponding Berry, the Berry will do nothing. An exception is the Chilan Berry, which works regardless of effectiveness (unless the Pokémon is immune) as Normal-type moves are not super effective against any type.

|                                     Berry                                    | Reduced Type |
| :--------------------------------------------------------------------------: | :----------: |
| Babiri Berry <img src="/files/REcTGLmRrSeBDljsmbC1" alt="" data-size="line"> |     Steel    |
| Charti Berry <img src="/files/AimtthK6GTNMKfaCOx3t" alt="" data-size="line"> |     Rock     |
| Chilan Berry <img src="/files/PqmclRhLsqB6BqArM57Z" alt="" data-size="line"> |    Normal    |
| Chople Berry <img src="/files/yOKQs4lCINPitkLcCuB8" alt="" data-size="line"> |   Fighting   |
|  Coba Berry <img src="/files/KBQErJgBjgFhTcfMyDb6" alt="" data-size="line">  |    Flying    |
| Colbur Berry <img src="/files/oqVQrEjI3BtFT0Ir5vPS" alt="" data-size="line"> |     Dark     |
|  Haban Berry <img src="/files/IMglDy0EFDgZnyXC75fa" alt="" data-size="line"> |    Dragon    |
|  Kasib Berry <img src="/files/m5fTZNZG2nNwEWtfS0ff" alt="" data-size="line"> |     Ghost    |
|  Kebia Berry <img src="/files/qbFAUR9NLnKDNHYPSO9x" alt="" data-size="line"> |    Poison    |
|  Occa Berry <img src="/files/PsD06NOKw8cvUyXzIYq6" alt="" data-size="line">  |     Fire     |
| Passho Berry <img src="/files/PxcJromMOt7dR1fgFE2V" alt="" data-size="line"> |     Water    |
| Payapa Berry <img src="/files/91wDwI8d4aPNAUvWYSG4" alt="" data-size="line"> |    Psychic   |
|  Rindo Berry <img src="/files/yYzGgCb5VkEohXbAtl54" alt="" data-size="line"> |     Grass    |
| Roseli Berry <img src="/files/wrfMQgPZ2fZp0cD0zSoT" alt="" data-size="line"> |     Fairy    |
|  Shuca Berry <img src="/files/s4QuFBw5EQIQPI65lMnC" alt="" data-size="line"> |    Ground    |
|  Tanga Berry <img src="/files/CMic8k61FxaVwwymDqAH" alt="" data-size="line"> |      Bug     |
|  Wacan Berry <img src="/files/9QsVqsyP7bH8i0xuuXr3" alt="" data-size="line"> |   Electric   |
|  Yache Berry <img src="/files/cnPuXBgFFLtSQyZfuukN" alt="" data-size="line"> |      Ice     |

### Pinch

These Berries have various effects that activate when the Pokémon's health drops below 25%.

|                                     Berry                                    |                                               Pokemon Effect                                              |
| :--------------------------------------------------------------------------: | :-------------------------------------------------------------------------------------------------------: |
| Apicot Berry <img src="/files/y3H8qMUcBJVeBKa3IaMZ" alt="" data-size="line"> |                                    Raises Special Defense by one stage                                    |
| Custap Berry <img src="/files/JSh0lBn0fvzqVrnkEZzB" alt="" data-size="line"> |                                      Lets the holder move first once                                      |
| Ganlon Berry <img src="/files/IBqrxmBu3ZuXeCKrA67h" alt="" data-size="line"> |                                        Raises Defense by one stage                                        |
| Lansat Berry <img src="/files/U3S6qq1rTOCpagR0RdPr" alt="" data-size="line"> |                                  Raises critical hit ratio by two stages                                  |
| Liechi Berry <img src="/files/EBRH5OuOXG7qhCYUIHcg" alt="" data-size="line"> |                                         Raises Attack by one stage                                        |
|  Micle Berry <img src="/files/5NGdszjkQotrmy1VA50v" alt="" data-size="line"> |                                   Raises the next move's accuracy by 20%                                  |
| Petaya Berry <img src="/files/SCvrV1nzk6gCej1Ivu5E" alt="" data-size="line"> |                                     Raises Special Attack by one stage                                    |
|  Salac Berry <img src="/files/CyCXtkXA57bzBCdxxQQc" alt="" data-size="line"> |                                         Raises Speed by one stage                                         |
|  Starf Berry <img src="/files/19bsD7olbfa5nXlf8wND" alt="" data-size="line"> | Raises a random stat (Attack/Defense/Special Attack/Special Defense/Speed/accuracy/evasion) by two stages |

### Damage

These Berries cause certain effects when the holder is hit with a certain type of attack.

|                                     Berry                                     |                                     Pokemon Effect                                    |
| :---------------------------------------------------------------------------: | :-----------------------------------------------------------------------------------: |
|  Jaboca Berry <img src="/files/NvmiQXFnmuyqjzAFfIzn" alt="" data-size="line"> | Cause an attack to take 1/8 of its maximum HP in recoil damage upon a Physical Attack |
|  Rowap Berry <img src="/files/jPt3iE12wUVG0MxzRMlA" alt="" data-size="line">  |  Cause an attack to take 1/8 of its maximum HP in recoil damage upon a Special Attack |
|   Kee Berry <img src="/files/aEmPnq3bBySQFFC4eKZM" alt="" data-size="line">   |      Raises the holders Defense by one stage upon being hit by a Physical Attack      |
| Maranga Berry <img src="/files/yYvO3xrBDEazXNWffVoR" alt="" data-size="line"> |   Raises the holders Special Defense by one stage upon being hit by a Special Attack  |

### Infuse

These Berries can be used in the Infuse along with an Incense Burner to create different Incenses.

|                                     Berry                                    |    Incense   |
| :--------------------------------------------------------------------------: | :----------: |
|  Durin Berry <img src="/files/QjqIntQiaWu6KEeYPZd5" alt="" data-size="line"> | Full Incense |
|  Cornn Berry <img src="/files/05nx6ujSXBhtznWDJtUE" alt="" data-size="line"> |  Lax Incense |
| Pamtre Berry <img src="/files/0RUG9k3MVVcrwmBXzlzG" alt="" data-size="line"> | Luck Incense |
|  Belue Berry <img src="/files/lNhABTY2nsPyiTpHOCGw" alt="" data-size="line"> |  Odd Incense |
|  Nomel Berry <img src="/files/xYV67xkDznV9r29bRe0O" alt="" data-size="line"> | Pure Incense |
| Spelon Berry <img src="/files/MtyDLVC3nkajDI6ZNkzp" alt="" data-size="line"> | Rock Incense |
| Rabuta Berry <img src="/files/xUMCBwuL3xUZ0ngAMFxH" alt="" data-size="line"> | Rose Incense |
| Watmel Berry <img src="/files/1H1PzxWnmeSSqmlAjgmH" alt="" data-size="line"> |  Sea Incense |
| Magost Berry <img src="/files/sQ2gne0IK8S5qGc08YQX" alt="" data-size="line"> | Wave Incense |

Credit for this information goes to the **Pixelmon Wiki** found here: <https://pixelmonmod.com/wiki/Berries>


# Complete Overview to Hunts

Here you'll find everything you need to know about hunts, what different type hunts there are and rewards for these hunts.

**Contents**

1. [What are Hunts and how do I access them?](#what-are-hunts-and-how-do-i-access-them)
2. [What is required for each hunt?](#what-is-required-for-each-hunt)
   1. [Beginner](#beginner)
   2. [Challenging](#challenging)
   3. [Insane](#insane)
3. [What are the rewards for hunts?](#what-are-the-rewards)
4. [Can I cancel a hunt?](#can-i-cancel-a-hunt)
5. [Can I do multiple hunts at once?](#can-i-do-multiple-hunts-at-once)

***

### What are Hunts and how do I access them?

Hunts are a way for players to earn rewards for finding specific Pokemon requested from them via `/hunts`. These range from difficulty from <mark style="color:blue;">**Beginner**</mark>, <mark style="color:purple;">**Challenging**</mark> and <mark style="color:red;">**Insane**</mark>. The harder the hunt is, the better reward you will end up with.

<figure><img src="/files/O2JIW8QsBw9U2kuEyi7n" alt=""><figcaption><p>Ex of GUI for <code>/hunts</code></p></figcaption></figure>

**You are only able to complete hunts by catching the Pokemon.** This means you can't trade to complete the hunt or if you already have the Pokemon in your PC/Party as none of these will count to the completion. Once you have completed a hunt you will be notified within the chat like this:

<figure><img src="/files/SYa2zIIwPYQddsUuLivZ" alt=""><figcaption></figcaption></figure>

### What is required for each hunt?

Each hunt brings it's own requirement and challenge for you to follow in order to gain the rewards. Here is all the current hunts you have access to on the server:

#### <mark style="color:blue;">**Beginner**</mark>

As the title implies, this is a easier hunt for players to do. This will typically require the player to find a random Pokemon in the wild in order to claim the hunt. As seen in the screenshot below:

<figure><img src="/files/2Ql5EBtr8tV2iIHjOK5Y" alt="" width="340"><figcaption><p>Example of Beginner Woobat Hunt</p></figcaption></figure>

You will **only have 2 hours** to complete this hunt before it expires and you will need to start a new hunt. Once completing the Hunt, you will be rewarded with **$1,500 Pokecoins + 1x Random Pokemon + 3x Rare Candy** and you will be able to start a brand new hunt.

#### <mark style="color:purple;">**Challenging**</mark>

These are harder hunts compared to what you find with Beginner Hunts since these will also **ask you to find a specific pokemon with specific gender, nature and min for IVs**. You can see what this looks like within the screenshot below:

<figure><img src="/files/OPVxReS7qgw1rhSIxZxr" alt="" width="416"><figcaption><p>Example of Challenging Sprigatito Hunt</p></figcaption></figure>

You will **only have 6 hours** to complete this hunt before it expires and you will need to start a new hunt. Once completing the Hunt, you will be rewarded with **$15,000 Pokecoins + 1x Random Shiny Pokemon + 16x Rare Candy** and you will be able to start a brand new hunt.

#### <mark style="color:red;">**Insane**</mark>

These hunts are a lot harder for players to complete, but will gain great rewards if you do so. Players will not only have to **hunt for a specific Pokemon**, but this Pokemon **will have to be** <mark style="color:orange;">**Shiny**</mark>. You can see what this looks like within the screenshot below:

<figure><img src="/files/xUXLYRLqurMtIw24o9ZI" alt="" width="428"><figcaption><p>Example of Insane Aron Hunt</p></figcaption></figure>

This hunt will never expire, which means you do not have to worry about Once completing the Hunt, you will be rewarded with **$50,000 Pokecoins, 1x Random Shiny Pokemon & 200 Gems + 64x Rare Candy** in which you will be able to start a brand new hunt.

### What are the rewards for hunts?

Here is all the rewards obtainable from all available hunts. Please be aware that **these may change over time** as we seem fit for the economy and player feedback so they very likely won't always remain like this:

* Players who complete the <mark style="color:blue;">**Beginner**</mark> hunt will be rewarded with **$1,500 Pokecoins & 1x Random Pokemon**.
  1. **$1,000** Pokecoins
  2. 1x Random Pokemon
  3. 1x Vote Key
  4. 2x Rare Candy
* Players who complete the <mark style="color:purple;">**Challenging**</mark> hunt will be rewarded with:&#x20;
  1. **$7,500** Pokecoins
  2. 1x Random <mark style="color:orange;">**Shiny**</mark> Pokemon
  3. 1x Random Pokemon Plush
  4. 3x Vote Key
  5. 8x Rare Candy
* Players who complete the <mark style="color:red;">**Insane**</mark> hunt will be rewarded with:
  1. **$25,000** Pokecoins
  2. 1x Random <mark style="color:orange;">**Shiny**</mark> Pokemon
  3. 1x Random Pokemon Plush
  4. 200 <mark style="color:blue;">**Gems**</mark>
  5. 24x Rare Candy

### Can I cancel a hunt?

You can cancel a hunt very easily via `/hunts` as all you need to do is click on the Red Glass Block on the line of your hunt which will end the hunt for you. **However**, if you do cancel a hunt then **you won't be able to re-active the specific hunt for 15 mins**. This is in place so that players don't keep starting and cancelling hunts to get a Pokemon they already have spawned on them.

<figure><img src="/files/QcfoG2tesWgtTJKd5cQi" alt=""><figcaption><p>Ex of Cancelling a Hunt with a Timer</p></figcaption></figure>

### Can I do multiple hunts at once?

Unfortunately players are **only able to do one hunt at a time** as the other hunts will be greyed out until you either complete, leave to expire or cancel the current hunt you have active.


# A Complete Guide to Catch Combo

Here you'll find a complete guide for the Catch Combo Mechanic that's been implemented on the server.

**CONTENTS**

1. [What is a Catch Combo?](#what-is-a-catch-combo)
2. [How to build a Catch Combo?](#how-to-build-a-catch-combo)
3. [What are the benefits for having a Catch Combo?](#what-are-the-benefits-for-having-a-catch-combo)
4. [How does the shiny odds work for Catch Combo?](#how-does-the-shiny-odds-work-for-catch-combo)

***

### **What is a Catch Combo?**

**Catch Combo** is a mechanic where repeatedly catching the *same Pokémon species* in a row builds a streak. You'll be familiar with this if you've played the Let's Go games on the Nintendo Switch. The combo increases as long as you successfully catch that species without catching anything else.

As the combo grows, it provides several benefits such as:

* <mark style="color:orange;">**Higher shiny odds**</mark> for that species
* **Guaranteed Perfect IVs** on that species
* **Additional Experience** upon capture of that species

The combo breaks if:

* You **catch a different species** of Pokemon
* The Pokémon **flees**

### How to build a Catch Combo?

Building your catch combo is incredibly easy to do, as well as keeping track of it! After successfully catching a Pokémon, your combo will begin and be displayed in the Battle UI. Each additional successful catch will update your current combo, ensuring you are always informed of your progress.

<figure><img src="/files/RTVN4WR37wOTiBoSKpzt" alt=""><figcaption></figcaption></figure>

Be mindful though as your combo will reset if you catch a different Pokémon, or the wild Pokemon flees from a battle. When a combo is broken, you will no longer see the tracker within the Battle UI.

<figure><img src="/files/UQTp4OTzVOgVXcnTDL1U" alt=""><figcaption></figcaption></figure>

Catch Combos can be built up to a maximum of **41**. Reaching this cap means no further bonuses will be gained to spawn rates or shiny odds beyond that point.

### What are the benefits for having a Catch Combo?

As stated above, building a Catch Combo will not only increases the EXP Gained from these Pokemon, but will also significantly improves its shiny encounter chance. The increased spawn frequency can also be leveraged to hunt for desirable abilities or high IV combinations.&#x20;

Mastering this mechanic offers an excellent opportunity to earn Pokécoins on the server, as targeting high-demand Pokémon can prove both rewarding and profitable.

<figure><img src="/files/ChK33EyORUwMMi1G4VKZ" alt=""><figcaption><p>Dratini, Bagon and Gible</p></figcaption></figure>

### How does the shiny odds work for Catch Combo?

Catch Combos provide an additional and highly effective method for shiny hunting on the server, allowing players to target specific shiny Pokémon providing they are obtainable in the wild.

As your Catch Combo increases, your shiny odds for that specific Pokémon will gradually improve. These odds reach their maximum effectiveness at a combo of **31**, which represents the highest possible shiny chance. Maintaining the combo is crucial, however; if it is broken before a shiny is found, the chain must be rebuilt from the beginning.

At a maximum Catch Combo, shiny odds are dramatically improved from the standard **`1/4096`** to an impressive **`1/1862`!** And can be boosted further by utilising shiny lures.

Once the **Shiny Charm** is implemented on the server, it will further enhance these odds so stay tuned for more information on its release and effects.

<figure><img src="/files/dckj61RMoMNWzigIFlSN" alt=""><figcaption><p>Ralts</p></figcaption></figure>


# Complete Overview to NPC Gyms

Here you'll find everything you need to know about Gyms on MMO Realms, how they work, what rewards they can give and so much more!

**Contents**

1. [What are NPC Gyms?](#what-are-npc-gyms)
2. [What are Regions?](#what-are-regions)
3. [How can I start battling in Gyms?](#how-can-i-start-gyms)
4. [What are Clauses?](#what-are-clauses)
   1. [Examples of Clauses](#examples-of-clauses)
5. [What Gyms are Available and their Rewards?](#what-gyms-are-available-and-their-rewards)
   1. [REGIONS](#regions)
      * [Kanto](#kanto)
6. [Frequently Asked Questions \[FAQ\] ](#frequently-asked-questions-faq)

***

## What are NPC Gyms?

Inspired by the mainline Pokémon games, this system lets you challenge powerful Cobblemon trainers and earn amazing rewards as you climb the ranks. Each Gym Battle grows tougher than the last, pushing your strategy and team-building skills to new heights.&#x20;

Every gym specializes in a specific type, giving players a chance to study, prepare, and craft the perfect team before stepping into the arena. Each of these trainers is inspired by iconic Gym Leaders from the main Pokémon series, letting you relive classic battles with a fresh Cobblemon twist. The only leader who does not specialize in a single type is the Champion. Their team features Pokémon of diverse types, making this battle the ultimate test of your skill and strategy.

<figure><img src="/files/1RnZH7KKoJRLruu0Ysfx" alt="" width="407"><figcaption><p>Brock, First Gym Leader of Kanto</p></figcaption></figure>

Defeat all 8 Gym Leaders, and you’ll unlock the ultimate challenge: the Elite Four—four incredibly strong trainers who will test your limits—followed by the Champion, the final battle that brings everything you’ve learned to the ultimate showdown.

## What are Regions?

Did you think defeating the Champion meant you were done with gym challenges? Think again! We’ve introduced an all-new multi-region Gym Challenge system designed to keep players engaged long after their first victory. Each region brings a fresh set of Gyms to defeat, with every new area ramping up the difficulty even further.

Staying true to the main series, these challenges are inspired by the regions you know and love—starting in Kanto and Johto and eventually making your way to the most modern regions like Paldea. These Gym sets will roll out in batches as they’re fully implemented, launching first with Kanto and followed by Johto at a later date.

Every new region adds a tougher layer of difficulty, pushing even the most seasoned players to their limits… and yes, that includes bending traditional rules like the level cap.

This evolving system is designed to keep you busy, challenged, and fully immersed in the server—alongside all the other exciting features we have in store!

## How can I start battling in Gyms?

Getting right into Gyms is incredibly easy and you can do this by just running the command `/gym` or `/gyms` which will bring up a GUI showing you all available regions on the server.

<figure><img src="/files/asj2KNLnkLlDc702nMy2" alt=""><figcaption><p>GUI for Gyms</p></figcaption></figure>

From there, simply select the **Kanto** region and choose the **Rock** Gym to be teleported directly to the appropriate location. Please note that additional Gyms will only become visible once you have completed the preceding one in the sequence. \[ *For example, in order to challenge Lt. Surge, you must first defeat the initial two Gyms.* ]

<figure><img src="/files/Lwdk4Dz4cdQTzIuLnKBs" alt=""><figcaption><p>GUI for Kanto Region</p></figcaption></figure>

Once you have selected a Gym, you will be teleported to the designated area where the Gym Leader can be found. Simply make your way to the Gym Leader and `Right Click` to initiate an interactive dialogue. These prompts will guide you toward the option to challenge the Gym Leader. Upon accepting, the battle will commence, where you will have the opportunity to either claim victory or suffer defeat—unless you choose to forfeit early.

<figure><img src="/files/uQEoUETsnYgskBxVN4sc" alt=""><figcaption></figcaption></figure>

Should you lose, you may attempt the battle again at any time once your party is prepared after a 10 minute cooldown when fighting the first 8 gyms of a region, with 20 minutes for the elite four and champion. If you emerge victorious, the next Gym in the progression will unlock, allowing you to continue your journey. This process repeats as you work your way through all Gyms and the Elite Four within the region.&#x20;

After conquering every Leader in the region, you will gain access to the next available region as it is released on the server, advancing your adventure even further.

## What are Clauses?

Gym Clauses are special rules used in Gym Battles to ensure fair and balanced challenges for players to enjoy. These clauses define what Pokémon, items, moves, or battle mechanics are allowed during a gym match, helping to maintain a consistent difficulty and prevent unfair strategies.

<figure><img src="/files/iH25zzDNDp2raP4UgWkE" alt=""><figcaption><p>Ex of Text given if failing a Clause.</p></figcaption></figure>

### Examples of Clauses

Here you can find examples of clauses that you'll see when competing in NPC Gyms on the server.

<details>

<summary>Examples of Clauses</summary>

#### **1. Level Cap Clause**

Challengers must not exceed the gym’s designated level cap. This ensures gym difficulty stays consistent and prevents over-levelling to brute-force battles.

#### **2. Species Clause**

Players cannot use two or more Pokémon of the same species on their team. This prevents duplicate-spam strategies and promotes more diverse teams.

#### **3. Item Clause**

Each held item may only be used once per team. For example, a player cannot have multiple Pokémon holding Leftovers. This increases strategy variety and prevents item stacking.

#### **4. Legendary / Mythical Clause**

Legendary, Mythical, or otherwise restricted Pokémon are not allowed unless specifically permitted by the gym. This preserves balance and prevents overpowering the challenge.

#### **5. Ability Clause**

Certain abilities (*e.g., Moody, Arena Trap, Shadow Tag, etc.*) may be banned if they create unfair stall or trapping tactics.

#### **6. Move Clause**

Specific moves may be banned if they trivialize gym fights, such as:

* OHKO moves (Sheer Cold, Fissure, Guillotine)
* Evasion-boosting moves (Double Team, Minimize)
* High stall moves (e.g., Baton Pass chains)

#### **7. Item Ban Clause**

Some items may be restricted for balance reasons, such as:

* Focus Sash
* Choice items
* Healing items in battle\
  These bans depend on the gym difficulty you want.

#### **8. Duplicate Pokémon Clause**

Players cannot use two Pokémon from the same evolutionary line (*e.g., two Charizards or a Charizard + Charmander*). This keeps gym battles varied.

#### **9. Sleep Clause**

Only one opposing Pokémon may be put to sleep at a time. This prevents sleep-spam strategies from making the fight unwinnable.

#### **10. Evasion Clause**

Moves that increase evasion or abilities that rely on evasion mechanics may be disallowed to prevent RNG-based strategies from dominating.&#x20;

#### **11. OHKO Clause**

All one-hit KO moves are banned to prevent instant win conditions.

#### **12. Freeze Clause**

Only one opposing Pokémon may be frozen at a time. While freeze is rarer in Cobblemon, some servers adopt this rule for fairness.

#### **13. Healing Clause**

Players may be restricted from using healing items mid-battle to prevent long stall tactics.

#### **14. Weather Clause**

Abusive or permanent weather strategies (*like infinite Sandstorm or Rain setups*) may be limited depending on the gym’s design.

#### **15. Hazard Clause**

Some gyms ban multiple layers of entry hazards (Spikes/Stealth Rock/Toxic Spikes) if they trivialize the challenge.

#### **16.** Smash Pass Clause

Pokémon that have both of the moves Shell Smash and Baton Pass cannot be used.

#### **17.** Bag Clause

Players cannot use items from their bags during battle, such as medicine. Held items can still be used by Pokémon.

</details>

## What Gyms are available and their Rewards?

Here you find all about the Gyms on the server, including their specific rewards, clauses and so on.

### REGIONS

#### Kanto

<details>

<summary><strong>Gym #1 - Brock [ ROCK ]</strong></summary>

<div align="left"><figure><img src="/files/8804tNwgikfssaMnO2Os" alt="" width="272"><figcaption><p>Brock</p></figcaption></figure></div>

#### Level Lock

**Gym Leader** is capped at `20`

**Player** is capped at `25`

#### POKEMON

**Glimmet**  &#x20;

Held Item: Focus Sash\
Ability: Toxic Debris\
Level: 20\
Tera Type: Rock\
EVs: 252 HP / 4 Def / 252 SpD\
Nature : Calm\
IVs: 0 Atk

**MOVES**

* Light Screen&#x20;
* Reflect&#x20;
* Spikes &#x20;
* Stealth Rock <br>

***

**Rockruff**&#x20;

Held Item: Air Balloon\
Ability: Keen Eye\
Level: 20\
Tera Type: Rock\
EVs: 252 HP / 252 Atk / 4 SpD\
Nature : Adamant

**MOVES**

* Stone Edge &#x20;
* Stomping Tantrum &#x20;
* Sucker Punch &#x20;
* Zen Headbutt  <br>

***

**Onix**&#x20;

Held Item: Eviolite\
Ability: Rock Head\
Level: 20\
Tera Type: Rock\
Shiny: Yes\
EVs: 236 HP / 236 Atk / 36 SpD\
Nature : Adamant

**MOVES**

* Rock Slide &#x20;
* Double-Edge&#x20;
* Curse &#x20;
* Swagger&#x20;

***

**Minior**

Held Item: Choice Band\
Ability: Shield's Down\
Level: 20\
Tera Type: Rock\
EVs: 4 HP / 252 Atk / 252 Spe\
Nature : Adamant

**MOVES**

* Iron Head &#x20;
* Rock Polish
* Rock Blast
* Acrobatics

***

#### CLAUSES

1. Baton Pass Clause
2. Evasion Moves Clause
3. Evasion Abilities Clause
4. OHKO Clause
5. Species Clause
6. Bag Clause
7. Smash Pass Clause

#### REWARDS

**FIRST TIME REWARDS**

• $12,000 PokeCoins\
• x1 Small EXP Candy\
• x3 Medium EXP Candies\
• Rock Gem\
• Hard Stone\
• EXP Share\
• x1 Charti Berry\
• Random Pokemon\
• Vote Crate Key\
• 5 Gems

**REPEAT REWARDS** \[`Every 24 Hours`]

• $2,000 PokeCoins\
• x1 Small XP Candy\
• x1 Charti Berry

</details>

<details>

<summary><strong>Gym #2 - Misty [ WATER ]</strong></summary>

<div align="left"><figure><img src="/files/HnWw1zJQJxCL7Y9pAd6g" alt="" width="246"><figcaption></figcaption></figure></div>

#### Level Lock

**Gym Leader** is capped at `40`

**Player** is capped at `45`

#### POKEMON

**Pelipper**  &#x20;

Held Item: Focus Sash\
Ability: Drizzle\
Level: 40\
Tera Type: Water\
EVs: 248 HP / 252 SpA / 8 SpD\
Nature : Modest\
IVs: 0 Atk

**MOVES**

* Tailwind
* Hurricane
* Weather Ball
* Feather Dance

***

**Golduck**

Held Item: Focus Sash\
Ability: Drizzle\
Level: 40\
Tera Type: Water\
EVs: 248 HP / 252 SpA / 8 SpD\
Nature : Modest\
IVs: 0 Atk

**MOVES**

* Ice Beam
* Focus Blast
* Psychic
* Surf

***

**Slowking**

Held Item: Leftovers\
Ability: Regenerator\
Level: 40\
Tera Type: Water\
Shiny: Yes\
EVs: 252 Hp / 252 SpA/ 4 SpD\
Nature : Modest\
IVs: 0 Atk

**MOVES**

* Calm Mind
* Psychic
* Light Screen
* Flamethrower

***

**Seaking**

Held Item: Assault Vest\
Ability: Swift Swim\
Level: 40\
Tera Type: Water\
EVs: 252 Atk / 4 SpD / 252 Spe\
Nature : Adamant

**MOVES**

* Megahorn
* Waterfall
* Double-Edge
* Drill Run

***

**Starmie**

Held Item: Expert Belt\
Ability: Analytic\
Level: 40\
Tera Type: Water\
Shiny: Yes\
EVs: 248 SpA / 8 SpD / 248 Spe\
Nature : Timid\
IVs: 0 Atk

**MOVES**

* Hydro Pump
* Psychic
* Signal Beam
* Ice Beam

***

#### CLAUSES

* Baton Pass Clause
* Evasion Moves Clause
* Evasion Abilities Clause
* OHKO Clause
* Species Clause
* Bag Clause
* Smash Pass Clause

#### REWARDS

**FIRST TIME REWARDS**

• $14,500 PokeCoins\
• x3 Small EXP Candy\
• x5 Medium EXP Candies\
• Water Gem\
• Mystic Water\
• Water Stone\
• x1 Passho Berry\
• Random Pokemon\
• Vote Crate Key\
• 5 Gems

**REPEAT REWARDS** \[`Every 24 Hours`]

• $2,500 PokeCoins\
• x3 Small XP Candy\
• x1 Passho Berry

</details>

<details>

<summary><strong>Gym #3 - Lt. Surge [ ELECTRIC ]</strong></summary>

<div align="left"><figure><img src="/files/vz6qGgEHtGQzP44VtqAi" alt="" width="230"><figcaption></figcaption></figure></div>

#### Level Lock

**Gym Leader** is capped at `60`

**Player** is capped at `65`

#### POKEMON

**Pinchurchin**

Held Item: Terrain Extender\
Ability: Electric Surge\
Level: 60\
Tera Type: Electric\
EVs: 252 HP / 252 Atk / 4 SpD\
Nature : Adamant

**MOVES**

* Zing Zang
* Poison Jab
* Memento
* Thunder Wave

***

**Magnezone**

Held Item: Assault Vest\
Ability: Analytic\
Level: 60\
Tera Type: Electric\
EVs: 248 HP / 8 Atk / 252 SpA\
Nature : Quiet

**MOVES**

* Flash Cannon
* Tri Attack
* Thunderbolt
* Heavy Slam

***

**Manectric**

Held Item: Leftovers\
Ability: Static\
Level: 60\
Tera Type: Electric\
EVs: 4 Atk / 252 SpA / 252 Spe\
Nature : Hasty

**MOVES**

* Swagger
* Flamethrower
* Rising Voltage
* Quick Attack

***

**Electivire**

Held Item: Life Orb\
Ability: Motor Drive\
Level: 60\
Tera Type: Electric\
EVs: 252 Atk / 4 SpD / 252 Spe\
Nature : Serious

**MOVES**

* Body Slam
* Bulk Up
* Earthquake
* Ice Punch

***

**Raichu**

Held Item: Air Balloon\
Ability: Static\
Level: 60\
EVs: 252 Atk / 4 SpD / 252 Spe\
Nature : Jolly

**MOVES**

* Fake Out
* Knock Off
* Volt Tackle
* Play Rough

***

**Vikavolt**

Held Item: Electric Seed\
Ability: Levitate\
Level: 60\
Shiny: Yes\
EVs: 252 HP / 252 SpA / 4 SpD\
Nature : Modest\
IVs: 0 Atk

**MOVES**

* Bug Buzz
* Energy Ball
* Thunderbolt
* Sticky Web

***

#### CLAUSES

* Baton Pass Clause
* Evasion Moves Clause
* Evasion Abilities Clause
* OHKO Clause
* Species Clause
* Bag Clause
* Smash Pass Clause

#### REWARDS

**FIRST TIME REWARDS**

• $17,000 PokeCoins\
• x1 Medium Candy\
• x1 Large EXP Candy\
• Electric Gem\
• Thunder Stone\
• Electirizer\
• x1 Wacan Berry\
• Random Pokemon\
• Vote Crate Key\
• 5 Gems

**REPEAT REWARDS** \[`Every 24 Hours`]

• $3,000 PokeCoins\
• x1 Medium Candy\
• x1 Wacan Berry

</details>

<details>

<summary><strong>Gym #4 - Erika [ GRASS ]</strong></summary>

<div align="left"><figure><img src="/files/IcthkkUrnsvbY3nKkgBU" alt="" width="225"><figcaption></figcaption></figure></div>

#### Level Lock

**Gym Leader** is capped at `80`

**Player** is capped at `85`

#### POKEMON

**Bellossom**

Held Item: Occa Berry\
Ability: Chlorophyll\
Level: 80\
Tera Type: Grass\
Shiny: Yes\
EVs: 252 HP / 4 SpA / 252 Spe\
Nature : Timid

**MOVES**

* Giga Drain
* Leech Seed
* Strength Sap
* Sunny Day

***

**Meowscarada**

Held Item: Choice Scarf\
Ability: Protean\
Level: 80\
Tera Type: Grass\
EVs: 4 HP / 252 Atk / 252 Spe  \
Nature : Jolly

**MOVES**

* Flower Trick
* Foul Play
* Play Rough
* Shadow Claw

***

**Arbolivia**

Held Item: Grassy Seed\
Ability: Seed Sower\
Level: 80\
Tera Type: Grass\
EVs: 248 HP / 252 SpA / 8 SpD\
Nature : Modest\
IVs: 0 Atk

**MOVES**

* Alluring Voice
* Earth Power
* Energy Ball
* Synthesis

***

**Tsareena**

Held Item: Life Orb\
Ability: Leaf Guard \
Level: 80  \
Tera Type: Grass\
EVs: EVs: 252 Atk / 4 SpD / 252 Spe\
Nature : Jolly

**MOVES**

* Knock Off
* Play Rough
* Power Whip
* U-turn

***

**Cradily**

Held Item: Leftovers\
Ability: Suction Cups\
Level: 80\
Tera Type: Rock\
EVs: 252 HP / 4 Atk / 252 SpD\
Nature : Careful

**MOVES**

* Rock Blast
* Sunny Day
* Toxic
* Recover

***

**Roserade**

Held Item: Choice Specs\
Ability: Technician\
Level: 80\
Tera Type: Grass\
Shiny: Yes\
EVs: 252 SpA / 4 SpD / 252 Spe\
Nature : Timid\
IVs: 0 Atk

**MOVES**

* Sludge Bomb
* Leaf Storm
* Weather Ball
* Hidden Power \[Water]

***

#### CLAUSES

* Baton Pass Clause
* Evasion Moves Clause
* Evasion Abilities Clause
* OHKO Clause
* Species Clause
* Bag Clause
* Smash Pass Clause

#### REWARDS

**FIRST TIME REWARDS**

• $18,500\
• x2 Medium EXP Candy\
• x2 Large EXP Candy\
• Grass Gem\
• Miracle Seed\
• Grassy Seed\
• Leaf Stone\
• x1 Rindo Berry\
• Random Berry\
• Random Mint\
• Random Pokemon\
• Vote Crate Key\
• 5 Gems

**REPEAT REWARDS** \[`Every 24 Hours`]

• $3,500 PokeCoins\
• x2 Medium EXP Candy\
• x1 Rindo Berry\
• x1 Random Berry

</details>

<details>

<summary><strong>Gym #5 - Koga [ POISON ]</strong></summary>

<div align="left"><figure><img src="/files/8syvlUSMkxwfZQ84a3Im" alt="" width="196"><figcaption></figcaption></figure></div>

#### Level Lock

**Gym Leader** is capped at `100`

**Player** is capped at `100`

#### POKEMON

**Ariados**

Held Item: Focus Sash\
Ability: Swarm\
Level: 100\
Tera Type: Bug\
EVs: 248 HP / 252 Atk / 8 SpD\
Nature : Adamant

**MOVES**

* Lunge
* Poison Jab
* Sticky Web
* Toxic Spikes

***

**Venomoth**

Held Item: Air Balloon\
Ability: Shield Dust\
Level: 100\
Tera Type: Bug\
EVs: 252 SpA / 4 SpD / 252 Spe  \
Nature : Modest\
IVs: 0 Atk

**MOVES**

* Air Slash
* Bug Buzz
* Quiver Dance
* Sludge Bomb

***

**Weezing**

Held Item: Payapa Berry\
Ability: Levitate\
Level: 100\
Tera Type: Poison\
EVs:  252 HP / 4 Atk / 80 SpA / 172 SpD\
Nature : Sassy

**MOVES**

* Clear Smog
* Dark Pulse
* Destiny Bond
* Explosion

***

**Crobat**

Held Item: Sharp Beak\
Ability: Infiltrator\
Level: 100\
Tera Type: Poison\
EVs: 252 HP / 252 Atk / 4 SpD\
Nature : Adamant

**MOVES**

* Brave Bird
* Super Fang
* Roost
* Leech Life

***

**Toxapex**

Held Item: Black Sludge\
Ability: Regenerator\
Level: 100\
Tera Type: Poison\
EVs: 252 HP / 252 Def / 4 SpA\
Nature : Bold\
IVs: 0 Atk

**MOVES**

* Recover
* Baneful Bunker
* Sludge Bomb
* Haze

***

**Muk \[ALOLA]**

Held Item: Assault Vest\
Ability: Poison Touch\
Level: 100\
Tera Type: Poison\
Shiny: Yes\
EVs: 252 HP / 252 Atk / 4 SpD\
Nature : Adamant

**MOVES**

* Body Slam
* Crunch
* Gunk Shot
* Drain Punch

***

#### CLAUSES

* Baton Pass Clause
* Evasion Moves Clause
* Evasion Abilities Clause
* OHKO Clause
* Species Clause
* Bag Clause
* Smash Pass Clause

#### REWARDS

**FIRST TIME REWARDS**

• $24,000\
• x3 Medium EXP Candy\
• x3 XL EXP Candy\
• Poison Gem\
• Black Sludge\
• Poison Barb\
• Toxic Orb\
• x1 Pecha Berry\
• x1 Antidote\
• Random Shiny Pokemon\
• Vote Crate Key\
• 10 Gems

**REPEAT REWARDS** \[`Every 24 Hours`]

• $4,000 PokeCoins\
• x3 Medium EXP Candy\
• x1 Pecha Berry\
• x1 Antidote

</details>

<details>

<summary><strong>Gym #6 - Sabrina [ PSYCHIC ]</strong></summary>

<div align="left"><figure><img src="/files/W9rvTqrUqKUlEuQS97iY" alt="" width="221"><figcaption></figcaption></figure></div>

#### Level Lock

**Gym Leader** is capped at `100`

**Player** is capped at `100`

#### POKEMON

**Mr. Mime**

Held Item: Rocky Helmet\
Ability: Filter\
Level: 100\
Tera Type: Psychic\
EVs: 252 HP / 124 Def / 132 SpD\
Nature : Calm\
IVs: 0 Atk

**MOVES**

* Reflect
* Light Screen
* Psychic
* Dazzling Gleam

***

**Slowking \[GALARIAN]**

Held Item: Leftovers\
Ability: Regenerator\
Level: 100\
Tera Type: Poison\
Shiny: Yes\
EVs: 252 HP / 252 SpA / 4 SpD\
Nature : Modest\
IVs: 0 Atk

**MOVES**

* Calm Mind
* Expanding Force
* Flamethrower
* Sludge Bomb

***

**Indeedee**

Held Item: Assault Vest\
Ability: Psychic Surge\
Level: 100\
Tera Type: Psychic\
EVs: 252 HP / 252 SpA / 4 SpD\
Nature : Quiet\
IVs: 0 Atk

**MOVES**

* Draining Kiss
* Expanding Force
* Shadow Ball
* Trick Room

***

**Farigiraf**

Held Item: Salac Berry\
Ability: Cud Chew\
Level: 100\
Tera Type: Normal\
EVs: 252 HP / 4 SpA / 252 SpD\
Nature : Calm\
IVs: 0 Atk

**MOVES**

* Substitute
* Expanding Force
* Nasty Plot
* Wish

***

**Gallade**

Held Item: Life Orb\
Ability: Sharpness\
Level: 100\
Tera Type: Psychic\
Shiny: Yes\
EVs: 252 Atk / 4 SpD / 252 Spe\
Nature : Jolly

**MOVES**

* Aqua Cutter
* Close Combat
* Night Slash
* Slash

***

**Latias**

Held Item: Soul Dew\
Ability: Levitate\
Level: 100\
EVs: 4 HP / 252 SpA / 252 Spe\
Nature : Timid\
IVs: 0 Atk

**MOVES**

* Draco Meteor
* Psychic
* Tailwind
* Shadow Ball

***

#### CLAUSES

* Baton Pass Clause
* Evasion Moves Clause
* Evasion Abilities Clause
* OHKO Clause
* Species Clause
* Bag Clause
* Smash Pass Clause

#### REWARDS

**FIRST TIME REWARDS**

• $35,000 PokeCoins\
• x3 Medium EXP Candy\
• x5 XL EXP Candy\
• Psychic Gem\
• Twisted Spoon\
• Psychic Seed\
• Wise Glasses\
• x1 Payapa Berry\
• Ability Capsule\
• Random Shiny Pokemon\
• Vote Crate Key\
• 10 Gems

**REPEAT REWARDS** \[`Every 24 Hours`]

• $5,000 PokeCoins\
• x3 Medium EXP Candy\
• Payapa Berry

</details>

<details>

<summary><strong>Gym #7 - Blaine [ FIRE ]</strong></summary>

<div align="left"><figure><img src="/files/24MlGhZa4ciQFpfYbZ6I" alt="" width="174"><figcaption></figcaption></figure></div>

#### Level Lock

**Gym Leader** is capped at `100`

**Player** is capped at `100`

#### POKEMON

**Torkoal**

Held Item: Leftovers \
Ability: Drought\
Level: 100\
Tera Type: Fire\
EVs: 252 HP / 252 SpA / 4 SpD\
Nature : Modest\
IVs: 0 Atk

**MOVES**

* Body Press
* Earth Power
* Fire Blast
* Solar Beam

***

**Blaziken**

Held Item: Focus Sash\
Ability: Speed Boost\
Level: 100\
Tera Type: Fire\
EVs: 252 Atk / 4 SpD / 252 Spe\
Nature : Adamant

**MOVES**

* Protect
* Blaze Kick
* Close Combat
* U-Turn

***

**Chandelure**

Held Item: Expert Belt\
Ability: Infiltrator\
Level: 100\
Tera Type: Ghost\
Shiny: Yes\
EVs: 252 SpA / 4 SpD / 252 Spe\
Nature : Timid\
IVs: 0 Atk

**MOVES**

* Flamethrower
* Hex
* Shadow Ball
* Will-O-Wisp

***

**Ceruledge**

Held Item: Charcoal\
Ability: Flash Fire\
Level: 100\
Tera Type: Fire\
EVs: 252 Atk / 4 SpD / 252 Spe\
Nature : Jolly

**MOVES**

* Bitter Blade
* Close Combat
* Shadow Claw
* Iron Head

***

**Ninetales**

Held Item: Air Balloon\
Ability: Drought\
Level: 100\
Tera Type: Fire\
EVs: 252 SpA / 4 SpD / 252 Spe\
Nature : Timid\
IVs: 0 Atk

**MOVES**

* Fire Blast
* Nasty Plot
* Solar Beam
* Pain Split

***

**Rotom \[HEAT]**

Held Item: Assault Vest\
Ability: Drought\
Level: 100\
Tera Type: Fire\
EVs: 252 SpA/ 4 SpD / 252 Spe\
Nature : Timid\
IVs: 0 Atk

**MOVES**

* Discharge
* Overheat
* Shadow Ball
* Dark Pulse

***

#### CLAUSES

* Baton Pass Clause
* Evasion Moves Clause
* Evasion Abilities Clause
* OHKO Clause
* Species Clause
* Bag Clause
* Smash Pass Clause

#### REWARDS

**FIRST TIME REWARDS**

• $45,000 PokeCoins\
• x3 Medium EXP Candy\
• x5 XL EXP Candy\
• Fire Gem\
• Magmarizer\
• Fire Stone\
• Charcoal Stick\
• Flame Orb\
• Burn Heal\
• Occa Berry\
• Random Shiny Pokemon\
• Vote Crate Key\
• 15 Gems

**REPEAT REWARDS** \[`Every 24 Hours`]

• $5,000 PokeCoins\
• x3 Medium EXP Candy\
• Burn Heal\
• Occa Berry

</details>

<details>

<summary><strong>Gym #8 - Giovanni [ GROUND ]</strong></summary>

<div align="left"><figure><img src="/files/AwOKKgLww63zn9KhiroJ" alt="" width="166"><figcaption></figcaption></figure></div>

#### Level Lock

**Gym Leader** is capped at `100`

**Player** is capped at `100`

#### POKEMON

**Gastrodon**

Held Item: Rindo Berry\
Ability: Storm Drain\
Level: 100\
Tera Type: Water\
Shiny: Yes\
EVs: 252 HP / 4 SpA / 252 SpD\
Nature : Calm\
IVs: 0 Atk

**MOVES**

* Spikes
* Stealth Rock
* Sandstorm
* Surf

***

**Excadrill**

Held Item: Air Balloon\
Ability: Sand Force\
Level: 100\
Tera Type: Ground\
EVs: 4 HP / 252 Atk / 252 Spe\
Nature : Jolly

**MOVES**

* Earthquake
* Iron Head
* Rock Slide
* X-Scissor

***

**Sandslash**

Held Item: Life Orb\
Ability: Sand Rush\
Level: 100\
Tera Type: Ground\
EVs: 252 Atk / 4 SpD / 252 Spe\
Nature : Adamant

**MOVES**

* Double-Edge
* Earthquake
* Poison Jab
* Knock Off

***

**Rhydon**

Held Item: Choice Band\
Ability: Reckless\
Level: 100\
Tera Type: Ground\
EVs: 252 HP / 252 Atk / 4 SpD\
Nature : Adamant

**MOVES**

* Double-Edge
* Earthquake
* Heat Crash
* Ice Punch

***

**Gliscor**

Held Item: Yache Berry\
Ability: Sand Veil\
Level: 100\
Tera Type: Ground\
Shiny: Yes\
EVs: 252 Atk / 4 SpD / 252 Spe\
Nature : Jolly

**MOVES**

* Crabhammer
* Earthquake
* X-Scissor
* Acrobatics

***

**Donphan**

Held Item: Passho Berry\
Ability: Sand Veil\
Level: 100\
Tera Type: Ground\
EVs: 248 HP / 252 Atk / 8 SpD\
Nature : Adamant

**MOVES**

* Earthquake
* Gunk Shot
* Head Smash
* Body Press

***

#### CLAUSES

* Baton Pass Clause
* Evasion Moves Clause
* OHKO Clause
* Species Clause
* Bag Clause
* Smash Pass Clause

#### REWARDS

**FIRST TIME REWARDS**

• $50,000 PokeCoins\
• x1 Large EXP Candy\
• x5 XL EXP Candy\
• Ground Gem\
• Soft Sand\
• x1 Full Heal\
• x3 Full Restore\
• x1 Master Ball\
• x1 Ability Capsule\
• x1 PP UP\
• x1 Random Berry\
• Random Shiny Pokemon\
• Vote Crate Key\
• 15 Gems

**REPEAT REWARDS** \[`Every 24 Hours`]

• $5,000 PokeCoins\
• x1 Large EXP Candy\
• x1 Full Heal\
• x1 Random Berry

</details>

<details>

<summary><strong>Elite Four #1 - Lorelei [ ICE ]</strong></summary>

<div align="left"><figure><img src="/files/I2YFSpimkcTajguhI3A4" alt="" width="193"><figcaption></figcaption></figure></div>

#### Level Lock

**Gym Leader** is capped at `100`

**Player** is capped at `95`

#### POKEMON

**Ninetales-Alola**

Held Item: Icy Rock\
Ability: Snow Warning\
Level: 100\
Tera Type: Ice\
EVs: 252 SpA / 4 SpD / 252 Spe\
Nature : Timid\
IVs: 0 Atk

**MOVES**

* Snowscape
* Ice Beam
* Moonblast
* Chilling Water

***

**Lapras**

Held Item: Shuca Berry\
Ability: Water Absorb\
Level: 100\
Tera Type: Water\
EVs: 248 HP / 252 SpA / 8 SpD\
Nature : Modest\
IVs: 0 Atk

**MOVES**

* Ice Beam
* Surf
* Thunderbolt
* Reflect

***

**Cloyster**

Held Item: Loaded Dice\
Ability: Skill Link\
Level: 100\
Tera Type: Water\
EVs: 252 Atk / 4 SpD / 252 Spe\
Nature : Adamant

**MOVES**

* Ice Shard
* Icicle Spear
* Shell Smash
* Waterfall

***

**Dewgong**

Held Item: Leftovers\
Ability: Ice Body\
Level: 100\
Tera Type: Water\
EVs: 252 HP / 4 Atk / 252 SpA\
Nature : Quiet

**MOVES**

* Ice Beam
* Hydro Pump
* Fake Out
* Flip Turn

***

**Articuno**

Held Item: Charti Berry\
Ability: Snow Cloak\
Level: 100\
Tera Type: Ice\
EVs: 252 SpA / 4 SpD / 252 Spe\
Nature : Timid\
IVs: 0 Atk

**MOVES**

* Air Slash
* Freeze-Dry
* Ice Beam
* Tailwind

***

**Abomasnow \[MEGA]**

Held Item: Abomasite\
Ability: Snow Warning\
Level: 100\
Tera Type: Grass\
Shiny: Yes\
EVs: 248 HP / 252 Atk / 8 SpD\
Nature : Adamant

**MOVES**

* Aurora Veil
* Earthquake
* Wood Hammer
* Ice Spinner

***

#### CLAUSES

* Baton Pass Clause
* Evasion Moves Clause
* OHKO Clause
* Species Clause
* Bag Clause

#### REWARDS

**FIRST TIME REWARDS**

• $55,000 PokeCoins\
• x1 Large EXP Candy\
• x5 XL EXP Candy\
• Ice Gem\
• Never-Melt Ice\
• Ice Stone\
• Icy Rock\
• Random Plushy\
• Random Shiny Pokemon\
• Vote Crate Key\
• Basic Crate Key\
• 25 Gems

**REPEAT REWARDS** \[`Every 24 Hours`]

• $5,000 PokeCoins\
• x1 Large EXP Candy\
• x1 Vote Crate Key

</details>

<details>

<summary><strong>Elite Four #2 - Bruno [ FIGHTING ]</strong></summary>

<div align="left"><figure><img src="/files/QVmTfsYuI7ZhqOtZjLgo" alt="" width="201"><figcaption></figcaption></figure></div>

#### Level Lock

**Gym Leader** is capped at `100`

**Player** is capped at `95`

#### POKEMON

**Flamigo**

Held Item: Focus Sash\
Ability: Scrappy\
Level: 100\
Tera Type: Flying\
EVs: 252 Atk / 4 SpD / 252 Spe\
Nature : Jolly

**MOVES**

* Tailwind
* U-Turn
* Roost
* Close Combat

***

**Annihilape**

Held Item: Life Orb\
Ability: Defiant\
Level: 100\
Tera Type: Fighting\
Shiny: Yes\
EVs: 252 Atk / 4 SpD / 252 Spe\
Nature : Jolly

**MOVES**

* Rage Fist
* Close Combat
* Night Slash
* Seed Bomb

***

**Great Tusk**

Held Item: Booster Energy\
Ability: Protosynthesis\
Level: 100\
Tera Type: Fighting\
EVs: 252 HP / 252 Atk / 4 SpD\
Nature : Adamant

**MOVES**

* Bulk Up
* Body Press
* Earthquake
* Supercell Slam

***

**Hitmontop**

Held Item: Assault Vest\
Ability: Technician\
Level: 100\
Tera Type: Fighting\
EVs: 248 HP / 252 Atk / 8 SpD\
Nature : Adamant

**MOVES**

* Mach Punch
* Fake Out
* Earthquake
* Close Combat

***

**Machamp**

Held Item: Choice Band\
Ability: No Guard\
Level: 100\
Tera Type: Fighting\
Shiny: Yes\
EVs: 248 HP / 252 Atk / 8 SpD\
Nature : Adamant

**MOVES**

* Stone Edge
* Dynamic Punch
* Earthquake
* Power-Up Punch

***

**Blaziken \[MEGA]**

Held Item: Blazikenite\
Ability: Speed Boost\
Level: 100\
Tera Type: Fire\
EVs: 252 Atk / 4 SpD / 252 Spe\
Nature : Adamant

**MOVES**

* Protect
* Close Combat
* Thunder Punch
* Poison Jab

***

#### CLAUSES

* Baton Pass Clause
* Evasion Moves Clause
* Evasion Abilities Clause
* OHKO Clause
* Species Clause
* Bag Clause
* Smash Pass Clause

#### REWARDS

**FIRST TIME REWARDS**

• $55,000 PokeCoins\
• x1 Large EXP Candy\
• x5 XL EXP Candy\
• Fighting Gem\
• Black Belt\
• Expert Belt\
• Punching Glove\
• Macho Brace\
• Random Plushy\
• Random Shiny Pokemon\
• Vote Crate Key\
• Basic Crate Key\
• 25 Gems

**REPEAT REWARDS** \[`Every 24 Hours`]

• $5,000 PokeCoins\
• x1 Large EXP Candy\
• x1 Vote Crate Key

</details>

<details>

<summary><strong>Elite Four #3 - Agatha [ GHOST ]</strong></summary>

<div align="left"><figure><img src="/files/VXvOjFHdAdhRpHXW0d18" alt="" width="208"><figcaption></figcaption></figure></div>

#### Level Lock

**Gym Leader** is capped at `100`

**Player** is capped at `95`

#### POKEMON

**Spritiomb**

Held Item: Leftovers\
Ability: Pressure\
Level: 100\
Tera Type: Ghost\
Shiny: Yes\
EVs: 248 HP / 8 SpA / 252 SpD\
Nature : Calm\
IVs: 0 Atk

**MOVES**

* Disable
* Foul Play
* Will-O-Wisp
* Hex

***

**Annihilape**

Held Item: Leftovers\
Ability: Defiant\
Level: 100\
Tera Type: Fighting\
EVs: 248 HP / 252 Atk / 8 SpD\
Nature : Adamant

**MOVES**

* Bulk Up
* Rage Fist
* Drain Punch
* Facade

***

**Gholdengo**

Held Item: Assault Vest\
Ability: Good as Gold\
Level: 100\
Tera Type: Ghost\
EVs: 4 HP / 252 SpA / 252 Spe\
Nature : Timid\
IVs: 0 Atk

**MOVES**

* Focus Blast
* Make it Rain
* Power Gem
* Shadow Ball

***

**Dragapult**

Held Item: Life Orb\
Ability: Infiltrator\
Level: 100\
Tera Type: Ghost\
EVs: 4 HP / 252 Atk / 252 Spe\
Nature : Jolly

**MOVES**

* Dragon Darts
* Outrage
* Phantom Force
* Sucker Punch

***

**Typhlosion-Hisui**

Held Item: Passho Berry\
Ability: Blaze\
Level: 100\
Tera Type: Fire\
EVs: 252 SpA / 4 SpD / 252 Spe\
Nature : Timid\
IVs: 0 Atk

**MOVES**

* Eruption
* Flamethrower
* Infernal Parade
* Shadow Ball

***

**Gengar \[MEGA]**

Held Item: Gengarite\
Ability: Shadow Tag\
Level: 100\
Tera Type: Ghost\
Shiny: Yes\
EVs: 252 SpA / 4 SpD / 252 Spe\
Nature : Timid\
IVs: 0 Atk

**MOVES**

* Hex
* Shadow Ball
* Sludge Bomb
* Thunderbolt

***

#### CLAUSES

* Baton Pass Clause
* Evasion Moves Clause
* Evasion Abilities Clause
* OHKO Clause
* Species Clause
* Bag Clause
* Smash Pass Clause

#### REWARDS

**FIRST TIME REWARDS**

• $55,000 PokeCoins\
• x1 Large EXP Candy\
• x5 XL EXP Candy\
• Ghost Gem\
• Spell Tag\
• Reaper Cloth\
• Dusk Stone\
• Life Orb\
• Random Plushy\
• Random Shiny Pokemon\
• Vote Crate Key\
• Basic Crate Key\
• 25 Gems

**REPEAT REWARDS** \[`Every 24 Hours`]

• $5,000 PokeCoins\
• x1 Large EXP Candy\
• x1 Vote Crate Key

</details>

<details>

<summary><strong>Elite Four #4 - Lance [ DRAGON ]</strong></summary>

<div align="left"><figure><img src="/files/Xhx0rrXth4wKVFdFGFro" alt="" width="208"><figcaption></figcaption></figure></div>

#### Level Lock

**Gym Leader** is capped at `100`

**Player** is capped at `95`

#### POKEMON

**Latios**

Held Item: Soul Dew\
Ability: Levitate\
Level: 100\
Tera Type: Dragon\
EVs: 4 HP / 252 SpA / 252 Spe\
Nature : Timid\
IVs: 0 Atk

**MOVES**

* Calm Mind
* Draco Meteor
* Ice Beam
* Luster Purge

***

**Hydrapple**

Held Item: Leftovers\
Ability: Regenerator\
Level: 100\
Tera Type: Grass\
Shiny: Yes\
EVs: 252 HP / 252 SpA / 4 SpD\
Nature : Modest\
IVs: 0 Atk

**MOVES**

* Fickle Beam
* Energy Ball
* Earth Power
* Reflect

***

**Dragonite**

Held Item: Assault Vest\
Ability: Multiscale\
Level: 100\
Tera Type: Dragon\
Shiny: Yes\
EVs: 252 HP / 252 Atk / 4 SpD\
Nature : Adamant

**MOVES**

* Earthquake
* Iron Head
* Outrage
* Thunder Punch

***

**Kingdra**

Held Item: Scope Lens\
Ability: Sniper\
Level: 100\
Tera Type: Water\
EVs: 252 SpA / 4 SpD / 252 Spe\
Nature : Timid

**MOVES**

* Draco Meteor
* Ice Beam
* Surf
* Ice Beam

***

**Dragonite**

Held Item: Choice Specs\
Ability: Multiscale\
Level: 100\
Tera Type: Dragon\
EVs: 252 SpA / 4 SpD / 252 Spe\
Nature : Timid\
IVs: 0 Atk

**MOVES**

* Air Slash
* Draco Meteor
* Fire Blast
* Thunderbolt

***

**Charizard \[MEGA-X]**

Held Item: Charizardite X\
Ability: Tough Claws\
Level: 100\
Tera Type: Fire\
EVs: 252 Atk / 4 SpD / 252 Spe\
Nature : Jolly

**MOVES**

* Flare Blitz
* Outrage
* Swords Dance
* Shadow Claw

***

#### CLAUSES

* Baton Pass Clause
* Evasion Moves Clause
* Evasion Ability Clause
* OHKO Clause
* Bag Clause
* Smash Pass Clause

#### REWARDS

**FIRST TIME REWARDS**

• $55,000 PokeCoins\
• x1 Large EXP Candy\
• x5 XL EXP Candy\
• Dragon Gem\
• Dragon Fang\
• Dragon Scale\
• Random Mint\
• x1 Ability Capsule\
• Random Plushy\
• Random Shiny Pokemon\
• Vote Crate Key\
• Basic Crate Key\
• 25 Gems

**REPEAT REWARDS** \[`Every 24 Hours`]

• $5,000 PokeCoins\
• x1 Large EXP Candy\
• x1 Vote Crate Key

</details>

<details>

<summary><strong>Champion - Blue</strong> </summary>

<div align="left"><figure><img src="/files/zYXI1jMh8wG7Lp70tNRT" alt="" width="244"><figcaption></figcaption></figure></div>

#### Level Lock

**Gym Leader** is capped at `100`

**Player** is capped at `90`

#### POKEMON

**Pidgeot**

Held Item: Focus Sash\
Ability: Tangled Feet\
Level: 100\
Tera Type: Normal\
EVs: 252 Atk / 4 SpD / 252 Spe\
Nature : Jolly

**MOVES**

* Tailwind
* Steel Wing
* Giga Impact
* Feather Dance

***

**Alakazam**

Held Item: Choice Specs\
Ability: Magic Guard\
Level: 100\
Tera Type: Psychic\
EVs: 252 SpA / 4 SpD / 252 Spe\
Nature : Timid\
IVs: 0 Atk

**MOVES**

* Psychic
* Protect
* Shadow Ball
* Dazzling Gleam

***

**Arcanine**

Held Item: N/A\
Ability: Intimidate\
Level: 100\
Tera Type: Fire\
EVs: 252 Atk / 4 SpD / 252 Spe\
Nature : Jolly

**MOVES**

* Close Conbat
* Extreme Speed
* Flare Blitz
* Play Rough

***

**Exeggutor**

Held Item: Occa Berry\
Ability: Harvest\
Level: 100\
Tera Type: Grass\
EVs: 252 HP / 252 SpA / 4 SpD\
Nature : Modest\
IVs: 0 Atk

**MOVES**

* Energy Ball
* Giga Drain
* Psychic
* Sludge Bomb

***

**Gyarados**

Held Item: Life Orb\
Ability: Moxie\
Level: 100\
Tera Type: Water\
EVs: 252 Atk / 4 SpD / 252 Spe\
Nature : Jolly

**MOVES**

* Crunch
* Outrage
* Waterfall
* Iron Head

***

**Venusaur \[MEGA]**

Held Item: Venusarite\
Ability: Thick Fat\
Level: 100\
Tera Type: Grass\
Shiny: Yes\
EVs: 252 SpA / 4 SpD / 252 Spe\
Nature : Timid\
IVs: 0 Atk

**MOVES**

* Leech Seed
* Synthesis
* Sludge Bomb
* Energy Ball

***

#### CLAUSES

* Baton Pass Clause
* Evasion Moves Clause
* Evasion Abilities Clause
* OHKO Clause
* Species Clause
* Bag Clause
* Smash Pass Clause

#### REWARDS

**FIRST TIME REWARDS**

• $70,000 PokeCoins\
• x1 Large EXP Candy\
• x5 XL EXP Candy\
• Random Evolution Stone\
• Random Mint\
• Ability Patch\
• PP Max\
• Random Evolution Stone\
• Random Shiny Plushy\
• Random Legendary Pokemon\
• Vote Crate Key\
• Premium Crate Key\
• 50 Gems

**REPEAT REWARDS** \[`Every 24 Hours`]

• $5,000 PokeCoins\
• x1 Large EXP Candy\
• x1 Vote Crate Key\
• x1 Random Evolution Stone

</details>

## Frequently Asked Questions \[FAQ]&#x20;

**Q \~ Are we able to re-battle the Gym Leaders to earn more rewards?**

**A \~** *After defeating the Gym Leader for the first time, every 24 hours you'll be able to defeat them again for more rewards which are listed above.*

**Q \~ Are there badges you can collect from the Gyms?**

**A \~** *Yes! You can access all of the Gyms you have currently collected by running the command `/`*`badge` or `/badges` respectively.

**Q \~ When will the next Region be made available on the server?**

**A \~** *Ultimately we have no ETA for when the next region will be accessible on the server. Be sure to keep an eye on our Discord server for any updates that is made to Gyms.*

**Q \~ Can I apply to be a Gym Leader?**

**A \~** *Since these Gyms are NPC, no players can apply to become a Gym Leader. We will eventually be adding a brand new system to benefit players who wish to become Gym Leaders with their own badge and rewards.*

**Q \~ Why are the Gyms NPC and not actual players?**

**A \~** *We designed these gyms in question so that any player is able to have access to the gym at any time they wish, and to show some progression they can work towards which isn't something that fully works with player run gyms since it's dependant on how active they are, how often they'll be doing battles since they'll still be playing, we then have to keep track to make sure it's all fair for everyone involved plus so many more reasons. This is why we plan to have systems for both to keep everyone happy, with both giving badges for players to get but progression will remain locked into NPC Gyms.*

**Q \~ I can only see one Gym when trying to attempt the gyms, where are the rest?**

**A \~** *New gyms will start appearing once you have completed the previous one. This means once you defeat the Pewter City, the GUI will now start showing Cerulean City gym and so on.*

**Q \~ Can multiple people fight the gym at the same time?**

**A \~** *Unfortunately this isn't possible at this time since we're still actively testing that for it to work since it was creating a lot of bugs when we had it implemented. Once we have it ready, this will be pushed into the server.*

**Q \~ I attempted a gym but it said I failed a clause, how do I fix this?**

**A \~** *If it's stating that you have failed a clause \[i.e. Baton Pass Clause] then one of your pokemon has an ability or move that is banned within that specific Gym. You can find out more information about* [*Clauses here*](#examples-of-clauses) *as well as the specifics for each* [*Gym clauses*](#what-gyms-are-available-and-their-rewards) *here.*

**Q \~ Do all gyms have the same clauses?**

**A \~** *No, each gym generally will have their own set of clauses. While a fair few gyms will be the same as one another, there will be specific gyms that have different clauses set for them.*

**Q \~ Why are my Pokemon levels being decreased in Gym battles?**

**A \~** *We have added level locks meaning your pokemon will be levelled to the specific lock of the Gym you are fighting. This is to encourage a bit of challenge, and encourage players to try different strategies in order to win!*


# Complete Overview of Fishing

This guide will go over everything you need to know about Fishing within Cobblemon on MMO Realms.

**Contents**

1. [Intro to Fishing in Pixelmon](#intro-to-fishing-in-pixelmon)
2. [How to start Fishing in Pixelmon](#how-to-start-fishing-in-pixelmon)
   1. [Poke Rods](#poke-rods)
3. [What Can you fish for?](#what-can-you-fish-for)
   1. [Fishing for Pokemon](#fishing-for-pokemon)
   2. [Fishing for Items](#fishing-for-items)
   3. [Jump Forms](#magikarp-jump-forms)

***

## Intro to Fishing in Pixelmon

**Fishing** functions similarly to Vanilla Minecraft in that you cast your rod, wait for the bobber to be pulled underwater, then reel in your catch.

However, unlike Vanilla gameplay, Pixelmon introduces exclusive Fishing Rods that allow you to obtain Pokemon and special items.&#x20;

<figure><img src="/files/0IB5kd9pt6hMregOBT3o" alt=""><figcaption><p>Fishing in Pixelmon</p></figcaption></figure>

## How to start Fishing in Pixelmon

To start fishing in Pixelmon there are a few things you need to collect and craft. These are as follows:

### Poke Rods

The primary item required for fishing is a **Poke Rod.** These can be easily crafted or obtained in a variety of ways. Generally the better the rod you are using to fish, the better quality Pokemon and Items you will reel in.

> **Old Rod**<br>
>
> ![](/files/xT33IlXRAHjfYn0GGytj)\
> Crafting Recipe: 3x Sticks, 1x String, 1x Poke Ball\
> \
> Alternatively this can be found as naturally generated loot within boat like structures.

> **Good Rod**\
> \
> ![](/files/JNsVLMchvMPjcYxEUSWr)\
> Crafting Recipe: 3x Blaze Rods, 1x String, 1x Ultra Ball\
> \
> Alternatively this can be found as naturally generated loot within boat like structures.

> **Super Rod**\
> \
> ![](/files/bVUy9LQj8fsiHRNbx8ou)\
> This cannot be crafted, but can be found as a **5% chance when reeling in an item** within any body of water whilst using a **Good Rod**.\
> \
> Alternatively this can be found as naturally generated loot within boat like structures.

## What Can you fish for?

You'll be able to not only fish for Pokemon, but also Pixelmon items. There is a chance for you to obtain nothing from a reel even if you did all the steps correctly, so please keep that in mind.

### Fishing for Pokemon

You'll be able to find Pokemon through fishing within Pixelmon, with some of them being only obtainable via fishing.&#x20;

### Fishing for Items

You can fish for unique items with Poke Rods too.

For a full list of everything that can be reeled in when fishing, regardless of biome or rod rarity, please refer to the official Pixelmon Mod Wiki.

{% embed url="<https://pixelmonmod.com/wiki/Fishing>" %}

### Jump Forms

JUMP! Textures are an alternative colour palette available for a variety of Pokemon that can be found through fishing. For a chance to reel in such a special Pokemon, you must have your **fishing rod appraised** by visiting an **Old Fisherman**.

Upon doing so, you will be able to encounter the JUMP! Textures for the following Pokemon.

* Magikarp
* Shellos
* Clobbopus
* Spheal
* Slugma

JUMP! Textures are retained through evolution, with the exception of Spheal, Slugma, and special Feebas or Magmar styled palettes for any Pokemon.

<figure><img src="/files/sdIect5zM1Be81eouwri" alt=""><figcaption><p>Examples of select JUMP! Textures</p></figcaption></figure>

For a full list of available jump textures, please again refer to the [Mod Wiki](https://pixelmonmod.com/wiki/Jump#Slugma).&#x20;


# Complete Guide to Mega Pokemon

Here you will find out everything you need to know about Mega Pokemon on the server from what they are, how to obtain and more.

**Contents**

1. [What are Mega Pokemon?](#what-are-mega-pokemon)
   1. [List of all current Mega Pokemon](#list-of-all-current-mega-pokemon)
2. [How to obtain Mega Pokemon on the server](#how-can-i-obtain-mega-pokemon-on-the-server)
3. [How to obtain a Mega Bracelet](#how-to-obtain-a-mega-bracelet)
4. [How do I Mega Evolve Pokemon?](#how-do-i-mega-evolve-pokemon)
   1. [Mega Evolving within a Battle](#mega-evolving-within-a-battle)
5. [Frequently Asked Questions \[FAQ\] ](#frequently-asked-questions-faq)

***

## What are Mega Pokemon?

<figure><img src="/files/WqklEy4IaZWgpJeBauGN" alt="" width="492"><figcaption><p>Mega Evolution Animation</p></figcaption></figure>

**Mega Pokémon** are special forms of certain Pokémon introduced in *Pokémon X and Y* for the Nintendo 3DS. By using a specific item called a **Mega Stone** unique to each Pokémon, a Pokémon can temporarily undergo **Mega Evolution** during battle, transforming into a more powerful form for the duration of that battle.

Mega Evolution boosts a Pokémon’s **stats**, sometimes changes its **ability**, and can even alter its **type**, giving it strategic advantages in combat. Once the battle ends, the Pokémon reverts to its normal form.&#x20;

You can Mega Evolve your pokemon outside of battles so that you can stroll around on the server with your favourite Mega Pokemon at your side!

### List of all current Mega Pokemon

Here you will find a complete **list of all Mega Pokemon** from the main series, their respective **Mega Stones** along with their current **availability** on the server.

<table data-card-size="large" data-view="cards"><thead><tr><th></th><th data-hidden data-card-target data-type="content-ref"></th><th data-hidden data-card-cover data-type="image">Cover image</th></tr></thead><tbody><tr><td>🌘 <strong>Mega Pokemon</strong></td><td><a href="/pages/TWjlk2YOq6rrzEl6krPW">/pages/TWjlk2YOq6rrzEl6krPW</a></td><td><a href="/files/YNURSHk9HGTmKfJIcxI1">/files/YNURSHk9HGTmKfJIcxI1</a></td></tr></tbody></table>

## How to obtain Mega Pokemon on the server

This is where our system diverges from the traditional Pokémon games, introducing a **Minecraft-inspired twist**.

Randomly within the wilderness, you will come across **Boss Pokemon**, being stronger alternatives that offer a range of rewards upon being defeated. One type of boss you may encounter are **Mega Evolved Boss Pokemon**, being one of any species which can naturally spawn in the biome you are currently standing in.

{% hint style="info" %}
**Mega Evolved Boss Pokemon** will only spawn as epic, legendary and ultimate rarities.
{% endhint %}

<figure><img src="/files/k2a5Ljp9Q3WDGrkyUfFH" alt="" width="483"><figcaption><p>Legendary Mega Venusaur Boss</p></figcaption></figure>

After defeating a **Mega Evolved Boss Pokemon** for the first time, they are guaranteed to drop their corresponding **Mega Stone**, which encourages players to explore different biomes in an attempt to track down their desired species. If you have already defeated a given species before, their dropped **Mega Stone** will no longer be guaranteed, and will instead have an equal chance to be **any** **Mega Stone**.

<figure><img src="/files/wLxe3NiAWUvPp3LENuIf" alt="" width="563"><figcaption><p>Mega Evolution Boss Drops</p></figcaption></figure>

## How to obtain a Mega Keystone

Obtaining a **Mega Keystone** is a straightforward process. It is granted to the user upon reaching 30% Dex completion, after which is will be permanently accessible through the users inventory, on the left side besides their Pokemon.

<figure><img src="/files/gJ7geQ6C90hKok2E6e1o" alt="" width="135"><figcaption><p>Mega Keystone in Inventory</p></figcaption></figure>

From here, you will be able to select how you want this **Mega Keystone** displayed on your user, which a range of cosmetic options available. Experiment with the options to find your own style!

<figure><img src="/files/L3JgGL2y0KTSqELRUew6" alt="" width="563"><figcaption><p>Mega Keystone Cosmetic Options</p></figcaption></figure>

With these steps completed, you are now ready to begin Mega Evolving your Pokemon in battle.

## How do I Mega Evolve Pokemon?

Once you have obtained the appropriate **Mega Stone** and a **Mega Keystone**, you’re ready to begin Mega Evolving your Pokemon and the process is both simple and exciting!

To get started, you can Mega Evolve Pokemon outside of battle, with your **Mega Keystone** equipped, **`Right Click`** the Pokemon whilst holding the **Mega Stone** in your hand to trigger its Mega Evolution animation.

<figure><img src="/files/WqklEy4IaZWgpJeBauGN" alt="" width="492"><figcaption><p>Mega Evolution Animation</p></figcaption></figure>

If you wish to Mega Evolve a different Pokémon in your party, just repeat this process by **`Right Clicking`** the desired Pokémon with the **Mega Stone**. You are able to have multiple **Mega Pokemon** at once through this method.

### Mega Evolving within a Battle

Mega Evolution during battles functions slightly differently from the standard method. To begin, ensure that your Pokemon is holding its corresponding **Mega Stone** and that you have your **Mega Keystone** equipped.

Once these requirements are met, enter a battle and select **Fight**. On the battle screen, a new **Mega Evolution icon** will appear. You may activate this option alongside your chosen move for that turn. When selected, your Pokemon will Mega Evolve and execute the selected move simultaneously.

Your Pokemon will remain in its Mega Evolved form until either the opposing Pokemon is defeated or your Pokemon is knocked out. Following these steps will allow you to effectively utilize Mega Evolution in battle.

<figure><img src="/files/Fc8efq8HnEV7TRdf9n7C" alt="" width="563"><figcaption><p>Mega Option via Battle Menu</p></figcaption></figure>

## Frequently Asked Questions \[FAQ]&#x20;

**Q \~ Do I need to download a extra mod in order to access the Megas?**

**A \~** *No! The only mod needed for the server is for Pixelmon, after that any content pushed into the server will not require any mod to be installed. Megas by nature are already integrated into the official mod.*

**Q \~ Are we able to use Mega Pokemon within gym battles?**

**A \~** *Yes, we have no clause against this currently so you're free to use Mega's within Gyms. In the future Gyms will also include Mega Pokemon you will have to fight for extra challenge!*

**Q \~ Do Mega Pokemon have their own shiny palletes?**

**A \~** *All mega pokemon will have their own unique Shiny Skin like within the main series games.*

**Q \~ Can we have more than one Mega Pokemon active at a time?**

**A \~** *Yes, but only outside of battles. Within battles you will be restricted to a single mega pokemon.*

**Q \~ Are every single Mega Pokemon live in the server including ZA and it's DLC Megas?**

**A \~** *No, many of the ZA Megas are still not yet obtainable in-game. This functionality is being introduced by the mod creators themselves, meaning we must remain patient for them to be added in future mod updates. However all past Megas are already available.*

**Q \~ Are there any custom Mega Pokemon in the server?**

**A \~** *At this time we have no plans to introduce any custom mega pokemon into the server. We will look into this in the future once we have left BETA and going off player feedback, but yeah currently we have no custom Mega Pokemon in the server.*

**Q \~ Can I access the Mega Bracelet recipe within JEI?**

**A \~** *No, the Mega Keystone is not a physical item you posses in your inventory, and instead lives within the gimmicks menu by the side of your Pokemon. Due to this you cannot pass a Mega Keystone to other users to use either.*

**Q \~ Can you ride on Mega Pokemon and if so which ones?**

**A \~** *Yes you're able to ride on Mega Pokemon assuming the normal form of that pokemon is already rideable. This includes the following Pokemon:*

> Abomasnow, Absol, Aerodactyl, Aggron, Alakazam, Altaria, Audino, Blastoise, Blaziken, Camerupt, Charizard, Garchomp, Gengar, Glalie, Gyarados, Heracross, Houndoom, Kangaskhan, Latias, Latios, Lucario, Manectric, Metagross, Mewtwo, Pidgeot, Pinsir, Rayquaza, Salamence, Sceptile, Scizor, Sharpedo, Slowbro, Steelix, Swampert, Tyranitar, Venusaur

**Q \~ Is there a Mega Stone for Rayquaza? How do I mega evolve Rayquaza?**

**A \~** *Rayquaza is the only Mega Pokemon that does not need a Mega Stone in order to mega evolve, although you will need to have the move Dragon Ascent on the Rayquaza in order to be able to mega evolve it. Once you have Rayquaza with Dragon Ascent, you can mega evolve it like any other general pokemon with the same restrictions.*


# Mega Pokemon

Here is a list of all current Mega Pokemon from the main series including if it's obtainable on the Cobblemon server.

**Contents**

1. [MEGA POKEMON](#mega-pokemon)
2. [PRIMAL REVERSION](#primal-reversion)

***

#### MEGA POKEMON

As of now, there is currently **51 different pokemon** that have the ability to **Mega Evolve \[54&#x20;*****different forms*****]** released within the main series of Pokemon Games. This includes a whopping **53 mega stones** for you to collect. Here is a list of all of them currently alongside their availability.

{% hint style="warning" %}
Please note that not all current Mega Pokemon are available yet. Any Pokemon listed below without images or an ability is **unavailable**.
{% endhint %}

<table><thead><tr><th width="137" align="center" valign="middle">Pokemon</th><th width="151" align="center">Typing</th><th width="141.5" align="center">Stone</th><th width="235" align="center">Benefits</th></tr></thead><tbody><tr><td align="center" valign="middle"><p><img src="/files/qfHLlOmzIK9jvk71IQI4" alt="" data-size="original"></p><p><strong>Venusaur</strong></p></td><td align="center">Grass/Poison</td><td align="center"><p><img src="/files/f6R38yx5zwdHiljfSlBP" alt="" data-size="original"></p><p>Venusaurite</p></td><td align="center"><p>Gains 18 in <strong>Attack</strong>, 40 in <strong>Defense</strong>, 22 in <strong>Sp. Atk</strong> and 20 in <strong>Sp. Def</strong>.</p><p></p><p> Gains the Ability <strong>Thick Fat</strong>.</p></td></tr><tr><td align="center" valign="middle"><p><img src="/files/NCe99583aYtpLKdR2cng" alt="" data-size="original"></p><p><strong>Charizard X</strong></p></td><td align="center">Fire/Dragon</td><td align="center"><p><img src="/files/07ddXVknx0NdQrzfGY1l" alt="" data-size="original"></p><p>Charizardite X</p></td><td align="center"><p>Gains 46 in <strong>Attack</strong>, 33 in <strong>Defense</strong> and 21 in <strong>Sp. Atk.</strong> </p><p>Gains the Ability <strong>Tough Claws</strong>.</p></td></tr><tr><td align="center" valign="middle"><p><img src="/files/wVkN3WgMJ2UTQtDQ8Lxf" alt="" data-size="original"></p><p><strong>Charizard Y</strong></p></td><td align="center">Fire/Flying</td><td align="center"><p><img src="/files/aD0BQEzsX45m2oena5a7" alt="" data-size="original"></p><p>Charizardite Y</p></td><td align="center"><p>Gains 20 in <strong>Attack</strong>, 50 in <strong>Sp. Atk</strong> and 30 in <strong>Sp. Def</strong>.</p><p></p><p> Gains the Ability <strong>Drought</strong>.</p></td></tr><tr><td align="center" valign="middle"><p><img src="/files/d7XrFbZ24ljnilS9xNLn" alt="" data-size="original"></p><p><strong>Blastoise</strong></p></td><td align="center">Water</td><td align="center"><p><img src="/files/JH6PbFHSzynFEcSe61eU" alt="" data-size="original"></p><p>Blastoisinite</p></td><td align="center"><p>Gains 20 in <strong>Attack</strong>, 20 in <strong>Defense</strong>, 50 in <strong>Sp. Atk</strong> and 10 in <strong>Sp. Def</strong>.</p><p></p><p> Gains the Ability <strong>Mega Launcher</strong>.</p></td></tr><tr><td align="center" valign="middle"><p><img src="/files/8b31r4GPzWC08SlFAGtW" alt="" data-size="original"></p><p><strong>Beedrill</strong></p></td><td align="center">Bug/Poison</td><td align="center"><p><img src="/files/IhEiMqDQA0WHcA8jI0rs" alt="" data-size="original"></p><p>Beedrillite</p></td><td align="center">Gains 60 in <strong>Attack</strong> and 70 in <strong>Speed</strong>. Loses 30 in <strong>Sp. Atk</strong>.<br><br>Gains the Ability <strong>Adaptibility</strong>.</td></tr><tr><td align="center" valign="middle"><p><img src="/files/w43TxMFDuusguBD2qEFy" alt="" data-size="original"></p><p><strong>Pidgeot</strong></p></td><td align="center">Normal/Flying</td><td align="center"><p><img src="/files/nmGch4WsB5md81hWUiS4" alt="" data-size="original"></p><p>Pidgeotite</p></td><td align="center">Gains 5 in <strong>Defence</strong>, 65 in <strong>Sp. Atk</strong>, 10 in <strong>Sp. Def</strong> and 20 in <strong>Speed</strong>.<br><br>Gains the Ability <strong>No Guard</strong>.</td></tr><tr><td align="center" valign="middle"><p><img src="/files/i6WmTT4NKNxBBrToO8CC" alt="" data-size="original"></p><p><strong>Raichu X</strong></p></td><td align="center">Electric</td><td align="center"><p><img src="/files/P4E9p3lCwqB4hyIywT6d" alt="" data-size="original"></p><p>Raichunite X</p></td><td align="center">Gains 45 in <strong>Attack</strong>, 40 in <strong>Defence</strong> and 15 in <strong>Sp. Def</strong>.<br><br>Gains the Ability <strong>Lightning Rod</strong>.</td></tr><tr><td align="center" valign="middle"><p><img src="/files/LpX36wPZeY7ehEPF6mRK" alt="" data-size="original"></p><p><strong>Raichu Y</strong></p></td><td align="center">Electric</td><td align="center"><p><img src="/files/6rf5NBXzYS4rVbEnDVhk" alt="" data-size="original"></p><p>Raichunite Y</p></td><td align="center">Gains 10 in <strong>Attack</strong>, 70 in <strong>Sp. Atk</strong> and 20 in <strong>Speed</strong>.<br><br>Gains the Ability <strong>Lightning Rod</strong>.</td></tr><tr><td align="center" valign="middle"><p></p><p><strong>Clefable</strong></p></td><td align="center">Fairy/Flying</td><td align="center"><p></p><p>Clefablite</p></td><td align="center">Gains 10 in <strong>Attack</strong>, 20 in <strong>Defence</strong>, 40 in <strong>Sp. Atk</strong>, 20 in <strong>Sp. Def</strong> and 10 in <strong>Speed</strong>.<br><br>Gains the Ability <strong>#</strong>.</td></tr><tr><td align="center" valign="middle"><p><img src="/files/EG2zhbjug8FDRqqiblz8" alt="" data-size="original"></p><p><strong>Alakazam</strong></p></td><td align="center">Psychic</td><td align="center"><p><img src="/files/zKJDFif2sGF8srumVbAH" alt="" data-size="original"></p><p>Alakazite</p></td><td align="center"><p>Gains 20 in <strong>Defense</strong>, 40 in <strong>Sp. Atk,</strong> 10 in <strong>Sp. Def</strong> and 30 in <strong>Speed</strong>.</p><p></p><p> Gains the Ability <strong>Trace</strong>.</p></td></tr><tr><td align="center" valign="middle"><p></p><p><strong>Victreebel</strong></p></td><td align="center">Grass/Poison</td><td align="center"><p></p><p>Victreebeite</p></td><td align="center">Gains 20 in <strong>Attack</strong>, 20 in <strong>Defence</strong>, 30 in <strong>Sp. Atk</strong> and 20 in <strong>Sp. Def</strong>.<br><br>Gains the Ability <strong>#</strong>.</td></tr><tr><td align="center" valign="middle"><p><img src="/files/RMlevAoy7sHubfonptYc" alt="" data-size="original"></p><p><strong>Slowbro</strong></p></td><td align="center">Water/Psychic</td><td align="center"><p><img src="/files/qMW7Odai9yro5tk4Y7ef" alt="" data-size="original"></p><p>Slowbronite</p></td><td align="center">Gains 70 in <strong>Defence</strong> and 30 in <strong>Sp. Atk</strong>.<br><br>Gains the Ability <strong>Shell Armour</strong>.</td></tr><tr><td align="center" valign="middle"><p><img src="/files/X0yBpHCOBLcAVNueTpng" alt="" data-size="original"></p><p><strong>Gengar</strong></p></td><td align="center">Ghost/Poison</td><td align="center"><p><img src="/files/BbOuZ0eGdMV7zr5lbC1Q" alt="" data-size="original"></p><p>Gengarite</p></td><td align="center"><p>Gains 20 in <strong>Defense</strong>, 40 in <strong>Sp. Atk, 2</strong>0 in <strong>Sp. Def</strong> and 20 in <strong>Speed</strong>.</p><p></p><p> Gains the Ability <strong>Levitate</strong>.</p></td></tr><tr><td align="center" valign="middle"><p><img src="/files/52heEQY3ZWK03ilITyEX" alt="" data-size="original"></p><p><strong>Kangaskhan</strong></p></td><td align="center">Normal</td><td align="center"><p><img src="/files/eF7P4OMOHnVTsbrYEYW9" alt="" data-size="original"></p><p>Kangaskhanite</p></td><td align="center"><p>Gains 30 in <strong>Attack</strong>, 20 in <strong>Defense</strong>, 20 in <strong>Sp. Atk,</strong> 20 in <strong>Sp. Def</strong> and 10 in <strong>Speed</strong>.</p><p></p><p> Gains the Ability <strong>Parental Bond</strong>.</p></td></tr><tr><td align="center" valign="middle"><p><img src="/files/quJr7jBDnxqB9z9Wahy4" alt="" data-size="original"></p><p><strong>Starmine</strong></p></td><td align="center">Water/Psychic</td><td align="center"><p><img src="/files/RNC89aNml2hFtZtX2zd2" alt="" data-size="original"></p><p>Starminite</p></td><td align="center">Gains 65 in <strong>Attack</strong>, 20 in <strong>Defence</strong>, 30 in <strong>Sp. Atk</strong>, 20 in <strong>Sp. Def</strong> and 5 in <strong>Speed</strong>.<br><br>Gains the Ability <strong>Analytic</strong>.</td></tr><tr><td align="center" valign="middle"><p><img src="/files/gD8g972Uf7oLmOxr8a5w" alt="" data-size="original"></p><p><strong>Pinsir</strong></p></td><td align="center">Bug/Flying</td><td align="center"><p><img src="/files/2oDnMxNiYsY3M5DsjMtu" alt="" data-size="original"></p><p>Pinsirite</p></td><td align="center"><p>Gains 30 in <strong>Attack</strong>, 20 in <strong>Defense</strong>, 10 in <strong>Sp. Atk,</strong> 20 in <strong>Sp. Def</strong> and 20 in <strong>Speed</strong>.</p><p></p><p> Gains the Ability <strong>Aerilate</strong>.</p></td></tr><tr><td align="center" valign="middle"><p><img src="/files/6akit8XJm2GvCon6WujB" alt="" data-size="original"></p><p><strong>Gyarados</strong></p></td><td align="center">Water/Dark</td><td align="center"><p><img src="/files/JFkrEpO2YkecY1HIfDAH" alt="" data-size="original"></p><p>Gyaradosite</p></td><td align="center"><p>Gains 30 in <strong>Attack</strong>, 30 in <strong>Defense</strong>, 10 in <strong>Sp. Atk</strong> and 30 in <strong>Sp. Def.</strong></p><p></p><p> Gains the Ability <strong>Mold Breaker</strong>.</p></td></tr><tr><td align="center" valign="middle"><p><img src="/files/iwQMDrz5CEcylxGzmLNN" alt="" data-size="original"></p><p><strong>Aerodactyl</strong></p></td><td align="center">Rock/Flying</td><td align="center"><p><img src="/files/o5grEPZfxsZO4a6jXt1v" alt="" data-size="original"></p><p>Aerodactylite</p></td><td align="center"><p>Gains 30 in <strong>Attack</strong>, 20 in <strong>Defense</strong>, 10 in <strong>Sp. Atk,</strong> 20 in <strong>Sp. Def</strong> and 20 in <strong>Speed.</strong></p><p></p><p> Gains the Ability <strong>Tough Claws</strong>.</p></td></tr><tr><td align="center" valign="middle"><p><img src="/files/mRc6HrfbQVkJZo1vzXz7" alt="" data-size="original"></p><p><strong>Dragonite</strong></p></td><td align="center">Dragon/Flying</td><td align="center"><p><img src="/files/2coNqPgsC0JToyunoJ4d" alt="" data-size="original"></p><p>Dragoninite</p></td><td align="center">Gains 20 in <strong>Defence</strong>, 45 in <strong>Sp. Atk</strong>, 25 in <strong>Sp. Def</strong> and 20 in <strong>Speed</strong>. Loses 10 in <strong>Attack</strong>.<br><br>Gains the Ability <strong>Multiscale</strong>.</td></tr><tr><td align="center" valign="middle"><p><img src="/files/YyB4PIRD1JaTO1bQjiiT" alt="" data-size="original"></p><p><strong>Mewtwo X</strong></p></td><td align="center">Psychic/Fighting</td><td align="center"><p><img src="/files/yI9oKwusR6yIEfMvFbi6" alt="" data-size="original"></p><p>Mewtwonite X</p></td><td align="center"><p>Gains 80 in <strong>Attack</strong>, 10 in <strong>Defense</strong> and <strong>1</strong>0 in <strong>Sp. Def.</strong></p><p></p><p> Gains the Ability <strong>Steadfast</strong>.</p></td></tr><tr><td align="center" valign="middle"><p><img src="/files/rsRoO78wyK8W6a2dcPjc" alt="" data-size="original"></p><p><strong>Mewtwo Y</strong></p></td><td align="center">Psychic</td><td align="center"><p><img src="/files/i05QjVf70bcD0OFqYAmd" alt="" data-size="original"></p><p>Mewtwonite Y</p></td><td align="center"><p>Gains 40 in <strong>Attack</strong>, 40 in <strong>Sp. Atk,</strong> 30 in <strong>Sp. Def,</strong> 10 in <strong>Speed</strong> and loses 20 in <strong>Defense.</strong></p><p></p><p> Gains the Ability <strong>Insomnia</strong>.</p></td></tr><tr><td align="center" valign="middle"><p></p><p><strong>Meganium</strong></p></td><td align="center">Grass/Fairy</td><td align="center"><p></p><p>Meganiumite</p></td><td align="center">Gains 10 in <strong>Attack</strong>, 15 in <strong>Defence</strong>, 60 in <strong>Sp. Atk</strong> and 15 in <strong>Sp. Def</strong>.<br><br>Gains the Ability #<strong>l</strong>.</td></tr><tr><td align="center" valign="middle"><p></p><p><strong>Feraligatr</strong></p></td><td align="center">Water/Dragon</td><td align="center"><p></p><p>Feraligite</p></td><td align="center">Gains 55 in <strong>Attack</strong>, 25 in <strong>Defence</strong>, 10 in <strong>Sp. Atk</strong> and 10 in <strong>Sp. Def</strong>.<br><br>Gains the Ability <strong>#</strong>.</td></tr><tr><td align="center" valign="middle"><p><img src="/files/0gZI5o90RLOux9JT0Lw1" alt="" data-size="original"></p><p><strong>Ampharos</strong></p></td><td align="center">Electric/Dragon</td><td align="center"><p><img src="/files/z7xW57zJEnoJky2x4Xyx" alt="" data-size="original"></p><p>Ampharosite</p></td><td align="center"><p>Gains 20 in <strong>Attack</strong>, 10 in <strong>Defense</strong>, 50 in <strong>Sp. Atk,</strong> 20 in <strong>Sp. Def</strong> and loses 10 in <strong>Speed.</strong></p><p></p><p> Gains the Ability <strong>Mold Breaker</strong>.</p></td></tr><tr><td align="center" valign="middle"><p><img src="/files/BpxDcfOZZk34JPEuXyin" alt="" data-size="original"></p><p><strong>Steelix</strong></p></td><td align="center">Steel/Ground</td><td align="center"><p><img src="/files/bqgh8vq0Ye88onLfTuE3" alt="" data-size="original"></p><p>Steelixite</p></td><td align="center">Gains 40 in <strong>Attack</strong>, 30 in <strong>Defence</strong> and 30 in <strong>Sp. Def</strong>.<br><br>Gains the Ability <strong>Sand Force</strong>.</td></tr><tr><td align="center" valign="middle"><p><img src="/files/htAhui3DPIC2iTwPJxYc" alt="" data-size="original"></p><p><strong>Scizor</strong></p></td><td align="center">Bug/Steel</td><td align="center"><p><img src="/files/IJWdiDId1CewwlJJLuWa" alt="" data-size="original"></p><p>Scizorite</p></td><td align="center"><p>Gains 20 in <strong>Attack</strong>, 40 in <strong>Defense</strong>, 10 in <strong>Sp. Atk,</strong> 20 in <strong>Sp. Def</strong> and 10 in <strong>Speed.</strong></p><p></p><p> Gains the Ability <strong>Technician</strong>.</p></td></tr><tr><td align="center" valign="middle"><p><img src="/files/sBHjiLaqdTdvpSF7YwRB" alt="" data-size="original"></p><p><strong>Heracross</strong></p></td><td align="center">Bug/Fighting</td><td align="center"><p><img src="/files/nl0GFS4FctYiAjFjkXCE" alt="" data-size="original"></p><p>Heracronite</p></td><td align="center"><p>Gains 60 in <strong>Attack</strong>, 40 in <strong>Defense</strong>, <strong>1</strong>0 in <strong>Sp. Def</strong> and loses 10 in <strong>Speed.</strong></p><p></p><p> Gains the Ability <strong>Skill Link</strong>.</p></td></tr><tr><td align="center" valign="middle"><p></p><p><strong>Skarmory</strong></p></td><td align="center">Steel/Flying</td><td align="center"><p></p><p>Skarmorite</p></td><td align="center">Gains 60 in <strong>Attack</strong>, 30 in <strong>Sp. Def</strong> and 40 in <strong>Speed</strong>. Loses 30 in <strong>Defence</strong>.<br><br>Gains the Ability <strong>#</strong>.</td></tr><tr><td align="center" valign="middle"><p><img src="/files/TX6I07424Zys9VVF5C5B" alt="" data-size="original"></p><p><strong>Houndoom</strong></p></td><td align="center">Dark/Fire</td><td align="center"><p><img src="/files/4XyL36MFRew8d925G4FA" alt="" data-size="original"></p><p>Houndoominite</p></td><td align="center"><p>Gains 40 in <strong>Defense</strong>, 30 in <strong>Sp. Atk,</strong> 10 in <strong>Sp. Def</strong> and 20 in <strong>Speed.</strong></p><p></p><p> Gains the Ability <strong>Solar Power</strong>.</p></td></tr><tr><td align="center" valign="middle"><p><img src="/files/wn0QtOAU3XRdhFqJ6qBH" alt="" data-size="original"></p><p><strong>Tyranitar</strong></p></td><td align="center">Rock/Dark</td><td align="center"><p><img src="/files/q35ADN5HwiZ4kUUVaeqC" alt="" data-size="original"></p><p>Tyranitarite</p></td><td align="center"><p>Gains 30 in <strong>Attack</strong>, 40 in <strong>Defense</strong>, 20 in <strong>Sp. Def</strong> and 10 in <strong>Speed.</strong></p><p></p><p> Gains the Ability <strong>Sand Stream</strong>.</p></td></tr><tr><td align="center" valign="middle"><p><img src="/files/4iUQsFbjJ1edb9adZPB0" alt="" data-size="original"></p><p><strong>Sceptile</strong></p></td><td align="center">Grass/Dragon</td><td align="center"><p><img src="/files/uQvVaLo8n15h4cy2HsSJ" alt="" data-size="original"></p><p>Sceptilite</p></td><td align="center">Gains 25 in <strong>Attack</strong>, 10 in <strong>Defence</strong>, 40 in <strong>Sp. Atk</strong> and 25 in <strong>Speed</strong>.<br><br>Gains the Ability <strong>Lightning Rod</strong>.</td></tr><tr><td align="center" valign="middle"><p><img src="/files/ssl89pKagE4US1whqvE7" alt="" data-size="original"></p><p><strong>Blaziken</strong></p></td><td align="center">Fire/Fighting</td><td align="center"><p><img src="/files/9Umv442MrUSTCGvD4xuC" alt="" data-size="original"></p><p>Blazikenite</p></td><td align="center"><p>Gains 40 in <strong>Attack</strong>, 10 in <strong>Defense</strong>, 20 in <strong>Sp. Atk</strong>, 10 in <strong>Sp. Def</strong> and 20 in <strong>Speed.</strong></p><p></p><p> Gains the Ability <strong>Speed Boost</strong>.</p></td></tr><tr><td align="center" valign="middle"><p><img src="/files/1zE4Xkzns0AMrzxlb3zc" alt="" data-size="original"></p><p><strong>Swampert</strong></p></td><td align="center">Water/Ground</td><td align="center"><p><img src="/files/9vQI8GbntlJJLGNogmuf" alt="" data-size="original"></p><p>Swampertite</p></td><td align="center">Gains 40 in <strong>Attack</strong>, 20 in <strong>Defence</strong>, 10 in <strong>Sp. Atk</strong>, 20 in <strong>Sp. Def</strong> and 10 in <strong>Speed</strong>.<br><br>Gains the Ability <strong>Swift Swim</strong>.</td></tr><tr><td align="center" valign="middle"><p><img src="/files/I4loWf8restodS4InOSy" alt="" data-size="original"></p><p><strong>Gardevoir</strong></p></td><td align="center">Psychic/Fairy</td><td align="center"><p><img src="/files/mRaI6Ln8vzyEJPzLOmFo" alt="" data-size="original"></p><p>Gardevoirite</p></td><td align="center"><p>Gains 20 in <strong>Attack</strong>, 40 in <strong>Sp. Atk</strong>, 20 in <strong>Sp. Def</strong> and 20 in <strong>Speed.</strong></p><p></p><p> Gains the Ability <strong>Pixilate</strong>.</p></td></tr><tr><td align="center" valign="middle"><p><img src="/files/Br47QW0ZNKtXof06qgLy" alt="" data-size="original"></p><p><strong>Sableye</strong></p></td><td align="center">Dark/Ghost</td><td align="center"><p><img src="/files/0upRqQR6iiyBtV8NMPZv" alt="" data-size="original"></p><p>Sablenite</p></td><td align="center">Gains 10 in <strong>Attack</strong>, 50 in <strong>Defence</strong>, 20 in <strong>Sp. Atk</strong> and 50 in <strong>Sp. Def</strong>. Loses 30 in <strong>Speed</strong>.<br><br>Gains the Ability <strong>Magic Bounce</strong>.</td></tr><tr><td align="center" valign="middle"><p><img src="/files/mjCfq6b6dUYfwIhJbM9B" alt="" data-size="original"></p><p><strong>Mawile</strong></p></td><td align="center">Steel/Fairy</td><td align="center"><p><img src="/files/6CgnOZLXhnuG4onGcVHv" alt="" data-size="original"></p><p>Mawilite</p></td><td align="center"><p>Gains 20 in <strong>Attack</strong>, 40 in <strong>Defense</strong> and 40 in <strong>Sp. Def.</strong></p><p></p><p> Gains the Ability <strong>Huge Power</strong>.</p></td></tr><tr><td align="center" valign="middle"><p><img src="/files/lPOQMRQULndxQkOZ1I9F" alt="" data-size="original"></p><p><strong>Aggron</strong></p></td><td align="center">Steel</td><td align="center"><img src="/files/OPQCpqHSDJNz5G5DKYzJ" alt=""><br>Aggronite</td><td align="center"><p>Gains 30 in <strong>Attack</strong>, 50 in <strong>Defense</strong> and 20 in <strong>Sp. Def.</strong></p><p></p><p> Gains the Ability <strong>Filter</strong>.</p></td></tr><tr><td align="center" valign="middle"><p><img src="/files/QtflFA1qtxIiPtmRz3dw" alt="" data-size="original"></p><p><strong>Medicham</strong></p></td><td align="center">Fighting/Psychic</td><td align="center"><img src="/files/fd93zeqhkTwtCMR6p2FF" alt=""><br>Medichamite</td><td align="center"><p>Gains 40 in <strong>Attack</strong>, 10 in <strong>Defense</strong>, 20 in <strong>Sp. Atk</strong>, 10 in <strong>Sp. Def</strong> and 20 in <strong>Speed.</strong></p><p></p><p> Gains the Ability <strong>Pure Power</strong>.</p></td></tr><tr><td align="center" valign="middle"><p><img src="/files/v6aBjtJnf9tpdIL6heIl" alt="" data-size="original"></p><p><strong>Manectric</strong></p></td><td align="center">Electric</td><td align="center"><p><img src="/files/7iqiFak5h4UX6SYvSGqe" alt="" data-size="original"></p><p>Manectite</p></td><td align="center"><p>Gains 20 in <strong>Defense</strong>, 30 in <strong>Sp. Atk</strong>, 20 in <strong>Sp. Def</strong> and 30 in <strong>Speed.</strong></p><p></p><p> Gains the Ability <strong>Intimidate</strong>.</p></td></tr><tr><td align="center" valign="middle"><p><img src="/files/Kn0rvAWmUQxxmCWzKRoj" alt="" data-size="original"></p><p><strong>Sharpedo</strong></p></td><td align="center">Water/Dark</td><td align="center"><p><img src="/files/Fvn882sBpcwMUz7LNnHF" alt="" data-size="original"></p><p>Sharpedonite</p></td><td align="center">Gains 20 in <strong>Attack</strong>, 30 in <strong>Defence</strong>, 15 in <strong>Sp. Atk</strong>, 25 in <strong>Sp. Def</strong> and 10 in <strong>Speed</strong>.<br><br>Gains the Ability <strong>Strong Jaw</strong>.</td></tr><tr><td align="center" valign="middle"><p><img src="/files/vVdlULYbeWYdw4mEnU91" alt="" data-size="original"></p><p><strong>Camerupt</strong></p></td><td align="center">Fire/Ground</td><td align="center"><p><img src="/files/FX1UiCMjd453gviGoZbV" alt="" data-size="original"></p><p>Cameruptite</p></td><td align="center">Gains 20 in <strong>Attack</strong>, 30 in <strong>Defence</strong>, 40 in <strong>Sp. Atk</strong> and 30 in <strong>Sp. Def</strong>. Loses 20 in Speed.<br><br>Gains the Ability <strong>Sheer Force</strong>.</td></tr><tr><td align="center" valign="middle"><p><img src="/files/ZxeQMDQRRuk9goxeYDFx" alt="" data-size="original"></p><p><strong>Altaria</strong></p></td><td align="center">Dragon/Fairy</td><td align="center"><p><img src="/files/auKAKNNBKWVN2NduAk1I" alt="" data-size="original"></p><p>Altarianite</p></td><td align="center">Gains 40 in <strong>Attack</strong>, 20 in <strong>Defence</strong> and 40 in <strong>Sp. Atk</strong>.<br><br>Gains the Ability <strong>Pixilate</strong>.</td></tr><tr><td align="center" valign="middle"><p><img src="/files/WBomnmWKArWmbbSXRtTH" alt="" data-size="original"></p><p><strong>Banette</strong></p></td><td align="center">Ghost</td><td align="center"><p><img src="/files/YBEIo6R0Ti46BqeFW3yO" alt="" data-size="original"></p><p>Banettite</p></td><td align="center"><p>Gains 50 in <strong>Attack</strong>, 10 in <strong>Defense</strong>, 10 in <strong>Sp. Atk</strong>, 20 in <strong>Sp. Def</strong> and 10 in <strong>Speed.</strong></p><p></p><p> Gains the Ability <strong>Prankster</strong>.</p></td></tr><tr><td align="center" valign="middle"><p></p><p><strong>Chimecho</strong></p></td><td align="center">Psychic/Steel</td><td align="center"><p></p><p>Chimechite</p></td><td align="center">Gains 30 <strong>Defence</strong>, 40 <strong>Sp. Atk</strong> and 30 <strong>Sp. Def</strong>.<br><br>Keeps the Ability <strong>#</strong>.</td></tr><tr><td align="center" valign="middle"><p><img src="/files/TzHB8AYEZzKfC6eMSfl2" alt="" data-size="original"></p><p><strong>Absol</strong></p></td><td align="center">Dark</td><td align="center"><p><img src="/files/OYC94D7nNiVnJY9NoFva" alt="" data-size="original"></p><p>Absolite</p></td><td align="center"><p>Gains 20 in <strong>Attack</strong>, 40 in <strong>Sp. Atk</strong> and 40 in <strong>Speed.</strong></p><p></p><p> Gains the Ability <strong>Magic Bounce</strong>.</p></td></tr><tr><td align="center" valign="middle"><p></p><p><strong>Absol Z</strong></p></td><td align="center">Dark/Ghost</td><td align="center"><br>Absolite Z</td><td align="center">Gains 24 in <strong>Attack</strong> and 76 in <strong>Speed.</strong><br><br>Gains the Ability <strong>#</strong>.</td></tr><tr><td align="center" valign="middle"><p><img src="/files/PgNAf1IpY5eFSXy7IIND" alt="" data-size="original"></p><p><strong>Glalie</strong></p></td><td align="center">Ice</td><td align="center"><p><img src="/files/BN4IQKj1d7mtudHDwCVw" alt="" data-size="original"></p><p>Glalitite</p></td><td align="center">Gains 40 in <strong>Attack</strong>, 40 in <strong>Sp. Atk</strong> and 20 in <strong>Speed</strong>.<br><br>Gains the Ability <strong>Refrigerate</strong>.</td></tr><tr><td align="center" valign="middle"><p><img src="/files/jkKcZ0IQyzVnPYY1iJBR" alt="" data-size="original"></p><p><strong>Salamence</strong></p></td><td align="center">Dragon/Flying</td><td align="center"><p><img src="/files/EEYnhJf2CPjLFRYOxVe7" alt="" data-size="original"></p><p>Salamencite</p></td><td align="center">Gains 10 in <strong>Attack</strong>, 50 in <strong>Defence</strong>, 10 in <strong>Sp. Atk</strong>, 10 in <strong>Sp. Def</strong> and 20 in Speed.<br><br>Gains the Ability <strong>Aerilate</strong>.</td></tr><tr><td align="center" valign="middle"><p><img src="/files/MIgXc6RK2iziJGUAd1mB" alt="" data-size="original"></p><p><strong>Metagross</strong></p></td><td align="center">Steel/Psychic</td><td align="center"><p><img src="/files/OCzWZQ1BX02P4xtqghqn" alt="" data-size="original"></p><p>Metagrossite</p></td><td align="center">Gains 10 in <strong>Attack</strong>, 20 in <strong>Defence</strong>, 10 in <strong>Sp. Atk</strong>, 20 in <strong>Sp. Def</strong> and 40 in <strong>Speed</strong>.<br><br>Gains the Ability <strong>Tough Claws</strong>.</td></tr><tr><td align="center" valign="middle"><p><img src="/files/RekEVNgDlOM91SBZWsXY" alt="" data-size="original"></p><p><strong>Latias</strong></p></td><td align="center">Dragon/Psychic</td><td align="center"><p><img src="/files/9NXo153CwMiAMG4qgjZY" alt="" data-size="original"></p><p>Latiasite</p></td><td align="center">Gains 20 in <strong>Attack</strong>, 30 in <strong>Defense</strong>, 30 in <strong>Sp. Atk</strong> and 20 in <strong>Sp. Def.</strong><br><br>Keeps the Ability <strong>Levitate</strong>.</td></tr><tr><td align="center" valign="middle"><p><img src="/files/on6YcoKwsPAvL1tgN0k3" alt="" data-size="original"></p><p><strong>Latios</strong></p></td><td align="center">Dragon/Psychic</td><td align="center"><p><img src="/files/QOzT0DAZpwwxgUqoXR2s" alt="" data-size="original"></p><p>Latiosite</p></td><td align="center">Gains 40 in <strong>Attack</strong>, 20 in <strong>Defense</strong>, 30 in <strong>Sp. Atk</strong> and 10 in <strong>Sp. Def.</strong><br><br>Keeps the Ability <strong>Levitate</strong>.</td></tr><tr><td align="center" valign="middle"><p><img src="/files/F2bWygvWRDq3P1Wjcpv7" alt="" data-size="original"></p><p><strong>Rayquaza</strong></p></td><td align="center">Dragon/Flying</td><td align="center"><strong>N/A</strong></td><td align="center">Gains 30 in <strong>Attack</strong>, 10 in <strong>Defence</strong>, 30 in <strong>Sp. Atk</strong>, 10 in <strong>Sp. Def</strong> and 20 in <strong>Speed</strong>.<br><br>Gains the Ability <strong>Delta Stream</strong>.</td></tr><tr><td align="center" valign="middle"><p></p><p><strong>Staraptor</strong></p></td><td align="center">Fighting/Flying</td><td align="center"><p></p><p>Staraptite</p></td><td align="center">Gains 20 in <strong>Attack</strong>, 30 in <strong>Defence</strong>, 10 in <strong>Sp. Atk</strong>, 30 in <strong>Sp.Def</strong> and 10 in <strong>Speed</strong>.<br><br>Gains the Ability <strong>#</strong>.</td></tr><tr><td align="center" valign="middle"><p><img src="/files/1JNgDmtkyE3dJJnXsIEg" alt="" data-size="original"></p><p><strong>Lopunny</strong></p></td><td align="center">Normal/Fighting</td><td align="center"><p></p><p><img src="/files/ycgiD91eO18lXgeC3t0Z" alt="" data-size="original"></p><p>Lopunnite</p></td><td align="center">Gains 60 in <strong>Attack</strong>, 10 in <strong>Defence</strong> and 30 in <strong>Speed</strong>.<br><br>Gains the Ability <strong>Scrappy</strong>. </td></tr><tr><td align="center" valign="middle"><br><img src="/files/PdR1U83FVLt0QXJhswFB" alt=""><br><strong>Garchomp</strong></td><td align="center">Dragon/Ground</td><td align="center"><p><img src="/files/0cKCp3v8o2UfJFbR4mJJ" alt="" data-size="original"></p><p>Garchompite</p></td><td align="center"><p>Gains 40 in <strong>Attack</strong>, 20 in <strong>Defense</strong>, 40 in <strong>Sp. Atk</strong>, 10 in <strong>Sp. Def</strong> and loses 10 in <strong>Speed.</strong></p><p></p><p> Gains the Ability <strong>Sand Force</strong>.</p></td></tr><tr><td align="center" valign="middle"><p></p><p><strong>Garchomp Z</strong></p></td><td align="center">Dragon</td><td align="center"><p></p><p>Garchompite Z</p></td><td align="center">Gains 61 in <strong>Sp. Atk,</strong> 49 in <strong>Speed</strong> and loses 10 in <strong>Defense.</strong> <br><br>Gains the Ability <strong>#</strong>.</td></tr><tr><td align="center" valign="middle"><p><img src="/files/1ejtSRhHW08FiWySQeYM" alt="" data-size="original"></p><p><strong>Lucario</strong></p></td><td align="center">Fighting/Steel</td><td align="center"><p></p><p><img src="/files/sWN6U593pMWVcUv19dpa" alt="" data-size="original"></p><p>Lucarionite</p></td><td align="center"><p>Gains 35 in <strong>Attack</strong>, 18 in <strong>Defense</strong>, 25 in <strong>Sp. Atk</strong> and 22 in <strong>Speed.</strong></p><p></p><p> Gains the Ability <strong>Adaptability</strong>.</p></td></tr><tr><td align="center" valign="middle"><p></p><p><strong>Lucario Z</strong></p></td><td align="center">Fighting/Steel</td><td align="center"><p></p><p>Lucarionite Z</p></td><td align="center">Gains 49 in <strong>Sp. Atk,</strong> 61 in <strong>Speed</strong> and loses <strong>1</strong>0 in <strong>Attack.</strong> <br><br>Gains the Ability <strong>#</strong>.</td></tr><tr><td align="center" valign="middle"><p><img src="/files/1u3r4qN0z3GysX3bFgb6" alt="" data-size="original"></p><p><strong>Abomasnow</strong></p></td><td align="center">Grass/Ice</td><td align="center"><p><img src="/files/prfLTy8kt683dQvBGeaJ" alt="" data-size="original"></p><p>Abomasite</p></td><td align="center"><p>Gains 40 in <strong>Attack</strong>, 30 in <strong>Defense</strong>, 40 in <strong>Sp. Atk</strong>, 20 in <strong>Sp. Def</strong> and loses 30 in <strong>Speed.</strong></p><p></p><p> Gains the Ability <strong>Snow Warning</strong>.</p></td></tr><tr><td align="center" valign="middle"><p><img src="/files/LcxIy0dy1kjVbDpGAcDl" alt="" data-size="original"></p><p><strong>Gallade</strong></p></td><td align="center">Psychic/Fighting</td><td align="center"><p><img src="/files/ypBHqgUzx9uQTfanxecQ" alt=""></p><p>Galladite</p></td><td align="center">Gains 40 in <strong>Attack</strong>, 30 in <strong>Defence</strong> and 30 in <strong>Speed</strong>.<br><br>Gains the Ability <strong>Inner Focus</strong>.</td></tr><tr><td align="center" valign="middle"><p></p><p><strong>Froslass</strong></p></td><td align="center">Ice/Ghost</td><td align="center"><p></p><p>Froslassite</p></td><td align="center">Gains 60 in <strong>Sp. Atk</strong>, 30 in <strong>Sp. Def</strong> and 10 in <strong>Speed</strong>.<br><br>Gains the Ability <strong>#</strong>.</td></tr><tr><td align="center" valign="middle"><p></p><p><strong>Heatran</strong></p></td><td align="center">Fire/Steel</td><td align="center"><p></p><p>Heatranite</p></td><td align="center">Gains 30 in <strong>Attack</strong>, 45 in <strong>Sp. Atk</strong> and 35 in <strong>Sp. Def</strong>. Loses 10 in <strong>Speed</strong>.<br><br>Gains the Ability <strong>#</strong>.</td></tr><tr><td align="center" valign="middle"><p><img src="/files/5qn4gZytPZi7XUmQAmWG" alt="" data-size="original"></p><p><strong>Darkrai</strong></p></td><td align="center">Dark</td><td align="center"><p></p><p><img src="/files/ifCFkST7Jry2tlbkj7dE" alt="" data-size="original"></p><p>Darkranite</p></td><td align="center">Gains 30 in <strong>Attack</strong>, 40 in <strong>Defence</strong>, 30 in <strong>Sp. Atk</strong> and 40 in <strong>Sp. Def</strong>. Loses 40 in <strong>Speed</strong>.<br><br>Keeps the Ability <strong>Bad Dreams</strong>.</td></tr><tr><td align="center" valign="middle"><p></p><p><strong>Emboar</strong></p></td><td align="center">Fire/Fighting</td><td align="center"><p></p><p>Emboarite</p></td><td align="center">Gains 25 in <strong>Attack</strong>, 10 in <strong>Defence</strong>, 10 in <strong>Sp. Atk</strong>, 45 in <strong>Sp. Def</strong> and 10 in <strong>Speed</strong>.<br><br>Gains the Ability <strong>#</strong>.</td></tr><tr><td align="center" valign="middle"><p></p><p><strong>Excadrill</strong></p></td><td align="center">Ground/Steel</td><td align="center"><p></p><p>Excadrite</p></td><td align="center">Gains 30 in <strong>Attack</strong>, 40 in <strong>Defence</strong>, 15 in <strong>Sp. Atk</strong> and 15 in <strong>Speed</strong>.<br><br>Gains the Ability <strong>#</strong>.</td></tr><tr><td align="center" valign="middle"><p><img src="/files/Mk9JYppUipi9gSsRD6c7" alt="" data-size="original"></p><p><strong>Audino</strong></p></td><td align="center">Normal/Fairy</td><td align="center"><p><img src="/files/OAxLYRZVnJDw3BiZTsZ1" alt="" data-size="original"></p><p>Audinite</p></td><td align="center">Gains 40 in <strong>Defence</strong>, 20 in <strong>Sp. Atk</strong> and 40 in <strong>Sp. Def</strong>.<br><br>Gains the Ability <strong>Healer</strong>.</td></tr><tr><td align="center" valign="middle"><p></p><p><strong>Scolipede</strong></p></td><td align="center">Bug/Poison</td><td align="center"><p></p><p>Scolipite</p></td><td align="center">Gains 40 in <strong>Attack</strong>, 60 in <strong>Defence</strong>, 20 in <strong>Sp. Atk</strong> and 30 in <strong>Sp. Def</strong>. Loses 50 in <strong>Speed</strong>.<br><br>Gains the Ability <strong>#</strong>.</td></tr><tr><td align="center" valign="middle"><p></p><p><strong>Scrafty</strong></p></td><td align="center">Fighting/Dark</td><td align="center"><p></p><p>Scraftinite</p></td><td align="center">Gains 40 in <strong>Attack</strong>, 20 in <strong>Defence</strong>, 10 in <strong>Sp. Atk</strong>, 20 in <strong>Sp. Def</strong> and 10 in <strong>Speed</strong>.<br><br>Gains the Ability <strong>#</strong>.</td></tr><tr><td align="center" valign="middle"><p></p><p><strong>Eelektross</strong></p></td><td align="center">Electric</td><td align="center"><p></p><p>Elektrossite</p></td><td align="center">Gains 30 in <strong>Attack</strong>, 30 in <strong>Sp. Atk</strong>, 10 in <strong>Sp. Def</strong> and 30 in <strong>Speed</strong>.<br><br>Gains the Ability <strong>#</strong>.</td></tr><tr><td align="center" valign="middle"><p><img src="/files/rL0iCEvz27QTaTAlhS2o" alt="" data-size="original"></p><p><strong>Chandelure</strong></p></td><td align="center">Fire/Ghost</td><td align="center"><p><img src="/files/iqazmxNC9oZtk5p1PuTV" alt="" data-size="original"></p><p>Chandelurite</p></td><td align="center">Gains 20 in <strong>Attack</strong>, 20 in <strong>Defence</strong>, 30 in <strong>Sp. Atk</strong>, 20 in <strong>Sp. Def</strong> and 10 in <strong>Speed</strong>.<br><br>Gains the Ability <strong>Infiltrator</strong>.</td></tr><tr><td align="center" valign="middle"><p></p><p><strong>Golurk</strong></p></td><td align="center">Ground/Ghost</td><td align="center"><p></p><p>Golurkite</p></td><td align="center">Gains 35 in <strong>Attack</strong>, 25 in <strong>Defence</strong>, 15 in <strong>Sp. Atk</strong> and 25 in <strong>Sp. Def</strong>.<br><br>Gains the Ability <strong>#</strong>.</td></tr><tr><td align="center" valign="middle"><p></p><p><strong>Chesnaught</strong></p></td><td align="center">Grass/Fighting</td><td align="center"><p></p><p>Chesnaughtite</p></td><td align="center">Gains 30 in <strong>Attack</strong>, 50 in <strong>Defence</strong> and 40 in <strong>Sp. Def</strong>. Loses 20 in <strong>Speed</strong>.<br><br>Gains the Ability <strong>#</strong>.</td></tr><tr><td align="center" valign="middle"><p></p><p><strong>Delphox</strong></p></td><td align="center">Fire/Psychic</td><td align="center"><p></p><p>Delphoxite</p></td><td align="center">Gains 45 in <strong>Sp. Atk</strong>, 25 in <strong>Sp. Def</strong> and 30 in <strong>Speed</strong>.<br><br>Gains the Ability <strong>#</strong>.</td></tr><tr><td align="center" valign="middle"><p></p><p><strong>Greninja</strong></p></td><td align="center">Water/Dark</td><td align="center"><p></p><p>Greninjite</p></td><td align="center">Gains 30 in <strong>Attack</strong>, 10 in <strong>Defence</strong>, 30 in <strong>Sp. Atk</strong>, 10 in <strong>Sp. Def</strong> and 20 in <strong>Speed</strong>.<br><br>Gains the Ability <strong>#</strong>.</td></tr><tr><td align="center" valign="middle"><p></p><p><strong>Pyroar</strong></p></td><td align="center">Fire/Normal</td><td align="center"><p></p><p>Pyroarite</p></td><td align="center">Gains 20 in <strong>Attack</strong>, 20 in <strong>Defence</strong>, 20 in <strong>Sp. Atk</strong>, 20 in <strong>Sp. Def</strong> and 20 in <strong>Speed</strong>.<br><br>Gains the Ability <strong>#</strong>.</td></tr><tr><td align="center" valign="middle"><p></p><p><strong>Floette (AZ)</strong></p></td><td align="center">Fairy</td><td align="center"><p></p><p>Floettite</p></td><td align="center">Gains 20 in <strong>Attack</strong>, 20 in <strong>Defence</strong>, 30 in <strong>Sp. Atk</strong>, 20 in <strong>Sp. Def</strong> and 10 in <strong>Speed</strong>.<br><br>Gains the Ability <strong>#</strong>.</td></tr><tr><td align="center" valign="middle"><strong>Meowstic</strong></td><td align="center">Psychic</td><td align="center"><p></p><p>Meowsticite</p></td><td align="center">Gains 60 in <strong>Sp. Atk</strong>, 20 in <strong>Sp. Def</strong> and 20 in <strong>Speed</strong>.<br><br>Gains the Ability <strong>#</strong>.</td></tr><tr><td align="center" valign="middle"><p></p><p><strong>Malamar</strong></p></td><td align="center">Dark/Psychic</td><td align="center"><p></p><p>Malamarite</p></td><td align="center">Gains 10 in <strong>Attack</strong>, 30 in <strong>Sp. Atk</strong>, 45 in <strong>Sp. Def</strong> and 15 in <strong>Speed</strong>.<br><br>Gains the Ability <strong>#</strong>.</td></tr><tr><td align="center" valign="middle"><p></p><p><strong>Barbaracle</strong></p></td><td align="center">Rock/Fighting</td><td align="center"><p></p><p>Barbaracite</p></td><td align="center">Gains 35 in <strong>Attack</strong>, 15 in <strong>Defence</strong>, 10 in <strong>Sp. Atk</strong>, 20 in <strong>Sp. Def</strong> and 20 in <strong>Speed</strong>.<br><br>Gains the Ability <strong>#</strong>'.</td></tr><tr><td align="center" valign="middle"><p></p><p><strong>Dragalge</strong></p></td><td align="center">Poison/Dragon</td><td align="center"><p></p><p>Dragalgite</p></td><td align="center">Gains 10 in <strong>Attack</strong>, 15 in <strong>Defence</strong>, 35 in <strong>Sp. Atk</strong> and 40 in <strong>Sp. Def</strong>.<br><br>Gains the Ability <strong>#</strong>.</td></tr><tr><td align="center" valign="middle"><p></p><p><strong>Hawlucha</strong></p></td><td align="center">Fightng/Flying</td><td align="center"><p></p><p>Hawluchanite</p></td><td align="center">Gains 45 in <strong>Attack</strong>, 25 in <strong>Defence</strong> and 30 in <strong>Sp. Def</strong>.<br><br>Gains the Ability <strong>#</strong>.</td></tr><tr><td align="center" valign="middle"><p></p><p><strong>Zygarde</strong></p></td><td align="center">Dragon/Ground</td><td align="center"><p></p><p>Zygardite</p></td><td align="center">Gains 108 <strong>Hp</strong>,  135 <strong>Sp. Atk</strong> and 5 <strong>Speed</strong>. Loses 30 <strong>Attack</strong>, 30 <strong>Defence</strong> and 10 <strong>Sp. Def</strong>.<br><br>Gains the Ability <strong>#</strong>.</td></tr><tr><td align="center" valign="middle"><p><img src="/files/SVLHQaHFvroBQjFtSXIq" alt="" data-size="original"></p><p><strong>Diancie</strong></p></td><td align="center">Rock/Fairy</td><td align="center"><p><img src="/files/BDKAYHMaF0ukFBoxAUrc" alt="" data-size="original"></p><p>Diancite</p></td><td align="center">Gains 60 <strong>Attack</strong>, 60 <strong>Sp. Atk</strong> and 60 <strong>Speed</strong>. Loses 40 <strong>Defence</strong> and 40 <strong>Sp. Def</strong>.<br><br>Gains the Ability <strong>Magic Bounce</strong>.</td></tr><tr><td align="center" valign="middle"><p></p><p><strong>Crabominable</strong></p></td><td align="center">Fighting/Ice</td><td align="center"><br>Crabominite</td><td align="center">Gains 25 <strong>Attack</strong>, 45 <strong>Defence</strong> and 40 <strong>Sp. Def</strong>. Loses 10 <strong>Speed</strong>.<br><br>Gains the Ability <strong>#</strong>.</td></tr><tr><td align="center" valign="middle"><p></p><p><strong>Golisopod</strong></p></td><td align="center">Bug/Steel</td><td align="center"><p></p><p>Golisopite</p></td><td align="center">Gains 25 <strong>Attack</strong>, 35 <strong>Defence</strong>, 10 <strong>Sp. Atk</strong> and 30 <strong>Sp Def</strong>.<br><br>Gains the Ability <strong>#</strong>.</td></tr><tr><td align="center" valign="middle"><p></p><p><strong>Drampa</strong></p></td><td align="center">Normal/Dragon</td><td align="center"><p></p><p>Drampanite</p></td><td align="center">Gains 25 <strong>Attack</strong>, 25 <strong>Defence</strong>, 25 <strong>Sp. Atk</strong> and 25 <strong>Sp. Def</strong>.<br><br>Gains the Ability <strong>#</strong>.</td></tr><tr><td align="center" valign="middle"><p></p><p><strong>Magearna</strong></p></td><td align="center">Steel/Fairy</td><td align="center"><p></p><p>Magearnite</p></td><td align="center">Gains 30 <strong>Attack</strong>, 40 <strong>Sp. Atk</strong> and 30 <strong>Speed</strong>.<br><br>Keeps the Ability <strong>#</strong>.</td></tr><tr><td align="center" valign="middle"><p></p><p><strong>Zeraora</strong></p></td><td align="center">Electric</td><td align="center"><p></p><p>Zeraorite</p></td><td align="center">Gains 45 <strong>Attack</strong>, 22 <strong>Defence</strong>, 45 <strong>Sp. Atk</strong> and 10 <strong>Speed</strong>.<br><br>Gains the Ability <strong>#</strong>.</td></tr><tr><td align="center" valign="middle"><p></p><p><strong>Falinks</strong></p></td><td align="center">Fighting</td><td align="center"><p></p><p>Falinksite</p></td><td align="center">Gains 35 <strong>Attack</strong>, 35 <strong>Defence</strong>, 5 <strong>Sp. Def</strong> and 25 <strong>Speed</strong>.<br><br>Gains the Ability <strong>#</strong></td></tr><tr><td align="center" valign="middle"><p></p><p><strong>Scovillan</strong></p></td><td align="center">Grass/Fire</td><td align="center"><p></p><p>Scovillianite</p></td><td align="center">Gains 30 <strong>Attack</strong>, 20 <strong>Defence</strong>, 30 <strong>Sp. Atk</strong> and 20 <strong>Sp. Def</strong>.<br><br>Gains the Ability <strong>#</strong>.</td></tr><tr><td align="center" valign="middle"><p></p><p><strong>Glimmora</strong></p></td><td align="center">Rock/Poison</td><td align="center"><p></p><p>Glimmoranite</p></td><td align="center">Gains 35 <strong>Attack</strong>, 15 <strong>Defence</strong>, 20 <strong>Sp. Atk</strong>, 15 <strong>Sp. Def</strong> and 15 <strong>Speed</strong>.<br><br>Gains the Ability <strong>#</strong>.</td></tr><tr><td align="center" valign="middle"><p></p><p><strong>Tatsugiri</strong></p></td><td align="center">Dragon/Water</td><td align="center"><p></p><p>Tatsugirinite</p></td><td align="center">Gains 15 <strong>Attack</strong>, 30 <strong>Defence</strong>, 15 <strong>Sp. Atk</strong>, 30 <strong>Sp. Def</strong> and 10 <strong>Speed</strong>.<br><br>Gains the Ability <strong>#</strong>.</td></tr><tr><td align="center" valign="middle"><p></p><p><strong>Baxcalibur</strong></p></td><td align="center">Dragon/Ice</td><td align="center"><p></p><p>Baxcalibrite</p></td><td align="center">Gains 30 <strong>Attack</strong>, 25 <strong>Defence</strong>, 30 <strong>Sp. Atk</strong> and 15 <strong>Sp. Def</strong>.<br><br>Gains the Ability <strong>#</strong>.</td></tr></tbody></table>

#### PRIMAL REVERSION

Unlike standard Mega Evolutions, there exists a similar mechanism that applies exclusively to two Legendary Pokémon. These Pokémon each require a unique stone to Mega Evolve, unlocking powerful benefits in their transformed state.&#x20;

The key distinction is that this evolution occurs automatically, instantly changing the Pokémon’s form, rather than requiring manual activation in battle like traditional Mega Evolutions.

|                                                  Pokemon                                                  |    Typing   |                                   Stone                                  |                                                                             Benefits                                                                            |
| :-------------------------------------------------------------------------------------------------------: | :---------: | :----------------------------------------------------------------------: | :-------------------------------------------------------------------------------------------------------------------------------------------------------------: |
|  <p><img src="/files/n3PuDbnXZglHoS6G2IFV" alt="" data-size="original"></p><p><strong>Kyogre</strong></p> |    Water    | <p><br><img src="/files/4hGJ2qnaQkdqq2dnAISj" alt=""></p><p>Blue Orb</p> | <p>Gains 50 <strong>Attack</strong>, 30 <strong>Sp. Atk</strong> and 20 <strong>Sp. Def</strong>.<br><br>Gains the Ability <strong>Primordial Sea</strong>.</p> |
| <p><img src="/files/EyNXq1wOik63RlCzN3iG" alt="" data-size="original"></p><p><strong>Groudon</strong></p> | Ground/Fire |     <p><img src="/files/UuNGakl5qgfrLCV8Kpnu" alt=""><br>Red Orb</p>     |  <p>Gains 30 <strong>Attack</strong>, 20 <strong>Defence</strong> and 50 <strong>Sp. Atk</strong>.<br><br>Gains the Ability <strong>Desolate Land</strong>.</p> |

For more information relating to Mega Pokemon, please refer to this link:

{% embed url="<https://bulbapedia.bulbagarden.net/wiki/Mega_Evolution>" %}


# Complete Guide to Dynamax Pokemon

Here you will find out everything you need to know about Dynamax Pokemon on the server from what they are, how to obtain and more.

**Contents**

1. [What are Dynamax Pokemon?](#what-are-dynamax-pokemon)
   1. [Max Moves](#max-moves)
   2. [List of all Current Dynamax Pokemon](#list-of-all-current-dynamax-pokemon)
2. [Gigantamax](#gigantamax)
3. [How to obtain a Dynamax Band](#how-to-obtain-a-dynamax-band)
4. [How do I Dynamax Pokemon?](#how-do-i-dynamax-pokemon)
   1. [Dynamaxing within a Battle](#dynamaxing-within-a-battle)
5. [Frequently Asked Questions \[FAQ\]](#frequently-asked-questions-faq)

***

## What are Dynamax Pokemon?

<figure><img src="/files/zlEGylBoy8tYq80d0Zgp" alt=""><figcaption><p>Dynamax Animation</p></figcaption></figure>

**Dynamax Pokémon** are special forms of certain Pokémon introduced in *Pokémon Sword and Shield* for the Nintendo Switch. By using the **Dynamax Bracelet**, a Pokémon can temporarily undergo a **Dynamax** transformation during battle, transforming into a more powerful form for the duration of 3 battle turns.

**Dynamax** boosts a Pokémon’s **HP**, and grants them access to **significantly stronger moves**, which as a result come with devastating effects. Once the battle progress 3 turns, or the Pokémon switches out, it to its normal form.&#x20;

### Max Moves

Along with a physical transformation, the moveset the Pokémon currently knows will be adjusted to further reflect this, providing an increase in damage and secondary effects. Moves will update corresponding to both their typing, and whether they are a status move or not.

### List of all current Dynamax Pokemon

Thankfully, **Dynamax** is a very versatile phenomena and applies to **every** Pokémon. No matter the species, nor its generation of origin, so long as you're able to battle with it, it may undergo the transformation.

<table><thead><tr><th width="162">Type</th><th width="215">Max Move</th><th>Secondary effect</th></tr></thead><tbody><tr><td>Normal</td><td>Max Strike</td><td>Decreases the Speed of the target and its allies by one stage</td></tr><tr><td>Fighting</td><td>Max Knuckle</td><td>Increases the Attack of the user and its allies by one stage</td></tr><tr><td>Flying</td><td>Max Airstream</td><td>Increases the Speed of the user and its allies by one stage</td></tr><tr><td>Poison</td><td>Max Ooze</td><td>Increases the Special Attack of the user and its allies by one stage</td></tr><tr><td>Ground</td><td>Max Quake</td><td>Increases the Special Defense of the user and its allies by one stage</td></tr><tr><td>Rock</td><td>Max Rockfall</td><td>Creates a sandstorm for five turns.</td></tr><tr><td>Bug</td><td>Max Flutterby</td><td>Decreases the Special Attack of the target and its allies by one stage</td></tr><tr><td>Ghost</td><td>Max Phantasm</td><td>Decreases the Defense of the target and its allies by one stage</td></tr><tr><td>Steel</td><td>Max Steelspike</td><td>Increases the Defense of the user and its allies by one stage</td></tr><tr><td>Fire</td><td>Max Flare</td><td>Creates harsh sunlight for five turns.</td></tr><tr><td>Water</td><td>Max Geyser</td><td>Creates rain for five turns.</td></tr><tr><td>Grass</td><td>Max Overgrowth</td><td>Creates Grassy Terrain for five turns.</td></tr><tr><td>Electric</td><td>Max Lightning</td><td>Creates Electric Terrain for five turns.</td></tr><tr><td>Psychic</td><td>Max Mindstorm</td><td>Creates Psychic Terrain for five turns.</td></tr><tr><td>Ice</td><td>Max Hailstorm</td><td>Creates Hail for five turns.</td></tr><tr><td>Dragon</td><td>Max Wyrmwind</td><td>Decreases the Attack of the target and its allies by one stage</td></tr><tr><td>Dark</td><td>Max Darkness</td><td>Decreases the Special Defense of the target and its allies by one stage</td></tr><tr><td>Fairy</td><td>Max Starfall</td><td>Creates Misty Terrain for five turns.</td></tr><tr><td>Status</td><td>Max Guard</td><td>Acts like Protect, but it protects from all moves, including Max Moves.</td></tr></tbody></table>

## Gigantamax

On a similar note, there is a sub-phenomena tied to **Dynamax**, called **Gigantamax**. This functions almost identically, but instead changes a Pokémons in-game model for the duration of the transformation, and also grants them a unique **G-Max** move which differs from the aforementioned **Max** equivalents.

<figure><img src="/files/NGAPLtlanidJuuaXqJP9" alt="" width="488"><figcaption><p>Gigantamax Animation</p></figcaption></figure>

Here you will find a complete **list of all Gigantamax Pokémon** from the main series, with their current **availability** on the server.

<table data-card-size="large" data-view="cards"><thead><tr><th></th><th data-hidden data-card-target data-type="content-ref"></th><th data-hidden data-card-cover data-type="image">Cover image</th></tr></thead><tbody><tr><td>🧬 <strong>Gigantamax Pokemon</strong></td><td><a href="/pages/VnV80RE3inB83WYMvNGs">/pages/VnV80RE3inB83WYMvNGs</a></td><td><a href="/files/WI6U789bjLnMP5PXp6s5">/files/WI6U789bjLnMP5PXp6s5</a></td></tr></tbody></table>

## How to obtain a Dynamax Band

Obtaining a **Dynamax Band** is a straightforward process. It is granted to the user upon reaching 20% Dex completion, after which is will be permanently accessible through the users inventory, on the left side besides their Pokemon.

<figure><img src="/files/3GQQuPO05Iox4Wf9v7iS" alt="" width="123"><figcaption><p>Dynamax Band in inventory</p></figcaption></figure>

From here, you will be able to select the band to be equipped.

<figure><img src="/files/V8ByZ4PJATdPqDuKiGyR" alt="" width="563"><figcaption><p>Dynamax Band Equip Menu</p></figcaption></figure>

With these steps completed, you are now ready to begin Dynamaxing your Pokemon in battle.

## How do I Dynamax Pokemon?

Once you have obtained the appropriate tools, you’re ready to begin Dynamaxing your Pokémon and the process is both simple and exciting!

### Dynamaxing within a Battle

Dynamax during battles functions slightly differently from the standard method. To begin, ensure that  you have your **Dynamax Band** equipped.

Once these requirements are met, enter a battle and select **Fight**. On the battle screen, a new **Dynamax icon** will appear. You may activate this option alongside your chosen move for that turn. When selected, your Pokemon will Dynamax and execute the selected move simultaneously.

Your Pokemon will remain in its Dynamax form until either 3 battle turns have passed, or the Pokemon is swapped out. Following these steps will allow you to effectively utilize Dynamax in battle.

<figure><img src="/files/V2ko0ox8FhOpCp9ANhAc" alt="" width="563"><figcaption><p>Dynamax Option via Battle Menu</p></figcaption></figure>

## Frequently Asked Questions \[FAQ]&#x20;

**Q \~ Do I need to download a extra mod in order to access Dynamax?**

**A \~** *No! The only mod needed for the server is for Pixelmon, after that any content pushed into the server will not require any mod to be installed. Dynamax by nature are already integrated into the official mod.*

**Q \~ Are we able to use Dynamax Pokemon within gym battles?**

**A \~** *Yes, we have no clause against this currently so you're free to use Dynamax's within Gyms. In the future Gyms may also include Dynamax Pokemon you will have to fight for extra challenge!*

**Q \~ Do Dynamax Pokemon have their own shiny palletes?**

**A \~** *All Dynamax pokemon will have their own unique Shiny Skin like within the main series games.*

**Q \~ Can we have more than one Dynamax Pokemon active at a time?**

**A \~** *No, within battles you will be restricted to a single Dynamax pokemon.*

**Q \~ Are every single Gigantamax Pokemon live in the server including the DLC exclusives?**

**A \~** *Yes, all Gigantamax forms from the mainline games have already been implemented and are fully functional.*

**Q \~ Are there any custom Gigantamax Pokemon in the server?**

**A \~** *At this time we have no plans to introduce any custom Gigantamax pokemon into the server. We will look into this in the future once we have left BETA and going off player feedback, but yeah currently have no custom Gigantamax Pokemon in the server.*

**Q \~ Can I access the Dynamax Band recipe within JEI?**

**A \~** *No, the Dynamax Band is not a physical item you posses in your inventory, and instead lives within the gimmicks menu by the side of your Pokemon. Due to this you cannot pass a Dynamax Band to other users to use either.*


# Gigantamax Pokemon

Here is a list of all current Mega Pokemon from the main series including if it's obtainable on the Cobblemon server.

**Contents**

1. [GIGANTAMAX POKEMON](#gigantamax-pokemon)

***

#### GIGANTAMAX POKEMON

As of now, there are currently **33 different pokemon** that have the ability to **Giganatmax Evolve** released within the main series of Pokemon Games. Here is a list of all of them currently alongside their availability.

|                                      Pokémon                                     |             Move & Type             | Secondary Effect                                           |
| :------------------------------------------------------------------------------: | :---------------------------------: | ---------------------------------------------------------- |
|        <p><img src="/files/IrBDwqN38V7DBlHMdbE5" alt=""><br>Charizard</p>        |    <p>G-Max Wildfire<br>Fire</p>    | Non-Fire types receive damage for 4 turns.                 |
|        <p><img src="/files/Him0TNwONZeFtrpo1Zmb" alt=""><br>Butterfree</p>       |     <p>G-Max Befuddle<br>Bug</p>    | Causes poison, paralysis or sleep to each opponent.        |
|         <p><img src="/files/qQKdIVJzuSfTSwOuV2Ub" alt=""><br>Pikachu</p>         | <p>G-Max Volt Crash<br>Electric</p> | Paralyzes all opponents.                                   |
|          <p><img src="/files/Hn0htmJXqn85pLZtXzJK" alt=""><br>Meowth</p>         |   <p>G-Max Gold Rush<br>Normal</p>  | Confuses all opponents and yields money after battle.      |
|         <p><img src="/files/489dOeDshXXk9jF8BVpm" alt=""><br>Machamp</p>         | <p>G-Max Chi Strike<br>Fighting</p> | Increases critical hit ratio.                              |
|          <p><img src="/files/EzMiFWBPRkfRca7jgLSm" alt=""><br>Gengar</p>         |     <p>G-Max Terror<br>Ghost</p>    | Prevents opponent switching out.                           |
|         <p><img src="/files/dq0R3kx5t0X1CTY3NzFa" alt=""><br>Kingler</p>         |   <p>G-Max Foam Burst<br>Water</p>  | Sharply lowers all opponents' speed.                       |
|          <p><img src="/files/dB2rGZMGhaOtetYmZy0D" alt=""><br>Lapras</p>         |    <p>G-Max Resonance<br>Ice</p>    | Halves damage from Physical and Special moves for 5 turns. |
|          <p><img src="/files/RGGY3mQkvtuuAgfp3CNJ" alt=""><br>Eevee</p>          |    <p>G-Max Cuddle<br>Normal</p>    | Infatuates all opposite-gender opponents.                  |
|         <p><img src="/files/CTR5onKEEACVgicUqvbU" alt=""><br>Snorlax</p>         |   <p>G-Max Replenish<br>Normal</p>  | Restores berries that have been consumed.                  |
|         <p><img src="/files/jERMTMLPjrj6ief9RZ3V" alt=""><br>Garbodor</p>        |    <p>G-Max Malodor<br>Poison</p>   | Poisons all opponents.                                     |
|         <p><img src="/files/WI6U789bjLnMP5PXp6s5" alt=""><br>Melmetal</p>        |    <p>G-Max Meltdown<br>Steel</p>   | Prevents opponent using the same move consecutively.       |
|       <p><img src="/files/XL6nX4oHz3ZMugqiTmYz" alt=""><br>Corviknight</p>       |   <p>G-Max Wind Rage<br>Flying</p>  | Removes field obstacles and terrains.                      |
|         <p><img src="/files/rA2kPWCisC0RQHP88Vs4" alt=""><br>Orbeetle</p>        |   <p>G-Max Gravitas<br>Psychic</p>  | Summons Gravity for 5 turns.                               |
|         <p><img src="/files/HmjqlFxN60q9Ne5W7Ejt" alt=""><br>Drednaw</p>         |   <p>G-Max Stonesurge<br>Water</p>  | Creates Stealth Rock.                                      |
|        <p><img src="/files/UDWPNA8qohM3WT6NhnfB" alt=""><br>Coalossal</p>        |    <p>G-Max Volcalith<br>Rock</p>   | Non-Rock types receive damage for 4 turns.                 |
|         <p><img src="/files/fuITArMYUyAqahUTMeIo" alt=""><br>Flapple</p>         |    <p>G-Max Tartness<br>Grass</p>   | Lowers all opponents' evasiveness.                         |
|         <p><img src="/files/0wkgNml0PhXErprlmGMK" alt=""><br>Appletun</p>        |   <p>G-Max Sweetness<br>Grass</p>   | Heals status conditions of all teammates.                  |
|        <p><img src="/files/lG9bNifsFLw6IOkw9mIV" alt=""><br>Sandaconda</p>       |   <p>G-Max Sandblast<br>Ground</p>  | Opponent receives damage for 4-5 turns.                    |
|        <p><img src="/files/dRFg0YaYAhnvHj7d5ANW" alt=""><br>Toxtricity</p>       | <p>G-Max Stun Shock<br>Electric</p> | Poisons or paralyzes each opponent.                        |
|       <p><img src="/files/MpFfkqeEoue4dA6i5Dk7" alt=""><br>Centiskorch</p>       |   <p>G-Max Centiferno<br>Fire</p>   | Opponent receives damage for 4-5 turns.                    |
|        <p><img src="/files/Tg2qqyJNvjFKhANHadoB" alt=""><br>Hatterene</p>        |     <p>G-Max Smite<br>Fairy</p>     | Confuses all opponents.                                    |
|        <p><img src="/files/AsLcE4hfO6wa315ZDh85" alt=""><br>Grimmsnarl</p>       |     <p>G-Max Snooze<br>Dark</p>     | Makes opponent drowsy, like Yawn.                          |
|         <p><img src="/files/IG5xsW15U2zIsJLX92Mb" alt=""><br>Alcremie</p>        |     <p>G-Max Finale<br>Fairy</p>    | Heals user's team.                                         |
|        <p><img src="/files/uQMF8mbSuVWF2obBxOqo" alt=""><br>Copperajah</p>       |   <p>G-Max Steelsurge<br>Steel</p>  | Scatters spikes on opponent's side of the field.           |
|        <p><img src="/files/ODR9DI12GY69e8dyIz3W" alt=""><br>Duraludon</p>        |   <p>G-Max Depletion<br>Dragon</p>  | Reduces PP of opponent's last move.                        |
|         <p><img src="/files/F6gVfMZhdhP5ZhwnVUHG" alt=""><br>Venusaur</p>        |   <p>G-Max Vine Lash<br>Grass</p>   | Non-Grass types receive damage for 4 turns.                |
|        <p><img src="/files/L9t0OUPXhr49UqmmynCT" alt=""><br>Blastoise</p>        |   <p>G-Max Cannonade<br>Water</p>   | Non-Water types receive damage for 4 turns.                |
|        <p><img src="/files/1gihAAFCJ1syalRrHfCD" alt=""><br>Rillaboom</p>        |   <p>G-Max Drum Solo<br>Grass</p>   | Ignores opponent's ability.                                |
|        <p><img src="/files/SDfMici1amcyGPzK2CKo" alt=""><br>Cinderace</p>        |    <p>G-Max Fireball<br>Fire</p>    | Ignores opponent's ability.                                |
|         <p><img src="/files/2M6B96W1zXz9gVeG9Mqi" alt=""><br>Inteleon</p>        |   <p>G-Max Hydrosnipe<br>Water</p>  | Ignores opponent's ability.                                |
| <p><img src="/files/JwMbJkhcfOaADfmDsCSa" alt=""><br>Urshifu (Single Strike)</p> |    <p>G-Max One Blow<br>Dark</p>    | Strikes through Max Guard and Protect moves.               |
|  <p><img src="/files/QGQmw34cisjaYPzLutmN" alt=""><br>Urshifu (Rapid Strike)</p> |   <p>G-Max Rapid Flow<br>Water</p>  | Strikes through Max Guard and Protect moves.               |

For more information relating to Dynamax and Gigantamax Pokemon, please refer to this link:

{% embed url="<https://pixelmonmod.com/wiki/Dynamax>" %}


# Complete Guide to Z-Moves

Here you will find out everything you need to know about Z-moves on the server from what they are, how to use and more.

**Contents**

1. [What are Z Moves?](#what-are-z-moves)
   1. [List of all current Z Crystals](#list-of-all-current-z-crystals)
2. [How to obtain a Mega Keystone](#how-to-obtain-a-mega-keystone)
3. [How do I use Z Moves?](#how-do-i-use-z-moves)
   1. [Utilising Z Moves within a Battle](#utilising-z-moves-within-a-battle)
4. F[requently Asked Questions \[FAQ\]](#frequently-asked-questions-faq)

***

## What are Z Moves?

**Z Moves** are special forms of certain moves introduced in *Pokémon Sun and Moon* for the Nintendo 3DS. By using a **Mega Keystone** and the corresponding Z Crystal, a Pokémon can utilise the alternate form of the move during battle, granting an increase in power, and often includes additional effects.

**Z Moves** can come in two forms, either being a generic move, or a specialist move. Generic moves can be used by *any* Pokémon, so long as they have learnt a move corresponding to the typing of the crystal. Whereas specialist moves can only be used by a singular Pokémon, and require they know a specific move (often their signature) to utilise it.

### List of all current Z Crystals

#### Generic Crystals

| Item                                              | Effect                                                  | Z-Move                 |
| ------------------------------------------------- | ------------------------------------------------------- | ---------------------- |
| **Buginium Z** ![](/files/x5DQcuf5zUwd8HblDCVV)   | Converts Bug-type moves into Bug-type Z-Moves           | Savage Spin-Out        |
| **Darkinium Z** ![](/files/llyGKPq5IgZeGkjaDmZL)  | Converts Dark-type moves into Dark-type Z-Moves         | Black Hole Eclipse     |
| **Dragonium Z** ![](/files/fjYpdztwxVp8ZvXYHyB8)  | Converts Dragon-type moves into Dragon-type Z-Moves     | Devastating Drake      |
| **Electrium Z** ![](/files/UBNgqDqMszeTYxvjGRnQ)  | Converts Electric-type moves into Electric-type Z-Moves | Gigavolt Havoc         |
| **Fairium Z** ![](/files/luVR3HucnJg7lW842zGR)    | Converts Fairy-type moves into Fairy-type Z-Moves       | Twinkle Tackle         |
| **Fightinium Z** ![](/files/1hHtoIsaSCQ650u5MHHl) | Converts Fighting-type moves into Fighting-type Z-Moves | All-Out Pummeling      |
| **Firium Z** ![](/files/RcSu5nSk8eUvkrF9M6du)     | Converts Fire-type moves into Fire-type Z-Moves         | Inferno Overdrive      |
| **Flyinium Z** ![](/files/qbMEBQgOmhnxRJZrJNF3)   | Converts Flying-type moves into Flying-type Z-Moves     | Supersonic Skystrike   |
| **Ghostium Z** ![](/files/i0Pg9E9lr0Cawed1QcvW)   | Converts Ghost-type moves into Ghost-type Z-Moves       | Never-Ending Nightmare |
| **Grassium Z** ![](/files/ouzn5ZnvvjOd3xsbmTYP)   | Converts Grass-type moves into Grass-type Z-Moves       | Bloom Doom             |
| **Groundium Z** ![](/files/dajpIEDbHRmH7PDQp1KW)  | Converts Ground-type moves into Ground-type Z-Moves     | Tectonic Rage          |
| **Icium Z** ![](/files/gHCZgX7ficwsqBfi6jg9)      | Converts Ice-type moves into Ice-type Z-Moves           | Subzero Slammer        |
| **Normalium Z** ![](/files/iMt0BauRyahUbuOlukgz)  | Converts Normal-type moves into Normal-type Z-Moves     | Breakneck Blitz        |
| **Poisonium Z** ![](/files/y9Cn6qzmfVsNSxoVD7Nr)  | Converts Poison-type moves into Poison-type Z-Moves     | Acid Downpour          |
| **Psychium Z** ![](/files/CHa8g4TGNhaFcHvNkXeL)   | Converts Psychic-type moves into Psychic-type Z-Moves   | Shattered Psyche       |
| **Rockium Z** ![](/files/OuNLCisuLMcWtrh9kkHA)    | Converts Rock-type moves into Rock-type Z-Moves         | Continental Crush      |
| **Steelium Z** ![](/files/j2rgFw4zEQfTB9zrjpZI)   | Converts Steel-type moves into Steel-type Z-Moves       | Corkscrew Crash        |
| **Waterium Z** ![](/files/rC0WcuK8jbasCn0xEFUf)   | Converts Water-type moves into Water-type Z-Moves       | Hydro Vortex           |

#### Specialist Crystals

| Item                                                  | Effect                                                        | Z-Move                      |
| ----------------------------------------------------- | ------------------------------------------------------------- | --------------------------- |
| **Aloraichium Z** ![](/files/WAUrrXhGsI47uS4G0e23)    | Converts Alolan Raichu's Thunderbolt into an exclusive Z-Move | Stoked Sparksurfer          |
| **Decidium Z** ![](/files/ec1HLruu1IQCYhdDifUS)       | Converts Decidueye's Spirit Shackle into an exclusive Z-Move  | Sinister Arrow Raid         |
| **Eevium Z** ![](/files/OGbWrnGuIlKYgkYbjH4G)         | Converts Eevee's Last Resort into an exclusive Z-Move         | Extreme Evoboost            |
| **Incinium Z** ![](/files/wG8EfI7CBnFyk9RZMxYY)       | Converts Incineroar's Darkest Lariat into an exclusive Z-Move | Malicious Moonsault         |
| **Kommonium Z** ![](/files/DzFriJFzqxEYBafMkJWS)      | Converts Kommo-o's Clanging Scales into an exclusive Z-Move   | Clangorous Soulblaze        |
| **Lunalium Z** ![](/files/Tqaycv5QhdaHI4mq3rH7)       | Converts Lunala's Moongeist Beam into an exclusive Z-Move     | Menacing Moonraze Maelstrom |
| **Lycanium Z** ![](/files/8504CtAAVbrwU4iNvrug)       | Converts Lycanroc's Stone Edge into an exclusive Z-Move       | Splintered Stormshards      |
| **Marshadium Z** ![](/files/plkKZvYTCAEgjuLPXcDj)     | Converts Marshadow's Spectral Thief into an exclusive Z-Move  | Soul-Stealing 7-Star Strike |
| **Mewnium Z** ![](/files/hSi0EsuQD5jLZeo7EK5S)        | Converts Mew's Psychic into an exclusive Z-Move               | Genesis Supernova           |
| **Mimikium Z** ![](/files/wjnTmmWGBKHi9oLXZEf1)       | Converts Mimikyu's Play Rough into an exclusive Z-Move        | Let's Snuggle Forever       |
| **Pikanium Z** ![](/files/Cmyj7jfhffIAbefh1WYe)       | Converts Pikachu's Volt Tackle into an exclusive Z-Move       | Catastropika                |
| **Pikashunium Z** ![](/files/mYuKnTM5STUHTJ3Lerrw)    | Converts Cap Pikachu's Thunderbolt into an exclusive Z-Move   | 10,000,000 Volt Thunderbolt |
| **Primarium Z** ![](/files/fWjD3LwuKqxFS3sv1M4Z)      | Converts Primarina's Sparkling Aria into an exclusive Z-Move  | Oceanic Operetta            |
| **Snorlium Z** ![](/files/jeZn5pR6yPe3wQD4jqHl)       | Converts Snorlax's Giga Impact into an exclusive Z-Move       | Pulverizing Pancake         |
| **Solganium Z** ![](/files/qBW10AEdYepG8UaNsikk)      | Converts Solgaleo's Sunsteel Strike into an exclusive Z-Move  | Searing Sunraze Smash       |
| **Tapunium Z** ![](/files/7TIOMrLcu6VftolyZS37)       | Converts Tapus' Nature's Madness into an exclusive Z-Move     | Guardian of Alola           |
| **Ultranecrozium Z** ![](/files/y0asSZIj9a2IgaeHOQAQ) | Turns Necrozma fused with Solgaleo or Lunala into a new form  | Light that Burns the Sky    |

## How to obtain a Mega Keystone

Obtaining a **Mega Keystone** is a straightforward process. It is granted to the user upon reaching 30% Dex completion, after which is will be permanently accessible through the users inventory, on the left side besides their Pokemon.

<figure><img src="/files/gJ7geQ6C90hKok2E6e1o" alt="" width="135"><figcaption><p>Mega Keystone in Inventory</p></figcaption></figure>

From here, you will be able to select how you want this **Mega Keystone** displayed on your user, which a range of cosmetic options available. Experiment with the options to find your own style!

<figure><img src="/files/L3JgGL2y0KTSqELRUew6" alt="" width="563"><figcaption><p>Mega Keystone Cosmetic Options</p></figcaption></figure>

With these steps completed, you are now ready to begin Mega Evolving your Pokemon in battle.

## How do I use Z Moves?

Once you have obtained the appropriate tools, you’re ready to begin upgrading your Pokémons moves and the process is both simple and exciting!

### Utilising Z Moves within a Battle

Z Moves during battles functions slightly differently from the standard method. To begin, ensure that  you have your **Mega Keystone** equipped.

Once these requirements are met, enter a battle and select **Fight**. On the battle screen, a new **Z Move icon** will appear. You may activate this option alongside your chosen move for that turn. When selected, your Pokemon will execute the selected move.

<figure><img src="/files/wbd2BWdjfR2SfZuRNTiz" alt="" width="563"><figcaption><p>Z Move Option via Battle Menu</p></figcaption></figure>

## Frequently Asked Questions \[FAQ]&#x20;

**Q \~ Do I need to download a extra mod in order to access Z Moves?**

**A \~** *No! The only mod needed for the server is for Pixelmon, after that any content pushed into the server will not require any mod to be installed. Z Moves by nature are already integrated into the official mod.*

**Q \~ Are we able to use Z Moves within gym battles?**

**A \~** *Yes, we have no clause against this currently so you're free to use Z Moves within Gyms. In the future Gyms may also include Z Moves Pokemon you will have to fight for extra challenge!*

**Q \~ Can we use more than one Z Move within a battle?**

**A \~** *No, within battles you will be restricted to a single Z Move.*

**Q \~ Are all Z Moves live in the server?**

**A \~** *Yes, all Z Moves from the mainline games have already been implemented and are fully functional.*

**Q \~ Are there any custom Z Moves in the server?**

**A \~** *At this time we have no plans to introduce any custom Z Moves into the server. We will look into this in the future once we have left BETA and going off player feedback, but yeah currently have no custom Z Moves in the server.*

**Q \~ Can I access the Mega Keystone recipe within JEI?**

**A \~** *No, the Mega Keystone is not a physical item you posses in your inventory, and instead lives within the gimmicks menu by the side of your Pokemon. Due to this you cannot pass a Mega Keystone to other users to use either.*


# Technical Guide

Here you'll find all of the Technical Guides which players might find useful for accessing stuff outside the main Cobblemon server.

<table data-card-size="large" data-view="cards"><thead><tr><th></th><th data-hidden data-card-target data-type="content-ref"></th></tr></thead><tbody><tr><td>🔗 <strong>Intro to Linking to Discord</strong></td><td><a href="/pages/yZ2EvdqihemHGcaGzyj6">/pages/yZ2EvdqihemHGcaGzyj6</a></td></tr><tr><td>🎫 <strong>Complete Overview of Support Tickets</strong></td><td><a href="/pages/bJCKXoDldrCsPtxOMtM4">/pages/bJCKXoDldrCsPtxOMtM4</a></td></tr><tr><td>📖 <strong>A Complete Guide to Appeals</strong></td><td><a href="/pages/f1Y7RvF3AgqC1k2GspjU">/pages/f1Y7RvF3AgqC1k2GspjU</a></td></tr><tr><td>🛒 <strong>A Complete Guide to the Store</strong></td><td><a href="/pages/l2One6G6G4n5gBgGtYPx">/pages/l2One6G6G4n5gBgGtYPx</a></td></tr><tr><td>📁 <strong>A Complete Guide to Logs</strong></td><td><a href="/pages/L7TfGpWdmU6BuBlR0H8y">/pages/L7TfGpWdmU6BuBlR0H8y</a></td></tr><tr><td><span data-gb-custom-inline data-tag="emoji" data-code="1f58b">🖋️</span> <strong>How to Change Minecraft Username</strong></td><td><a href="/pages/udNeOYtTFSEGaxUSWpAo">/pages/udNeOYtTFSEGaxUSWpAo</a></td></tr></tbody></table>


# Intro to Linking to Discord

Here you'll find out how to link your in-game account to Discord + bonuses for doing so!

**Contents**

* [How to install Discord](#how-to-install-discord)
* [How to link in-game account to Discord](#how-to-link-in-game-account-to-discord)
* [Benefits for linking to Discord](#benefits-for-linking-to-discord)
* [What else is the MMO Realms Discord server useful for?](#what-else-is-the-mmo-realms-discord-server-useful-for)

***

### How to install Discord

The first step understandably is downloading Discord. You can download this directly to your PC/Laptop or you can download it on your phone via the **Google Play Store** or **Apple App Store**.  You can find the download link for computers below:

<table data-card-size="large" data-view="cards"><thead><tr><th></th><th data-type="content-ref"></th></tr></thead><tbody><tr><td><strong>Download Discord for Computers Here!</strong></td><td><a href="https://discord.com/">https://discord.com/</a></td></tr></tbody></table>

Once you have downloaded Discord on your device of choice, the next step you will need to do is **create an account**. You should be able to **do this through the app** itself asking the basic create an account questions you'll see from other apps and websites.

**\*NOTE\*** - It's important to note that **you need to be at least aged 13 or older to use Discord** so if you're below the age of 13 then you will need a parent or guardian to create an account and follow the steps below themselves so you can gain access to the free shiny.

<div align="left"><figure><img src="/files/WnPeG18vqZLNPlK9SDlT" alt="" width="247"><figcaption><p>Create an Account menu on Discord</p></figcaption></figure></div>

Now that you have created an account, you should be able to **log into Discord** and start being able to join different Discord server which is needed for the next steps outlined below.

### How to link in-game account to Discord

Once you have access to a Discord account as well as the app on either your PC, Laptop or Mobile you can now **join our official Discord Server**. You can click the link below in order to join:

<table data-card-size="large" data-view="cards"><thead><tr><th></th><th></th><th data-hidden></th><th data-hidden data-card-target data-type="content-ref"></th><th data-hidden data-card-cover data-type="files"></th></tr></thead><tbody><tr><td><strong>MMO Realms Discord</strong></td><td>Click here to join our Official Discord Server for giveaways, server updates, direct support plus more!</td><td></td><td><a href="https://discord.gg/4pmEJjq6Cu">https://discord.gg/4pmEJjq6Cu</a></td><td><a href="/files/PV7SnEuVJgBtGjk9VRoX">/files/PV7SnEuVJgBtGjk9VRoX</a></td></tr></tbody></table>

Once you're in the Discord server and have gone through the intro of our server (*in order to gain access to roles like notifications to Giveaways and more*) the next step is for you head back onto the server.

Once you're in-game you will want to **run the command** `/discord link` which will bring up text within the chat which will include a **code you will need to note down** as we'll need that for later.

<div align="left"><figure><img src="/files/GNzpk3eAMQTAwabDdfe9" alt=""><figcaption><p>Example of /link being run in-game.</p></figcaption></figure></div>

With that code you will want to **head back over to Discord** and specifically make your way to the [**#🔗-linking**](https://discord.com/channels/1332431737694982209/1332431738609336436) **channel** and **input that code** within the chat box.

<div align="left"><figure><img src="/files/lfeU5hq38N9woTeelGnt" alt=""><figcaption><p>This is how it should look when you're inputting the code into the channel.</p></figcaption></figure></div>

If done correctly you should get notified that you have linked in-game and then both messages will be deleted within the Discord Channel. Congratulations, you have linked your Discord account!

<div align="left"><figure><img src="/files/hWuqn8Df5YLU7C7Q66IQ" alt=""><figcaption><p>Confirmation that you have linked your account.</p></figcaption></figure></div>

You can now **claim your free linking shiny** in-game by either running the command `/kit Discord` or inputting `/kits` and clicking it within the sub-menu.

### Benefits for linking to Discord

Benefits for linking to our Official MMO Realms Discord include:

* **1x Free Shiny** (Redeemable via `/kit Discord` in-game)
* **Linking role** given in the Discord Server.
* Rank roles relating to which **donor rank** you are in-game! (**Still to be implemented**)

### What else is the MMO Realms Discord server useful for?

The Discord server has multiple different things you'll find useful for you if you're planning on playing on our server for the long haul. Benefits to being part of our Discord server include:

* **Direct support** from our Staff Team via our Tickets system (via [#ticket-support](https://discord.com/channels/1332431737694982209/1332431740563755106))
* Notifications for any **Events or Contests** running on the server.
* Get notified for **Updates and Announcements** made on the server.
* **Discord giveaways** for players the chance to earn rewards in-game!
* **Community channels** for you to talk with others, show off your art skills, your pets or speak about other topics altogether!
* **Sneak Peaks** to future content coming to the server!
* **Suggestions** channel for you to make suggestions you would like to see on the server.

Our Discord Server is the best place for players to keep upto date with everything happening with the server so you'll want to join to keep an eye on everything!


# Complete Overview of Support Tickets

Here you can find everything you need to know about creating tickets for support on the server.

**Contents**

1. [Intro](#intro)
2. [What is a Ticket?](#what-is-a-ticket)
3. [How to Make a Ticket](#how-to-make-a-ticket)
4. [What are the different Ticket Categories?](#what-are-the-different-ticket-categories)
   1. [General Support](#general-support)
   2. [Bug Report](#bug-report)
   3. [Realm Issue](#realm-issue)
   4. [Missing Items / Pokemon](#missing-items-pokemon)
   5. [Player Report](#player-report)
   6. [Griefing / Stolen Items](#griefing-stolen-items)
5. [Frequently Asked Questions \[FAQ\]](#frequently-asked-questions-faq)

***

### Intro

If you're reading this guide, then you either need help with making a ticket or just want more information about the ticket process as well as questions you may have about them. **Please be aware that you can only create a ticket within our Discord server** in which you can find a invite link if you ain't already in our server. There is no way to create a ticket without being within our Discord server so if you need to contact staff you'll either have to try in-game, or if you see a staff member online on the forums.

If you are not within our **Discord server** then you can **join via the link provided below**:

{% embed url="<https://discord.gg/muGmwBkAFB>" %}

### **What is a Ticket?**

**A ticket is a system in place where players can have direct contact with multiple staff members for any issues or questions they may have for the server.** This can range from reporting a bug on the server, reporting another player for scamming or harassing, disputing or requesting proof for a punishment given, asking a question about the server or Cobblemon and so on.&#x20;

**Creating a ticket is better than contacting a member of staff directly as any staff member is able to respond to a ticket if one is free as it's part of the responsibilities for staff members.** This means if one staff member has to go away, another staff member can deal with it instead. Tickets will also remain open until it's been dealt with, or if there is no response from you after us trying to contact you. **Please do not create multiple tickets for the same issue as this will only delay things rather than speed up the process for you.**

### **How to Make a Ticket**

When you are in our Discord server, you want to head down the channels until you find a category that's called **Support**, and then click on the channel that's called **#ticket-support**.

<p align="center"><img src="/files/7LRgkRZg0ZQDomMrY9lv" alt=""></p>

Once you click onto **#ticket-support**, you will be greeted with a drop down menu which includes one of 5 different options you can choose from. Please pick the one that is in relation to what you want to create the ticket about.

<figure><img src="/files/fBDvPt9e358bZhs2kE8m" alt="" width="375"><figcaption></figcaption></figure>

Once you have picked a option that's best suited to what you wish to speak to staff about, you will then be given a fill out forum asking for information about yourself, as well as about what you are reporting. **Depending on which option you chose, you may have to give more information** than others like coordinates if you are reporting a grief, or a case ID if you are trying to reclaim a egg lost due to full inventory.&#x20;

Once you have filled it out, you can then select **Submit** in which will create the ticket for you.

<p align="center"><img src="/files/gXWgB2oLTqDbTamt0Byk" alt=""></p>

After clicking **Submit**, your ticket will be created. This ticket, alongside any other active tickets you have open, will be found underneath the support section so that you can keep track of it. Please **keep a close eye on this ticket** as responses will not always be immediate and depending on availability you may have to wait a bit before you receive a response. As long as your ticket is open, you will get a response to it.&#x20;

We do try and @ you in tickets so you know when we are responding but this might not always be the case so it's always a good idea to keep an eye on it in case.

![](/files/vAFF68hDa65jGts1s5Je)

Please keep an eye on the ticket for any responses you get as depending on what the ticket is about, we may ask for more information or files from you for example logs. We will deal with your ticket as soon as we can to the best of our ability but please be aware that our staff team is only voluntary and as a result won't be there to deal with your ticket 24/7. We will let you know about the outcome of your ticket, before we start asking you if there is anything else that you need and if we're free to close the ticket.

### **What are the different Ticket Categories?**

As you may have seen, there are 5 different ticket categories you can pick from when creating a ticket. While yes you can use any of these for any particular reason, to help the process of getting all the corresponding information needed for your ticket so that it can be dealt with as soon as we can, it's advised that you pick the category that's best for you. I will go over each of the ticket categories and what tickets are best being created for it.

#### **General Support**

If you're creating a ticket that does not fall under any of the sections stated below, then please make a ticket for this category. This can be for whatever you need to contact us for, and we will do our best to get back to you. Please make a ticket in this section even if you think it's only minor as our staff will be there to help you to the best of our ability.

Examples for what you may create a ticket for in this section includes but is not limited to:

* Asking a question about Cobblemon or the Server
* Asking for proof about a punishment given to yourself on the server
* Disputing a punishment you have been given on the server
* Reporting a issue with logging into the server (*I.e. Crash, Login error, blocked from a specific realm etc*)
* Asking for a update for an Appeal with 7+ days of no response
* Issues with payments made on our Official Store

#### **Bug Report**

If you want to make a ticket to report a bug or exploit that you have witness on the server, then this is what you want to choose. Please be aware that there is a log of issues with the mod that we're unable to fix ourselves and as such can't take it further but please make a ticket anyway even if you want confirmation this is the case. Please report anything you see or hear as we will do our best to look into it and fix as and when we can.

Examples for what you may create a ticket for in this section includes but is not limited to:

* Reporting a bug or exploit on the server
* Reporting a issue with prices on the server
* Reporting a issue with text or commands on the server
* Reporting issues with new features on the server

#### **Realm Issue**

If you want to make a ticket to report a problem regarding your Realm on the server, then this is what you want to choose. Whilst we are aware of many issues regarding Realms (and actively fixing them), they still appear to be problematic in a few select cases. Luckily these issues are simple fixes in most cases, so by opening a ticket we are able to direct you on getting it resolved with minimal or no loss.

Examples for what you may create a ticket for in this section includes but is not limited to:

* Reporting a Realm that fails to load
* Reporting a Realm that is inaccessible
* Reporting a Realm which has experienced data loss
* Reporting a Realm which is partially or fully corrupted
* Reporting concerns regarding a Realms functionality

#### **Missing Items / Pokemon**

If you want to create a ticket in order to claim back Keys, Eggs or other items/pokemon that you lost due to full inventory, glitches or other issues then this is the section you want to choose. We will do our best to refund you the items to the best of our ability, but please be aware that we may not be able to refund you if insufficient evidence and/or lost due to player error. **You can keep the option for Case Number empty since this isn't applicable for the server.**

Examples for what you may create a ticket for in this section includes but is not limited to:

* Lost egg or key due to full inventory
* Lost pokemon due to bug
* Money/Tokens lost after logging back into the server
* Skins lost on Pokemon when evolving

#### **Player Report**

If you are trying to create a ticket to report another player, then unsurprisingly this is the option you want to pick outside of it being related to anything claim or build related. When you make this ticket, please make sure to provide their full In-Game Name (*Do not provide their Nick*) so that we're easily able to track down the player you wish to report. In these tickets we will ask you for proof so if you have any photos or videos then please provide them otherwise your logs may do the trick. We will then go over all the information we have provided, and punish accordingly.

Examples for what you may report a player for in this section includes but is not limited to:

* Reporting a Scam
* Reporting a Chat Offense (*Racism, Spam, Non-English in Public Chat etc*)
* Reporting a player for harassing you in-game or outside the server
* Reporting a player for cheating or exploiting a bug

#### **Griefing / Stolen Items**

Finally if you are attempting to make a ticket to report a issue with your realm, grief to your realms and/or stolen items within your realms then this is the section you want to choose. When you make this ticket, please make sure to provide the specific coordinates to the claim/grief in question so that a member of staff is able to teleport to the location to look into it for you. We will go over all the block logs, and punish accordingly if applicable to your report or help you to the best of our ability.

Examples for what you may create a ticket for in this section includes but is not limited to:

* Reporting a grief to your realm
* Reporting stolen items from your realm
* Issues with finding your realm
* Rollback/Corruption issues with your Realm
* Reporting a inappropriate build or sign
* Reporting a troll claim

**\*NOTE\*** - Any builds created within the Wilds will be wiped and any players will be able to take from it as we won't refund or punish players for this. Please make sure to keep all builds within your own personal realm or friends realms.

### Frequently Asked Questions \[FAQ]

**Q \~ My ticket got closed and I don't know what happened to it? Can I make another ticket asking about it?**\
A \~ If your ticket was closed without you knowing, then it will have likely been closed due to inactivity. If we respond to you, and there is no response after 24 hours then we will close the ticket due to this. We have transcripts for all tickets so if there is information needed to be recovered then we can do this easily enough.

**Q \~ I want to report a member of the MMO Realms Staff Team. Do I make a ticket in player report?**\
A \~ If you want to report a staff member, then please contact a Head Admin or Manager about it as we do not deal with staff reports in a ticket.

**Q \~ I purchased Gems from the website and haven't got them in-game. How can I get them back?**\
A \~ If you purchased gems from the website but have yet to get them in-game, then make a ticket in the support section and provide all the proof you can for it i.e. Receipt. We will track down the transaction to the best of our ability and fix it for you.

**Q \~ I lost a item(s) due to full inventory. How do I get the items back?**\
A \~ Unfortunately we won't be able refund you these items back due to it being a issue with player error regardless for what is lost.

**Q \~ No one is responding to my Ticket. Can I message or @ staff into the ticket so that I get a response?**\
A \~ Ultimately no you can't, tickets will be dealt with as soon as possible but depending on staff availability due to staff being voluntary as is, you will have to wait until you get a response. As long as your ticket is open, you will get a response as soon as possible.

**Q \~ Can I use a single ticket for multiple reasons, instead of multiple different tickets?**\
A \~ To keep things as easy as possible for staff to deal with tickets and punish accordingly, we only deal with one set of issue per ticket. This means if you want to report a player, but then also report a issue with your realm then you got then you will have to create a new ticket for it.

**Q \~ One of my friends has been punished on the server? Can I ask why they were punished as well as the proof for their punishment?**\
A \~ No, only the player in question is allowed to ask for proof for their punishment regardless if you're close to the player or not. If they can't make a ticket, then they'll have to contact a staff member directly asking for proof or more info about their punishment.

**Q \~ I have linked to the wrong account on the server. Am I able to change it?**\
A \~ Ultimately if you have linked to the wrong discord account then you won't be able to have it moved over I am afraid. The only times we will move a link over for you is if you have lost access to the account that was linked to and are able to provide proof of this.


# A Complete Guide to Supporting Evidence

This guide covers everything you need to know about gathering supporting evidence to assist in tickets, whether that be for reports about bugs, another players actions, or anything in between.

**Contents**

1. [The Purpose of Evidence](#the-purpose-of-evidence)
2. [What Type of Evidence is Needed?](#what-type-of-evidence-is-needed)
3. [How do I gather Evidence?](#how-do-i-gather-evidence)
   1. [Logs](#logs)
   2. [Screenshots](#screenshots)
   3. [Video Recording](#video-recording)

***

### The Purpose of Evidence

Some may wonder why evidence is needed in the first place. To be clear, some types of support tickets will require evidence to be able to be handled by staff, to ensure accuracy in the details provided by the reporter, and to assist staff in reproducing the issue if needed to try and correct it. Some reasons include:

* Player Reports - To be able to issue punishment against any player, staff need clear evidence showing the players actions that broke the rules. This prevents malicious use of staff perms, and ensuring all players are treated fairly.
* Bug Reports - Whilst steps to reproduce may be provided, they are not guaranteed to be sufficient for staff to run into the same bug. Providing evidence of the bug itself shows clearly an issue is present, and may lead to a better understanding on how to reproduce it.
* Missing Items - Similar to reporting a bug, having concrete evidence of items going missing is a clear way to show staff that you are missing out on something as a result of a server fault, and will help in getting the right items returned to you.

### What Type of Evidence is Needed?

When it comes to defining what evidence is relevant, one should consider what they are reporting. Simply the evidence should demonstrate or show what the player would like to report. If they are reporting a player, they must show the players actions that violate server rules. If they are reporting a bug, they must show the bug itself and it's steps / outcome. If they are reporting missing items, they must show what items went missing and how.

As a result, there is no singular clear format that covers everything, as what is needed will vary by situation. However, what is recommended is to focus on video evidence, as this is more likely to pick up relevant details to show staff.

<details>

<summary>Are Staff able to gather Evidence?</summary>

In some cases, yes. Staff have access to additional logging server-side that allow them to review finer details of specific actions between players. However, this does not mean they will always have proof. This is why we strongly urge players to gather their own proof in all cases, even if they think staff might have enough.&#x20;

</details>

{% hint style="info" %}
Evidence supplied must be relevant to the situation you are reporting. This means it should either clearly show the exact issue and how it happened, or even something recent to just before the issue happened (note this may not be sufficient for **all** problems being reported).\
\
The time for which evidence is considered "recent" varies drastically based on the specific issue, but something around 2 weeks or newer is a good time to aim for.
{% endhint %}

### How do I gather Evidence?

Luckily, there are many ways for players to gather evidence of their own without the need for specalist paid software, in-fact, some even come preinstalled into all major operating systems.

#### Logs

Logs are a set of files created by Minecraft during play that record everything happening within your in-game chat. As a result, they are very handy in reviewing what had happened earlier, and to show anything either another player had said, or feedback from the server resulting from certain actions, such as AH sales.

There is a guide covering logs in great detail available [here](/cobblemon-wiki/technical-guide/a-complete-guide-to-logs).

<figure><img src="/files/XD5M3RNQfrZBRVHxVepM" alt=""><figcaption><p>Ex of Logs Folder with Dated Logs</p></figcaption></figure>

#### Screenshots

All major operating systems come with screenshot capabilities baked into the operating system. There are a few ways to gather them.

<details>

<summary>Print Screen</summary>

Many keyboards come with a key labelled "Prnt Scr", standing for print screen. Pressing this will take a screenshot of everything currently visible on your screen, which can then be pasted into other apps through use of `Ctrl` + `V`

On certain operating systems, the key can be reassigned to run Snipping Tool instead.
<figure><img src="/files/NtKtyCKpxWfm8yVdIT8j" alt="" width="563"><figcaption><p>Windows 11 settings for Print Screen reassignment</p></figcaption></figure>

</details>

<details>

<summary>Snipping Tool</summary>

Snipping tool is an app that comes preinstalled on Windows devices, allowing for more customisability in what is included within a screenshot, and how to export it.&#x20;

<figure><img src="/files/ut1UBUGGswgnb8DiFfcJ" alt="" width="563"><figcaption><p>Snipping Tool App</p></figcaption></figure>

Upon opening the app, select "New" and drag your cursor across the screen, covering everything you would like to be included. Afterwards, the image of what you had snipped will appear in the window, and can be annotated, copied, or saved as a file.

<figure><img src="/files/h1z7TaPEAgBQmAcgJEOL" alt="" width="563"><figcaption><p>Snipping Tool App with Image</p></figcaption></figure>

Alternatively, there is a keybind which allows for snipping tool to be run without opening the app, and automatically copies any snipped image to your devices clipboard, allowing it to be pasted elsewhere. This keybind is `Windows` + `Shift` + `S`

</details>

<details>

<summary>Third Party Apps</summary>

Third party apps offering similar functionality exist, however are generally not recommended unless they offer a unique feature you plan on using, since the two methods mentioned above are generally sufficient for all cases of image evidence.

</details>

#### Video Recording

Video recording is generally recommended to players by staff for all situations. It gathers much more detail than other options, and can always be trimmed down, or even screenshot later if the whole recording is not needed.

Specifically, certain software allow the user 'clip past gameplay'. This means that with the software running, as soon as an issue occurs the user can press a preset keybind to save everything recorded within the past 60 seconds (or whatever buffer time is set). This ensures players only save relevant video, without filling up an otherwise limited storage. This functionality comes in a few different pieces of software, however popular free options include:

<details>

<summary>OBS</summary>

Open Broadcaster Software is widely known for use in hosting streams, however also supports the ability to record locally, and with the playback option. It can be downloaded from their website, <https://obsproject.com/>

Once setup, use the follow steps to create a profile for playback recording.

1. At the bottom of the screen, select `+` within the sources tab.&#x20;

<figure><img src="/files/JbtMUsKeBVqTSK75Lrs7" alt="" width="563"><figcaption></figcaption></figure>

2. Select either `Display Capture` if you would like to record all windows open on a specific monitor, or `Window Capture` if you would like to only record one window, such as Minecraft or Discord.

<figure><img src="/files/bAbExKJv7BbsdD6Vb5Dr" alt="" width="440"><figcaption></figcaption></figure>

3. Grant the capture a name (this has no relevance on the output, just how it shows up within OBS).
4. Select either the Display or Window you would like to capture. Capture method should be kept on automatic unless you are facing difficulties in viewing an output. If available, enable `Capture Audio` as this ensures audio is saved within the recording without the need of setting up another capture.

<figure><img src="/files/PBoDUpyCUjy2aAL91zey" alt="" width="563"><figcaption></figcaption></figure>

5. Head to `File` -> `Settings` -> `Output`, and scroll down until you see `Replay Buffer`. Here you can set how long back you want the recording to save, note that increasing the time length, or resolution of the video will require additional memory to remain stable. Unfortunately we cannot recommend a balance that suits everyone, so it's worthwhile to experiment here to find what works for your system.

<figure><img src="/files/lcC9v6pQTvbrz2jRwk2u" alt="" width="563"><figcaption></figcaption></figure>

6. Finally, you are able to record using the playback feature. At the home page of OBS, under the controls submenu there will be an option to `Start Replay Buffer`. Once running, the download symbol can be used to save any recent gameplay to your device.

<figure><img src="/files/yASLR36GQOcFAmbk5VSf" alt="" width="375"><figcaption></figcaption></figure>

<figure><img src="/files/BpKk1hwbujXU6R68J4Hx" alt="" width="375"><figcaption></figcaption></figure>

</details>

<details>

<summary>Medal</summary>

Medal is very similar in functionality, with greater focus on the playback system to allow for quick clipping with use of a keybind. It can be downloaded from their website, <https://medal.tv/>

Once setup, use the follow steps to create a profile for playback recording.

1. Upon launch, Medal will begin to search for a suitable game to begin recording. If no game is found, or the user would prefer to record everything, they can select `Desktop Capture` instead.

<figure><img src="/files/3keSildPUcOw7ykgpWU1" alt="" width="540"><figcaption></figcaption></figure>

2. Within the clip settings, the user can set a keybind so save recent clips, as well as how long the replay buffer should last.

<figure><img src="/files/e6XEBUgqGGvFMuJcEozu" alt="" width="563"><figcaption></figcaption></figure>

3. The quality may be adjusted to define how clear the output should be, along with audio settings to ensure relevant sounds are picked up.

<figure><img src="/files/5PdB7pmuTqh1GwSTGRUX" alt="" width="563"><figcaption></figcaption></figure>

<figure><img src="/files/8k5A3p46lZZxkorS7bIk" alt="" width="563"><figcaption></figcaption></figure>

</details>


# A Complete Guide to Appeals

In this guide you'll find everything you need to know about creating appeals, and how to get yourself unbanned or unmuted.

If you're reading this Guide, then you've likely got banned or muted on either the Discord server or the Cobblemon server and are now trying to figure out how to get yourself unbanned. The process is pretty straight forward however there is a lot of common mistakes we are seeing when it comes to people making appeals which ultimately get denied. Lets start off with the basic process on how to make an appeal.

**Contents**

1. [Process of Making an Appeal](#process-of-making-an-appeal)
2. [Frequently Asked Questions \[FAQ\]](#frequently-asked-questions-faq)

***

### Process of Making an Appeal

Currently all appeals are dealt with via a **thread** on our **Forums**.

{% embed url="<https://forum.mmorealms.gg/>" %}

There are different sections based on what exactly you are appealing. It is **vital** that you create your appeal in the right section so that it may be considered, as the questions may vary between sections, so failing to do so would lead to non relevant questioning. For simplicity, you may use the links below which direct to the specified sections.

* [Ban Appeals](https://forum.mmorealms.gg/t/ban-appeal)
* [Mute Appeals](https://forum.mmorealms.gg/t/mute-appeal)

Prior to making an appeal, you will need to create an account on the Forums.

<figure><img src="/files/p0uBkaUPJkU6gNZ4T235" alt="" width="563"><figcaption></figcaption></figure>

Afterwards, it's as simple as navigating to the relevant section, and selecting `Start a Discussion`.

<figure><img src="/files/G1g5tR78VLK5vuJJD6eP" alt="" width="563"><figcaption></figcaption></figure>

Then filling in the responses to all proposed questions.

<figure><img src="/files/k7h4xYshwgx78cHGO7fL" alt="" width="563"><figcaption></figcaption></figure>

### Frequently Asked Questions \[FAQ]

**Q \~ Hey I have been banned but I didn't do anything wrong. Should I create an appeal and dispute it there? Where can I see proof of my ban?**\
**A \~** *If you think your ban is unjust then you will have to make a ticket within our Discord Server in which we can easily discuss the punishment with you and provide the proof if you require it.*\
\
**Q \~ My ban is only temporary (*****set amount of days*****). Can I appeal it to get unbanned sooner?**\
**A \~** *If your ban is only temp, then you will unfortunately not be able to appeal it as it will just be denied. You will have to wait out your ban like everyone else. Appeals are only for permanent Discord or Cobblemon bans.*\
\
**Q \~ How long does it take to get a response to my Appeal?**\
**A \~** *You should get a response to your appeal within a few days. If you have not had a response after 7 days then you're best making a ticket within our Discord server and asking for an update to your appeal.*\
\
**Q \~ Will I lose my Pokemon/Items after getting banned on the server?**\
**A \~** *It depends on what you're being banned for, but regardless you won't get a complete wipe. For example if you have been banned for X-Ray then we will likely remove anything associated with mining or dungeons, even if you got them legit. If you get banned prior a reset and you appeal after it, then you will be reset like everyone else.*\
\
**Q \~ I have had my main and alt(s) account banned for using Alts for Personal Gain. Am I able to get all the accounts unbanned?**\
**A \~** *You will be able to have your main account unbanned, however any alts (regardless if it's someone else's or not) will remain banned without any chance of getting unbanned.*\
\
**Q \~ My ban states (No Appeal) at the end of it. Am I still able to appeal?**\
**A \~** *If you get a No Appeal ban (which is usually only given on repeated offense after an initial ban + appeal) then that means there is no possibility for you to be unbanned on the server. Any appeals you create will either be denied, deleted or straight up ignored.*\
\
**Q \~ Can I appeal my Discord and Pixelmon bans within one Appeal?**\
**A \~** *If you want to be unbanned on both the Cobblemon and Discord servers then you will need to make a separate appeal for each ban in which you show understanding about why you got banned and that you won't do anything like this again. If you make an appeal for both, then only one of the bans will be dealt with within the appeal.*\
\
**Q \~ My Appeal keeps getting denied. What am I doing wrong?**\
**A \~** *If you keep getting denied, then you are either not being 100% truthful about your actions and/or are missing stuff out. We will leave a response to your appeal if it's been denied stating why this is the case. Make sure to take notes of this and make a new appeal with it. Disputing your appeal within the appeal itself and/or blaming others is also going to get your appeal denied since that isn't the place for them. If you are disputing the appeal and/or reporting someone else then you will need to make a ticket within our Discord server.*\
\
**Q \~ I have been banned for Chargeback. How do I appeal it?**\
**A \~** *If you have been banned for Chargeback then you will have to make a ticket within our Discord server as we will need to get more information from you as these will ultimately be dealt with by the owner due to the nature of the bans.*


# A Complete Guide to the Store

If you're reading this guide, then you either need help with making purchase, purchases issues you are having or just want some more information about the store.

**Our store provider in which we use for the server is Tebex**, and while for the most part purchases will go through fine with no issues there are times where you may not be able to make a purchase and/or purchases have gone through yet you have not received your gems. I'm going to make this guide to go over everything about the store which you can access here [<mark style="color:blue;">**Store**</mark>](#user-content-fn-1)[^1], as well as potential fixes to issues players have via a FAQ.

**Contents**

1. [How to Make a Purchase](#how-to-make-a-purchase)
2. [Frequently Asked Questions \[FAQ\]](#frequently-asked-questions-faq)

***

### How to Make a Purchase

Once you are on the store page via [<mark style="color:blue;">**Store**</mark>](#user-content-fn-1)[^1], you will need to click onto the Login button which is at the top right of the screen, and then type in your Minecraft IGN (*This is not your **/nick** if you have one active or even your real name*) as putting anything but your IGN will result in you not getting the purchases in-game and will have to create a ticket in order to fix the transaction. Once you have entered your IGN click on the Green Login button which will bring you into the store page.\
![](/files/C6xT0LXtdzYP0xwBrgBs)

Once you are onto the next page you will then need to click on the **Menu** option on the left side of the store, and then **click on the option** you wish to purchase from to open the respective page.

<div align="left"><figure><img src="/files/NVpb8ESwmC9ii04FouqS" alt="" width="563"><figcaption></figcaption></figure></div>

Once you are onto the **Respective Store** page, you'll be able to pick on the corresponding package that you want to buy and then add it to cart. Doing this will bring you into a new page in which you will need to pick the realm that you play on. Once you have done so, you can click onto the **Add to Cart** option in which it will be placed into your Cart. Repeat this process for any other packages you want to purchase as well. Once you are happy with what you wish to purchase, you will then need to click onto the **Cart** option on the top right and then click the **Checkout** option.

<div align="left"><figure><img src="/files/YvIMGRhXcih63YHERBVq" alt="" width="257"><figcaption></figcaption></figure></div>

If this is your first purchase on the server, you are able to put in the coupon code **15OFF** in order to receive 15% off your purchase. Any coupon codes that you may have can be put into there to get discounts on your purchase. Once you are happy with your purchase, you can go ahead and click the Pay Now option which will take you into the payment page. Click on the corresponding payment method that you wish to purchase the gems with as well as your contact information. Once this is all done, go ahead and make the payment, and if the payment went through you should go to a order confirmation page which includes a Order Number like the one below:

<div align="left"><figure><img src="/files/0XalskSIb1PIByTOK01A" alt=""><figcaption></figcaption></figure></div>

Now that the purchase has gone though, you should receive the purchase within the next couple of minutes on the server. It will state within the chat when you have donated at which point the purchases will be given to you.

### Frequently Asked Questions \[FAQ]

**Q \~ I want to make a purchase, but the payment method I want to use isn't listed. Am I able to use my payment method to make a purchase?**

**A \~** *Ultimately no, if your payment method is not listed then there isn't any way around for you to use that payment method either directly through the server or the server.*

**Q \~ My Payment method keeps getting declined, why is this the case? Any way I can help make the purchase go through?**

**A \~** *Your payment may keep getting declined for a number of reasons like not enough money in your payment method, your bank provider does not authorize the payment due to scam prevention, your payment method isn't compatible with the store (I.e. Visa Prepaid Card) and so on. You may want to try using another payment method if you have the money but it still does not go through and/or use Paypal in which you can add a balance to your Paypal account in which you make a purchase with that.*

**Q \~ My purchase has gone through, yet I have not got the purchase in-game?**

**A \~** *Please be aware the purchase may take a few minutes to go through, but if you still do not receive it then you may have put wrong information within the purchase. Jump into every realm to confirm that you have not accidentally purchased it for another realm as otherwise you are best making a ticket via our Discord server in which we can help you out further to get to the bottom of it.*

**Q \~ My transaction did not go through on the server, yet money was taken from my bank. Can I get my money back?**

**A \~** *If money has been taken from your bank despite the fact the payment was declined for whatever reason, you should receive the payment back to you over the next couple of days. If this is not the case you will have to contact Tebex further in order to try and get your money back as it's not an issue we're able to help with further other than confirming it was declined via a ticket.*

**Q \~ I don't play on the server anymore and want to get a refund for my purchases, how do I get my money back?**

**A \~** *All purchases made on the store are final, meaning there is no way for you to be given a refund for the purchases you have made regardless if you have stopped playing, have been banned, accidental purchase and so on.*

**Q \~ The 15OFF code does not work despite the fact I have not made a purchase on the server, why is this the case?**

**A \~** *If you are no longer able to claim the 15OFF coupon then you will have either already made a purchase in the past and/or you've attempted to make a purchase with the coupon which got declined. If you have had the latter happen to you, then you can make a ticket for a HA+ to look into it to potentially give you a fresh coupon to use on the server however if the same thing happens again after the new code being given to you then a new one will not be issued.*

**Q \~ I put the wrong IGN for the purchase, can I get this fixed?**

**A \~** *If you accidentally put the wrong name when purchasing from the Store, you can make a ticket via our Discord server for a HA+ to help fix the purchase for you.*

**Q \~ Can I make a purchase for another person by putting their IGN into the store instead?**

**A \~** *Yes you are able to make purchases for other players, you can put their IGN into the store for them to recieve them in-game!*

**Tebex Support if needed:** <https://www.tebex.io/support>

[^1]:


---

[Next Page](/llms-full.txt/1)